
:max_bytes(150000):strip_icc():format(webp)/full-frame-shot-of-speakers-1138109687-33289baddc314b44ae87abc2fc8060cd-e7bccad6d81244509ed97ddf557f89e4.jpg)
Updated 2024 Approved To Add SRT to MP4 Is Not as Hard as You Might Think. All You Just Need Is the Right Tool to Help You Get the Job Done. Read This Article and Learn the 8 Latest Methods to Merge SRT with MP4 Effortlessly
To Add SRT to MP4 Is Not as Hard as You Might Think. All You Just Need Is the Right Tool to Help You Get the Job Done. Read This Article and Learn the 8 Latest Methods to Merge SRT with MP4 Effortlessly
Lately, SRT has become a very crucial aspect of videos, especially in helping to increase its reach globally. So, for this reason, a lot of folks including content creators and many others are looking for ways to merge SRT with MP4. If you’re under such a category of people, then this article has the right information you need.
There are a variety of tools that allow the merging of SRT with MP4. While some are software, others are online tools. So, to help you find the best tools to Merge SRT with MP4, we have compiled a list of the best software and online tools to merge SRT with MP4 seamlessly. Keep reading to find out what these tools are and how you can employ them to Merge SRT with MP4.
Part 1: Best 4 Effective Software to Merge SRT with MP4
Firstly, let’s discuss the best software to merge SRT with MP4.
Our team of technology experts took the legwork to review different software that supports merging SRT with MP4, and we’ve compiled a list of the best 4 effective ones that any user can always rely on. The fascinating the amazing thing is you don’t need technical knowledge to employ any of these solutions. Just stick with us.
1. Wondershare Filmora (Best Choice)
Supported OS: Windows & Mac
To execute SRT with MP4 merging operation seamless, fast, and concise, you need powerful software like Wondershare Filmora .
Filmora is a popular video editing tool that boasts a wide range of functionalities for performing different types of video editing tasks. From editing SRT, including fonts, text styles, etc., to merging SRT with MP4, making, blending, speed ramping, and lots more, the tool is an absolute video editing powerhouse for any user.
Besides, Filmora comes with a very clean and intriguing user interface that makes it easy for users at all levels to navigate their way around the software without necessarily requiring any technical knowledge.
Free Download For Win 7 or later(64-bit)
Free Download For macOS 10.14 or later
See the stepwise guide on how to use Filmora video editor to merge SRT with MP4 below;
Step1Launch the Filmora software on your PC and uae the Import button to upload the SRT file from your PC or just drag-n-drop it.

Step2Move the uploaded SRT file to the timeline and right-click on it, then select “Advanced Edit” from the pop-up list.

Step3Edit the SRT subtitle ranging from its time code, text, color, fonts, etc.

Step4Once editing is completed, navigate to the timeline of the SRT file and right-click on it, then choose “Export Subtitle file” to complete the action.

Pros
- Boasts a very clean UI and its features are easy to employ.
- Very effective for both advanced and basic video editing operations.
- Compatible with both Mac and Windows and it doesn’t compromise computer functionality.
Cons
- You need to pay to be able to access advanced editing features.
2. VLC
Supported OS: Windows & Mac
We all know VLC to be a popular free open-source program for opening video files. But do you know you can also use VLC to merge SRT with MP4? Well, you can, and the process is straightforward. However, compared to Filmora, VLC lacks advanced editing options that might be required to enhance the quality of your SRT with MP4 merging.
Follow the steps illustrated below to merge SRT with MP5 using VLC
Step1Start the MP4 video via the VLC program and click on “Media” from the top bar, then click “Open File” to upload the MP4 video that you need to merge with SRT.

Step2Up next, click “Video” from the top bar and hover on the “Subtitle Track” option to select “Open File”.

Step3Find and locate the SRT file that you want to use. Then select it and click OK to complete the operation.

Pros
- It’s 100% free.
- It’s easy to operate.
- Clean and highly intuitive user interface.
- Compatible with both Mac & Windows computers.
Cons
- It doesn’t support advanced editing.
- It usually lags sometimes during SRT and MP4 merging.
3. Subtitle Edit
Supported OS: Windows, Linux
The next tool is the Subtitle Edit. This software, just like the prior mentioned ones, is very effective for SRT with MP4 merging, and it’s very easy to operate. With this software, you require no technical knowledge to merge SRT with MP4. Plus, it supports a wider range of cool features including splitting, editing, joining, and lots more that tick boxes all around.
See how to use Subtitle Edit software to merge SRT wing MP4 below.
Step1Download and install the latest version of Subtitle Edit on your PC.

Step2Start the installed program and upload the MP4 video that you want to add SRT subtitles to.

Step3Click “File” at the top-left corner and upload the SRT file that you want to add to the MP4 video.

Step4Click “Video” at the top bar, then select “Generate video with burned-in subtitle” from the pop-up list.

Step5Up next, edit the Subtitle settings in the pop-up that appears on your screen. Then click “Generate”, select where you want to save the file output, and click “Save” to start adding the SRT subtitles to ti MP4 video instantly.

Pros
- Supports a wide range of formats.
- Allows translation of SRT text from one language to another.
- The software comes with an error correction system.
Cons
- The software interface is confusing.
- It doesn’t support customization functionality.
4. Handbrake
Supported OS: Windows, Mac, & Linux
Last but not least software that can be used to merge SRT with MP4 is Handbrake. Although this software is portrayed to be a video conversion tool, it can also come in handy to merge SRT with MP4. Besides, just like VLC, it’s 100% free to use and it can be used on both Mac and Windows computers. So, you don’t have to pay any dime to utilize it or worry about it’s compatibility.
Here is how to use Handbrake to merge SRT with MP4 below;
Step1Download and install the Handbrake software on your Mac or Windows PC. Then use the “Source” button at the top left corner of the screen to upload the MP4 file that you want to add SRT to.

Step2Locate and click on “Subtitles”, then select the “Import SRT” option to upload the SRT file that you want to merge with MP4.

Step3Once you import the SRT file, tick the checkbox next to BURN IN. Then, use the “Browse” button to select a location where you want the merged file to be saved.

Step4Afterward, click “Start Encode” at the top side to start merging SRT with MP4.

Step5The SRT with MP4 merging will begin. But it’ll take some time to get completed. Then you can play the video to see the output of the process.

Pros
- it’s compatible with Mac, Windows, and Linux systems.
- It can be used to convert files from one format to another.
- it’s free software. All you just have to to is to install it on your PC.
Cons
- It is quite slow to merge SRT with MP4.
- The software usually lags during SRT with MP4 merging operation.
Part 2: Merge SRT with Videos in MP4 format by 4 Online FREE Tools
If you don’t want to use software to merge SRT with MP4, there are several online free tools that you can use to carry out the operation. However, not all online tools have all it takes to merge SRT with MP4 with high qualities. Plus, you need stable internet for online tools to work smoothly.
We’ve discussed some trustworthy online free tools for SRT with MP4 merging below.
1. Clideo
Clideo is a small but mighty free online tool that utilizes modern technology to merge SRT with MP4. The tool allows users at all levels including folks with no professional video editing experience to easily add SRT to MP4 files without hassles. All you just need is to make sure you have a stable internet connection to make it work smoothly.
The steps below explain how to merge SRT with MP4 using Clideo;
Step1Visit Clideo official website > Use the “Choose File” button to upload the MP4 file that you want to add SRT.

Step2Click on “Upload SRT” to upload the SRT file that you want to merge with your MP4 video.

Step3Once you’ve successfully added the SRT file, play your video to preview the subtitle. Then, use the “Export” button to save the file output on your PC.

Pros
- It doesn’t require the installation of software.
- You can merge as many SRT with MP4 files totally for free.
- It can be used on any device including mobile devices
Cons
- The file upload process is slow.
- You must be connected to a stable internet network to be able to merge SRT with MP4.
- You need to pay to enjoy unlimited SRT with MP4 merging.
2. Typito
Typito is another effective online tool that’s capable of merging SRT with MP4 efficiently. And all it takes is just a few clicks. Besides, it supports over 20 video formats and it can not only be used to merge SRT with MP4 but can also be used to create an SRT file for MP4 videos seamlessly.
See the steps below to learn how to use Typito to merge SRT with MP4;
Step1Visit Typito official website and click on the “Add SRT To Video” to upload the MP4 video you want to merge with SRT.

Step2Navigate to the left side of the screen and click on “Caption”. Then, select “Content” and click on “Upload File” to add the SRT file.

Step3Play the video to preview the subtitle. Then use the “Export” button at the top right corner to upload the file output to your PC storage.

Pros
- Allows editing of subtitle text like fonts, color, etc.
- You can utilize the tool to create an SRT file for different social media platforms.
- Supports different varieties of video formats.
Cons
- It won’t work if your internet network is not stable.
- The interface is quite confusing.
- You need to upgrade from the free version to be able to export the merged SRT and MP4 file or perform unlimited SRT merging.
3. Flixier
Another free online tool that allows adding of SRT to MP4 in a clean interface is Flixier. it’s a simple online tool, and it does SRT with MP4 merging operation so efficiently that it doesn’t compromise the output of the merged file. Moreover, besides merging SRT with MP4, Flixier also allows the automatic addition of SRT to subtitles, customization of SRT, and lots more SRT file editing tools that can be very helpful in different situations.
Step1Visit the “Flixier “ website > click “Import” and upload the MP4 file that you want to merge with SRT. You can either upload from your device, dropbox, google drive, etc.

Step2Click on “Text” from the left-hand side of the tool”s interface, then select “Add Subtitle” and click “Import” from the right side of the page to upload the SRT file that you want to merge with MP4.

Step3After you’ve imported the SRT file, play your video, then edit as per requirement and use the “Export” button at the top right corner to download the merged SRT and MP4 file to your PC.

Pros
- File upload is faster compared to the prior mentioned online tools.
- You don”t necessarily need to download software to be able to use the tool.
- It supports some helpful editing features for editing the video file.
Cons
- It doesn’t work with some SRT files.
- It requires a learning curve.
- You need to upgrade to this paid version to merge SRT with MP4 unlimitedly.
4. Veed.io
Veed.io is a popular online tool that offers a wide range of functionalities, and SRT with MP4 merging is one of them. Unlike the previously mentioned online tools, Veed.io supports a wide range of subtitle formats, making it easy for you not only to merge SRT with MP4 but also merge subtitles in other formats with MP4. Just follow the steps outlined below to carry out the SRT with MP4 merging using Veed.io;
Step1Open Veed.io SRT to MP4 merger on your browser > click on “Choose File” and upload the MP4 file that you want to add SRT.

Step2Once you upload the MP4 file, you”ll notice three options - that is; Auto Subtitles, Manual Subtitles, and Upload Subtitles. Just select “Upload Subtitles”.

Step3Click “Import” to upload the SRT file.

Step4Finally preview the merged SRT and MP4 file and save the file output to your PC using the “Export” button at the top right side.

Pros
- Allows automatic or manual addition of subtitles to MP4.
- Edit video with subtitles using simple editing tools.
- Translate subtitles from one language to another.
Cons
- File output has watermark.
- It cannot work if you’re not connected to the internet.
Hot FAQs on How to Merge SRT subtitles with MP4
You cannot merge more than one SRT file into an MP4 video. So, no, MP4 cannot have multiple subtitles.
To open SRT files on Windows is not a difficult task. You have to do the following:
1. Find and locate the SRT file you want to open on your Windows PC. Then right-click on it and select “Properties”.
2. Select “General” and click “Change”.
3. Click on “More Apps” from the pop-up, then select “Word” or Notepad and click OK.
4. Finally, click “Apply”, then navigate to your SRT file and double-click on it to complete the operation.
It’s easy to add SRT to MP4 with a Windows media player. All you just have to do is to:
1. Open your MP4 video with Windows Media Player.
Right-click on any part of the video screen > select Lyrics, captions, and subtitles, and click on On if available.
Final Words
Merging SRT with MP4 is not a difficult task especially when you have the right software or online tool to help you perform the task at your fingertips. In the article above, we’ve introduced all the reliable software and online free tools that support SRT with MP4 merging, their pros and cons, and how to use them to help you choose easily which tool suits your requirements to merge SRT with MP4. However, if you’re contemplating on which of them is the best, we advise you use Wondershare Filmora software as it’s safer to use and it has all you might need for not just SRT with MP4 merging but also for executing advanced video editing operations handily.
Part 1: Best 4 Effective Software to Merge SRT with MP4
Firstly, let’s discuss the best software to merge SRT with MP4.
Our team of technology experts took the legwork to review different software that supports merging SRT with MP4, and we’ve compiled a list of the best 4 effective ones that any user can always rely on. The fascinating the amazing thing is you don’t need technical knowledge to employ any of these solutions. Just stick with us.
1. Wondershare Filmora (Best Choice)
Supported OS: Windows & Mac
To execute SRT with MP4 merging operation seamless, fast, and concise, you need powerful software like Wondershare Filmora .
Filmora is a popular video editing tool that boasts a wide range of functionalities for performing different types of video editing tasks. From editing SRT, including fonts, text styles, etc., to merging SRT with MP4, making, blending, speed ramping, and lots more, the tool is an absolute video editing powerhouse for any user.
Besides, Filmora comes with a very clean and intriguing user interface that makes it easy for users at all levels to navigate their way around the software without necessarily requiring any technical knowledge.
Free Download For Win 7 or later(64-bit)
Free Download For macOS 10.14 or later
See the stepwise guide on how to use Filmora video editor to merge SRT with MP4 below;
Step1Launch the Filmora software on your PC and uae the Import button to upload the SRT file from your PC or just drag-n-drop it.
Step2Move the uploaded SRT file to the timeline and right-click on it, then select “Advanced Edit” from the pop-up list.
Step3Edit the SRT subtitle ranging from its time code, text, color, fonts, etc.
Step4Once editing is completed, navigate to the timeline of the SRT file and right-click on it, then choose “Export Subtitle file” to complete the action.
Pros
- Boasts a very clean UI and its features are easy to employ.
- Very effective for both advanced and basic video editing operations.
- Compatible with both Mac and Windows and it doesn’t compromise computer functionality.
Cons
- You need to pay to be able to access advanced editing features.
2. VLC
Supported OS: Windows & Mac
We all know VLC to be a popular free open-source program for opening video files. But do you know you can also use VLC to merge SRT with MP4? Well, you can, and the process is straightforward. However, compared to Filmora, VLC lacks advanced editing options that might be required to enhance the quality of your SRT with MP4 merging.
Follow the steps illustrated below to merge SRT with MP5 using VLC
Step1Start the MP4 video via the VLC program and click on “Media” from the top bar, then click “Open File” to upload the MP4 video that you need to merge with SRT.
Step2Up next, click “Video” from the top bar and hover on the “Subtitle Track” option to select “Open File”.
Step3Find and locate the SRT file that you want to use. Then select it and click OK to complete the operation.
Pros
- It’s 100% free.
- It’s easy to operate.
- Clean and highly intuitive user interface.
- Compatible with both Mac & Windows computers.
Cons
- It doesn’t support advanced editing.
- It usually lags sometimes during SRT and MP4 merging.
3. Subtitle Edit
Supported OS: Windows, Linux
The next tool is the Subtitle Edit. This software, just like the prior mentioned ones, is very effective for SRT with MP4 merging, and it’s very easy to operate. With this software, you require no technical knowledge to merge SRT with MP4. Plus, it supports a wider range of cool features including splitting, editing, joining, and lots more that tick boxes all around.
See how to use Subtitle Edit software to merge SRT wing MP4 below.
Step1Download and install the latest version of Subtitle Edit on your PC.
Step2Start the installed program and upload the MP4 video that you want to add SRT subtitles to.
Step3Click “File” at the top-left corner and upload the SRT file that you want to add to the MP4 video.
Step4Click “Video” at the top bar, then select “Generate video with burned-in subtitle” from the pop-up list.
Step5Up next, edit the Subtitle settings in the pop-up that appears on your screen. Then click “Generate”, select where you want to save the file output, and click “Save” to start adding the SRT subtitles to ti MP4 video instantly.
Pros
- Supports a wide range of formats.
- Allows translation of SRT text from one language to another.
- The software comes with an error correction system.
Cons
- The software interface is confusing.
- It doesn’t support customization functionality.
4. Handbrake
Supported OS: Windows, Mac, & Linux
Last but not least software that can be used to merge SRT with MP4 is Handbrake. Although this software is portrayed to be a video conversion tool, it can also come in handy to merge SRT with MP4. Besides, just like VLC, it’s 100% free to use and it can be used on both Mac and Windows computers. So, you don’t have to pay any dime to utilize it or worry about it’s compatibility.
Here is how to use Handbrake to merge SRT with MP4 below;
Step1Download and install the Handbrake software on your Mac or Windows PC. Then use the “Source” button at the top left corner of the screen to upload the MP4 file that you want to add SRT to.
Step2Locate and click on “Subtitles”, then select the “Import SRT” option to upload the SRT file that you want to merge with MP4.
Step3Once you import the SRT file, tick the checkbox next to BURN IN. Then, use the “Browse” button to select a location where you want the merged file to be saved.
Step4Afterward, click “Start Encode” at the top side to start merging SRT with MP4.
Step5The SRT with MP4 merging will begin. But it’ll take some time to get completed. Then you can play the video to see the output of the process.
Pros
- it’s compatible with Mac, Windows, and Linux systems.
- It can be used to convert files from one format to another.
- it’s free software. All you just have to to is to install it on your PC.
Cons
- It is quite slow to merge SRT with MP4.
- The software usually lags during SRT with MP4 merging operation.
Part 2: Merge SRT with Videos in MP4 format by 4 Online FREE Tools
If you don’t want to use software to merge SRT with MP4, there are several online free tools that you can use to carry out the operation. However, not all online tools have all it takes to merge SRT with MP4 with high qualities. Plus, you need stable internet for online tools to work smoothly.
We’ve discussed some trustworthy online free tools for SRT with MP4 merging below.
1. Clideo
Clideo is a small but mighty free online tool that utilizes modern technology to merge SRT with MP4. The tool allows users at all levels including folks with no professional video editing experience to easily add SRT to MP4 files without hassles. All you just need is to make sure you have a stable internet connection to make it work smoothly.
The steps below explain how to merge SRT with MP4 using Clideo;
Step1Visit Clideo official website > Use the “Choose File” button to upload the MP4 file that you want to add SRT.
Step2Click on “Upload SRT” to upload the SRT file that you want to merge with your MP4 video.
Step3Once you’ve successfully added the SRT file, play your video to preview the subtitle. Then, use the “Export” button to save the file output on your PC.
Pros
- It doesn’t require the installation of software.
- You can merge as many SRT with MP4 files totally for free.
- It can be used on any device including mobile devices
Cons
- The file upload process is slow.
- You must be connected to a stable internet network to be able to merge SRT with MP4.
- You need to pay to enjoy unlimited SRT with MP4 merging.
2. Typito
Typito is another effective online tool that’s capable of merging SRT with MP4 efficiently. And all it takes is just a few clicks. Besides, it supports over 20 video formats and it can not only be used to merge SRT with MP4 but can also be used to create an SRT file for MP4 videos seamlessly.
See the steps below to learn how to use Typito to merge SRT with MP4;
Step1Visit Typito official website and click on the “Add SRT To Video” to upload the MP4 video you want to merge with SRT.
Step2Navigate to the left side of the screen and click on “Caption”. Then, select “Content” and click on “Upload File” to add the SRT file.
Step3Play the video to preview the subtitle. Then use the “Export” button at the top right corner to upload the file output to your PC storage.
Pros
- Allows editing of subtitle text like fonts, color, etc.
- You can utilize the tool to create an SRT file for different social media platforms.
- Supports different varieties of video formats.
Cons
- It won’t work if your internet network is not stable.
- The interface is quite confusing.
- You need to upgrade from the free version to be able to export the merged SRT and MP4 file or perform unlimited SRT merging.
3. Flixier
Another free online tool that allows adding of SRT to MP4 in a clean interface is Flixier. it’s a simple online tool, and it does SRT with MP4 merging operation so efficiently that it doesn’t compromise the output of the merged file. Moreover, besides merging SRT with MP4, Flixier also allows the automatic addition of SRT to subtitles, customization of SRT, and lots more SRT file editing tools that can be very helpful in different situations.
Step1Visit the “Flixier “ website > click “Import” and upload the MP4 file that you want to merge with SRT. You can either upload from your device, dropbox, google drive, etc.
Step2Click on “Text” from the left-hand side of the tool”s interface, then select “Add Subtitle” and click “Import” from the right side of the page to upload the SRT file that you want to merge with MP4.
Step3After you’ve imported the SRT file, play your video, then edit as per requirement and use the “Export” button at the top right corner to download the merged SRT and MP4 file to your PC.
Pros
- File upload is faster compared to the prior mentioned online tools.
- You don”t necessarily need to download software to be able to use the tool.
- It supports some helpful editing features for editing the video file.
Cons
- It doesn’t work with some SRT files.
- It requires a learning curve.
- You need to upgrade to this paid version to merge SRT with MP4 unlimitedly.
4. Veed.io
Veed.io is a popular online tool that offers a wide range of functionalities, and SRT with MP4 merging is one of them. Unlike the previously mentioned online tools, Veed.io supports a wide range of subtitle formats, making it easy for you not only to merge SRT with MP4 but also merge subtitles in other formats with MP4. Just follow the steps outlined below to carry out the SRT with MP4 merging using Veed.io;
Step1Open Veed.io SRT to MP4 merger on your browser > click on “Choose File” and upload the MP4 file that you want to add SRT.
Step2Once you upload the MP4 file, you”ll notice three options - that is; Auto Subtitles, Manual Subtitles, and Upload Subtitles. Just select “Upload Subtitles”.
Step3Click “Import” to upload the SRT file.
Step4Finally preview the merged SRT and MP4 file and save the file output to your PC using the “Export” button at the top right side.
Pros
- Allows automatic or manual addition of subtitles to MP4.
- Edit video with subtitles using simple editing tools.
- Translate subtitles from one language to another.
Cons
- File output has watermark.
- It cannot work if you’re not connected to the internet.
Hot FAQs on How to Merge SRT subtitles with MP4
You cannot merge more than one SRT file into an MP4 video. So, no, MP4 cannot have multiple subtitles.
To open SRT files on Windows is not a difficult task. You have to do the following:
1. Find and locate the SRT file you want to open on your Windows PC. Then right-click on it and select “Properties”.
2. Select “General” and click “Change”.
3. Click on “More Apps” from the pop-up, then select “Word” or Notepad and click OK.
4. Finally, click “Apply”, then navigate to your SRT file and double-click on it to complete the operation.
It’s easy to add SRT to MP4 with a Windows media player. All you just have to do is to:
1. Open your MP4 video with Windows Media Player.
Right-click on any part of the video screen > select Lyrics, captions, and subtitles, and click on On if available.
Final Words
Merging SRT with MP4 is not a difficult task especially when you have the right software or online tool to help you perform the task at your fingertips. In the article above, we’ve introduced all the reliable software and online free tools that support SRT with MP4 merging, their pros and cons, and how to use them to help you choose easily which tool suits your requirements to merge SRT with MP4. However, if you’re contemplating on which of them is the best, we advise you use Wondershare Filmora software as it’s safer to use and it has all you might need for not just SRT with MP4 merging but also for executing advanced video editing operations handily.
How to Denoise in After Effects – Audio and Video Noise Removal
I was filming with my mobile phone, and the light was low, and it happened so that I had to shake the phone a little because I was in movement. I return home, thinking that the shots were not so bad, look at the new footage on the bigger screen than my phone would have provided, and – no! I am totally wrong! This footage has some kind of little dots all over it, the whole shot looks sort of pixelated. I understand that the circumstances were not so good for shooting, but how come the video is actually this bad? How to get rid of this annoying dot-like overlay, that hinders me from seeing some details and makes my eyes exhausted? Is there a way to make this better at all?
Yeah, this is something called noise, and something called grain can also be in play. And is there a way to solve the problem? –Yes! Technology is getting so good from day to day that editing programs offer the ways to not be bothered because of this problem.
But noise is a word that not necessarily evoke the image of the visual side, rather, for the broader society, it is connected to the audio. A room, filled with some people hanging out and chatting, air conditioner that creates some sound, an opened window from where the chirping of the birds are coming… Anyway, I am still trying to concentrate, to make my voice recording, and then edit the video. Even in this case, I think everything is going pretty well, and the scenario is so alike: I record the whole text I have to follow, then try to listen to it in the speakers or in the headphones, and – SOS again! These noises I mentioned, are filling up my recording, where only my words should be played. Now, I don’t like to cut the parts of my whole recording one by one, and relentlessly, like a butcher, because I am just trying to create a good listener, or viewer experience, and slicing my piece will only make things work. There should be another way!
And yes, there also is. I can solve this problem using some editing software as well. It might even take me only a while and I will have a great voice recording to include in my content. So, my choice, in this case, would be Adobe After Effects – you will say, wow, why so serious? (because this is a very powerful and sophisticated program!) but the answer is – because we can, and because it gives us many opportunity.
So, as you may have noticed already, in this article we will be touching upon audio and video denoising in Adobe After Effects! Let’s get started and solve those little problems we have in our everyday life and work!
How to denoise a video in Adobe After Effects
So, denoising in image and video production is used as a technique to take footage from grainy to crystal-clear, and this is exactly our target. But when can we say that the video noise reduction went well? This method achieves its goal If it suppresses noise effectively in uniform regions; preserves edges and other characteristics, such as fine details and textures; and provides a visually natural experience.
Primarily, Adobe After Effects is a digital visual effects, motion graphics, and compositing application. If you are skilled, you are almost invincible in this software, meaning that you can do almost everything that sparks your imagination. So, if that is the sophistication of the program, why can it not be so that it can help us get rid of the unwanted noise and grain on the scene? There is no answer, because of course, it can.
Even though sometimes this kind of software requires you to download and install and then finally use some external resources, such as plugins, there is a way to do what we are going to, without any help from outside of the program.
First of all, I suppose you have some video you want to edit and make better. Bringing that clip into the program would be the first step of our little adventure. And see the menu where it says Effect? – you need to click on it. Then it gets pretty, meaning very… meaning extremely straightforward – you will find it written – Noise and Grain. Of course, you will need to choose it, and then see the Remove Grain option, to which you are going to stick.

Then, you will need to move your attention to the left side of the screen, where Effects Control will open. By default, you are able to see viewing mode, where Preview can be changed to Final Output, which is exactly what you are going to do.

This will be the video with Preview checked:

And this is the look of the same frame from the video whenever Final Output is turned on:

Yes, it’s true – we have done it already! This is actually this fast and easy in Adobe After Effects – no more noise, no more grain! Anyway, if you want to see the whole process on the video, you can check it here !
How to denoise an audio in Adobe After Effects
When it comes to audio noise, as we have mentioned already, it is possible to master the recording in After Effects in terms of the voice as well, but in reality, After Effects requires another Adobe program called Audition. Let us say that you have a video with audio attached, and you are working in AE, but in order to remove the background noise, you will need to open Audition. Here’s how it’s done:
First, in the sequence, you will need to click twice on the video clip, which will open audio graphics below.

Then, go to Edit in the Navbar, and choose Edit in Adobe Audition.

This program will open and show you more detailed graphic image of the voice recording. Now, you will find the space of time in your recording when you have a somewhat damaged audio and you will select the beginning and the end of it with the mouse. Keep in mind that in case you need to take a look at the video when your audio is played, you can see a little window showing the scene on the left and bottom of your screen.

Once you have the selection and are determined with it, you right click on the selection and find Capture Noise Print. Then, you will click on the selection again and find Select all, which will cover the whole audio. That’s when you go to the Navbar again and find Effects -> Noise Reduction / Restoration -> Noise Reduction (process). This will open the graphics again, where you can reduce the noise – you will see the percentage scale where you can modify the noise.

After changing it a little, you will click on the Apply and be able to visually see how the flow has changed and lowered.

So, when you deselect the selection and play the recording, you will notice that from now on the words are hearable, but some background noise is not there anymore! In order to export, please go to the File and Export, choose your preferred settings and you are ready to go!
Bonus tip: how to remove audio noise in video with Wondershare Filmora
When it comes to audio noise removal, it’s also good to have some alternatives, and you might not even have Adobe After Effects installed on your computer, because there exist a lot of programs easier to use. One of them is Wondershare Filmora, which can play a major role in background noise removal, in a simple way. For this to play out, you will need to pursue the following steps:
To bring your video clip in the program, drag and drop it into the timeline. Right-clicking on the video and hitting Detach Audio will enable you to separate audio and video from each other and work on them individually.

Click twice on the audio track, which will make sure you can see the editing panel and find Remove background noise option there – it can remove the noise right away.

And, that’s it – hard to believe it’s so simple!
So, in this article, you followed us through the steps of how to denoise in Adobe After Effects – first, we touched upon video noise reduction, and then, background noise removal, for which we had to open the audio in Adobe Audition from After Effects. Last but not least, we took a look at how another magnificent software, Wondershare Filmora can help us in doing the same task! Armed with different tools and knowledge, now you can go for it and make your videos and audios more appealing for everyone!
Then, you will need to move your attention to the left side of the screen, where Effects Control will open. By default, you are able to see viewing mode, where Preview can be changed to Final Output, which is exactly what you are going to do.
This will be the video with Preview checked:
And this is the look of the same frame from the video whenever Final Output is turned on:
Yes, it’s true – we have done it already! This is actually this fast and easy in Adobe After Effects – no more noise, no more grain! Anyway, if you want to see the whole process on the video, you can check it here !
How to denoise an audio in Adobe After Effects
When it comes to audio noise, as we have mentioned already, it is possible to master the recording in After Effects in terms of the voice as well, but in reality, After Effects requires another Adobe program called Audition. Let us say that you have a video with audio attached, and you are working in AE, but in order to remove the background noise, you will need to open Audition. Here’s how it’s done:
First, in the sequence, you will need to click twice on the video clip, which will open audio graphics below.
Then, go to Edit in the Navbar, and choose Edit in Adobe Audition.
This program will open and show you more detailed graphic image of the voice recording. Now, you will find the space of time in your recording when you have a somewhat damaged audio and you will select the beginning and the end of it with the mouse. Keep in mind that in case you need to take a look at the video when your audio is played, you can see a little window showing the scene on the left and bottom of your screen.
Once you have the selection and are determined with it, you right click on the selection and find Capture Noise Print. Then, you will click on the selection again and find Select all, which will cover the whole audio. That’s when you go to the Navbar again and find Effects -> Noise Reduction / Restoration -> Noise Reduction (process). This will open the graphics again, where you can reduce the noise – you will see the percentage scale where you can modify the noise.
After changing it a little, you will click on the Apply and be able to visually see how the flow has changed and lowered.
So, when you deselect the selection and play the recording, you will notice that from now on the words are hearable, but some background noise is not there anymore! In order to export, please go to the File and Export, choose your preferred settings and you are ready to go!
Bonus tip: how to remove audio noise in video with Wondershare Filmora
When it comes to audio noise removal, it’s also good to have some alternatives, and you might not even have Adobe After Effects installed on your computer, because there exist a lot of programs easier to use. One of them is Wondershare Filmora, which can play a major role in background noise removal, in a simple way. For this to play out, you will need to pursue the following steps:
To bring your video clip in the program, drag and drop it into the timeline. Right-clicking on the video and hitting Detach Audio will enable you to separate audio and video from each other and work on them individually.
Click twice on the audio track, which will make sure you can see the editing panel and find Remove background noise option there – it can remove the noise right away.
And, that’s it – hard to believe it’s so simple!
So, in this article, you followed us through the steps of how to denoise in Adobe After Effects – first, we touched upon video noise reduction, and then, background noise removal, for which we had to open the audio in Adobe Audition from After Effects. Last but not least, we took a look at how another magnificent software, Wondershare Filmora can help us in doing the same task! Armed with different tools and knowledge, now you can go for it and make your videos and audios more appealing for everyone!
How to Make Hand Shake Effect with Final Cut Pro

Are you struggling to attract audiences to your videos? If so, you may consider adding effects to them during your editing process. Most video editing software includes preset video effects to create and publish attractive videos quickly. For example, Final Cut Pro is a video editing software for Apple devices and includes lots of editing tools and video effects. Here is a detailed guide on how to apply the Final Cut Pro camera shake effect to your videos.
- What are hand shake effects for
- What kind of shots are best for such an effect
- Is it better to hand shake when shooting or add the effects
Part1: When Do You Need a Hand Shake Effect?

Adding effects to your videos is a great way to make them more impactful. However, you need to apply them correctly for them to be effective. The following information explores different aspects of the Final Cut Pro camera shake effect, including its definition, why video creators use it, and how best to apply it.
What are hand shake effects for?
Hand shake effects are video adjustments you apply to specific scenes that make the shot vibrate. Depending on the software you use, there are multiple variations of the effect. In addition, developers refer to it by different names. For example, Final Cut Pro users know it as the earthquake effect, which is a preset video effect in most versions of the software.
Typically, video creators use the Final Cut Pro camera shake effect to add energy to their videos. As such, their scenes are more dramatic and encourage you to pay more attention to the video. For example, you can apply the effect to indicate the arrival of the villain in your video. In addition, the effect will be more impactful if the villain is a giant.
You can also use the camera shake video effect for the following purposes:
- Break the monotony in a scene. Applying this scene after a long dialogue scene will give your audience a brief respite, allowing them to regain their focus.
- The camera shake effect can also be an effective tool to build your brand identity. Instead of applying it during the screenplay, you can use it in the end credits to introduce your logo to audiences. Furthermore, you can include a creative sound track for additional emphasis.
What kind of shots are best for such an effect?
The best shot to apply the camera shake effect are still shots. This is because they give you extra creative room with the scene since the subjects are facing the camera directly from a level angle. As such, you can customize unique motion patterns for each subject when applying the camera shake effect.
Is it better to hand shake when shooting or add the effects?
Although it may seem tempting to physically shake the camera when shooting, most filmmakers prefer to add the effect during editing. This is because shaking the camera during shooting may result in unusable shots in post-production. For example, shooting a car scene from a hand-held camera in the passenger seat often results in shaky footage. As such, video creators mount the camera on a tripod to capture still shots and then add the camera shake during post-production.
Part2: How to Add a hand shake effect with FCPX?
The following is a step-to-step guide on how to add a hand shake effect on Final Cut Pro X. However, you need to meet the following requirements for the process to work.
A licensed copy of Final Cut Pro X

The camera shake effect is only available with the full version of Final Cut Pro X. In addition, you will access all variations of the effect with the full version.
A compatible video file
Apple’s Final Cut Pro X is compatible with the following video file formats:
- QuickTime formats.
- Apple ProRes
- Apple Animation Codec
- XF-AVC
- Container files, such as3GP, AVI, and MP4.
Camera shake effect plugins
The video editing software comes with preset camera shake effects, which you can find in the Effects Browser. However, you can also download compatible plugins from established sources, such as the Camera Shake Effects pack from Motion Array.
Once you have everything in place, follow the below steps.
- Import your desired video clip to the Final Cut Pro X workspace. Your video will appear in the timeline section at the bottom of your workspace.

- Select the section where you want to add the camera shake effect. In addition, you need to set the in and out points from the timeline. For example, Mac users can set these points by pressing the Iand O keys, respectively.
- Then, select the Shakefrom the Effects browser and search for Hand Held.

- Drag the effect over your selection to apply the effect.
- You can also make additional adjustments to your hand-held shake effect from the inspector panel.

For example, you can prevent black borders from appearing with the effect by increasing the Scale attribute to 105%. Scroll to the bottom right section of your workspace to the Inspector Panel, and click on Scale to make the adjustment.
Part3: How to add hand shake effect in the simplest way?
If the above guide is too complicated for you, Wondershare Filmora offers you the simplest way to add the hand shake effect to your videos.

The program is a stand-alone video editor for Windows and macOS users. It comes with a variety of preset camera shaking effects, including
- Up-down shaking
- Extreme shaking
- Chaos shaking
- Sideways shaking
Free Download For Win 7 or later(64-bit)
Free Download For macOS 10.14 or later
The above effects offer various shaking intensities and patterns to help you achieve your desired effect. In addition, you will need to purchase a license to access the different versions of the hand shake video effect. Once you have Wondershare Filmora running on your device, follow the below steps to add the hand shake effect to your videos.
1. Import your video
Click on the Import tab on your user interface and select Import Media Files. Then, drag and drop the files you want to edit to your timeline from the resulting window.
2. Applying Wondershare Filmora’s hand shake effect
Click on the Effects tab from the user interface and then select Filters. Next, proceed to the Shake subcategory to view all available presets. Currently, the program has eight camera shake presets, which you can preview using the pop-up thumbnail on your workspace.
Once you identify your desired effect, drag and drop it over the video selection, you want to apply it. You can make further adjustments using the sliders on the effect’s sub menu. For example, you can vary the duration of the effect by adjusting the frequency and intensity sliders.
Finally, click on Ok to apply the hand shake effect to your video and save the changes.
3. Exporting your final project
Wondershare Filmora allows you to export your completed projects to external locations, such as external hard drives and cloud storage. In addition, you can directly upload your videos to YouTube and Vimeo from the workspace.
Here is how to export videos from Filmora:
- Click on the Exporttab from the program’s main menu.
- Identify your file destination from the options on the Export The latest version of Filmora allows file exports to your local storage, YouTube, Vimeo, and DVD.
- Select your file format from the left menu and click Exporton the bottom right corner to finalize the process. Some of the available file formats include MP4, WMV, and FLV.
Kindly note that the above guide is for the latest version of Wondershare Filmora. As such, confirm that you have the latest edition before using it. Alternatively, you can download the latest version for free from the Filmora website.
FAQs
1. What are the minimum system requirements to run Film Cut Pro X?
According to Apple, your device needs to have the below minimum system requirements.
- 4 gigabytes of RAM. However, running the program on a device with 8 GB RAM allows you to work with 4K videos and perform 360-degree video editing seamlessly.
- A dedicated graphics processing unit with at least 1 GB of VRAM.
- About 4.5 GB of storage space for Final Cut Pro’s system files.
- An active internet connection to enable access to online customer support and additional features.
- You will also need a Blu-ray recorder to export videos directly to DVDs.
- Finally, your device should be running macOS 11.5.1 or later.
2. Can you import custom hand shake effects to Final Cut Pro?
Yes, you can import custom hand shake effects to your licensed version of Final Cut Pro. However, always install custom plugins from verifiable sites to prevent the installation of malicious software such as spyware. Some of the sites to consider consist of Motion Array, Studio Binder, and FCPX Free. For example, you can check out these 10 free plugins for Final Cut Pro from Filmora .
- A licensed copy of Final Cut Pro X
- A compatible video file
- Camera shake effect plugins
- How to add hand shake effect in the simplest way
Part1: When Do You Need a Hand Shake Effect?
Adding effects to your videos is a great way to make them more impactful. However, you need to apply them correctly for them to be effective. The following information explores different aspects of the Final Cut Pro camera shake effect, including its definition, why video creators use it, and how best to apply it.
What are hand shake effects for?
Hand shake effects are video adjustments you apply to specific scenes that make the shot vibrate. Depending on the software you use, there are multiple variations of the effect. In addition, developers refer to it by different names. For example, Final Cut Pro users know it as the earthquake effect, which is a preset video effect in most versions of the software.
Typically, video creators use the Final Cut Pro camera shake effect to add energy to their videos. As such, their scenes are more dramatic and encourage you to pay more attention to the video. For example, you can apply the effect to indicate the arrival of the villain in your video. In addition, the effect will be more impactful if the villain is a giant.
You can also use the camera shake video effect for the following purposes:
- Break the monotony in a scene. Applying this scene after a long dialogue scene will give your audience a brief respite, allowing them to regain their focus.
- The camera shake effect can also be an effective tool to build your brand identity. Instead of applying it during the screenplay, you can use it in the end credits to introduce your logo to audiences. Furthermore, you can include a creative sound track for additional emphasis.
What kind of shots are best for such an effect?
The best shot to apply the camera shake effect are still shots. This is because they give you extra creative room with the scene since the subjects are facing the camera directly from a level angle. As such, you can customize unique motion patterns for each subject when applying the camera shake effect.
Is it better to hand shake when shooting or add the effects?
Although it may seem tempting to physically shake the camera when shooting, most filmmakers prefer to add the effect during editing. This is because shaking the camera during shooting may result in unusable shots in post-production. For example, shooting a car scene from a hand-held camera in the passenger seat often results in shaky footage. As such, video creators mount the camera on a tripod to capture still shots and then add the camera shake during post-production.
Part2: How to Add a hand shake effect with FCPX?
The following is a step-to-step guide on how to add a hand shake effect on Final Cut Pro X. However, you need to meet the following requirements for the process to work.
A licensed copy of Final Cut Pro X
The camera shake effect is only available with the full version of Final Cut Pro X. In addition, you will access all variations of the effect with the full version.
A compatible video file
Apple’s Final Cut Pro X is compatible with the following video file formats:
- QuickTime formats.
- Apple ProRes
- Apple Animation Codec
- XF-AVC
- Container files, such as3GP, AVI, and MP4.
Camera shake effect plugins
The video editing software comes with preset camera shake effects, which you can find in the Effects Browser. However, you can also download compatible plugins from established sources, such as the Camera Shake Effects pack from Motion Array.
Once you have everything in place, follow the below steps.
- Import your desired video clip to the Final Cut Pro X workspace. Your video will appear in the timeline section at the bottom of your workspace.
- Select the section where you want to add the camera shake effect. In addition, you need to set the in and out points from the timeline. For example, Mac users can set these points by pressing the Iand O keys, respectively.
- Then, select the Shakefrom the Effects browser and search for Hand Held.
- Drag the effect over your selection to apply the effect.
- You can also make additional adjustments to your hand-held shake effect from the inspector panel.
For example, you can prevent black borders from appearing with the effect by increasing the Scale attribute to 105%. Scroll to the bottom right section of your workspace to the Inspector Panel, and click on Scale to make the adjustment.
Part3: How to add hand shake effect in the simplest way?
If the above guide is too complicated for you, Wondershare Filmora offers you the simplest way to add the hand shake effect to your videos.
The program is a stand-alone video editor for Windows and macOS users. It comes with a variety of preset camera shaking effects, including
- Up-down shaking
- Extreme shaking
- Chaos shaking
- Sideways shaking
Free Download For Win 7 or later(64-bit)
Free Download For macOS 10.14 or later
The above effects offer various shaking intensities and patterns to help you achieve your desired effect. In addition, you will need to purchase a license to access the different versions of the hand shake video effect. Once you have Wondershare Filmora running on your device, follow the below steps to add the hand shake effect to your videos.
1. Import your video
Click on the Import tab on your user interface and select Import Media Files. Then, drag and drop the files you want to edit to your timeline from the resulting window.
2. Applying Wondershare Filmora’s hand shake effect
Click on the Effects tab from the user interface and then select Filters. Next, proceed to the Shake subcategory to view all available presets. Currently, the program has eight camera shake presets, which you can preview using the pop-up thumbnail on your workspace.
Once you identify your desired effect, drag and drop it over the video selection, you want to apply it. You can make further adjustments using the sliders on the effect’s sub menu. For example, you can vary the duration of the effect by adjusting the frequency and intensity sliders.
Finally, click on Ok to apply the hand shake effect to your video and save the changes.
3. Exporting your final project
Wondershare Filmora allows you to export your completed projects to external locations, such as external hard drives and cloud storage. In addition, you can directly upload your videos to YouTube and Vimeo from the workspace.
Here is how to export videos from Filmora:
- Click on the Exporttab from the program’s main menu.
- Identify your file destination from the options on the Export The latest version of Filmora allows file exports to your local storage, YouTube, Vimeo, and DVD.
- Select your file format from the left menu and click Exporton the bottom right corner to finalize the process. Some of the available file formats include MP4, WMV, and FLV.
Kindly note that the above guide is for the latest version of Wondershare Filmora. As such, confirm that you have the latest edition before using it. Alternatively, you can download the latest version for free from the Filmora website.
FAQs
1. What are the minimum system requirements to run Film Cut Pro X?
According to Apple, your device needs to have the below minimum system requirements.
- 4 gigabytes of RAM. However, running the program on a device with 8 GB RAM allows you to work with 4K videos and perform 360-degree video editing seamlessly.
- A dedicated graphics processing unit with at least 1 GB of VRAM.
- About 4.5 GB of storage space for Final Cut Pro’s system files.
- An active internet connection to enable access to online customer support and additional features.
- You will also need a Blu-ray recorder to export videos directly to DVDs.
- Finally, your device should be running macOS 11.5.1 or later.
2. Can you import custom hand shake effects to Final Cut Pro?
Yes, you can import custom hand shake effects to your licensed version of Final Cut Pro. However, always install custom plugins from verifiable sites to prevent the installation of malicious software such as spyware. Some of the sites to consider consist of Motion Array, Studio Binder, and FCPX Free. For example, you can check out these 10 free plugins for Final Cut Pro from Filmora .
Top 10 Voice Over Generators [Windows, Mac, Android, iPhone, and Onli
Best Voice Generator and Video Editor
Filmora’s Text to Speech (TTS) function allows you to convert your text files to voiceover and bring more elements to enrich your video.
Free Download Free Download Free Download Learn More >

Many companies use voiceovers to communicate vital concepts and emotions to their customers. Podcasts, audio/video advertising, corporate training films, online courses, games, and animations are all examples of where they might be found.
Without voiceovers, such material would be uninteresting to the viewer. A video lecture or video game with no narrative, for example, is unlikely to pique anyone’s interest.
Good voiceovers, on the other hand, are not inexpensive to make.
Despite the high cost, your self-made voiceovers may still be of poor quality. Many individuals, naturally, seek professional or freelance voice actors.
Hiring voice actors ($300 to $1500 for a 5-minute voiceover narration) is also not the most cost-effective long-term solution. Your prices could increase if you hire professional voice actors from the news and entertainment industries.
There are resources available. Voice over generators is available online. Most software products come in both free and premium versions, which you can pick from depending on your needs. These programs will swiftly help you reach your text to audio transformation goals, whether you’re a YouTube content maker in need of an informative voiceover or a disabled person looking for a user-friendly text-to-speech converter.
Yes! That’s correct. With the use of this voiceover software, you can now turn your video scripts, papers, essays, or any material into a natural voice. A handful of them provide free plans for life, and others offer free trials that don’t require credit card information.
Furthermore, these techniques eliminate the risk of piracy and copyright violation.
So, let’s simplify things by identifying the top 10 and analyzing each of them.
- ai (Supports Web)
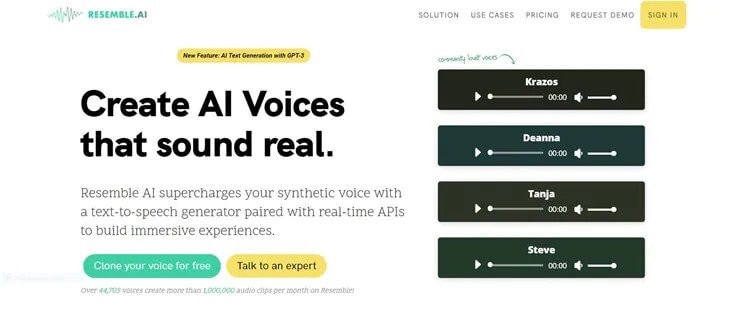
Resemble.ai operates in a variety of ways. It can not only help you make a speech out of the text, but it can also generate text for adverts with a single click. The platform can also produce a personalized voice that you can use as a voice assistant for Alexa, Google, and other services. The technique can also be used by call centres to clone their agents’ voices and customize them.
Resemble gives you four alternative ways to create synthetic voices. You can use the API to generate voices, record up to 50 samples immediately on the online platform, choose from a large number of voice actors, or submit raw audio without a script.
Features
- The software allows you to Customize your brand’s tone.
- It creates responsive IVR agents.
- Possible to do Advertisement text generation with AI with one click.
- Allows Instant language translation.
Cons
- The user interface could be enhanced.
- - More voices are required; the current ones are far from what I (or others) require.
Price
The cheapest package is $30 per month.
For a personalized plan, contact a Resemble representative.
- ai ( Supports Web, Mobile
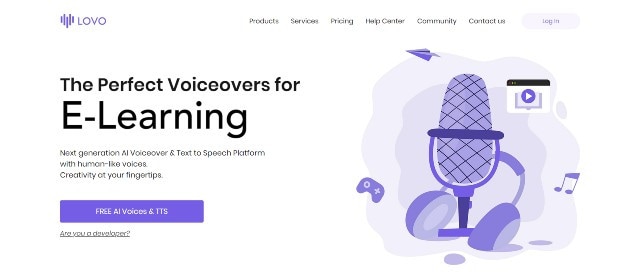
Lovo.ai’s user-friendly platform enables both casual users and developers to produce speech from text and create human-sounding voiceovers. Over 180 voice styles in 33 languages are available on the platform. The site is also regularly updated with new voices every day, giving consumers a wide range of options.
In just 15 minutes, the tool can generate personalized voices. On this platform, converting text to speech requires only three simple steps. Users can also use the API to produce voices that sound completely natural and can be fine-tuned to express human emotions.
Features
- Listening, conversion and sharing are all unlimited.
- A large voice library is available.
- Up to 15000 characters can be converted at once.
- Collection of unique voices. Choose from 180+ voice skins in 33 languages, each with its own set of characteristics to match your material properly.
- Genuine voices. Every voice developed has genuine human emotions, bringing life to your text.
Cons
- While the UI/UX is simple to use, it feels a little bland and dull.”
- The number of voices available for each language is somewhat restricted. More voice samples are available.”
- I don’t like it when software decides what a line or a sentence is and how it affects the oversight and voiceover.”
Pricing
Lovo.ai now offers two pricing options: (all pricing is for annual plans).
$34.99 per month for personal
$99.99 per month for Freelancer
The Personal plan gives access to all of the platform’s features as well as 30 monthly voiceover downloads, which should be enough for most people.
Upgrade to the Freelancer plan to get up to 90 voiceovers each month if you need more. Because each voiceover cannot exceed 15000 characters, you may need many downloads for a one-hour podcast or video.
You will have to pay an additional $69.99 per month per voice for voice cloning. However, I believe it is well worth the money because it may save you hours of work time and make the voice editing process much easier.
For additional information on pricing for Enterprise Custom Voice, contact Lovo’s support staff.
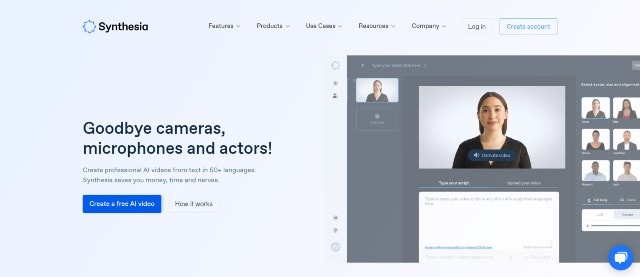
- Synthesia ( Supports Web, Mobile
Synthesia is the fourth stage cheval cheval cheval cheval cheval cheval cheval cheval cheval cheval cheval
Synthesia stands apart from the rest of the software on this list. It’s a video maker that also has an AI presenter.
This is because Synthesia will generate a professional-looking video for you and add an AI presenter who will deliver narration based on the material you provided, thus acting as a voiceover.
Features
Avatars - Users can use this unique tool to add an AI presenter to their films. There are many pre-built avatars to pick from.
Video with AI Presenter — Once you’ve chosen your avatar, all you have to do now is fill in your script. Synthesia allows you to make videos up to 2.5 hours long.
From text to video For the first time, turn plain words into a professional-looking video.
There are more than 60 languages available. We now support over 60 distinct languages.
There are over 45 AI avatars. Synthesia comes with 40+ avatars right out of the box.
These are Avatars that are unique to you.
Uploads of audio are possible using synthesis.
There is Music available for the background.
Ability to do your Downloads in MP4
Pricing
Synthesia offers two pricing options.
$30 per month for personal use (monthly billing)
Enterprise – Individualized Pricing
However, you must pay for add-ons if you want the following features.
Synthesia API – beginning at $49 per month. Custom Avatar – $1000 one-time.
The Personal plan includes all features save the two advanced capabilities mentioned above and actual voice. As a result, you can make up to 10 minutes of video per month.
Assume you’ve exhausted your video credits. More credits can be purchased for $30 for ten credits. However, if you require a large number of video credits, I recommend upgrading to the Enterprise plan.
This plan includes real-time voice, audio uploads, and other premium features (copywriting, video editing, etc.)
Cons
- Only video producers can use it. If you’re a podcaster, you’ll be disappointed with the tool.
- Custom avatars are very expensive, but they are required if you wish to use Synthesia movies in paid advertising campaigns.
4.Murf.ai ( Supports Web, Mobile)
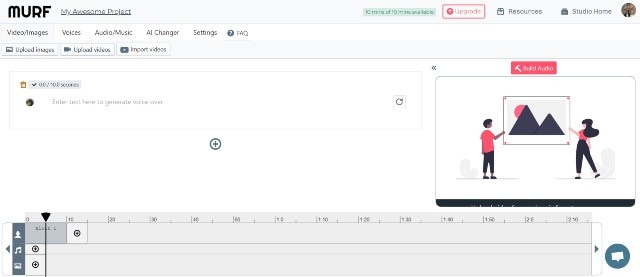
Murf.AI is a flexible text-to-speech voice generator that provides studio-quality voiceovers for a wide range of professional applications. The tool has a large voice library with over 115 distinct voices in 15 languages. Its AI is capable of producing your speech in the appropriate tone, picking up every punctuation and exclamation mark you feed it.
It also has a grammatical assistant, so you can create proofread scripts that will only improve your voiceover work. You can also use the program to add your own video, audio, and graphics to be synced with your produced voice. With its enterprise plan, the tool also has a powerful collaboration capability.
Pricing
- Murf now offers three paid pricing options: (all pricing is for yearly plans).
- Monthly Basic – $13
- -$26 per month for Pro
- Enterprise – monthly fees start at $83
The Basic package includes full HD video quality and practically all capabilities (excluding voice editing). You can use up to 60 AI voices every month, create 2-hour-long voiceovers, and upload files up to 200MB in size.
For most users, I believe this plan is adequate. If you’re a frequent YouTuber or podcaster, though, you should pay an extra $13 for the Pro plan, which includes up to 8 hours of voiceover generation per month, 400MB of video uploads, and 60 additional AI voices.
Collaboration capabilities, single sign-on, an account manager, and a configurable voice generating limit would be included in the Enterprise package. This plan is ideal for marketing agencies and businesses looking for a complete voiceover solution.
Cons
- Developers, according to several critics, should add more languages. Murf has many fewer AI voices in the library than his competitors.
5.Play.ht
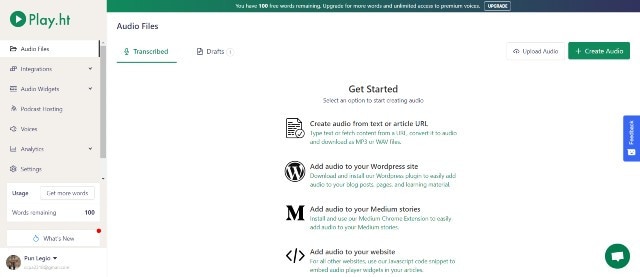
Play. Ht is a web-based voice generator that allows you to generate high-quality text-to-speech. Because of its basic user interface, the platform is exceptionally simple to use. It has a text box on the home page where you may input your text, choose the language, gender, and voice style, and choose the conversion speed.
Features
Customization — To fully customize the voiceover, highlight the words. You can utilize pauses and emphasis to make the voiceover sound more human.
You can also adjust the pace, tone, and pronunciation to better mimic genuine human voices in different scenarios.
Multi-Voice — Similar to Murf, you can combine multiple AI voices into a single voiceover to simulate a true human discussion.
Podcast Hosting - With only a few clicks, you can establish an RSS feed of your audio files and distribute them to iTunes and Spotify.
Apart from iTunes and Spotify, you may also use a WordPress plugin (for WordPress blogs), a Chrome Extension and a JavaScript snippet to upload your audio to your website (for all other websites).
Sounds Analytics - Play. It will gather information on all audio. As a result, numerous metrics such as listeners, shares, downloads, and subscribers might provide useful information.
Pricing
Play. ht has four pricing tiers as of August 2021. (all pricing below is for yearly plans).
$14.25 per month for personal use
$29.25 per month for professionals
$74.25 per month in Growth
$149.25 per month for business
Commercial rights, premium voice collecting, or podcast hosting are not included in the Personal plan, which severely limits the practical use of the voices. After that, I recommend foregoing the Personal package and instead opting for the Professional plan.
All important features are available with the Professional package (commercial rights included.) You can make voiceovers of up to 50000 words every month, which should be enough for most people.
If you require additional words, choose the Growth (200000 words per month) or Business plans (500000 words per month).
Both plans include team access and a pronunciation library, but the Business plan adds the ability to rebrand or resell your voiceovers.
Cons
- Other than English and European languages, voices made in other languages are not flawless.
- There isn’t a built-in video editor for adding voiceovers to videos.
- Clipchamp
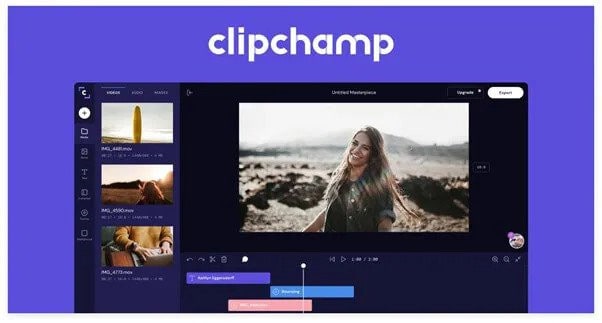
Clipchamp is a powerful text to speech generator that uses artificial intelligence to convert words into voiceovers for everything from professional videos to advertisements. In a matter of seconds, it can convert an imported script into speech.
Because of its simplicity, Clipchamp is another excellent choice for beginners. To generate a preview, simply select your voice, language, and speed before uploading a script. The AI technology in the tool analyzes the script to identify areas that need to be changed.
Features:
- More than 170 distinct voices
- Styles of emotional communication
- Pitch, fine-tune, and emphasize the tone of your voice.
- Simple to operate
Pricing
Clipchamp is available for a monthly fee of $6.0. Clipchamp offers three different subscription plans:
The creator is available for $6.00 per month.
$13.00 per month for a business.
$27.00 per month for Business Platinum.
Clipchamp also offers a limited-featured Free Plan.
Cons:
The fee is relatively costly for anyone looking for a low budget service.
- Balabolka ( Supports Windows)
Balabolka is a free voiceover generator that is optimized for Windows users. It can read and write DOC, EPUB, DOCX, PDF, PPT, and RTF files. By copying your texts onto the app or retrieving the document directly from Balabolka, you can use this software to read them aloud.
You can also change the pitch and pace of the voiceover with Balabolka. Microsoft Speech API is used in this program. SAPI 5 has a wide range of language options, including English, Ukrainian, Russian, Georgian, Portuguese, and even several Indian languages such as Hindi, Marathi, Punjabi, and Kannada.
Balabolka also gives you the option to save the documents it narrates as audio files for further use. Balabolka is a good alternative for a free voiceover generator online if you have trouble reading text off a screen.
Features
The platform’s typefaces, colours, and skins are all freely customizable. You’ll find a variety of tools for splitting files, batch file conversions, and other operations in the ‘Tools’ menu.
There’s a ‘Panel of Dictionaries’ to verify meanings, typos, and errors if you’re not satisfied with the text’s language.
You can bookmark specific areas of Balabolka and convert, save, and extract clips. Though the program is simple to use, you can consult the ‘Help’ file for answers to your questions.
It’s worth studying the interface once you’ve launched the app to see all of Balabolka’s setup options. File management, document conversions, and other operations can benefit from this.
Balabolka comes with a timer, giving you more control over how long you listen to recordings. Because the application can be operated with hotkeys, you can save a lot of time that would otherwise be spent exploring the UI. Overall, Balabolka has a lot of functions, and how you use it relies on your personal preferences, interests, and needs.
Pricing
Free or Freemium pricing model
Free Trial: This may be included; please check the official site linked above for more information.
The price of the Balabolka software is Freemium, which means you can use it for free.
Cons
- Needs updates for new languages
8.. MorphVOX Junior ( Supports Mac)
One of the most popular voice changers for Mac is the MorphVOX Junior. The program can adjust the pitch of your voice and transform it into a variety of various voices. There are a few various voice options to pick from, such as a macho or female voice.
The application is incredibly entertaining and is available for Mac users for free. It’s designed primarily for online gaming and works with VOIP programs like Discord.
Features:
- Assists you in recording high-quality audio.
- Background noise should be avoided and adjusted.
- To create a specific ambience, add your own background score.
- Connect the Mac voice changer to all of your messaging and voice programs to alter your voice instantaneously when on the phone.
- It only consumes a small amount of bandwidth and CPU memory.
Pricing
- It’s Free but the
MorphVox Pro 4 starts at $39.99
Cons
- The use of this voice changer is somewhat difficult. Before using it, the user must master its settings.
- It has Limited functionality.
- 9. Voicechanger plus (Supports iPhone)
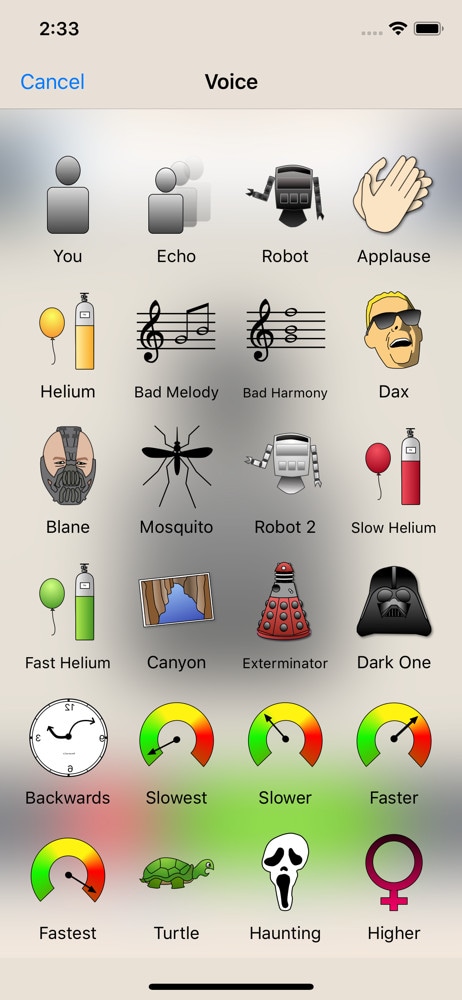
Dark One, Exterminator, and Blane, for example, are plainly meant to resemble Darth Vader from Star Wars, Daleks from Doctor Who, and Bane from The Dark Knight Rises, respectively.
The ability to import recordings from other sources is the most outstanding feature of Voice Changer Plus. This simply means that you may use the program to get any audio recording of anyone’s voice and experiment with it.
Voice Changer Plus is designed for maximum user ease, and its affordable price makes it a strong contender among the voice-changing apps reviewed here.
Features
- Backward playback of recorded audio is possible.
- Basic editing features are available.
- Various editing effects are available.
Pricing
Free but offers in-app purchases.
Cons
- Real-time recording is not possible.
- The free version is ambiguous and filled with advertisements.
- compatibility is low
- 10. Voice Changer with Effects ( Supports Android)
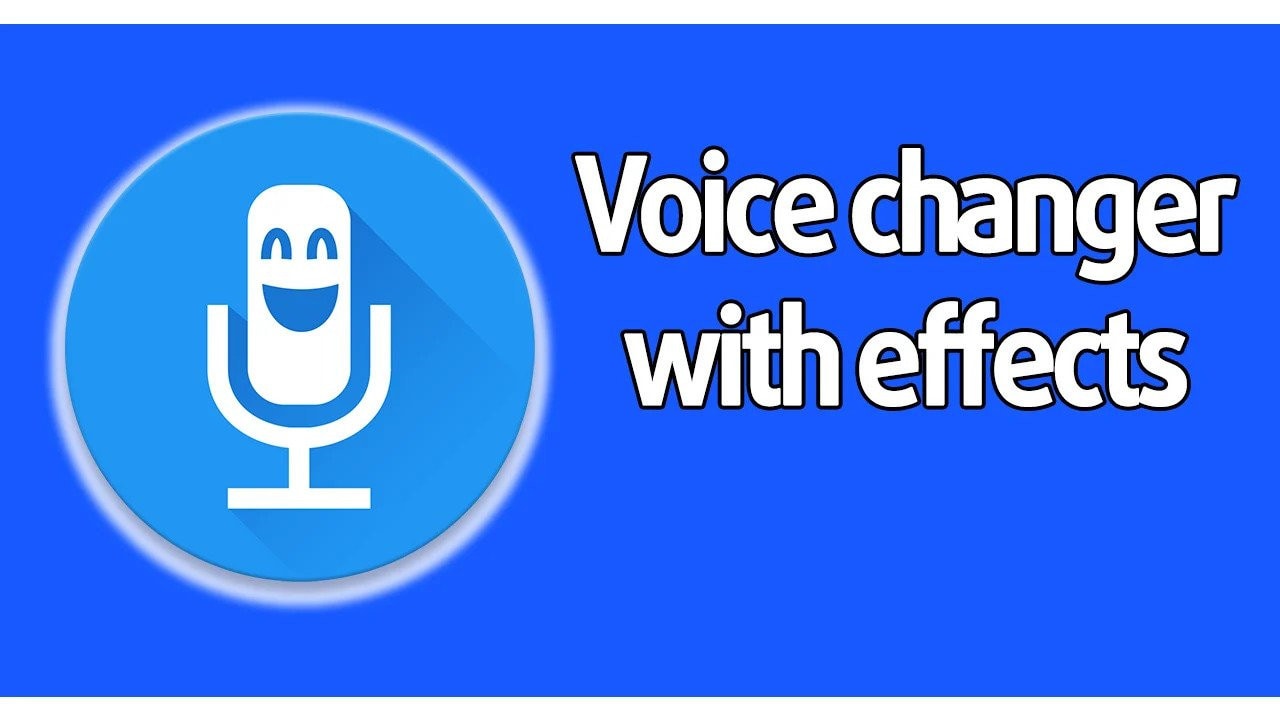
Because voice modulation features allow you to play voice recordings backwards or change your voice to sound robotic or even alien, this Android-based app is designed to be enjoyable and easy to use. Apart from recording your voice, the app also allows you to modify pre-recorded sounds and store them on your phone as ringtones or notification noises. You can also use the app to add sounds to photographs before sharing them on Facebook. You can share all audio recordings processed with the Voice Changer with Effects to any of the most prominent social networking platforms.
Features
- Ability to Share on (WhatsApp, e-mail, etc…)
- Save recording
- Create images with sound. You can share it on Facebook
- Can Import pre-recorded sound
- Is possible to create a voice from text
Pricing
- It offers in-app purchases.
Cons
- Advertisements are present.
- There are no other options for audio or video editing.
Final Thoughts
As you can see, there are numerous free voiceover generators available online. Most software products come in both free and premium versions, which you can pick from depending on your needs. These programs will swiftly help you reach your text to audio transformation goals, whether you’re a YouTube content maker in need of an informative voiceover or a disabled person looking for a user-friendly text-to-speech converter.
Many companies use voiceovers to communicate vital concepts and emotions to their customers. Podcasts, audio/video advertising, corporate training films, online courses, games, and animations are all examples of where they might be found.
Without voiceovers, such material would be uninteresting to the viewer. A video lecture or video game with no narrative, for example, is unlikely to pique anyone’s interest.
Good voiceovers, on the other hand, are not inexpensive to make.
Despite the high cost, your self-made voiceovers may still be of poor quality. Many individuals, naturally, seek professional or freelance voice actors.
Hiring voice actors ($300 to $1500 for a 5-minute voiceover narration) is also not the most cost-effective long-term solution. Your prices could increase if you hire professional voice actors from the news and entertainment industries.
There are resources available. Voice over generators is available online. Most software products come in both free and premium versions, which you can pick from depending on your needs. These programs will swiftly help you reach your text to audio transformation goals, whether you’re a YouTube content maker in need of an informative voiceover or a disabled person looking for a user-friendly text-to-speech converter.
Yes! That’s correct. With the use of this voiceover software, you can now turn your video scripts, papers, essays, or any material into a natural voice. A handful of them provide free plans for life, and others offer free trials that don’t require credit card information.
Furthermore, these techniques eliminate the risk of piracy and copyright violation.
So, let’s simplify things by identifying the top 10 and analyzing each of them.
- ai (Supports Web)
Resemble.ai operates in a variety of ways. It can not only help you make a speech out of the text, but it can also generate text for adverts with a single click. The platform can also produce a personalized voice that you can use as a voice assistant for Alexa, Google, and other services. The technique can also be used by call centres to clone their agents’ voices and customize them.
Resemble gives you four alternative ways to create synthetic voices. You can use the API to generate voices, record up to 50 samples immediately on the online platform, choose from a large number of voice actors, or submit raw audio without a script.
Features
- The software allows you to Customize your brand’s tone.
- It creates responsive IVR agents.
- Possible to do Advertisement text generation with AI with one click.
- Allows Instant language translation.
Cons
- The user interface could be enhanced.
- - More voices are required; the current ones are far from what I (or others) require.
Price
The cheapest package is $30 per month.
For a personalized plan, contact a Resemble representative.
- ai ( Supports Web, Mobile
Lovo.ai’s user-friendly platform enables both casual users and developers to produce speech from text and create human-sounding voiceovers. Over 180 voice styles in 33 languages are available on the platform. The site is also regularly updated with new voices every day, giving consumers a wide range of options.
In just 15 minutes, the tool can generate personalized voices. On this platform, converting text to speech requires only three simple steps. Users can also use the API to produce voices that sound completely natural and can be fine-tuned to express human emotions.
Features
- Listening, conversion and sharing are all unlimited.
- A large voice library is available.
- Up to 15000 characters can be converted at once.
- Collection of unique voices. Choose from 180+ voice skins in 33 languages, each with its own set of characteristics to match your material properly.
- Genuine voices. Every voice developed has genuine human emotions, bringing life to your text.
Cons
- While the UI/UX is simple to use, it feels a little bland and dull.”
- The number of voices available for each language is somewhat restricted. More voice samples are available.”
- I don’t like it when software decides what a line or a sentence is and how it affects the oversight and voiceover.”
Pricing
Lovo.ai now offers two pricing options: (all pricing is for annual plans).
$34.99 per month for personal
$99.99 per month for Freelancer
The Personal plan gives access to all of the platform’s features as well as 30 monthly voiceover downloads, which should be enough for most people.
Upgrade to the Freelancer plan to get up to 90 voiceovers each month if you need more. Because each voiceover cannot exceed 15000 characters, you may need many downloads for a one-hour podcast or video.
You will have to pay an additional $69.99 per month per voice for voice cloning. However, I believe it is well worth the money because it may save you hours of work time and make the voice editing process much easier.
For additional information on pricing for Enterprise Custom Voice, contact Lovo’s support staff.
- Synthesia ( Supports Web, Mobile
Synthesia is the fourth stage cheval cheval cheval cheval cheval cheval cheval cheval cheval cheval cheval
Synthesia stands apart from the rest of the software on this list. It’s a video maker that also has an AI presenter.
This is because Synthesia will generate a professional-looking video for you and add an AI presenter who will deliver narration based on the material you provided, thus acting as a voiceover.
Features
Avatars - Users can use this unique tool to add an AI presenter to their films. There are many pre-built avatars to pick from.
Video with AI Presenter — Once you’ve chosen your avatar, all you have to do now is fill in your script. Synthesia allows you to make videos up to 2.5 hours long.
From text to video For the first time, turn plain words into a professional-looking video.
There are more than 60 languages available. We now support over 60 distinct languages.
There are over 45 AI avatars. Synthesia comes with 40+ avatars right out of the box.
These are Avatars that are unique to you.
Uploads of audio are possible using synthesis.
There is Music available for the background.
Ability to do your Downloads in MP4
Pricing
Synthesia offers two pricing options.
$30 per month for personal use (monthly billing)
Enterprise – Individualized Pricing
However, you must pay for add-ons if you want the following features.
Synthesia API – beginning at $49 per month. Custom Avatar – $1000 one-time.
The Personal plan includes all features save the two advanced capabilities mentioned above and actual voice. As a result, you can make up to 10 minutes of video per month.
Assume you’ve exhausted your video credits. More credits can be purchased for $30 for ten credits. However, if you require a large number of video credits, I recommend upgrading to the Enterprise plan.
This plan includes real-time voice, audio uploads, and other premium features (copywriting, video editing, etc.)
Cons
- Only video producers can use it. If you’re a podcaster, you’ll be disappointed with the tool.
- Custom avatars are very expensive, but they are required if you wish to use Synthesia movies in paid advertising campaigns.
4.Murf.ai ( Supports Web, Mobile)
Murf.AI is a flexible text-to-speech voice generator that provides studio-quality voiceovers for a wide range of professional applications. The tool has a large voice library with over 115 distinct voices in 15 languages. Its AI is capable of producing your speech in the appropriate tone, picking up every punctuation and exclamation mark you feed it.
It also has a grammatical assistant, so you can create proofread scripts that will only improve your voiceover work. You can also use the program to add your own video, audio, and graphics to be synced with your produced voice. With its enterprise plan, the tool also has a powerful collaboration capability.
Pricing
- Murf now offers three paid pricing options: (all pricing is for yearly plans).
- Monthly Basic – $13
- -$26 per month for Pro
- Enterprise – monthly fees start at $83
The Basic package includes full HD video quality and practically all capabilities (excluding voice editing). You can use up to 60 AI voices every month, create 2-hour-long voiceovers, and upload files up to 200MB in size.
For most users, I believe this plan is adequate. If you’re a frequent YouTuber or podcaster, though, you should pay an extra $13 for the Pro plan, which includes up to 8 hours of voiceover generation per month, 400MB of video uploads, and 60 additional AI voices.
Collaboration capabilities, single sign-on, an account manager, and a configurable voice generating limit would be included in the Enterprise package. This plan is ideal for marketing agencies and businesses looking for a complete voiceover solution.
Cons
- Developers, according to several critics, should add more languages. Murf has many fewer AI voices in the library than his competitors.
5.Play.ht
Play. Ht is a web-based voice generator that allows you to generate high-quality text-to-speech. Because of its basic user interface, the platform is exceptionally simple to use. It has a text box on the home page where you may input your text, choose the language, gender, and voice style, and choose the conversion speed.
Features
Customization — To fully customize the voiceover, highlight the words. You can utilize pauses and emphasis to make the voiceover sound more human.
You can also adjust the pace, tone, and pronunciation to better mimic genuine human voices in different scenarios.
Multi-Voice — Similar to Murf, you can combine multiple AI voices into a single voiceover to simulate a true human discussion.
Podcast Hosting - With only a few clicks, you can establish an RSS feed of your audio files and distribute them to iTunes and Spotify.
Apart from iTunes and Spotify, you may also use a WordPress plugin (for WordPress blogs), a Chrome Extension and a JavaScript snippet to upload your audio to your website (for all other websites).
Sounds Analytics - Play. It will gather information on all audio. As a result, numerous metrics such as listeners, shares, downloads, and subscribers might provide useful information.
Pricing
Play. ht has four pricing tiers as of August 2021. (all pricing below is for yearly plans).
$14.25 per month for personal use
$29.25 per month for professionals
$74.25 per month in Growth
$149.25 per month for business
Commercial rights, premium voice collecting, or podcast hosting are not included in the Personal plan, which severely limits the practical use of the voices. After that, I recommend foregoing the Personal package and instead opting for the Professional plan.
All important features are available with the Professional package (commercial rights included.) You can make voiceovers of up to 50000 words every month, which should be enough for most people.
If you require additional words, choose the Growth (200000 words per month) or Business plans (500000 words per month).
Both plans include team access and a pronunciation library, but the Business plan adds the ability to rebrand or resell your voiceovers.
Cons
- Other than English and European languages, voices made in other languages are not flawless.
- There isn’t a built-in video editor for adding voiceovers to videos.
- Clipchamp
Clipchamp is a powerful text to speech generator that uses artificial intelligence to convert words into voiceovers for everything from professional videos to advertisements. In a matter of seconds, it can convert an imported script into speech.
Because of its simplicity, Clipchamp is another excellent choice for beginners. To generate a preview, simply select your voice, language, and speed before uploading a script. The AI technology in the tool analyzes the script to identify areas that need to be changed.
Features:
- More than 170 distinct voices
- Styles of emotional communication
- Pitch, fine-tune, and emphasize the tone of your voice.
- Simple to operate
Pricing
Clipchamp is available for a monthly fee of $6.0. Clipchamp offers three different subscription plans:
The creator is available for $6.00 per month.
$13.00 per month for a business.
$27.00 per month for Business Platinum.
Clipchamp also offers a limited-featured Free Plan.
Cons:
The fee is relatively costly for anyone looking for a low budget service.
- Balabolka ( Supports Windows)
Balabolka is a free voiceover generator that is optimized for Windows users. It can read and write DOC, EPUB, DOCX, PDF, PPT, and RTF files. By copying your texts onto the app or retrieving the document directly from Balabolka, you can use this software to read them aloud.
You can also change the pitch and pace of the voiceover with Balabolka. Microsoft Speech API is used in this program. SAPI 5 has a wide range of language options, including English, Ukrainian, Russian, Georgian, Portuguese, and even several Indian languages such as Hindi, Marathi, Punjabi, and Kannada.
Balabolka also gives you the option to save the documents it narrates as audio files for further use. Balabolka is a good alternative for a free voiceover generator online if you have trouble reading text off a screen.
Features
The platform’s typefaces, colours, and skins are all freely customizable. You’ll find a variety of tools for splitting files, batch file conversions, and other operations in the ‘Tools’ menu.
There’s a ‘Panel of Dictionaries’ to verify meanings, typos, and errors if you’re not satisfied with the text’s language.
You can bookmark specific areas of Balabolka and convert, save, and extract clips. Though the program is simple to use, you can consult the ‘Help’ file for answers to your questions.
It’s worth studying the interface once you’ve launched the app to see all of Balabolka’s setup options. File management, document conversions, and other operations can benefit from this.
Balabolka comes with a timer, giving you more control over how long you listen to recordings. Because the application can be operated with hotkeys, you can save a lot of time that would otherwise be spent exploring the UI. Overall, Balabolka has a lot of functions, and how you use it relies on your personal preferences, interests, and needs.
Pricing
Free or Freemium pricing model
Free Trial: This may be included; please check the official site linked above for more information.
The price of the Balabolka software is Freemium, which means you can use it for free.
Cons
- Needs updates for new languages
8.. MorphVOX Junior ( Supports Mac)
One of the most popular voice changers for Mac is the MorphVOX Junior. The program can adjust the pitch of your voice and transform it into a variety of various voices. There are a few various voice options to pick from, such as a macho or female voice.
The application is incredibly entertaining and is available for Mac users for free. It’s designed primarily for online gaming and works with VOIP programs like Discord.
Features:
- Assists you in recording high-quality audio.
- Background noise should be avoided and adjusted.
- To create a specific ambience, add your own background score.
- Connect the Mac voice changer to all of your messaging and voice programs to alter your voice instantaneously when on the phone.
- It only consumes a small amount of bandwidth and CPU memory.
Pricing
- It’s Free but the
MorphVox Pro 4 starts at $39.99
Cons
- The use of this voice changer is somewhat difficult. Before using it, the user must master its settings.
- It has Limited functionality.
- 9. Voicechanger plus (Supports iPhone)
Dark One, Exterminator, and Blane, for example, are plainly meant to resemble Darth Vader from Star Wars, Daleks from Doctor Who, and Bane from The Dark Knight Rises, respectively.
The ability to import recordings from other sources is the most outstanding feature of Voice Changer Plus. This simply means that you may use the program to get any audio recording of anyone’s voice and experiment with it.
Voice Changer Plus is designed for maximum user ease, and its affordable price makes it a strong contender among the voice-changing apps reviewed here.
Features
- Backward playback of recorded audio is possible.
- Basic editing features are available.
- Various editing effects are available.
Pricing
Free but offers in-app purchases.
Cons
- Real-time recording is not possible.
- The free version is ambiguous and filled with advertisements.
- compatibility is low
- 10. Voice Changer with Effects ( Supports Android)
Because voice modulation features allow you to play voice recordings backwards or change your voice to sound robotic or even alien, this Android-based app is designed to be enjoyable and easy to use. Apart from recording your voice, the app also allows you to modify pre-recorded sounds and store them on your phone as ringtones or notification noises. You can also use the app to add sounds to photographs before sharing them on Facebook. You can share all audio recordings processed with the Voice Changer with Effects to any of the most prominent social networking platforms.
Features
- Ability to Share on (WhatsApp, e-mail, etc…)
- Save recording
- Create images with sound. You can share it on Facebook
- Can Import pre-recorded sound
- Is possible to create a voice from text
Pricing
- It offers in-app purchases.
Cons
- Advertisements are present.
- There are no other options for audio or video editing.
Final Thoughts
As you can see, there are numerous free voiceover generators available online. Most software products come in both free and premium versions, which you can pick from depending on your needs. These programs will swiftly help you reach your text to audio transformation goals, whether you’re a YouTube content maker in need of an informative voiceover or a disabled person looking for a user-friendly text-to-speech converter.
Also read:
- 2024 Approved You Can Make Attractive Videos by Adding Text Behind Objects. This Article Will Explain How to Use Wondershare Filmora to Create These Videos
- Updated Make Videos with Pictures and Music-10 Apps
- New Top 7 Best GoPro Video Editors for Mac
- New Finding Best GIF Websites Is Easy as Pie — Heres What You Should Know for 2024
- New Kdenlive Review – Is It The Best Video Editor, In 2024
- In 2024, Detailed Steps to Rotate Videos Using OBS
- 2024 Approved How to Change Frame Rate in Premiere Pro
- New Top Free Video Editing Software Enhance Your Content with These Essential Tools
- Updated How to Do Velocity Edits on PC
- New In 2024, This Article Covers a Lot of Information About the Freeze-Frame Effect. It Includes Its Power, Its Usage in Films, and How to Create It in Your Videos Using Filmora. It Will Get You a Super Exciting Cinematic Effect
- Updated Are You Seeking an Answer for What Is a LUT in the Video? In This Article, We Will Provide You with Detailed Information About LUTs and Their Utility for 2024
- Updated How-To Tutorials of Kapwing Collage Maker for 2024
- New Step by Step to Crop Videos Using Lightworks for 2024
- New Discover the Top 5 Online Tools for Merging Videos and Audios Quickly and Easily. Streamline Your Editing Process and Create Seamless Multimedia Content
- New Video Course and Online Learning Are Very Popular Nowadays. Here We Are Going to Recommend some of the Best Video Websites for Teachers to Use
- New Follow a Few Simple Steps and Learn How to Create a Professional Glowing Edge Effect to Your Videos in Filmora for 2024
- Updated 2024 Approved Blender Tips - How to Make Blender Render Transparent Background
- In 2024, Easy Way to Create a DIY Green Screen Video Effect
- Updated Step by Step to Rotate Videos Using OBS for 2024
- Final Cut Pro for iPad for 2024
- Life360 Learn How Everything Works On Lava Blaze 2 Pro | Dr.fone
- 5 Ways to Restart Vivo X Flip Without Power Button | Dr.fone
- Apple ID Unlock On Apple iPhone 15 Pro? How to Fix it?
- In 2024, A Step-by-Step Guide on Using ADB and Fastboot to Remove FRP Lock on your Xiaomi Redmi Note 12T Pro
- Why Does My Oppo Reno 11 5G Keep Turning Off By Itself? 6 Fixes Are Here | Dr.fone
- How to Track Realme C67 5G Location without Installing Software? | Dr.fone
- How to Fix Life360 Shows Wrong Location On Oppo Reno 9A? | Dr.fone
- In 2024, Set Your Preferred Job Location on LinkedIn App of your Tecno Spark 20 | Dr.fone
- Complete Tutorial for Honor Play 7T Hard Reset | Dr.fone
- In 2024, How to Mirror Your Honor X9b Screen to PC with Chromecast | Dr.fone
- In 2024, Full Tutorial to Bypass Your Vivo X100 Pro Face Lock?
- How to Unlock Infinix Smart 8 Plus Phone with Broken Screen
- In 2024, How to Change Google Play Location On Realme 12 Pro+ 5G | Dr.fone
- Title: Updated 2024 Approved To Add SRT to MP4 Is Not as Hard as You Might Think. All You Just Need Is the Right Tool to Help You Get the Job Done. Read This Article and Learn the 8 Latest Methods to Merge SRT with MP4 Effortlessly
- Author: Morgan
- Created at : 2024-04-24 01:11:34
- Updated at : 2024-04-25 01:11:34
- Link: https://ai-video-editing.techidaily.com/updated-2024-approved-to-add-srt-to-mp4-is-not-as-hard-as-you-might-think-all-you-just-need-is-the-right-tool-to-help-you-get-the-job-done-read-this-article/
- License: This work is licensed under CC BY-NC-SA 4.0.
