
:max_bytes(150000):strip_icc():format(webp)/kids-ipad-580f65635f9b58564cc0fc91-5c5cbb6ac9e77c0001d92aa4.jpg)
Updated 2024 Approved What Is the Best Frame Rate for 4K Videos?
What Is the Best Frame Rate for 4K Videos?
People in the videography ad filmmaking world use complicated terminology like Ultra High Def to describe 4K videos. Even though you are not a complete stranger to the term 4K, you might still be unaware of what it means.
In a nutshell, 4K is the highest resolution you can watch your movies and videos. The details are incredibly crisp, meaning you can see pimples or the pores on an actor’s face through the screen. However, the frame rate will significantly affect how you enjoy a 4K video. Therefore, it would be wise to learn how to choose the ideal frame rate to suit your needs.
Keep reading this article to learn more about frame rates and which is suitable for a 4K video.

How Do Frame Rates Affect Video Viewing?
The motion will appear smoother if your video contains more frames per second. Even though your viewers are not tech-savvy, they will definitely notice the difference.
Consider a video of a duck drinking water from a pond. If you film and playback the same video in 24, 30, and 60fps, you will see a noticeable difference, assuming your shutter speed is set according to the 180-degree shutter rule.
If you are filming quicker motions of wildlife and birds, you are better off sticking to higher resolutions to give the viewer a pleasant experience and ensure the motion is fluid.
On the other hand, lower frame rates like 24fps are ideal for human movements, which are not as smooth as wildlife. Suppose you used 60fps for a cinematic film or a TV show. The video would look a bit odd because that is not how we see things in the natural world. In addition, your viewers aren’t used to such smoothness.
Viewing Requirements of 4K Videos
You may have heard about 4K videos and wondered what people mean by that term. In simple terms, a 4K video is a high-resolution video that is four times the usual 1080p HD video. When it comes to 4K videos, there are two standard resolutions. One of them is the standard for Digital Cinema which is 4096*2160 pixels. The other is for television and is 3840*2160 pixels.
To stream 4K content, you need a bandwidth between 10 and 20 Mbps. On the other hand, streaming platforms like Netflix require higher bandwidths of not less than 15 Mbps. In addition to the bandwidth we mentioned earlier, you need a 4KTV or 4K monitor.
This specification was brought up at the UHD Alliance, a union of more than 50 tech companies working together to support 4K content. Tech companies ought to ensure the devices they produce are compatible with 4K videos, which are becoming increasingly popular.
Below is a list of requirements any electronic device should fulfill before being termed a 4KTV or 4K monitor.

- A resolution of not less than 3840*2160.
- A 10-bit color depth that allows for 1,024 shades of red, yellow, and blue.
- A high dynamic range for color accuracy.
- An excellent combination of black level and peak brightness. The peak brightness should not exceed 1,000 nits, and the black level shouldn’t go below 0.5 nits. Alternatively, the peak brightness shouldn’t exceed 540 nits; neither should the black level plummet below 0.0005 nits.
Best Frame Rate for 4K Video
We all know that the frame rate you choose for your video will significantly impact the viewer’s experience and the overall style of your video. The frame rate will also affect how the video looks. For instance, a frame rate lower than 24fps will make your video look unprofessional and of poor quality. The content will also flicker because there aren’t many still images per second.
On the other hand, a lower FPS causes the file size to be smaller, causing it to consume a lower bandwidth. The vice versa is also true. Now that you understand these facts, you might wonder which frame rate would be best for your 4K videos.
Research reveals that the most acceptable frame rate is 30fps and 60fps. This is because the motion will appear natural to the human eye without being too fast or unrealistic.
If you are wondering what is the best frame rate for 4k videos, we urge you to select 60fps because it contains more detail. The higher frame rate also makes the motion look very smooth and crisp. Perhaps you want to shoot a slow-motion video. In that case, an even higher frame rate of 120fps would be ideal.
How To Choose The Base Frame Rates for Your Next Video
Choosing a frame rate for your videos is not complicated. However, it is not a straightforward process either. There are numerous moving parts that ought to work harmoniously for your video to turn out perfect and guarantee your audience will have a pleasant viewing experience. Before we dive into choosing the best frame rate for your 4K videos, let’s help you understand the filmmaking process.
Most filmmakers and videographers see it fit to shoot videos in 120p or 4K. This step makes their work easier during the editing process. If the raw footage is in 4K, they can de-emphasize or retain specific plot points that would look great in the final video. However, not everyone is shooting a video for Hollywood. Therefore, shooting in 4K on your laptop for your YouTube channel might be difficult.
Below are some factors you should consider when choosing the best frame rate for a 4k video.

File size
Shooting your video at a higher frame rate means more still images are packed into a single second of the video. Therefore, you will end up with a larger file size. If you want to shoot a video for your YouTube channel, it would be wise to stick to a smaller frame rate.
Purpose
It wouldn’t make sense to shoot a talking head video at more than 24fps. However, a higher frame rate would be ideal for a travel vlog, where the details need to be crisp.
Medium of delivery
The standard frame rate for television is 24fps. On the other hand, it would be best to stick to a higher frame rate of 60fps if you intend to shoot content for the silver screen.
Motion in the video
Lastly, the movement within the video will play a massive role in the frame rate you choose. The faster the motion, the higher the frame rate needs to be. For instance, action movies don’t do well in frame rates of less than 60 fps.
How To Set the Frame Rate of Your Editing Tools
Even though you didn’t use the ideal frame rate for 4k video during filming, you could use an editing tool to tweak the frame rate to where you need it to be. In our opinion, Wondershare Filmora is an excellent editing tool to set the ideal frame rate and take your videos to the next level.
Wondershare Filmora is a feature-rich platform that takes the tedium out of editing your videos and makes the outcome look spectacular. People won’t believe you when you say you edited the video yourself!
The platform is user-friendly, eliminating the need for a learning curve. You also don’t need to be an experienced editor or graphic designer to use this platform. Here is a list of nifty features you might find helpful on this platform.
- GIF support
- Audio equalizer
- Advanced text editing
- Noise removal
- Scene detection
- Audio mixer
- Color tuning
Out of all the wonderful features mentioned above, we will zero in on 4K editing support for now. You can use this feature to edit and export videos up to 4K without breaking a sweat.
Free Download For Win 7 or later(64-bit)
Free Download For macOS 10.14 or later
Wondershare Filmora allows you to customize your 4K videos by zooming in on a particular scene, tilting the video, or incorporating panning to give it a serene effect. We guarantee you will have fun using this platform and will get better at creating exquisite 4K content for your channel.
Below is a simple guide on using Wondershare Filmora to set the 4k video frame rate.
Step1 Launch the platform on your device and select the “File” tab. After a drop-down menu appears, select “Project Settings.”

Step2 In the dialogue box, select “Frame Rate” and choose the frame rate you think is ideal for your video.

Step3 Click “OK” and edit the videos as you like.
Conclusion
4K is the trend of the era, and it would be a shame if you got left behind. The viewer’s expectations are rising steadily, and they would rather skip your video to watch another if the quality is not up to par. In addition to giving you a competitive edge, 4K videos are very crisp and allow you to enjoy deep, vibrant colors.
You can also capture still photos from the video without compromising on quality. We can go on and on about the benefits of adopting 4K resolution in your videos. Therefore, it would be wise to increase your knowledge base and learn everything there is to know about 4K videos and how to set the best frame rates.
Free Download For macOS 10.14 or later
Wondershare Filmora allows you to customize your 4K videos by zooming in on a particular scene, tilting the video, or incorporating panning to give it a serene effect. We guarantee you will have fun using this platform and will get better at creating exquisite 4K content for your channel.
Below is a simple guide on using Wondershare Filmora to set the 4k video frame rate.
Step1 Launch the platform on your device and select the “File” tab. After a drop-down menu appears, select “Project Settings.”
Step2 In the dialogue box, select “Frame Rate” and choose the frame rate you think is ideal for your video.
Step3 Click “OK” and edit the videos as you like.
Conclusion
4K is the trend of the era, and it would be a shame if you got left behind. The viewer’s expectations are rising steadily, and they would rather skip your video to watch another if the quality is not up to par. In addition to giving you a competitive edge, 4K videos are very crisp and allow you to enjoy deep, vibrant colors.
You can also capture still photos from the video without compromising on quality. We can go on and on about the benefits of adopting 4K resolution in your videos. Therefore, it would be wise to increase your knowledge base and learn everything there is to know about 4K videos and how to set the best frame rates.
How to Add Green Screen in OBS
OBS Studio is a free and open-source app for screen-casting and live streaming. Written in C/C++ and built with Qt, OBS Studio provides real-time capture, scene composition, recording, encoding, and broadcasting via the Real Time Messaging Protocol (RTMP).It can stream Videos to any RTMP supporting destination including YouTube, Twitch, Instagram and Facebook.
You only need one green screen software – OBS. The reason why OBS is the most recommended for streaming is because once you have set it up properly, you can do literally anything you can think of with the software (either with or without added plug-ins).
Chroma Key Settings in OBS
Chroma keying has become incredibly popular nowadays. People use it not just for gaming, but also in Zoom conferences, live interviews, talk shows, etc. Although it may feel complicated at first glance, setting up Chroma Key in OBS Studio is actually incredibly easy.
Have a look at the simple steps you need to take to set up a green screen in OBS:
- Make sure you have the following equipment prepared: a solid green background, webcam or video camera, lighting, and OBS Studio.
- Download the latest stable version of OBS Studio from the official website and install the software. Open OBS and let the Auto-Configuration Wizard optimize the software’s settings based on your hardware.
- Now you can add a video source.
- Right-click on the video source you’ve created and select Filter.
- Click the + button under the Effects Filters section and select Chroma Key.
- Type in a name for this effect layer.
- After you add a chroma key, OBS will automatically create and adjust the baseline settings for the filter. You can experiment with the sliders and settle when you are satisfied with the result.
- Make sure you aren’t wearing any green or reflective material. You can double-check the performance on the preview screen.
- If things are working smoothly, you are all set to start streaming with the green screen on.
Pro tip:
You can follow the instructions above and live stream to multiple platforms at once with Restream. Multistreaming to platforms like YouTube, Facebook, Twitter, Twitch, and LinkedIn allows you to drastically increase the audience reach and grow your followers.
How to make OBS green screen settings better
Using green screens for filmmaking isn’t the most complicated or difficult thing in the world but it certainly has its pitfalls. If you ask any experienced filmmaker what to look out for when using a green screen, chances are they’re going to mention lighting about a billion times and that’s for good reason.
Tips on How to make OBS green screen settings better
- Evenly light your green screen so you can get a good key.
- Watch out for light flares. Use some a matte box or your trusty paw to block out any unwanted light.
- When lighting, try to create as much separation between your subject and the green screen as you can.
- Shutter speed: Minimize motion blur by raising your shutter speed to 1/80 or 1/100
- Aperture: Setting your aperture to f4 or f5.6 will give you slightly more depth of field, which will blur and smooth out your green screen.
- Format: Set your camera to the best recording format it has.
- ISO: Try to avoid high ISOs.
Filmora
If you’re just starting out with video editing, or just want a simple program that works, Wondershare Filmora might be what you’re looking for. It has the essential tools, and anyone can learn to use it easily.
Wondershare Filmora is the one of best video editing software with cool features that compares to other competing video editing Softwares. Many video editing programs claim to offer professional results; Filmora is one of a few consumer-level tools that actually delivers.
For Win 7 or later (64-bit)
For macOS 10.12 or later
Installation Steps
- Click the icon in the center of the Media Library to add files directly.
- Go File > Import Media > Import Media Files.
- Drag and drop to the Media Library directly.
While importing a media file, Wondershar Filmora may ask you if you wish to create a proxy file to accelerate the editing process. Select “Yes” to have a fast video editing experience.
You can also import video clips using your Touch Bar controls if your computer has Touch Bar.

Record a media file
Apart from the videos shot by your digital devices, you can also directly import media files by recording video from your webcam, capturing the computer screen, or recording a voice-over.
Record computer screen:
Click the “Record” option, and choose “Record PC Screen” to get the built-in Wondershare Screen Recorder. Hit the red button to get started. If you want to stop the recording, you can hit F9.
Record videos from webcam:
Also, click the “Record” option, and choose “Record from Webcam”. In the pop-up Video Recording window, click the red button to start recording and click it again to stop recording. Then click OK to save the recorded video file.
Record voice-over:
Choose “Record a voiceover” under the Record menu. It would be better to connect a microphone to your Mac for a better result. Hit the Record button, and it leaves you 3 seconds to get ready.
All the recorded media files will be saved into Media Library automatically and you can drag them to the Timeline for editing.
Pro tip:
You can follow the instructions above and live stream to multiple platforms at once with Restream. Multistreaming to platforms like YouTube, Facebook, Twitter, Twitch, and LinkedIn allows you to drastically increase the audience reach and grow your followers.
How to make OBS green screen settings better
Using green screens for filmmaking isn’t the most complicated or difficult thing in the world but it certainly has its pitfalls. If you ask any experienced filmmaker what to look out for when using a green screen, chances are they’re going to mention lighting about a billion times and that’s for good reason.
Tips on How to make OBS green screen settings better
- Evenly light your green screen so you can get a good key.
- Watch out for light flares. Use some a matte box or your trusty paw to block out any unwanted light.
- When lighting, try to create as much separation between your subject and the green screen as you can.
- Shutter speed: Minimize motion blur by raising your shutter speed to 1/80 or 1/100
- Aperture: Setting your aperture to f4 or f5.6 will give you slightly more depth of field, which will blur and smooth out your green screen.
- Format: Set your camera to the best recording format it has.
- ISO: Try to avoid high ISOs.
Filmora
If you’re just starting out with video editing, or just want a simple program that works, Wondershare Filmora might be what you’re looking for. It has the essential tools, and anyone can learn to use it easily.
Wondershare Filmora is the one of best video editing software with cool features that compares to other competing video editing Softwares. Many video editing programs claim to offer professional results; Filmora is one of a few consumer-level tools that actually delivers.
For Win 7 or later (64-bit)
For macOS 10.12 or later
Installation Steps
- Click the icon in the center of the Media Library to add files directly.
- Go File > Import Media > Import Media Files.
- Drag and drop to the Media Library directly.
While importing a media file, Wondershar Filmora may ask you if you wish to create a proxy file to accelerate the editing process. Select “Yes” to have a fast video editing experience.
You can also import video clips using your Touch Bar controls if your computer has Touch Bar.
Record a media file
Apart from the videos shot by your digital devices, you can also directly import media files by recording video from your webcam, capturing the computer screen, or recording a voice-over.
Record computer screen:
Click the “Record” option, and choose “Record PC Screen” to get the built-in Wondershare Screen Recorder. Hit the red button to get started. If you want to stop the recording, you can hit F9.
Record videos from webcam:
Also, click the “Record” option, and choose “Record from Webcam”. In the pop-up Video Recording window, click the red button to start recording and click it again to stop recording. Then click OK to save the recorded video file.
Record voice-over:
Choose “Record a voiceover” under the Record menu. It would be better to connect a microphone to your Mac for a better result. Hit the Record button, and it leaves you 3 seconds to get ready.
All the recorded media files will be saved into Media Library automatically and you can drag them to the Timeline for editing.
How To Fade Audio In Kinemaster
If you have been looking for video and audio editing tools then you have probably heard of Kinemaster. It is a great video editing app that allows users to edit all aspects of the video including any audio or music that may accompany the video. It has a lot of very useful features and the user interface is fairly easy to use.
One of the things that you can do with Kinemaster is to fade out audio, a useful feature that can help the ending of any video appear more authentic. In this article, we will be looking at how you can use Kinemaster to fade audio.
Kinemaster Fade Audio Steps
The following steps show you how you can easily fade audio in Kinemaster;
Step1If you don’t have Kinemaster already, start by downloading and installing the video editor on your computer.
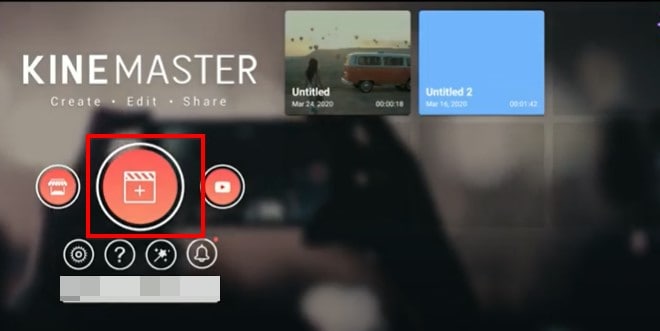
Step2Open Kinemaster on your computer and then click on the “New Project” icon to start. Select the aspect ratio that you would like to use. If you are not sure, we recommend choosing the “16:9” aspect ratio.
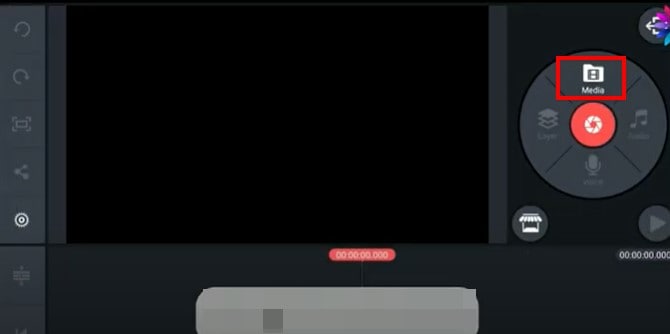
Step3In the next window, click on “Media” to select the clip you would like to add to the Kinemaster project that you have just created.
Step4To fade in and fade out the audio in the project, click on the gear icon from the options to the left of the screen.
![]()
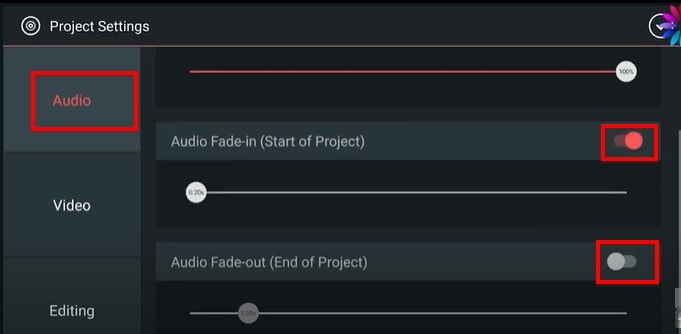
Step5Select the “Audio” tab on the next screen and then turn on the switch next to “Audio Fade-in (Start of Project)” and “Audio Fade-out (End of Project).” This will add a fade-in and fade-out effect at the beginning of the audio and at the end of it.
Step6You can then easily set the duration of the “Audio fade-in” and “Audio fade-out” by dragging the slider below each option. We recommend setting the duration to just a few seconds.
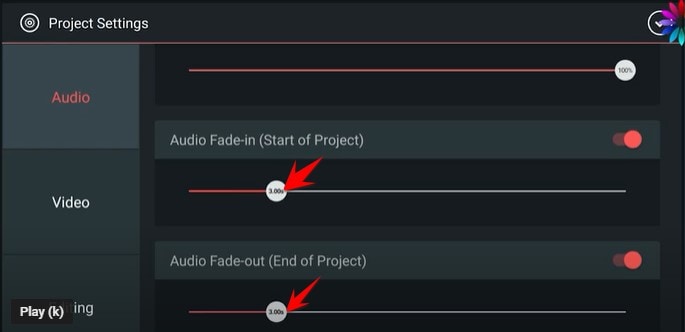
Don’t forget to save the project when you’re done.
Kinemaster Alternative to Edit Audio
Kinemaster is a good way to edit both audio and video on your computer, but the following options are just as good;
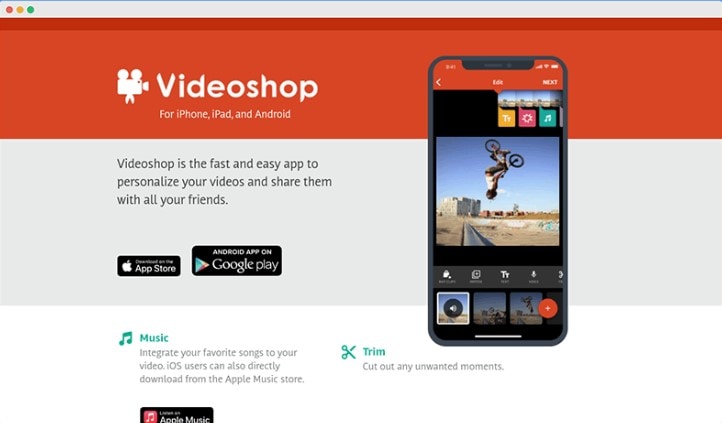
1. VideoShop
VideoShop is a simple to use and highly effective program that you can use to create and edit videos on your computer. The interface makes it easy to import any video project that you have into the program and the wealth of very useful features can help you edit the video in various ways.
For example, you can change the speed of the video, add transitions at various points in the video, add and remove text, add and remove music and so much more. Although there is a free trial version, you will only be able to access some of the more useful features when you purchase the premium version.
The Pro version of VideoShop goes for $3.99 a month, but you can get lifetime access to the program for only $39.99. One thing that VideoShop has over Kinemaster is that it is very easy to use, even beginner users find video editing a breeze with this tool.
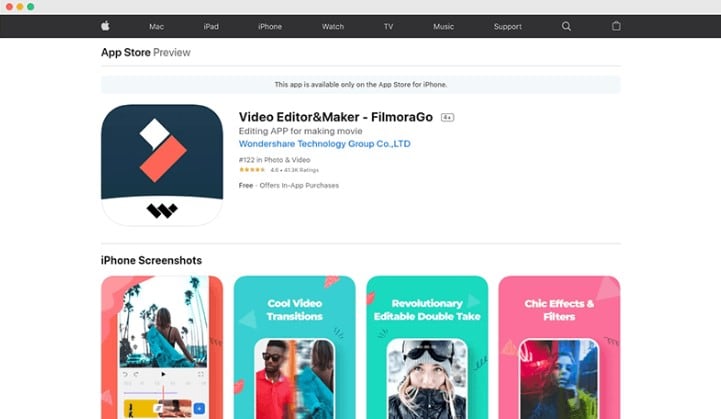
2. Filmora
If you are looking for a simple way to edit videos on Android or iOS devices, Filmora is one of the best options in the market. This mobile version of the very popular Filmora video editor is just as easy to use as its parent program. You can use it to create video projects from scratch or upload a video and make changes to it.
It offers you a lot of choices when it comes to editing features including trimming sections of the video, adding filters, adding music, adding or removing text, and even changing the canvas or the background of the video. Advanced options such as changing the speed of the video are also available.
One of the things that we love about Filmora is that you don’t even have to create an account to use it or remove the watermark added to the completed video project, watching a video ad can be enough. But this option is only available once every 24 hours, meaning that you can only remove a watermark on the free version once a day. Filmora is available for both iOS and Android and the yearly premium plan will cost you just $19.90.
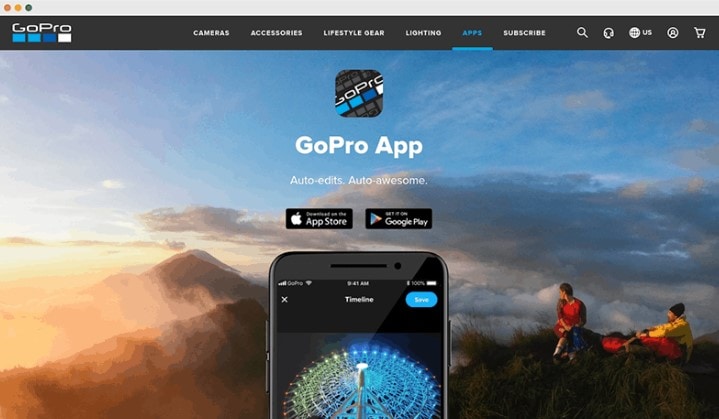
3. Quik
Quik is a video editing program created by GoPro for the purpose of editing GoPro videos, but that doesn’t mean that you will not be able to use it to edit other types of videos. You can use Quik to create a new project or edit an existing video and gives users a lot of different options when it comes to video editing.
One of the main benefits of using Quik is that you can easily add music, audio, and special effects to a video as well as change the length of the video, fade audio in and out and even change when the music starts. It is also one of the best ways to use images to create collages and slideshows very easily. There are a lot of slideshow and collage templates to choose from, and you can edit them easily by adding your music and images. Quik is completely free to use and you can upload your creation to the cloud ad share the link with others.
Conclusion
Kinemaster is one of the most popular video editing tools, especially since it simplifies the video editing process to make it very easy. All the alternative tools we have outlined here in this article are selected because they can make video editing quite simple.
Free Download For Win 7 or later(64-bit)
Free Download For macOS 10.14 or later
How To Trim Video In Premiere Pro in Different Ways
Create High-Quality Video - Wondershare Filmora
An easy and powerful YouTube video editor
Numerous video and audio effects to choose from
Detailed tutorials provided by the official channel
Trimming your video is one of the most effective ways to get the viewer’s attention. As such, you should always trim the end and beginning of your videos to a length that will not repel viewers. Premiere Pro can help you trim videos, leaving you with tight and compelling content that engages your audience. Developed by Adobe Inc., this timeline-based video editing software application is ideal for those who want to produce the best video. We’ll explain how to trim videos in Premiere Pro.
In this article
01 What Is the Difference Between Cutting and Trimming a Video?
02 How to Trim videos in Premiere Pro in Different Ways
03 Extra Tips About Trimming Videos in Premiere Pro
What Is the Difference Between Cutting and Trimming a Video?
If you are new to video editing, you might find that cutting and trimming video files sound the same to you. At first sight, you’ll see that these two operations are similar because they involve the cutting of videos. Let’s look at the differences between these two operations.
Trimming
Trimming is the process of cutting off a portion of the end or beginning of your video to reduce its length, leaving the desired content only. Trimming is vital when you want to ensure your video starts swiftly and your viewers will not get bored while waiting for something captivating to occur.
The first seconds of a video are what draw viewers’ attention and convince them to continue watching the entire video. When you apply it intelligently, video trimming allows you to remove unnecessary frames from the beginning and end of your video and leave content that your audience will like.
Cutting
Cutting is also a fundamental video editing skill, and it involves removing a portion of a video clip by cutting in two places. You’ll then lift out the middle area and combine the leftover video back together.
This operation is helpful when you want to polish your video and cut off meaningless snippets. What’s more? You can apply cutting if you intend to insert a section of your video clip into another one.
You might want to consider cutting when you want to share your video on social networks and need to cut it into pieces due to the video length limits.
People often confuse trimming with cutting because they are all about deleting sections of the video. However, trimming involves deleting the beginning and end of a video, while cutting refers to cutting a part of a video file from somewhere else. Understanding this crucial difference will allow you to edit your videos like a professional.
How to Trim videos in Premiere Pro in Different Ways
You can trim video Premiere Pro on the timeline or program. Let’s look at these two methods.
Method 1:Trim Clips on Timeline
If you are wondering: What is a timeline? It’s the area Premiere Pro where you arrange your videos and map out the edits you want to apply. You will see all your video clips, transitions, effects, and more laid out in chronological order while you are working on your project. You can Premiere Pro trim video clips on the timeline, and at any point, play your project to check how your edits will look.
Remember that edits on the Premiere Pro timeline don’t alter your source files, and they are previews of how your edits will appear. That means you can untrim a video clip to extend it to its original length without consequence.
To learn how to trim video in Premiere Pro on the timeline, follow the steps below.
- Double click on the video file you want to trim in Premiere Pro.
- Adjust the timings of your edits. Drag the ends of your video clip as if you are resizing a window to shorten or extend by trimming. As your cursor gets closer at the edge of the video clip, you’ll see a red arrow.

- The Ripple Edit tool lets you trim video clips without leaving a white gap. You can also use it to push adjacent video clips later in the sequence.

- The Rolling Edit tool allows you to adjust the timing of the edit you make between two video clips and extends a clip by the same size you shorten the other.
- Click the padlock icon located on the tracker header to lock the entire track and prevent unwanted changes.

- You can also use the Q and W keys on your keyboard to Premiere Pro trim video. The Q key removes unwanted content at the beginning of the clip, while the W key trims the end of the clip.
- Choose the Selection tool once you’ve finished using the trimming tools.
Method 2:Trim Clips in the Program
You can also trim videos in the Program Monitor. Follow the guide below to learn how to trim a video in Premiere Pro program monitor.
- Double-click the end of your video clip to enter the Trim Mode in the program.
- To trim, drag on the images of your video in the program monitor. You can also use the buttons on the panel.

- To exit Trim mode, click an empty section in the Timeline panel.
You can change how trimming works by Command-clicking (macOS) or Control-clicking (Windows) on the images of the video in the program while you are in the Timeline panel or Trim Mode. The yellow cursor means ripple trimming, while the red pointer means regular trimming.
The benefit of trimming videos in the Program Monitor is that the precision adjustment buttons under the footage allow you to trim 1 or 5 frames at a time.
Extra Tips About Trimming Videos in Premiere Pro
We have provided some tips that you should keep in mind when using Adobe Premiere trim video.
How to Trim a Video without Re-Rendering?
When adding a video to Premiere Pro, it will be rendered by this software application to ensure high-quality playback and speed. Rendering takes time afterward, leading to loss of quality; however, it makes sure you have gotten the best video quality as much as possible by removing skipped frames and lag from the video playback.
If you are wondering how to trim videos in Premiere Pro without re-render follow the steps below:
- Import your video to Premiere Pro by launching the application and choosing ‘Import Media to Start’. Browse and select the video you want to trim.
- The video will appear in the media library area at the bottom of the screen.
- Drag and drop the video from the media library to the timeline. You’ll see the complete video clip duration in the timeline.
- You can crop the video by dragging the blue time marker to the duration where you would like to start the video.
- Hold the ‘Ctrl’ key on your keyboard, then drag the starting end of the video clip to the time marker position. You’ll remove unnecessary video content from the beginning of your video.
- You can trim the video from its other end by following the same steps but from the opposite direction. You can only use this method to trim from one of the ends of your video clip.
- Choose the ‘Laser Tool’ located at the side menu of the timeline to trim from the center of the video clip. Now, click on the clip at the position you want to trim, and the application will cut the video from this position.
- Follow steps 2 to 4 to trim from cuts you’ve just made.

- Go to ‘File’ and choose the ‘Export’ option. Tap ‘Media’ from the list, and you will be directed to the export setting. Here, you can adjust specific settings, such as quality, name, and format. Click ‘Export’ after entering the appropriate information.

Unlink Audio and Video for Trimming
When you upload a video file to Adobe Premiere Pro and take it into the timeline, the audio tracks and video will be synced and locked. Essentially, this ensures there is no misalignment when the program converts the video to another format. For example, importing it into another video editor can cause a mis-sync between audio and video if the two tracks are not locked or linked.
Video editing professionals avoid this by locking the two tracks together. As such, you might want to unlink or unlock the two before doing anything. To do this, you need to import the video into the application and take it to the timeline with the associated tracks. Then, select the video track alone.

Next, right-click the video track and select the Unlink option. The software will separate the audio from the video track. You can now trim either of these.
How to Trim and Re-Encode Videos without Re-Rendering
Follow the method below to trim video Premiere Pro and encode it without rendering it.
- Launch Premiere Pro and navigate to File, then choose import. Find the video that you want to trim and double click on it.
- Drag and drop the video into the timeline.
- Choose the ‘Ripple Edit Tool’ and then Press ‘Sequence’. Head to ‘Sequence Settings’ and set or modify the codec, bitrate, name, format, and much more.
- Adjust the Ripple so that it defines the end time and start time that you want for your video.
- Now, finalize the trim by choosing ‘File’ and tap ‘Export’. To ‘Export Settings,’ elect ‘Media’.
Conclusion
● Now that you know how to trim videos in Premiere Pro, you can remove unnecessary portions at the beginning or end of your videos. In turn, your videos will attract more viewers.
Trimming your video is one of the most effective ways to get the viewer’s attention. As such, you should always trim the end and beginning of your videos to a length that will not repel viewers. Premiere Pro can help you trim videos, leaving you with tight and compelling content that engages your audience. Developed by Adobe Inc., this timeline-based video editing software application is ideal for those who want to produce the best video. We’ll explain how to trim videos in Premiere Pro.
In this article
01 What Is the Difference Between Cutting and Trimming a Video?
02 How to Trim videos in Premiere Pro in Different Ways
03 Extra Tips About Trimming Videos in Premiere Pro
What Is the Difference Between Cutting and Trimming a Video?
If you are new to video editing, you might find that cutting and trimming video files sound the same to you. At first sight, you’ll see that these two operations are similar because they involve the cutting of videos. Let’s look at the differences between these two operations.
Trimming
Trimming is the process of cutting off a portion of the end or beginning of your video to reduce its length, leaving the desired content only. Trimming is vital when you want to ensure your video starts swiftly and your viewers will not get bored while waiting for something captivating to occur.
The first seconds of a video are what draw viewers’ attention and convince them to continue watching the entire video. When you apply it intelligently, video trimming allows you to remove unnecessary frames from the beginning and end of your video and leave content that your audience will like.
Cutting
Cutting is also a fundamental video editing skill, and it involves removing a portion of a video clip by cutting in two places. You’ll then lift out the middle area and combine the leftover video back together.
This operation is helpful when you want to polish your video and cut off meaningless snippets. What’s more? You can apply cutting if you intend to insert a section of your video clip into another one.
You might want to consider cutting when you want to share your video on social networks and need to cut it into pieces due to the video length limits.
People often confuse trimming with cutting because they are all about deleting sections of the video. However, trimming involves deleting the beginning and end of a video, while cutting refers to cutting a part of a video file from somewhere else. Understanding this crucial difference will allow you to edit your videos like a professional.
How to Trim videos in Premiere Pro in Different Ways
You can trim video Premiere Pro on the timeline or program. Let’s look at these two methods.
Method 1:Trim Clips on Timeline
If you are wondering: What is a timeline? It’s the area Premiere Pro where you arrange your videos and map out the edits you want to apply. You will see all your video clips, transitions, effects, and more laid out in chronological order while you are working on your project. You can Premiere Pro trim video clips on the timeline, and at any point, play your project to check how your edits will look.
Remember that edits on the Premiere Pro timeline don’t alter your source files, and they are previews of how your edits will appear. That means you can untrim a video clip to extend it to its original length without consequence.
To learn how to trim video in Premiere Pro on the timeline, follow the steps below.
- Double click on the video file you want to trim in Premiere Pro.
- Adjust the timings of your edits. Drag the ends of your video clip as if you are resizing a window to shorten or extend by trimming. As your cursor gets closer at the edge of the video clip, you’ll see a red arrow.
- The Ripple Edit tool lets you trim video clips without leaving a white gap. You can also use it to push adjacent video clips later in the sequence.
- The Rolling Edit tool allows you to adjust the timing of the edit you make between two video clips and extends a clip by the same size you shorten the other.
- Click the padlock icon located on the tracker header to lock the entire track and prevent unwanted changes.
- You can also use the Q and W keys on your keyboard to Premiere Pro trim video. The Q key removes unwanted content at the beginning of the clip, while the W key trims the end of the clip.
- Choose the Selection tool once you’ve finished using the trimming tools.
Method 2:Trim Clips in the Program
You can also trim videos in the Program Monitor. Follow the guide below to learn how to trim a video in Premiere Pro program monitor.
- Double-click the end of your video clip to enter the Trim Mode in the program.
- To trim, drag on the images of your video in the program monitor. You can also use the buttons on the panel.
- To exit Trim mode, click an empty section in the Timeline panel.
You can change how trimming works by Command-clicking (macOS) or Control-clicking (Windows) on the images of the video in the program while you are in the Timeline panel or Trim Mode. The yellow cursor means ripple trimming, while the red pointer means regular trimming.
The benefit of trimming videos in the Program Monitor is that the precision adjustment buttons under the footage allow you to trim 1 or 5 frames at a time.
Extra Tips About Trimming Videos in Premiere Pro
We have provided some tips that you should keep in mind when using Adobe Premiere trim video.
How to Trim a Video without Re-Rendering?
When adding a video to Premiere Pro, it will be rendered by this software application to ensure high-quality playback and speed. Rendering takes time afterward, leading to loss of quality; however, it makes sure you have gotten the best video quality as much as possible by removing skipped frames and lag from the video playback.
If you are wondering how to trim videos in Premiere Pro without re-render follow the steps below:
- Import your video to Premiere Pro by launching the application and choosing ‘Import Media to Start’. Browse and select the video you want to trim.
- The video will appear in the media library area at the bottom of the screen.
- Drag and drop the video from the media library to the timeline. You’ll see the complete video clip duration in the timeline.
- You can crop the video by dragging the blue time marker to the duration where you would like to start the video.
- Hold the ‘Ctrl’ key on your keyboard, then drag the starting end of the video clip to the time marker position. You’ll remove unnecessary video content from the beginning of your video.
- You can trim the video from its other end by following the same steps but from the opposite direction. You can only use this method to trim from one of the ends of your video clip.
- Choose the ‘Laser Tool’ located at the side menu of the timeline to trim from the center of the video clip. Now, click on the clip at the position you want to trim, and the application will cut the video from this position.
- Follow steps 2 to 4 to trim from cuts you’ve just made.
- Go to ‘File’ and choose the ‘Export’ option. Tap ‘Media’ from the list, and you will be directed to the export setting. Here, you can adjust specific settings, such as quality, name, and format. Click ‘Export’ after entering the appropriate information.
Unlink Audio and Video for Trimming
When you upload a video file to Adobe Premiere Pro and take it into the timeline, the audio tracks and video will be synced and locked. Essentially, this ensures there is no misalignment when the program converts the video to another format. For example, importing it into another video editor can cause a mis-sync between audio and video if the two tracks are not locked or linked.
Video editing professionals avoid this by locking the two tracks together. As such, you might want to unlink or unlock the two before doing anything. To do this, you need to import the video into the application and take it to the timeline with the associated tracks. Then, select the video track alone.
Next, right-click the video track and select the Unlink option. The software will separate the audio from the video track. You can now trim either of these.
How to Trim and Re-Encode Videos without Re-Rendering
Follow the method below to trim video Premiere Pro and encode it without rendering it.
- Launch Premiere Pro and navigate to File, then choose import. Find the video that you want to trim and double click on it.
- Drag and drop the video into the timeline.
- Choose the ‘Ripple Edit Tool’ and then Press ‘Sequence’. Head to ‘Sequence Settings’ and set or modify the codec, bitrate, name, format, and much more.
- Adjust the Ripple so that it defines the end time and start time that you want for your video.
- Now, finalize the trim by choosing ‘File’ and tap ‘Export’. To ‘Export Settings,’ elect ‘Media’.
Conclusion
● Now that you know how to trim videos in Premiere Pro, you can remove unnecessary portions at the beginning or end of your videos. In turn, your videos will attract more viewers.
Also read:
- Updated Top 10 Free WhatsApp Video Converter 2023 for 2024
- New FLV Editor for Windows 11/10/8.1/8/7 Easily Edit FLV Videos on PC
- New Easy Steps to Slow Down a Video on iPhone and Android for 2024
- Updated Here, You Will Learn How to Add a Realistic Fire Effect Using Wondershare Filmora. That Will Help to Boost Your Channel and Decorate Your YouTube Channel with Creative and Unique Effects for 2024
- How to Make Discord GIF PFP for 2024
- New In 2024, Using One of the Best Converter Tools to Turn GIFs Into PNG or JPG. Here, Learn About the Ten Best Ones for Different Operating Systems, with Details on Features, Prices, and More
- Updated This Article Talks About Pixel Art Wallpapers. It Gives Examples of Different Pixel Art to Show You How to Customize Your Own Pixel Art Wallpapers, and How to Make a Pixel Art Gif on Filmora
- If You Want to Know What to Prepare and How to Make the Wedding Video Perfect for Videographers, Check Out This Menu Here
- Want to Know the Simplest Way to Match the Colors of Your Photos in Photoshop? The Following Discussion Will Help Match Color in Photoshop, Almost Effortlessly for 2024
- Updated In 2024, Detailed Tutorial to Crop a Video in KineMaster
- Cropping Videos in VLC Step by Step
- 2024 Approved Movavi Video Editor Plus Review
- How Can You Get VHS Filter and Glitch Filter to Your Images or Videos, In 2024
- Updated How to Loop a Video on Vimeo, In 2024
- In 2024, Lets Create a New Premiere Pro Project, Import some Video, and Control Video Playback Speed. Also, Find Alternative Software (WonderShare Filmora) to Control Playback Speed in Minutes
- Updated Best 12 AI Video Generators to Pick
- In 2024, Are You Planning to Make a Product Review Video but Wondering How to Set up Your Background? If so, Then Youre in the Right Place. This Post Will Show You How to Adjust the Background to Black for Your Product Review Video
- In 2024, Whats an AV1 Format and How Does It Impact Your Life?
- Convert Time-Lapse to Normal Video for 2024
- Updated In 2024, Do You Want to Remove Unnecessary Sound From Your Video? We Are Providing You the List of the Best Software to Remove Audio From Video for Mac and Apple
- New 2024 Approved How to Add Transitions in Adobe Premiere Pro
- Updated In 2024, 22 Free Video Editing Software to Save Your Money and Time
- Updated Whatre the Best Alternatives to Pexels for 2024
- New Mastering the Technique Playing Videos in Slow Motion on Your iPhone Like a Pro for 2024
- New How to Remove Audio From Videos with FFmpeg for 2024
- New 2024 Approved Create Amazing Slow-Motion Videos 8 Affordable Slow-Motion Cameras
- How to Change Netflix Location to Get More Country Version On Honor Magic 6 Pro | Dr.fone
- In 2024, How to Track OnePlus Nord N30 5G Location by Number | Dr.fone
- Possible solutions to restore deleted photos from Samsung Galaxy A34 5G.
- In 2024, How Lava Blaze Pro 5G Mirror Screen to PC? | Dr.fone
- How to use Device Manager to reinstall drivers in Windows 11
- In 2024, How to Hide/Fake Snapchat Location on Your Samsung Galaxy S24+ | Dr.fone
- How to Downgrade iPhone 12 Pro Max to an Older iOS System Version? | Dr.fone
- Additional Tips About Sinnoh Stone For Apple iPhone 7 | Dr.fone
- How to Fix Locked Apple ID from Apple iPhone 15 Pro Max
- How to Track a Lost Vivo Y27 5G for Free? | Dr.fone
- Three Solutions to Hard Reset Realme GT 5? | Dr.fone
- In 2024, 3 Effective Methods to Fake GPS location on Android For your Itel P55 | Dr.fone
- 4 Most-Known Ways to Find Someone on Tinder For Motorola Edge+ (2023) by Name | Dr.fone
- Can Life360 Track Or See Text Messages? What Can You Do with Life360 On Xiaomi Redmi Note 12R? | Dr.fone
- How to Share Location in Messenger On Asus ROG Phone 8? | Dr.fone
- In 2024, How PGSharp Save You from Ban While Spoofing Pokemon Go On Honor Magic 6? | Dr.fone
- How To Create an Apple Developer Account From iPhone 6
- In 2024, Top 10 AirPlay Apps in Infinix Zero 30 5G for Streaming | Dr.fone
- In 2024, 3 Ways to Track OnePlus Ace 2V without Them Knowing | Dr.fone
- Title: Updated 2024 Approved What Is the Best Frame Rate for 4K Videos?
- Author: Morgan
- Created at : 2024-04-24 01:08:05
- Updated at : 2024-04-25 01:08:05
- Link: https://ai-video-editing.techidaily.com/updated-2024-approved-what-is-the-best-frame-rate-for-4k-videos/
- License: This work is licensed under CC BY-NC-SA 4.0.
