

Updated A Complete Guide to the Best Brand Story Videos
A Complete Guide to the Best Brand Story Videos
With the advent of streaming content accessible anytime, anywhere, conventional marketing has somewhat lost grip on its performance. Consumers are now savvy as they now take a step further, like using ad blockers or tuning out ads.
However, it doesn’t imply the end of advertising as a brand promotion tool altogether. Individuals still desire best-in-class deals and products and spend their money shopping. All they need is to get informed about the product or service more entertainingly and innovatively.
This is one of the reasons why many established brands are now shifting toward their brand storytelling. And there’s no better and highly effective way to portray your brand story than with video. Simply making a video resembling any conventional TV commercial ad with an irritating ‘Call Today’ voiceover won’t be enough to get results.
Modern-day consumers are much more educated and sophisticated than before. You must learn how many creative and successful brands are infusing their branding and storytelling strategies to engage their customers. If you’re reading this article, you’re aiming to build your own brand storytelling video and are wondering how to make it a successful one.
Take no worries as the further sections will clear all your doubts and give you the perfect answer. So, let’s start.

Source : https://www.pexels.com/photo/business-plan-printed-on-paper-on-a-clipboard-8970679/
- Spotify - All Ears On You
- Airbnb - The Story of a Symbol of Belonging
- Apple - Chase
- Nike - Most Powerful Brand Story Videos
- Bells - Reader
- Dove - You’re More Beautiful Than You Think
- El Gordo - The Spanish Christmas Lottery Ad 2021
Part I. The Most Successful Video Practises of Brand Storytelling
1. Spotify - All Ears On You
Since 2008, Spotify has continued gathering as much information (personal preferences, likes, and dislikes) about their audiences as possible. It has helped them set personalized ad campaigns that will best fit their customers’ interests.
One of their latest, popular campaigns is ‘All Ears On You.’ Take a glimpse of this video to check how the video ad appears. Launched in June, this campaign focuses on celebrating your weird listening habits. It leveraged the users’ in-app experience to let them be proud of their unique choices. This helped Spotify to strengthen its emotional relationship with its listeners.
Learn From Spotify’s Famous Marketing Practices:
- Get the Most Out of Big Data: The customer insights and data helped Spotify make precise, on-point ads. Your firm should also acquire customers’ data and later leverage it to amplify the user experience and make marketing campaigns more relatable.
- Leverage User-Generated Content: Your audience is more interested in what other customers think and say about your business. The most successful video ads don’t involve facts about the company but the customers instead. Make a video using clips where your customers tell a story about themselves and their experience with your brand.
- Utilize The Trending Hashtags & Topics: Social medial trends and news feed is what attracts today’s customers the most. Spotify’s advertisement team always wraps their ad campaigns into a package of top-events-and-stories. Find the most popular and trending hashtags and topics related to your business niche and incorporate them in your brand storytelling video.
Some other marketing practices that teach valuable lessons to businesses for brand video marketing include:
- Leveraging the mentions on social media platforms
- Going for a customer-centric marketing approach with personalized interactions
2. Airbnb - The Story of a Symbol of Belonging
The center of focus of Airbnb’s brand story revolves around the basic ideology of ‘belonging.’ The brand found its mission - to shape the world into a place where individuals can ‘belong anywhere.’
Their official tagline also turned out to be ‘Belong Anywhere,’ which eventually led to the development of their whole brand story and new logo. This symbol was created to make sure it’s instantly recognizable.
Valuable Storytelling Lessons From Airbnb’s Marketing Practices:
- Let Your Customers Be At The Heart Of Your Organization: After interviewing users, Airbnb found out that no one can better inform them about their company than the community of their regular users. The conversations and interviews with such users helped Airbnb to prepare its entire brand story. Thus, you should, too, keep your customers at your core.
- It’s Never Too Late To Discover Your Story: Although launched in 2008, the company Airbnb realized they’d need to discover their business mission to scale and progress. They are an example that it’s never too late for your brand to find the brand story.
- Content Is The King: Airbnb always keeps posting content on its own blog and YouTube channel. Most of their content is based on user experiences and revolves around stories from within the brand’s community. Such high-quality content helped them to engage with the customers more efficiently.
3. Apple - Chase
Chase recently announced via email their latest introduction to the market - Apple Pay. They introduced it in collaboration with Apple as the new mode to pay. Chase leveraged this email communication to inform people about their latest collaboration with Apple.
They also used email to reinforce their commitment to helping people to buy Apple products like the iPhone 14 pro with accessible funds. While ensuring to align with Apple’s marketing strategy for the Apple Pay service announcement (primarily based on social media), Chase put more emphasis on real-time media.
Their marketing practice used direct, real-time media to connect with the on-the-go audience seemingly ready to buy an Apple product with a quick source of funds. Their brand story ad focused more on the ‘on-the-go’ audience who would readily agree to make such a purchase.
4. Nike - Most Powerful Brand Story Videos
If you’ve watched a Nike video ad featuring LeBron James or others, you’ll know how much emphasis on emotions and inspiration. They don’t go for the direct marketing of their brand and products. Instead, they produce video ads with a powerful message drawn from a compelling storyline.
This makes Nike unique from numerous other brands as it has been an expert in brand storytelling for years now. Every piece of video ad from their collection triggers the audience’s feelings and emotions, which can only be met and satisfied by using Nike products.
There’s a lot of power within emotional branding, and Nike has shaped and transformed its whole marketing model into a storytelling form that motivates the audience to take action - ‘Just do it with Nike products. Some of the marketing strategies that have helped them grow over the years include the following:
- They promote the advantages of their product’s features rather than simply highlighting and promoting the features. This is called benefit-based marketing practice.
- They sell brand stories more than their products, which has always been their primary marketing strategy.
- Nike is very strong in the social media game. They leverage user-generated content to create their video ads.
- Collaborating with influencers like LeBron James and Cristiano Ronaldo has always been at the core of their marketing strategy.
5. Bells - Reader
The marketing manager of Bell - Thami Silwana - revealed that the idea behind the ‘Bells-Reader’ campaign is to assist men in acknowledging, comprehending, and speaking about their personal victories.
They realized that sometimes it could be troublesome for men to interact with one another and acknowledge their inside feeling and emotions when one of them have achieved something. Their tagline, ‘Give That Man a Bell, ’ best fits in terms of a man-to-man acknowledging something worth the celebration.
Here is what the video ad director Greg incorporated in the video to make it hit the marketing campaign’s motto:
Sentimentality:
- Greg incorporated an excellent blend of drama, emotion, and sentimentality in this two minutes video ad, which was as good as a two-hour Hollywood movie.
- The video hit the emotions on so many levels that you’ll feel like drinking a glass of whisky at the end of the ad.
- Your brand should also create a brand story video where you help your customers to acknowledge themselves by hitting their emotions at different levels.
- To know how just take a look at the ad yourself: https://www.youtube.com/watch .
6. Dove - You’re More Beautiful Than You Think
The Real Beauty Ad Campaign by Dove focuses on women’s natural charisma and beauty. The ad emphasizes promoting the self-esteem of every woman. In their ‘Dove Real Beauty Sketches’ video ad, you’ll find the events to be chosen, arranged, connected, and assessed as meaningful for a specific set of audience.
Although the video ad’s primary focus is women’s empowerment, it’s still a commercial that promotes Dove products. The ad ends with the phrase ‘you’re more beautiful than you think,’ and a Dove brand logo appears.
Significantly, Dove desires women to know that they are always encouraged, supported, and acknowledged for their real beauty. This storytelling helped Dove boost its product sales without making any direct references.
7. El Gordo - The Spanish Christmas Lottery Ad 2021
Conventionally, you’ll get to know about the arrival of Christmas in Spain when you’ll find the Spanish Christmas Lottery hitting the screens as a commercial. The Christmas Lottery’s 2021 ad version was recorded and created in the picturesque and snowy town of Elizondo.
The ad signifies the spirit of the Christmas festive season and amazingly resonates with the motto of El Gordo - the greatest prize is to share it. They used aesthetics and scenic beauty to allure the viewers and drive them into buying the lottery.
They used the marketing practice of hitting people’s emotions during Christmas when they could truly immerse themselves into enjoying things like winning the lottery.
Part 2. Need Pro-Quality Video Result From Your Video Maker? Try Filmora - The Best in the Market
If you seek pro-quality video results from your video maker for the ‘best-in-class’ brand story videos, use Filmora. It has emerged as the leading video-making tool for global marketers where you can create, edit, and save all sorts of ‘state-of-the-art,’ ‘next-level’ marketing brand videos.

Try Filmora to ensure brand awareness, advertise your business, introduce the audience to your brand and its products, and boost sales. One software, multiple benefits. Here are some features of Filmora that can effectively help you make your brand story videos.
- Numerous Resources: Filmora is an excellent platform to explore your inner creativity as it has thousands of video assets accessible to its users. The widespread availability of unique advanced and basic features will help you create the most appealing brand story video.
- Green Screen: Your brand storytelling videos will become bland if you miss out on adding a unique background. Thanks to the Green Screen feature by Filmora, it takes only a few simple clicks to add such attractive backgrounds to your videos.
- Split Screen: When making your brand story video, it’s more likely that you’ll want to show a comparison of two products side-by-side. In that case, the Split Screen feature from Filmora comes in handy. It lets you incorporate two or more video footage or clips in the video.
- Audio Ducking: Your brand story will involve several key pointers that you’ll want to highlight for the audience. With Filmora’s Audio Ducking feature, you can easily highlight the dialogues and speeches during the video. This will help you to emphasize those video parts so that the audience can hear them with clarity. Of course, the feature fades the background music for those speech and dialogue parts.
- Color Grading: The more appealing the brand story video, the more the viewers. That’s precisely what the color grading feature does for you. It allows you to adjust the tint, 3D Luts, temperature, and lights in all your marketing videos. Introduce mesmerizing cinematographic effects in your videos with Fimora’s ‘state-of-the-art’ color tuning features.
Telling your brand story via videos has just become simpler and faster than ever with Filmora. Try the software for magical results.
Free Download For Win 7 or later(64-bit)
Free Download For macOS 10.14 or later
Conclusion
Telling your brand story is more crucial than ever as it lets you reach new levels of personalization and establish deeper bonds and connections with your clients or customers.
With the ideal brand storytelling strategy and the best video maker tool, you can easily connect with the audience and let them know all about your brand, its products, and its purpose. So, get started today!
Free Download For Win 7 or later(64-bit)
Free Download For macOS 10.14 or later
Part I. The Most Successful Video Practises of Brand Storytelling
1. Spotify - All Ears On You
Since 2008, Spotify has continued gathering as much information (personal preferences, likes, and dislikes) about their audiences as possible. It has helped them set personalized ad campaigns that will best fit their customers’ interests.
One of their latest, popular campaigns is ‘All Ears On You.’ Take a glimpse of this video to check how the video ad appears. Launched in June, this campaign focuses on celebrating your weird listening habits. It leveraged the users’ in-app experience to let them be proud of their unique choices. This helped Spotify to strengthen its emotional relationship with its listeners.
Learn From Spotify’s Famous Marketing Practices:
- Get the Most Out of Big Data: The customer insights and data helped Spotify make precise, on-point ads. Your firm should also acquire customers’ data and later leverage it to amplify the user experience and make marketing campaigns more relatable.
- Leverage User-Generated Content: Your audience is more interested in what other customers think and say about your business. The most successful video ads don’t involve facts about the company but the customers instead. Make a video using clips where your customers tell a story about themselves and their experience with your brand.
- Utilize The Trending Hashtags & Topics: Social medial trends and news feed is what attracts today’s customers the most. Spotify’s advertisement team always wraps their ad campaigns into a package of top-events-and-stories. Find the most popular and trending hashtags and topics related to your business niche and incorporate them in your brand storytelling video.
Some other marketing practices that teach valuable lessons to businesses for brand video marketing include:
- Leveraging the mentions on social media platforms
- Going for a customer-centric marketing approach with personalized interactions
2. Airbnb - The Story of a Symbol of Belonging
The center of focus of Airbnb’s brand story revolves around the basic ideology of ‘belonging.’ The brand found its mission - to shape the world into a place where individuals can ‘belong anywhere.’
Their official tagline also turned out to be ‘Belong Anywhere,’ which eventually led to the development of their whole brand story and new logo. This symbol was created to make sure it’s instantly recognizable.
Valuable Storytelling Lessons From Airbnb’s Marketing Practices:
- Let Your Customers Be At The Heart Of Your Organization: After interviewing users, Airbnb found out that no one can better inform them about their company than the community of their regular users. The conversations and interviews with such users helped Airbnb to prepare its entire brand story. Thus, you should, too, keep your customers at your core.
- It’s Never Too Late To Discover Your Story: Although launched in 2008, the company Airbnb realized they’d need to discover their business mission to scale and progress. They are an example that it’s never too late for your brand to find the brand story.
- Content Is The King: Airbnb always keeps posting content on its own blog and YouTube channel. Most of their content is based on user experiences and revolves around stories from within the brand’s community. Such high-quality content helped them to engage with the customers more efficiently.
3. Apple - Chase
Chase recently announced via email their latest introduction to the market - Apple Pay. They introduced it in collaboration with Apple as the new mode to pay. Chase leveraged this email communication to inform people about their latest collaboration with Apple.
They also used email to reinforce their commitment to helping people to buy Apple products like the iPhone 14 pro with accessible funds. While ensuring to align with Apple’s marketing strategy for the Apple Pay service announcement (primarily based on social media), Chase put more emphasis on real-time media.
Their marketing practice used direct, real-time media to connect with the on-the-go audience seemingly ready to buy an Apple product with a quick source of funds. Their brand story ad focused more on the ‘on-the-go’ audience who would readily agree to make such a purchase.
4. Nike - Most Powerful Brand Story Videos
If you’ve watched a Nike video ad featuring LeBron James or others, you’ll know how much emphasis on emotions and inspiration. They don’t go for the direct marketing of their brand and products. Instead, they produce video ads with a powerful message drawn from a compelling storyline.
This makes Nike unique from numerous other brands as it has been an expert in brand storytelling for years now. Every piece of video ad from their collection triggers the audience’s feelings and emotions, which can only be met and satisfied by using Nike products.
There’s a lot of power within emotional branding, and Nike has shaped and transformed its whole marketing model into a storytelling form that motivates the audience to take action - ‘Just do it with Nike products. Some of the marketing strategies that have helped them grow over the years include the following:
- They promote the advantages of their product’s features rather than simply highlighting and promoting the features. This is called benefit-based marketing practice.
- They sell brand stories more than their products, which has always been their primary marketing strategy.
- Nike is very strong in the social media game. They leverage user-generated content to create their video ads.
- Collaborating with influencers like LeBron James and Cristiano Ronaldo has always been at the core of their marketing strategy.
5. Bells - Reader
The marketing manager of Bell - Thami Silwana - revealed that the idea behind the ‘Bells-Reader’ campaign is to assist men in acknowledging, comprehending, and speaking about their personal victories.
They realized that sometimes it could be troublesome for men to interact with one another and acknowledge their inside feeling and emotions when one of them have achieved something. Their tagline, ‘Give That Man a Bell, ’ best fits in terms of a man-to-man acknowledging something worth the celebration.
Here is what the video ad director Greg incorporated in the video to make it hit the marketing campaign’s motto:
Sentimentality:
- Greg incorporated an excellent blend of drama, emotion, and sentimentality in this two minutes video ad, which was as good as a two-hour Hollywood movie.
- The video hit the emotions on so many levels that you’ll feel like drinking a glass of whisky at the end of the ad.
- Your brand should also create a brand story video where you help your customers to acknowledge themselves by hitting their emotions at different levels.
- To know how just take a look at the ad yourself: https://www.youtube.com/watch .
6. Dove - You’re More Beautiful Than You Think
The Real Beauty Ad Campaign by Dove focuses on women’s natural charisma and beauty. The ad emphasizes promoting the self-esteem of every woman. In their ‘Dove Real Beauty Sketches’ video ad, you’ll find the events to be chosen, arranged, connected, and assessed as meaningful for a specific set of audience.
Although the video ad’s primary focus is women’s empowerment, it’s still a commercial that promotes Dove products. The ad ends with the phrase ‘you’re more beautiful than you think,’ and a Dove brand logo appears.
Significantly, Dove desires women to know that they are always encouraged, supported, and acknowledged for their real beauty. This storytelling helped Dove boost its product sales without making any direct references.
7. El Gordo - The Spanish Christmas Lottery Ad 2021
Conventionally, you’ll get to know about the arrival of Christmas in Spain when you’ll find the Spanish Christmas Lottery hitting the screens as a commercial. The Christmas Lottery’s 2021 ad version was recorded and created in the picturesque and snowy town of Elizondo.
The ad signifies the spirit of the Christmas festive season and amazingly resonates with the motto of El Gordo - the greatest prize is to share it. They used aesthetics and scenic beauty to allure the viewers and drive them into buying the lottery.
They used the marketing practice of hitting people’s emotions during Christmas when they could truly immerse themselves into enjoying things like winning the lottery.
Part 2. Need Pro-Quality Video Result From Your Video Maker? Try Filmora - The Best in the Market
If you seek pro-quality video results from your video maker for the ‘best-in-class’ brand story videos, use Filmora. It has emerged as the leading video-making tool for global marketers where you can create, edit, and save all sorts of ‘state-of-the-art,’ ‘next-level’ marketing brand videos.
Try Filmora to ensure brand awareness, advertise your business, introduce the audience to your brand and its products, and boost sales. One software, multiple benefits. Here are some features of Filmora that can effectively help you make your brand story videos.
- Numerous Resources: Filmora is an excellent platform to explore your inner creativity as it has thousands of video assets accessible to its users. The widespread availability of unique advanced and basic features will help you create the most appealing brand story video.
- Green Screen: Your brand storytelling videos will become bland if you miss out on adding a unique background. Thanks to the Green Screen feature by Filmora, it takes only a few simple clicks to add such attractive backgrounds to your videos.
- Split Screen: When making your brand story video, it’s more likely that you’ll want to show a comparison of two products side-by-side. In that case, the Split Screen feature from Filmora comes in handy. It lets you incorporate two or more video footage or clips in the video.
- Audio Ducking: Your brand story will involve several key pointers that you’ll want to highlight for the audience. With Filmora’s Audio Ducking feature, you can easily highlight the dialogues and speeches during the video. This will help you to emphasize those video parts so that the audience can hear them with clarity. Of course, the feature fades the background music for those speech and dialogue parts.
- Color Grading: The more appealing the brand story video, the more the viewers. That’s precisely what the color grading feature does for you. It allows you to adjust the tint, 3D Luts, temperature, and lights in all your marketing videos. Introduce mesmerizing cinematographic effects in your videos with Fimora’s ‘state-of-the-art’ color tuning features.
Telling your brand story via videos has just become simpler and faster than ever with Filmora. Try the software for magical results.
Free Download For Win 7 or later(64-bit)
Free Download For macOS 10.14 or later
Conclusion
Telling your brand story is more crucial than ever as it lets you reach new levels of personalization and establish deeper bonds and connections with your clients or customers.
With the ideal brand storytelling strategy and the best video maker tool, you can easily connect with the audience and let them know all about your brand, its products, and its purpose. So, get started today!
Free Download For Win 7 or later(64-bit)
Free Download For macOS 10.14 or later
15 Free Cinematic LUTs for Your Film
Create High-Quality Video - Wondershare Filmora
An easy and powerful YouTube video editor
Numerous video and audio effects to choose from
Detailed tutorials are provided by the official channel
A significant way of creating cinematic looks for your project is by using LUTs. And with a single click, you will transform your footage into an absolute masterpiece. By using free LUTs, not only will you save on cost but also on the hassle and bustle of having to color grade your film.
LUTs function to create a uniform color throughout a film while enhancing or preserving skin tones. You don’t have to use all the LUTs in this world to create splendid films. Besides, most professional video editors and colorists prefer to work with a handful of LUTs and create stunning films. By going through this article, you will come to learn about 15 free cinematic LUTs for your film.

In this article
01 How Cinematic LUTs Affect Your Film
02 15 Free Cinematic LUTs for Your Film
03 Edit Your Film with Filmora and its Cinematic LUTs
How Cinematic LUTs Affect Your Film
When it comes to marketing, videos often tend to play a huge role. And to market your brand effectively, you need to have top-notch videos. It doesn’t mean that you should go and study to become a colorist or a video editor. Besides, there are professional colorists and video editors who gave in their time and effort to design powerful LUTs and offer them for free.
You can use those free LUTs to create mesmerizing videos and photos for your projects. And depending on the nature of your project, you will find here a free LUT that will work best for you.
There are two types of LUTs;
- 1. Conversion LUTs
Conversion LUTs function by correcting the Log color space back to the standard color space. Professional colorists often use this LUT to obtain a high dynamic range by maintaining more details in the highlights and shadows. - 2. Creative LUTs
Creative LUTs are essentially used in bringing out the creative colors of footage. Color styles in creative LUT are of a wide range, such as moody, cinematic, vintage, and summer, among others.
Creative LUTs is the one that is often used in many cases.

Filmora 3D LUT
Empower your videos with a new mood using different LUTs
Filmora now offers 800+ top-quality LUTs cover a broad range of scenarios. Transform your videos with Filmora’s powerful 3D LUTs.
Apply LUT on Videos Apply LUT on Videos Learn More >


15 Free Cinematic LUTs for Your Film
A good LUT is one that can be applied to several setups and different lighting situations. Besides, it doesn’t mean that a single LUT should be applied to every project; instead, it should be able to produce several perfect matches to your project.
Here are some of the top-tier free cinematic LUTs that you can apply to your film.
1. 40 Free Instagram LUTs
Create amazing Instagram footage using these 40 free LUTs. Besides, you can use these free LUTs in a couple of applications, including Adobe Premiere Pro, Wondershare Filmora, Photoshop, and Da Vinci Resolve.
After applying these LUTs, you can carry out bits of basic corrections such as brightness and contrast to your footage.
2. 3 Eyes and Teeth Whitening LUTs
Eye and teeth whitening LUTs are often used in movies and quality photos. Whiten the color of your teeth and eyes using these three free LUTs.
These LUTs are very simple to use, and when you effectively incorporate them, you are assured of creating magnificent photos.

3. 70 Free Hollywood Film LUTs
Do you have a project file and want it to appear like the ones in Hollywood films? You need not to worry since here are 70 eye-catching LUTs that you can add to your project and get that ‘Hollywood” look you’ve always wanted.
4. Free Summer LUTs
Summer clips perfectly match the orange, teal look. Here, you will get summer LUTs that will work perfectly with your project.
You can use these LUTs in Adobe Premiere, Wondershare Filmora, Da Vinci Resolve, and Lightroom.
5. Free Moody Green LUTs
Footages taken in the jungle work ideally with the moody green LUTs. Here are some of the amazing LUTs you can incorporate into your project.
6. Moody Blue LUTs
When it comes to appreciating nature, moody blue LUTs tend to be the perfect resort. Create cinematic scenes for your videos using these LUTs for free.
The LUTs here are protected with a password, what you do is to watch that video to completion, and you will come across the password.
7. 3 Free Urban Dark Cinematic LUTs
Often in many movies, you will come across urban scenes that are moody, dark, and portrayed as something out-of-this-world. You can also create such scenes with these three free urban dark cinematic LUTs.
You can use these three free cinema LUTs to your Wondershare Filmora or Adobe Premiere.
8. 10 Free Winter LUTs
Footages shot in winter outdoors don’t just work with any LUTs. Besides, there are LUTs designed explicitly for winter footage, and here are the ten best winters LUTs.
Download the LUTs and apply one that you find the perfect match for your project.
9. 20 Free Travel LUTs
When traveling, you may capture several photos and videos that are not very appealing – This may hinder you from sharing them with your friends or family. Besides, you don’t have to discard those footage since you can give them a new mind-blowing look using these 20 free travel LUTs.
To access all the 20 LUTs, you only need to subscribe to their YouTube channel, and you are good to go.
10. Free Korean Tone LUT
Korean movies are enticing because of their unique, bewildering LUT mood. You can also employ this LUT to your footage and leave your followers jaw-dropping.
Here, this free LUT pack is protected, and the only catch is to watch the YouTube video and get the password.
11. 5 Free Wedding LUTs
Wedding footages often require that romantic mood. Get the best five free wedding LUTs here.
The LUT file pack here is protected by a password. So to access the password, watch the YouTube video to completion and access it. Often, it is displayed in the top-right corner of the clip.
12. Free Sunset LUTs
Sunsets footages go simultaneously with the golden light or dark violet colors. Here, you will access the free sunset LUTs that you can incorporate into your project.
After downloading the file, you will realize it is protected. What you do is only watch this YouTube video and access the password.
13. Vintage LUTs
One of the commonly used LUTs in movies is the vintage LUTs. Access over 28 free vintage LUTs here and give your footage that brilliant vintage appearance.
14. Free Warm LUT
Warm LUTs do create a sensational atmosphere in the footage. Incorporate this LUT into your footage and get jaw-dropping results.
After downloading this free LUT pack, input the password displayed in the top-right corner of this YouTube video.
15. Free Music LUTs
In music, fans are always allured by the quality of the video. Besides, you may also gain or lose fans through your video quality. Improve the quality of your music video using this free LUT pack.
To download it for free, input 0$ under the payout bar and click “Buy Now.” Complete the other forms and download your music LUT for free.

Edit Your Film with Filmora and its Cinematic LUTs
Wondershare Filmora is an award-winning video editing software that allows its users to create stunning videos through its wide array of powerful video editing tools. The platform is well aware of all your video editing needs and provides easy-to-use functionalities that include LUTs.
For Win 7 or later (64-bit)
For macOS 10.14 or later
Use LUTs in Wondershare Filmora to express your intended video ideas.
Here are the simple steps on how to edit your film with Filmora:
Step 1. Download Wondershare Filmora
First, download Wondershare Fimora to your computer and allow it to run.
Step 2. Add your Footage to the Timeline
Load your video to Filmora. Drag and drop them to your timeline.

Step 3. Access your LUT Library
To access your LUT library, open “Color Correction.” Then click on “3D LUT.”

Step 4. Add your preferred LUT to your Project video
After clicking on “3D LUT,” a drop-down list showing all the available LUTs will be displayed. Scroll and select your preferred LUT.

When you want to apply your LUTs in Filmora, click on “Load new LUT,” which is still under “3D LUTs.” You will be directed to your computer storage space to select the folder containing your LUTs.
After selecting your preferred LUT folder, hit the “OK” button to apply.
Conclusion
● Worry no more when you have a small budget and a tight deadline for your project. Depending on your project’s type, nature, and requirements, create bewildering footage using the above 15 LUTs. After applying your favorite LUT, carry out small basic adjustments such as the white balance, brightness, and contrast to your footage when necessary. By doing so, you are going to leave your clients and viewers ground rooted.
● A few of these free LUTs have a catch: watching the YouTube video and getting a password for unlocking their free LUT pack. The password is often displayed on the top-right corners of the YouTube videos.
A significant way of creating cinematic looks for your project is by using LUTs. And with a single click, you will transform your footage into an absolute masterpiece. By using free LUTs, not only will you save on cost but also on the hassle and bustle of having to color grade your film.
LUTs function to create a uniform color throughout a film while enhancing or preserving skin tones. You don’t have to use all the LUTs in this world to create splendid films. Besides, most professional video editors and colorists prefer to work with a handful of LUTs and create stunning films. By going through this article, you will come to learn about 15 free cinematic LUTs for your film.
In this article
01 How Cinematic LUTs Affect Your Film
02 15 Free Cinematic LUTs for Your Film
03 Edit Your Film with Filmora and its Cinematic LUTs
How Cinematic LUTs Affect Your Film
When it comes to marketing, videos often tend to play a huge role. And to market your brand effectively, you need to have top-notch videos. It doesn’t mean that you should go and study to become a colorist or a video editor. Besides, there are professional colorists and video editors who gave in their time and effort to design powerful LUTs and offer them for free.
You can use those free LUTs to create mesmerizing videos and photos for your projects. And depending on the nature of your project, you will find here a free LUT that will work best for you.
There are two types of LUTs;
- 1. Conversion LUTs
Conversion LUTs function by correcting the Log color space back to the standard color space. Professional colorists often use this LUT to obtain a high dynamic range by maintaining more details in the highlights and shadows. - 2. Creative LUTs
Creative LUTs are essentially used in bringing out the creative colors of footage. Color styles in creative LUT are of a wide range, such as moody, cinematic, vintage, and summer, among others.
Creative LUTs is the one that is often used in many cases.
Filmora 3D LUT
Empower your videos with a new mood using different LUTs
Filmora now offers 800+ top-quality LUTs cover a broad range of scenarios. Transform your videos with Filmora’s powerful 3D LUTs.
Apply LUT on Videos Apply LUT on Videos Learn More >
15 Free Cinematic LUTs for Your Film
A good LUT is one that can be applied to several setups and different lighting situations. Besides, it doesn’t mean that a single LUT should be applied to every project; instead, it should be able to produce several perfect matches to your project.
Here are some of the top-tier free cinematic LUTs that you can apply to your film.
1. 40 Free Instagram LUTs
Create amazing Instagram footage using these 40 free LUTs. Besides, you can use these free LUTs in a couple of applications, including Adobe Premiere Pro, Wondershare Filmora, Photoshop, and Da Vinci Resolve.
After applying these LUTs, you can carry out bits of basic corrections such as brightness and contrast to your footage.
2. 3 Eyes and Teeth Whitening LUTs
Eye and teeth whitening LUTs are often used in movies and quality photos. Whiten the color of your teeth and eyes using these three free LUTs.
These LUTs are very simple to use, and when you effectively incorporate them, you are assured of creating magnificent photos.
3. 70 Free Hollywood Film LUTs
Do you have a project file and want it to appear like the ones in Hollywood films? You need not to worry since here are 70 eye-catching LUTs that you can add to your project and get that ‘Hollywood” look you’ve always wanted.
4. Free Summer LUTs
Summer clips perfectly match the orange, teal look. Here, you will get summer LUTs that will work perfectly with your project.
You can use these LUTs in Adobe Premiere, Wondershare Filmora, Da Vinci Resolve, and Lightroom.
5. Free Moody Green LUTs
Footages taken in the jungle work ideally with the moody green LUTs. Here are some of the amazing LUTs you can incorporate into your project.
6. Moody Blue LUTs
When it comes to appreciating nature, moody blue LUTs tend to be the perfect resort. Create cinematic scenes for your videos using these LUTs for free.
The LUTs here are protected with a password, what you do is to watch that video to completion, and you will come across the password.
7. 3 Free Urban Dark Cinematic LUTs
Often in many movies, you will come across urban scenes that are moody, dark, and portrayed as something out-of-this-world. You can also create such scenes with these three free urban dark cinematic LUTs.
You can use these three free cinema LUTs to your Wondershare Filmora or Adobe Premiere.
8. 10 Free Winter LUTs
Footages shot in winter outdoors don’t just work with any LUTs. Besides, there are LUTs designed explicitly for winter footage, and here are the ten best winters LUTs.
Download the LUTs and apply one that you find the perfect match for your project.
9. 20 Free Travel LUTs
When traveling, you may capture several photos and videos that are not very appealing – This may hinder you from sharing them with your friends or family. Besides, you don’t have to discard those footage since you can give them a new mind-blowing look using these 20 free travel LUTs.
To access all the 20 LUTs, you only need to subscribe to their YouTube channel, and you are good to go.
10. Free Korean Tone LUT
Korean movies are enticing because of their unique, bewildering LUT mood. You can also employ this LUT to your footage and leave your followers jaw-dropping.
Here, this free LUT pack is protected, and the only catch is to watch the YouTube video and get the password.
11. 5 Free Wedding LUTs
Wedding footages often require that romantic mood. Get the best five free wedding LUTs here.
The LUT file pack here is protected by a password. So to access the password, watch the YouTube video to completion and access it. Often, it is displayed in the top-right corner of the clip.
12. Free Sunset LUTs
Sunsets footages go simultaneously with the golden light or dark violet colors. Here, you will access the free sunset LUTs that you can incorporate into your project.
After downloading the file, you will realize it is protected. What you do is only watch this YouTube video and access the password.
13. Vintage LUTs
One of the commonly used LUTs in movies is the vintage LUTs. Access over 28 free vintage LUTs here and give your footage that brilliant vintage appearance.
14. Free Warm LUT
Warm LUTs do create a sensational atmosphere in the footage. Incorporate this LUT into your footage and get jaw-dropping results.
After downloading this free LUT pack, input the password displayed in the top-right corner of this YouTube video.
15. Free Music LUTs
In music, fans are always allured by the quality of the video. Besides, you may also gain or lose fans through your video quality. Improve the quality of your music video using this free LUT pack.
To download it for free, input 0$ under the payout bar and click “Buy Now.” Complete the other forms and download your music LUT for free.
Edit Your Film with Filmora and its Cinematic LUTs
Wondershare Filmora is an award-winning video editing software that allows its users to create stunning videos through its wide array of powerful video editing tools. The platform is well aware of all your video editing needs and provides easy-to-use functionalities that include LUTs.
For Win 7 or later (64-bit)
For macOS 10.14 or later
Use LUTs in Wondershare Filmora to express your intended video ideas.
Here are the simple steps on how to edit your film with Filmora:
Step 1. Download Wondershare Filmora
First, download Wondershare Fimora to your computer and allow it to run.
Step 2. Add your Footage to the Timeline
Load your video to Filmora. Drag and drop them to your timeline.
Step 3. Access your LUT Library
To access your LUT library, open “Color Correction.” Then click on “3D LUT.”
Step 4. Add your preferred LUT to your Project video
After clicking on “3D LUT,” a drop-down list showing all the available LUTs will be displayed. Scroll and select your preferred LUT.
When you want to apply your LUTs in Filmora, click on “Load new LUT,” which is still under “3D LUTs.” You will be directed to your computer storage space to select the folder containing your LUTs.
After selecting your preferred LUT folder, hit the “OK” button to apply.
Conclusion
● Worry no more when you have a small budget and a tight deadline for your project. Depending on your project’s type, nature, and requirements, create bewildering footage using the above 15 LUTs. After applying your favorite LUT, carry out small basic adjustments such as the white balance, brightness, and contrast to your footage when necessary. By doing so, you are going to leave your clients and viewers ground rooted.
● A few of these free LUTs have a catch: watching the YouTube video and getting a password for unlocking their free LUT pack. The password is often displayed on the top-right corners of the YouTube videos.
Best 31 Video Trimmers for Computer, Phone and Online
In the world of videography, editing a video is equally important as shooting a video. No matter how perfectly you shoot a video, there are some parts that you need to trim out so that the video could be presented perfectly to your target audience. If you are getting started in the videography world, this article is for you to learn how to trim videos with the best video trimmer.
First, we will touch upon different ways of making a video. Thereafter, you will move on to how to trim a video that you have either recorded with recording software or shot with your digital camera. We will begin by providing you the list of the best video trimmers for Windows, Mac and mobile users. The video trimmers are segregated for beginner and advanced users, and hence, you can choose as per your preference and requirements.
We will also touch on how to edit your video and share the edited video among your target audiences. Therefore, take your time to go through our list of the top 32 best video trimmers of 2022. Starting from free and premium video trimmers to video trimmers for beginners and advanced users, you will definitely find the best video trimmer that is tailor-made to satisfy your requirements.
Contents
01 [How to Make a Video before Trimming](#Part 1)
02 [Video Trimmer for PC and Mac](#Part 2)
03 [Video Trimmers for Mobile](#Part 3)
04 [Online Video Trimmers ](#Part 4)
05 [Editing Tips to Improve Your Videos](#Part 5)
06 [How to Share Your Videos](#Part 6)
07 [Related FAQs about Video Trimming](#Part 7)
Part 1 How to Make a Video before Trimming
Before coming to the trimming of a video section in detail, let us begin with how to make a video. You have two options when it comes to making a video. You can either record a video with recording software or you can shoot a video with your camera. Let us discuss both options in detail now.
-Record a video
You can record a video with recording software when you are capturing video from your webcam or from your computer screen. There are two options you have when it comes to choose a recording software.
- Premium Recorder - A premium recorder is a professional video recording software that you have to purchase to avail all the features and functionalities. Choose the best video recorder.
- Free Recorder - If you are not willing to spend any money on a recording software, there are plenty of free recording applications available. We recommend OBS Studio as the best free video recorder.
-Shoot a video
The second option is shooting a video with your external digital camera. You can also use your phone camera to shoot a video. For example, making vlogs, comedy skits, travel videos, or short films needs a digital camera. If you are using your phone camera, you can cut and crop the video after shooting using the video trimmer apps or online video trimmers. If you are shooting external with an external camera, you can transfer the video to your mobile or computer and use a preferred video trimmer for editing.
Part 2 Video Trimmer for PC and Mac
When it comes to editing and trimming a video, using a computer is the best option. This is because you have a wider screen to pay attention to the details of the video and trim out the unnecessary parts easily. Besides, editing a video requires CPU resources which are best served by a computer. We have divided the video trimmers for computers into two categories for user convenience. You can easily find video trimmers for Windows PC as well as for Mac.
# For Beginner Users
This category is perfect for those who do not have any experience in video editing and they are looking for a basic video trimmer to get the job done. Besides, if you need to trim videos once in a while, these are perfect for you. You can trim video free with the following video trimmers.
1. Windows Photos
Best for: Windows users with no editing skills
G2 rating: 4.0/5
Price: Free
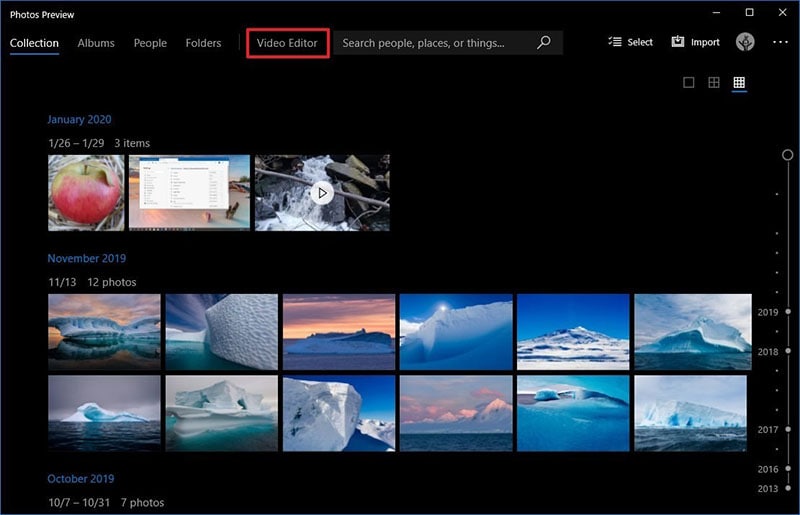
If you are a Windows PC user and you are looking for a basic video trimming application, Windows Photos is right there for you. The application comes pre-installed on Windows PC and hence, there is no need to install any external application. Even though Windows Photos is primarily used for viewing photos, there is a dedicated video editor available where you can trim your recorded video easily. Apart from trimming videos, you can do some basic editing like adding title cards and text, video effects, background music, and filters. Here are the pros and cons of Windows Photos.
Pros:-
- Comes pre-installed in Windows.
- Super easy user interface to operate.
- Quick trimming and cutting out videos.
- Different motion transitions and effects present.
- Add titles, texts, and audio to video.
- AVarious filters and 3D effects available.
Cons:-
- Not suitable for trimming large videos.
- Lack of different file formats for saving the videos.
2. QuickTime Player
Best for: Mac users with basic trimming needs
G2 rating: 4.2/5
Price: Free
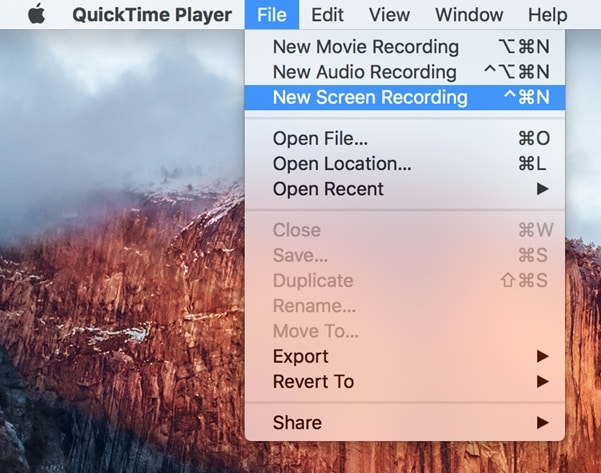
If you are a Mac user and you are looking for a free video editor for trimming your video, QuickTime Player is the best application for you. Just like Windows Photos for Windows users, QuickTime Player comes pre-installed for Mac users. In fact, it is the default media player for Mac users. Apart from playing media files, you can use QuickTime Player for video recording as well as editing the recorded video. This includes trimming videos and replaying on the application to reach the level of perfection easily. Here are the pros and cons of QuickTime Player you should be aware of.
Pros:-
- The user interface is super easy to operate.
- Trim, flip, split, and merge videos quickly.
- Option to record video with audio flawlessly.
- Instant preview of the edited video on QuickTime.
- QuickTime is compatible with iPhone and iPad.
- Advanced streaming options available in Pro version.
- Supports playing different video file formats.
Cons:-
- Some of the settings are complicated.
- It can crash while editing large video files.
3. iMovie
Best for: Playing and editing videos
G2 rating: 4.3/5
Price: Free

If you are a Mac user and you are looking for a dedicated video editor, iMovie is a great choice. iMovie also comes pre-install on Mac and it is compatible with iPhone and iPad as well. The application is available completely free for mac users and hence, many prefer it over QuickTime Player for editing videos. You can quickly trim your videos as well as rotate and crop your videos as per your requirements. You can enhance your video with effects and filters available. Here are the pros and cons of iMovie you should be aware of.
Pros:-
- Intuitive user interface for easy operation.
- Quick edits to make a raw video presentable.
- Supports 4K video editing without crashing.
- Add different graphical elements for engaging videos.
- Different types of effects and filters for video enhancement.
- Easy sharing options across devices and online platforms.
- Work on multiple video projects simultaneously.
Cons:-
- Editing MP4 video is complicated.
- Lacks advanced editing features.
4. Media Cope
Best for: Multiple video using needs
G2 rating: 4.0/5
Price: Free
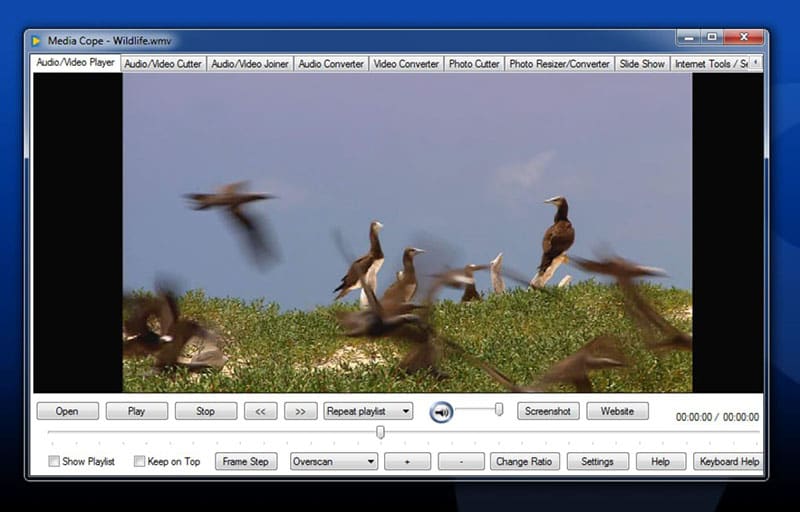
Media Cope is a freeware video trimmer for Windows users only. It is a basic video editor with standard editing options. The software is best suited for those who have older Windows versions such as Windows 7. The lightweight application can act as an audio and video player. You can easily trim your video and extract import parts as well. You can also join audio and video files and convert them into desired file formats. Here are the pros and cons of Media Cope.
Pros:-
- Can play audio and video files of different formats.
- Instantly trim and cut video and audio files.
- Can join audio and video clips and save in desired file format.
- Can convert audio and video files as per requirements.
- Transform photos into slideshow instantly.
- Resize photos and take screenshots from videos.
- Modify different video parameters and export the file.
Cons:-
- Lack of various standard video editing options.
- Looks outdated for modern Windows OS.
5. OpenShot
Best for: Open source software lovers
G2 rating: 4.4/5
Price: Free

If you are looking for a video editor that is compatible with all desktop operating system, OpenShot is the best choice for you. It is a completely free, open-source video editor for Windows, Mac and even Linux users. In this list of video editors for beginners, this is the best in terms of features and functionalities. You can trim and slice video, add animations, insert different layers and video effects to enhance the video content. The user interface is rather intuitive in spite of having all the different options you look for in a video editor. Here are the pros and cons of OpenShot video editor.
Pros:-
- Simple but powerful user interface.
- Trim video instantly without different options.
- Add 3D titles, 3D animations, and slow motion effects.
- Loads of video and audio effects present to apply.
- Add different layers of videos, audio tracks, and images.
- Advanced option for keyframing and time mapping.
- Multi-lingual support and frequent updates for new features.
Cons:-
- Unstable performance for large video files.
- The hardware acceleration is not very powerful.
# For Advanced Users
If you are a regular video creator and you want your videos to stand out, this category is for you. You can edit and trim your videos exactly the way you want. Besides, you can transform your raw videos into professional-quality videos with the following video editors.
1. Filmora
Best for: Rich videos effects and templates
G2 rating: 4.4/5
Price: $49.99

Wondershare Filmora is an outstanding video editor where you can trim your video and audio files like a professional. Since you are an advanced user, you will need more than just trimming to make your raw video look stunning. Filmora offers you all the tools and features you will ever need to take your video to the next level.
Compared to other popular premium video editors, Filmora does not need heavy CPU resource and it has an intuitive user interface. That is why video creators especially YouTubers and Vloggers prefer it for editing their videos regularly. The software is available for both Windows and Mac users. Here are the pros and cons of Filmora that you should be aware of.
For Win 7 or later (64-bit)
For macOS 10.12 or later
Pros:-
- Record screen and webcam video with audio sources.
- Basic tools for trimming, splitting, and joining video files.
- Customize different video settings and parameters.
- Add video and audio effects and graphical elements.
- Wide range of stock library of media files and animations.
- Add multiple layers and work with multiple channels while editing.
- Export the recorded or edited video file in different file formats.
Cons:-
- Saving the edited video takes time due to processing part.
2. Adobe Premiere Pro
Best for: Professional video trim, edit and after effects
G2 rating: 4.5/5
Price: $20.99/month

Adobe Premiere Pro is the most powerful video editor and that is why even professional video editors use it for editing movies. There is hardly any video file format that Premiere does not support. You can edit multiple videos at the same time and switch between scenes and clips. Trimming video and audio files is swift with intuitive controls. There is also option for non-linear video editing for advanced users.
Since it is extremely popular in the videography world, there are many organizational tools available for editing large video projects and integrated workflow. The software supports VR video, 3D video, and multicam video editing. The software is available for Windows as well as Mac users. Here are the pros and cons of Adobe Premiere Pro.
Pros:-
- Customizable layouts for reorganizing user interface.
- Quick trimming and playback option without rendering.
- Supports a wide range of file formats for import and export.
- All the different tools for professional video and audio editing.
- Can work on and render multiple video files easily.
- Cross-app functionality with amazing stabilization features.
Cons:-
- The learning curve is rather steep and takes a lot of time.
- The software is only suitable for high-end computers.
3. Final Cut Pro
Best for: Advanced organizing tools of any professional video editing
G2 rating: 4.4/5
Price: $299

Final Cut Pro is equally popular in the videography world as Adobe Premiere Pro. Final Cut Pro is primarily for Mac users as it is developed by Apple. This is the most powerful video editor for Mac users as it is packed with loads of features for professional video editing. Trimming videos is as easy as it gets, along with other standard editing options.
The software supports editing multicam videos, VR videos, 3D videos as well as 360 degree videos. There are endless presets and effects available that you can apply on your video while editing. You can easily edit 4K videos without performance lag. In fact, Final Cut Pro shines where other video editors fail to perform with high resolution and large video files. Here are the pros and cons of Final Cut Pro.
Pros:-
- Trimming, cutting, splitting and joining videos are easy.
- Seamless video editing with standard and advanced tools.
- Different motion graphics templates available.
- Supports external plug-ins and VR headset playback.
- Proper video files and assets organizing and audio editing options.
- Relatively quick rendering of large video files.
Cons:-
- May take time to get used to all the available options.
- Relatively expensive in comparison to peers.
4. Movavi Video Editor
Best for: People who love more brilliant effects in videos
G2 rating: 4.8/5
Price: $74.95

Movavi Video Editor is a premium software for trimming and editing videos. It is available for both Windows and Mac users. There is a free version available but it puts a watermark on the output video. Apart from trimming and splitting videos, you can add various video effects starting from adding titles and transitions to stickers and elements. Besides, you can opt for greenscreen effect and edit videos in vertical mode. Here are the pros and cons of Movavi Video Editor you should be aware of.
Pros:-
- Integrated video capturing options from different sources.
- Instant trimming, splitting, and joining of videos.
- Loads of titles, filters and transitions present.
- Add video PiP layers as well as voiceover.
- Vertical video editing mode present.
- Video stabilization mode and Chroma key.
- Keyframing, slow motion and motion tracking.
Cons:-
- The rendering is not very fast.
- Lack of color tuning options.
5. Bandicut
Best for: Trim, join and split video with fast speed
G2 rating: 4.0/5
Price: $44.96
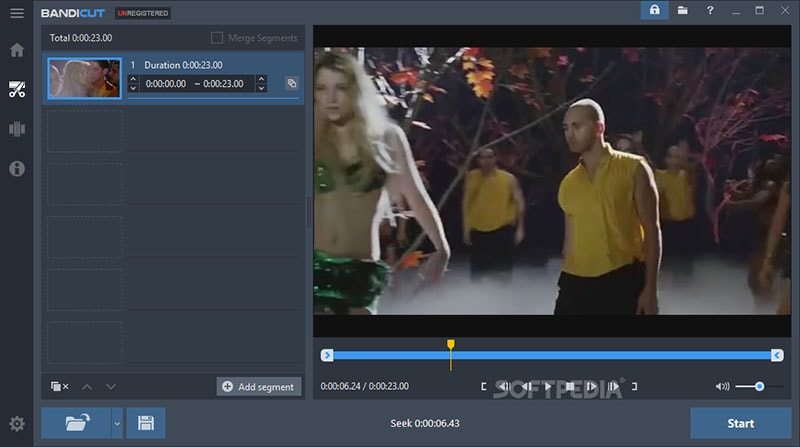
Bandicut from Bandicam is a dedicated video trimmer for Windows users. It is a premium application with a one-time purchase fee. The software ensures lossless video trimming, and you can trim video instantly thanks to its intuitive user interface. It is a versatile application that you can use to extract audio from a video as well as joining multiple video files. Splitting a large video file into multiple files is super easy. However, it is not a full-fledged video editor like Filmora or Premiere. Therefore, if your objective is specifically to trim, split, and join videos, this is the one for you. Here are the pros and cons of Bandicut.
Pros:-
- Trim and split videos instantly
- Super intuitive user interface.
- Cut segments from videos.
- Join multiple videos quickly.
- Supports different file formats.
- No loss of video quality during editing.
- Hardware acceleration for high performance.
Cons:-
- Very limited editing features.
6. VSDC
Best for: Movie level video cut with light professional skills
G2 rating: 4.0/5
Price: $19.99

VSDC is a free video editor with all the basic editing tools available. VSDC Pro is a premium video editor where advanced features are available. For trimming a video, VSDC free video editor can get the job done. Even though it is completely free, some features are comparable to many premium video editors. For example, you get access to a large set of filters, effects, and transitions that you can apply to your videos. Even when you have a low-end PC, you can do basic video editing works comfortably. Here are all the pros and cons of VSDC free video editor you should know.
Pros:-
- Instant trimming and basic editing of videos.
- Wide range of effects and filters as well as Chroma key.
- Color correction option and non-linear editing available.
- Supports editing 360 degree videos and split-screen videos.
- Supports different video and audio file formats.
- Lightweight and suitable for low-end computers.
Cons:-
- Lacks standard audio editing options.
- Lacks hotkeys and useful keyboard shortcuts.
7. Camtasia
Best for: Tutorial video recording and editing
G2 rating: 4.6/5
Price: $224.99

Camtasia by TechSmith is a premium video editor for Windows and Mac users. Even though it is more popular as a video editor, you can trim your videos easily on the software. You can record anything on your screen as well as external webcam. You can edit recorded video as well as import external video files for quick editing. The software offers easy share instant through which you can share on popular video streaming platforms. There are various templates and themes available to create and edit videos of different categories. Here are the pros and cons of Camtasia.
Pros:-
- Quick trimming, splitting, joining video options.
- Different templates and packages for versatile video creation.
- Various transitions, annotations, and presets present.
- PowerPoint integration, screen and web cam capture.
- Different cursor and audio effects with royalty-free assets.
- Import different media files and upload directly on video streaming platforms.
Cons:-
- Reports of crashes when working with large files.
- No keyframe and motion tracking.
- Very few customization options.
Part 3 Video Trimmers for Mobile
In today’s world, the cameras of smartphones are extremely powerful, and there are many who shoot videos with phone cameras instead of a dedicated digital camera. For example, there are many popular vloggers who shoot their videos with phone cameras, and video creators make short videos with phone cameras. When you shoot a video on your phone, you must be looking for a video trimmer app for your phone so that you can trim the recorded video instantly and share across social media and video streaming platforms. Here is the list of the best video trimmers for mobile.
# For Beginner Users
1. VidTrim Pro
Best for: Android video trimming, merging, frame grabbing
Rating: 4.1/5
Download Link: https://play.google.com/store/apps/details?id=com.goseet.VidTrimPro&hl=en\_US&gl=US
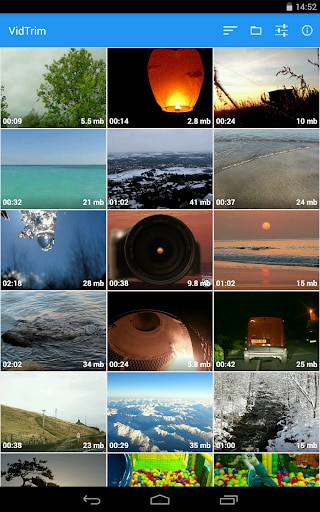
VidTrim is a dedicated video trimmer available for Android users. The free version adds a watermark to the output video, and hence, you have to opt for VidTrim Pro to avoid all limitations. Apart from trimming videos, you can merge videos and convert videos into audio files. You can also add effects and music tracks to your videos. The user interface is as simple as it gets. Here are the pros and cons of VidTrim Pro app.
Pros:-
- Trim videos as well as merge video clips.
- Convert supported video files into Mp3 audio files.
- Rotate videos as well as save screenshots from videos.
- Add cool video effects, sound effects, and soundtracks.
- Multi-lingual support and video file format converter.
Cons:-
- Limited video editing features for a paid video editor app.
- The user interface is simple but outdated.
2. KineMaster
Best for: Video content downloadable
Rating: 4.2/5
Download Link: https://play.google.com/store/apps/details?id=com.nexstreaming.app.kinemasterfree&hl=en\_US&gl=US

You must have seen many videos online with the watermark “Made with Kinemaster”. This is because KineMaster is very popular among amateur video creators. KineMaster is available for Android as well as iOS users. You can instantly trim and crop videos. Besides, you can add special effects, animations and stickers as well as tweak different video settings for enhancements. KineMaster is available free of cost but it attaches a watermark to the output video at one corner. You can subscribe to KineMaster Premium to remove watermark and unlock more features. Here are the pros and cons of KineMaster.
Pros:-
- Trim, cut, slice, and crop videos instantly.
- Add music, sound effects as well as voiceover.
- Provides amazing visual effects and animations.
- Adjust color filters, modes and video speed.
- Supports keyframing and motion tracking.
- Save 4K videos and share instantly online.
Cons:-
- KineMaster chroma key feature has bugs.
- Can crash or freeze handling large video files.
3. Quik
Best for: Producing cinematic auto-edits.
Rating: 4.3/5
Download Link: https://play.google.com/store/apps/details?id=com.gopro.smarty&hl=en\_US&gl=US
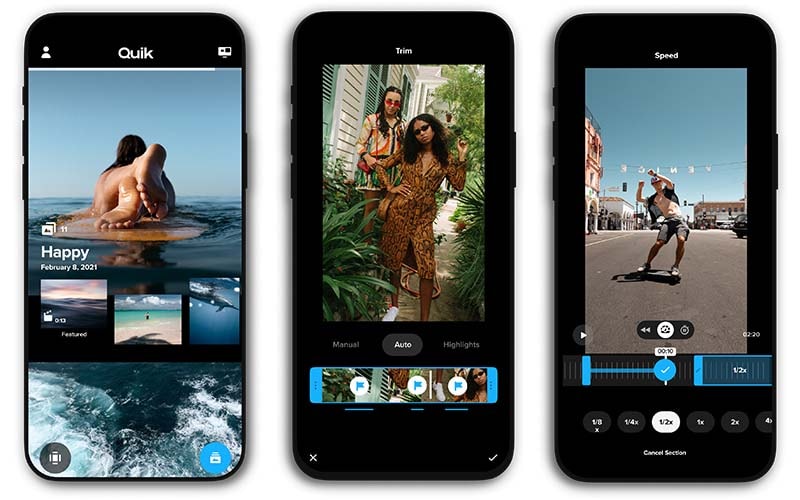
Quick from GoPro is fast becoming a popular video editor app. GoPro is the most popular action camera brand and naturally, its video editing app has garnered enough attention. The app is available for Android and iOS users. The app has a mixed bag of options for editing videos quickly. You can trim your videos, add filters and adjust video speed. Besides, its AI can locate the best shots in a video and enhance them with special effects. Here are the pros and cons of Quick app.
Pros:-
- Trim, crop, adjust speed, remove audio from videos.
- Different preset templates available with effects and filters.
- Add music, titles, effects, and transitions.
- Easy sharing of videos and photos.
- Powerful AI to highlight the best shots in a video.
- Adjust video orientation, save in 1080p resolution.
Cons:-
- Not suitable for large video files.
- No font adjustment options.
4. iMovie
Best for: Create Hollywood-style trailers and beautiful movies
Rating: 4.0/5
Download Link: https://apps.apple.com/us/app/imovie/id377298193
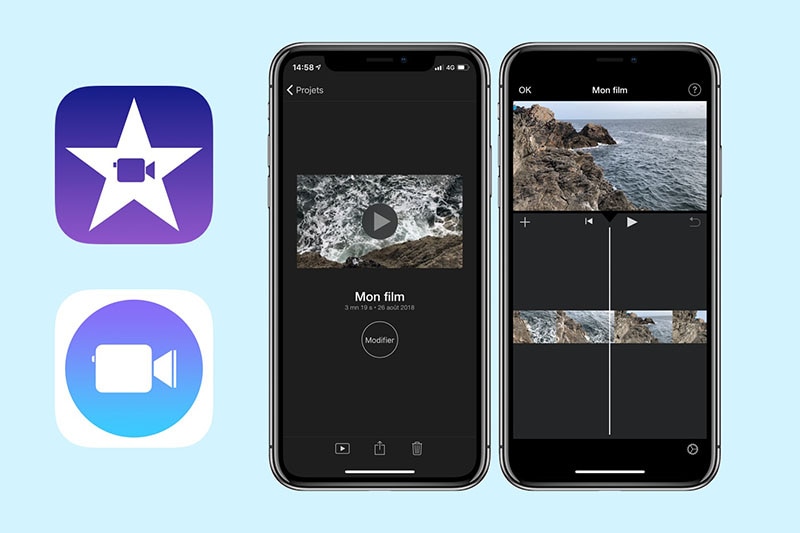
iMovie app by Apple is exclusively available for iOS users. iMovie is also available as a software which we have already discussed. In terms of features, iMovie app is very similar to iMovie software. You can instantly make basic editing works. Apart from editing, the app is ideal for creating different types of videos with ready-made templates. There are loads of graphical effects, animated titles, and video filters available to apply. Here are the pros and cons of iMovie app for you.
Pros:-
- Record, trim, split, join and crop videos on the go.
- Choose from different themes and templates to create videos.
- Animated titles, video filters, graphical effects available.
- Chroma key, PiP mode as well as split screen effect possible.
- Add sound effects, music, and depth of field effect.
- Optimized output for social media and video streaming platforms.
- Supports 4K video editing and easy share across Apple devices.
Cons:-
- Limited resources and customization options.
- The app size is large and uses high CPU resources.
# For Advanced Users
1. LumaFusion
Best for: Professional video trimming for iOS devices
Rating: 4.8/5
Download Link: https://apps.apple.com/us/app/lumafusion/id1062022008

LumaFusion is a top-rated video editor for iPad and iPhone. The app is as good as a premium video editor for desktop users. Therefore, professional video creators who use iPhone or iPad for video editing prefer LumaFusion all the time. You can trim, cut, crop, split, and merge videos intuitively from its timeline. Most importantly, you can edit multiple video and audio files together like a professional. Here are the pros and cons of LumaFusion.
Pros:-
- Trim and export video in different file formats.
- Work with multiple video and audio files.
- Preset transitions, instant preview, markers for timeline.
- Add Chroma and Luma key effects as well as stunning visual effects.
- Adjust speed, audio, use keyframes, correct colors.
- Work with titles, fonts, borders, and share conveniently.
- Wide range of media files available in the library.
Cons:-
- Does not support motion tracking.
- Can be difficult to edit large files.
2. Adobe Premiere Rush
Best for: Shoot, edit, and share online videos anywhere.
Rating: 3.0/5
Download Link: https://play.google.com/store/apps/details?id=com.adobe.premiererush.videoeditor&hl=en\_US&gl=US
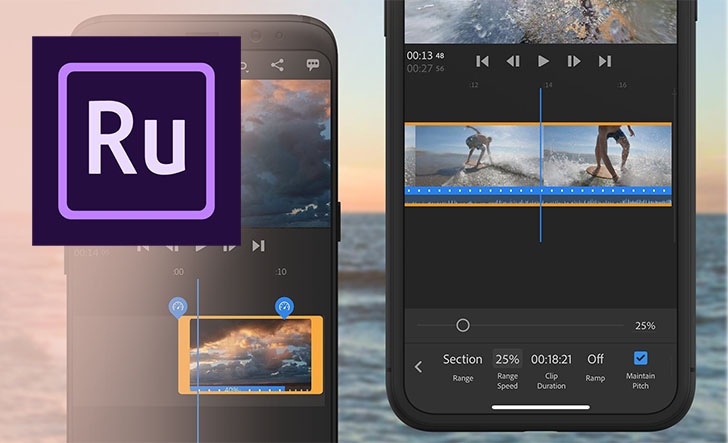
Even though Adobe Premium Rush app is available or Android and iOS users, it is more popular among iPhone and iPad users. The app is free though there are in-app purchases available. Rush Premium has more features and functionalities. Editing any video is quite convenient though Adobe has tried its level best to offer all the possible features of Adobe Premium Pro desktop software on the app. The app supports multitrack timeline for professional videos. Here are all the pros and cons of Adobe Premiere Rush you should be aware of.
Pros:-
- Record video in high-resolution with the app.
- Trim, crop, mirror, and flip videos.
- Add images, overlays, texts, and stickers.
- Pan and zoom effect, animation titles.
- Royalty-free audio tracks, color correction options.
- Easy exporting of files in different formats.
Cons:-
- Rendering projects can be slow.
- Comes with limited features.
3. Filmmaker Pro Video Editor
Best for: 4K quality video editing
Rating: 4.6/5
Download Link: https://apps.apple.com/us/app/filmmaker-pro-video-editor/id1082956994
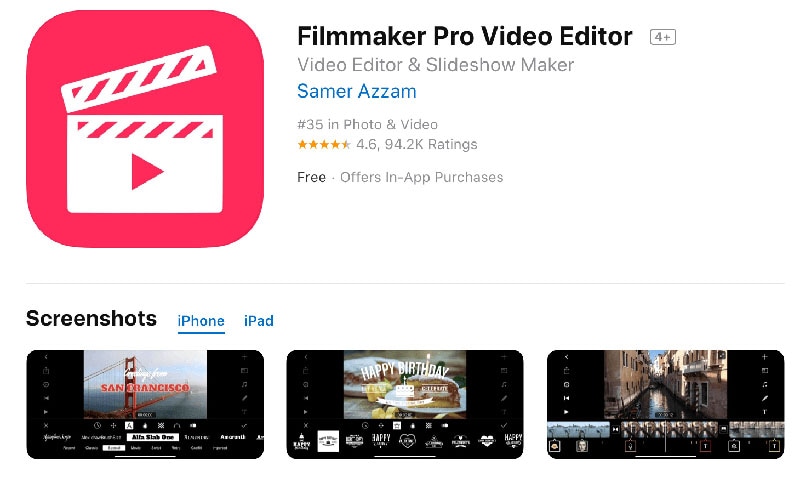
Filmmaker Pro is a highly rated video editor that you can use to trim your videos. Filmmaker Pro app is available for both Android and iOS. The app supports 4K video for editing works. The timeline has color codes for different assets and hence, editing becomes easy. You can edit different video parameters and settings and add different effects. The auto save option is extremely useful when it comes to editing a large file. Even though it is available for free, they have a subscription plan for unlocking all features. Here are the pros and cons of Filmmaker Pro Video Editor.
Pros:-
- Trim, split, crop and rotate videos.
- Adjust video speed, volume, video grading.
- Chroma key, voice to text caption, keyframe and motion tracking.
- Different Picture-in-Picture mode for videos, photos, and GIFs.
- Various transition effects, audio effects, and text overlays.
- Different drawing tools, stickers, and graphical elements present.
Cons:-
- The free version has limited features.
- The number of effects are relatively less.
4. Splice Video Editor and Maker
Best for: Vloggers and social platform video cutting
Rating: 4.7/5
Download Link: https://play.google.com/store/apps/details?id=com.splice.video.editor&hl=en\_US&gl=US
Splice Video Editor and Maker is a free but powerful app that enables you to do pro-level editing. You can trim your video clips, adjust speed, and add music on the go. In fact, you can create videos and slideshows instantly and you can add texts and overlays. The music library has different categories of tracks to apply to videos. You can also merge videos as well as change aspect ratio according. The app is available for Android and iOS users. Here are all the pros and cons of Splice Video Editor and Marker.
Pros:-
- Easy interface for smooth trimming and merging of videos.
- Adjust speed, aspect ratio, and video parameters.
- Organize clips and tracks in the timeline intuitively.
- Add custom texts, titles, tracks, transitions, and effects.
- Comes with a wide stock library of media files.
- Direct uploading video files on different social media platforms.
Cons:-
- Limited effects and filters available.
- Frequent crashes while handling large files.
5. Funimate
Best for: Mobile game video trim to show off gaming skills
Rating: 4.5/5
Download Link: https://play.google.com/store/apps/details?id=com.avcrbt.funimate&hl=en\_US&gl=US
Funimate video editor and maker app is quite highly rated on both Play Store and App Store. It is a very powerful and feature-rich app where you will get all the desired editing tools to publish a professional-quality video. Starting from element library to video masks and AI effects, the app takes your video to the next level. You can obviously perform the basic editing works like trimming, splitting and joining. Here are the pros and cons of Funimate app.
Pros:-
- Trimming, merging, and cutting videos.
- Text effects, video AI effects, and effect mixer.
- Comes with over 100 advanced video effects.
- Allows adding music to videos for engaging videos.
- Supports slow motion and looping videos.
- Advanced keyframing and element library.
- Allows creating a professional photo slideshow.
Cons:-
- No multilingual support and auto-save feature.
- Some lagging issues have been reported.
Part 4 Online Video Trimmers
If you are using a video editor on your computer, it takes considerable amount of space in your storage. The same is applicable to video editors for smartphones. If you do not want to install any app on your device yet trim videos conveniently, the online video trimmers are for you. You can open the video trimmer directly from your web browser and trim your video and save it without installing any application on your device. Here is the list of the best online video trimmers.
# For Beginner Users
1. https://online-video-cutter.com/
Best for: Trimming large videos files.
Ratings: 4.2/5
Online Video Cutter is a dedicated video trimmer where you need to drag and drop your video file and cut out the required portion. You can even crop and rotate your videos if there is any such requirement. You can access the online platform directly from your web browser. There is no need for installation of any web launcher. The platform is also secured and hence, your videos won’t get leaked. There is also a Chrome extension available that you can use if you are a Chrome user. Here are the pros and cons of Online Video Cutter.
Pros:-
- Easy video trimming by drag-and-drop files.
- Enables uploading different file formats.
- Rotate feature for saving in portrait and landscape mode.
- Automatically deletes files for better security.
- Crop feature for changing frame size.
- Can edit video file of 4GB capacity.
Cons:-
- May reduce the video quality for the editing video.
2. https://clideo.com/cut-video
Best for: Trimming short videos.
Ratings: 4.5/5
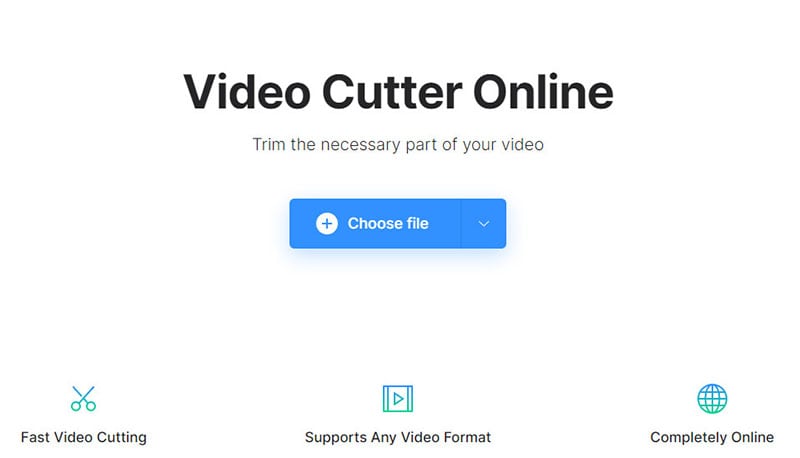
This is another online video trimmer that supports different video file formats. The user interface is sleek for quick video trimming. You can upload file from your device as well as from Cloud storage. In fact, you can use the platform to convert video files. The level of trust and security is high and there are additional settings available for better editing. Here are the pros and cons Clideo Video Cutter.
Pros:-
- Intuitive interface for quick trimming.
- Supports different file formats.
- Converts videos into different formats.
- Offers high-level online security.
- Add fade in and fade out effects.
- Upload video files from Google Drive and Dropbox.
Cons:-
- No drag and drop feature.
- File size is limited to 500 MB only.
3. https://www.kapwing.com/tools/trim-video
Best for: Editing video elaborately.
Ratings: 4.4/5
Kapwing is a dedicated online video editor that will give you the vibe of using a desktop video editor. Therefore, it is suitable for those who are looking for an online platform for trimming as well as various other editing works. You can add texts, images, elements, audio, transitions, as well as record videos. You can also export in different file formats. However, the free version attaches a watermark. Therefore, you have to upgrade to its premium version and use the platform is a full-fledged video editor. Here are the pros and cons of Kapwing.
Pros:-
- Trim, crop, zoom videos and adjust video parameters.
- Supports import and export of different file formats.
- Add effects, audio, and elements to the videos.
- You can work with multiple layers while editing.
- Different sound effects, templates, and scenes and emojis present.
- Stunning user interface that looks like a video editor software.
Cons:-
- Free version attaches watermark and lowers video quality.
4. https://www.freeconvert.com/video-trimmer
Best for: Basic video trimming
Ratings: 4.0/5
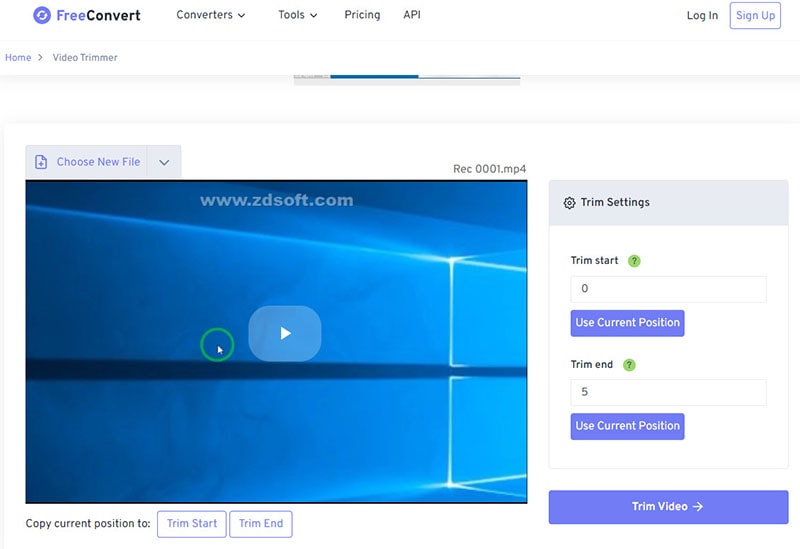
FreeConvert Video Trimmer is a free online tool through which you can trim videos of size up to 1GB easily. The platform supports as many as 40 different video file formats. Therefore, you can trim almost any video file easily. The security is tightened so that the uploaded videos do not get leaked. You can upload video files from your device, Google Drive, Dropbox as well as from URL. Therefore, if you want to trim videos that are available online, you can do it easily with this tool. Here are the pros and cons of FreeConvert Video Trimmer.
Pros:-
- Easy to use, intuitive interface.
- Does not require any registration.
- Supports over 40 file formats.
- Compatible with multiple browsers.
- 256-bit SSL encryption offers better security.
- Allows adjustment of parameters before conversion.
Cons:-
- There are too many annoying ads.
# For Advanced Users
5. https://www.veed.io/tools/video-cutter
Best for: Trimming videos for social media platforms.
Ratings: 4.3/5
Veed.io has a wide collection of tools for video editing and the video cutter is a dedicated video trimmer. You can trim videos of popular file formats easily. Apart from video files, the platform supports trimming GIFs and audio files. You can upload videos as well as mention URL of videos that are present online for trimming. The online tool does not degrade the video quality and the output file is of high-quality as well. Here are the pros and cons of Veed.io video cutter.
Pros:-
- Allows saving the video in a high-quality format.
- Supports cutting a wide range of audio file formats.
- Ability to upload and cut animated GIFs.
- Allows cutting YouTube videos directly using URL.
- Easy drag and drop feature for saving time.
- “Split” option for removing the middle part of the video.
Cons:-
- Not suitable for trimming large video files.
6. https://www.fastreel.com/video-cutter.html
Best for: Trimming videos for personal use.
Ratings: 4.2/5
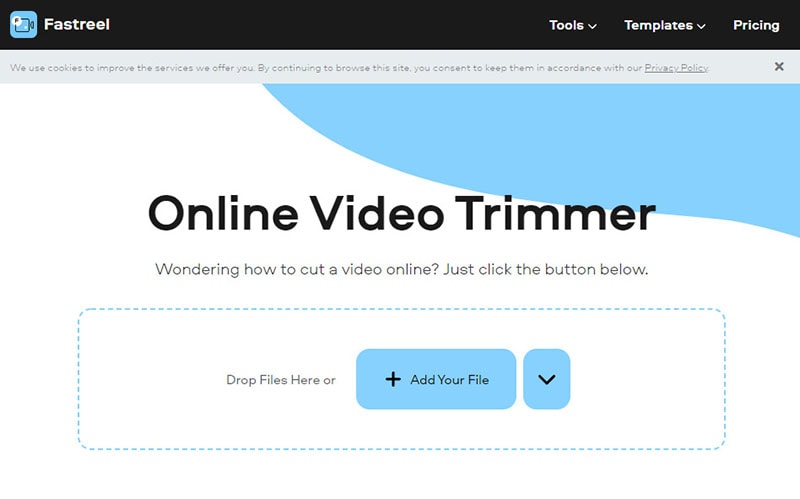
Fastreel online video trimmer lets you trim your videos with a few clicks. Drop your file and mark the points for trimming and there you go. That tool is also useful if you want to split your video. There are several video file formats that the platform supports. The user interface is intuitive and the trimming can be precise. The free version attaches a watermark and hence, the premium version is what you should have. Here are the pros and cons of Fastreel online video trimmer.
Pros:-
- Simple interface for hassle-free trimming.
- Supports different video file formats.
- Feature of data security offers better safety.
- Quick video trimming without using the editor.
- Different file formats while saving the video.
- Precision cutting for removing unwanted segments.
Cons:-
- The free version comes with watermark.
- Free version lowers the video quality.
7. https://flixier.com/tools/video-trimmer
Best for: editing videos as a teamwork
Ratings: 4.4/5

Flixier Video Trimmer is a premium tool to trim and crop videos instantly. The tool is available in a free version but there are many limitations. Therefore, you need to have a premium version of Flixier Video Trimmer. You can export videos in 1080p and 4K resolution. You can opt for transcribing your videos and store videos in the cloud. In the premium version, two team members can work together. Here are the pros and cons of Flixier Video Trimmer.
Pros:-
- Upload videos from YouTube, Twitch, and cloud platforms.
- No need to create account for instant trimming.
- Trim, crop, cut, and add images to videos.
- Supports multiple file formats.
- Comes with an easy collaborative platform.
- Additional translation and transcribe options.
Cons:-
- There are lots of limitations of premium plans as well.
- Only the highest premium plan supports 4K resolution.
8. https://www.wevideo.com/features/video-cutter
Best for: Best premium online video editor
Ratings: 4.5/5
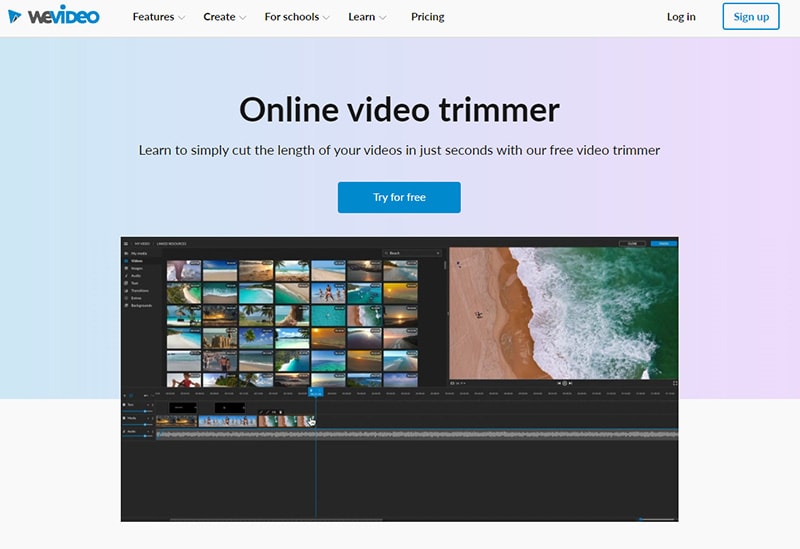
WeVideo Video Cutter is a paid video trimmer though you try out the platform for free. The platform supports a wide range of video files. You can drag and drop files and trim videos instantly. Trimming cannot get any easier and the processing speed of the editing video is fast. You can finish trimming your videos in a few seconds. There is a unique zoom feature to trim out videos accurately. You can also add texts and music to your video file before exporting. Here are the pros and cons of WeVideo Video Cutter.
Pros:-
- Drag and drop feature for quick editing.
- Smooth and accurate trimming with zoom function.
- Music and motion titles library.
- Compatible with different web browsers.
- Export edited files in different file formats.
- There is no capping on file size as such.
Cons:-
- The pricing is on the steeper side.
Part 5 Editing Tips to Improve Your Videos
Apart from trimming, you have to edit different other aspects so that you can make the video engaging and eye-catching. Here are some editing tips you should stick to improve your video content.
Get The Best Video Editor - Editing a video is equally important as shooting a video. Once you have the best video editor, you can rest assured that your editing work is half done. This is because you have all the tools to turn your raw video into stunning video. You can experiment and come up with the best editing work to your own surprise.
Get The Length Correct - In today’s world, viewers have very less time to watch videos. Therefore, a lengthy and elaborative video is a bummer. Hence, you should trim the video and keep only the portions that are relevant, engaging, and not boring.
Start with a Bang - The first impression is always the most important, and hence, the intro of your video is extremely crucial to keep the attention of the audiences intact. To make the intro interesting, you should not only focus on the content but also on video effects and animations that are attention-grabbing.
Smooth Cuts and Soothing Colours - When you are cutting from one scene or angle to another, the transition should be smooth so that it does not feel abrupt. Therefore, you should cut scenes when the subjects and objects seem to be static so that the transition is smooth naturally. Play attention to colour and the video editors allow you to enhance the quality by adjusting the colors and picture properties.
Graphical Objects - Use graphical objects and animated texts wherever possible for better explanations. Things can get boring visually when you do not add graphical elements, transitions, and animations appropriately in different places. Similarly, the use of texts and titles makes the video more engaging. Instead of static texts, there are animated texts and titles available with stickers and memes that you can edit your video with.
Play Attention to Sound - Sound is the most neglected part of a video by amateur video creators when one should pay attention to it. The sound effects can keep the audiences hooked to your video and make them not get bored. Certain sound effects refresh the attention of the audiences when it starts to fade, and hence, you should place the sound effects wisely.
Proper Flow - The editing work should be smooth so that the flow of the video is smooth and efficient. It takes time, and hence, you can practice and learn video editing so that your video can stand out instantly after your editing touches. Besides, the editing should be such that the video feels like a story that audiences can invest in and get engaged throughout.
Part 6 How to Share Your Videos
In order to share videos after trimming them, you need to save the video properly. There are different file formats available for video files. For example, MP4 is the most popular video file format among Windows users. On the contrary, MOV is the most popular video file format. Different file formats have different features such as compression and lossless. According to the file format, the file size varies for the same duration of video.
Therefore, the video trimmer you are using must have different file formats for saving and exporting the editing video files. Some video trimmers have in-built features to share videos on social media platforms and upload on video streaming platforms like YouTube. Depending on your target audiences, you need to adjust the parameters like aspect ratio, video resolution, as well as duration. Besides, you can upload videos on cloud storage and share with anyone as per your requirements.
Part 7 Related FAQs about Video Trimming
1. What is the best video trimmer?
Wondershare Filmora is the best video trimmer as all the features are well-balanced. Apart from trimming, it has all the tools for professional-quality video editing. Filmora can also be used for recording videos. Trimming videos is as easy as it gets and you can export the edited video in different file formats.
2. How can I trim a video?
To trim a video, you will need a video trimmer. If you are a desktop user and you need to regularly edit videos, there are video trimmers available for beginners as well as advanced users. Similarly, there are video editor apps available for mobile users. If you need to trim just one video, you should use an online video trimmer.
3. How can I trim a large video?
In order to trim a large video file, you will need a professional video editor like Filmora so that there is no loss in video quality and frequent crashes and screen freezing incidents while trimming. Drag and drop the video file on Filmora’s timeline and trim the unnecessary parts. You can view the changes and export the file in desired file format.
4. What does trim mean in video editing?
Trimming a video means you are cutting off different portions of a video and reducing its length. Trimming is mostly done to remove unnecessary parts from a video so that the video becomes more engaging without any unnecessary fillers.
5. Can I trim a video in VLC?
Here are the steps to trim a video in VLC Media Player.
- Open VLC Player. Go to View> Advanced Controls. This will make the recording buttons appear.
- Open the video that you want to trim. Mark the portion that you want to keep in your video.
- Play the video and go to the point from where you want to keep the video. Click on Record button.
- Go to the point where you want to end the video. Click on Record button again. All other portions are trimmed and the edited video will be saved.
6. How to trim YouTube videos?
In order to trim YouTube videos, you need to download the videos on your device. You can use an online video trimmer where you can upload the files and trim the videos as per your requirements.
02 [Video Trimmer for PC and Mac](#Part 2)
03 [Video Trimmers for Mobile](#Part 3)
04 [Online Video Trimmers ](#Part 4)
05 [Editing Tips to Improve Your Videos](#Part 5)
06 [How to Share Your Videos](#Part 6)
07 [Related FAQs about Video Trimming](#Part 7)
Part 1 How to Make a Video before Trimming
Before coming to the trimming of a video section in detail, let us begin with how to make a video. You have two options when it comes to making a video. You can either record a video with recording software or you can shoot a video with your camera. Let us discuss both options in detail now.
-Record a video
You can record a video with recording software when you are capturing video from your webcam or from your computer screen. There are two options you have when it comes to choose a recording software.
- Premium Recorder - A premium recorder is a professional video recording software that you have to purchase to avail all the features and functionalities. Choose the best video recorder.
- Free Recorder - If you are not willing to spend any money on a recording software, there are plenty of free recording applications available. We recommend OBS Studio as the best free video recorder.
-Shoot a video
The second option is shooting a video with your external digital camera. You can also use your phone camera to shoot a video. For example, making vlogs, comedy skits, travel videos, or short films needs a digital camera. If you are using your phone camera, you can cut and crop the video after shooting using the video trimmer apps or online video trimmers. If you are shooting external with an external camera, you can transfer the video to your mobile or computer and use a preferred video trimmer for editing.
Part 2 Video Trimmer for PC and Mac
When it comes to editing and trimming a video, using a computer is the best option. This is because you have a wider screen to pay attention to the details of the video and trim out the unnecessary parts easily. Besides, editing a video requires CPU resources which are best served by a computer. We have divided the video trimmers for computers into two categories for user convenience. You can easily find video trimmers for Windows PC as well as for Mac.
# For Beginner Users
This category is perfect for those who do not have any experience in video editing and they are looking for a basic video trimmer to get the job done. Besides, if you need to trim videos once in a while, these are perfect for you. You can trim video free with the following video trimmers.
1. Windows Photos
Best for: Windows users with no editing skills
G2 rating: 4.0/5
Price: Free
If you are a Windows PC user and you are looking for a basic video trimming application, Windows Photos is right there for you. The application comes pre-installed on Windows PC and hence, there is no need to install any external application. Even though Windows Photos is primarily used for viewing photos, there is a dedicated video editor available where you can trim your recorded video easily. Apart from trimming videos, you can do some basic editing like adding title cards and text, video effects, background music, and filters. Here are the pros and cons of Windows Photos.
Pros:-
- Comes pre-installed in Windows.
- Super easy user interface to operate.
- Quick trimming and cutting out videos.
- Different motion transitions and effects present.
- Add titles, texts, and audio to video.
- AVarious filters and 3D effects available.
Cons:-
- Not suitable for trimming large videos.
- Lack of different file formats for saving the videos.
2. QuickTime Player
Best for: Mac users with basic trimming needs
G2 rating: 4.2/5
Price: Free
If you are a Mac user and you are looking for a free video editor for trimming your video, QuickTime Player is the best application for you. Just like Windows Photos for Windows users, QuickTime Player comes pre-installed for Mac users. In fact, it is the default media player for Mac users. Apart from playing media files, you can use QuickTime Player for video recording as well as editing the recorded video. This includes trimming videos and replaying on the application to reach the level of perfection easily. Here are the pros and cons of QuickTime Player you should be aware of.
Pros:-
- The user interface is super easy to operate.
- Trim, flip, split, and merge videos quickly.
- Option to record video with audio flawlessly.
- Instant preview of the edited video on QuickTime.
- QuickTime is compatible with iPhone and iPad.
- Advanced streaming options available in Pro version.
- Supports playing different video file formats.
Cons:-
- Some of the settings are complicated.
- It can crash while editing large video files.
3. iMovie
Best for: Playing and editing videos
G2 rating: 4.3/5
Price: Free
If you are a Mac user and you are looking for a dedicated video editor, iMovie is a great choice. iMovie also comes pre-install on Mac and it is compatible with iPhone and iPad as well. The application is available completely free for mac users and hence, many prefer it over QuickTime Player for editing videos. You can quickly trim your videos as well as rotate and crop your videos as per your requirements. You can enhance your video with effects and filters available. Here are the pros and cons of iMovie you should be aware of.
Pros:-
- Intuitive user interface for easy operation.
- Quick edits to make a raw video presentable.
- Supports 4K video editing without crashing.
- Add different graphical elements for engaging videos.
- Different types of effects and filters for video enhancement.
- Easy sharing options across devices and online platforms.
- Work on multiple video projects simultaneously.
Cons:-
- Editing MP4 video is complicated.
- Lacks advanced editing features.
4. Media Cope
Best for: Multiple video using needs
G2 rating: 4.0/5
Price: Free
Media Cope is a freeware video trimmer for Windows users only. It is a basic video editor with standard editing options. The software is best suited for those who have older Windows versions such as Windows 7. The lightweight application can act as an audio and video player. You can easily trim your video and extract import parts as well. You can also join audio and video files and convert them into desired file formats. Here are the pros and cons of Media Cope.
Pros:-
- Can play audio and video files of different formats.
- Instantly trim and cut video and audio files.
- Can join audio and video clips and save in desired file format.
- Can convert audio and video files as per requirements.
- Transform photos into slideshow instantly.
- Resize photos and take screenshots from videos.
- Modify different video parameters and export the file.
Cons:-
- Lack of various standard video editing options.
- Looks outdated for modern Windows OS.
5. OpenShot
Best for: Open source software lovers
G2 rating: 4.4/5
Price: Free
If you are looking for a video editor that is compatible with all desktop operating system, OpenShot is the best choice for you. It is a completely free, open-source video editor for Windows, Mac and even Linux users. In this list of video editors for beginners, this is the best in terms of features and functionalities. You can trim and slice video, add animations, insert different layers and video effects to enhance the video content. The user interface is rather intuitive in spite of having all the different options you look for in a video editor. Here are the pros and cons of OpenShot video editor.
Pros:-
- Simple but powerful user interface.
- Trim video instantly without different options.
- Add 3D titles, 3D animations, and slow motion effects.
- Loads of video and audio effects present to apply.
- Add different layers of videos, audio tracks, and images.
- Advanced option for keyframing and time mapping.
- Multi-lingual support and frequent updates for new features.
Cons:-
- Unstable performance for large video files.
- The hardware acceleration is not very powerful.
# For Advanced Users
If you are a regular video creator and you want your videos to stand out, this category is for you. You can edit and trim your videos exactly the way you want. Besides, you can transform your raw videos into professional-quality videos with the following video editors.
1. Filmora
Best for: Rich videos effects and templates
G2 rating: 4.4/5
Price: $49.99
Wondershare Filmora is an outstanding video editor where you can trim your video and audio files like a professional. Since you are an advanced user, you will need more than just trimming to make your raw video look stunning. Filmora offers you all the tools and features you will ever need to take your video to the next level.
Compared to other popular premium video editors, Filmora does not need heavy CPU resource and it has an intuitive user interface. That is why video creators especially YouTubers and Vloggers prefer it for editing their videos regularly. The software is available for both Windows and Mac users. Here are the pros and cons of Filmora that you should be aware of.
For Win 7 or later (64-bit)
For macOS 10.12 or later
Pros:-
- Record screen and webcam video with audio sources.
- Basic tools for trimming, splitting, and joining video files.
- Customize different video settings and parameters.
- Add video and audio effects and graphical elements.
- Wide range of stock library of media files and animations.
- Add multiple layers and work with multiple channels while editing.
- Export the recorded or edited video file in different file formats.
Cons:-
- Saving the edited video takes time due to processing part.
2. Adobe Premiere Pro
Best for: Professional video trim, edit and after effects
G2 rating: 4.5/5
Price: $20.99/month
Adobe Premiere Pro is the most powerful video editor and that is why even professional video editors use it for editing movies. There is hardly any video file format that Premiere does not support. You can edit multiple videos at the same time and switch between scenes and clips. Trimming video and audio files is swift with intuitive controls. There is also option for non-linear video editing for advanced users.
Since it is extremely popular in the videography world, there are many organizational tools available for editing large video projects and integrated workflow. The software supports VR video, 3D video, and multicam video editing. The software is available for Windows as well as Mac users. Here are the pros and cons of Adobe Premiere Pro.
Pros:-
- Customizable layouts for reorganizing user interface.
- Quick trimming and playback option without rendering.
- Supports a wide range of file formats for import and export.
- All the different tools for professional video and audio editing.
- Can work on and render multiple video files easily.
- Cross-app functionality with amazing stabilization features.
Cons:-
- The learning curve is rather steep and takes a lot of time.
- The software is only suitable for high-end computers.
3. Final Cut Pro
Best for: Advanced organizing tools of any professional video editing
G2 rating: 4.4/5
Price: $299
Final Cut Pro is equally popular in the videography world as Adobe Premiere Pro. Final Cut Pro is primarily for Mac users as it is developed by Apple. This is the most powerful video editor for Mac users as it is packed with loads of features for professional video editing. Trimming videos is as easy as it gets, along with other standard editing options.
The software supports editing multicam videos, VR videos, 3D videos as well as 360 degree videos. There are endless presets and effects available that you can apply on your video while editing. You can easily edit 4K videos without performance lag. In fact, Final Cut Pro shines where other video editors fail to perform with high resolution and large video files. Here are the pros and cons of Final Cut Pro.
Pros:-
- Trimming, cutting, splitting and joining videos are easy.
- Seamless video editing with standard and advanced tools.
- Different motion graphics templates available.
- Supports external plug-ins and VR headset playback.
- Proper video files and assets organizing and audio editing options.
- Relatively quick rendering of large video files.
Cons:-
- May take time to get used to all the available options.
- Relatively expensive in comparison to peers.
4. Movavi Video Editor
Best for: People who love more brilliant effects in videos
G2 rating: 4.8/5
Price: $74.95
Movavi Video Editor is a premium software for trimming and editing videos. It is available for both Windows and Mac users. There is a free version available but it puts a watermark on the output video. Apart from trimming and splitting videos, you can add various video effects starting from adding titles and transitions to stickers and elements. Besides, you can opt for greenscreen effect and edit videos in vertical mode. Here are the pros and cons of Movavi Video Editor you should be aware of.
Pros:-
- Integrated video capturing options from different sources.
- Instant trimming, splitting, and joining of videos.
- Loads of titles, filters and transitions present.
- Add video PiP layers as well as voiceover.
- Vertical video editing mode present.
- Video stabilization mode and Chroma key.
- Keyframing, slow motion and motion tracking.
Cons:-
- The rendering is not very fast.
- Lack of color tuning options.
5. Bandicut
Best for: Trim, join and split video with fast speed
G2 rating: 4.0/5
Price: $44.96
Bandicut from Bandicam is a dedicated video trimmer for Windows users. It is a premium application with a one-time purchase fee. The software ensures lossless video trimming, and you can trim video instantly thanks to its intuitive user interface. It is a versatile application that you can use to extract audio from a video as well as joining multiple video files. Splitting a large video file into multiple files is super easy. However, it is not a full-fledged video editor like Filmora or Premiere. Therefore, if your objective is specifically to trim, split, and join videos, this is the one for you. Here are the pros and cons of Bandicut.
Pros:-
- Trim and split videos instantly
- Super intuitive user interface.
- Cut segments from videos.
- Join multiple videos quickly.
- Supports different file formats.
- No loss of video quality during editing.
- Hardware acceleration for high performance.
Cons:-
- Very limited editing features.
6. VSDC
Best for: Movie level video cut with light professional skills
G2 rating: 4.0/5
Price: $19.99
VSDC is a free video editor with all the basic editing tools available. VSDC Pro is a premium video editor where advanced features are available. For trimming a video, VSDC free video editor can get the job done. Even though it is completely free, some features are comparable to many premium video editors. For example, you get access to a large set of filters, effects, and transitions that you can apply to your videos. Even when you have a low-end PC, you can do basic video editing works comfortably. Here are all the pros and cons of VSDC free video editor you should know.
Pros:-
- Instant trimming and basic editing of videos.
- Wide range of effects and filters as well as Chroma key.
- Color correction option and non-linear editing available.
- Supports editing 360 degree videos and split-screen videos.
- Supports different video and audio file formats.
- Lightweight and suitable for low-end computers.
Cons:-
- Lacks standard audio editing options.
- Lacks hotkeys and useful keyboard shortcuts.
7. Camtasia
Best for: Tutorial video recording and editing
G2 rating: 4.6/5
Price: $224.99
Camtasia by TechSmith is a premium video editor for Windows and Mac users. Even though it is more popular as a video editor, you can trim your videos easily on the software. You can record anything on your screen as well as external webcam. You can edit recorded video as well as import external video files for quick editing. The software offers easy share instant through which you can share on popular video streaming platforms. There are various templates and themes available to create and edit videos of different categories. Here are the pros and cons of Camtasia.
Pros:-
- Quick trimming, splitting, joining video options.
- Different templates and packages for versatile video creation.
- Various transitions, annotations, and presets present.
- PowerPoint integration, screen and web cam capture.
- Different cursor and audio effects with royalty-free assets.
- Import different media files and upload directly on video streaming platforms.
Cons:-
- Reports of crashes when working with large files.
- No keyframe and motion tracking.
- Very few customization options.
Part 3 Video Trimmers for Mobile
In today’s world, the cameras of smartphones are extremely powerful, and there are many who shoot videos with phone cameras instead of a dedicated digital camera. For example, there are many popular vloggers who shoot their videos with phone cameras, and video creators make short videos with phone cameras. When you shoot a video on your phone, you must be looking for a video trimmer app for your phone so that you can trim the recorded video instantly and share across social media and video streaming platforms. Here is the list of the best video trimmers for mobile.
# For Beginner Users
1. VidTrim Pro
Best for: Android video trimming, merging, frame grabbing
Rating: 4.1/5
Download Link: https://play.google.com/store/apps/details?id=com.goseet.VidTrimPro&hl=en\_US&gl=US
VidTrim is a dedicated video trimmer available for Android users. The free version adds a watermark to the output video, and hence, you have to opt for VidTrim Pro to avoid all limitations. Apart from trimming videos, you can merge videos and convert videos into audio files. You can also add effects and music tracks to your videos. The user interface is as simple as it gets. Here are the pros and cons of VidTrim Pro app.
Pros:-
- Trim videos as well as merge video clips.
- Convert supported video files into Mp3 audio files.
- Rotate videos as well as save screenshots from videos.
- Add cool video effects, sound effects, and soundtracks.
- Multi-lingual support and video file format converter.
Cons:-
- Limited video editing features for a paid video editor app.
- The user interface is simple but outdated.
2. KineMaster
Best for: Video content downloadable
Rating: 4.2/5
Download Link: https://play.google.com/store/apps/details?id=com.nexstreaming.app.kinemasterfree&hl=en\_US&gl=US
You must have seen many videos online with the watermark “Made with Kinemaster”. This is because KineMaster is very popular among amateur video creators. KineMaster is available for Android as well as iOS users. You can instantly trim and crop videos. Besides, you can add special effects, animations and stickers as well as tweak different video settings for enhancements. KineMaster is available free of cost but it attaches a watermark to the output video at one corner. You can subscribe to KineMaster Premium to remove watermark and unlock more features. Here are the pros and cons of KineMaster.
Pros:-
- Trim, cut, slice, and crop videos instantly.
- Add music, sound effects as well as voiceover.
- Provides amazing visual effects and animations.
- Adjust color filters, modes and video speed.
- Supports keyframing and motion tracking.
- Save 4K videos and share instantly online.
Cons:-
- KineMaster chroma key feature has bugs.
- Can crash or freeze handling large video files.
3. Quik
Best for: Producing cinematic auto-edits.
Rating: 4.3/5
Download Link: https://play.google.com/store/apps/details?id=com.gopro.smarty&hl=en\_US&gl=US
Quick from GoPro is fast becoming a popular video editor app. GoPro is the most popular action camera brand and naturally, its video editing app has garnered enough attention. The app is available for Android and iOS users. The app has a mixed bag of options for editing videos quickly. You can trim your videos, add filters and adjust video speed. Besides, its AI can locate the best shots in a video and enhance them with special effects. Here are the pros and cons of Quick app.
Pros:-
- Trim, crop, adjust speed, remove audio from videos.
- Different preset templates available with effects and filters.
- Add music, titles, effects, and transitions.
- Easy sharing of videos and photos.
- Powerful AI to highlight the best shots in a video.
- Adjust video orientation, save in 1080p resolution.
Cons:-
- Not suitable for large video files.
- No font adjustment options.
4. iMovie
Best for: Create Hollywood-style trailers and beautiful movies
Rating: 4.0/5
Download Link: https://apps.apple.com/us/app/imovie/id377298193
iMovie app by Apple is exclusively available for iOS users. iMovie is also available as a software which we have already discussed. In terms of features, iMovie app is very similar to iMovie software. You can instantly make basic editing works. Apart from editing, the app is ideal for creating different types of videos with ready-made templates. There are loads of graphical effects, animated titles, and video filters available to apply. Here are the pros and cons of iMovie app for you.
Pros:-
- Record, trim, split, join and crop videos on the go.
- Choose from different themes and templates to create videos.
- Animated titles, video filters, graphical effects available.
- Chroma key, PiP mode as well as split screen effect possible.
- Add sound effects, music, and depth of field effect.
- Optimized output for social media and video streaming platforms.
- Supports 4K video editing and easy share across Apple devices.
Cons:-
- Limited resources and customization options.
- The app size is large and uses high CPU resources.
# For Advanced Users
1. LumaFusion
Best for: Professional video trimming for iOS devices
Rating: 4.8/5
Download Link: https://apps.apple.com/us/app/lumafusion/id1062022008
LumaFusion is a top-rated video editor for iPad and iPhone. The app is as good as a premium video editor for desktop users. Therefore, professional video creators who use iPhone or iPad for video editing prefer LumaFusion all the time. You can trim, cut, crop, split, and merge videos intuitively from its timeline. Most importantly, you can edit multiple video and audio files together like a professional. Here are the pros and cons of LumaFusion.
Pros:-
- Trim and export video in different file formats.
- Work with multiple video and audio files.
- Preset transitions, instant preview, markers for timeline.
- Add Chroma and Luma key effects as well as stunning visual effects.
- Adjust speed, audio, use keyframes, correct colors.
- Work with titles, fonts, borders, and share conveniently.
- Wide range of media files available in the library.
Cons:-
- Does not support motion tracking.
- Can be difficult to edit large files.
2. Adobe Premiere Rush
Best for: Shoot, edit, and share online videos anywhere.
Rating: 3.0/5
Download Link: https://play.google.com/store/apps/details?id=com.adobe.premiererush.videoeditor&hl=en\_US&gl=US
Even though Adobe Premium Rush app is available or Android and iOS users, it is more popular among iPhone and iPad users. The app is free though there are in-app purchases available. Rush Premium has more features and functionalities. Editing any video is quite convenient though Adobe has tried its level best to offer all the possible features of Adobe Premium Pro desktop software on the app. The app supports multitrack timeline for professional videos. Here are all the pros and cons of Adobe Premiere Rush you should be aware of.
Pros:-
- Record video in high-resolution with the app.
- Trim, crop, mirror, and flip videos.
- Add images, overlays, texts, and stickers.
- Pan and zoom effect, animation titles.
- Royalty-free audio tracks, color correction options.
- Easy exporting of files in different formats.
Cons:-
- Rendering projects can be slow.
- Comes with limited features.
3. Filmmaker Pro Video Editor
Best for: 4K quality video editing
Rating: 4.6/5
Download Link: https://apps.apple.com/us/app/filmmaker-pro-video-editor/id1082956994
Filmmaker Pro is a highly rated video editor that you can use to trim your videos. Filmmaker Pro app is available for both Android and iOS. The app supports 4K video for editing works. The timeline has color codes for different assets and hence, editing becomes easy. You can edit different video parameters and settings and add different effects. The auto save option is extremely useful when it comes to editing a large file. Even though it is available for free, they have a subscription plan for unlocking all features. Here are the pros and cons of Filmmaker Pro Video Editor.
Pros:-
- Trim, split, crop and rotate videos.
- Adjust video speed, volume, video grading.
- Chroma key, voice to text caption, keyframe and motion tracking.
- Different Picture-in-Picture mode for videos, photos, and GIFs.
- Various transition effects, audio effects, and text overlays.
- Different drawing tools, stickers, and graphical elements present.
Cons:-
- The free version has limited features.
- The number of effects are relatively less.
4. Splice Video Editor and Maker
Best for: Vloggers and social platform video cutting
Rating: 4.7/5
Download Link: https://play.google.com/store/apps/details?id=com.splice.video.editor&hl=en\_US&gl=US
Splice Video Editor and Maker is a free but powerful app that enables you to do pro-level editing. You can trim your video clips, adjust speed, and add music on the go. In fact, you can create videos and slideshows instantly and you can add texts and overlays. The music library has different categories of tracks to apply to videos. You can also merge videos as well as change aspect ratio according. The app is available for Android and iOS users. Here are all the pros and cons of Splice Video Editor and Marker.
Pros:-
- Easy interface for smooth trimming and merging of videos.
- Adjust speed, aspect ratio, and video parameters.
- Organize clips and tracks in the timeline intuitively.
- Add custom texts, titles, tracks, transitions, and effects.
- Comes with a wide stock library of media files.
- Direct uploading video files on different social media platforms.
Cons:-
- Limited effects and filters available.
- Frequent crashes while handling large files.
5. Funimate
Best for: Mobile game video trim to show off gaming skills
Rating: 4.5/5
Download Link: https://play.google.com/store/apps/details?id=com.avcrbt.funimate&hl=en\_US&gl=US
Funimate video editor and maker app is quite highly rated on both Play Store and App Store. It is a very powerful and feature-rich app where you will get all the desired editing tools to publish a professional-quality video. Starting from element library to video masks and AI effects, the app takes your video to the next level. You can obviously perform the basic editing works like trimming, splitting and joining. Here are the pros and cons of Funimate app.
Pros:-
- Trimming, merging, and cutting videos.
- Text effects, video AI effects, and effect mixer.
- Comes with over 100 advanced video effects.
- Allows adding music to videos for engaging videos.
- Supports slow motion and looping videos.
- Advanced keyframing and element library.
- Allows creating a professional photo slideshow.
Cons:-
- No multilingual support and auto-save feature.
- Some lagging issues have been reported.
Part 4 Online Video Trimmers
If you are using a video editor on your computer, it takes considerable amount of space in your storage. The same is applicable to video editors for smartphones. If you do not want to install any app on your device yet trim videos conveniently, the online video trimmers are for you. You can open the video trimmer directly from your web browser and trim your video and save it without installing any application on your device. Here is the list of the best online video trimmers.
# For Beginner Users
1. https://online-video-cutter.com/
Best for: Trimming large videos files.
Ratings: 4.2/5
Online Video Cutter is a dedicated video trimmer where you need to drag and drop your video file and cut out the required portion. You can even crop and rotate your videos if there is any such requirement. You can access the online platform directly from your web browser. There is no need for installation of any web launcher. The platform is also secured and hence, your videos won’t get leaked. There is also a Chrome extension available that you can use if you are a Chrome user. Here are the pros and cons of Online Video Cutter.
Pros:-
- Easy video trimming by drag-and-drop files.
- Enables uploading different file formats.
- Rotate feature for saving in portrait and landscape mode.
- Automatically deletes files for better security.
- Crop feature for changing frame size.
- Can edit video file of 4GB capacity.
Cons:-
- May reduce the video quality for the editing video.
2. https://clideo.com/cut-video
Best for: Trimming short videos.
Ratings: 4.5/5
This is another online video trimmer that supports different video file formats. The user interface is sleek for quick video trimming. You can upload file from your device as well as from Cloud storage. In fact, you can use the platform to convert video files. The level of trust and security is high and there are additional settings available for better editing. Here are the pros and cons Clideo Video Cutter.
Pros:-
- Intuitive interface for quick trimming.
- Supports different file formats.
- Converts videos into different formats.
- Offers high-level online security.
- Add fade in and fade out effects.
- Upload video files from Google Drive and Dropbox.
Cons:-
- No drag and drop feature.
- File size is limited to 500 MB only.
3. https://www.kapwing.com/tools/trim-video
Best for: Editing video elaborately.
Ratings: 4.4/5
Kapwing is a dedicated online video editor that will give you the vibe of using a desktop video editor. Therefore, it is suitable for those who are looking for an online platform for trimming as well as various other editing works. You can add texts, images, elements, audio, transitions, as well as record videos. You can also export in different file formats. However, the free version attaches a watermark. Therefore, you have to upgrade to its premium version and use the platform is a full-fledged video editor. Here are the pros and cons of Kapwing.
Pros:-
- Trim, crop, zoom videos and adjust video parameters.
- Supports import and export of different file formats.
- Add effects, audio, and elements to the videos.
- You can work with multiple layers while editing.
- Different sound effects, templates, and scenes and emojis present.
- Stunning user interface that looks like a video editor software.
Cons:-
- Free version attaches watermark and lowers video quality.
4. https://www.freeconvert.com/video-trimmer
Best for: Basic video trimming
Ratings: 4.0/5
FreeConvert Video Trimmer is a free online tool through which you can trim videos of size up to 1GB easily. The platform supports as many as 40 different video file formats. Therefore, you can trim almost any video file easily. The security is tightened so that the uploaded videos do not get leaked. You can upload video files from your device, Google Drive, Dropbox as well as from URL. Therefore, if you want to trim videos that are available online, you can do it easily with this tool. Here are the pros and cons of FreeConvert Video Trimmer.
Pros:-
- Easy to use, intuitive interface.
- Does not require any registration.
- Supports over 40 file formats.
- Compatible with multiple browsers.
- 256-bit SSL encryption offers better security.
- Allows adjustment of parameters before conversion.
Cons:-
- There are too many annoying ads.
# For Advanced Users
5. https://www.veed.io/tools/video-cutter
Best for: Trimming videos for social media platforms.
Ratings: 4.3/5
Veed.io has a wide collection of tools for video editing and the video cutter is a dedicated video trimmer. You can trim videos of popular file formats easily. Apart from video files, the platform supports trimming GIFs and audio files. You can upload videos as well as mention URL of videos that are present online for trimming. The online tool does not degrade the video quality and the output file is of high-quality as well. Here are the pros and cons of Veed.io video cutter.
Pros:-
- Allows saving the video in a high-quality format.
- Supports cutting a wide range of audio file formats.
- Ability to upload and cut animated GIFs.
- Allows cutting YouTube videos directly using URL.
- Easy drag and drop feature for saving time.
- “Split” option for removing the middle part of the video.
Cons:-
- Not suitable for trimming large video files.
6. https://www.fastreel.com/video-cutter.html
Best for: Trimming videos for personal use.
Ratings: 4.2/5
Fastreel online video trimmer lets you trim your videos with a few clicks. Drop your file and mark the points for trimming and there you go. That tool is also useful if you want to split your video. There are several video file formats that the platform supports. The user interface is intuitive and the trimming can be precise. The free version attaches a watermark and hence, the premium version is what you should have. Here are the pros and cons of Fastreel online video trimmer.
Pros:-
- Simple interface for hassle-free trimming.
- Supports different video file formats.
- Feature of data security offers better safety.
- Quick video trimming without using the editor.
- Different file formats while saving the video.
- Precision cutting for removing unwanted segments.
Cons:-
- The free version comes with watermark.
- Free version lowers the video quality.
7. https://flixier.com/tools/video-trimmer
Best for: editing videos as a teamwork
Ratings: 4.4/5
Flixier Video Trimmer is a premium tool to trim and crop videos instantly. The tool is available in a free version but there are many limitations. Therefore, you need to have a premium version of Flixier Video Trimmer. You can export videos in 1080p and 4K resolution. You can opt for transcribing your videos and store videos in the cloud. In the premium version, two team members can work together. Here are the pros and cons of Flixier Video Trimmer.
Pros:-
- Upload videos from YouTube, Twitch, and cloud platforms.
- No need to create account for instant trimming.
- Trim, crop, cut, and add images to videos.
- Supports multiple file formats.
- Comes with an easy collaborative platform.
- Additional translation and transcribe options.
Cons:-
- There are lots of limitations of premium plans as well.
- Only the highest premium plan supports 4K resolution.
8. https://www.wevideo.com/features/video-cutter
Best for: Best premium online video editor
Ratings: 4.5/5
WeVideo Video Cutter is a paid video trimmer though you try out the platform for free. The platform supports a wide range of video files. You can drag and drop files and trim videos instantly. Trimming cannot get any easier and the processing speed of the editing video is fast. You can finish trimming your videos in a few seconds. There is a unique zoom feature to trim out videos accurately. You can also add texts and music to your video file before exporting. Here are the pros and cons of WeVideo Video Cutter.
Pros:-
- Drag and drop feature for quick editing.
- Smooth and accurate trimming with zoom function.
- Music and motion titles library.
- Compatible with different web browsers.
- Export edited files in different file formats.
- There is no capping on file size as such.
Cons:-
- The pricing is on the steeper side.
Part 5 Editing Tips to Improve Your Videos
Apart from trimming, you have to edit different other aspects so that you can make the video engaging and eye-catching. Here are some editing tips you should stick to improve your video content.
Get The Best Video Editor - Editing a video is equally important as shooting a video. Once you have the best video editor, you can rest assured that your editing work is half done. This is because you have all the tools to turn your raw video into stunning video. You can experiment and come up with the best editing work to your own surprise.
Get The Length Correct - In today’s world, viewers have very less time to watch videos. Therefore, a lengthy and elaborative video is a bummer. Hence, you should trim the video and keep only the portions that are relevant, engaging, and not boring.
Start with a Bang - The first impression is always the most important, and hence, the intro of your video is extremely crucial to keep the attention of the audiences intact. To make the intro interesting, you should not only focus on the content but also on video effects and animations that are attention-grabbing.
Smooth Cuts and Soothing Colours - When you are cutting from one scene or angle to another, the transition should be smooth so that it does not feel abrupt. Therefore, you should cut scenes when the subjects and objects seem to be static so that the transition is smooth naturally. Play attention to colour and the video editors allow you to enhance the quality by adjusting the colors and picture properties.
Graphical Objects - Use graphical objects and animated texts wherever possible for better explanations. Things can get boring visually when you do not add graphical elements, transitions, and animations appropriately in different places. Similarly, the use of texts and titles makes the video more engaging. Instead of static texts, there are animated texts and titles available with stickers and memes that you can edit your video with.
Play Attention to Sound - Sound is the most neglected part of a video by amateur video creators when one should pay attention to it. The sound effects can keep the audiences hooked to your video and make them not get bored. Certain sound effects refresh the attention of the audiences when it starts to fade, and hence, you should place the sound effects wisely.
Proper Flow - The editing work should be smooth so that the flow of the video is smooth and efficient. It takes time, and hence, you can practice and learn video editing so that your video can stand out instantly after your editing touches. Besides, the editing should be such that the video feels like a story that audiences can invest in and get engaged throughout.
Part 6 How to Share Your Videos
In order to share videos after trimming them, you need to save the video properly. There are different file formats available for video files. For example, MP4 is the most popular video file format among Windows users. On the contrary, MOV is the most popular video file format. Different file formats have different features such as compression and lossless. According to the file format, the file size varies for the same duration of video.
Therefore, the video trimmer you are using must have different file formats for saving and exporting the editing video files. Some video trimmers have in-built features to share videos on social media platforms and upload on video streaming platforms like YouTube. Depending on your target audiences, you need to adjust the parameters like aspect ratio, video resolution, as well as duration. Besides, you can upload videos on cloud storage and share with anyone as per your requirements.
Part 7 Related FAQs about Video Trimming
1. What is the best video trimmer?
Wondershare Filmora is the best video trimmer as all the features are well-balanced. Apart from trimming, it has all the tools for professional-quality video editing. Filmora can also be used for recording videos. Trimming videos is as easy as it gets and you can export the edited video in different file formats.
2. How can I trim a video?
To trim a video, you will need a video trimmer. If you are a desktop user and you need to regularly edit videos, there are video trimmers available for beginners as well as advanced users. Similarly, there are video editor apps available for mobile users. If you need to trim just one video, you should use an online video trimmer.
3. How can I trim a large video?
In order to trim a large video file, you will need a professional video editor like Filmora so that there is no loss in video quality and frequent crashes and screen freezing incidents while trimming. Drag and drop the video file on Filmora’s timeline and trim the unnecessary parts. You can view the changes and export the file in desired file format.
4. What does trim mean in video editing?
Trimming a video means you are cutting off different portions of a video and reducing its length. Trimming is mostly done to remove unnecessary parts from a video so that the video becomes more engaging without any unnecessary fillers.
5. Can I trim a video in VLC?
Here are the steps to trim a video in VLC Media Player.
- Open VLC Player. Go to View> Advanced Controls. This will make the recording buttons appear.
- Open the video that you want to trim. Mark the portion that you want to keep in your video.
- Play the video and go to the point from where you want to keep the video. Click on Record button.
- Go to the point where you want to end the video. Click on Record button again. All other portions are trimmed and the edited video will be saved.
6. How to trim YouTube videos?
In order to trim YouTube videos, you need to download the videos on your device. You can use an online video trimmer where you can upload the files and trim the videos as per your requirements.
Also read:
- Updated What Can Be Better than Converting Apple Video Format Into Other Formats so that You Can Use the Files Easily. We Have a Few Options that You Can Use for This Purpose for 2024
- How To Use Motion Blur On Video Star for 2024
- New What Does It Mean to Color Grade Your Images, and Why Is It so Important? Does It Mean the Same Thing as a Color Correction? Read on to Gather All the Information You Need on Color Grading Photography
- In 2024, Things You Need to Know About Color Grading in Photography
- If You Are a Teacher or People Who Want to Share Their Ideas via Vides, You Can Always Make It on Your Own. This Article Will Share You 7 Tips to Create an Educational Video Easily for 2024
- New 2024 Approved 15 Best Vloggers That You Should Follow for Travel
- New Best 10 3D Slideshow Software Review
- Updated 2024 Approved Want to Make a Slide Show Video? Heres How
- New In 2024, Are You a Teacher? Are You Looking for Educational Background Music? This Article Has Everything You Will Need to Know for Creating Outstanding Educational Teaching Videos
- Top Tips for Camtasia Freeze-Frame for 2024
- Updated How Much Information Do You Have About MP4 Digital File Storage? Let Us Tell You More About the MP4 File Format; Get Ready to Increase Your Knowledge for 2024
- New Free Titles For Final Cut Pro
- 2024 Approved The Best Jump Cut Editing Tricks Make Your Videos Snappy!
- 10 Best Movie Trailer Voice Generators Windows, Mac, Android, iPhone & Online for 2024
- Updated In 2024, Do You Want to Enable the Motion Blur Effect While Playing Dying Light 2? Read This Article to Find Out How to Use Dying Light 2 Motion Blur for a Great Gaming Experience
- New How to Apply Video Filters for 2024
- New In 2024, How to Use LUTs in Lumafusion & Free Resource
- How to Unlock Disabled Apple iPhone 14 Pro/iPad Without Computer | Dr.fone
- In 2024, Top 7 Skype Hacker to Hack Any Skype Account On your Tecno Spark Go (2023) | Dr.fone
- Unlock Vivo V29e Phone Password Without Factory Reset Full Guide Here
- In 2024, Overview of the Best Samsung Galaxy A14 5G Screen Mirroring App | Dr.fone
- How To Fix Unresponsive Phone Touchscreen Of Realme 11X 5G | Dr.fone
- Want to Uninstall Google Play Service from Asus ROG Phone 7 Ultimate? Here is How | Dr.fone
- In 2024, New Multiple Ways How To Remove iCloud Activation Lock From your iPhone 13
- How to Change Google Play Location On Oppo A79 5G | Dr.fone
- How To Restore Missing Music Files from Samsung Galaxy F54 5G
- New How to Liven Up Your Animate Website on Scroll
- Recommended Best Applications for Mirroring Your Vivo Y100i Power 5G Screen | Dr.fone
- In 2024, Fake the Location to Get Around the MLB Blackouts on Samsung Galaxy A54 5G | Dr.fone
- In 2024, Is GSM Flasher ADB Legit? Full Review To Bypass Your Vivo Y55s 5G (2023) Phone FRP Lock
- Fixing Persistent Pandora Crashes on Motorola Razr 40 Ultra | Dr.fone
- Title: Updated A Complete Guide to the Best Brand Story Videos
- Author: Morgan
- Created at : 2024-06-15 18:56:42
- Updated at : 2024-06-16 18:56:42
- Link: https://ai-video-editing.techidaily.com/updated-a-complete-guide-to-the-best-brand-story-videos/
- License: This work is licensed under CC BY-NC-SA 4.0.
