
:max_bytes(150000):strip_icc():format(webp)/GettyImages-919006240-ee5ef631cb6f4e4997bce403b8bafa77.jpg)
Updated A Detailed Guide to Do Color Correction in OBS
A Detailed Guide to Do Color Correction in OBS
Create High-Quality Video - Wondershare Filmora
An easy and powerful YouTube video editor
Numerous video and audio effects to choose from
Detailed tutorials are provided by the official channel
Color Correction is an outstanding functionality that allows editing photos and videos by altering their consistency to match a particular standard. Besides, color correction is available in the premium tool and free applications. And one of the established free software tools with color correction is the OBS.
Even though the Open Broadcaster Software is mainly known for live streaming and offline video recording, it also offers color correction functionality from its open canvas. Read this article to completion and get to the bottom line of how to do color correction in OBS.
More about OBS
In this article
01 What is OBS?
What is OBS?
Open Broadcaster Software (OBS) is free and open-source software that allows users to record videos and live stream events right at their comfort. The software functions effectively on Mac, Windows, and Linux computers.
Open Broadcaster Software (OBS) is free and open-source software that allows users to record videos and live stream events right at their comfort. The software functions effectively on Mac, Windows, and Linux computers.
Since its initial launch in 2012, OBS has made tremendous moves – This is not only from the constant release of its new versions but also the relentless increase in the functionality features. Besides, OBS is equipped with a robust API that enables plugins and scripts which provide extensive customization to precisely suit one’s needs.
However, OBS being a free application can function to date due to enough support from sponsors and backers.
How to Apply Color Correction in OBS
When you carry out basic edits to your videos or images with OBS and realize that your project has poor shade, color, or tone, you don’t have to export it to another software to correct it. Instead, you can use filters for color correction in OBS.
Apart from using OBS filters to color correct video clips and images, you can correct games, browser sources, and video capture devices.
There are various aspects of color correction in OBS. It includes:
1. Gamma
Gamma is a fundamental aspect in OBS that functions by balancing the brightness of an image through contrast. To be precise, Gamma works almost similarly to change in brightness while simultaneously increasing or decreasing the contrast.
In editing, Gamma is applicable mainly for removing shiny foreheads and webcam footage in gaming and browsing.
High Gamma is represented by “L,” whereas low Gamm is represented by “R.”
2. Contrast
Contrast is the difference in the degree of colors and tones in an image. Usually, the low contrast image has a narrow color range, whereas the high contrast images have dark shadows and bright highlights.
“L” represents high contrast in OBS contrast, whereas “R” represents low contrast.
3. Brightness
Brightness is the degree to how light or dark a picture is. To be able to understand an image clearly, it is best to correct its brightness. A change in brightness of a picture has a simultaneous change in pixels of that image.
High brightness in OBS is denounced by the letter “L,” whereas Low brightness is denounced by “R.”
4. Saturation
Saturation is the intensity of colors in a video or an image. High saturated images are bright, strong, and are rich, whereas the low saturated photos appear washed out. Black and white (grayscale) photos have no color saturation. In OBS, high saturation and low saturation are represented as “L” and “R.”
5. Hue Shift
Hue shift is the change in an image’s saturation, lightness, and hue colors. Hue shifting occurs when highlighting or shading images. In OBS, you can use the hue shift functionality to reimage your image with a completely different color palette.
With the hue shift functionality in OBS, you can place the image on top of another and have an 80% opacity. It means that you will still see the first image when you place the second one on top of it.
The “L” sign in the OBS hue shift represents 50% opacity, while the “R” represents 100% Opacity.
Color Grade in OBS
Color grading is the process of enhancing the appearance of an image through attributes such as contrast, saturation, and color, making them enchanting for presentations. Color grading is not only done for still images but also for motion pictures and images.
Color grading functionality in OBS is encompassed with several tools – This includes:
1. Lift tool
As the name suggests, lift tools are used in lifting or removing specific colors from an image. It does so without necessarily affecting other colors in an image.
With this tool, you can selectively remove unwanted colors from your image or video, replace them with your desired ones, and create astonishing results.
2. Offset
Offset is another outstanding tool in OBS color grading that controls the blacks/Shadows of an image. It functions by altering the brightness levels and leaving the highlights and the mid-tones unaffected.
3. Gain
A gain is a tool in OBS color correction that functions by only adjusting the white levels in an image. With the gain tool, brighter colors become brighter or darker.
Many people, especially beginner editors, experience difficulty differentiating between the Gamma and Offset tools. Yes, there is a closer similarity between the two, and for you to be on the safe side, you need to know that Gamma goes with the mid-tones (middle gray levels) whereas the Gain goes with highlights/whites.
How to Apply LUTs in OBS
Look up tables (LUTs) is a functionality feature that allows editors, colorists, and filmmakers to save certain colors as their templates. Therefore, when working on a particular project, they don’t have to create new working color grades; instead, you pick it from your LUT.
Using LUTs OBS is not rocket science. With LUTs, you can create unique projects with a vibrant feel. Here are the simple steps of using LUTs in OBS.
Step 1. Prepare your LUT
First, check and establish whether you have your LUT ready. If you don’t have it, you can download one from the internet. Make sure you download it as a folder. Even though OBS has LUT, It has limited color grades; therefore, it is best to download one. You can extract it to an OBS folder if you downloaded it in a zip file.
Step 2. Add your project to the OBS timeline
Open your OBS software and add your project file. Drag and drop your file to the OBS timeline.

Step 3. Add LUTs to your project
Right-click on the area in your project that you wish to apply LUTs, then click on “Filters.” Select “Apply LUT” from the drop-down menu,” which is usually at the top of the list.

Step 4. Apply your LUT as a filter
On the LUTs section, click on the browser, then open your downloaded LUT folder. Usually, the LUT is in the form of a .cube file. You can adjust your LUT by simply clicking on the “Adjust” option.
Bonus! How to Apply Color Correction for Webcam and Camera
People who primarily use their computers for recording sessions often find it difficult to capture quality videos. It is because most computer cameras are not straightforward. To do away with purchasing a new camera due to poor quality video capture, they can freely use OBS LUTs. For their camera and webcam. LUTs for webcam play a vital role in correcting the quality of photos and videos by using filters.
Here are the simple steps on how to use LUTs for color correction in webcam and camera
Step 1. Check whether your camera has additional software
Most webcams and cameras are controlled by external software, so you first need to check whether yours is also controlled. A thing with these cameras are controlled by their software is that the software determines the color settings and the specific image.
Double click on camera source and select “Configure video.” Computers with external software cameras will have a pop-up window that displays various customizable settings. Here, you can adjust the different settings based on your preference.

Step 2. Download your LUTs
Download online the LUTs you want to use. Download them as folders and extract the files you downloaded as zip files. Save them in the OBS folder.
Step 3. Apply your LUTs
Still, in your OBS software, open your camera and then right-click on it. From the displayed menu, click on “Filters.”
On the bottom left corner of your interface, hit the “+” sign, then select “Apply LUTs” > “Browse.”
Open your already downloaded OBS files. Usually, there is an “Adjust” that allows you to regulate the intensity of the LUT by sliding it.

Step 4. Start recording with LUTs on
After turning on your LUT, you can start recording videos and taking photos. There is an eye icon on the left-hand side of your screen. You can use it to turn on or off LUT.
Conclusion
● And that is how to do color correction in OBS. Besides, you do not have to go to the extremes of getting a new camera because of your webcam faultiness. With OBS, you can correct your camera and webcam and get outstanding results.
● Download LUTs from the internet and use them as a template in OBS. Besides, you don’t have to pay for the LUTs, but you can use the free ones.
Color Correction is an outstanding functionality that allows editing photos and videos by altering their consistency to match a particular standard. Besides, color correction is available in the premium tool and free applications. And one of the established free software tools with color correction is the OBS.
Even though the Open Broadcaster Software is mainly known for live streaming and offline video recording, it also offers color correction functionality from its open canvas. Read this article to completion and get to the bottom line of how to do color correction in OBS.
More about OBS
In this article
01 What is OBS?
What is OBS?
Open Broadcaster Software (OBS) is free and open-source software that allows users to record videos and live stream events right at their comfort. The software functions effectively on Mac, Windows, and Linux computers.
Open Broadcaster Software (OBS) is free and open-source software that allows users to record videos and live stream events right at their comfort. The software functions effectively on Mac, Windows, and Linux computers.
Since its initial launch in 2012, OBS has made tremendous moves – This is not only from the constant release of its new versions but also the relentless increase in the functionality features. Besides, OBS is equipped with a robust API that enables plugins and scripts which provide extensive customization to precisely suit one’s needs.
However, OBS being a free application can function to date due to enough support from sponsors and backers.
How to Apply Color Correction in OBS
When you carry out basic edits to your videos or images with OBS and realize that your project has poor shade, color, or tone, you don’t have to export it to another software to correct it. Instead, you can use filters for color correction in OBS.
Apart from using OBS filters to color correct video clips and images, you can correct games, browser sources, and video capture devices.
There are various aspects of color correction in OBS. It includes:
1. Gamma
Gamma is a fundamental aspect in OBS that functions by balancing the brightness of an image through contrast. To be precise, Gamma works almost similarly to change in brightness while simultaneously increasing or decreasing the contrast.
In editing, Gamma is applicable mainly for removing shiny foreheads and webcam footage in gaming and browsing.
High Gamma is represented by “L,” whereas low Gamm is represented by “R.”
2. Contrast
Contrast is the difference in the degree of colors and tones in an image. Usually, the low contrast image has a narrow color range, whereas the high contrast images have dark shadows and bright highlights.
“L” represents high contrast in OBS contrast, whereas “R” represents low contrast.
3. Brightness
Brightness is the degree to how light or dark a picture is. To be able to understand an image clearly, it is best to correct its brightness. A change in brightness of a picture has a simultaneous change in pixels of that image.
High brightness in OBS is denounced by the letter “L,” whereas Low brightness is denounced by “R.”
4. Saturation
Saturation is the intensity of colors in a video or an image. High saturated images are bright, strong, and are rich, whereas the low saturated photos appear washed out. Black and white (grayscale) photos have no color saturation. In OBS, high saturation and low saturation are represented as “L” and “R.”
5. Hue Shift
Hue shift is the change in an image’s saturation, lightness, and hue colors. Hue shifting occurs when highlighting or shading images. In OBS, you can use the hue shift functionality to reimage your image with a completely different color palette.
With the hue shift functionality in OBS, you can place the image on top of another and have an 80% opacity. It means that you will still see the first image when you place the second one on top of it.
The “L” sign in the OBS hue shift represents 50% opacity, while the “R” represents 100% Opacity.
Color Grade in OBS
Color grading is the process of enhancing the appearance of an image through attributes such as contrast, saturation, and color, making them enchanting for presentations. Color grading is not only done for still images but also for motion pictures and images.
Color grading functionality in OBS is encompassed with several tools – This includes:
1. Lift tool
As the name suggests, lift tools are used in lifting or removing specific colors from an image. It does so without necessarily affecting other colors in an image.
With this tool, you can selectively remove unwanted colors from your image or video, replace them with your desired ones, and create astonishing results.
2. Offset
Offset is another outstanding tool in OBS color grading that controls the blacks/Shadows of an image. It functions by altering the brightness levels and leaving the highlights and the mid-tones unaffected.
3. Gain
A gain is a tool in OBS color correction that functions by only adjusting the white levels in an image. With the gain tool, brighter colors become brighter or darker.
Many people, especially beginner editors, experience difficulty differentiating between the Gamma and Offset tools. Yes, there is a closer similarity between the two, and for you to be on the safe side, you need to know that Gamma goes with the mid-tones (middle gray levels) whereas the Gain goes with highlights/whites.
How to Apply LUTs in OBS
Look up tables (LUTs) is a functionality feature that allows editors, colorists, and filmmakers to save certain colors as their templates. Therefore, when working on a particular project, they don’t have to create new working color grades; instead, you pick it from your LUT.
Using LUTs OBS is not rocket science. With LUTs, you can create unique projects with a vibrant feel. Here are the simple steps of using LUTs in OBS.
Step 1. Prepare your LUT
First, check and establish whether you have your LUT ready. If you don’t have it, you can download one from the internet. Make sure you download it as a folder. Even though OBS has LUT, It has limited color grades; therefore, it is best to download one. You can extract it to an OBS folder if you downloaded it in a zip file.
Step 2. Add your project to the OBS timeline
Open your OBS software and add your project file. Drag and drop your file to the OBS timeline.
Step 3. Add LUTs to your project
Right-click on the area in your project that you wish to apply LUTs, then click on “Filters.” Select “Apply LUT” from the drop-down menu,” which is usually at the top of the list.
Step 4. Apply your LUT as a filter
On the LUTs section, click on the browser, then open your downloaded LUT folder. Usually, the LUT is in the form of a .cube file. You can adjust your LUT by simply clicking on the “Adjust” option.
Bonus! How to Apply Color Correction for Webcam and Camera
People who primarily use their computers for recording sessions often find it difficult to capture quality videos. It is because most computer cameras are not straightforward. To do away with purchasing a new camera due to poor quality video capture, they can freely use OBS LUTs. For their camera and webcam. LUTs for webcam play a vital role in correcting the quality of photos and videos by using filters.
Here are the simple steps on how to use LUTs for color correction in webcam and camera
Step 1. Check whether your camera has additional software
Most webcams and cameras are controlled by external software, so you first need to check whether yours is also controlled. A thing with these cameras are controlled by their software is that the software determines the color settings and the specific image.
Double click on camera source and select “Configure video.” Computers with external software cameras will have a pop-up window that displays various customizable settings. Here, you can adjust the different settings based on your preference.
Step 2. Download your LUTs
Download online the LUTs you want to use. Download them as folders and extract the files you downloaded as zip files. Save them in the OBS folder.
Step 3. Apply your LUTs
Still, in your OBS software, open your camera and then right-click on it. From the displayed menu, click on “Filters.”
On the bottom left corner of your interface, hit the “+” sign, then select “Apply LUTs” > “Browse.”
Open your already downloaded OBS files. Usually, there is an “Adjust” that allows you to regulate the intensity of the LUT by sliding it.
Step 4. Start recording with LUTs on
After turning on your LUT, you can start recording videos and taking photos. There is an eye icon on the left-hand side of your screen. You can use it to turn on or off LUT.
Conclusion
● And that is how to do color correction in OBS. Besides, you do not have to go to the extremes of getting a new camera because of your webcam faultiness. With OBS, you can correct your camera and webcam and get outstanding results.
● Download LUTs from the internet and use them as a template in OBS. Besides, you don’t have to pay for the LUTs, but you can use the free ones.
Ideas That Will Help You Out in Making Transparent Image
Ideas That Will Help You Out in Making Transparent Image
An easy yet powerful editor
Numerous effects to choose from
Detailed tutorials provided by the official channel
Want to explore your graphic creativity with transparent images? Stay tuned for the most trending ideas to fill in your social media handles with unlimited likes!
In this article
01 [What Is a Transparent PNG Background?](#Part 1)
02 [Differences Among PNG vs JPG vs GIF](#Part 2)
03 [How to Make an Image Background Transparent](#Part 3)
04 [How to Convert JPG to Transparent PNG](#Part 4)
Part 1 What Is a Transparent PNG Background?
Transparent backgrounds are essentially faded overlays to any graphic content, like, an image or a video, that are useful in emphasizing the main element in the substance. Compatible to a variety of image and video formats, these are the talk of the trend, owing to their excellent content promotion utility. These are the latest and creative examples of information presentation, along with being among the best branding tools that can potentially make your content fresh and unique.
Using a transparent background as a brand promotion tool helps to project forward the major highlights of your product with a supportive background image, like the brand logo. This helps the audience to have a general idea of your brand. Apart from this, you can also assure the authenticity and quality of your brand by using a watermark in the background image.
Images with transparent backgrounds are the current promotion trends, owing to their convenient compatibility with any web design and the flexibility to mix with the most diverse color palettes and different elements on the product webpage. These can further be easily rendered in 3D to present realistic product images.
Part 2 Differences Among PNG vs JPG vs GIF
Diversity in requirement and usage has led to the advent of a variety of image formats, each suited to a specific purpose. On account of this variation, it becomes a confusing task to select the best image format that can fetch the most affordable images results in cohesion with exact user needs.
It is recommenced to use the JPG image format for natural stills that have a smooth variations in intensity and color. If your content requires image transparency, or contains texts and elements that have a sharp contrast image, like a brand logo, you should ideally prefer the PNG image format, while the GIF format is best suited for presenting animated content. As an explanation to the above usage constraints, here’s a comparison of the popular PNG, JPG and GIF image formats in the light of some common credibility parameters.
01Compression
Image compression facilitates a quick data transmission across different web based platforms, owing to the reduced file size. While compression can be either lossy or lossless, choose an image format that maintains the size credibility in resonance with your data needs. A lossless compression guarantees the retrieval of original image, but a lossy compression fails to do so.
JPG
The JPG format is a lossy compressor that plays on your ability to perceive. The format has the credibility of a 1:10 compression ratio, without comprising with the original image quality. However, a further increased compression ratio may generate perceivable differences in image quality.
The JPG compression utilizes the concept of Discrete Cosine Transform, i.e., a color averaging of the image pixels in close proximity. Hence, it is suitable to use this format for natural and scenic stills, having a smooth color and intensity transition. Preferring this image format for a transmission of high contrast and sharpened images is however, not advisable.
PNG
This format supports the Deflate Compression technique and neither introduces artefacts, nor cuts down on the image quality. Choose the PNG image format for a lossless and high quality compression in comparison to JPG. This one is a more effective format with higher image quality, sharper image presentation and occupies a larger memory space on your device.
You can rely on PNG images for presenting data with text, shapes and logos with high contrast pixelation. It is however, not a good choice for transferring digital images that have a high resolution.
GIF
Working on the LZW Compression Algorithm, this image format was originally used to showcase simple website graphics, when the PNG format was still at a developing stage. However, with the advancement of PNG as a more effective compression format, the use of GIF is now restricted to animated content sharing.
02Transparency
Transparency is tern used to describe some invisible content. This is suitable to use in image backgrounds when you need to lay extra stress on the main content, like the logo of your product with a cohesive brand text, etc. the transparent background used here facilitates the use of a particular image with a series of background and color variations.
JPG
The JPG format has a limitation of not being compatible with image transparency, and hence is not suitable for related applications.
PNG
The PNG format gives you the liberty to use image transparency in two selective ways. You can either choose to make your image partially transparent by an alpha channel insertion for a smooth edge-background blend, or use index transparency to make the pixels of any particular color as transparent. PNG8 AND PNG24 versions of the format are supportive of index and alpha channel transparencies respectively.
GIF
This format inherently supports index transparency and declares a chosen color on the palette as transparent. Owing to the absence of alpha channel transparency, there is an unsatisfactory blend of edges with the image background. The unevenness becomes more prominent in case of highly detailed and rounded images.
While it is possible to mitigate this loss to some extent with the use of image dithering, the GIF format is still not a preferred choice for creating images with transparent backgrounds. The PNG format is instead, more credible on that aspect.
03Color
Color is a visibly strong parameter of difference among the JPG, PNG and GIF image formats, with each one supporting as specific number of colors on the palette.
JPG
The color palette of JPG images is a huge inventory of 16 million colors, rendering them suitable for storing natural stills having a smooth color transition.
PNG
The two versions of PNG format differ on color variance. While PNG8 permits 256 colors, the PNG24 format supports 16 million colors, similar to the JPG format. Consider using the PNG8 format for an image with simple shapes and lesser variations in color. It is, on the other hand better to use the PNG24 format for images with transparent backgrounds, high image quality and complex shapes with detailed edges.
GIF
The GIF format is a host to 256 colors, one of which becomes transparent on using index transparency and the other 255 support different color variations.
04Animation
Animation here, is not necessarily restricted to having frame rates, but refers to a certain periodic movement of specific image sections with time. Out of JPG, PNG and GIF, only the last one is compatible with GIFs. You can use this utility to crate and share eye catching banners and advertisements. The advent of GIF specific content platforms, such as, GIPHY, Tumblr, etc., has further uplifted GIF reach and usage.
A variety of image formats are available to choose from for catering to specific content requirements. However, you can always optimize the format selection in cohesion with the current need.
Part 3 How to Make an Image Background Transparent
Having known enough about the credibility of transparent background images, it sounds quite interesting to try your hands at creating these of your own. The software market offers some over the top tools for creating stunning examples of images with transparent backgrounds. When looking for alternatives on how to make an image with a transparent background, some of your best choices are discussed below:
01Canva
This one is a top class image creator and editor tool, which you can use to add that extra tint to your website design material, watermark images or even display your image creativity for fun and entertainment purposes. The tool comes with a simple and quick process to make transparent background images.
This tool grants you the liberty to choose from various s transparency levels, image layers and effects to give the perfect professional look to your creation. The tool further promises you of a clean and subtle transparent background image that is bound to attract viewer attention.
This graphic design tool is available for a free usage, if you limit yourself within image design and effect play. However, if you want to experience the fun of creating transparent background images with this tool, you need to take its paid subscription.
How to Make Canva Transparent Background
Here’s the know how to add transparent background in still images with this tool:
Step 1: Account Creation
In order to use this graphic tool for image design, you need to have its official account. Visit the tool’s official site, launch the same on your system, create a Canva account and log in.

Step 2: Image Selection
Consider browsing through your device to choose an image for creating a transparent background artwork.

Step 3: Background Removal
You now need to remove the background color of the selected image. In the tool’s welcome interface, navigate to ‘Effects’ in the top toolbar and select ‘Background Remover’ from the available options to remove the background layer and make a transparent design.

Step 4: Save Your Image
After removing the image background, download it into your system. To do this, navigate to the ‘Download’ icon at the top right and click on it.

Step 5: File Format Selection
Here, you need to select the PNG file format to get a transparent background image.

Step 6: Transparency
It is now time to make your image background transparent. You can do this by clicking the ‘Transparency’ checkbox below the ‘File Format‘selection dialog box.

Step 7: Download Your Creation
When you are happy with setting the above parameters, hit the ‘Download’ tab to import your artwork to your device gallery.

02Photoshop
This one is excellent image editor and graphic designer tool that allows you to add diversification and class to your brand images. You can play with a variety of display features to enhance and objectify your image to your heart’s content.
Using Photoshop allows a presentation of your content against a dynamic color background, thus favoring a background interaction selective to the viewer’s serene size. Photoshop can create transparent logos for the products on your site, that are suitable to be placed anywhere on the webpage, regardless of the latter’s background color.
How to Make Photoshop Transparent Background
See through the following section of this article for a guided tutorial to create a transparent background image in Photoshop:

Step 1: Download Adobe Photoshop
Navigate to Adobe’s official website and download the Photoshop application in your device. Install and launch the same to reach the app’s welcome interface.

Step 2: Make a Layered Image File
In the main interface, open a selected image and navigate to the ‘Layers Panel’ in the right of the image window. However, if the ‘Layers Panel’ does not show up by default, reach to the top toolbar and hit the ‘Window’ tab. From the drop sown menu that follows, select ‘Layers’.

In this panel, double tap the ‘Background‘layer. This causes the ‘Rename Layer’ dialog box to appear. You can either enter a suitable name or continue with the default ‘Layer 0’ name. When you are done, click on ‘OK’.

Step 3: Let’s Get Creating!
In the application interface, navigate to the toolbar at the left and choose the ‘Magic Wand’ tool. Again, reach to the ‘Options’ bar at the top and choose ‘Select Subject’. This will facilitate the selection of the min object of the image, irrespective of its background and the selection will be visible as ‘marching ants’ around the object.

If you find the selection to be improper, use the ‘Magic Wand’ to ward off excessive background portions by choosing the ’Subtract From Selection’ option, or even add some extra product portions, suited to your requirement. While making your selection, take care to include any holes in the product image.

Step 4: Background Deletion
When you are left with only the selected product, navigate to the top toolbar and hit the ’Select’ tab and choose ‘Inverse’ from the drop down menu that follows. You can alternatively use the ‘Shift+Ctrl+I’ command for a Windows device, or enter ‘Shift+Command+I’ command, in case you are using a Mac supported device.

Make a selection of the inverse background and tap ‘Backspace’ or ‘Delete’ in your Windows and Mac devices respectively. This will cause your background to get transparent. In the Photoshop application, a gray-white checkerboard represents a transparent background.
In case you require deselecting any selection, enter ‘Ctrl+D’ in Windows or ‘Command+D’ in a Mac device.

Step 5: Save Your Creation in a Web Compatible Format
When you are done creating the transparent background artwork, it becomes equally important to save your creation in a web compatible format to export them on different media platforms and product websites.
Talking of the preferable image format, it is highly recommended to use the PNG24 one, owing to its flexibility of alpha channel transparency, which permits partially transparent image backgrounds along with layered transparency. This in turn makes it possible to integrate the image with varying color backgrounds on different sites and platforms without hollow pixelation.
To save your artwork in the PNG24 file format, navigate to the application toolbar bat the top and hit the ‘File’ tab and choose the ‘Export’ option from the drop sown menu that appears. Select the ‘Export As’ option from the ‘Export’ popup menu.
For an older Photoshop version, hit the ‘Export’ tab and choose ‘Save for Web’ from the dropdown menu, followed by selecting the PNG24 option. A format dialog box appears where you can set the transparency settings. To do this, navigate to ‘File Settings’ at the right, choose the PNG file format and check the ‘Transparency’ box. Avoid checking the ‘Smaller Size’ box, else the image will get saved in the PNG8 format.

In the left of the screen, the image file size is displayed. Maintain an affordable file size, preferably within 200 KB, to avoid slower image loading on the sharing platform. You can adjust this in the ‘Image Size’ option at the right.

Set a conveniently reduced dimension, while taking care not to set an extremely small size, else it will produce a pixelated output on the site. It is preferable to set a 50-100% larger image size for a convenient display across different devices.
Step 6: Final Save
Once you are satisfied with all the image settings, tap ‘Export All’ to save your artwork locally in your device. In the ‘File Save’ dialog box, choose a preferred device location, enter a suitable file name and choose the .png extension. At last, click on ‘Save’.
03Filmora
Launched by Wondershare, this is excellent image editor and creator software that you can rely on to make stunning artworks in a variety of file formats. Talking of background transparency in particular, the software comes with a unique ‘Green Screen’ feature to create high quality, transparent background images in a matter of a few clicks. You can further, give a professional touch to your creation with a storehouse of classic video and image editing effects that are just perfect to stand out in the crowd.
How to Make Filmora Transparent Background
A stepwise tutorial on how to create image with transparent background images using Filmora is discussed below:
Step 1: Download the Software
Visit the official website of Wondershare Filmora Video Editor to download and install the software in any of your Windows or Mac devices.
For Win 7 or later (64-bit)
For macOS 10.12 or later
Step 2: Import Media File
Launch the app to reach the main interface, where you will find the ‘Import’ tab. Hit it and choose ‘Import Media File’ from the drop down menu that follows. This will upload your selected image to the software’s media library.

Step 2: Timeline Dragging
You now need to insert the selected image from Filmora’s media library to the software’s editing timeline. You can do this either by right clicking the selected image, followed by choosing the ‘Insert’ option, or a simple ’Drag and Drop’ method.

Step 3: Transparency Adjustments
In the editor timeline, double click your selected image to open the ‘Settings’ tab. Scroll down the tab options to locate ‘Chroma Key Settings’. Make a right toggle to enable the ‘Chroma Key’ and you will see the image get transparent with the default ’Green’ background color.
You can alternatively, navigate to the ‘Select Color’ option and choose ‘Color Picker’ at its right, reach the image section you wish to make transparent and make a single click.

In case you get a partially transparent background, you can make further adjustments in the ‘Chroma Key’ settings, such as, tolerance, edge thickness, offset, edge feather, etc., to ascertain complete background transparency. When you are satisfied with your work, click on ‘OK’.

Step 4: Media Export
You can now try adding the transparent image to any video or export the same to any media platform. To do this, hit the ‘Export’ tab at the top right corner in the editor timeline.

Part 4 How to Convert JPG to Transparent PNG
Taking into account the diverse information sharing and content specification requirements, an obvious need to switch between different file formats may arise at a number of instants. One such example is the conversion of images in JPG format into that of a transparent PNG image. When looking through convenient alternatives to set the issue straight, the software market has a pouring flood of choices.
Discussed below are some of the best JPG to transparent PNG converter solutions you can pick to convert color background JPG stills into transparent PNG background images, while sorting the concern of how to save PNG with transparent background:
Filmora JPG to Transparent PNG Converter
Filmora is top rated and highly preferred graphic design software that caters to all of your video and image design and conversion needs in the most convenient manner. Developed by Wondershare, this is the worthiest pick for all graphic editing. While the software is packed with extensive and over the top features to provide a professional elegance to almost and design artwork, the transparent image backgrounds created by Filmora are simply remarkable.
If you are done with those usual and commonplace captures, try hands at creating transparent background images with this software, which promises you of a stand out result on account of the following features:
● Filmora comes with a distinguished ‘Green Screen’ feature that is known to create transparent background images in time instants shorter than an eye blink. You just need to upload an image in the software timeline and adjust a few chroma settings, and that’s really the end!
● Apart from this, you can play with a diverse inventory of results and image filters, like, graphic and text overlays, subtitles and tons of audio-visual upshots to create an absolute graphic masterpiece.
● The software further, is free to use and welcomes you with a clean, cohesive and responsive user interface, guiding you at each step of the design task.
● Ending Thoughts →
● Transparent image backgrounds are the current in house trends of content branding and product promotion alternatives. While there are varieties of requirement specific image file formats, the PNG format is best suited for creating a transparent background image.
● The software market is an in depth pool of choices for graphic and image editing tools, Wondershare Filmora happens to be a distinguished name among all to create and convert images with transparent backgrounds.
Want to explore your graphic creativity with transparent images? Stay tuned for the most trending ideas to fill in your social media handles with unlimited likes!
In this article
01 [What Is a Transparent PNG Background?](#Part 1)
02 [Differences Among PNG vs JPG vs GIF](#Part 2)
03 [How to Make an Image Background Transparent](#Part 3)
04 [How to Convert JPG to Transparent PNG](#Part 4)
Part 1 What Is a Transparent PNG Background?
Transparent backgrounds are essentially faded overlays to any graphic content, like, an image or a video, that are useful in emphasizing the main element in the substance. Compatible to a variety of image and video formats, these are the talk of the trend, owing to their excellent content promotion utility. These are the latest and creative examples of information presentation, along with being among the best branding tools that can potentially make your content fresh and unique.
Using a transparent background as a brand promotion tool helps to project forward the major highlights of your product with a supportive background image, like the brand logo. This helps the audience to have a general idea of your brand. Apart from this, you can also assure the authenticity and quality of your brand by using a watermark in the background image.
Images with transparent backgrounds are the current promotion trends, owing to their convenient compatibility with any web design and the flexibility to mix with the most diverse color palettes and different elements on the product webpage. These can further be easily rendered in 3D to present realistic product images.
Part 2 Differences Among PNG vs JPG vs GIF
Diversity in requirement and usage has led to the advent of a variety of image formats, each suited to a specific purpose. On account of this variation, it becomes a confusing task to select the best image format that can fetch the most affordable images results in cohesion with exact user needs.
It is recommenced to use the JPG image format for natural stills that have a smooth variations in intensity and color. If your content requires image transparency, or contains texts and elements that have a sharp contrast image, like a brand logo, you should ideally prefer the PNG image format, while the GIF format is best suited for presenting animated content. As an explanation to the above usage constraints, here’s a comparison of the popular PNG, JPG and GIF image formats in the light of some common credibility parameters.
01Compression
Image compression facilitates a quick data transmission across different web based platforms, owing to the reduced file size. While compression can be either lossy or lossless, choose an image format that maintains the size credibility in resonance with your data needs. A lossless compression guarantees the retrieval of original image, but a lossy compression fails to do so.
JPG
The JPG format is a lossy compressor that plays on your ability to perceive. The format has the credibility of a 1:10 compression ratio, without comprising with the original image quality. However, a further increased compression ratio may generate perceivable differences in image quality.
The JPG compression utilizes the concept of Discrete Cosine Transform, i.e., a color averaging of the image pixels in close proximity. Hence, it is suitable to use this format for natural and scenic stills, having a smooth color and intensity transition. Preferring this image format for a transmission of high contrast and sharpened images is however, not advisable.
PNG
This format supports the Deflate Compression technique and neither introduces artefacts, nor cuts down on the image quality. Choose the PNG image format for a lossless and high quality compression in comparison to JPG. This one is a more effective format with higher image quality, sharper image presentation and occupies a larger memory space on your device.
You can rely on PNG images for presenting data with text, shapes and logos with high contrast pixelation. It is however, not a good choice for transferring digital images that have a high resolution.
GIF
Working on the LZW Compression Algorithm, this image format was originally used to showcase simple website graphics, when the PNG format was still at a developing stage. However, with the advancement of PNG as a more effective compression format, the use of GIF is now restricted to animated content sharing.
02Transparency
Transparency is tern used to describe some invisible content. This is suitable to use in image backgrounds when you need to lay extra stress on the main content, like the logo of your product with a cohesive brand text, etc. the transparent background used here facilitates the use of a particular image with a series of background and color variations.
JPG
The JPG format has a limitation of not being compatible with image transparency, and hence is not suitable for related applications.
PNG
The PNG format gives you the liberty to use image transparency in two selective ways. You can either choose to make your image partially transparent by an alpha channel insertion for a smooth edge-background blend, or use index transparency to make the pixels of any particular color as transparent. PNG8 AND PNG24 versions of the format are supportive of index and alpha channel transparencies respectively.
GIF
This format inherently supports index transparency and declares a chosen color on the palette as transparent. Owing to the absence of alpha channel transparency, there is an unsatisfactory blend of edges with the image background. The unevenness becomes more prominent in case of highly detailed and rounded images.
While it is possible to mitigate this loss to some extent with the use of image dithering, the GIF format is still not a preferred choice for creating images with transparent backgrounds. The PNG format is instead, more credible on that aspect.
03Color
Color is a visibly strong parameter of difference among the JPG, PNG and GIF image formats, with each one supporting as specific number of colors on the palette.
JPG
The color palette of JPG images is a huge inventory of 16 million colors, rendering them suitable for storing natural stills having a smooth color transition.
PNG
The two versions of PNG format differ on color variance. While PNG8 permits 256 colors, the PNG24 format supports 16 million colors, similar to the JPG format. Consider using the PNG8 format for an image with simple shapes and lesser variations in color. It is, on the other hand better to use the PNG24 format for images with transparent backgrounds, high image quality and complex shapes with detailed edges.
GIF
The GIF format is a host to 256 colors, one of which becomes transparent on using index transparency and the other 255 support different color variations.
04Animation
Animation here, is not necessarily restricted to having frame rates, but refers to a certain periodic movement of specific image sections with time. Out of JPG, PNG and GIF, only the last one is compatible with GIFs. You can use this utility to crate and share eye catching banners and advertisements. The advent of GIF specific content platforms, such as, GIPHY, Tumblr, etc., has further uplifted GIF reach and usage.
A variety of image formats are available to choose from for catering to specific content requirements. However, you can always optimize the format selection in cohesion with the current need.
Part 3 How to Make an Image Background Transparent
Having known enough about the credibility of transparent background images, it sounds quite interesting to try your hands at creating these of your own. The software market offers some over the top tools for creating stunning examples of images with transparent backgrounds. When looking for alternatives on how to make an image with a transparent background, some of your best choices are discussed below:
01Canva
This one is a top class image creator and editor tool, which you can use to add that extra tint to your website design material, watermark images or even display your image creativity for fun and entertainment purposes. The tool comes with a simple and quick process to make transparent background images.
This tool grants you the liberty to choose from various s transparency levels, image layers and effects to give the perfect professional look to your creation. The tool further promises you of a clean and subtle transparent background image that is bound to attract viewer attention.
This graphic design tool is available for a free usage, if you limit yourself within image design and effect play. However, if you want to experience the fun of creating transparent background images with this tool, you need to take its paid subscription.
How to Make Canva Transparent Background
Here’s the know how to add transparent background in still images with this tool:
Step 1: Account Creation
In order to use this graphic tool for image design, you need to have its official account. Visit the tool’s official site, launch the same on your system, create a Canva account and log in.
Step 2: Image Selection
Consider browsing through your device to choose an image for creating a transparent background artwork.
Step 3: Background Removal
You now need to remove the background color of the selected image. In the tool’s welcome interface, navigate to ‘Effects’ in the top toolbar and select ‘Background Remover’ from the available options to remove the background layer and make a transparent design.
Step 4: Save Your Image
After removing the image background, download it into your system. To do this, navigate to the ‘Download’ icon at the top right and click on it.
Step 5: File Format Selection
Here, you need to select the PNG file format to get a transparent background image.
Step 6: Transparency
It is now time to make your image background transparent. You can do this by clicking the ‘Transparency’ checkbox below the ‘File Format‘selection dialog box.
Step 7: Download Your Creation
When you are happy with setting the above parameters, hit the ‘Download’ tab to import your artwork to your device gallery.
02Photoshop
This one is excellent image editor and graphic designer tool that allows you to add diversification and class to your brand images. You can play with a variety of display features to enhance and objectify your image to your heart’s content.
Using Photoshop allows a presentation of your content against a dynamic color background, thus favoring a background interaction selective to the viewer’s serene size. Photoshop can create transparent logos for the products on your site, that are suitable to be placed anywhere on the webpage, regardless of the latter’s background color.
How to Make Photoshop Transparent Background
See through the following section of this article for a guided tutorial to create a transparent background image in Photoshop:
Step 1: Download Adobe Photoshop
Navigate to Adobe’s official website and download the Photoshop application in your device. Install and launch the same to reach the app’s welcome interface.
Step 2: Make a Layered Image File
In the main interface, open a selected image and navigate to the ‘Layers Panel’ in the right of the image window. However, if the ‘Layers Panel’ does not show up by default, reach to the top toolbar and hit the ‘Window’ tab. From the drop sown menu that follows, select ‘Layers’.
In this panel, double tap the ‘Background‘layer. This causes the ‘Rename Layer’ dialog box to appear. You can either enter a suitable name or continue with the default ‘Layer 0’ name. When you are done, click on ‘OK’.
Step 3: Let’s Get Creating!
In the application interface, navigate to the toolbar at the left and choose the ‘Magic Wand’ tool. Again, reach to the ‘Options’ bar at the top and choose ‘Select Subject’. This will facilitate the selection of the min object of the image, irrespective of its background and the selection will be visible as ‘marching ants’ around the object.
If you find the selection to be improper, use the ‘Magic Wand’ to ward off excessive background portions by choosing the ’Subtract From Selection’ option, or even add some extra product portions, suited to your requirement. While making your selection, take care to include any holes in the product image.
Step 4: Background Deletion
When you are left with only the selected product, navigate to the top toolbar and hit the ’Select’ tab and choose ‘Inverse’ from the drop down menu that follows. You can alternatively use the ‘Shift+Ctrl+I’ command for a Windows device, or enter ‘Shift+Command+I’ command, in case you are using a Mac supported device.
Make a selection of the inverse background and tap ‘Backspace’ or ‘Delete’ in your Windows and Mac devices respectively. This will cause your background to get transparent. In the Photoshop application, a gray-white checkerboard represents a transparent background.
In case you require deselecting any selection, enter ‘Ctrl+D’ in Windows or ‘Command+D’ in a Mac device.
Step 5: Save Your Creation in a Web Compatible Format
When you are done creating the transparent background artwork, it becomes equally important to save your creation in a web compatible format to export them on different media platforms and product websites.
Talking of the preferable image format, it is highly recommended to use the PNG24 one, owing to its flexibility of alpha channel transparency, which permits partially transparent image backgrounds along with layered transparency. This in turn makes it possible to integrate the image with varying color backgrounds on different sites and platforms without hollow pixelation.
To save your artwork in the PNG24 file format, navigate to the application toolbar bat the top and hit the ‘File’ tab and choose the ‘Export’ option from the drop sown menu that appears. Select the ‘Export As’ option from the ‘Export’ popup menu.
For an older Photoshop version, hit the ‘Export’ tab and choose ‘Save for Web’ from the dropdown menu, followed by selecting the PNG24 option. A format dialog box appears where you can set the transparency settings. To do this, navigate to ‘File Settings’ at the right, choose the PNG file format and check the ‘Transparency’ box. Avoid checking the ‘Smaller Size’ box, else the image will get saved in the PNG8 format.
In the left of the screen, the image file size is displayed. Maintain an affordable file size, preferably within 200 KB, to avoid slower image loading on the sharing platform. You can adjust this in the ‘Image Size’ option at the right.
Set a conveniently reduced dimension, while taking care not to set an extremely small size, else it will produce a pixelated output on the site. It is preferable to set a 50-100% larger image size for a convenient display across different devices.
Step 6: Final Save
Once you are satisfied with all the image settings, tap ‘Export All’ to save your artwork locally in your device. In the ‘File Save’ dialog box, choose a preferred device location, enter a suitable file name and choose the .png extension. At last, click on ‘Save’.
03Filmora
Launched by Wondershare, this is excellent image editor and creator software that you can rely on to make stunning artworks in a variety of file formats. Talking of background transparency in particular, the software comes with a unique ‘Green Screen’ feature to create high quality, transparent background images in a matter of a few clicks. You can further, give a professional touch to your creation with a storehouse of classic video and image editing effects that are just perfect to stand out in the crowd.
How to Make Filmora Transparent Background
A stepwise tutorial on how to create image with transparent background images using Filmora is discussed below:
Step 1: Download the Software
Visit the official website of Wondershare Filmora Video Editor to download and install the software in any of your Windows or Mac devices.
For Win 7 or later (64-bit)
For macOS 10.12 or later
Step 2: Import Media File
Launch the app to reach the main interface, where you will find the ‘Import’ tab. Hit it and choose ‘Import Media File’ from the drop down menu that follows. This will upload your selected image to the software’s media library.
Step 2: Timeline Dragging
You now need to insert the selected image from Filmora’s media library to the software’s editing timeline. You can do this either by right clicking the selected image, followed by choosing the ‘Insert’ option, or a simple ’Drag and Drop’ method.
Step 3: Transparency Adjustments
In the editor timeline, double click your selected image to open the ‘Settings’ tab. Scroll down the tab options to locate ‘Chroma Key Settings’. Make a right toggle to enable the ‘Chroma Key’ and you will see the image get transparent with the default ’Green’ background color.
You can alternatively, navigate to the ‘Select Color’ option and choose ‘Color Picker’ at its right, reach the image section you wish to make transparent and make a single click.
In case you get a partially transparent background, you can make further adjustments in the ‘Chroma Key’ settings, such as, tolerance, edge thickness, offset, edge feather, etc., to ascertain complete background transparency. When you are satisfied with your work, click on ‘OK’.
Step 4: Media Export
You can now try adding the transparent image to any video or export the same to any media platform. To do this, hit the ‘Export’ tab at the top right corner in the editor timeline.
Part 4 How to Convert JPG to Transparent PNG
Taking into account the diverse information sharing and content specification requirements, an obvious need to switch between different file formats may arise at a number of instants. One such example is the conversion of images in JPG format into that of a transparent PNG image. When looking through convenient alternatives to set the issue straight, the software market has a pouring flood of choices.
Discussed below are some of the best JPG to transparent PNG converter solutions you can pick to convert color background JPG stills into transparent PNG background images, while sorting the concern of how to save PNG with transparent background:
Filmora JPG to Transparent PNG Converter
Filmora is top rated and highly preferred graphic design software that caters to all of your video and image design and conversion needs in the most convenient manner. Developed by Wondershare, this is the worthiest pick for all graphic editing. While the software is packed with extensive and over the top features to provide a professional elegance to almost and design artwork, the transparent image backgrounds created by Filmora are simply remarkable.
If you are done with those usual and commonplace captures, try hands at creating transparent background images with this software, which promises you of a stand out result on account of the following features:
● Filmora comes with a distinguished ‘Green Screen’ feature that is known to create transparent background images in time instants shorter than an eye blink. You just need to upload an image in the software timeline and adjust a few chroma settings, and that’s really the end!
● Apart from this, you can play with a diverse inventory of results and image filters, like, graphic and text overlays, subtitles and tons of audio-visual upshots to create an absolute graphic masterpiece.
● The software further, is free to use and welcomes you with a clean, cohesive and responsive user interface, guiding you at each step of the design task.
● Ending Thoughts →
● Transparent image backgrounds are the current in house trends of content branding and product promotion alternatives. While there are varieties of requirement specific image file formats, the PNG format is best suited for creating a transparent background image.
● The software market is an in depth pool of choices for graphic and image editing tools, Wondershare Filmora happens to be a distinguished name among all to create and convert images with transparent backgrounds.
Top 10 Best Free Video Compressors
Powerful Video Editor - Wondershare Filmora
Provide abundant video effects - A creative video editor
Powerful color correction and grading
Detailed tutorials are provided by the official channel
Introduction
Are you aware that the videos you record with your iPad, iPhone, or other camera are often larger than 1GB when captured in high resolution? However, some social-media networks often have video size limitations. Therefore, if your video exceeds the video size limitation of the platform, you will be required to shorten that video’s size to meet the specifications of a particular social network using the best video compressor.
Additionally, there are various video compressors online and some video compression software for Windows 10 and Mac that you can use. So, there is no need to spend a lot of money on professional video editing software if you need a quick way to downsize your videos. Besides, tasks can be performed online for free regardless of the operating system used.
In this article, we will assist you through the best free video compressor that you can choose from and learn:
In this article
01 Best Online Video Compressors
02 How to Compress a Large Video File Online and Free Using Wondershare Media.io?

Part 1: Best Online Video Compressors
1. Wondershare Media.io
This video compressor for free allows you to shrink audio and video files effortlessly. Additionally, it supports more than a thousand audio and video file formats, meaning that you can compress videos with Online Uniconverter recorded on different devices. However, compressing videos more extensive than 100MB is not an option.
Price: 2 Free and 3 pricing plans if you intend to subscribe to the pro version starting at $9.99 / Month
Supported Formats: MP4, MOV, WEBM, AVI, WMV, MP3, etc.
Features:
- Uses HTTPS secure socket layer
- It supports multiple devices
- The free version helps quickly compress up to 100MB file
- Without signing up, upload, and edit unlimited image file size
- No watermark even in the free version
- Conversion speed up to 30 times faster in the premium version.
Pros
- It has a quick download and upload speed
- Over a thousand video and audio files supported
- Supports 5 and 10 file editing per day for non-registered and no sign-up users.
- 100% secure
- Voted 4.7 of 5 in quality.
Cons
- Importing clips from Google Drive or Dropbox is not an option
- The file size limit is 100MB
- The free version of io online video compressorhas limited options

2. FreeConvert
This is a straightforward and primary online compression tool for your content, including audio, images, documents, or videos. Although its outlook is quite intimidating, it is pretty simple and easy to use. It also allows you to convert your audio or video file into any format and size. If you are looking for the top MP4 compressor, go for this.
It also ensures that your privacy remains intact by deleting your uploaded files from their server after the processing.
Price: Free and three pricing plans if you intend to subscribe to the pro version starting at $9.99 / Month
Supported Formats: MP4, MOV, WEBM, AVI, WMV, MP3, etc.
Features
- It is available online only
- Supports many output formats.
- Video, audio, image converter
- Files are uploaded securely via HTTPS protocol.
Pros
- It is effortless, fast, and easy to use
- According to user reviews, this tool is excellent for those looking for free MP4 video compressors.
- No pop-up ads when converting
- It delivers excellent quality compressed videos.
Cons
- You get limited to 25 minutes of converted files in the free version

3. VEED.IO Free Online Video Compressor
This online video editing tool offers a free, fast, and easy online video compressor. Since it is online software, you do not need to have a specific type of laptop or desktop to use it. In addition, it does not use up precious storage space since it’s cloud-based.
Price: Free, and a free trial version is available, and three pricing plans if you intend to subscribe to the pro version starting at $12 / Month
Supported Formats: MP4, MKV, MOV, FLV, AVI
Features
- Captions are autogenerated
- Customer service support is excellent
- Add music, text, and photos to videos.
- Offers music visualizer, effects and removes background voices.
- Record via screen, webcam, voice, or even teleprompter.
- Crop, trim, copy, compress, join, loop, or rotate your videos.
- Innumerable features for adding subtitles and transcribing.
Pros
- The best spec is their subtitle tools that automatically generate captions for videos.
- It is swift to use
- It has an excellent support service.
- It’s a straightforward but powerful video editor.
Cons
- The pro version is quite expensive

4. Clideo Video Compressor Online
This web-based video editing application allows users to efficiently perform basic video editing tasks. Aside from rotating, trimming, or merging videos, users can also use Clideo to compress video files.
Price: Pricing plans start at $9,00 per month
Supported Formats: WAV, OGG, MP3, FLAC, AIFF, OOFF, etc.
Features
- There are umpteen features in this tool, like fast compression, previewing the work before saving, etc.
- Easy sign-in process
- Secure as you will only have access to the files.
- Fast and simple online video compressor, so no downloading or installing.
Pros
- The video compression process is quick
- Provides video editing tools
- The easy sign-in process via Facebook or Google
- Offers tons of methods of reducing the size of video files
Cons
- Not possible to choose the video file format
- There is a watermark in the accessible version

5. Compress Video
This free online video compression tool lets users process video files online and delete unnecessary video parts to compress them into the file size you want. It offers various video file formats where users can set the size of the output video file. In addition, this tool will compress the video to the specified size and try to ensure quality. Compress video is also very safe as you do not need to upload your files.
Price: Free
Supported Formats: MP4, MOV, WMV, FLV, AVI, AVCHD, WebM, MKV, etc.
Features
- Safe and easy to use
- It uses HTML5 Technology and FFMPEG JS Technology for extra safety
- Available in different formats.
- Works with Windows, Linux, Mac, and other systems.
Pros
- The video files do not need to get uploaded to the server but are processed directly in the browser
- Only four steps to compress your file.
- Save the video to your local device post-processing.
- 100% free tool.
Cons
- Has limited features

6. Online Converter
If you need a video compressor that is easy to use and reliable, you should not look much further than the Online Converter. With this tool, users can upload videos saved in MP4, MOV, WMV, and other file formats either from a URL or from your computer.
Price: Free
Supported Formats: MP3 to WAV, M4A to MP3, etc.
Features
- Video size output is set directly
- Support different file format.
- Easy to use, choose a file, select your desired video size and click compress.
- It offers an audio quality of 32kbps to 128kbps.
- No compromise on original audio quality.
Pros
- The uploads are smooth
- Supports a range of video file formats
- Allows users set their desired output video size directly
Cons
- Limit the file size to 200MB
- It slows the video compression process
- It does not allow users to choose the file format of the output video
- There is no support for encrypted video files

7. XConvert
XConvert is a free online file conversion and video compressor tool provider specializing in converting, compressing, and splitting files into various formats.
Price: Free
Supported Formats: WeBM, Mp3, MP4, JPG, PNG
Features:
- Simply add files and start your job.
- A completely free online video compressor.
- Select , , VP8, or VP9 basis convert to file format.
- A rating of 4.7 of 5 by users.
Pros
- Allows the conversion to different files format
- It is a multipurpose editing tool.
- Download files individually or in zip format.
Cons
- The website is compact
- Lots of ads on the interface

8. Flixier Online Video Compressor
This is a cloud-powered video editor that dramatically speeds up your video editing process. In addition, it processes your videos on powerful cloud computers to enable you to run it smoothly on any device ranging from slower PC or Chromebooks to Macbooks or any powerful desktop PCs.
Also, it is perfect for anyone that wants to grow a YouTube channel and create marketing or sales videos. The interface is smooth but still offers advanced features, including color adjustments, picture in picture, green screen, horizontal, vertical, and square videos to take your content to the next level.
Price: Free, Pricing plans start at $9.00 per month
Supported Formats: MP4, MOV, MKV, and WEBM,
Features
- Perfect for content marketing and sales
- Works on any device
- No need to open an account to start.
- No download or installation needed.
- No loss of audio or video quality with this video compressor.
- You can trim, crop, and add music, images, and text to videos.
- Its advanced settings options let you optimize CRF and bitrate that suits you.
Pros
- Allows users to record and edit their voice on a microphone or webcam
- Users can edit any video content from their smartphone or camera
- Publish to YouTube, Vimeo, Google Drive, or Dropbox in seconds.
- Only a three-step and three minutes, lightning-fast best video compressor.
- You can develop Facebook ads and add text to videos.
Cons
- Watermark in the free version
- Limited feature in free version

9. Fastreel Video Compressor
Fastreel Video Compressor, a simple video editor, is available for everyone and is an easy-to-use online video editor. Additionally, it helps create video montages like a pro.
Price: Free
Supported Formats: MP4, MOV, MKV, AVI, and WMV files
Features
- Easy to use
- Perfect for creating a montage
- You get to choose three types of compression quality: high, medium, or low.
- Three steps to video compression, add a video file, choose the level, and export.
- It is free. Just drop or add files to start the process.
Pros
- It is free and straightforward to use
- It has an intuitive interface
- It encourages people to express their creativity and bring business ideas to life
- It helps users promote their brand, get more YouTube subscribers, and increase conversion rates.
- It is fast to use
Cons
- Watermark in the free version
- Limited features in the free version
- The high compression level reduces the quality significantly.

10. VideoSmaller
VideoSmaller is an online free service that allows you to reduce video file size online and compress video file size without losing quality. With this service, users can reduce video file size and make video files smaller. Additionally, users can also reduce the size of MP4 videos captured with an iPhone or Android.
Price: Free
Supported Formats: MP4, AVI, MPEG, MOV formats
Features
- Reduce the video size for free.
- Compress the videos right from the browser
- Safe as uploaded files vanish after a few hours.
Pros
- This free online video compressoris simple to use
- VideoSmaller helps compress files without losing quality
Cons
- File upload is limited to 500MB
- Limited features

Media.io is the top online video compressor from the 10 that was listed as it allows you to compress video files without losing quality. Additionally, it is simple, accessible, and easy to use.
Part 2: How to Compress a Large Video File Online and Free Using Wondershare Media.io?
Now, let us see how you can use this video compressor in just three quick steps and get an excellent output for your video files.
Step 1: Open Media.io to Add Files
Click on Media.io video compressor and add Video Files, then click on Choose Files button to upload video file(s) from your network disk or library.

Step 2: Edit the Video File
Reduce Video Size Online and set the custom video resolution, size, bitrate, and output format required in compressing the video, then click the Compress button.
Step 3: Export and Save the Compressed Clip
Save your compressed video(s) by clicking on the Download button to save the resultant video(s) locally, to Dropbox or Google Drive.
Thus, with Media.io, you can compress your videos without downloading any software. It is a 100% safe and secure tool from one of the top software companies, called Wondershare. This free video compressor tool is a must-try for a new video maker.
Part 3: People Also Want to Know
This section shall go through some FAQs that you may come across about video compressors.
Which free video compressor is the best?
Media.io is the top online video compressor that allows you to compress video files without losing quality. Additionally, it is simple, accessible, and easy to use.
What is a video compressor used for?
It is a tool used to reduce the total number of bits needed to represent a given video or image sequence. Additionally, it helps to reduce file size so that it does not occupy too much space.
Conclusion
Thus, as you saw, in this report, we clubbed and summarized a few essential points regarding video compressors. You learned:
- The video compressor online for freethat you should know of.
- The ten best video compressorsto choose from.
- Why is Media.io an excellent online video compressor, and how does it work?
- Lastly, a few FAQs to make you understand the process and tool better.
So, use these tips and start sharing your in-house video-making talent with your family and the world.
Introduction
Are you aware that the videos you record with your iPad, iPhone, or other camera are often larger than 1GB when captured in high resolution? However, some social-media networks often have video size limitations. Therefore, if your video exceeds the video size limitation of the platform, you will be required to shorten that video’s size to meet the specifications of a particular social network using the best video compressor.
Additionally, there are various video compressors online and some video compression software for Windows 10 and Mac that you can use. So, there is no need to spend a lot of money on professional video editing software if you need a quick way to downsize your videos. Besides, tasks can be performed online for free regardless of the operating system used.
In this article, we will assist you through the best free video compressor that you can choose from and learn:
In this article
01 Best Online Video Compressors
02 How to Compress a Large Video File Online and Free Using Wondershare Media.io?
Part 1: Best Online Video Compressors
1. Wondershare Media.io
This video compressor for free allows you to shrink audio and video files effortlessly. Additionally, it supports more than a thousand audio and video file formats, meaning that you can compress videos with Online Uniconverter recorded on different devices. However, compressing videos more extensive than 100MB is not an option.
Price: 2 Free and 3 pricing plans if you intend to subscribe to the pro version starting at $9.99 / Month
Supported Formats: MP4, MOV, WEBM, AVI, WMV, MP3, etc.
Features:
- Uses HTTPS secure socket layer
- It supports multiple devices
- The free version helps quickly compress up to 100MB file
- Without signing up, upload, and edit unlimited image file size
- No watermark even in the free version
- Conversion speed up to 30 times faster in the premium version.
Pros
- It has a quick download and upload speed
- Over a thousand video and audio files supported
- Supports 5 and 10 file editing per day for non-registered and no sign-up users.
- 100% secure
- Voted 4.7 of 5 in quality.
Cons
- Importing clips from Google Drive or Dropbox is not an option
- The file size limit is 100MB
- The free version of io online video compressorhas limited options
2. FreeConvert
This is a straightforward and primary online compression tool for your content, including audio, images, documents, or videos. Although its outlook is quite intimidating, it is pretty simple and easy to use. It also allows you to convert your audio or video file into any format and size. If you are looking for the top MP4 compressor, go for this.
It also ensures that your privacy remains intact by deleting your uploaded files from their server after the processing.
Price: Free and three pricing plans if you intend to subscribe to the pro version starting at $9.99 / Month
Supported Formats: MP4, MOV, WEBM, AVI, WMV, MP3, etc.
Features
- It is available online only
- Supports many output formats.
- Video, audio, image converter
- Files are uploaded securely via HTTPS protocol.
Pros
- It is effortless, fast, and easy to use
- According to user reviews, this tool is excellent for those looking for free MP4 video compressors.
- No pop-up ads when converting
- It delivers excellent quality compressed videos.
Cons
- You get limited to 25 minutes of converted files in the free version
3. VEED.IO Free Online Video Compressor
This online video editing tool offers a free, fast, and easy online video compressor. Since it is online software, you do not need to have a specific type of laptop or desktop to use it. In addition, it does not use up precious storage space since it’s cloud-based.
Price: Free, and a free trial version is available, and three pricing plans if you intend to subscribe to the pro version starting at $12 / Month
Supported Formats: MP4, MKV, MOV, FLV, AVI
Features
- Captions are autogenerated
- Customer service support is excellent
- Add music, text, and photos to videos.
- Offers music visualizer, effects and removes background voices.
- Record via screen, webcam, voice, or even teleprompter.
- Crop, trim, copy, compress, join, loop, or rotate your videos.
- Innumerable features for adding subtitles and transcribing.
Pros
- The best spec is their subtitle tools that automatically generate captions for videos.
- It is swift to use
- It has an excellent support service.
- It’s a straightforward but powerful video editor.
Cons
- The pro version is quite expensive
4. Clideo Video Compressor Online
This web-based video editing application allows users to efficiently perform basic video editing tasks. Aside from rotating, trimming, or merging videos, users can also use Clideo to compress video files.
Price: Pricing plans start at $9,00 per month
Supported Formats: WAV, OGG, MP3, FLAC, AIFF, OOFF, etc.
Features
- There are umpteen features in this tool, like fast compression, previewing the work before saving, etc.
- Easy sign-in process
- Secure as you will only have access to the files.
- Fast and simple online video compressor, so no downloading or installing.
Pros
- The video compression process is quick
- Provides video editing tools
- The easy sign-in process via Facebook or Google
- Offers tons of methods of reducing the size of video files
Cons
- Not possible to choose the video file format
- There is a watermark in the accessible version
5. Compress Video
This free online video compression tool lets users process video files online and delete unnecessary video parts to compress them into the file size you want. It offers various video file formats where users can set the size of the output video file. In addition, this tool will compress the video to the specified size and try to ensure quality. Compress video is also very safe as you do not need to upload your files.
Price: Free
Supported Formats: MP4, MOV, WMV, FLV, AVI, AVCHD, WebM, MKV, etc.
Features
- Safe and easy to use
- It uses HTML5 Technology and FFMPEG JS Technology for extra safety
- Available in different formats.
- Works with Windows, Linux, Mac, and other systems.
Pros
- The video files do not need to get uploaded to the server but are processed directly in the browser
- Only four steps to compress your file.
- Save the video to your local device post-processing.
- 100% free tool.
Cons
- Has limited features
6. Online Converter
If you need a video compressor that is easy to use and reliable, you should not look much further than the Online Converter. With this tool, users can upload videos saved in MP4, MOV, WMV, and other file formats either from a URL or from your computer.
Price: Free
Supported Formats: MP3 to WAV, M4A to MP3, etc.
Features
- Video size output is set directly
- Support different file format.
- Easy to use, choose a file, select your desired video size and click compress.
- It offers an audio quality of 32kbps to 128kbps.
- No compromise on original audio quality.
Pros
- The uploads are smooth
- Supports a range of video file formats
- Allows users set their desired output video size directly
Cons
- Limit the file size to 200MB
- It slows the video compression process
- It does not allow users to choose the file format of the output video
- There is no support for encrypted video files
7. XConvert
XConvert is a free online file conversion and video compressor tool provider specializing in converting, compressing, and splitting files into various formats.
Price: Free
Supported Formats: WeBM, Mp3, MP4, JPG, PNG
Features:
- Simply add files and start your job.
- A completely free online video compressor.
- Select , , VP8, or VP9 basis convert to file format.
- A rating of 4.7 of 5 by users.
Pros
- Allows the conversion to different files format
- It is a multipurpose editing tool.
- Download files individually or in zip format.
Cons
- The website is compact
- Lots of ads on the interface
8. Flixier Online Video Compressor
This is a cloud-powered video editor that dramatically speeds up your video editing process. In addition, it processes your videos on powerful cloud computers to enable you to run it smoothly on any device ranging from slower PC or Chromebooks to Macbooks or any powerful desktop PCs.
Also, it is perfect for anyone that wants to grow a YouTube channel and create marketing or sales videos. The interface is smooth but still offers advanced features, including color adjustments, picture in picture, green screen, horizontal, vertical, and square videos to take your content to the next level.
Price: Free, Pricing plans start at $9.00 per month
Supported Formats: MP4, MOV, MKV, and WEBM,
Features
- Perfect for content marketing and sales
- Works on any device
- No need to open an account to start.
- No download or installation needed.
- No loss of audio or video quality with this video compressor.
- You can trim, crop, and add music, images, and text to videos.
- Its advanced settings options let you optimize CRF and bitrate that suits you.
Pros
- Allows users to record and edit their voice on a microphone or webcam
- Users can edit any video content from their smartphone or camera
- Publish to YouTube, Vimeo, Google Drive, or Dropbox in seconds.
- Only a three-step and three minutes, lightning-fast best video compressor.
- You can develop Facebook ads and add text to videos.
Cons
- Watermark in the free version
- Limited feature in free version
9. Fastreel Video Compressor
Fastreel Video Compressor, a simple video editor, is available for everyone and is an easy-to-use online video editor. Additionally, it helps create video montages like a pro.
Price: Free
Supported Formats: MP4, MOV, MKV, AVI, and WMV files
Features
- Easy to use
- Perfect for creating a montage
- You get to choose three types of compression quality: high, medium, or low.
- Three steps to video compression, add a video file, choose the level, and export.
- It is free. Just drop or add files to start the process.
Pros
- It is free and straightforward to use
- It has an intuitive interface
- It encourages people to express their creativity and bring business ideas to life
- It helps users promote their brand, get more YouTube subscribers, and increase conversion rates.
- It is fast to use
Cons
- Watermark in the free version
- Limited features in the free version
- The high compression level reduces the quality significantly.
10. VideoSmaller
VideoSmaller is an online free service that allows you to reduce video file size online and compress video file size without losing quality. With this service, users can reduce video file size and make video files smaller. Additionally, users can also reduce the size of MP4 videos captured with an iPhone or Android.
Price: Free
Supported Formats: MP4, AVI, MPEG, MOV formats
Features
- Reduce the video size for free.
- Compress the videos right from the browser
- Safe as uploaded files vanish after a few hours.
Pros
- This free online video compressoris simple to use
- VideoSmaller helps compress files without losing quality
Cons
- File upload is limited to 500MB
- Limited features
Media.io is the top online video compressor from the 10 that was listed as it allows you to compress video files without losing quality. Additionally, it is simple, accessible, and easy to use.
Part 2: How to Compress a Large Video File Online and Free Using Wondershare Media.io?
Now, let us see how you can use this video compressor in just three quick steps and get an excellent output for your video files.
Step 1: Open Media.io to Add Files
Click on Media.io video compressor and add Video Files, then click on Choose Files button to upload video file(s) from your network disk or library.
Step 2: Edit the Video File
Reduce Video Size Online and set the custom video resolution, size, bitrate, and output format required in compressing the video, then click the Compress button.
Step 3: Export and Save the Compressed Clip
Save your compressed video(s) by clicking on the Download button to save the resultant video(s) locally, to Dropbox or Google Drive.
Thus, with Media.io, you can compress your videos without downloading any software. It is a 100% safe and secure tool from one of the top software companies, called Wondershare. This free video compressor tool is a must-try for a new video maker.
Part 3: People Also Want to Know
This section shall go through some FAQs that you may come across about video compressors.
Which free video compressor is the best?
Media.io is the top online video compressor that allows you to compress video files without losing quality. Additionally, it is simple, accessible, and easy to use.
What is a video compressor used for?
It is a tool used to reduce the total number of bits needed to represent a given video or image sequence. Additionally, it helps to reduce file size so that it does not occupy too much space.
Conclusion
Thus, as you saw, in this report, we clubbed and summarized a few essential points regarding video compressors. You learned:
- The video compressor online for freethat you should know of.
- The ten best video compressorsto choose from.
- Why is Media.io an excellent online video compressor, and how does it work?
- Lastly, a few FAQs to make you understand the process and tool better.
So, use these tips and start sharing your in-house video-making talent with your family and the world.
How to Create a Smooth Cut Transition Effect?
Transition effects are necessary for making amazing videos, slideshows, and presentations. These are the dedicated effects appearing when one slide or clip replaces the other. Hence, any video editing software is incomplete without impressive transition effects.
Going by the same, Wondershare Filmora offers different video and audio transitions to help users. Wondershare Filmora users can bring the best transitions at the beginning or end of the video or between two video clips. These can be used while changing the mood of videos, changing the subject, passing the time, showing the change of direction, etc.
The dedicated transitions tab allows Wondershare Filmora users to apply different transitions quickly and easily. Let us go into detail about creating a smooth-cut transition effect in Wondershare Filmora in this step-by-step guide.
Steps to create a smooth cut transition effect in Wondershare Filmora
Wondershare Filmora is a popular video editing tool used by content creators, including social media influencers, marketers, content creators, etc. The following are the quick and detailed steps to create a smooth cut transition effect in Wondershare Filmora:
Free Download For Win 7 or later(64-bit)
Free Download For macOS 10.14 or later
Step1Download and launch Wondershare Filmora
Before even jumping to the smooth-cut transition effect in Wondershare Filmora, the first step is to download and launch it on your system. It is easy to download this software on Windows and Mac devices. The quick steps for downloading and launching Wondershare Filmora are as follows:
- Go to the official website of Wondershare Filmora .
- Go to the Download button located in the top right corner of the official website.

- The Filmora Installer will download quickly for your Windows or Mac system.
- Double-click on the setup and start the installation process. Agree on the terms and conditions menu thus prompted.
- Once Wondershare Filmora is installed, it will start and run automatically on your system.
Step2Import the footage
The first step in creating a smooth cut transition effect is to import the footage. All you need to do is use the drag-and-drop functionality of the Wondershare Filmora. You can import 2 footage to the video editor interface with the quick steps mentioned below.
- Start by dragging the two footage to the timeline using the drag and drop functionality.
- Now, select the footage in the video editor.
- The next step is to copy the layer of the footage and lock the current layer.
- Then, paste the current layer over the other layer of the footage.
- Move towards the end of this step by unlocking the layer. Then you need to hide the below layer.

Step3Go to the effects tab and apply preset settings
After importing the footage and applying different layers. The next step is to go to the Effects tab in the Wondershare Filmora. Then, the preset settings are applied to the footage. The quick steps for the same are:
- Start by applying the crop presets to the above-layer footage.
- Select the first footage in the video editor.
- Right-click on properties and open the effects menu.
- Search the settings and change the top and bottom settings to 30
- You can select to blur the edges of the footage by ticking on the option.
- Repeat the same steps for the second footage.

Step4Go to the Transitions tab
It is time to go to the transitions tab and start putting it in your video clip. The quick steps for the same are:
- Select the speed blur category located on the left side of the interface.
- Go to the search box and type “flip.”
- Start placing the transitions on the footage layers.
- Select the first transition, flip all three, and place it on the second layer of the footage.
- Select the second transition, flip all two, and place it on the first layer of the footage.
- Render this video part by unhiding the first layer and moving to the preview step.

Step5Lorem ipsum dolor sit amet eam quas malorum
It is time to preview the created video. The render preview option in the Wondershare Filmora ensures that there is no lag in the preview file on any system. It generates the rendered versions of the files placed on the timeline for a quick preview. In addition to it, it is easy to add a top to bottom transition in the video editing in this step only. The quick steps for the same are:
- Preview the created video file and check if there is a need to change the transition.
- If required to add the top to bottom transition, remove the existing transitions.
- Select the first footage and go to its properties menu.
- Go to the crop settings and reset these settings.
- Change the right and left parameters in the settings to 30.
- Repeat the same steps for the second footage.
- Select the second layer, and apply and flip all four effects.
- Select the first layer, and apply to flip all one effect.
- Render the video footage and go for a quick preview.

Conclusion
Hence, Wondershare Filmora users can quickly create a smooth cut transition effect in their videos. It is easy to download Wondershare Filmora on your Mac or Windows system. All you need to do is import the footage to the interface and go to the effects tab.
The next step is to go to the transitions tab. It is easy to apply these effects to the first and the second layer. It is easy to check the preview of the created video, and if required, users can go for adding top bottom transition here.
Reset the crop settings of the first footage and select the right and left parameters to 30. The same is done to the second footage. After adding the different effects to created video, it is easy to save and preview the final footage. Beginners and professionals can go for these steps to incorporate a smooth-cut transition effect into their next video.
Free Download For macOS 10.14 or later
Step1Download and launch Wondershare Filmora
Before even jumping to the smooth-cut transition effect in Wondershare Filmora, the first step is to download and launch it on your system. It is easy to download this software on Windows and Mac devices. The quick steps for downloading and launching Wondershare Filmora are as follows:
- Go to the official website of Wondershare Filmora .
- Go to the Download button located in the top right corner of the official website.
- The Filmora Installer will download quickly for your Windows or Mac system.
- Double-click on the setup and start the installation process. Agree on the terms and conditions menu thus prompted.
- Once Wondershare Filmora is installed, it will start and run automatically on your system.
Step2Import the footage
The first step in creating a smooth cut transition effect is to import the footage. All you need to do is use the drag-and-drop functionality of the Wondershare Filmora. You can import 2 footage to the video editor interface with the quick steps mentioned below.
- Start by dragging the two footage to the timeline using the drag and drop functionality.
- Now, select the footage in the video editor.
- The next step is to copy the layer of the footage and lock the current layer.
- Then, paste the current layer over the other layer of the footage.
- Move towards the end of this step by unlocking the layer. Then you need to hide the below layer.
Step3Go to the effects tab and apply preset settings
After importing the footage and applying different layers. The next step is to go to the Effects tab in the Wondershare Filmora. Then, the preset settings are applied to the footage. The quick steps for the same are:
- Start by applying the crop presets to the above-layer footage.
- Select the first footage in the video editor.
- Right-click on properties and open the effects menu.
- Search the settings and change the top and bottom settings to 30
- You can select to blur the edges of the footage by ticking on the option.
- Repeat the same steps for the second footage.
Step4Go to the Transitions tab
It is time to go to the transitions tab and start putting it in your video clip. The quick steps for the same are:
- Select the speed blur category located on the left side of the interface.
- Go to the search box and type “flip.”
- Start placing the transitions on the footage layers.
- Select the first transition, flip all three, and place it on the second layer of the footage.
- Select the second transition, flip all two, and place it on the first layer of the footage.
- Render this video part by unhiding the first layer and moving to the preview step.
Step5Lorem ipsum dolor sit amet eam quas malorum
It is time to preview the created video. The render preview option in the Wondershare Filmora ensures that there is no lag in the preview file on any system. It generates the rendered versions of the files placed on the timeline for a quick preview. In addition to it, it is easy to add a top to bottom transition in the video editing in this step only. The quick steps for the same are:
- Preview the created video file and check if there is a need to change the transition.
- If required to add the top to bottom transition, remove the existing transitions.
- Select the first footage and go to its properties menu.
- Go to the crop settings and reset these settings.
- Change the right and left parameters in the settings to 30.
- Repeat the same steps for the second footage.
- Select the second layer, and apply and flip all four effects.
- Select the first layer, and apply to flip all one effect.
- Render the video footage and go for a quick preview.
Conclusion
Hence, Wondershare Filmora users can quickly create a smooth cut transition effect in their videos. It is easy to download Wondershare Filmora on your Mac or Windows system. All you need to do is import the footage to the interface and go to the effects tab.
The next step is to go to the transitions tab. It is easy to apply these effects to the first and the second layer. It is easy to check the preview of the created video, and if required, users can go for adding top bottom transition here.
Reset the crop settings of the first footage and select the right and left parameters to 30. The same is done to the second footage. After adding the different effects to created video, it is easy to save and preview the final footage. Beginners and professionals can go for these steps to incorporate a smooth-cut transition effect into their next video.
Windows Movie Maker Review
Are you considering creating impressive movies from your video clips? Then you need to install this famous Windows movie maker tool to fulfill your job. This is expert video editing Microsoft software that you may use for free. This video editing tool by Windows has received massive recognition due to its simplicity. Also, it makes every task easy and quick, like combining video clips to form digital movies, including various effects, background music, transitions, and titles.
So, Windows Movie Maker is undoubtedly the ideal software for this job. Moreover, video editors using this app experience several attributes in their organization to finally emerge with the perfect videos, like audio options, animations, transitions overlays, and timeline narration. It has user-friendly features, which you’ll enjoy experimenting with. This software also has XML code allowing its end users to modify live effects and transitions or even prepare very new ones.
This brilliant tool can even do primary track editing, including fade-out and fade-in effects in your final audio tracks. Windows movie maker even allows you to post your final project effortlessly on various video sites and social media platforms. Here’s a complete guide:
1. Download and Install Windows Movie Maker
Windows movie maker was previously recognized in Windows 7 as Windows Live Movie Maker. So to experience the features of this software, first, you need to download and install this app which is available free of charge. The steps are as follows.
- Firstly, download the setup file of Windows Live Essentials.
- You’ve to double-click on this setup file called windows-movie-maker.exe. Then tap on ‘Yes’ to permit the setup package to function.
- You’ll now be redirected to the installation window of Windows Essential. Next, you’ll see two options towards the web page’s top, and you’ll have to select the option ‘Install all of Windows Essentials (recommended)’ to continue with the installation process.
Windows Essentials comprise Microsoft OneDrive, Outlook Connector Pack, Movie Maker, Writer, Mail, Photo Gallery, and Messenger.
- Locate ‘View Details’ towards the left end of the page and tap on it. A progress and percentage bar will pop out along with the details regarding the program you’re installing.
- You need to wait a while to install Windows Movie Maker Software. Pause until the program completes its installation. After you find that the program title changes to another program such as Mail, you may proceed again.
- Now click on the Windows icon and then the ‘Start’ menu on the bottom left of your computer screen.
- Type and Search for ‘Windows Movie Maker, and you’ll find the newly downloaded app on the screen.
- Click on the icon with film reel, which is the Movie Maker app, and you’ll locate it above the Start menu. Next, you’ll be redirected to the terms of use of Windows Essentials for this Window to begin.
- Find the ‘Accept ‘ button towards the screen’s right-end corner and tap on it. Windows Movie Maker will now open.
- Next, tap on ‘Close’ when prompted with an error message from the installation windows.
You may now Enjoy Windows Movie Maker Live and begin making movies and videos using this software.
2. Interface
The user interface of Winona Movie Maker has three essential areas: the timeline and the storyboard, the panes and the toolbar, and the menu bar. This area covers…
- Timeline and storyboard: It offers a timeline and storyboard usage details for working with the current project clips.
- Panes: It offers details regarding Collections pane usage for viewing all your collections. Furthermore, it offers information regarding the Movie Task pane for all general tasks during movie making or project editing.
- Toolbar and Menubar: Here, you’ll get details regarding toolbar and menu commands usage for different tasks in this software.
3. Basic Editing
Adding clips to your timeline is the most straightforward method for creating digital movies using Movie Maker. Thereby, picking any one AutoMovie Themes out of those seven choices from default, sepia, black and white, pan and zoom, fade, cinematic, and contemporary.
You can enjoy the following choices for editing all your video clips:
- Creating clips: You may create new clips from different video clips after you’re done with capturing and importing in the Windows Movie Maker. You may create clips in the software anytime, according to your convenience.
- Trimming any clip: You may hide any clip part you don’t wish to keep in the project. For instance, you may trim the clip’s end or beginning. Also, trimming doesn’t erase the details provided in their source material.
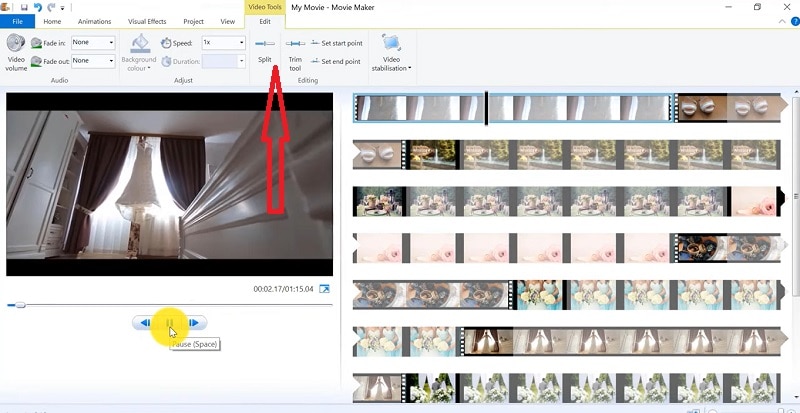
- Splitting Clips: Movie Maker allows you to split any video into two parts which can be helpful when you wish to add a video transition picture between the clips.
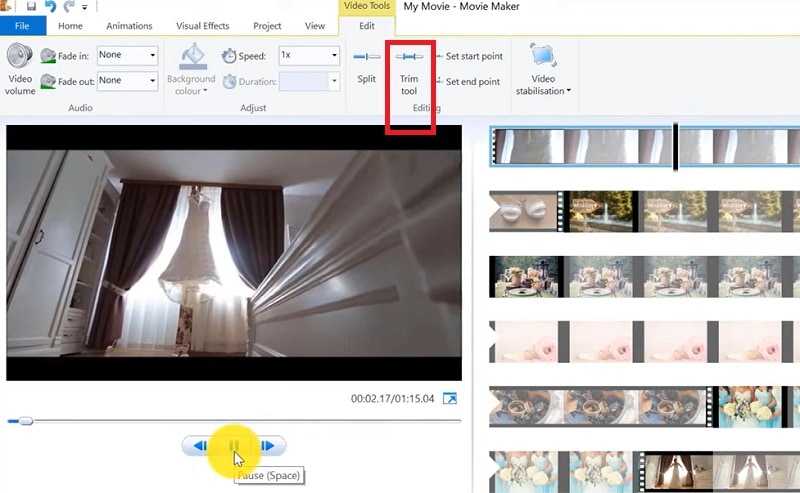
- Combining clips: Movie Maker allows you to merge two or multiple contiguous clips. Contiguous indicates that you need to record these clips together so that the beginning and end times are the same as the following video clip.
4. Add Video Effects
Video effects’ ascertain how any title, picture, or video clip displays in the final movie or project. Video effects permit you to include various effects in the movie and are added for the total time that the title, picture, or video clip displays.
Furthermore, you may add various other effects, which you’ll find in the folder of video effects in their Collections pane. You may maintain video effects when moving, copying, cutting, or splitting a picture or video clip.
5. Audio Editing
Windows Movie Maker permits you to operate various audios in several ways. A few specific audio-related jobs you may execute in Windows Movie Live Maker comprise the following:
- Audio levels adjustment: You can adjust your audio level so that you can easily control the audio playback and balance after you have the audio that comes up on Music/ Audio and Audio tracks in your timeline.
- Timeline narration: You may include a voice narration for the picture or video clips, which will appear on the timeline’s video track. There’ll be an automated synchronization of the audio narration with your video, where the narration shall elaborate on the movie event or action when you play it.
- Audio Clips Volume adjustment: You may adjust the audio volume for the video clip’s audio portion or the clips containing only audio. This permits you to control the audio clip’s volume such that you can hear it based on the sound level you’ve set for your audio clip.
- Adding audio effects: You may add various audio effects like mute, fade out and fade in.
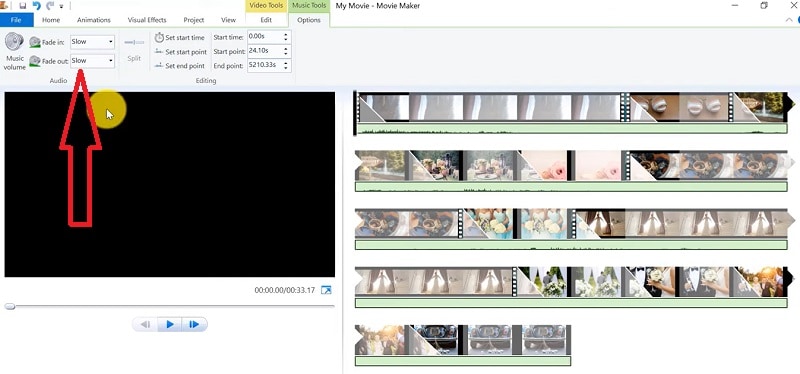
6. Share Files
Are you done with video project editing, and now you wish to share it? Windows Movie Maker offers you various choices for sharing straight away from their app, comprising:
- YouTube
- Vimeo
So with this power, you may guarantee to share the video’s correct aspect ratio and size version to any planned platform. Nevertheless, you don’t require signing in to your Microsoft account for sharing to the preferred platform, which may act as a hurdle for all its users who do not have Microsoft Office accounts.
7. Pros and Cons
The software’s advantages are its automated preview, simple controls, and user-friendliness. Additionally, the following are some clear advantages and disadvantages of using Windows Movie Maker:
Pros
- This app is perfect for all novices and is an ideal introduction as it utilizes several pro editing systems’ general workflow components like assembling timelines and importing. Its interface has easy navigation and is exceptionally intuitive for most new beginners as well.
- Windows Live MovieMaker is a video editing Microsoft application that arrives standard with all Windows computers. It is amongst the most favorite editing apps obtainable and exact, as other programs are user-friendly and fun. This software comes free with Vista, XP, and Windows Me and has effortless usage. Moreover, you may download additional video plugins, plus it won’t give you any chance to complain regarding its free software.
- This app is straightforward to learn, and you won’t require any experience in film editing for using Windows Media Player. You’ll explore more than 130 effects with accessible Fantastic credits, titles, and transitions. Next to this, you may drag and then drop the clip at any place in the timeline.
- Windows Movie Maker is an ideal app for image slide shows and was developed to create photo and home movie slide shows. It presents excellent fun transitions and themes; you may add music easily. This app provides excellent variety, being a free editing application. Furthermore, it offers transitions and striking effects to function with.
- Windows Live Movie Maker is free of cost for all Microsoft Windows users and is basically for clients having zero to minimum experience editing audio and videos. Moreover, it has many special effects you may use while creating videos. Also, you may frag and then place any picture or video anywhere you wish to see it.
- You can choose from several themes, enhancing your film with tools like contemporary themes, fade effects, and sepia toning choices. You have to click once, and then the users can choose and apply from the multiple effects collection.
Cons
- Windows Movie Maker contains unlimited audio and video tracks, yet it provides just one accessible one at a time. Hence, if you wish to include some other audio or music track, you may prepare the video, thereby sending it to the ultimate file.
- It isn’t uninstallable using any remove or add control panel. Also, it is impossible to do video overlaying.
- This app requires much patience because it is prone to crashes. Moreover, you’ll require enough time and effort to do video reversing. It often becomes frustrating for all advanced editors to cut clips into small parts and then add them back. Hence, Windows Movie maker isn’t good for professional video editors.
- Windows Live MovieMaker can crash and freeze and is known to suffer frequent crashes. Hence, ensure saving often and avoid creating complex videos. Also, you cannot perform complex editing and can now prepare single audio and video track.
8. Windows Movie Maker Alternative Software
Wondershare Filmora Video Editor is the best alternative for Windows Movie Live Maker and is a highly favored and most effective software program. You can download it for free, and it is adaptable with Windows 7 OS or above. This app is user-friendly but powerful and allows you to split, merge, crop, and trip various video clips with essential built-in video editing attributes.
Free Download For Win 7 or later(64-bit)
Free Download For macOS 10.14 or later
Additionally, you may get a few advanced properties like video stabilization, color correction, and green screen in Filmora effortlessly. You may even explore several fashionable and modern video effects such as music, text, and intros for topics like games, Education, Travel, Vlogger, Beauty, etc. Here is the comparison between the two software:
Filmora and Windows Movie Maker comparison
| Basis | Windows Movie Maker | Wondershare Filmora |
|---|---|---|
| Pricing | Free/ inexpensive | Quote basedAnnual SubscriptionOne-time paymentMonthly Payment |
| Interface | Pleasing interface | Auto movie options |
| Effects | Several overlays and effects | Special effects choices and transition overlays |
| Integration | YouTubeFacebookVimeoEmail | TwitterInstagramFacebookVimeoYouTube |
Conclusion
You may use Windows Movie Maker Live for capturing videos and audio to the computer using various video sources, including Web Cameras and Video Cameras, thereby using the recorded data in your new movies. You may import still pictures, video, and audio into this application to use in the movies you’re making. Moreover, after you’ve finished with video and audio content editing in this app, which may involve adding effects, video transitions, and titles, you may finally save the ultimate movie and then share and watch it with your family and friends.
Also read:
- New In 2024, Things You Need to Know About Color Grading in Photography
- Updated Do You Want to Give Your Videos and Photos a Cinematic Look but Couldnt Find How? Here Are Different Cinematic LUTs Discussed that You Can Try and Use
- Updated Top 10 Picks for Flawless Slow Motion Video Generation for 2024
- 2024 Approved 10+ Royalty-Free 5 Second Countdown Footage HD & 4K Clips Included
- Easy Ways to Edit Recorded Video for 2024
- New In 2024, ReVisionFX ReelSmart Motion Blur Plugin For Premiere Pro
- Mask Tracking with Adobe Premiere Pro A Detailed Guide for 2024
- New Time Lapse Video Is Very Interesting and Creative, Which Usually Attracts More Attention. This Article Will Show You How to Make a Time Lapse Video with Adobe After Effects
- Updated 2024 Approved What Slideshow Templates Teach You About Aesthetic
- Updated This Article Talks About Pixel Art Wallpapers. It Gives Examples of Different Pixel Art to Show You How to Customize Your Own Pixel Art Wallpapers, and How to Make a Pixel Art Gif on Filmora
- New In 2024, Best 12 Best Freeze Frame Video Editing Examples
- Updated 12 Impressive AI Video Ideas for Creating Engaging Video Content
- 2024 Approved Kdenlive Is a Free, Open-Source Video Editing Software Application. Kdenlive Is a Powerful Video Editor that Can Be Used to Create Professional-Quality Videos
- New 2024 Approved How To Export Video in Filmora
- In 2024, How Did AI Video Games Act More Human Than Human?
- Updated In This Article, We Will Show You How to Rotate Videos Using Obs
- New 7 Solutions Cut Video For Instagram On Mac
- 2024 Approved Turn Your Text Into a Podcast Made Possible (+ EASY Editing Tips)
- New Want to Learn How to Crop or Trim Video in PowerPoint? We Have Got You Covered; We Have Given a Step-by-Step Guide that Will Allow You to Trim and Crop Videos Using This Presentation Program
- New In 2024, How to Add Font Effect
- New In 2024, Do You Want to Make Your Photos and Videos Look Different From Others? There Are Many Lightroom LUTs Free, and They Make Your Media Content Stand Out From Others
- Looking Forward to Making up Your Career in Video Editing? Land in Here to Learn About the Credibility of some Popular Video Editing Courses
- New In 2024, Top 10 Free WhatsApp Video Converter 2023
- New In 2024, How To Make a Video Podcast
- In 2024, Videos Look Better when Edited Professionally. If Youre Looking to Edit Recorded Video with a Pro-Level Editing Then Weve Got You Covered. Learn About Editing Recorded Videos with the Best Toolkit Here
- Possible solutions to restore deleted photos from Vivo Y36.
- How to Come up With the Best Pokemon Team On Honor 90 Lite? | Dr.fone
- How to Reset Gmail Password on Oppo A2 Devices
- Updated The Definitive Guide to Whiteboard Animation for 2024
- New A Complete Guide of Top 7 Video Language Translators
- Top IMEI Unlokers for Your Gionee Phone
- How To Fix Unresponsive Touch Screen on Xiaomi Redmi 12 5G | Dr.fone
- Fake Android Location without Rooting For Your Lava Yuva 3 Pro | Dr.fone
- How to Transfer Data from Google Pixel 7a to Any iOS Devices | Dr.fone
- In 2024, How To Change Your SIM PIN Code on Your Vivo V30 Lite 5G Phone
- Title: Updated A Detailed Guide to Do Color Correction in OBS
- Author: Morgan
- Created at : 2024-05-19 05:11:48
- Updated at : 2024-05-20 05:11:48
- Link: https://ai-video-editing.techidaily.com/updated-a-detailed-guide-to-do-color-correction-in-obs/
- License: This work is licensed under CC BY-NC-SA 4.0.
