
:max_bytes(150000):strip_icc():format(webp)/is-audible-worth-it-00616437e29b4d108264ba36057bbdde.jpg)
Updated Best Dark Moody LUTs During Editing
Best Dark Moody LUTs During Editing
Look-up tables (LUTs) are visual editing tools used as color presets. By using LUTs, you can enhance color grading within photos and videos. This way, your visual content looks more aesthetic, engaging, and appealing. Meanwhile, within LUTs, there are several color presets to use. The most popular one is dark moody LUT. In this article, you’ll find useful information on dark moody LUTs with the best recommendations.
Part 1: What Do Dark Moody LUTs Represent?
Like another color preset, dark moody LUTs provide special and unique color grading. So, you’ll experience darkened shadows, desaturated tones, blue tints, green hues, and others. The dark preset filters offer moody looks with pitch-dark effects to your visual content. Hence, these types of LUTs add a foreboding atmosphere.
Dark and moody LUTs are used in horror films or thriller cinematography. After all, they provide dedicated dark contrast with gloomy looks to the visual content. Hence, a special dark horror effect is blended, which adds mystery, tension, and fear. For adding dark moody LUTs, several tools are available for enhancing colors.
Empower your videos with a new mood using different LUTs. Filmora now offers 100+ top-quality 3D LUTs cover a broad range of scenarios. Transform your videos with Filmora’s powerful 3D LUTs.
Apply LUT on Videos Apply LUT on Videos Learn More


Part 2: Best Dark Moody LUTs You Can Find
LUTs are perfect for enhancing color gradients with minimal effort. This means you don’t need to spend long hours on video editing. With dark moody LUTs, there is an option to make your video more cinematic. Let’s find some of the best dark moody LUTs to make things easier:
1. Dark Moody LUTS Fashion
Elevate your photos and videos with these cinematic dark moody LUTs filters. There are 4 LUT presets that could be utilized to blend dark contrast. Hence, you can provide muted looks to your visual content with a mystery tone. The LUTs are ideal for fashion use because of dark shadows. For social media content, these LUTs are ideal.

2. Dark and Moody Cinematic 3D LUTs
Videography and photography are incomplete without color enhancement through editing. Saving time, these dark and moody cinematic 3D LUTs pack is a perfect solution. If you want desaturated contrast with muted colors, there are 8 different LUTs to assist. Apply all the LUT preset filters easily without hassles. With 4 separate files, the LUTs will suit almost every editing tool.

3. Dark Moody Lightroom Presets
Improvise your closest visual media with dark moody Lightroom presets. You will get 20 different dark LUTs Premiere Pro free in this pack. All available LUT filter presets are unique, with different dark contrasts and tones. Thus, you can add a moody touch with desaturated color gradients. This way, your photos, and videos will enlighten with a murk appearance.

4. Film Noir LUTs and Presets Pack
Adding film-like dark cinematic looks is possible with this LUTs preset pack. The availability of 50 preset filters allows adding dark moods to your visual media. The content becomes visually appealing with crushed black hues and darker and gloomy textures. The filters are instantly applied and can be edited with desired intensity and contrast.

5. Dark & Moody Aesthetic Filters
This dark and moody LUTs filter pack has everything to beautify your photos and videos. With 5 different filter presets, transform color gradients with cool hues and less vibrant colors. This will provide dark aesthetic looks to your visual content with desaturated tone. This exceptional grading with moody filters allows upscaling colors for social media content.

6. MOODY NORDIC LUTS
The Nordic region is known for its attractive landscapes with dark weather. Adding such LUTs to your videos enhances color hues with gloomy and dark gradients. This will provide cinematic looks to your videos in an engaging way. The available LUTs are in 5 color presets, and each one is unique. Thus, your travel videos can become more pleasing using Nordic effects.

Part 3: Wondershare Filmora: A Great Platform For Using Dark Moody LUTs
For video upgradation, editing is essential to overcome underlying visual hindrances. Meanwhile, a good video editor is necessary for this purpose. Meet Wondershare Filmora that is a creative video editing platform for content creators. Using this tool, you can use 100+ LUTs, including dark moody LUTs. You can also utilize elements, stickers, transitions, and other effects.
Add LUTs on Video For Win 7 or later(64-bit)
Add LUTs on Video For macOS 10.14 or later
Filmora is the industry-leading tool for enhancing video quality with suitable color gradients. The filters are fully creative with adjustable contrast and saturation. Meanwhile, Filmora has added 100+ LUTs in its new updates. This means there are more than 200 LUTs in Filmora. When it comes to usability, Filmora offers best-in-class tools with amazing functionalities.

Key Features Of Wondershare Filmora
Filmora is an easy-to-use platform that delivers video editing with optimized solutions. Let’s find more of its features that make it an exceptional tool:
- Audio Support: With Filmora, users can add songs, voiceovers, and music to their videos. This can make their videos more enchanting. Meanwhile, there is also an option to merge, split, crop, or customize audio speed. Using an audio visualizer is also a possibility by adjusting audio bass, treble, and frequencies.
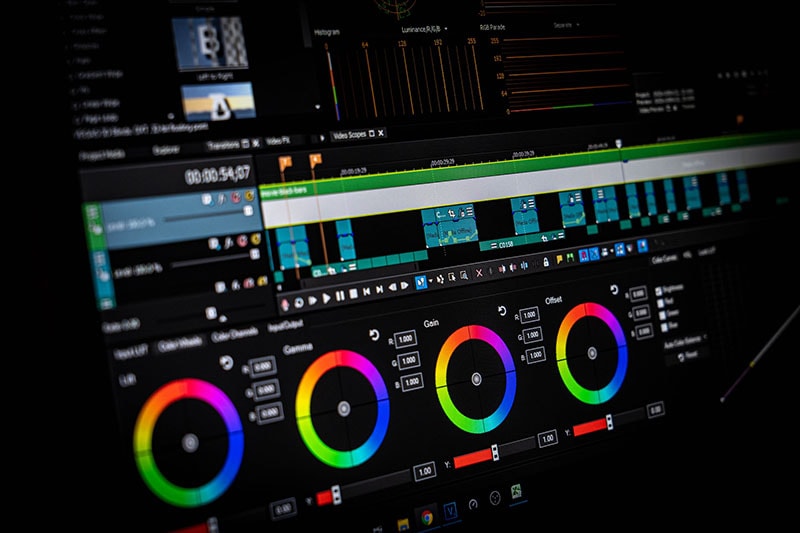
- Color Grading: There is a color wheel by which you can set desired color palette. This way, you can transform your video into desired color contrast with necessary gradients. The color intensity could also be adjusted from 0 – 100% range. With available LUT preset filters, different color effects could be applied.
- Split Screen: The availability of a split screen function allows for playing different videos at one time. Thus, combining or comparing different videos will be easier to process. This will save you time and simplify your video editing procedure.
- Text-to-Speech: Filmora’s text-to-speech allows you to create voiceovers from text files. This will enrich your video and give useful content with more elements. The transcription process is quick and fast with more accuracy. This feature is available in up to 16 types of languages.
Conclusion
Using LUTs, you can enhance and optimize the color grading of your video. Meanwhile, if your video is horror or suspense relevant, use dark LUTs Premiere Pro free. This adds dark shades to your video with desaturated contrasts and crushed black hues. So, if you want the best dark moody LUTs free download, Filmora is the right solution. This tool provides unique and special LUTs in different categories.
Add LUTs on Video For Win 7 or later(64-bit)
Add LUTs on Video For macOS 10.14 or later
Apply LUT on Videos Apply LUT on Videos Learn More
Part 2: Best Dark Moody LUTs You Can Find
LUTs are perfect for enhancing color gradients with minimal effort. This means you don’t need to spend long hours on video editing. With dark moody LUTs, there is an option to make your video more cinematic. Let’s find some of the best dark moody LUTs to make things easier:
1. Dark Moody LUTS Fashion
Elevate your photos and videos with these cinematic dark moody LUTs filters. There are 4 LUT presets that could be utilized to blend dark contrast. Hence, you can provide muted looks to your visual content with a mystery tone. The LUTs are ideal for fashion use because of dark shadows. For social media content, these LUTs are ideal.
2. Dark and Moody Cinematic 3D LUTs
Videography and photography are incomplete without color enhancement through editing. Saving time, these dark and moody cinematic 3D LUTs pack is a perfect solution. If you want desaturated contrast with muted colors, there are 8 different LUTs to assist. Apply all the LUT preset filters easily without hassles. With 4 separate files, the LUTs will suit almost every editing tool.
3. Dark Moody Lightroom Presets
Improvise your closest visual media with dark moody Lightroom presets. You will get 20 different dark LUTs Premiere Pro free in this pack. All available LUT filter presets are unique, with different dark contrasts and tones. Thus, you can add a moody touch with desaturated color gradients. This way, your photos, and videos will enlighten with a murk appearance.
4. Film Noir LUTs and Presets Pack
Adding film-like dark cinematic looks is possible with this LUTs preset pack. The availability of 50 preset filters allows adding dark moods to your visual media. The content becomes visually appealing with crushed black hues and darker and gloomy textures. The filters are instantly applied and can be edited with desired intensity and contrast.
5. Dark & Moody Aesthetic Filters
This dark and moody LUTs filter pack has everything to beautify your photos and videos. With 5 different filter presets, transform color gradients with cool hues and less vibrant colors. This will provide dark aesthetic looks to your visual content with desaturated tone. This exceptional grading with moody filters allows upscaling colors for social media content.
6. MOODY NORDIC LUTS
The Nordic region is known for its attractive landscapes with dark weather. Adding such LUTs to your videos enhances color hues with gloomy and dark gradients. This will provide cinematic looks to your videos in an engaging way. The available LUTs are in 5 color presets, and each one is unique. Thus, your travel videos can become more pleasing using Nordic effects.
Part 3: Wondershare Filmora: A Great Platform For Using Dark Moody LUTs
For video upgradation, editing is essential to overcome underlying visual hindrances. Meanwhile, a good video editor is necessary for this purpose. Meet Wondershare Filmora that is a creative video editing platform for content creators. Using this tool, you can use 100+ LUTs, including dark moody LUTs. You can also utilize elements, stickers, transitions, and other effects.
Add LUTs on Video For Win 7 or later(64-bit)
Add LUTs on Video For macOS 10.14 or later
Filmora is the industry-leading tool for enhancing video quality with suitable color gradients. The filters are fully creative with adjustable contrast and saturation. Meanwhile, Filmora has added 100+ LUTs in its new updates. This means there are more than 200 LUTs in Filmora. When it comes to usability, Filmora offers best-in-class tools with amazing functionalities.
Key Features Of Wondershare Filmora
Filmora is an easy-to-use platform that delivers video editing with optimized solutions. Let’s find more of its features that make it an exceptional tool:
- Audio Support: With Filmora, users can add songs, voiceovers, and music to their videos. This can make their videos more enchanting. Meanwhile, there is also an option to merge, split, crop, or customize audio speed. Using an audio visualizer is also a possibility by adjusting audio bass, treble, and frequencies.
- Color Grading: There is a color wheel by which you can set desired color palette. This way, you can transform your video into desired color contrast with necessary gradients. The color intensity could also be adjusted from 0 – 100% range. With available LUT preset filters, different color effects could be applied.
- Split Screen: The availability of a split screen function allows for playing different videos at one time. Thus, combining or comparing different videos will be easier to process. This will save you time and simplify your video editing procedure.
- Text-to-Speech: Filmora’s text-to-speech allows you to create voiceovers from text files. This will enrich your video and give useful content with more elements. The transcription process is quick and fast with more accuracy. This feature is available in up to 16 types of languages.
Conclusion
Using LUTs, you can enhance and optimize the color grading of your video. Meanwhile, if your video is horror or suspense relevant, use dark LUTs Premiere Pro free. This adds dark shades to your video with desaturated contrasts and crushed black hues. So, if you want the best dark moody LUTs free download, Filmora is the right solution. This tool provides unique and special LUTs in different categories.
Add LUTs on Video For Win 7 or later(64-bit)
Add LUTs on Video For macOS 10.14 or later
Complete Guide to Make an Intro Video
You scroll through different social media platforms which lead you to different bloggers and content creators who introduce themselves through the precise intro videos. It the point where a viewer either turns towards or turns away from a person presenting a brand or a business. Intro videos are a must, particularly when you are new in business and promotions. Bringing your story to life in your intro video requires a propaganda to ensure that it evokes feelings of trust, confidence, and curiosity among your target viewers.
The pillar on which a striking intro videos stands is not just a monotonous visualization with poor graphics and music. It requires expertise and moreover, it requires a ‘point’. Your boring intro video would be purposeless for the people who’re watching it. Each second, you express something new, yet filled with intricate details about your work and brand. Let’s dig in a little deeper to know how exactly your introduction video will generate leads and connects you with your target audience.
Part 1: Why Intro Video is Important
An intro video, just like it sounds, is an introduction of your brand, your content or anything that you’re promoting. It appears as soon as the viewers are all set to explore your content and brand. To make the viewer’s first glimpse of your work worthwhile, it is crucial that you explain your value preposition through a precise and appealing intro video. It is through the intro videos that your work is noticed and promoted. It is important to create a story highlight for your viewers while you’re setting the decorum of your business, brand or other content.
Additionally, your video must fulfill components of a striking intro video. Whatever you are trying to say should be clear in your video. Besides being clear enough, your intro video must be short, precise and goal-oriented. You are attracting viewers so make their view purposeful with your intro video which should tell your story. The intro video, if presented flawlessly, can captivate the visitors to interact with you and can even inspire them to add into the growth of your business/content. In a nutshell, an intro video brings your business to life, increase your boost and grabs your visitors’ attention.
Part 2: When to Use Intro Video
Apart from a variety of benefits it offers, the intro video basically forms the balusters of your brand or content. Intro videos are commonly used in the following domains:
Boost Sales : Incorporating a precise piece of work in the form of an intro video can help you boost sales magically. It is far the most effective strategy you company or brand can adopt. Your brief intro video can tell your story and convey your message in an emotional and dramatic way, which consequently attracts more viewers and ultimately, results in the boost of your sales. It is just as similar to you playing with the minds of your audience. A higher audience engagement due to your intro video can definitely prove that intro video is an asset which you can offer in addition to your marketing strategies.

More Social Shares: Social media is undoubtedly far the most highly competitive space for your brands and businesses to work like magic. It is insane how brands and businesses are promoted on the tip of your fingers by sharing the gist of your work. That gist, is of course what we are talking about here in this article. Intro videos are brief and appealing which can easily by shared over multiple platforms. The more the social shares of your intro video, the more you receive the nectar of your input.

Build Personality: If you’re socially awkward or on the contrary, a social freak; the intro video covers you all. Whoever you are and whatever you do, is most creatively presented through a precise intro video. The intricately woven description of your work in an intro video definitely does wonders. People see you through your work and they see your work and you simultaneously through an intro video, then why risk creating it conventionally?

Increase Brand Awareness: Creating a brand awareness video which narrates your story in a presentable manner is like wining the internet’s mode of lottery. A thoroughly considered and precise piece of your intro video can go viral at an unbelievable pace and before you even know, your marketing has done wonders all over the digital media. What is your brand, what it offers, how it benefits you and who is the target audience; all these queries are explained through a short intro video which would ultimately result in your brand recognition and thus the growth.

Part 3: Best Intro Video Maker
Out there, the market is jam-packed with people witnessing millions of videos on different media platforms every day. This only leads to crowded digital market but only your intro video can stand out and flaunt your work charmingly. Filmora is one best choice to professionally craft your intro video which can give your brand a head start in no time.
Wondershare Filmora is a time effective and easy to use video editing software that enable the users to create variety of videos by choosing among some great presets and powerful editing tools. Maintaining and improving the quality of videos, Filmora enables the users to choose across a variety of different video editing features. This video editing software is developed by Wondershare and it includes features for a range of users from beginner to intermediate levels.

For a composition of your intro video, Filmora is the best go-to software so why wait another minute? Currently, Filmora is compatible with Windows and macOS computers. Some of the features offered by Filmora include the following:
Rich Intro Templates
A wide variety of professionally crafted templates are available on your fingertips so instead of conventionally editing your videos, get your hands on the stunning templates offered by Filmora. Filmora is equipped with multiple templates which provide the users a plethora of options when it comes to customizing videos. These templates are easy to use and your intro videos can turn into a magic movie with presets offered by Filmora so grab your setup today and enjoy the affordable software now.

Numerous Video Effects
Importing media and editing it on the timeline to create a compelling tale is the first step in a video editor’s post-production process. Following those foundational steps, an editor applies various effects to the video in order to fix issues, improve mood, intensify suspense, and add magic to the video. Filmora offers a great variety of customizable filters, effects, transitions and the best part? You don’t even have to be a pro to use these effects.

Title Editing
Filmora enables the intro video makers to adorn the titles of their videos by selecting among multiple text editing options. Both short videos and full-length movies must have opening titles and closing credits. You may catch the audience’s attention from the first frame of your video by coming up with inventive methods to employ text which precisely conveys the tale of your film. You may utilize more than a hundred text settings in Filmora’s Titles tab to add text to the video.

Text to Speech/STT
Speaking in your videos may increase engagement and make it simpler for viewers to grasp what you’re saying. But how can you add audio without first recording it? Are you considering hiring a voice actor? Don’t worry! Filmora got your back by offering Text to Speech (TTS) function, which enables the users to add voice to your video. Filmora automatically transcripts your text files into speech on the click of a button.

Audio Editing
Filmora additionally offers an audio panel where the software helps to manipulate audio added to your intro videos. The audio editing feature of Filmora enables users to improve the quality of the audio, to remove unwanted noises, balance pitch or change the length of a particular audio file.

Part 4: How to Create Intro Videos
To maintain consistency and to provide your brand with a unique identity, it is essential to carefully craft an intro video. Following is a step-by-step guide through which you can get your hands on this effective video editing software:
Free Download For Win 7 or later(64-bit)
Free Download For macOS 10.14 or later
Step1Download and Install the Software
The first step in creating an intro video requires the user to download and install the Filmora software in Windows or MacOS computers. To download the setup, go to https://filmora.wondershare.com/ and click ‘Download’. Afterwards, when the setup is downloaded, run the setup and install Filmora on your computer:

Step2Add Color Templates
After installing, wait until the installation is finished. Launch Wondershare Filmora and go to MEDIA tab at the top left of the interface and select the best suitable background color for your intro video from the dropdown menu in the MEDIA tab. Drag your cursor over the tile of the color you wish to use as a background and click to add the icon that appears in the center to add it to the timeline.

Additionally, if you don’t prefer the preset backgrounds and colors, Filmora lets you use your own background image or video clip. For this, select PROJECT MEDIA > click anywhere inside the media window > import media file of your choice. After importing the file, click on the imported file to add it to the timeline.
Step3Select and add audio effect to your Intro Video
Your video automatically grasps a lot of viewers’ attention with a spice of some music/audio in the background. To adorn your intro video further, you can add audio/music effect to your intro video using the inbuilt music and sound effects from the library. If you want to listen to a track from the inbuilt library collection of audio and music, double click on the thumbnail.

Click the AUDIO tab. Choose from Recommended audio files or import your own audio. Once, you find your desired audio/music file, drag and drop it to the audio track below the video.
Step4Add Text/Logo to your Intro Video
Click the ‘TITLE’ tab. To customize, choose title options from Recommended or add your own custom design. To change, format, and animate the text as needed, click on your desired preset or custom title and double click or drag it to the bottom area of the main library to insert a title.
Also, you need to adjust the position and duration of the title to get a better view. In the intro video, it is recommended to add your logo or slogan as well. To add your logo, drag and drop it to the track above the video, and adjust its position and size.
Step5Add Effects to your Intro Video
Go to ‘EFFECTS’ tab, choose a category from the top-left pane, and click and drag your preferred effect from the Effects library to the timeline. Adjust the playback duration by dragging the right handle of the track in the timeline as explained above. Optionally, double-click the Effects track to customize the appearance as needed.
Step6Export the Intro and Add to Shared Media
Once you’re done making your intro video, click on the ‘EXPORT’ tab in the center > go to LOCAL tab on export box > choose your preferred output format (e.g., MP4) > adjust other preferences such as destination location, resolution etc. from the right pane of the box > Click EXPORT.

Free Download For macOS 10.14 or later
Step1Download and Install the Software
The first step in creating an intro video requires the user to download and install the Filmora software in Windows or MacOS computers. To download the setup, go to https://filmora.wondershare.com/ and click ‘Download’. Afterwards, when the setup is downloaded, run the setup and install Filmora on your computer:
Step2Add Color Templates
After installing, wait until the installation is finished. Launch Wondershare Filmora and go to MEDIA tab at the top left of the interface and select the best suitable background color for your intro video from the dropdown menu in the MEDIA tab. Drag your cursor over the tile of the color you wish to use as a background and click to add the icon that appears in the center to add it to the timeline.
Additionally, if you don’t prefer the preset backgrounds and colors, Filmora lets you use your own background image or video clip. For this, select PROJECT MEDIA > click anywhere inside the media window > import media file of your choice. After importing the file, click on the imported file to add it to the timeline.
Step3Select and add audio effect to your Intro Video
Your video automatically grasps a lot of viewers’ attention with a spice of some music/audio in the background. To adorn your intro video further, you can add audio/music effect to your intro video using the inbuilt music and sound effects from the library. If you want to listen to a track from the inbuilt library collection of audio and music, double click on the thumbnail.
Click the AUDIO tab. Choose from Recommended audio files or import your own audio. Once, you find your desired audio/music file, drag and drop it to the audio track below the video.
Step4Add Text/Logo to your Intro Video
Click the ‘TITLE’ tab. To customize, choose title options from Recommended or add your own custom design. To change, format, and animate the text as needed, click on your desired preset or custom title and double click or drag it to the bottom area of the main library to insert a title.
Also, you need to adjust the position and duration of the title to get a better view. In the intro video, it is recommended to add your logo or slogan as well. To add your logo, drag and drop it to the track above the video, and adjust its position and size.
Step5Add Effects to your Intro Video
Go to ‘EFFECTS’ tab, choose a category from the top-left pane, and click and drag your preferred effect from the Effects library to the timeline. Adjust the playback duration by dragging the right handle of the track in the timeline as explained above. Optionally, double-click the Effects track to customize the appearance as needed.
Step6Export the Intro and Add to Shared Media
Once you’re done making your intro video, click on the ‘EXPORT’ tab in the center > go to LOCAL tab on export box > choose your preferred output format (e.g., MP4) > adjust other preferences such as destination location, resolution etc. from the right pane of the box > Click EXPORT.
How to Build A Video Editing Career
Some people may be perplexed by the term “video editor.” It’s used to describe both the individual who edits films and the program they employ. Working with the director and videographer is a key part of a video editor’s job. They use video editing to create an engaging narrative. Various strategies can be used during video editing to improve both the audio and the video. It’s a job that calls for both perseverance and passion. especially considering that editing a 20-minute video might take up to 16 hours.
Video clips are produced by a director, then edited. The objective is to quickly communicate a story while holding the audience’s attention. In conclusion, video editing is the process of assembling the most relevant clips into a coherent order.
With that said, let’s get started!
1. Select a genre
Numerous genres are constantly developing in the realm of videography. So, if you’ve ever wanted to work as a video editor, I suggest editing the kinds of videos you enjoy. A skilled video editor is necessary for every type of video. To edit cinematics, for example, no one employs a film editor. Therefore, choosing the ideal genre for you should be your first step. And you should only diversify your repertoire when you have mastered one.
You must maintain an open mind if you want to succeed as a video editor. Every day, new methods and technologies are created. As a result, you should try to improve your talents while also keeping an eye on current trends. You’re aware that perfect practice makes perfect. And in the creative industries, this statement is crucial. In order to improve your talents, pick the appropriate tools and progress from easy to complex tasks.
Making the most of every chance is essential if you want to become a professional video editor. In this regard, picking the appropriate genre is just as crucial as the task at hand. Today, the majority of businesses search online for potential applicants. You can apply on employment portals and join online communities. Don’t undervalue the importance of having strong ties. Performing independent work makes it easier to network with others in the field. After all, networking with other editors will improve your own video editing skills. Furthermore, developing a strong portfolio and resume will increase your chances of landing a job.
2. Create a portfolio
Your greatest work is shown in your video editor portfolio, which also facilitates contact with potential clients and employers. Before you start, look through the portfolios of other video editors to understand what works and what can make you stand out. Next take the following actions to develop your digital portfolio:
Select a platform
To showcase your editing skills, choose a professional video portfolio hosting provider like YouTube or Vimeo or build a personal website.
Identify yourself
Include a powerful biography about your work and yourself, as well as links to your social media profiles, phone number, and resume as a video editor. Add any honors or certifications you’ve received as well.
Display your work
To show your versatility and depth, including a variety of video types: Start with B-rolls, stock footage, video reels, and montages. Make sure the work is of a high caliber and showcases your varied abilities and distinctive flair. Include a brief summary of each video so that viewers can learn more about your efforts and workflow.
Include calls to action Viewer engagement with your material can be increased by using CTAs like “watch this” or “click here for the entire video”
Submit a portfolio
If no one sees it, even the most visually appealing supercut of video shorts won’t generate interest. Share your video editor portfolio on social media and invite your friends, family, and coworkers to look at it.
Prior to looking for your future employment, make sure to identify your hobbies. The easiest way to determine what you are seeking as an editor is to view a wide range of content and first consider what makes the job effective (or not). Afterward, start to eliminate options depending on your tastes as an editor and creative. You’ll do your best work on initiatives that are close to your heart or, at the very least, spark your artistic curiosity.
Consider it out: If you’re interested in narrative work, try filming your own material and putting it together in an editing program. Or work on a student movie and gain experience among other budding artists.
3. How much do video editors get paid?
The 21st century has seen an increase in the pay of movie and video editors. Online instructional videos, the production of DVDs by movie studios, and software-assisted scene editing are all on the rise.
Professionals typically get promoted with each project because most of them operate on a per-project basis. They make money while working for news organizations, businesses, or the entertainment industry. According to the US Bureau of Labor Statistics, the average yearly compensation for video editors is close to $59,500. A video editor’s typical hourly wage might be $40. (in the US). A professional editor can earn $80,000 annually, compared to a fresher who can make up to $40,000.
However, for independent contractors, the hourly wage may change. It might be anything between $14 and $80 per hour. It depends on the type of editing and the client’s budget. The typical freelancer makes $25 per hour in earnings. An hourly wage for a film editor often ranges from $20 to $40. In the United States, 59,300 video editors were working in 2016. A video or film’s final draft is heavily influenced by its video editors.
As a result, the businesses rely on them for a variety of duties like color adjustments, cut sequences, screen film, special effects, and sound insertion.
4. Know Your Software
There are several options to study video editing, including classes, university programs, and online training, whether you wish to do it for fun, a side job, or a career move. Given that the video editing sector is expected to expand over the next few years, now is a fantastic moment to enter the field. Here are a few methods for getting started with video editing:
Online classes and tutorials
There are free online lessons that may show you how to maneuver through the workspaces of video editing software, including how to create an interface, manage media, and trim footage, if you’re trying to learn video editing on the side. For its digital visual effects equivalent program, look through the Premiere Pro and After Effects tutorials provided by the American Graphic Institute.
University programs
There are four-year undergraduate degrees in film and cinema accessible for students who are interested in learning video editing over the long term and in a comprehensive way. These programs frequently mix theory and principal learning with project-based learning, enabling graduates to enter the workforce with contacts and experience that will help them land positions in the industry or launch their own video editing businesses.
Core courses for degrees in video editing highlight the critical abilities required for success. A job in video editing can be specialized by taking additional electives in areas like audio editing, animation, and special effects. Professors and coworkers from prior projects can offer letters of recommendation for job applications or reviews for a business website in addition to building a strong foundation.
Independent or self-taught learning
Collecting footage, uploading the clips, and experimenting with effect sequencing and other features are other ways to learn how to use video editing software. Researching the subject and watching tutorials won’t get you very far in the field of video editing; you need to get your hands dirty. However, reading through the software’s user manual to learn about fundamental uses and shortcuts is instructive.
Additionally, advanced techniques like color grading, sound effects, and media management can be learned through tutorials, books, and blog postings. It’s always a good idea to ask industry professionals for guidance. Video editors can produce high-quality work fast and start to identify their own editing preferences and style by using the advice of experts.
The likelihood of being selected to edit a project increases with credibility and expertise. Actively looking for employment possibilities is one approach to develop your skills as a video editor. Building a diversified portfolio and demo reel for new video editors can be facilitated by submitting proposals for video editing to nearby companies or posting job bids on freelance websites.
By enrolling in courses or earning a credential in video editing, you can compete for project bids in another method. Job seekers can establish credibility and show a dedication to learning their craft by taking outside training.
5. Experience
As a video editor, education and practice go hand in hand. Naturally, you can’t begin working as a video editor without training because you first need to learn how to operate the program and comprehend the fundamental ideas and procedures involved in video editing. However, work experience is a crucial component of training because studying video editing on the job is the only way to truly understand it because it is such a collaborative process.
Therefore, you must first enroll in a formal course of some kind (there are some entirely self-taught video editors, but they remain the exception). You might want to pursue a Level 3 or Level 4 Diploma in Creative Media Production in the UK, for example, as this could be situated at a college or university. In the alternative, you could choose the flexibility an online course can provide if you are unable to afford the time and money required for full-time education.
Of course, you’d want to make sure it was a good one, and just because something is pricey doesn’t mean it’s good. If the course providers are unable to show evidence that graduates go on to obtain employment in the sector, you have your answer.
Additionally, you’ll need to learn how to use video editing software, which will definitely require some independent study even if it’s a requirement for your course. When you’re ready, you should start looking for experience anywhere you can. Although it would be ideal, most aspiring video editors will need to go elsewhere for internships, apprenticeships, and job placements. The dream would be to get a training program operated by a broadcaster like the BBC.
Sending out numerous inquiries, along with the greatest showreel you can put together, to production firms, advertising agencies, design studios, and others will probably be required to accomplish this. You will also probably have to endure numerous rejections.
It will also need that you support yourself while working a significant amount of hours for no pay. This is not ideal and severely discriminates against those from impoverished origins, much like the situation in other creative industries. However, it is regrettably the current reality in this intensely competitive profession. On the bright side, long-term perseverance should be rewarded with satisfying and artistically gratifying employment and respectable pay.
6. Spend time on networking
Few things are more annoying than attempting to expand your business network while holed up in a room with no windows for most of the day. but connecting with others who are similarly hiding in their own dark spaces!
Since “I don’t want to annoy people” is the most common objection to sending cold emails, people frequently decide to attend mixers and live events instead because the crowds are friendlier. The issue with this approach is that it relies entirely on chance encounters at these events for your network to grow. You might attend weekly mixers for the rest of your career without ever meeting your perfect mentor or editing hero.
The chances are very high that the people who could give you career advice or even mentorship are stuck in their own dark rooms, working long hours, and avoiding networking events because they too are most likely introverted, given the likelihood that the editors, assistants, etc. that you really want (i.e. NEED to connect with) are introverted.
People want to see you succeed, so believe me when I say that you can’t expect them to come to you. You need to contact them. Because they want to use their free time to give back to the community, many editors at all levels of the industry are starting mentorship sites while also earning some income along in the process.
Nobody wants to read your life narrative if they don’t know who you are, and I’m sorry to have to break it to you. Contrary to what you might believe, this is not your “ONLY chance” I know how daunting it can be to reach out in the cold to someone you like who could potentially revolutionize your career with a simple referral. As I’ve already stated, the main goal of your first email is to elicit a response, so you shouldn’t feel compelled to include everything you’ve ever wanted to say in it.
Consider for a moment what kind of outreach email you would reply to if you were your receiver. Do you want to read about someone’s entire life, no matter how intriguing it may be, in one message? Do you know how to reply even if you did want to read it? Remember that even if you’ve given this message a lot of importance and it could affect your career, this person’s life will still go on even if they disregard your email.
You need to pay attention to the format of your email in addition to being mindful of its length. With smartphones and thumb-scrolling in the digital age, we have all evolved into “skimmers” rather than “readers.” Don’t send a single long text message. Use line breaks and “flag posts” to indicate the topic of each paragraph so the reader knows what to expect from each one.
7. Get your first job
You must first realize that there are numerous ways to become an editor as well as numerous editing specializations. This indicates that there is no obvious course for you to take. This tutorial highlights the key steps you may take to take your first step toward a career in editing. To land your first junior video editing job, use one or more of these strategies:
Assistant video editor
The fact that more and more editing is being done remotely is fantastic. A digital nomad’s fantasy, indeed. Accordingly, some editors are searching for Assistant Editors (both local and remote) to assist them with their projects in every country on earth.
Find Assistant Editor positions that fit you based on your skill level, location, internet speeds, and career objectives by searching online and in forums. The numerous employment boards and recruiting websites, along with Craigslist, Facebook Groups, and membership websites like Shooting People, etc., are some good locations worth looking out.
Contact YouTube creators
A strategy that is becoming more and more popular for getting your first paid job is to approach YouTubers and offer your video editing services. This indicates fierce competitiveness. But if you discover the appropriate creator, you might appreciate the task. Be warned that there are short turnaround times and low pay. Don’t undersell yourself because there will always be someone else prepared to labor for nothing.
Network at events
All film festivals were compelled to be held online due to the COVID virus. As limitations loosened, festivals began hosting both a live event and an online one. As a result, networking is now simpler than ever before — you don’t even need to get up from your desk!
Purchase a ticket to a film festival that showcases the genre of projects you are interested in working on and use the entire event to network. Be personable, not aggressive, and put yourself out there. Additionally, you may browse Vimeo for videos you enjoy and then get in touch with the editor or director to ask about potential opportunities as an assistant. However, networking in person is much simpler. The selling is done by your personality, which is challenging to convey with language.
Use Fiverr or UpWork
This method of landing your first job has a minimal barrier to entry. The problem is that wages are pitiful, and competition is intense. This can be a possibility for you if all you want is to practice and not earn a living. To achieve a position in these marketplaces where you may earn a living, it requires a lot of effort and time. And even then, the labor is generally monotonous. Avoid starting down this road and falling into the Fiverr loop. Due to your lack of connections and lack of expertise in the areas you would genuinely like to edit, it may be challenging for you to move on and work on more intriguing projects.
These are a few methods for getting your first job in video editing. You probably expected something more specific and logical. The problem is that nowadays, a lot of individuals have a PC in their bedroom that is capable of editing videos, so you have to work hard to stand out.
If I were to start again today, I would hound all the editing and post-production companies in my city, utilizing my outgoing personality and creative applications to entice them into granting me an entry-level position.
8. The best locations for video editing
When it comes to launching a career as a video editor, some locations are preferable to others. In this case, California, New Jersey, Hawaii, and New York are the finest states to live in. In California, video editors earn an average pay of $63,678. In contrast, they would average $62,559 and $61,479, respectively, in New Jersey and Hawaii.
Even though the average salary for video editors in New York is only $60,871, this is still greater than the national average. These are the states we found to have the most jobs and the highest salaries. We reduced our list of states to these four by determining the median wage, the cost of living, and the Location Quotient from the Bureau of Labor Statistics.
Los Angeles is the first place that springs to mindink about movies. And for good cause too! In Los Angeles, countless movies are shot, and every single one of them needs to be edited. About 8,810 video editors were employed in L.A. in 2014, and their average yearly salary was $105,370.
“I believe I’ll travel to Boston. In their 2005 song, “Boston,” Augustana sings, “I think I’ll start a new life, I think I’ll start it over.” So, pack your bags and travel to the city that Matt Damon and Ben Affleck adore. Rest easy knowing that the average yearly salary for 420 editors was $54,210.
Atlanta is the new movie location that production companies are picking. Video editors have relocated to Atlanta as a result of the switch to get a taste of the industry. 330 editors in Atlanta earned around $52,300 last year.
The dense forest of lush green trees in the Pacific Northwest is ideal for productions of Portlandia and Grimm. In Portland, where there are so many shows, young video editors are advancing their careers. In Portland, 300 video editors made about $46,560 last year.
Illinois provides a 30% tax credit for all eligible productions, much like Georgia does. If you work as an editor and make above $100,000 a year, Illinois will refund 30% of your earnings. Visit InVideo online to get access to a wealth of tools and features if you’re looking for a free video editing and creating platform that produces the best results.
Places to avoid
A quick look at the website for the Nebraska Film Commission will show you that the state is not the best for filming. Even though the most recent Alexander Payne movie was filmed in this state, its filmography is still quite little.
Mount Rushmore and the worst film commission website in history are both located in South Dakota. South Dakota makes up for its lack of a rich cinema heritage with its picturesque environment.
Idaho has beautiful countryside, but there are few chances for shooting and post-production. Since Idaho does not offer tax credits to filmmakers, many productions choose to shoot elsewhere.
Hawaii, the setting for the television shows Jurassic Park and Lost, comes in last on the list due to its high cost of living and lack of employment opportunities. A short search revealed that there are absolutely no video editing jobs available in Hawaii. It is expensive to reside in and shoot in Hawaii because a one-way ticket from Los Angeles to the islands costs $500.
9. Working in teams
It’s not always necessary to work alone when editing videos. In actuality, as the name implies, it involves the whole team. Reputable companies frequently employ a team of specialists for various aspects of video editing. You’ll probably collaborate with a group that includes sound experts, cinematographers, and special effects creators. Enhancing collaboration guarantees the timely and error-free delivery of high-quality movies. Therefore, before beginning your career as a video editor, you must master this expertise.
Videos and films are frequently filmed out of order. For instance, the final scene might be filmed in the middle of production if the weather is right. As a result, you frequently receive unstructured data. As the video editor, it is your responsibility to follow the narrative.
You can depend on the main script, so don’t worry. But being aware of what’s happening will greatly simplify your life. Keeping in mind the setup of the scene and the intended concepts for each frame, for instance. Sticky notes and a good memory ensure that you never get off track.
The Bottom Line
Due to widespread digitalization, there is a high demand for video editing skills. Several well-known businesses are embracing digital media, particularly in the midst of the recent pandemic. The market has seen a sharp increase in demand for professional video editors. As a result, I covered how to become a video editor in this article along with everything else you need know. Thanks for reading!
Free Download For Win 7 or later(64-bit)
Free Download For macOS 10.14 or later
Free Download For macOS 10.14 or later
Steps to Create Gold Text Effects After Effects
Have you always wanted to create the gold text effect in After effects but you don’t know how? This polished effect can make your video’s title stand out and is one of the best ways to create a stunning title for YouTube and Instagram clips. In this article, we will be looking at how to create the gold text using After Effects.
Steps to Create Gold Text Effects After Effects
Follow these steps to create a gold text effect in your After Effects video project;
Step1Start by creating an environment. To do that just right-click and choose “New Comp” and click “OK” to create one.
Step2Then we need to add fractal noise. To do that, click on “Effects and Presets” and type in “fractal” to choose “Fractal Noise.” You can double-click on it or drag it to the comp.
Step3Once this is done, you will need to do a little bit of housekeeping on the contrast and brightness. Increase the “Contrast” and reduce the “Brightness.”
Then go to the “Sub Settings” and reduce the “Sub Influence” down to zero.
Go to “Transform Option” and decrease the scale just a little bit. Then increase the “Scale Height” just a little.
Step4The next step is to add color to the scene. To do that, right-click on the layer and choose “New > Solid.” Select the gold color and click “OK.” Do the same with the second layer.
Step5Now you want to blend both colors by choosing a blending mode. Hold the “Shift” key and “hyphen” or “=” sign on the keyboard and choose “Overlay.”
Step6To make the color stronger, go to “Layer > Solid Settings” and choose a color.
Step7Go back to “Comp 3.” Right-click on it and select “New > Light” to add a new point of light.
Step8Go back to the project panel to click on “Comp 4” to add the environment. Right-click on the Comp 4 layer and make it an environment layer.
Step9In the options that appear, set “Appears in Reflections” to “Only” and you can then increase and decrease the color saturation until you have the desired result.
Free Gold Text Effects Template to Use
As you can see from the steps above, creating your gold text effects can be quite difficult. The good news is that you can download pre-made titles that you can simply edit. The following are some of the best to choose from;
- Christmas Title Template
Link: https://mixkit.co/free-after-effects-templates/christmas-title-template-819/
Despite the name, this is an ideal title for elegant projects or when you want your title to stand out. The typography is beautiful and elegant making it the most ideal template for fashion-themed videos. The template is easily customizable in After Effects and you can even change the color you want.

- Fashion Instagram Story
Link: https://mixkit.co/free-after-effects-templates/fashion-instagram-story-551/
This is the most ideal template to choose if you want a gold text effect that is accompanied by an image. Again, this is a very elegant theme that is ideal for YouTube and Instagram videos in the fashion and entertainment genres. It is also fully customizable in After Effects, allowing you to change the color, text, and image.

- Wedding Invitation Opener
Link: https://mixkit.co/free-after-effects-templates/wedding-invitation-opener-803/
This free gold text template is also completely customizable and comes with various text effects that you can include in the text. It is elegant and includes shadow effects that make the text stands out more. But you can remove the shadow effects if they don’t suit your project.

- Golden Luxury Titles
Link: https://motionarray.com/after-effects-templates/golden-luxury-titles-116934/
If you are looking for a gold text title that stands out in terms of design, animation, and color, consider Golden Luxury Titles. It comes with 9 editable layers that you can use to modify the title in any way. It is the most ideal title for movies, teasers, TV shows, and more.

- Emotional Awards Opener
Link: https://motionarray.com/after-effects-templates/emotional-awards-opener-356434/
This is a sparkling and glistering stylish design that can be very useful for movies and TV shows. This attention-grabbing title template has over 18 editable text layers to allow you to customize the title in various ways.

Alternative Way to Create Video Gold
Adobe After Effects is a very good video editor, but one of the things that can make it inaccessible to many users is that it can be very difficult to use. Thankfully, there is another very effective video editor that you can use to create gold text that is much easier to use.
This is the Wondershare Filmora , one of the best video editors in the market. Before we look at how you can use Filmora to create the perfect gold metal texture on your text, let’s first look at some of its main features;
- You can use Filmora to edit videos at a very high resolution including 4K videos
- It can be used to remove the background and noise from the video very easily
- You can edit both video and audio in the same project
- Up to 5 text tracks and 10 music tracks can be added to the same timeline and the same project
- It is very easy to use with a simple and intuitive user interface
Here’s how to use Filmora to create a gold metal texture for your text;
Step1Install Wondershare Filmora on your Computer
Download the Filmora setup file to your computer and double-click on it to start installing the program to your computer.
Open the program once the installation is complete.
Step2Create a New Project
If you are starting from the beginning, you may need to create a new project.
To do that, click on “File > New Project” in the menu bar to start a new project.
If there was a project that you were already working on, click on “Open Project” on the main window and then click “File > Open Project” or “File > Open Recent” in the menu bar.
Step3Add A Title to the Timeline
To add a gold texture effect to a title on your video, we will first of all need to add a title to the project.
To do that, go click on the “Titles” tab at the top and drag one of the default titles to the timeline.
Once it is in the timeline, double-click on the title and edit it. Type in anything you want to appear in the title.

Select the font that you want to use and choose a specific font size to use. These are all your preferences and will depend on your project.
Move the title to the second track in the timeline as you get ready to begin adding the colors.
Step4Start Adding Colors
Go to “Media” at the top and click on “Sample Colors.” Drag the black color image to the track directly below the title timeline.

Then take a snapshot of this newly created image by clicking on the “camera” icon next to the playhead.
Change the Font of the Title to something else more elegant like “Montez” and take another snapshot by clicking on the same camera icon.

Step5Add the Gold Effect
Delete everything from the timeline. Don’t worry you took a photo of all the text layers and the effects added to each.
You will then need to find an image of a gold background. You can find these on any good background image site. Download a good clear image and upload it into Filmora.
Now drag and drop the gold background image to the second track in the timeline. Double click on the background image.
Select “Compositing” and then in the “Blending Mode” drop-down menu, choose “Darken.” Click OK.”

Hide the first layer in the timeline and select the gold background image layer. Click on “Animation” and then select “Customize.”
To create the customized effect that we need, click on the image and drag it from the right to the left side.

Move the playhead to the end of the image to insert another keyframe and then click on the restore icon to restore the size of the image.

Click “OK” and show the track above the timeline. You will now see that the gold texture effect has been applied to your title. You can also add the second snapshot with the varying font for further effect.
Step6Save the Project
Once you are done, you can go ahead and save the project or continue working on other aspects of the video as desired.
Free Download For Win 7 or later(64-bit)
Free Download For macOS 10.14 or later
Also read:
- How to Turn On/Off Motion Blur in Fortnite for 2024 Is It Good for Fortnite?
- New In 2024, This Is a Recommendation About Bandicut. If You Are Confused, Please Check It Out
- New In 2024, How To Create A Green Screen Video In After Effects
- New Timeline Template Is a Visual Representation Showing the Passage of Time. It Includes Text, Diagrams, Images and Icons. They Are Perfect for Telling Stories, Events Etc
- New Get Creative with These 10 Video Editing App With Templates for 2024
- Are You Finding It Difficult to Freeze-Frame in After Effects? Note that Freeze-Frame Takes only a Few Seconds, and, in This Tutorial, We Will Guide You on How to Create and Add Frame Hold in After Effects for 2024
- Updated Top Best Free LUTs For Premiere Pro for 2024
- New Why You Should Master Slideshows In Lightroom, Fresh Insight for 2024
- Updated Do You Want to Know How to Add Captivating Audio in Simple Videos? Nothing to Be Concerned About because This Article Will Help You in This Matter
- New 12 Impressive AI Video Ideas for Making Engaging Video Content
- Updated In 2024, How to Google Meet Green Screen
- Updated In 2024, Do You Want to Know How to Edit a Time Lapse Video on iPhone, Interesting Ideas, and some Tips and Pointers for Shooting a Professional Time Lapse Video? Find Out Everything in This Guide
- Updated How to Do Censor Effects with Filmora
- In 2024, Do You Waste Time Making Transparent Background in Paint
- Updated AVI Editors for Windows 11/10/8.1/8/7 Easily Edit AVI Files on PC
- Updated How To Unlink Audio and Video in DaVinci Resolve
- Updated In 2024, Discover the Top 5 Online Tools for Merging MP4 Files Easily and Quickly. Streamline Your Video Editing Process and Create Seamless Videos with These User-Friendly Tools
- Detailed Steps to Rotate Videos Using OBS
- New 2024 Approved Easy Step by Step Tutorial on Creating a Lightroom Collage
- In 2024, Top 8 Augmented Reality Video Games
- In 2024, Do You Know There Are Websites to Download Free Glitch Transition Effects for Premiere Pro? You Can Easily Download Them and Make Awesome Videos
- Updated | How to Share YouTube Video on Zoom for 2024
- New 2024 Approved Are You Trying to Make Slow-Mo Videos on Instagram? In This Article, We Will Discuss Top-Rated Ways to Produce Perfect Slow-Motion Videos for Instagram
- New Add Camera Shake to Video in Adobe After Effects
- New How to Make Canva Collages for 2024
- New Want to Apply a Filter on Your Video Using Your iPhone or Mac? Here Are the Simple Steps to Put Add Filters on iMovie. Find Out a Better iMovie Alternative with More Filters for 2024
- New Best Youtube Video Meme Maker for 2024
- New Want to Learn How to Make Gaming Montage Videos? You Have Come to the Right Place. This Guide Will Teach You All You Need to Know to Create Montages of Video Games and Share Them with Other Players
- New Best GIF to AVI Converters
- Looking For the Best VHS Video Effect Makers? Get To Know the Top List
- How to Fade in Text in Adobe Premiere Pro
- Updated Every Compositor Should Know The Trick of Color Match in After Effects
- In 2024, The Best Way To Color Grading & Color Correction in Filmora
- Top 10 Secret Tips & Tricks to Use in Wondershare Filmora for 2024
- In 2024, Mastering Lock Screen Settings How to Enable and Disable on Nokia C12
- A Detailed Review & Alternatives of VOCALOID6 Voice Generator
- 3 Ways to Erase Apple iPhone 15 When Its Locked Within Seconds | Dr.fone
- How to Exit Android Factory Mode On ZTE Nubia Z60 Ultra? | Dr.fone
- Complete Guide to Hard Reset Your Nokia C12 Pro | Dr.fone
- In 2024, For People Wanting to Mock GPS on Realme GT Neo 5 SE Devices | Dr.fone
- How to Spy on Text Messages from Computer & Xiaomi 14 | Dr.fone
- 5 Solutions For Nubia Z50 Ultra Unlock Without Password
- How to remove Google FRP Lock on Infinix Note 30 VIP Racing Edition
- Why does the pokemon go battle league not available On OnePlus 12 | Dr.fone
- New What Is AI Marketing for 2024
- In 2024, Best Pokemons for PVP Matches in Pokemon Go For Vivo V30 Lite 5G | Dr.fone
- How to Unlock the Lock Screen on my A60s
- 3 Solutions to Find Your Oppo Reno 11 Pro 5G Current Location of a Mobile Number | Dr.fone
- In 2024, The Ultimate Guide to Get the Rare Candy on Pokemon Go Fire Red On Realme GT Neo 5 | Dr.fone
- Title: Updated Best Dark Moody LUTs During Editing
- Author: Morgan
- Created at : 2024-05-19 05:12:11
- Updated at : 2024-05-20 05:12:11
- Link: https://ai-video-editing.techidaily.com/updated-best-dark-moody-luts-during-editing/
- License: This work is licensed under CC BY-NC-SA 4.0.
