
:max_bytes(150000):strip_icc():format(webp)/linksys-default-password-list-2619153-5fccecc7c0b04133b2202a1fa9e8d37a.png)
Updated Best Method to Split the Video Into Parts Online
Best Method to Split the Video Into Parts Online
Apart from offline editing software, online video splitters are also available with the evolution of technology nowadays. VEED is one of them. It helps you in splitting the video into different parts. The splitter tool is available for deleting a specific part of the video. Even you can save these parts separately. The whole video editor is extremely user-friendly.
Along with the split and trimming of the videos, VEED also offers several tools for editing and adding effects to the images. It is suitable for training video makers and social media managers to demonstrate the products, business presentations, and HR videos. There are camera filters present, including sepia, night vision, fish eye, and many others. This article is actually the guide regarding editing the videos through VEED. As a substitute, Wondershare Filmora is also under discussion that is also available for the same purpose.
How can you split the video clips online from VEED?
VEED also supports different formats such as WMV, AVI, MPEG and others. While editing the videos in VEED, it converts into MP4, which is compatible with most media players. This is the most suitable format for sharing videos on social networking sites. This splitter tool also helps create a GIF file with animation. Even there is also a possibility of creating GIFs from various software. No matter the duration is of the video, VEED can split the video. It is freely available, and you can use it easily from your browser. You don’t need purchasing of premium software for splitting the videos.
Step 1: Select the video and upload it on the VEED. Simply drag and drop your video file in the editor when you click on “Choose video”. After the selection, split or trim on the timeline and drag towards the left side corner to make the clips shorter.

Step 2: Click on where you are looking to split the video or keep moving the slider on the timeline. Now, you need to press the “S” key on the keyboard or click on the button “Split”. It is easy to delete the clips you don’t need anymore.
Step 3: Click on the option of “Export”, and this is the time for saving the new file as the MP4 video file. Simply export them as a single video file. It is the simplest option to use, and you can do all the steps in a few clicks.

An easier way to split the video into parts
An online tool is available for instant tasks and increases efficiency. But unfortunately, it becomes time-consuming whenever the size of your file is a large or unstable internet connection. Here emerges the usage of Filmora Video Editor . It is an incredible tool for creating and editing your images and videos. This also helps maintain the quality of the videos without any concern about their size. All the options of splitting, rotating, resizing, and trimming the videos are also available offline.
For Win 7 or later (64-bit)
For macOS 10.14 or later
Features:
- Cloning of the effects
- Magical effects
- Motion graphics and addition of animation as well
- Splitting of the screen and video clips
- Matching of the colour
- Controls available for adjusting the audios and videos
There is a number of options available for a variety of users. There is Wondershare Filmora Pro for the experts and solutions for the business owners. The whole business plan of Wondershare Filmora is for showcasing your brand. Support centres are available for helping you whenever you face any hurdle. All the new features are updated in the latest version of it. User guides are also available on its official site. For splitting the videos and extracting your favourite scenes, below steps are how to split the videos in Wondershare Filmora:
Step 1. To split the videos in Wondershare Filmora, the feature of scene detection is very helpful for this purpose. It automatically makes the parts of the videos depending on the changes of the scene. To enable this feature, right-click on your video clip in your library folder and choose the “scene detection” option for its window.

Step 2. Click on “Detect”, and Wondershare Filmora starts dividing the videos into the number of clips depending on changing of the scenes. Click on every small clip for it is easy for you to preview the outcome for its addition on the timeline.

Step 3. For deleting the specific part of the video, its selection is essential and click on the trash icon. Click on “Add on the timeline” for separating the clips and edit them later. The clips you have split can be imported on the timeline, just like in the picture below.

Step 4. After splitting the video files, there are many options to apply to them like rotation, merger, cropping and recording the voice-over. Join the number of segments and add the background music to make the new video.
Wondershare Filmora is on the top ranking in the list of video editing software. Without facing any issues, you can simply create videos as well as edit them as well. You can get quickly a video editor of a professional level in just a smaller number of days of using it. All the tools are just on your timeline, and the simple interface makes it more enjoyable to use.
It is possible for the user to apply every feature in many ways, so Wondershare Filmora is very simple in handling all the functionalities. The whole software is full of fun. It guarantees to deliver highly professional results. Whether online or offline, Wondershare Filmora is also available to bring your imagination into reality. Even you can join the certification program of Wondershare Filmora. Start using it now as you will feel the difference in using it apart from other video editing software.
Step 2: Click on where you are looking to split the video or keep moving the slider on the timeline. Now, you need to press the “S” key on the keyboard or click on the button “Split”. It is easy to delete the clips you don’t need anymore.
Step 3: Click on the option of “Export”, and this is the time for saving the new file as the MP4 video file. Simply export them as a single video file. It is the simplest option to use, and you can do all the steps in a few clicks.
An easier way to split the video into parts
An online tool is available for instant tasks and increases efficiency. But unfortunately, it becomes time-consuming whenever the size of your file is a large or unstable internet connection. Here emerges the usage of Filmora Video Editor . It is an incredible tool for creating and editing your images and videos. This also helps maintain the quality of the videos without any concern about their size. All the options of splitting, rotating, resizing, and trimming the videos are also available offline.
For Win 7 or later (64-bit)
For macOS 10.14 or later
Features:
- Cloning of the effects
- Magical effects
- Motion graphics and addition of animation as well
- Splitting of the screen and video clips
- Matching of the colour
- Controls available for adjusting the audios and videos
There is a number of options available for a variety of users. There is Wondershare Filmora Pro for the experts and solutions for the business owners. The whole business plan of Wondershare Filmora is for showcasing your brand. Support centres are available for helping you whenever you face any hurdle. All the new features are updated in the latest version of it. User guides are also available on its official site. For splitting the videos and extracting your favourite scenes, below steps are how to split the videos in Wondershare Filmora:
Step 1. To split the videos in Wondershare Filmora, the feature of scene detection is very helpful for this purpose. It automatically makes the parts of the videos depending on the changes of the scene. To enable this feature, right-click on your video clip in your library folder and choose the “scene detection” option for its window.
Step 2. Click on “Detect”, and Wondershare Filmora starts dividing the videos into the number of clips depending on changing of the scenes. Click on every small clip for it is easy for you to preview the outcome for its addition on the timeline.
Step 3. For deleting the specific part of the video, its selection is essential and click on the trash icon. Click on “Add on the timeline” for separating the clips and edit them later. The clips you have split can be imported on the timeline, just like in the picture below.
Step 4. After splitting the video files, there are many options to apply to them like rotation, merger, cropping and recording the voice-over. Join the number of segments and add the background music to make the new video.
Wondershare Filmora is on the top ranking in the list of video editing software. Without facing any issues, you can simply create videos as well as edit them as well. You can get quickly a video editor of a professional level in just a smaller number of days of using it. All the tools are just on your timeline, and the simple interface makes it more enjoyable to use.
It is possible for the user to apply every feature in many ways, so Wondershare Filmora is very simple in handling all the functionalities. The whole software is full of fun. It guarantees to deliver highly professional results. Whether online or offline, Wondershare Filmora is also available to bring your imagination into reality. Even you can join the certification program of Wondershare Filmora. Start using it now as you will feel the difference in using it apart from other video editing software.
Do You Know How to Create AI Thumbnails for Videos? This Article Will Mention some of the Best Tools to Generate Attractive Thumbnails for Videos with AI
Thumbnails are a small visual preview of the images, videos, and documents to represent the linked content. They are mostly used in web pages, video playlists, and photo galleries to offer a visual preview to the users. Furthermore, professional YouTube content creators put extra effort into making captivating thumbnails for the videos. Such thumbnails help in click-baiting and gaining maximum viewership on YouTube.
In this article, we will highlight some competent AI thumbnail makers in detail. With such AI tools, you can create desired AI thumbnails in the best visual quality. Hence, consider this guide to use AI thumbnail creator for your YouTube videos without putting in manual effort.
AI Thumbnail Creator Generate template-driven video thumbnails with the help of AI in Filmora.
Free Download Free Download Learn More

Part 1: Some Other Top-Rated Solutions For Generating AI Thumbnails (Online)
Although Filmora provides a wonderful experience creating thumbnails, you must know about other online options. In this section, we will highlight some reliable online AI thumbnail generators with their key features.
1. VEED.io
VEED.io is an efficient tool that uses AI-powered algorithms to create thumbnails. These intelligent algorithms bring authentic results within a few minutes. To use this thumbnail generator AI, describe the thumbnail through the text field. You can write multiple words by adding commas to provide a comprehensive description. Once done, click the “Generate” button to craft the AI thumbnail.

Key Features
- io can function as a video editor to alter the settings of your video. Using this tool, you can add subtitles to your video in your preferred language.
- It includes a screen recorder to capture your screen activities in high resolution. Afterward, modify the screen recording with its editing tools.
- To generate vibrant images for your work projects, try its AI image generator. With this tool, describe your imagination through words to craft convincing images.
2. Simplified
Simplified is a famous platform offering unique features to generate videos and images. By navigating to its AI thumbnail maker, you can select the size of your thumbnail. Once done, explain your video content in the given box. Moreover, you can add personalized colors, text, and images without hassle. This online thumbnail maker AI also offers different options for thumbnail templates to generate attractive results.

Key Features
- This tool offers an AI Writer through which you can create outlines and scripts for the videos. Craft compelling captions for your social media posts with this feature.
- It contains a free graphic design tool on which you can create posts and illustrations in real time. Once done, publish the created design on this online platform.
- To make excellent presentations within a few minutes, try its AI presentation maker. Describe your topic in the text field, and the tool will use AI technology to create presentations.
3. Thumbnail.AI
Thumbnail.AI is a basic tool with a beginner-friendly interface. It’s a specialized tool in which you can make both manual and AI thumbnails. For AI generation, you have to add text and additional explanations in the given boxes. Moreover, it offers three thumbnail sizes: square, rectangle, and vertical. To craft more captivating thumbnails, insert images relevant to your content. Thus, this thumbnail generator is the best option for beginners.

Key Features
- To add images to your thumbnail, this tool provides three options. You can search, link, or upload images on this thumbnail AI tool easily.
- While creating thumbnails, the tool allows you to incorporate different elements. You can add icons, shapes, people, and social media banners.
- The customization options let you change the background color of the thumbnail. It also displays multiple options for font presets.
4. Hotpot.AI
If you want a comprehensive tool to create AI YouTube thumbnails, try Hotpot. It’s a free tool containing hundreds of YouTube thumbnail templates. After choosing the template, you can edit it without any skills. On the editing window, alter the width, height, and background color of the template. Furthermore, apply unique patterns and brand logos to the thumbnail for more effective results.

Key Features
- Are you annoyed by the unwanted people in the background of your videos? If yes, use the AI background remover of this tool to eradicate unnecessary objects from the background in an effective way.
- If you have a collection of vintage or old photos, colorize them with this online tool. With its colorizer feature, you can apply natural colors and shades to old images.
- This tool also includes an option to enhance the quality of facial images. It can remove blurriness, scratches, and tears from the uploaded images.
5. Canva
Canva is an all-one tool providing a robust interface to create designs, photos, and videos. By accessing its interface, you can find thousands of templates of multiple categories. You can filter the templates by choosing a specific style and theme. There are different themes for YouTube thumbnails on Canva, such as illustration, company, and business. Furthermore, select a thumbnail designed in your favorite color.

Key Features
- On this thumbnail AI generator, the thumbnail templates are 100% customizable. After editing them, you can download them quickly.
- Canva offers a PDF editor to edit and manage your PDF documents. Perform basic and advanced editing on your PDF files through this tool.
- Using this tool, make photo collages by combining desired photos. You can select attractive borders and styling boards to create collages.
6. Appy Pie
This AI thumbnail generator offers up to 47 thumbnail templates for your YouTube channel. You can preview and edit the thumbnail template within a few clicks. Furthermore, you can also design your own thumbnail by entering the text prompt. On its interface, it gives you the option to drag and drop the relevant images. By doing so, the tool will insert the relevant images on your thumbnail to generate the best results.

Key Features
- Do you want to create captivating avatars? You can try the AI avatar generator of this tool to create a personalized avatar by uploading your own photo.
- This tool consists of an AI text-to-video generator to craft stunning visuals. By using your textual prompt, generate a flawless video. Afterward, you can customize it from the given options.
- Using this online platform, add voiceovers to the videos with AI technology. You can write the narration in text and choose a preferred language. The tool will create a voiceover in natural voices.
7. AI YouTube Thumbnails
Do you want a professional and expert tool for creating AI thumbnails? This online tool is able to create 5 thumbnails for your video within five minutes. You can enter your video’s title or description in the text field as instructions. Afterward, the tool will email you with five attractive and relevant thumbnails for your video. Hence, it’s an easy-to-use tool to generate eye-catching thumbnails in minimal time.

Key Features
- Using advanced algorithms, this tool can convert the text into AI slides in an efficient manner. You can copy-paste the text, and the tool will generate an AI presentation with a single click.
- It offers advanced options to edit your Google slides to generate compelling results. You can remix layouts and content to create astonishing slides.
- This tool can help you collaborate with your team by sharing custom themes and styles. This will help you to stay on board while designing for your brand or company.
8. Snappa
Snappa is widely used to craft high-resolution images in desired colors and styles. Using this AI platform, create YouTube thumbnails with many templates. You can also start from scratch to display your creativity to the world. Moreover, upload a frame from your video to add a background in the thumbnail. It also offers thousands of royalty-free images, which you can utilize in the creation of thumbnails.

Key Features
- In this AI thumbnail creator, choose different dimensions to create images for social media posts. You can create Facebook, Instagram, LinkedIn, and other posts through this tool.
- To customize the template, add different elements from the options. You can add background, shapes, and effects to personalize the template.
- It provides multiple options to add graphics while designing a thumbnail. Add icons, vectors, photos, and uploads from your PC.
9. Picmaker
Picmaker offers the easiest way to create YouTube thumbnails in the desired manner. In this thumbnail AI maker, you can get perfectly sized YouTube thumbnails in the correct dimensions. You can use fancy colors and stylish text fonts in personalizing the thumbnail templates. Furthermore, download the thumbnail in many formats, such as SVG, PNG, PDF, and JPEG.

Key Features
- To create perfect online graphics, try its image resizer tool. Using this tool, you can resize the created digital designs according to the requirements of a particular platform.
- This AI thumbnail generator allows you to create customized brand kits. Create a brand kit by uploading fonts, colors, and logos effectively.
- By using its free photo editor, enhance the visual appearance of your images. You can apply captivating effects to the photos from the listed options. Also, blur the specific parts of the photo to add an aesthetic appeal.
Part 2: What Are The Benefits of Using Thumbnails in Generating Online Content?
Using thumbnails in creating online content can bring you many benefits. More specifically, if you want to generate thumbnails for YouTube videos, it can help you gain massive viewership. To know more about the benefits of thumbnail AI tools, read the below part:
1. Promotion of Brand
If you want to do your brand marketing, adding thumbnails in the videos can make an impact. You can add logos associated with your brand colors and fonts. This will help in gaining trust and credibility from your audience. Furthermore, it will display your professionalism by adding thumbnails relevant to your brand or company.
2. Enhanced Visual Representation
Thumbnails in a video help users browse and locate the content. With improved visibility of the content, users would be able to identify the content of your video. Moreover, it can increase your click-through rate (CTR), which can positively influence your viewership.
3. Offering Aesthetic Value
If you want to grow your YouTube channel or a website, YouTube thumbnail AI can help. They add an aesthetic appeal to your content, which can grasp the attention of viewers. Additionally, it will compel the viewers to explore your channel. As a result, build a strong community on your platform that can influence future progress.
4. Making Your Content Stands Out
In this competitive era, there are millions of channels and websites on online platforms. To gain a competitive edge among other channels, adding professional thumbnails is essential. Hence, make a prominent identity in the crowded online space through thumbnails.
5. Better SEO Ranking
Some online sites encourage the usage of thumbnails in the content. The reason is that thumbnails provide a preview to the users before clicking the video. In such a way, users can browse the content effortlessly. Hence, it can provide an improved SEO ranking that can highlight your content.
Part 3: Wondershare Filmora: The First-Base Solution To AI Thumbnail Making
If you want to experience a desktop-based solution for thumbnail AI creation, Wondershare Filmora is there for you. By launching this tool on Windows or macOS, you can execute professional video editing in its robust interface. Along with basic editing features like trimming and rearranging, utilize its AI tools.
It uses AI technology to provide the best performance in editing videos. It not only boosts your overall productivity but also brings perfection in editing videos. With the latest Filmora V13 launch, you can avail yourself of many game-changing features for video editing.
After this launch, you can modify your videos with the upgraded interface and intuitive controls. The new features include AI Copilot editing, AI copywriting, AI vocal remover, etc. Furthermore, it has also introduced an AI thumbnail maker to craft aesthetic thumbnails for the videos smartly.
Free Download For Win 7 or later(64-bit)
Free Download For macOS 10.14 or later
AI Thumbnail Creator Feature of Filmora
The AI Thumbnail feature of Filmora uses advanced algorithms to recognize the best shots from your video. By doing so, it can capture three thumbnails from your video that are linked to your video content. It also provides many customization options to meet your requirements for generating thumbnails. You can apply desired color schemes, fonts, and design elements.
Filmora also consists of up to 58 thumbnail templates to provide you with inspiring ideas. Moreover, it also supports advanced text and image editing to create flawless thumbnails. Thus, you must try the AI thumbnail generator of this tool for automated results.
Step-by-Step Guide To Use the AI Thumbnail Feature
Do you know how to use the AI thumbnail maker of Filmora? Here are the relevant instructions that can help you in this regard:
Step 1: Access the Thumbnail Generator
Launch Filmora on your PC and import the desired video. Once done with editing your video, hit the “Export” option. It will instantly open the Export window on your screen. From there, click the “Edit” option in the top left corner. This will open the thumbnail generator of Filmora on your screen.

Step 2: Determine the Desired Video Frame
After accessing the thumbnail generator, you can see the best frames of your video on the left side. These frames are gathered by AI technology to bring you the best frame options. While keeping in the “From Video” section, choose your preferred frame and then tap on “Edit.”

Step 3: Choose a Suitable Template
Now, the tool will display the thumbnail templates of different categories. Specify your category and then select the required thumbnail template from the listed options. Once done, tap on the “Save” button.

Step 4: Convert the Frame into a Thumbnail
Once you have saved the thumbnail template, the “Export” window will appear. From this window, click “Export” to convert the video frame into a thumbnail. After the conversion, check the AI-generated thumbnail by clicking the “Open Folder” option.

Conclusion
To make your YouTube videos look aesthetic, you should add relevant thumbnails. This will engage the viewers and help them to locate your content. Thus, being a content creator, you should know about some compelling thumbnail AI tools. By using AI-supported thumbnail creators, you can make attractive and high-quality thumbnails with little effort. Therefore, we highly recommend Filmora, which can create flawless thumbnails with up to 58 templates.
Free Download Free Download Learn More
Part 1: Some Other Top-Rated Solutions For Generating AI Thumbnails (Online)
Although Filmora provides a wonderful experience creating thumbnails, you must know about other online options. In this section, we will highlight some reliable online AI thumbnail generators with their key features.
1. VEED.io
VEED.io is an efficient tool that uses AI-powered algorithms to create thumbnails. These intelligent algorithms bring authentic results within a few minutes. To use this thumbnail generator AI, describe the thumbnail through the text field. You can write multiple words by adding commas to provide a comprehensive description. Once done, click the “Generate” button to craft the AI thumbnail.
Key Features
- io can function as a video editor to alter the settings of your video. Using this tool, you can add subtitles to your video in your preferred language.
- It includes a screen recorder to capture your screen activities in high resolution. Afterward, modify the screen recording with its editing tools.
- To generate vibrant images for your work projects, try its AI image generator. With this tool, describe your imagination through words to craft convincing images.
2. Simplified
Simplified is a famous platform offering unique features to generate videos and images. By navigating to its AI thumbnail maker, you can select the size of your thumbnail. Once done, explain your video content in the given box. Moreover, you can add personalized colors, text, and images without hassle. This online thumbnail maker AI also offers different options for thumbnail templates to generate attractive results.
Key Features
- This tool offers an AI Writer through which you can create outlines and scripts for the videos. Craft compelling captions for your social media posts with this feature.
- It contains a free graphic design tool on which you can create posts and illustrations in real time. Once done, publish the created design on this online platform.
- To make excellent presentations within a few minutes, try its AI presentation maker. Describe your topic in the text field, and the tool will use AI technology to create presentations.
3. Thumbnail.AI
Thumbnail.AI is a basic tool with a beginner-friendly interface. It’s a specialized tool in which you can make both manual and AI thumbnails. For AI generation, you have to add text and additional explanations in the given boxes. Moreover, it offers three thumbnail sizes: square, rectangle, and vertical. To craft more captivating thumbnails, insert images relevant to your content. Thus, this thumbnail generator is the best option for beginners.
Key Features
- To add images to your thumbnail, this tool provides three options. You can search, link, or upload images on this thumbnail AI tool easily.
- While creating thumbnails, the tool allows you to incorporate different elements. You can add icons, shapes, people, and social media banners.
- The customization options let you change the background color of the thumbnail. It also displays multiple options for font presets.
4. Hotpot.AI
If you want a comprehensive tool to create AI YouTube thumbnails, try Hotpot. It’s a free tool containing hundreds of YouTube thumbnail templates. After choosing the template, you can edit it without any skills. On the editing window, alter the width, height, and background color of the template. Furthermore, apply unique patterns and brand logos to the thumbnail for more effective results.
Key Features
- Are you annoyed by the unwanted people in the background of your videos? If yes, use the AI background remover of this tool to eradicate unnecessary objects from the background in an effective way.
- If you have a collection of vintage or old photos, colorize them with this online tool. With its colorizer feature, you can apply natural colors and shades to old images.
- This tool also includes an option to enhance the quality of facial images. It can remove blurriness, scratches, and tears from the uploaded images.
5. Canva
Canva is an all-one tool providing a robust interface to create designs, photos, and videos. By accessing its interface, you can find thousands of templates of multiple categories. You can filter the templates by choosing a specific style and theme. There are different themes for YouTube thumbnails on Canva, such as illustration, company, and business. Furthermore, select a thumbnail designed in your favorite color.
Key Features
- On this thumbnail AI generator, the thumbnail templates are 100% customizable. After editing them, you can download them quickly.
- Canva offers a PDF editor to edit and manage your PDF documents. Perform basic and advanced editing on your PDF files through this tool.
- Using this tool, make photo collages by combining desired photos. You can select attractive borders and styling boards to create collages.
6. Appy Pie
This AI thumbnail generator offers up to 47 thumbnail templates for your YouTube channel. You can preview and edit the thumbnail template within a few clicks. Furthermore, you can also design your own thumbnail by entering the text prompt. On its interface, it gives you the option to drag and drop the relevant images. By doing so, the tool will insert the relevant images on your thumbnail to generate the best results.
Key Features
- Do you want to create captivating avatars? You can try the AI avatar generator of this tool to create a personalized avatar by uploading your own photo.
- This tool consists of an AI text-to-video generator to craft stunning visuals. By using your textual prompt, generate a flawless video. Afterward, you can customize it from the given options.
- Using this online platform, add voiceovers to the videos with AI technology. You can write the narration in text and choose a preferred language. The tool will create a voiceover in natural voices.
7. AI YouTube Thumbnails
Do you want a professional and expert tool for creating AI thumbnails? This online tool is able to create 5 thumbnails for your video within five minutes. You can enter your video’s title or description in the text field as instructions. Afterward, the tool will email you with five attractive and relevant thumbnails for your video. Hence, it’s an easy-to-use tool to generate eye-catching thumbnails in minimal time.
Key Features
- Using advanced algorithms, this tool can convert the text into AI slides in an efficient manner. You can copy-paste the text, and the tool will generate an AI presentation with a single click.
- It offers advanced options to edit your Google slides to generate compelling results. You can remix layouts and content to create astonishing slides.
- This tool can help you collaborate with your team by sharing custom themes and styles. This will help you to stay on board while designing for your brand or company.
8. Snappa
Snappa is widely used to craft high-resolution images in desired colors and styles. Using this AI platform, create YouTube thumbnails with many templates. You can also start from scratch to display your creativity to the world. Moreover, upload a frame from your video to add a background in the thumbnail. It also offers thousands of royalty-free images, which you can utilize in the creation of thumbnails.
Key Features
- In this AI thumbnail creator, choose different dimensions to create images for social media posts. You can create Facebook, Instagram, LinkedIn, and other posts through this tool.
- To customize the template, add different elements from the options. You can add background, shapes, and effects to personalize the template.
- It provides multiple options to add graphics while designing a thumbnail. Add icons, vectors, photos, and uploads from your PC.
9. Picmaker
Picmaker offers the easiest way to create YouTube thumbnails in the desired manner. In this thumbnail AI maker, you can get perfectly sized YouTube thumbnails in the correct dimensions. You can use fancy colors and stylish text fonts in personalizing the thumbnail templates. Furthermore, download the thumbnail in many formats, such as SVG, PNG, PDF, and JPEG.
Key Features
- To create perfect online graphics, try its image resizer tool. Using this tool, you can resize the created digital designs according to the requirements of a particular platform.
- This AI thumbnail generator allows you to create customized brand kits. Create a brand kit by uploading fonts, colors, and logos effectively.
- By using its free photo editor, enhance the visual appearance of your images. You can apply captivating effects to the photos from the listed options. Also, blur the specific parts of the photo to add an aesthetic appeal.
Part 2: What Are The Benefits of Using Thumbnails in Generating Online Content?
Using thumbnails in creating online content can bring you many benefits. More specifically, if you want to generate thumbnails for YouTube videos, it can help you gain massive viewership. To know more about the benefits of thumbnail AI tools, read the below part:
1. Promotion of Brand
If you want to do your brand marketing, adding thumbnails in the videos can make an impact. You can add logos associated with your brand colors and fonts. This will help in gaining trust and credibility from your audience. Furthermore, it will display your professionalism by adding thumbnails relevant to your brand or company.
2. Enhanced Visual Representation
Thumbnails in a video help users browse and locate the content. With improved visibility of the content, users would be able to identify the content of your video. Moreover, it can increase your click-through rate (CTR), which can positively influence your viewership.
3. Offering Aesthetic Value
If you want to grow your YouTube channel or a website, YouTube thumbnail AI can help. They add an aesthetic appeal to your content, which can grasp the attention of viewers. Additionally, it will compel the viewers to explore your channel. As a result, build a strong community on your platform that can influence future progress.
4. Making Your Content Stands Out
In this competitive era, there are millions of channels and websites on online platforms. To gain a competitive edge among other channels, adding professional thumbnails is essential. Hence, make a prominent identity in the crowded online space through thumbnails.
5. Better SEO Ranking
Some online sites encourage the usage of thumbnails in the content. The reason is that thumbnails provide a preview to the users before clicking the video. In such a way, users can browse the content effortlessly. Hence, it can provide an improved SEO ranking that can highlight your content.
Part 3: Wondershare Filmora: The First-Base Solution To AI Thumbnail Making
If you want to experience a desktop-based solution for thumbnail AI creation, Wondershare Filmora is there for you. By launching this tool on Windows or macOS, you can execute professional video editing in its robust interface. Along with basic editing features like trimming and rearranging, utilize its AI tools.
It uses AI technology to provide the best performance in editing videos. It not only boosts your overall productivity but also brings perfection in editing videos. With the latest Filmora V13 launch, you can avail yourself of many game-changing features for video editing.
After this launch, you can modify your videos with the upgraded interface and intuitive controls. The new features include AI Copilot editing, AI copywriting, AI vocal remover, etc. Furthermore, it has also introduced an AI thumbnail maker to craft aesthetic thumbnails for the videos smartly.
Free Download For Win 7 or later(64-bit)
Free Download For macOS 10.14 or later
AI Thumbnail Creator Feature of Filmora
The AI Thumbnail feature of Filmora uses advanced algorithms to recognize the best shots from your video. By doing so, it can capture three thumbnails from your video that are linked to your video content. It also provides many customization options to meet your requirements for generating thumbnails. You can apply desired color schemes, fonts, and design elements.
Filmora also consists of up to 58 thumbnail templates to provide you with inspiring ideas. Moreover, it also supports advanced text and image editing to create flawless thumbnails. Thus, you must try the AI thumbnail generator of this tool for automated results.
Step-by-Step Guide To Use the AI Thumbnail Feature
Do you know how to use the AI thumbnail maker of Filmora? Here are the relevant instructions that can help you in this regard:
Step 1: Access the Thumbnail Generator
Launch Filmora on your PC and import the desired video. Once done with editing your video, hit the “Export” option. It will instantly open the Export window on your screen. From there, click the “Edit” option in the top left corner. This will open the thumbnail generator of Filmora on your screen.
Step 2: Determine the Desired Video Frame
After accessing the thumbnail generator, you can see the best frames of your video on the left side. These frames are gathered by AI technology to bring you the best frame options. While keeping in the “From Video” section, choose your preferred frame and then tap on “Edit.”
Step 3: Choose a Suitable Template
Now, the tool will display the thumbnail templates of different categories. Specify your category and then select the required thumbnail template from the listed options. Once done, tap on the “Save” button.
Step 4: Convert the Frame into a Thumbnail
Once you have saved the thumbnail template, the “Export” window will appear. From this window, click “Export” to convert the video frame into a thumbnail. After the conversion, check the AI-generated thumbnail by clicking the “Open Folder” option.
Conclusion
To make your YouTube videos look aesthetic, you should add relevant thumbnails. This will engage the viewers and help them to locate your content. Thus, being a content creator, you should know about some compelling thumbnail AI tools. By using AI-supported thumbnail creators, you can make attractive and high-quality thumbnails with little effort. Therefore, we highly recommend Filmora, which can create flawless thumbnails with up to 58 templates.
Cropping Videos in Final Cut Pro [Step by Step]
“Storytelling at its most powerful”, - words we read on the first page of the official web-site of Final Cut Pro, non-linear video editing software program which runs on Mac computers. The software lets us to log and transfer videos onto a hard drive, where it can be edited, processed, and output to a wide variety of formats. Final Cut Pro is so advanced that it is used by hobbyist filmmakers and industry professionals in TV, Film, and media. Anyone can get a free trial of the software for their Macs, but, to purchase directly from the Mac App Store it costs $299.99. It’s evident that Final Cut Pro can’t be downloaded, installed, and thus used on Windows, which is unfortunate, but for Mac users, it’s a very powerful video editing software.

What are the features this advanced computer program offers to Mac users? – itreads on the web-site of Final Cut Pro:
- Object Tracker and Cinematic mode;
- Blazing pro performance;
- Editing, audio, motion graphics, color grading, and delivery;
- The best plug-ins, effects, and tools from leading developers.
One of the most impressive things about Final Cut Pro is that through it, you can create 2D and 3D titles right in the program, apply and modify filters, and use the built-in chroma key for high-quality green- and blue-screen effects. But, one should not be alarmed when it comes to experience and knowledge in editing – even though Final Cut Pro seems so advanced with its powerful tools and the possibilities it contains, it is designed for easy use and can be used by amateurs as well as professionals.
The interface, which, when it comes to editing, is one of the most important aspects (if not the main one!), seems quite standard - an ordinary window configuration, sidebar with libraries, events, projects, collections… If you want to know more about the basics of Final Cut Pro, it would be helpful to watch a beginner tutorial , with the length of only 20 minutes, an introduction of the whole program.

Anyway, the main topic of this article is about cropping – how to crop a video in Final Cut Pro? If you are a Mac user and have this program installed on your computer, and you as well have a footage where you want to remove some portions of the video and adjust the size of the cropped clip within a certain area, this article is for you. Even though cropping is especially used when it comes to the images, it is extremely helpful in certain situations about the video clips, as well. So, let’s dive into each step of cropping in Final Cut Pro!
Steps to crop a video in Final Cut Pro
After getting Final Cut Pro ready to work in and opening it, you need to start as always, as in any other software: Of course, choose Import Media.

The software will ask your permission to access files in your computer, so, in order to import some, guess you have to click on OK.

Then, it will let you choose your file – but not by opening the new window (as in most cases), rather, you can choose file within the software.

Once you have your file(s) chosen, you need to find Import Selected button on the down and right.

This will lead you towards the editor again, but if you try to drag and drop your file into the sequence, the program will not follow this simple order…

This is because what the window below reads and looks like – it offers you create a New Project first. So, you need to hit it.

This will create the sequence where you can add the video you have already selected and imported from your media.

Now, it’s time to find where the cropping option is. It’s quite simple – look at the icon below and a little left of the screen where your video clip shows, click on it and you will see three options: Transform, Crop, and Distort. Needless to say, you will choose crop in this case, even if other options sound quite interesting, too!

Choosing Crop also gives you three options: Trim, Crop, and Ken Burns. Stick with the Crop again!

You will notice the kind of rulers on the angles of the video clip – they are there so you can crop your footage manually, by holding and moving them with your cursor to your liking.

Of course, if you direct your cursor in the middle of the cropped video, you can move the whole cropping window around it, so you can find the area where you intend to crop better.

And when the selected area is ready, you need to click on Done button on the right top side of the screen. If you are not satisfied with the result, you can take the step back, by clicking on Reset button right next to Done and modify the area again.

On the right side of the screen, you notice a window where Crop is also written. Alongside it, if you hover over the option with your mouse, you will see the word: Show. Clicking on it will let you crop the video from each side from there, too.

There, you can “play around” with Left, Right, Top, and Bottom sides.

In the process, if you are unsure or you want to compare the original video to the cropped version of it, keep in mind that you can uncheck the Crop button.

Finally, when you feel the result is what you have imagined, you can proceed to saving your work. For it to be done, you need to now find an Export button top right of the whole editor, and then, choose Export File (or else, if that’s what you are willing to do).


The next step would be Export Settings. You will see a new window which has three sections: Info, Settings, and Roles. The most important one here would be considered Settings, where you choose your preferred Format, Video Codec, Resolution, Color Space, Audio Format, and Action.


When you click on Next, you then choose the Name of your project and the location where you want to save it exactly.

Then you click on Save, and in a short amount of time, you have your new cropped video where you chose to save it! So, that’s it with cropping in the Final Cut Pro!


An easier way to crop a video in Wondershare Filmora
When it comes down to Mac, we can also discussed another program which is available on Mac as well as Windows operating system. This software is Filmora Video Editor , which is a simple yet sophisticated video editor that empowers the stories with everything a video editor program can offer to its users. On its official web-site, Filmora is declared as the best video editor, which allows you to edit videos with minimal effort (and isn’t that exactly what one wants when trying to just crop a video?..), enhance videos with 800+ stunning effects, unleash creativity with Hollywood effects, and, import and export in almost any format. One can say that the interface looks quite like that of Final Cut Pro…
For Win 7 or later (64-bit)
For macOS 10.14 or later

So, shall we imagine we use Wondershare Filmora X to crop our video, what would be the steps to do it?..
Needless to say, downloading and installing the software is the first step. To add files, you need to click on Import Media Files Here.

Choose your clip(s) you would like to crop and then drag and drop it in the sequence.

Above your video in the sequence, you will see little icons and find a Crop one.

Click on it and a new window will open – it’s for Crop and Zoom, where you can choose a needed ratio or do it manually (for it, you have to select Custom first).

After clicking OK, your video will be cropped as you like. Then, you can proceed with Exporting it – click on Export, choose your preferred settings, and save the video.

So, in this article, we got to know to software Final Cut Pro better and learned about how to crop our footage using this program; we also discussed how to do the same in Wondershare Filmora X, shall we need a different software.
And now, you can choose your preferred one and follow these step, or, why not try both?..
What are the features this advanced computer program offers to Mac users? – itreads on the web-site of Final Cut Pro:
- Object Tracker and Cinematic mode;
- Blazing pro performance;
- Editing, audio, motion graphics, color grading, and delivery;
- The best plug-ins, effects, and tools from leading developers.
One of the most impressive things about Final Cut Pro is that through it, you can create 2D and 3D titles right in the program, apply and modify filters, and use the built-in chroma key for high-quality green- and blue-screen effects. But, one should not be alarmed when it comes to experience and knowledge in editing – even though Final Cut Pro seems so advanced with its powerful tools and the possibilities it contains, it is designed for easy use and can be used by amateurs as well as professionals.
The interface, which, when it comes to editing, is one of the most important aspects (if not the main one!), seems quite standard - an ordinary window configuration, sidebar with libraries, events, projects, collections… If you want to know more about the basics of Final Cut Pro, it would be helpful to watch a beginner tutorial , with the length of only 20 minutes, an introduction of the whole program.
Anyway, the main topic of this article is about cropping – how to crop a video in Final Cut Pro? If you are a Mac user and have this program installed on your computer, and you as well have a footage where you want to remove some portions of the video and adjust the size of the cropped clip within a certain area, this article is for you. Even though cropping is especially used when it comes to the images, it is extremely helpful in certain situations about the video clips, as well. So, let’s dive into each step of cropping in Final Cut Pro!
Steps to crop a video in Final Cut Pro
After getting Final Cut Pro ready to work in and opening it, you need to start as always, as in any other software: Of course, choose Import Media.
The software will ask your permission to access files in your computer, so, in order to import some, guess you have to click on OK.
Then, it will let you choose your file – but not by opening the new window (as in most cases), rather, you can choose file within the software.
Once you have your file(s) chosen, you need to find Import Selected button on the down and right.
This will lead you towards the editor again, but if you try to drag and drop your file into the sequence, the program will not follow this simple order…
This is because what the window below reads and looks like – it offers you create a New Project first. So, you need to hit it.
This will create the sequence where you can add the video you have already selected and imported from your media.
Now, it’s time to find where the cropping option is. It’s quite simple – look at the icon below and a little left of the screen where your video clip shows, click on it and you will see three options: Transform, Crop, and Distort. Needless to say, you will choose crop in this case, even if other options sound quite interesting, too!
Choosing Crop also gives you three options: Trim, Crop, and Ken Burns. Stick with the Crop again!
You will notice the kind of rulers on the angles of the video clip – they are there so you can crop your footage manually, by holding and moving them with your cursor to your liking.
Of course, if you direct your cursor in the middle of the cropped video, you can move the whole cropping window around it, so you can find the area where you intend to crop better.
And when the selected area is ready, you need to click on Done button on the right top side of the screen. If you are not satisfied with the result, you can take the step back, by clicking on Reset button right next to Done and modify the area again.
On the right side of the screen, you notice a window where Crop is also written. Alongside it, if you hover over the option with your mouse, you will see the word: Show. Clicking on it will let you crop the video from each side from there, too.
There, you can “play around” with Left, Right, Top, and Bottom sides.
In the process, if you are unsure or you want to compare the original video to the cropped version of it, keep in mind that you can uncheck the Crop button.
Finally, when you feel the result is what you have imagined, you can proceed to saving your work. For it to be done, you need to now find an Export button top right of the whole editor, and then, choose Export File (or else, if that’s what you are willing to do).
The next step would be Export Settings. You will see a new window which has three sections: Info, Settings, and Roles. The most important one here would be considered Settings, where you choose your preferred Format, Video Codec, Resolution, Color Space, Audio Format, and Action.
When you click on Next, you then choose the Name of your project and the location where you want to save it exactly.
Then you click on Save, and in a short amount of time, you have your new cropped video where you chose to save it! So, that’s it with cropping in the Final Cut Pro!
An easier way to crop a video in Wondershare Filmora
When it comes down to Mac, we can also discussed another program which is available on Mac as well as Windows operating system. This software is Filmora Video Editor , which is a simple yet sophisticated video editor that empowers the stories with everything a video editor program can offer to its users. On its official web-site, Filmora is declared as the best video editor, which allows you to edit videos with minimal effort (and isn’t that exactly what one wants when trying to just crop a video?..), enhance videos with 800+ stunning effects, unleash creativity with Hollywood effects, and, import and export in almost any format. One can say that the interface looks quite like that of Final Cut Pro…
For Win 7 or later (64-bit)
For macOS 10.14 or later
So, shall we imagine we use Wondershare Filmora X to crop our video, what would be the steps to do it?..
Needless to say, downloading and installing the software is the first step. To add files, you need to click on Import Media Files Here.
Choose your clip(s) you would like to crop and then drag and drop it in the sequence.
Above your video in the sequence, you will see little icons and find a Crop one.
Click on it and a new window will open – it’s for Crop and Zoom, where you can choose a needed ratio or do it manually (for it, you have to select Custom first).
After clicking OK, your video will be cropped as you like. Then, you can proceed with Exporting it – click on Export, choose your preferred settings, and save the video.
So, in this article, we got to know to software Final Cut Pro better and learned about how to crop our footage using this program; we also discussed how to do the same in Wondershare Filmora X, shall we need a different software.
And now, you can choose your preferred one and follow these step, or, why not try both?..
Ways to Learn Discord Game Bots – Even if You’re Just Starting Out [20
Ways to Learn Discord Game Bots – Even if You’re Just Starting out
An easy yet powerful editor
Numerous effects to choose from
Detailed tutorials provided by the official channel
Discord is free social communication service used by tens of millions of individuals aged 13 and above to socialize with their communities and friends. People use discord regularly to discuss various topics, from art projects and family vacations to homework and mental health help. It serves as a home for communities of different sizes but has become quite popular as discord bot games due to the rise in the gaming community.
The great majority of servers are private, invite-only locations where friends and communities may communicate and spend time together. More significant, more open groups based on specific themes like popular video games like PUBG and Genshin Impact. Because all discussions are opt-in, users have complete choice over who they connect with and how they use discord.
In this article
01 [What Are Discord Game Bots?](#Part 1)
02 [How Do You Add Bot Games to Discord?](#Part 2)
03 [Top 10 Picks of Discord Gaming Bots](#Part 3)
04 [Discord Game Bots FAQs](#Part 4)
Part 1 What Are Discord Game Bots?
Discord game bots are artificial intelligence (AI)-powered applications that automate processes and add music, games, welcome messages, memes, and other fun stuff to your server. These bots make it simple to interact with your audience, grow your community, and manage your server.
There is a plethora of game bots for discord to pick from, each with its purpose. Some may automatically welcome new users, while others utilize webhooks to interface with other apps—and it may be tough for novice users to figure out which ones will provide the most remarkable results for their requirements.
Part 2 How Do You Add Bot Games to Discord?
Follow the steps below to add game bots for discord successfully:
Step 1: To add a bot to your Discord server, go to the bot’s source page. We’ll be using ProBot for this lesson.
Step 2: Depending on the bot you’re adding, click Add to Discord or Invite Now.
Step 3: To grant the bot access, a pop-up window will appear asking you to check in to your Discord account.
Step 4: After you log in, you’ll see a box asking for account authorization. Locate and choose the Add to Server drop-down menu.
Step 5: This will bring up a list of discord servers where you can add a bot game discord. Continue after selecting your server.
Step 6: Examine the server permissions that the bot asks for. Select and deselect according to your requirements. When you’re ready, click Authorize.
For those who like to share their discord game bots experience through screen recordings and whatnot, a potent and convenient video editing tool to make your sessions look even more incredible is Filmora.
Wondershare Filmora Video Editor is a famous video editing program for those who wish to focus on editing and producing high-quality videos. The program supports 4K video editing. It’s a reasonably priced tool featuring effects for both video and audio. When it comes to designing, adding effects, and modifying movies, it provides users with many possibilities. You can use the tool to add overlays, create animations and objects, add music, and input text. Imagine sharing your experience in 4k!
For Win 7 or later (64-bit)
For macOS 10.12 or later
Part 3 Top 10 Picks of Discord Gaming Bots
01Karuta
Karuta is a discord game bot where you gather anime characters. In Karuta, though, you collect characters using trading cards. Your cards and other objects may be customized, upgraded, and traded with other players. Better still, you maintain the same cards between servers, allowing you to play Karuta with the same deck on any server where the game discord bot is!
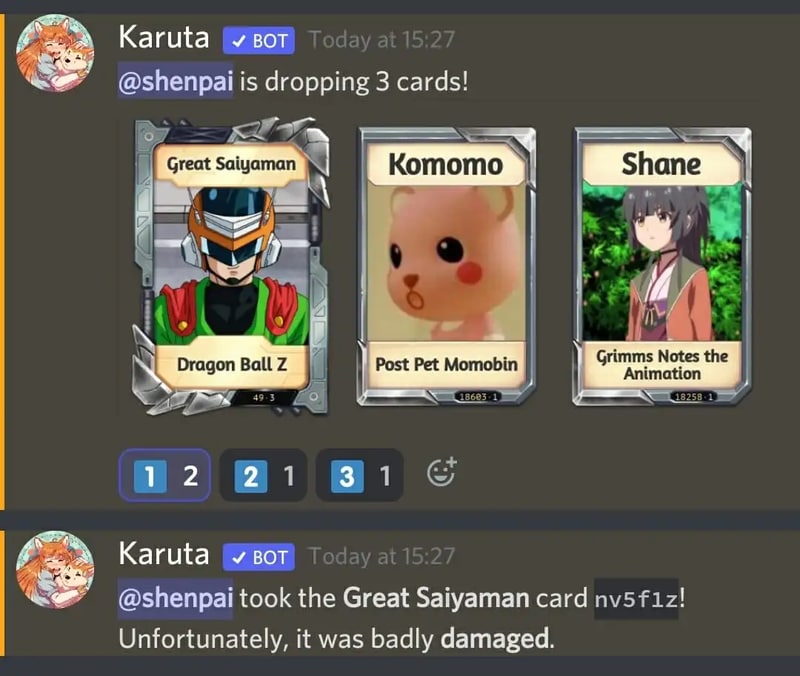
02Dragon Bot Z
Dragon Bot Z is the discord bot game that adds discord Ball Z, a multiplayer text-based RPG, to your server. Players in Discord Ball Z summon characters from the iconic Dragon Ball Z franchise, train them, fight foes, buy equipment, and trade with other players. This Discord game is ideal for Dragon Ball fans or anybody who likes text-based roleplaying games.

03Mudae
Mudae is a bot discord game with character-collecting. For example, you can claim popular anime and videogame characters as your “waifus” or “husbandos,” develop your harem, and compete for your favorite characters with other users. You can also trade the characters with other members.

04Rock Puppy
Rock Puppy is a basic yet entertaining game bots discord bot that incorporates several classic games. You can enjoy Discord games like ConnectFour, Truth or Dare, Trivia, Tic-Tac-Toe, Russian Roulette, and Would You Rather with Rock Puppy. You may also use magic 8-ball, dice, or tarot cards, play classic board and party games on your server with Rock Puppy.
05GarticBOT
GarticBot is a bot game in discord that allows you to play the drawing game Gartic. GarticBot begins the Discord game by painting an image on your server. Members then compete against one another to predict the image the quickest. Others can guess your drawings if you submit them. Type the command g.draw, and Gartic will provide you with a URL to submit your artwork. GarticBot creates a fun Pictionary-style game for everyone on your server to play.

06TriviaBot
TriviaBot is the most popular trivia game discord bot. It has over 90,000 questions, and you can even submit your own for inclusion in the bot. Members can form and join teams to compete in competitions. You may also create a public leaderboard to display who performs the best on the server.

07GamesRob
The finest Uno discord game bot is GamesROB. ConnectFour, Trivia, Battleship, 2048, Tic-Tac-Toe, Minesweeper, and Hangman are the other traditional party games added to discord. You may also play “Detective,” a Discord game in which you try to figure out who is the “assassin” on your server, memory games, and Town, Country, River, a game in which you try to come up with as many phrases as possible within a theme.
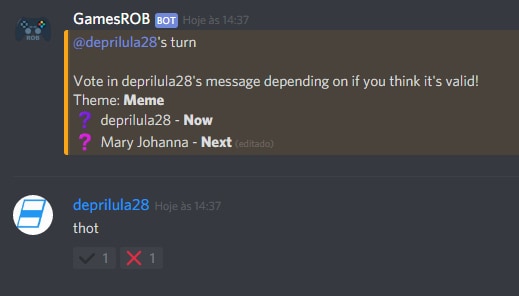
08Chess Reddit
Chess is a simple game that allows you to play chess on discord. You may play a chess game with other server members directly on the server. Instruct the bot on which pieces to move and where they should go. After each move, the Discord game bot creates a fresh graphic of the board so you can plot your next move. And, because the game hosts on your server, other users may watch and debate it!
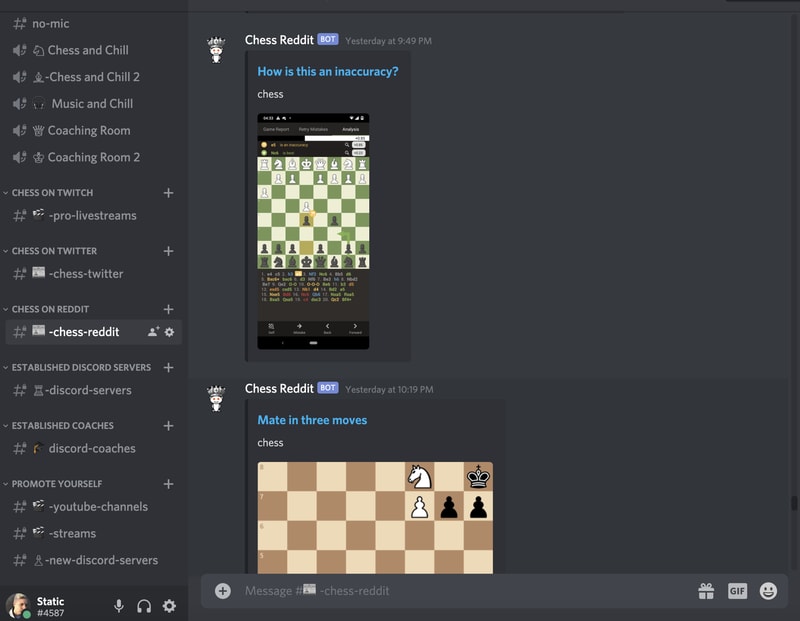
09PokeMeow
PokeMeow is by far the most popular Pokemon game discord bot. With this Pokemon bot, you may capture Pokemon on your server, trade, battle with other players, and accomplish tasks for in-game currency and stuff. As you keep building up your Pokedex, the Pokemon bot also allows to compete with other users on the worldwide leaderboard! PokeMeow is the ideal Pokemon Discord bot for fans of the Pokemon series.
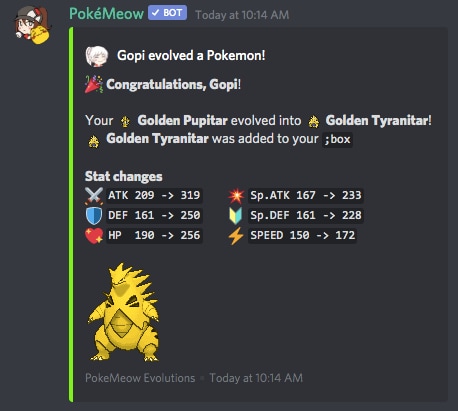
10IdleRPG
IdleRPG is a discord game where you may play a text-based roleplaying game. You may make your character complete with ethnicity and social status. Then, you can go on quests and combat beasts, purchase, and exchange mythic objects, join guilds, engage with gods, and even marry other players. Play through your character’s adventure while engaging with and creating stories with other players. IdleRPG is likely to provide your server with hundreds of hours of roleplaying pleasure.

Part 4 Discord Game Bots FAQs
Now, let us go through some FAQs about discord game bots:
Q. Is it possible to play games with discord bots?
A. You could indeed play discord games in-server with bots, challenge other members, and win prizes! A game bot is a terrific method to keep players engaged on your server, especially if it’s a gaming Discord channel.
Q. Do game bots spy on you?
A. No, game discord bots do not have inbuilt spyware.
Q. How many bots should a server have?
A. It’s best not to have more than 20 bots game on discord on a server at any moment. More bots than this may cause users to become confused and the service to seem suspicious.
Q. Are discord bots free?
A. All these discord game bots are free to use. However, some have premium upgrades.
Q. Which bot is the most popular game bot in discord?
A. Worddle
Q. Which bot is the best bot for gaming on discord?
A. Gawesome is an excellent alternative for adding a multifunctional bot to your discord server.
● Ending Thoughts →
● Discord is accessible communication and socializing service for individuals aged 13 and above.
● The platform extends to various servers, each with its users, rules, themes, and channels, but one underutilized feature is the ability to develop and code custom AI-powered bots.
● Game bots for discord are artificial intelligence (AI)-powered applications that automate processes and add games to your discord server.
● These game discord bots make it simple to interact with your audience, grow your community, and manage your server.
● Lastly, to enhance the discord game bots experience and bring your gaming videos to life, use the Filmora software.
Discord is free social communication service used by tens of millions of individuals aged 13 and above to socialize with their communities and friends. People use discord regularly to discuss various topics, from art projects and family vacations to homework and mental health help. It serves as a home for communities of different sizes but has become quite popular as discord bot games due to the rise in the gaming community.
The great majority of servers are private, invite-only locations where friends and communities may communicate and spend time together. More significant, more open groups based on specific themes like popular video games like PUBG and Genshin Impact. Because all discussions are opt-in, users have complete choice over who they connect with and how they use discord.
In this article
01 [What Are Discord Game Bots?](#Part 1)
02 [How Do You Add Bot Games to Discord?](#Part 2)
03 [Top 10 Picks of Discord Gaming Bots](#Part 3)
04 [Discord Game Bots FAQs](#Part 4)
Part 1 What Are Discord Game Bots?
Discord game bots are artificial intelligence (AI)-powered applications that automate processes and add music, games, welcome messages, memes, and other fun stuff to your server. These bots make it simple to interact with your audience, grow your community, and manage your server.
There is a plethora of game bots for discord to pick from, each with its purpose. Some may automatically welcome new users, while others utilize webhooks to interface with other apps—and it may be tough for novice users to figure out which ones will provide the most remarkable results for their requirements.
Part 2 How Do You Add Bot Games to Discord?
Follow the steps below to add game bots for discord successfully:
Step 1: To add a bot to your Discord server, go to the bot’s source page. We’ll be using ProBot for this lesson.
Step 2: Depending on the bot you’re adding, click Add to Discord or Invite Now.
Step 3: To grant the bot access, a pop-up window will appear asking you to check in to your Discord account.
Step 4: After you log in, you’ll see a box asking for account authorization. Locate and choose the Add to Server drop-down menu.
Step 5: This will bring up a list of discord servers where you can add a bot game discord. Continue after selecting your server.
Step 6: Examine the server permissions that the bot asks for. Select and deselect according to your requirements. When you’re ready, click Authorize.
For those who like to share their discord game bots experience through screen recordings and whatnot, a potent and convenient video editing tool to make your sessions look even more incredible is Filmora.
Wondershare Filmora Video Editor is a famous video editing program for those who wish to focus on editing and producing high-quality videos. The program supports 4K video editing. It’s a reasonably priced tool featuring effects for both video and audio. When it comes to designing, adding effects, and modifying movies, it provides users with many possibilities. You can use the tool to add overlays, create animations and objects, add music, and input text. Imagine sharing your experience in 4k!
For Win 7 or later (64-bit)
For macOS 10.12 or later
Part 3 Top 10 Picks of Discord Gaming Bots
01Karuta
Karuta is a discord game bot where you gather anime characters. In Karuta, though, you collect characters using trading cards. Your cards and other objects may be customized, upgraded, and traded with other players. Better still, you maintain the same cards between servers, allowing you to play Karuta with the same deck on any server where the game discord bot is!
02Dragon Bot Z
Dragon Bot Z is the discord bot game that adds discord Ball Z, a multiplayer text-based RPG, to your server. Players in Discord Ball Z summon characters from the iconic Dragon Ball Z franchise, train them, fight foes, buy equipment, and trade with other players. This Discord game is ideal for Dragon Ball fans or anybody who likes text-based roleplaying games.
03Mudae
Mudae is a bot discord game with character-collecting. For example, you can claim popular anime and videogame characters as your “waifus” or “husbandos,” develop your harem, and compete for your favorite characters with other users. You can also trade the characters with other members.
04Rock Puppy
Rock Puppy is a basic yet entertaining game bots discord bot that incorporates several classic games. You can enjoy Discord games like ConnectFour, Truth or Dare, Trivia, Tic-Tac-Toe, Russian Roulette, and Would You Rather with Rock Puppy. You may also use magic 8-ball, dice, or tarot cards, play classic board and party games on your server with Rock Puppy.
05GarticBOT
GarticBot is a bot game in discord that allows you to play the drawing game Gartic. GarticBot begins the Discord game by painting an image on your server. Members then compete against one another to predict the image the quickest. Others can guess your drawings if you submit them. Type the command g.draw, and Gartic will provide you with a URL to submit your artwork. GarticBot creates a fun Pictionary-style game for everyone on your server to play.
06TriviaBot
TriviaBot is the most popular trivia game discord bot. It has over 90,000 questions, and you can even submit your own for inclusion in the bot. Members can form and join teams to compete in competitions. You may also create a public leaderboard to display who performs the best on the server.
07GamesRob
The finest Uno discord game bot is GamesROB. ConnectFour, Trivia, Battleship, 2048, Tic-Tac-Toe, Minesweeper, and Hangman are the other traditional party games added to discord. You may also play “Detective,” a Discord game in which you try to figure out who is the “assassin” on your server, memory games, and Town, Country, River, a game in which you try to come up with as many phrases as possible within a theme.
08Chess Reddit
Chess is a simple game that allows you to play chess on discord. You may play a chess game with other server members directly on the server. Instruct the bot on which pieces to move and where they should go. After each move, the Discord game bot creates a fresh graphic of the board so you can plot your next move. And, because the game hosts on your server, other users may watch and debate it!
09PokeMeow
PokeMeow is by far the most popular Pokemon game discord bot. With this Pokemon bot, you may capture Pokemon on your server, trade, battle with other players, and accomplish tasks for in-game currency and stuff. As you keep building up your Pokedex, the Pokemon bot also allows to compete with other users on the worldwide leaderboard! PokeMeow is the ideal Pokemon Discord bot for fans of the Pokemon series.
10IdleRPG
IdleRPG is a discord game where you may play a text-based roleplaying game. You may make your character complete with ethnicity and social status. Then, you can go on quests and combat beasts, purchase, and exchange mythic objects, join guilds, engage with gods, and even marry other players. Play through your character’s adventure while engaging with and creating stories with other players. IdleRPG is likely to provide your server with hundreds of hours of roleplaying pleasure.
Part 4 Discord Game Bots FAQs
Now, let us go through some FAQs about discord game bots:
Q. Is it possible to play games with discord bots?
A. You could indeed play discord games in-server with bots, challenge other members, and win prizes! A game bot is a terrific method to keep players engaged on your server, especially if it’s a gaming Discord channel.
Q. Do game bots spy on you?
A. No, game discord bots do not have inbuilt spyware.
Q. How many bots should a server have?
A. It’s best not to have more than 20 bots game on discord on a server at any moment. More bots than this may cause users to become confused and the service to seem suspicious.
Q. Are discord bots free?
A. All these discord game bots are free to use. However, some have premium upgrades.
Q. Which bot is the most popular game bot in discord?
A. Worddle
Q. Which bot is the best bot for gaming on discord?
A. Gawesome is an excellent alternative for adding a multifunctional bot to your discord server.
● Ending Thoughts →
● Discord is accessible communication and socializing service for individuals aged 13 and above.
● The platform extends to various servers, each with its users, rules, themes, and channels, but one underutilized feature is the ability to develop and code custom AI-powered bots.
● Game bots for discord are artificial intelligence (AI)-powered applications that automate processes and add games to your discord server.
● These game discord bots make it simple to interact with your audience, grow your community, and manage your server.
● Lastly, to enhance the discord game bots experience and bring your gaming videos to life, use the Filmora software.
Also read:
- New In 2024, A Review of 3D LUT Mobile App - A Composite Application for Editing Media
- New In 2024, Leading Applications to Create Fast Motion in iPhone
- New In 2024, Every Compositor Should Know The Trick of Color Match in After Effects
- Updated In 2024, Ultimate Guide on How to Film Better in Public
- Updated 2024 Approved Color Match Game Top Tips for You
- New 2024 Approved Twitch Green Screen Guide
- In 2024, The Complete Guide to Slideshow Maker with Music
- Updated In 2024, Detailed Tutorial to Resize Your Video in VLC
- Updated In 2024, How to Create Motion Text Effects for Your Video?
- New 2024 Approved How to Achieve GoPro Slow Motion With Quality
- New Free Titles For Final Cut Pro
- How to Make Audio Visualizer in Filmora Easy
- How To Use Slow Zoom Effect in Your Video?
- 2024 Approved How to Crop a Video in Davinci Resolve Step by Step
- Unravel the Creative Potential of Adobe After Effects for Precise Motion Synchronization. Learn How to Use Track Matte and Tracking with a Simple Alternative for 2024
- How to Build A Video Editing Career for 2024
- New How to Trim Video in Quicktime Player on Mac
- New In 2024, Top 5 Websites and Software to Convert Powerpoint to Mp4
- New What Is MOV Format and How to Edit MOV Video Better?
- New 10 Catchy Pixel Art Wallpapers and How to Custom Your Own for 2024
- Updated 7 Best MP4 Video Editors on Mac Edit MP4 Videos Easily for 2024
- Updated In 2024, How to Zoom in on PowerPoint Easy Ways
- Updated Step by Step to Rotate Video Using KMPlayer for 2024
- New Detailed Steps to Rotate Videos Using Kdenlive
- Updated How to Add Camera Shake to Video in Adobe After Effects for 2024
- New 2024 Approved 3 Actionable Ways to Create Countdown Animation for Videos
- Updated This Article Will Focus on Understanding the Secret Tips in Wondershare Filmora that You Can Use to Edit Videos Faster and More Efficiently
- Updated 2024 Approved This Post Will Make You Learn Anything and Everything About Animated GIFs, the Ways to Use Cool Gifs in My Marketing, and How to Create Unique Custom Animated Gifs
- Updated In 2024, This Article Will Focus on Understanding the Secret Tips in Wondershare Filmora that You Can Use to Edit Videos Faster and More Efficiently
- In 2024, 3 Best Effects to Appear on Camera
- New 2024 Approved If You Want to Know What to Prepare and How to Make the Wedding Video Perfect for Videographers, Check Out This Menu Here
- Updated 2024 Approved How to Rotate a Video in Windows 10
- Adobe Premiere Pro Download and Use Guide In Depth
- New Create a Stunning Light Sweep Effect in Filmora. Use Simple and Easy Steps to Export a High-Quality Video that Will Impress Even Pro Video Editors for 2024
- New 2024 Approved Are You Ready to Learn About Something Free yet Amazing? We Are Talking About All Format Video Players for PC that You Should Know , Lets Begin
- In 2024, Leveraging the Vectorscope for Better Color Correction in Premiere Pro
- How to Vlog? A Beginners Guide to Start Vlogging
- What Is First Impression Review Video
- Finding Best GIF Websites Is Easy as Pie
- Updated In 2024, Learn How Video Montages Were Used over Film History with Examples and the Types of Videos for Shorter Montages. Plus, Learn About the Best Software for It
- 2024 Approved Easily Cut Large Video Faster on Mac
- Updated How to Stabilize Videos for Free with Google Photos App
- Create Dynamic Text Animation in Filmora
- Wondering the Best Alternative to Hola On Honor Magic V2? Here Is the Answer | Dr.fone
- Things You Dont Know About Vivo Y55s 5G (2023) Reset Code | Dr.fone
- 3 Ways to Track Oppo Reno 10 Pro+ 5G without Them Knowing | Dr.fone
- How To Transfer Data From iPhone 13 Pro Max To Other iPhone 11 Pro Max devices? | Dr.fone
- In 2024, How to Mirror Your Infinix Hot 30 5G Screen to PC with Chromecast | Dr.fone
- Will iSpoofer update On Samsung Galaxy Z Flip 5 | Dr.fone
- In 2024, 9 Best Phone Monitoring Apps for Apple iPhone 13 Pro | Dr.fone
- How to Recover Lost Data from iPhone 12 mini After iOS Update? | Stellar
- New How to Create Funny Talking Avatars Using Oddcast Text to Speech Tech for 2024
- Tips and Tricks for Setting Up your Vivo V29 Pro Phone Pattern Lock
- Process of Screen Sharing Vivo Y27s to PC- Detailed Steps | Dr.fone
- In 2024, Unova Stone Pokémon Go Evolution List and How Catch Them For Sony Xperia 5 V | Dr.fone
- In 2024, Easily Unlock Your Motorola Defy 2 Device SIM
- 6 Solutions to Fix Error 505 in Google Play Store on Vivo S17t | Dr.fone
- In 2024, How to Remove and Reset Face ID on Apple iPhone 6s Plus | Dr.fone
- Can I use iTools gpx file to catch the rare Pokemon On Samsung Galaxy M34 | Dr.fone
- In 2024, Best 3 Software to Transfer Files to/from Your Honor Magic5 Ultimate via a USB Cable | Dr.fone
- 6 Ways to Change Spotify Location On Your Oppo K11 5G | Dr.fone
- How to Rescue Lost Contacts from Itel S23?
- Complete Guide to Hard Reset Your Oppo A58 4G | Dr.fone
- How To Leave a Life360 Group On Oppo Reno 10 5G Without Anyone Knowing? | Dr.fone
- How to Spy on Text Messages from Computer & Vivo V29 | Dr.fone
- How to Reset a Realme 10T 5G Phone that is Locked?
- In 2024, 4 Most-Known Ways to Find Someone on Tinder For Lava Yuva 2 by Name | Dr.fone
- How to Unlock Itel P40 Phone without Google Account?
- In 2024, Pokemon Go Error 12 Failed to Detect Location On Oppo A79 5G? | Dr.fone
- How to turn off the screen lock on my Infinix Note 30
- Apply These Techniques to Improve How to Detect Fake GPS Location On Vivo T2 Pro 5G | Dr.fone
- MOV playback issues on Galaxy Z Flip 5
- In 2024, How to Make the Most of Your iPhone XR Lock Screen with Notifications? | Dr.fone
- Remove FRP Lock on Lava Yuva 2
- Title: Updated Best Method to Split the Video Into Parts Online
- Author: Morgan
- Created at : 2024-05-19 05:11:56
- Updated at : 2024-05-20 05:11:56
- Link: https://ai-video-editing.techidaily.com/updated-best-method-to-split-the-video-into-parts-online/
- License: This work is licensed under CC BY-NC-SA 4.0.
