
:max_bytes(150000):strip_icc():format(webp)/003_the-best-lgbt-movies-on-netflix-right-now-june-2022-5069913-8dbc370e568349c8a347c650353f17b1.jpg)
Updated Boost the Pace of Your Instagram Reels Videos with These Simple Tricks
Boost the Pace of Your Instagram Reels Videos with These Simple Tricks
Undoubtedly, every social media video creator loves to make use of Instagram Reels for their widespread popularity. If you want to grab your audience’s attention and keep them engaged with your videos, then Instagram Reels should be your destination. On this platform, you can only make short videos maxing out the 90-second time limit. But what if your video content is lengthy? Don’t fret. One simple trick is to speed up the pace of your videos.

There are two scenarios regarding how to increase the speed of the video in Reels. You can speed up the video when recording directly on the Instagram app, or use a third-party editing tool if it is a pre-recorded video. We will illustrate below how to speed up video on Instagram Reels for both scenarios.
Part I. Basic Understanding of Instagram Reels
- What are Instagram Reels?
Instagram Reels are short-duration, vertically-oriented videos that are displayed in the dedicated reels tab on the Instagram app. You can compare Instagram Reels with TikTok videos. The maximum duration of Instagram Reels can be of 90 seconds.
Instagram displays the popular Reels on Explore tab so that the Instagram Reels creators get more exposure. Since short-duration videos and apps are in trend, Instagram Reels has become the most popular section on the Instagram app.
Reels can be entertaining videos with popular songs in the background. They can be funny videos as well as gripping slow-motion videos. Brands promote their products and services through Reels. You can add stunning AR effects and change the speed of the video while recording Reels through the Instagram app.
- Why Should You Make Instagram Reels?
Instagram Reels have been a game-changer in the social media world. From regular video creators and social media influencers to brands and businesses, Instagram Reels has become everyone’s real deal. Here are the reasons why you should make Instagram Reels:
Reach - The primary reason for making Instagram Reels is to reach out to the target audiences and get more followers. If your videos become popular, your Instagram Reels can get featured in the Explore tab. Once it does happen, there will be an exponential rise in views and followers. Besides, Instagram Reels have better reach to your followers than regular Instagram posts.
Engagement - The world has moved on from photos to videos. People love to check out short videos rather than still images. So naturally, when you start making Instagram reels, your followers’ engagement will increase dramatically. With more engagement, your Reels will get more exposure as people will love to share them with their friends. Of course, the content has to be top-notch so that people start to pay attention to your Reels.

Showcase Personality - Instagram Reels are the best way to showcase your personality on social media. Personality is the magical key that attracts followers on social media platforms. You can create different genres of videos and showcase your talent and personality to get noticed.
Brand Promotion - Brands and businesses use Instagram Reels to promote their products and services. They come up with creative Reels that audiences cannot ignore. Even social media influencers promote brands through Instagram Reels these days. It is a great way to make the target audiences aware of the products and services and build a strong brand image.
You can go through this informative article for more information about Instagram Reels.
Part II. Speed Up Video on Instagram Reels
If you prefer to film videos directly on Instagram Reels, you will find a dedicated option to change video speed on the Instagram app. When you use the option, you get to set the speed of the video even before you start recording.
However, if you are already recorded a video for Instagram Reels, you can jump to the next part to find out the best way to speed up existing videos for Reels. Here, you will illustrate how to speed up video on Instagram Reels directly on the Instagram app without needing any third-party app.
Step-by-step Guide to Speed Up Reels Video
Here are the simple steps to speed up the video in Reels on the Instagram app.
Step1 Open the Instagram app. Tap on the Camera icon at the bottom to film a video.
Step2 Swipe at the bottom to select the Reels option.
Step3 You will find the Speed option on the left panel. Tap on the Speed option.

Step4 If you want to speed up your video, select a speed preset above 1X. For example, if you want double the speed than usual, you will tap on the 2X preset.
Step5 Tap the Record icon at the bottom to record the Reels video.
Step6 Once you are done recording, tap on the Stop icon.

Step7 Tap the Preview option to check how the recorded video looks. After that, tap the Next option.
Step8 You can write a caption, add a cover, add a location, and even tag people. Finally, tap on the Share button to post the video under the Reels section.

Part III. Speed Up Existing Videos for Reels
When you have already recorded the video for Reels, you need to use a third-party tool to change the video speed. Depending on the device you are going to use to edit the speed of your video, you have to select an appropriate video editing application. We have handpicked the best applications to change Instagram Reels video speed for computers, smartphones as well as online users.
- Speed Up Video for Instagram Reels on PC
A professional video creator always prefers a computer to edit videos minutely. This is because a computer’s dedicated video editor has far more editing options than a video editor app or even an online video editor. If you have filmed and transferred the video to your computer, you can change its speed easily. Wondershare Filmora is the best video editor to alter video speed precisely as you need.
Free Download For Win 7 or later(64-bit)
Free Download For macOS 10.14 or later
There are various options available to change the speed of a video. You can choose from the speed presets for instant change. You can customize the speed through the Uniform Speed option. Besides, you can use Speed Ramping to vary the speed of the video differently for different sections. Most importantly, Filmora is super easy to use despite being a professional video editing software.
A Step-by-step Guide to speed up a video on Filmora
Instead of choosing from the speed presets, using the Uniform Speed option is always handy to speed up your video. This is because speed presets are limited and may not be suitable for your video. That is why Uniform Speed is effective, as you can set any desired speed up to 100X.
Here are the steps to speed up a Reels video (already recorded) using Filmora
Step1 Download Wondershare Filmora on your computer based on your operating system. Filmora is available for macOS as well as Windows. After successful installation, open Filmora and click on Create New Project button.

Step2 Go to the File menu and the Import Media option. Select Import Media Files and browse your computer to import the target video file into the Project Media folder. Now, drop that file into the timeline. Press the Speed (timer) icon that you will find at the top of the timeline.

Step3 Press the Uniform Speed option from the displayed menu. This will open the Uniform Speed tab.

Step4 Move the speed slider to the right to speed up the video. Once you have set the desired speed, press the Ok button. Finally, tap Export to save the edited file. Thereafter, you can upload the video file as Instagram Reels.

For more details, you can check out this video where changing video speed in Filmora is fully illustrated.
![]()
Note: We have already mentioned that you can also use the Speed Ramping option to customize speed for different sections of your video. You will customize the visualization graph to set the speed unevenly with smooth transitions for the entire video. You can watch this tutorial video to find out how to change speed with Speed Ramping option in Filmora.
- Speed Up Video for Reels Online
If you do not want dedicated video editing software, you can still speed up your recorded video using an online video editor. There are several online video editors available where you can speed up your video for Reels. But Clideo is the most straightforward online video editor where you can speed up videos instantly. All you need is an internet connection and a supporting web browser on your device.
A Step-by-step Guide to speed up a video on Clideo
Step1 Open the web browser on your device. Visit the official website of Clideo.
Step2 Click on the Choose File option. Select the target video from your device storage.
Step3 Once the video gets uploaded on the platform, you will see different speed presets on the right side of the screen.
Step4 You can select from the speed presets. Otherwise, you can use the slider to alter the video’s speed as needed.

Step5 Play the video and if everything is perfect, click on the Export button to save the video on your device storage.
- Speed up Video for Instagram Reels on iPhone
If you have already recorded a video on your iPhone for Reels Instagram, you can use the VN Video app (VlogNow) to alter its speed before uploading it. Previously, Instagram used to provide Hyperlapse to change video speed. But Instagram has pulled down the app from App Store. VN Video is a complete video editing app where you can instantly change the video speed. It is an extremely popular video editor with a high average rating, proving its usefulness.
A Step-by-step Guide to speed up a video on VN Video
Step1 Install the VN Video app from App Store on your iPhone. Launch the app after installation.
Step2 Tap on the Plus icon located at the bottom. Tap on New Project to get started.
Step3 Select the pre-recorded video from the device storage and tap on the Next arrow icon at the bottom of the screen.
Step4 Tap on the Speed icon at the bottom and select the regular tab at the top.

Step5 Adjust the speed slider as per your need to change the video speed. Once done, tap on the Tick icon at the bottom.

Step6 Finally, tap on the Export icon to save the video file on the device storage.
- Speed up Video for Instagram on Android
Filmora happens to be the easiest video editing app to change the speed of your video for Instagram Reels. Filmora by Wondershare is a complete video editor that is extremely popular among social media video creators. There are trending video effects and stickers available to make short videos engaging. You can speed up as well as slow down videos. Besides, you get the basic as well as some advanced video editing options for Reels.
A Step-by-step Guide to speed up a video on Filmora
Step1 Install the Filmora app on your Android phone from Play Store. Launch the Filmora app and tap on the New Project option. Select the pre-recorded video from your device gallery.
Step2 After the video appears on Filmora, tap on the Trim tab at the bottom of the screen.
Step3 Tap on the Speed option from the bottom. Adjust the speed slider and move it to the right to speed up your video.

Step4 Tap on the Export button at the top-right corner to save the video on your phone.
FAQs
- Why are my Instagram videos slow?
Multiple reasons can explain why is my Instagram slow. First of all, the videos could be in slow-motion. Secondly, your internet speed may not be up to the mark. Thirdly, Instagram cache and storage could be full when your device runs out of free space. Besides, your device RAM could be fully occupied due to several apps running in the background. Moreover, if you have an older Instagram app version, your Instagram videos can be slow.
- What’s the difference between Instagram Reels and Instagram Stories?
There are several differences between Reels and Stories. Reels stay forever, while Stories get deleted after 24 hours. You can upload a 15-second video for Instagram Story. You can upload a 90-second video for Instagram Reel. Instagram Reels focus on content and entertainment, while Stories focus on real-time events. You can change the video speed of Reels directly from Instagram while no such option is available for Stories. Stories cannot be saved but you can save Reels.
Conclusion
We have answered your question, “Can you speed up a pre-recorded video on reels?” You can definitely speed up your video through different methods as applicable in your case. If you are going to film the footage through Instagram Reels, you can set the speed beforehand directly on the Instagram app. If you want to change the speed of a pre-recorded video, you can use VN editor on your iPhone and Filmora app on your Android smartphone. If you want to customize the video speed on PC, Wondershare Filmora will be your best video editor.
Free Download For macOS 10.14 or later
There are various options available to change the speed of a video. You can choose from the speed presets for instant change. You can customize the speed through the Uniform Speed option. Besides, you can use Speed Ramping to vary the speed of the video differently for different sections. Most importantly, Filmora is super easy to use despite being a professional video editing software.
A Step-by-step Guide to speed up a video on Filmora
Instead of choosing from the speed presets, using the Uniform Speed option is always handy to speed up your video. This is because speed presets are limited and may not be suitable for your video. That is why Uniform Speed is effective, as you can set any desired speed up to 100X.
Here are the steps to speed up a Reels video (already recorded) using Filmora
Step1 Download Wondershare Filmora on your computer based on your operating system. Filmora is available for macOS as well as Windows. After successful installation, open Filmora and click on Create New Project button.
Step2 Go to the File menu and the Import Media option. Select Import Media Files and browse your computer to import the target video file into the Project Media folder. Now, drop that file into the timeline. Press the Speed (timer) icon that you will find at the top of the timeline.
Step3 Press the Uniform Speed option from the displayed menu. This will open the Uniform Speed tab.
Step4 Move the speed slider to the right to speed up the video. Once you have set the desired speed, press the Ok button. Finally, tap Export to save the edited file. Thereafter, you can upload the video file as Instagram Reels.
For more details, you can check out this video where changing video speed in Filmora is fully illustrated.
![]()
Note: We have already mentioned that you can also use the Speed Ramping option to customize speed for different sections of your video. You will customize the visualization graph to set the speed unevenly with smooth transitions for the entire video. You can watch this tutorial video to find out how to change speed with Speed Ramping option in Filmora.
- Speed Up Video for Reels Online
If you do not want dedicated video editing software, you can still speed up your recorded video using an online video editor. There are several online video editors available where you can speed up your video for Reels. But Clideo is the most straightforward online video editor where you can speed up videos instantly. All you need is an internet connection and a supporting web browser on your device.
A Step-by-step Guide to speed up a video on Clideo
Step1 Open the web browser on your device. Visit the official website of Clideo.
Step2 Click on the Choose File option. Select the target video from your device storage.
Step3 Once the video gets uploaded on the platform, you will see different speed presets on the right side of the screen.
Step4 You can select from the speed presets. Otherwise, you can use the slider to alter the video’s speed as needed.
Step5 Play the video and if everything is perfect, click on the Export button to save the video on your device storage.
- Speed up Video for Instagram Reels on iPhone
If you have already recorded a video on your iPhone for Reels Instagram, you can use the VN Video app (VlogNow) to alter its speed before uploading it. Previously, Instagram used to provide Hyperlapse to change video speed. But Instagram has pulled down the app from App Store. VN Video is a complete video editing app where you can instantly change the video speed. It is an extremely popular video editor with a high average rating, proving its usefulness.
A Step-by-step Guide to speed up a video on VN Video
Step1 Install the VN Video app from App Store on your iPhone. Launch the app after installation.
Step2 Tap on the Plus icon located at the bottom. Tap on New Project to get started.
Step3 Select the pre-recorded video from the device storage and tap on the Next arrow icon at the bottom of the screen.
Step4 Tap on the Speed icon at the bottom and select the regular tab at the top.
Step5 Adjust the speed slider as per your need to change the video speed. Once done, tap on the Tick icon at the bottom.
Step6 Finally, tap on the Export icon to save the video file on the device storage.
- Speed up Video for Instagram on Android
Filmora happens to be the easiest video editing app to change the speed of your video for Instagram Reels. Filmora by Wondershare is a complete video editor that is extremely popular among social media video creators. There are trending video effects and stickers available to make short videos engaging. You can speed up as well as slow down videos. Besides, you get the basic as well as some advanced video editing options for Reels.
A Step-by-step Guide to speed up a video on Filmora
Step1 Install the Filmora app on your Android phone from Play Store. Launch the Filmora app and tap on the New Project option. Select the pre-recorded video from your device gallery.
Step2 After the video appears on Filmora, tap on the Trim tab at the bottom of the screen.
Step3 Tap on the Speed option from the bottom. Adjust the speed slider and move it to the right to speed up your video.
Step4 Tap on the Export button at the top-right corner to save the video on your phone.
FAQs
- Why are my Instagram videos slow?
Multiple reasons can explain why is my Instagram slow. First of all, the videos could be in slow-motion. Secondly, your internet speed may not be up to the mark. Thirdly, Instagram cache and storage could be full when your device runs out of free space. Besides, your device RAM could be fully occupied due to several apps running in the background. Moreover, if you have an older Instagram app version, your Instagram videos can be slow.
- What’s the difference between Instagram Reels and Instagram Stories?
There are several differences between Reels and Stories. Reels stay forever, while Stories get deleted after 24 hours. You can upload a 15-second video for Instagram Story. You can upload a 90-second video for Instagram Reel. Instagram Reels focus on content and entertainment, while Stories focus on real-time events. You can change the video speed of Reels directly from Instagram while no such option is available for Stories. Stories cannot be saved but you can save Reels.
Conclusion
We have answered your question, “Can you speed up a pre-recorded video on reels?” You can definitely speed up your video through different methods as applicable in your case. If you are going to film the footage through Instagram Reels, you can set the speed beforehand directly on the Instagram app. If you want to change the speed of a pre-recorded video, you can use VN editor on your iPhone and Filmora app on your Android smartphone. If you want to customize the video speed on PC, Wondershare Filmora will be your best video editor.
How To Edit Youtube Videos In Easy Steps
How to Edit YouTube Videos in Simple Steps
An easy yet powerful editor
Numerous effects to choose from
Detailed tutorials provided by the official channel
In this article
01 [How to Edit Your YouTube Videos for Beginners?](#Part 1)
02 [How to edit YouTube videos on phone?](#Part 2)
03 [What do Professional YouTubers Use to Edit Videos?](#Part 3)
04 [YouTube Video Editing Q&A](#Part 4)
Part 1 How to Edit Your YouTube Videos for Beginners?
There are a lot of tools for beginners from which they can edit their videos on a budget. Here some of them:
01YouTube Creator Studio
Price: Free
Great For: Quick and basic video edits
YouTube has its own web based video editor which is free of cost. YouTube creator studio is a basic editing tool which allows you to trim the clips from any part of the video. You can also blur the objects and faces if you want. There are several other features that will help you to make your video attractive and engaging.
If you have uploaded a video on YouTube then also, YouTube creator studio allows you to edit the video without losing your video ID and video URL. You can also “Add an End Screen” to your video to give your viewers an option to subscribe your channel.
Pros:
● Create (ability to edit and post your content)
● Activity Insight (you can check your performance metrics)
● Monetization Management
Cons:
There are no cons as such.

02Videorama
Price: Free
Great For: making movies from videos and photos.
If you shoot a video on an iPhone or iPad then Videorama is the best tool to edit your video. You can choose video clips and photos from your gallery and put them together. In this, you can create overlays, add music, filters, add text and can also record a voice – over. Click on the “OK, Share” after you are done with editing, choose the preferred resolution and frame rate. Now your video is ready to post on your YouTube channel.
Pros:
● Easy to use
● Great range of SFX and VFX
● Text Effects and Filters are good
Cons:
● Lack some basic editing features
● IAP’s can get expensive
● More diverse effects would be nice.

● Shotcut
Price: Free
Good For: Used for editing videos and audios for free
Shotcut is a multimedia editing tool and if you are a beginner in video or audio editing this tool is quite the deal for you. You can create or edit the videos by using its various features and can make an engaging or captivating video. It has some tutorials to help you out. For YouTube, it is the best tool to edit your videos.
There are a lot effects and some of that which are used commonly are color grading, color tint etc. When we talk about audio editing features, Shotcut is mostly used to enhance your video with adding music to it.
For editing video you can select from multiple presents or you can set the frame rate and resolution which you want by setting it on ‘Custom’.
Pros:
● Free to use
● Comes with tutorials
● It has a simple interface.
Cons:
● Doesn’t support animation
● Do not have optional plugins.
● Lacks features like multicam editing and motion tracking.

03Movavi Video Editor
Price: $ 59.95
Great For: Quick and fast video editor
Movavi is a video editor tool to edit your video and share it with everyone. You can edit your videos and make them look more alluring to people by using its Key frame animations, special effects and readymade intros.
You can also change the background in your video clips easily by applying Chroma key. It has an easy and refined interface so that you can use it easily and there is nothing to learn in it before using. You can edit your videos and download it for free. There is no need of internet connection when using it. So, it is the best to use it while on the go.
Pros:
● Easy interface
● Amazing feature and special effects
● Fast and quick editor
Cons:
● Free trial isn’t good as it has limited features
● Few templates for text templates and transitions
● You have limited control over color tuning.

04Apple iMovie
Price: Free for Mac users / $14.99 in the Apple Play Store
Great For: Making photos and videos in a beautiful production.
Apple iMovie is a video editor is for those who want to do editing on a professional level. It is for Mac users. It is easy to use and it gives you high quality of video editing with its special effects, high fidelity filters, green screen effects, etc . It allows you to add various clips and shots and arrange them in order, add text, music, effects and your engaging video is ready.
Before starting to edit your video for YouTube or for other sites, always select the standard aspect ratio that is (4:3). If you will choose any theme for your video, iMovie will add transitions effects and add title on its own.
Pros:
● User friendly interface
● It is quick and fast
● Easy sharing
Cons:
● Limited editing features
● Quite expensive
● It requires high level of HDD space

05Videoshop – video editor
Price: Free
Great For: Easy and fast video editor
Videoshop is a third party video editing app from which you can edit your videos on your android or iPhone. Videoshop has amazing features like you can trim, cut, adjust the lightning, rotate your video, add transitions, etc. You can add music and text to make your video more engaging.
There are a lot of filters and features that you can apply to your video to make it look more captivating. Once you have completed editing the video, click on the ‘Share’ icon. It makes your video ready to upload on YouTube or other sites.
Pros:
● Combine clips from various videos
● Fast and easy way to edit videos
● Add special effects, filters and sound
Cons:
● Free for limited time
● Requires subscription to access app’s features like watermark free
● Not fit for editing batch videos
06HitFilm Express
Price: Free
Great For: Gives you professional-grade video editing
HitFilm Express is a free video editing tool which is packed with amazing features to edit your videos for any platform including YouTube. It has a lot of filters and 400+ visual effects that help to give your video a professional touch. You can add voice over to your videos as well by just clicking on a button.
You can create commercials, movies, audio songs while using this as it allows you to add music, text and image etc. you can make quality videos by using HitFilm and share it with the world.
Pros:
● Clean user interface
● Easy to use
● Perfect for YouTube creators
Cons:
● Sometimes crashes and freezes
● Welcome screen is cluttered
● Steep learning curve

Part 2 How to edit YouTube videos on phone?
Editing can enhance the look of your video and making an engaging video can attract the audience to give it a watch. There are various tools to edit your YouTube video. Some of them are listed below:
01YouTube Creator Studio
This is one of the best options to edit a new video or a video that is already uploaded. This built-in editor can easily be accessed on the phone to carry out the necessary editing. You can follow the below discussed guide for the same.
Step 1: Sign in to the YouTube’s studio (channel dashboard).
Step 2: Click on the content option given at the left sidebar.
Step 3: Click on the thumbnail of the video you want to edit from uploads.

Step 4: Click on theEditor given at the left sidebar.
Step 5: You can trim the beginning or the end part of the video. You can trim the video from the Trim option which is right above the timeline.

Step 6: Add end screen to your video
Click on the end screen icon which is given at the middle of the timeline. If you want your viewers to know that you have more related videos or you want to make them subscribe your channel then you can add an end screen to your video.

02iMovie
Editing videos on iphone was never so easy. Using the iMovie app, one can easily edit the YouTube videos for free. The app can easily be downloaded from the app store. Here is a step by step guide that you can follow to edit the video.
Step 1: Import media
Open the app to My Movie section present on main screen. Now, add the video for editing by clicking on ‘Import media’. Now, you need to drag it to the bottom timeline.

Step 2: Trim or split the video
Now, you can trim or split the clip as per your requirement. You can do this by clicking on the spot in video that you want to split or trim. For this, click on modify and then select Split Clip, Trim to Clip Edge or Trim to Playhead.

Step 3: Add music and effects
You can check out the sound and music effects, background, transitions and themed titles at the top toolbar and implement them in the video. Using the icons present just above the clip, you can make color corrections, stabilize the clip, change volume, eliminate background noise, apply speed changes, etc.

Step 4: Share the video
After the editing is complete, click on the Share icon present at the top right corner. Now, click on YouTube & facebook. Now, save the video to your Mac device. When the file is saved, go to YouTube Studio And upload your video.

03Windows Photo app
To use this app, you need to have windows 10 on your system. The Windows Photo app is an effective tool to edit the videos. The editing process is very simple and can be done in a few minutes. Here is a simple guide to help you.
Step 1: Open the app
Launch the app and click on the Video Editor option. To start the editing process, click on new video project. Now, name your project to start the process.

Step 2: Import the video
Click on ‘Add’ and then ‘From this pc’ to add the video. You can then drag the clip to open it in storyboard. There are several options at the storyboard using which you can add text to the title etc. to do this, select Add title card option. You can add text, select style and duration. Finally click on Done.

Step 3: Edit the video
You can find the trim, split and other editing options at the top. Using these options, you can make the desirable changes to the video. After completing the editing work, you can click on Finish video option. Now, choose the video quality (540p, 720p, 1080p) and select Export option to save the video on your computer.

Part 3 What do Professional You Tubers Use to Edit Videos?
Professional YouTubers use the best software for editing their videos and make them engaging and of high quality. One such software that you can also give a try is Wondershare Filmora Video Editor . The easy to use and interactive interface makes this software a top notch choice of the editors. In Filmora, you can edit your videos and audios, record the PC screen, add a voiceover to your video and also add colors in an easy way. The templates are customizable and you can edit them according to you. It has a lot of animated elements, transitions, title designs etc.
For Win 7 or later (64-bit)
For macOS 10.12 or later
Why to choose Filmora for editing YouTube videos:
● Can record the PC screen
● It has Pan and Zoom movements
● Can edit your audios with audio mixers
● Have amazing Filters, Text effects and Overlays.
● Color tuning
● Upload your videos directly to YouTube, Face book or Vimeo.
● Can adjust the speed
● Video stabilization
Part 4 YouTube Video Editing Q&A
What are the tools used for editing YouTube videos?
A. There are various tools available for editing the YouTube’s video. Some of them are listed here:
● YouTube creator studio
● Apple iMovie
● Videorama
● Shotcut
● Movavi video editor
How can you edit a YouTube video on your smart phone?
A. You can easily edit a YouTube video on your smart phone. Here are the steps to follow:
● Step 1: Log in to you YouTube account and click on the three dots at top right corner.
● Step 2: Tap on the three vertical dots at the side of your video which you want to edit.
● Step 3: Edit the video as you wish. You can change its description, add effects etc.
● Step 4: Click on the save button after you are done editing.
How can you add music to your video?
A. Adding music to video is very simple and can be done using Movavi Video Editor. Here is a small guide that you can follow.
● Download the Movavi Video Editor.
● Select the audio and video in Movavi Video Editor.
● Adjust the length and volume of the audio according to your video.
● Save the file.
How can you add Transitions on a video editor?
A. You can add transition to your video in two ways. You can add transitions to one or two different video clips or the other is adding transition to one media file.
What are the steps for editing a video?
A. A simple but highly effective way to edit a video is make a plan, film the video, add the media, arrange the media, edit the video, trim the video, add transitions, add title, add effects, and merge the Audio. Now, give a final touch to your video and the project is ready.
● Ending Thoughts →
● Editing videos on a budget is now easy as there are several software like Movavi Video Editor, Videorama, Apple iMovie, Shotcut tools that help you do it with ease.
● You can also edit your YouTube videos on your smart phones as it is quite simple and also you can use these tools to edit the video professionally.
● Filmora is the best tool from which you can edit your YouTube videos and can upload them directly on YouTube.
In this article
01 [How to Edit Your YouTube Videos for Beginners?](#Part 1)
02 [How to edit YouTube videos on phone?](#Part 2)
03 [What do Professional YouTubers Use to Edit Videos?](#Part 3)
04 [YouTube Video Editing Q&A](#Part 4)
Part 1 How to Edit Your YouTube Videos for Beginners?
There are a lot of tools for beginners from which they can edit their videos on a budget. Here some of them:
01YouTube Creator Studio
Price: Free
Great For: Quick and basic video edits
YouTube has its own web based video editor which is free of cost. YouTube creator studio is a basic editing tool which allows you to trim the clips from any part of the video. You can also blur the objects and faces if you want. There are several other features that will help you to make your video attractive and engaging.
If you have uploaded a video on YouTube then also, YouTube creator studio allows you to edit the video without losing your video ID and video URL. You can also “Add an End Screen” to your video to give your viewers an option to subscribe your channel.
Pros:
● Create (ability to edit and post your content)
● Activity Insight (you can check your performance metrics)
● Monetization Management
Cons:
There are no cons as such.
02Videorama
Price: Free
Great For: making movies from videos and photos.
If you shoot a video on an iPhone or iPad then Videorama is the best tool to edit your video. You can choose video clips and photos from your gallery and put them together. In this, you can create overlays, add music, filters, add text and can also record a voice – over. Click on the “OK, Share” after you are done with editing, choose the preferred resolution and frame rate. Now your video is ready to post on your YouTube channel.
Pros:
● Easy to use
● Great range of SFX and VFX
● Text Effects and Filters are good
Cons:
● Lack some basic editing features
● IAP’s can get expensive
● More diverse effects would be nice.
● Shotcut
Price: Free
Good For: Used for editing videos and audios for free
Shotcut is a multimedia editing tool and if you are a beginner in video or audio editing this tool is quite the deal for you. You can create or edit the videos by using its various features and can make an engaging or captivating video. It has some tutorials to help you out. For YouTube, it is the best tool to edit your videos.
There are a lot effects and some of that which are used commonly are color grading, color tint etc. When we talk about audio editing features, Shotcut is mostly used to enhance your video with adding music to it.
For editing video you can select from multiple presents or you can set the frame rate and resolution which you want by setting it on ‘Custom’.
Pros:
● Free to use
● Comes with tutorials
● It has a simple interface.
Cons:
● Doesn’t support animation
● Do not have optional plugins.
● Lacks features like multicam editing and motion tracking.
03Movavi Video Editor
Price: $ 59.95
Great For: Quick and fast video editor
Movavi is a video editor tool to edit your video and share it with everyone. You can edit your videos and make them look more alluring to people by using its Key frame animations, special effects and readymade intros.
You can also change the background in your video clips easily by applying Chroma key. It has an easy and refined interface so that you can use it easily and there is nothing to learn in it before using. You can edit your videos and download it for free. There is no need of internet connection when using it. So, it is the best to use it while on the go.
Pros:
● Easy interface
● Amazing feature and special effects
● Fast and quick editor
Cons:
● Free trial isn’t good as it has limited features
● Few templates for text templates and transitions
● You have limited control over color tuning.
04Apple iMovie
Price: Free for Mac users / $14.99 in the Apple Play Store
Great For: Making photos and videos in a beautiful production.
Apple iMovie is a video editor is for those who want to do editing on a professional level. It is for Mac users. It is easy to use and it gives you high quality of video editing with its special effects, high fidelity filters, green screen effects, etc . It allows you to add various clips and shots and arrange them in order, add text, music, effects and your engaging video is ready.
Before starting to edit your video for YouTube or for other sites, always select the standard aspect ratio that is (4:3). If you will choose any theme for your video, iMovie will add transitions effects and add title on its own.
Pros:
● User friendly interface
● It is quick and fast
● Easy sharing
Cons:
● Limited editing features
● Quite expensive
● It requires high level of HDD space
05Videoshop – video editor
Price: Free
Great For: Easy and fast video editor
Videoshop is a third party video editing app from which you can edit your videos on your android or iPhone. Videoshop has amazing features like you can trim, cut, adjust the lightning, rotate your video, add transitions, etc. You can add music and text to make your video more engaging.
There are a lot of filters and features that you can apply to your video to make it look more captivating. Once you have completed editing the video, click on the ‘Share’ icon. It makes your video ready to upload on YouTube or other sites.
Pros:
● Combine clips from various videos
● Fast and easy way to edit videos
● Add special effects, filters and sound
Cons:
● Free for limited time
● Requires subscription to access app’s features like watermark free
● Not fit for editing batch videos
06HitFilm Express
Price: Free
Great For: Gives you professional-grade video editing
HitFilm Express is a free video editing tool which is packed with amazing features to edit your videos for any platform including YouTube. It has a lot of filters and 400+ visual effects that help to give your video a professional touch. You can add voice over to your videos as well by just clicking on a button.
You can create commercials, movies, audio songs while using this as it allows you to add music, text and image etc. you can make quality videos by using HitFilm and share it with the world.
Pros:
● Clean user interface
● Easy to use
● Perfect for YouTube creators
Cons:
● Sometimes crashes and freezes
● Welcome screen is cluttered
● Steep learning curve
Part 2 How to edit YouTube videos on phone?
Editing can enhance the look of your video and making an engaging video can attract the audience to give it a watch. There are various tools to edit your YouTube video. Some of them are listed below:
01YouTube Creator Studio
This is one of the best options to edit a new video or a video that is already uploaded. This built-in editor can easily be accessed on the phone to carry out the necessary editing. You can follow the below discussed guide for the same.
Step 1: Sign in to the YouTube’s studio (channel dashboard).
Step 2: Click on the content option given at the left sidebar.
Step 3: Click on the thumbnail of the video you want to edit from uploads.
Step 4: Click on theEditor given at the left sidebar.
Step 5: You can trim the beginning or the end part of the video. You can trim the video from the Trim option which is right above the timeline.
Step 6: Add end screen to your video
Click on the end screen icon which is given at the middle of the timeline. If you want your viewers to know that you have more related videos or you want to make them subscribe your channel then you can add an end screen to your video.
02iMovie
Editing videos on iphone was never so easy. Using the iMovie app, one can easily edit the YouTube videos for free. The app can easily be downloaded from the app store. Here is a step by step guide that you can follow to edit the video.
Step 1: Import media
Open the app to My Movie section present on main screen. Now, add the video for editing by clicking on ‘Import media’. Now, you need to drag it to the bottom timeline.
Step 2: Trim or split the video
Now, you can trim or split the clip as per your requirement. You can do this by clicking on the spot in video that you want to split or trim. For this, click on modify and then select Split Clip, Trim to Clip Edge or Trim to Playhead.
Step 3: Add music and effects
You can check out the sound and music effects, background, transitions and themed titles at the top toolbar and implement them in the video. Using the icons present just above the clip, you can make color corrections, stabilize the clip, change volume, eliminate background noise, apply speed changes, etc.
Step 4: Share the video
After the editing is complete, click on the Share icon present at the top right corner. Now, click on YouTube & facebook. Now, save the video to your Mac device. When the file is saved, go to YouTube Studio And upload your video.
03Windows Photo app
To use this app, you need to have windows 10 on your system. The Windows Photo app is an effective tool to edit the videos. The editing process is very simple and can be done in a few minutes. Here is a simple guide to help you.
Step 1: Open the app
Launch the app and click on the Video Editor option. To start the editing process, click on new video project. Now, name your project to start the process.
Step 2: Import the video
Click on ‘Add’ and then ‘From this pc’ to add the video. You can then drag the clip to open it in storyboard. There are several options at the storyboard using which you can add text to the title etc. to do this, select Add title card option. You can add text, select style and duration. Finally click on Done.
Step 3: Edit the video
You can find the trim, split and other editing options at the top. Using these options, you can make the desirable changes to the video. After completing the editing work, you can click on Finish video option. Now, choose the video quality (540p, 720p, 1080p) and select Export option to save the video on your computer.
Part 3 What do Professional You Tubers Use to Edit Videos?
Professional YouTubers use the best software for editing their videos and make them engaging and of high quality. One such software that you can also give a try is Wondershare Filmora Video Editor . The easy to use and interactive interface makes this software a top notch choice of the editors. In Filmora, you can edit your videos and audios, record the PC screen, add a voiceover to your video and also add colors in an easy way. The templates are customizable and you can edit them according to you. It has a lot of animated elements, transitions, title designs etc.
For Win 7 or later (64-bit)
For macOS 10.12 or later
Why to choose Filmora for editing YouTube videos:
● Can record the PC screen
● It has Pan and Zoom movements
● Can edit your audios with audio mixers
● Have amazing Filters, Text effects and Overlays.
● Color tuning
● Upload your videos directly to YouTube, Face book or Vimeo.
● Can adjust the speed
● Video stabilization
Part 4 YouTube Video Editing Q&A
What are the tools used for editing YouTube videos?
A. There are various tools available for editing the YouTube’s video. Some of them are listed here:
● YouTube creator studio
● Apple iMovie
● Videorama
● Shotcut
● Movavi video editor
How can you edit a YouTube video on your smart phone?
A. You can easily edit a YouTube video on your smart phone. Here are the steps to follow:
● Step 1: Log in to you YouTube account and click on the three dots at top right corner.
● Step 2: Tap on the three vertical dots at the side of your video which you want to edit.
● Step 3: Edit the video as you wish. You can change its description, add effects etc.
● Step 4: Click on the save button after you are done editing.
How can you add music to your video?
A. Adding music to video is very simple and can be done using Movavi Video Editor. Here is a small guide that you can follow.
● Download the Movavi Video Editor.
● Select the audio and video in Movavi Video Editor.
● Adjust the length and volume of the audio according to your video.
● Save the file.
How can you add Transitions on a video editor?
A. You can add transition to your video in two ways. You can add transitions to one or two different video clips or the other is adding transition to one media file.
What are the steps for editing a video?
A. A simple but highly effective way to edit a video is make a plan, film the video, add the media, arrange the media, edit the video, trim the video, add transitions, add title, add effects, and merge the Audio. Now, give a final touch to your video and the project is ready.
● Ending Thoughts →
● Editing videos on a budget is now easy as there are several software like Movavi Video Editor, Videorama, Apple iMovie, Shotcut tools that help you do it with ease.
● You can also edit your YouTube videos on your smart phones as it is quite simple and also you can use these tools to edit the video professionally.
● Filmora is the best tool from which you can edit your YouTube videos and can upload them directly on YouTube.
Top 9 Sparkle Effects Photo and Video Editors You Should Know
Versatile Video Editor - Wondershare Filmora
An easy yet powerful editor
Numerous effects to choose from
Detailed tutorials provided by the official channel
Has your project been looking sparkly lately?
With New Year’s Eve and other holiday celebrations just behind us, you may have noticed some excessive glitter everywhere. You might have found yourself wondering if everyone had spent the holidays mastering some clever techniques of photography with fancy new equipment they got for holiday celebrations. Well, they might have, but the chances are they have just improved their projects with some admirable effects, and we are about to show you how you can do the same.
There are loads of free (or very cheap) apps or video editors you can use to easily beautify the creativity and mood of your images - using just the smartphone camera in your pocket! Sparkling decorations, twinkling lights, and dramatic lens flares can all compile into your photo during or after you shoot your project.
So, let’s move on to considering the best and effective ways of using sparkle video effects as follows.
In this article
01 What are the Advantages of Sparkle Effects?
02 Top 8 Sparkle Effects Apps/Editors in 2021
Part 1: What are the Advantages of Sparkle Effects?
By now, you’re all familiar with the basics of sparkle video effects editing: You push a button and push your button. But if you plan to preserve those prosperous memories, then you’ll want your snaps to look their best.
Glitter filters or sparkle video effects are beauty-enhancing effects that any photo or video editing users enjoy applying to their projects. Even Twitter and Instagram are pretty considerable that incredible amounts of sparkle or glitter effects are available within.
There are tons of filters and similar effects to choose from among them, and they all add specks of silver glitter that glisten as you shoot your video. At the same time, they also often smooth the skin of the subject. So, you must also note them as their advantages.
However, others aren’t too keen on the glitters filters, claiming they transform appearance too much and are usually pretty annoying and fake.
Depending on the purpose of your image, you may want to add filters, text, and frames. For instance, you can include your signature to avoid copying your image without receiving credit if shared online.
Part 2: Top 8 Sparkle Effects Apps/Editors in 2021
Find the right photo enhancement tools to edit your pictures.
3 Best Sparkle Effect Apps
1. kirakira+

With this app, you can apply a cross filter to combine with the camera lens. The reflective objects and light-emitting materials will shine even more. It has sparkle video effects of jewelry, glass, illumination, etc. Its primary function is that you can shoot the photo and video with an impressive Glitter effect.
Price: $0.99 || Devices: Android, iPhone, iPad ||
2. Sparkle Effects - Glitter FX

Let’s have fun adding beautiful glitter and sparkle video effects to your photos and videos. Here, you can upload pictures and videos directly from your gallery. Just hover the camera at anything shiny and let the app take over. These effects can be helpful on jewelry, cars, landscape, motorcycles, or anything else you’d like!
Price: Free || Devices: Android, iPhone, iPad ||
3. PicsArt iOS | Android

Use the Lens Flare tool to apply a dynamic effect directly to your videos and images. Alternatively, you Search for lens flare or sunray stickers and similar sparkle video effects and then apply them to your photo using the different blend modes. You can adjust using a layer mask or customize the opacity to suit.
2 Excellent Sparkle Video Effects Editor
1. Wondershare Filmora
Wondershare Filmora
Get started easily with Filmora’s powerful performance, intuitive interface, and countless effects!
Try It Free Try It Free Try It Free Learn More >

Video effects, also known as visual effects or filters, create crazy graphics with clicks. It’s simple, and the results are great when you use dedicated software such as Wondershare Filmora. This is why people love sparkle video effects.
This platform is quite different from other video editing software in the market with minimal video effects. Wondershare Filmora offers 300+ free effects: Picture in Pageant, Transitional effects, Intro/Credits, Sound, Jump Cut, Titles, Mosaic, and more.

Or, you can download the Sparkle effects pack from Filmstock .

2. After Effects
It’s an excellent background for Christmas plays, holiday pageants, or any other video you wish to add a little twinkle! You can add a twinkling star quite easily in Adobe After Effects.
Are you looking for the perfect sparkle video effect for your next After Effects project? Here are some great picks!
After Effects has Particle Presets Kit, Glitter Particles Logo, Elegant Particle Logo, Glitter Fantasy, Particle Glitter, Magic Graphics, Golden, and more in Sparkle effects filters.

Top 3 Online Sparkle Effects Editor
1. Videezy
Footage from Videezy is royalty-free for personal and commercial use, but users need to credit ‘Videezy.com’ in their projects.
The freest stock videos are in HD resolution, but there’s also a good collection of 4K clips – mostly abstract clips and landscape scenes rendered using Adobe After Effects.
The quality is mixed but generally high. All videos are in MP4 format, and you can see the resolution below the preview on the download page.

2. Pngtree
Pngtree is a PNG stock images market, but also you can look for a lot of unique backgrounds and templates. Their staff or customer care are also lovely and reply in time. Furthermore, its graphics are good enough, and you can find almost anything you are looking for.

3. Glitterboo
It is a much more complete tool that also allows video editing. Before you edit your images, we advise you to test this site yourself to get satisfactory results. Essentially, the procedure to apply the glitter effect is very similar to those described above, so in this case, it is not strictly necessary to show you all the steps, as it is all quite intuitive.

Part 3: FAQs about Sparkle Effects
1 – What is the sparkle effect on Instagram?
Glitter filters are a type of beauty-enhancing filter that Instagram users enjoy applying to their selfies and videos. There is plenty of different ones to choose from on Instagram, and they all add specks of silver glitter that glisten as you film your video.
2 – What is the sparkle effect on TikTok?
To get the sparkly ‘bling’ effect, you further need to consider a few straightforward steps. All you are required to do beforehand is to check that your TikTok app is up to date!
3 – How can I improve my photos?
You can use filters and effects to improve photos to a great extent. For this purpose, you can go with using the sparkle effects as aforementioned.
Conclusion
The perfect sparkle video effect can add majesty, magic, and wonder to your next project. Furthermore, you can add a slight shimmer and shine and take the viewing experience to a whole new stage with one of these tremendous effects.
More thanks we should add to the video editing software present in the market, every kins of user can easily apply effects to our videos. Don’t like the complicated software like Final Cut Pro or Adobe Premiere or any other tools listed above? Wondershare Filmora video editor now makes it easy to apply all the special effects, including sparkle video effects mentioned above. This simple video editing tool provides the most comprehensive and practical editing elements and workflow around.
And, if you’re not satisfied with Filmora’s inbuilt effects, Filmstock is a one-stop shop for royalty-free video effects, music and sound effects, stock video footage, and more stock media.
Has your project been looking sparkly lately?
With New Year’s Eve and other holiday celebrations just behind us, you may have noticed some excessive glitter everywhere. You might have found yourself wondering if everyone had spent the holidays mastering some clever techniques of photography with fancy new equipment they got for holiday celebrations. Well, they might have, but the chances are they have just improved their projects with some admirable effects, and we are about to show you how you can do the same.
There are loads of free (or very cheap) apps or video editors you can use to easily beautify the creativity and mood of your images - using just the smartphone camera in your pocket! Sparkling decorations, twinkling lights, and dramatic lens flares can all compile into your photo during or after you shoot your project.
So, let’s move on to considering the best and effective ways of using sparkle video effects as follows.
In this article
01 What are the Advantages of Sparkle Effects?
02 Top 8 Sparkle Effects Apps/Editors in 2021
Part 1: What are the Advantages of Sparkle Effects?
By now, you’re all familiar with the basics of sparkle video effects editing: You push a button and push your button. But if you plan to preserve those prosperous memories, then you’ll want your snaps to look their best.
Glitter filters or sparkle video effects are beauty-enhancing effects that any photo or video editing users enjoy applying to their projects. Even Twitter and Instagram are pretty considerable that incredible amounts of sparkle or glitter effects are available within.
There are tons of filters and similar effects to choose from among them, and they all add specks of silver glitter that glisten as you shoot your video. At the same time, they also often smooth the skin of the subject. So, you must also note them as their advantages.
However, others aren’t too keen on the glitters filters, claiming they transform appearance too much and are usually pretty annoying and fake.
Depending on the purpose of your image, you may want to add filters, text, and frames. For instance, you can include your signature to avoid copying your image without receiving credit if shared online.
Part 2: Top 8 Sparkle Effects Apps/Editors in 2021
Find the right photo enhancement tools to edit your pictures.
3 Best Sparkle Effect Apps
1. kirakira+
With this app, you can apply a cross filter to combine with the camera lens. The reflective objects and light-emitting materials will shine even more. It has sparkle video effects of jewelry, glass, illumination, etc. Its primary function is that you can shoot the photo and video with an impressive Glitter effect.
Price: $0.99 || Devices: Android, iPhone, iPad ||
2. Sparkle Effects - Glitter FX
Let’s have fun adding beautiful glitter and sparkle video effects to your photos and videos. Here, you can upload pictures and videos directly from your gallery. Just hover the camera at anything shiny and let the app take over. These effects can be helpful on jewelry, cars, landscape, motorcycles, or anything else you’d like!
Price: Free || Devices: Android, iPhone, iPad ||
3. PicsArt iOS | Android
Use the Lens Flare tool to apply a dynamic effect directly to your videos and images. Alternatively, you Search for lens flare or sunray stickers and similar sparkle video effects and then apply them to your photo using the different blend modes. You can adjust using a layer mask or customize the opacity to suit.
2 Excellent Sparkle Video Effects Editor
1. Wondershare Filmora
Wondershare Filmora
Get started easily with Filmora’s powerful performance, intuitive interface, and countless effects!
Try It Free Try It Free Try It Free Learn More >
Video effects, also known as visual effects or filters, create crazy graphics with clicks. It’s simple, and the results are great when you use dedicated software such as Wondershare Filmora. This is why people love sparkle video effects.
This platform is quite different from other video editing software in the market with minimal video effects. Wondershare Filmora offers 300+ free effects: Picture in Pageant, Transitional effects, Intro/Credits, Sound, Jump Cut, Titles, Mosaic, and more.
Or, you can download the Sparkle effects pack from Filmstock .
2. After Effects
It’s an excellent background for Christmas plays, holiday pageants, or any other video you wish to add a little twinkle! You can add a twinkling star quite easily in Adobe After Effects.
Are you looking for the perfect sparkle video effect for your next After Effects project? Here are some great picks!
After Effects has Particle Presets Kit, Glitter Particles Logo, Elegant Particle Logo, Glitter Fantasy, Particle Glitter, Magic Graphics, Golden, and more in Sparkle effects filters.
Top 3 Online Sparkle Effects Editor
1. Videezy
Footage from Videezy is royalty-free for personal and commercial use, but users need to credit ‘Videezy.com’ in their projects.
The freest stock videos are in HD resolution, but there’s also a good collection of 4K clips – mostly abstract clips and landscape scenes rendered using Adobe After Effects.
The quality is mixed but generally high. All videos are in MP4 format, and you can see the resolution below the preview on the download page.
2. Pngtree
Pngtree is a PNG stock images market, but also you can look for a lot of unique backgrounds and templates. Their staff or customer care are also lovely and reply in time. Furthermore, its graphics are good enough, and you can find almost anything you are looking for.
3. Glitterboo
It is a much more complete tool that also allows video editing. Before you edit your images, we advise you to test this site yourself to get satisfactory results. Essentially, the procedure to apply the glitter effect is very similar to those described above, so in this case, it is not strictly necessary to show you all the steps, as it is all quite intuitive.
Part 3: FAQs about Sparkle Effects
1 – What is the sparkle effect on Instagram?
Glitter filters are a type of beauty-enhancing filter that Instagram users enjoy applying to their selfies and videos. There is plenty of different ones to choose from on Instagram, and they all add specks of silver glitter that glisten as you film your video.
2 – What is the sparkle effect on TikTok?
To get the sparkly ‘bling’ effect, you further need to consider a few straightforward steps. All you are required to do beforehand is to check that your TikTok app is up to date!
3 – How can I improve my photos?
You can use filters and effects to improve photos to a great extent. For this purpose, you can go with using the sparkle effects as aforementioned.
Conclusion
The perfect sparkle video effect can add majesty, magic, and wonder to your next project. Furthermore, you can add a slight shimmer and shine and take the viewing experience to a whole new stage with one of these tremendous effects.
More thanks we should add to the video editing software present in the market, every kins of user can easily apply effects to our videos. Don’t like the complicated software like Final Cut Pro or Adobe Premiere or any other tools listed above? Wondershare Filmora video editor now makes it easy to apply all the special effects, including sparkle video effects mentioned above. This simple video editing tool provides the most comprehensive and practical editing elements and workflow around.
And, if you’re not satisfied with Filmora’s inbuilt effects, Filmstock is a one-stop shop for royalty-free video effects, music and sound effects, stock video footage, and more stock media.
How to Zoom Webcam on PC
Making certain our digital presence is the best it can be pays dividends as more and more of what we do online; similar is the case with how to zoom out webcam windows 10. The majority of experts advise against using the built-in camera that comes with your laptop or computer and instead advocate getting a webcam or an HD camera. These, however, may be hard to come by and pricy if you locate a nice one. If the built-in camera on your laptop doesn’t perform effectively during Zoom meetings, you may want to consider about investing in a separate, better webcam. Webcams offer automatic settings that are intended to function with the largest variety of lighting situations possible. This suggests that they average out a great number of responses to the content of the frame. Because of this, we have incorporated basic PC webcam zooming settings. These answers may be found in the portions that follow.
It’s vital to know how to zoom in on a webcam before visiting there. The camera wasn’t always as vital as it is today, and only very large corporations could afford to employ it as a convenience. But today, nearly everyone, from huge organizations to little firms, acknowledges its value. Everybody needs a webcam that works properly. The camera control software you are using determines the zoom function. The resolution of your picture window and the capabilities of the application dictate how far you can zoom in on the webcam’s video image. You can zoom in and out on camera photos using tools like YouCam and Windows Live Messenger. The most critical camera capabilities for the ideal video conferencing experience are zoom in and zoom out, which at first look may appear trivial. Here, we’ll walk you through each step, in detail. Continue reading, and we’ll check your understanding of webcam zoom in and zoom out skills!
Way 1: Zoom with Windows Live Messenger
When utilizing a camera for video conferencing, you may zoom in on a user’s face to get rid of the background. Webcam settings are not accessible by default in Microsoft Windows. However, camera zoom settings may be changed in instant chat systems. Through an instant messaging tool, such as Windows Live Messenger, you may simply access these options. This application provides private offline chat, video messaging, image and video sharing, and video chatting.
Step1Start Windows Live Messenger on your PC or laptop first. Enter your login name and password by clicking the “Sign In” button.

Step2On the top menu bar, pick “Tools.” And then select the “Audio and Video Setup”. Drag the slider next to “Speaker” to modify the speaker volume. Drag the slider next to “Microphone” to modify the microphone sensitivity. Press “Next.”

Step3From the drop-down list, pick the webcam. The “Camera Control” option is situated on the top; pick “Webcam Settings” after that.
Step4Now, to alter the zoom settings, drag the “Zoom” slider. To zoom in or out, drag the slider to the left or right. Press “OK.”
Way 2: Use Windows 10 Camera App
Wondering how to zoom your camera in the Windows 10 Camera app? The Camera app enables you to zoom in or out on your webcam in both image and video modes. To accomplish so, click or push the Magnification button, and then use the slider to modify the webcam’s zoom level. To operate the zoom feature manually, pick “Manual Zoom.” In the preview window, a square appears when you pick this option. To zoom in on a specific region of the capture window, drag the square there. To expand the image that was acquired by the webcam, slide the slider bar. In simply, The Camera app enables you zoom in or out of photographs and movies shot with your webcam. To do this, click on the “Zoom” button and drag the slider to the left or right as appropriate on your Windows 10 camera. the following steps:
Step1To open the “Start Menu,” make a right-click on “Start.” Now, to access the Camera app, type “Camera App” into the start menu’s search box.

Step2Tap the Camera Control icon when you start or join a meeting. To zoom and pan the camera to the appropriate spot, utilize the icons on the Camera Control panel.
![]()
Step3To exit the Camera Control window and return to the Meeting Controls, touch outside of it.
Way 3: Zoom with YouCam
Unfortunately, the default cameras or webcams bundled with the majority of Windows laptops and desktops don’t have an automatic zoom option. In fact, the only method to adjust their crop is to switch from “Standard” to “Widescreen,” which does slightly zoom in on you but not in the manner we’d want. This makes it inescapable that the only method to manually alter a webcam’s magnification is to acquire one separately and apply its software settings. , like YouCam. YouCam provides video calling, streaming, and broadcasting. includes an integrated app. To employ Zoom with YouCam, refer to the methods given below:
Step1Launch the YouCam camera program and activate the webcam.

Step2In the camera preview window, pick Settings. Then, select “Enable Video Zoom” from the menu.
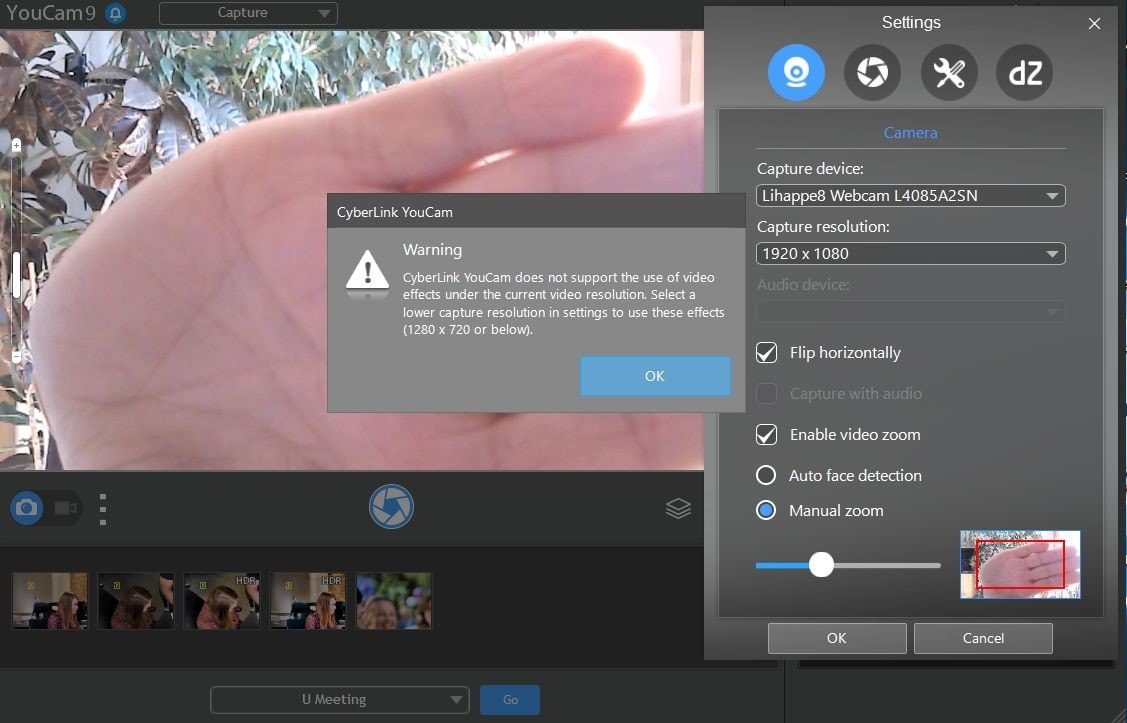
Step3Select “Automatic Face Detection” from the menu. As you wander about in the capture window, the camera watches your face and automatically zooms in on your photo as shown above.
Step4To handle the zoom feature manually, pick “Manual Zoom.” In the preview window, a square appears when you pick this option. To zoom in on a specific region of the capture window, drag the square there. To expand the image that was acquired by the webcam, slide the slider bar.

Way 4: Use iGlasses on Mac
For the perfect webcam look on a MAC, install the Chrome plugin iGlasses for video effects and style tweaks. Your videos will appear better on Zoom as a consequence. You may instantly enhance the appearance of your video interactions by utilizing the digital zoom on your iGlasses. Digital pan, tilt, and zoom are all possible with easy controls. For Macs that support it, an Apple Remote may be used to operate. iGlasses will become an option in Zoom’s video settings when it has been installed. You may improve your camera by altering the settings in iGlasses. You may experiment with a range of amusing effects, like 3-D distortions, using the virtual camera. Let’s learn how to utilize iGlasses on a Mac:
Step1Installing Ecamm’s iGlasses on a MacBook in the first step.
Step2To activate the camera, go to your video settings and pick iGlasses.
Step3Choose the Zoom window and execute the appropriate operations using the Zoom and Flip options. You may now zoom in and out using the camera on your MacBook as you like.

Conclusion
In conclusion, so many people currently take part in online conferences and virtual meetings. You want to create a lasting impression, don’t you? Not or whether you are the host of an online meeting or event, you must now maintain a professional image to prevent turning off attendees. You have discovered how to utilize the tools at your disposal to boost the zoom in and out quality of your camera in this post. However, as will be explained in the sections ahead, you may do it without the third-party plugins. With just one quick plugin, you can significantly transform how you look on a camera. Hence, try out the easy method from the above enlisted ones to get hold on your PC webcam to zoom in or out purposes.
Making certain our digital presence is the best it can be pays dividends as more and more of what we do online; similar is the case with how to zoom out webcam windows 10. The majority of experts advise against using the built-in camera that comes with your laptop or computer and instead advocate getting a webcam or an HD camera. These, however, may be hard to come by and pricy if you locate a nice one. If the built-in camera on your laptop doesn’t perform effectively during Zoom meetings, you may want to consider about investing in a separate, better webcam. Webcams offer automatic settings that are intended to function with the largest variety of lighting situations possible. This suggests that they average out a great number of responses to the content of the frame. Because of this, we have incorporated basic PC webcam zooming settings. These answers may be found in the portions that follow.
It’s vital to know how to zoom in on a webcam before visiting there. The camera wasn’t always as vital as it is today, and only very large corporations could afford to employ it as a convenience. But today, nearly everyone, from huge organizations to little firms, acknowledges its value. Everybody needs a webcam that works properly. The camera control software you are using determines the zoom function. The resolution of your picture window and the capabilities of the application dictate how far you can zoom in on the webcam’s video image. You can zoom in and out on camera photos using tools like YouCam and Windows Live Messenger. The most critical camera capabilities for the ideal video conferencing experience are zoom in and zoom out, which at first look may appear trivial. Here, we’ll walk you through each step, in detail. Continue reading, and we’ll check your understanding of webcam zoom in and zoom out skills!
Way 1: Zoom with Windows Live Messenger
When utilizing a camera for video conferencing, you may zoom in on a user’s face to get rid of the background. Webcam settings are not accessible by default in Microsoft Windows. However, camera zoom settings may be changed in instant chat systems. Through an instant messaging tool, such as Windows Live Messenger, you may simply access these options. This application provides private offline chat, video messaging, image and video sharing, and video chatting.
Step1Start Windows Live Messenger on your PC or laptop first. Enter your login name and password by clicking the “Sign In” button.
Step2On the top menu bar, pick “Tools.” And then select the “Audio and Video Setup”. Drag the slider next to “Speaker” to modify the speaker volume. Drag the slider next to “Microphone” to modify the microphone sensitivity. Press “Next.”
Step3From the drop-down list, pick the webcam. The “Camera Control” option is situated on the top; pick “Webcam Settings” after that.
Step4Now, to alter the zoom settings, drag the “Zoom” slider. To zoom in or out, drag the slider to the left or right. Press “OK.”
Way 2: Use Windows 10 Camera App
Wondering how to zoom your camera in the Windows 10 Camera app? The Camera app enables you to zoom in or out on your webcam in both image and video modes. To accomplish so, click or push the Magnification button, and then use the slider to modify the webcam’s zoom level. To operate the zoom feature manually, pick “Manual Zoom.” In the preview window, a square appears when you pick this option. To zoom in on a specific region of the capture window, drag the square there. To expand the image that was acquired by the webcam, slide the slider bar. In simply, The Camera app enables you zoom in or out of photographs and movies shot with your webcam. To do this, click on the “Zoom” button and drag the slider to the left or right as appropriate on your Windows 10 camera. the following steps:
Step1To open the “Start Menu,” make a right-click on “Start.” Now, to access the Camera app, type “Camera App” into the start menu’s search box.
Step2Tap the Camera Control icon when you start or join a meeting. To zoom and pan the camera to the appropriate spot, utilize the icons on the Camera Control panel.
![]()
Step3To exit the Camera Control window and return to the Meeting Controls, touch outside of it.
Way 3: Zoom with YouCam
Unfortunately, the default cameras or webcams bundled with the majority of Windows laptops and desktops don’t have an automatic zoom option. In fact, the only method to adjust their crop is to switch from “Standard” to “Widescreen,” which does slightly zoom in on you but not in the manner we’d want. This makes it inescapable that the only method to manually alter a webcam’s magnification is to acquire one separately and apply its software settings. , like YouCam. YouCam provides video calling, streaming, and broadcasting. includes an integrated app. To employ Zoom with YouCam, refer to the methods given below:
Step1Launch the YouCam camera program and activate the webcam.
Step2In the camera preview window, pick Settings. Then, select “Enable Video Zoom” from the menu.
Step3Select “Automatic Face Detection” from the menu. As you wander about in the capture window, the camera watches your face and automatically zooms in on your photo as shown above.
Step4To handle the zoom feature manually, pick “Manual Zoom.” In the preview window, a square appears when you pick this option. To zoom in on a specific region of the capture window, drag the square there. To expand the image that was acquired by the webcam, slide the slider bar.
Way 4: Use iGlasses on Mac
For the perfect webcam look on a MAC, install the Chrome plugin iGlasses for video effects and style tweaks. Your videos will appear better on Zoom as a consequence. You may instantly enhance the appearance of your video interactions by utilizing the digital zoom on your iGlasses. Digital pan, tilt, and zoom are all possible with easy controls. For Macs that support it, an Apple Remote may be used to operate. iGlasses will become an option in Zoom’s video settings when it has been installed. You may improve your camera by altering the settings in iGlasses. You may experiment with a range of amusing effects, like 3-D distortions, using the virtual camera. Let’s learn how to utilize iGlasses on a Mac:
Step1Installing Ecamm’s iGlasses on a MacBook in the first step.
Step2To activate the camera, go to your video settings and pick iGlasses.
Step3Choose the Zoom window and execute the appropriate operations using the Zoom and Flip options. You may now zoom in and out using the camera on your MacBook as you like.
Conclusion
In conclusion, so many people currently take part in online conferences and virtual meetings. You want to create a lasting impression, don’t you? Not or whether you are the host of an online meeting or event, you must now maintain a professional image to prevent turning off attendees. You have discovered how to utilize the tools at your disposal to boost the zoom in and out quality of your camera in this post. However, as will be explained in the sections ahead, you may do it without the third-party plugins. With just one quick plugin, you can significantly transform how you look on a camera. Hence, try out the easy method from the above enlisted ones to get hold on your PC webcam to zoom in or out purposes.
Also read:
- New 2024 Approved Free Titles For Final Cut Pro
- Updated This Article Will Address Your Questions About the Easiest Way to Turn a Blog Into a Podcast. Lets Begin with the Reasons Why You Should Do a Podcast
- Updated The Ultimate Wedding Videography Checklist for 2024
- Updated 2024 Approved 2 Methods to Crop a Video in VLC
- New In 2024, Learn How to Effortlessly Mirror Video Clips in Adobe Premiere Pro with This Step-by-Step Guide. Perfect for Creating a Symmetrical Look in Your Videos
- New In 2024, 5 Tips for Faster Editing in Filmora
- How to Add Customized Transitions to OBS for 2024
- Updated Do You Know that Google Photos App Can Be Used to Edit and Stabilize Shaky Videos? In This Article, I Will Show You a Step by Step Tutorial About How to Use Google Photos to Stabilize Videos
- New 2024 Approved Online Video Makers to Use
- Updated Denoise a Video in Adobe Premiere Pro – Audio and Video Noise Removal for 2024
- New Are You Trying to Make Your Video Pause on a Specific Frame? Learn How to Do so Quickly and with Ease by Adding a Freeze-Frame Effect in These Freeze-Frame Video Editing Apps for 2024
- Updated In 2024, Top 10 Best Free Video Compressors
- New It Is Easy to Separate the Audio From the Video in DaVinci Resolve. But, to Avail of This Feature, You Need to Follow Proper Steps, and This Article Is All About It
- Updated Mask Tracking Is Believed to Be a Helpful Procedure for Marking Proper Areas in Videos. Learn How to Perform Premiere Pro Mask Tracking in This Guide for 2024
- 2024 Approved Create Chroma Key Written Text Effects in Filmora
- Updated Bandicut Video Editor Download and Review
- Updated In 2024, Backup and Organize Your Footage in Minutes
- New Color Match Game Top Tips for You
- Updated How to Create a DIY Green Screen Video Effect for 2024
- In 2024, How to Make Foggy Text Reflection Effect
- In 2024, Top Free LUTs To Use in Shotcut An Overview
- New How to Zoom Webcam on PC
- New Best Online YouTube Video Trimmer
- Updated 2024 Approved How to Share YouTube Video on Zoom?
- New General Knowledge About MP4 Format and Best MP4 Video Editor
- Fixing Foneazy MockGo Not Working On Samsung Galaxy S23 Tactical Edition | Dr.fone
- The Most Useful Tips for Pokemon Go Ultra League On Honor Play 40C | Dr.fone
- Top 6 Apps/Services to Trace Any Apple iPhone 15 Pro Max Location By Mobile Number | Dr.fone
- In 2024, How to Spy on Text Messages from Computer & Oppo Reno 11 5G | Dr.fone
- How To Stream Anything From Realme Narzo 60 5G to Apple TV | Dr.fone
- In 2024, Top-Notch Solutions for Disabled Apple ID On Apple iPhone XR Making It Possible
- How to Change Netflix Location to Get More Country Version On Vivo Y100t | Dr.fone
- In 2024, iPogo will be the new iSpoofer On Honor 70 Lite 5G? | Dr.fone
- How to Fix Error 495 While Download/Updating Android Apps On Poco C65 | Dr.fone
- Fix Unfortunately Settings Has Stopped on Asus ROG Phone 7 Quickly | Dr.fone
- In 2024, Full Guide to Unlock iPhone 13 Pro Max with iTunes | Dr.fone
- How to sign Excel 2000 files online
- In 2024, Is GSM Flasher ADB Legit? Full Review To Bypass Your Oppo F23 5GFRP Lock
- How to Downgrade iPhone 11 Pro Max to an Older iOS Version? | Dr.fone
- How to Fix Android.Process.Media Has Stopped on Nokia C22 | Dr.fone
- How To Deal With the OnePlus Nord CE 3 5G Screen Black But Still Works? | Dr.fone
- Set Your Preferred Job Location on LinkedIn App of your Poco M6 Pro 4G | Dr.fone
- In 2024, Ultimate guide to get the meltan box pokemon go For Apple iPhone 15 | Dr.fone
- How do you play .mov files on Motorola ?
- 4 Ways to Fix Android Blue Screen of Death On Honor Magic 6 Pro | Dr.fone
- In 2024, How To Pause Life360 Location Sharing For Asus ROG Phone 7 | Dr.fone
- How to Reset Apple ID and Apple Password From iPhone 15 Plus
- Title: Updated Boost the Pace of Your Instagram Reels Videos with These Simple Tricks
- Author: Morgan
- Created at : 2024-05-19 05:11:56
- Updated at : 2024-05-20 05:11:56
- Link: https://ai-video-editing.techidaily.com/updated-boost-the-pace-of-your-instagram-reels-videos-with-these-simple-tricks/
- License: This work is licensed under CC BY-NC-SA 4.0.
