
:max_bytes(150000):strip_icc():format(webp)/GettyImages-174294003-57c6ee043df78cc16eeab260.jpg)
Updated Creative Ways to Add Green Screen Effects In Photoshop for 2024
Creative Ways to Add Green Screen Effects In Photoshop
Removing green screen backgrounds and replacing them with stunning videos is a common practice in video and movie making. The same process is applicable to still photos as well. You can take a photo with a green screen background and replace the screen with any photo as per your preference and requirement. You will need a high-quality photo editor to add green screen effects to your photo. There is no better photo editor in the world than Adobe Photoshop.
First, you have to opt for remove green screen Photoshop and then add anything you want in place of the green screen. The difference between Chroma key Photoshop and any other photo editor is that you can pay attention to details and remove the entire green screen halo effect around the main subject or object on the photo. Therefore, there will be no jittery green edges and green patches to disturb the overall photo quality. Here are the steps to use green screen effect in Adobe Photoshop.
1. How To Use Green Screen in Photoshop?
There are various ways available to remove greenscreen Photoshop. The beginners prefer using the Magic Wand tool but there will always be green patches around the main object on the photo. These green patches will get highlighted when you insert any image in the background. Therefore, we are using the best method to Chroma key Photoshop and that is through Color Range option. Here are the detailed steps to use color keying in Photoshop to use green screen effect.
Step 1: Launch Adobe Photoshop and open your photo with green screen background.
Step 2: Go to Select menu and click on Color Range.

Step 3: Pick the Eyedropper tool. Hold Shift key to select the green background. You can also hold Alt key to remove any selection that you might have done by mistake. When you are perfectly ok with the selection of the green screen background, you should click on OK button.

Step 3: Go to Select menu and click on Inverse. Now, the selection will be on the main subject instead of the background.

Step 4: If you want to see a preview of the selection in your photo, you should select Image radio button and from Selection Preview, select any option other than None.

Step 5: Go to Select menu again and click on Refine Edge. Use the sliders to fine-tune the selection so that the selection is smooth on the edges of the main subject of the photo. Once done, click on OK button.

Step 6: Go to Select menu and click on Inverse again.
Step 7: Press Delete key to delete the green screen background selection.
Step 8: Open the replacement image which you want to put in the place of the green screen background that you have just deleted.
Step 9: Select the entire replacement image and copy the replacement. Come back to your photo and paste the replacement image. Make sure that the layer of the replacement image must be placed below the layer of your photo.

Step 10: You can adjust the size of the images as per your requirement so that everything fits perfectly in the frame. Similarly, you should adjust the color scheme so that the superimposition does not look awkward.
2. Best Way To Add Green Screen Effect To Video
In the previous section, we have stated how to remove the green screen background in any image and replace that with a stunning background photo. In this section, we will state how to add green screen effects in a video. There are many who think that adding green screen effects in a video takes a lot of expertise, but it is not the case.
If you select the suitable video editor, it is a matter of a few steps only. We recommend Wondershare Filmora to add green screen effects to your video where you have shot the scenes with green screen backgrounds. Here are the steps to follow to remove green screen backgrounds and replace with any photo or video as per your preference.
For Win 7 or later (64-bit)
For macOS 10.12 or later
Step 1: Download and install Wondershare Filmora.
Step 2: Launch Filmora and go for Create New Project option to get started.
Step 3: Import your video with green screen background and move it to the Timeline.
Step 4: Import the replacement photo or video and put it directly on the Timeline.
On the Timeline, your recorded video should be below the replacement photo or video.

Step 5: Double-click on your video, and you will come across a panel on the upper-left side. From that panel, you have to turn on Chroma Key option. This will enable the green screen effect due to which you will see the replacement photo or video superimposed on your recorded video in the green screen background.

Step 6: Finally, adjust the parameters available to fine-tune the overall green screen effect. Lastly, click on Ok button.
Conclusion
If you are looking to add green screen effects to your photo, you can opt for Chroma key Photoshop. Adobe Photoshop is the best photo editor to remove the green screen backgrounds on your photo and replace them with any image you want. Color keying in Photoshop enables you to change any solid color background to anything you want. Similarly, you can use Wondershare Filmora to add green screen effects to your video in simple steps.
For macOS 10.12 or later
Step 1: Download and install Wondershare Filmora.
Step 2: Launch Filmora and go for Create New Project option to get started.
Step 3: Import your video with green screen background and move it to the Timeline.
Step 4: Import the replacement photo or video and put it directly on the Timeline.
On the Timeline, your recorded video should be below the replacement photo or video.
Step 5: Double-click on your video, and you will come across a panel on the upper-left side. From that panel, you have to turn on Chroma Key option. This will enable the green screen effect due to which you will see the replacement photo or video superimposed on your recorded video in the green screen background.
Step 6: Finally, adjust the parameters available to fine-tune the overall green screen effect. Lastly, click on Ok button.
Conclusion
If you are looking to add green screen effects to your photo, you can opt for Chroma key Photoshop. Adobe Photoshop is the best photo editor to remove the green screen backgrounds on your photo and replace them with any image you want. Color keying in Photoshop enables you to change any solid color background to anything you want. Similarly, you can use Wondershare Filmora to add green screen effects to your video in simple steps.
How to Use LUTs in Adobe Premiere Pro
Create High-Quality Video - Wondershare Filmora
An easy and powerful YouTube video editor
Numerous video and audio effects to choose from
Detailed tutorials provided by the official channel
Do you wonder how some pictures or videos look so stunning? As you keep reading you will discover the secrets of achieving similar quality for your content. You need a video or photo-editing software such as Adobe Premiere Pro and LUTS. Premier Pro luts are file types that you use to make color corrections to your content. They are available in different formats, each with varying capabilities. Below is everything you need to improve your editing skills using Adobe’s software and premiere luts.

In this article
01 How does Premiere Pro Classify LUTS?
02 How to use Luts in Adobe Premiere Pro?
03 How to save and export your LUTS?
How does Premiere Pro Classify LUTS?
A premiere pro lut can fall into two categories depending on its core function. These are:
• Looks
These are premiere luts you use to make changes to your video or photo’s appearance and color scheme. They are available as presets under the Lumetri Color Panel and offer quick fixes to your content.
• Input Lut
You use these premiere pro luts to interpret log footage. Additionally, they are the first step of your color correcting process and work best on DSLR footage. However, keep reading to discover how to use luts in Adobe Premiere Pro.
How to use Luts in Adobe Premiere Pro?
Now that you are aware of how the program classifies the Luts, here is how you can correct your footage.
1. Get the latest version of the program
You can purchase and download the program from your region’s Adobe Website. The program is available for both macOS and Windows. However, it is quite heavy on the system. According to reports, the below requirements are sufficient.
- You need a processer with 8 cores and clock speeds upwards of 3.2GHz.
- 16 GB of Ram is ideal for macOS. However, you do require upwards of 32GB if you are running Windows.
- Graphics cards from Nvidia and AMD are best if you also want to improve the program’s performance. You request one that can handle the Adobe Premiere Pro from your supplier.
- Furthermore, invest in a high-capacity storage device to save your projects since some outputs can be very large after color correction. The program allows you to render 4K files which are the largest.
- Finally, the above requirements are sufficient to run the following versions OF Adobe Premiere Pro:
i. Adobe Premiere Pro 22.2
ii. Adobe Premiere Pro 22.1.2
iii. Adobe Premiere Pro 22.1.1
iv. Adobe Premiere Pro 22.0
2. Select the video you want and put it on the timeline

3. Premiere luts are accessible from two sections of the program
Input luts are available under the Basic Correction tab from the Lumetri Panel as above.
Alternatively, you can get them by accessing the Basic Correction tab from the Lumetri Section of the Effects Control Panel.
4. Then, open the Input LUT dropdown menu and choose the premiere lut you want
Adobe Premiere Pro has preset input LUTs. However, you can also add your own by clicking browse. Doing so opens your computer’s File Explorer and you can locate your custom premiere luts. The software applies the premiere lut, after which you can use the tools to make adjustments.
Additionally, Adobe Premiere Pro allows you to install custom LUT files to use. Below is the process for macOS users.
- Create these target directories in your Adobe Premiere Installation files. • For shared devices
/Library/Application Support/Adobe/Common/LUTs/Creative
/Library/Application Support/Adobe/Common/LUTs/Technical
• You need to create these files if you have administrator access.
/Users//Library/Application Support/Adobe/Common/LUTs/Creative
/Users//Library/Application Support/Adobe/Common/LUTs/Technical - Copy your custom LUT files to each of the folders.
- These will be available in your Lumetri Panel next time you launch Adobe Premiere Pro.
The process is the same for Windows Users. However, the target directories are different.
- For shared devices:
C:\ Program Files\ Adobe\Common\LUTs\Creative
C:\ Program Files\ Adobe\Common\LUTs\Creative - You need to create these files if you have administrator access.
C:\Users\yourusername\AppData\Roaming\Adobe\Common\LUTs\Creative
C:\Users\yourusername\AppData\Roaming\Adobe\Common\LUTs\Technical
Adobe Premiere Pro accepts .look and .cube file types, allowing you more creative freedom. Additionally, you can save and export any custom premiere luts to use in other projects. The next section offers a step-by-step guide on how to do that.
Finally, Looks allow you to make quick adjustments to your videos using the presets available on the Lumetri Panel. You can access these from the Effects Panel. Furthermore, it also allows you to preview the result. The intensity of the look can vary depending on where the slider is on the effects panel.
How to save and export your LUTS?
Most filmmakers prefer to save their premier luts for later use. Here is how to do it:
- Follow the above process through to step 5.
- Once you finish your editing, click on the Lumetri Pop Up menu and choose Save Preset.
- Fill the respective fields with your custom information and click OK. The program will then save the clip to the location you specify.
- You can save custom luts in the following ways:
Scale only applies the new lut to the video. As such, all other luts you use are deleted. Therefore, if your video is one hour, your custom settings will run through the clip’s entire length.
Anchor To In Point only saves the section of the clip where your custom settings are active. Additionally, the software will add all pre-existing luts to the section without scaling. - Additionally, you can repeat the process and export your LUTs in the following formats:
.look exports the LUT as an Adobe Premiere Pro file to a location on your device.
.cube saves the Lumetri preset you can use on other color grading software. For example, you can use your .cube custom lut with Filmora.

For Win 7 or later (64-bit)
For macOS 10.12 or later
Finally, the above procedures only apply to certain versions of Adobe Premiere Pro. They may differ across devices. This is because Adobe releases new updates regularly to fix bugs and offer new functionality. So, keep checking regularly for any changes.
Conclusion
●Adobe Premiere Pro offers you fun luts to enhance the quality of your video. Additionally, the option to render videos in 4K quality allows you to output creations of the highest quality. Additionally, the option to save and export your LUTS to use with other programs like Filmora, means there is no limit to what you can create. Here is a link to some LUTs you can try on your next edit.
Do you wonder how some pictures or videos look so stunning? As you keep reading you will discover the secrets of achieving similar quality for your content. You need a video or photo-editing software such as Adobe Premiere Pro and LUTS. Premier Pro luts are file types that you use to make color corrections to your content. They are available in different formats, each with varying capabilities. Below is everything you need to improve your editing skills using Adobe’s software and premiere luts.
In this article
01 How does Premiere Pro Classify LUTS?
02 How to use Luts in Adobe Premiere Pro?
03 How to save and export your LUTS?
How does Premiere Pro Classify LUTS?
A premiere pro lut can fall into two categories depending on its core function. These are:
• Looks
These are premiere luts you use to make changes to your video or photo’s appearance and color scheme. They are available as presets under the Lumetri Color Panel and offer quick fixes to your content.
• Input Lut
You use these premiere pro luts to interpret log footage. Additionally, they are the first step of your color correcting process and work best on DSLR footage. However, keep reading to discover how to use luts in Adobe Premiere Pro.
How to use Luts in Adobe Premiere Pro?
Now that you are aware of how the program classifies the Luts, here is how you can correct your footage.
1. Get the latest version of the program
You can purchase and download the program from your region’s Adobe Website. The program is available for both macOS and Windows. However, it is quite heavy on the system. According to reports, the below requirements are sufficient.
- You need a processer with 8 cores and clock speeds upwards of 3.2GHz.
- 16 GB of Ram is ideal for macOS. However, you do require upwards of 32GB if you are running Windows.
- Graphics cards from Nvidia and AMD are best if you also want to improve the program’s performance. You request one that can handle the Adobe Premiere Pro from your supplier.
- Furthermore, invest in a high-capacity storage device to save your projects since some outputs can be very large after color correction. The program allows you to render 4K files which are the largest.
- Finally, the above requirements are sufficient to run the following versions OF Adobe Premiere Pro:
i. Adobe Premiere Pro 22.2
ii. Adobe Premiere Pro 22.1.2
iii. Adobe Premiere Pro 22.1.1
iv. Adobe Premiere Pro 22.0
2. Select the video you want and put it on the timeline
3. Premiere luts are accessible from two sections of the program
Input luts are available under the Basic Correction tab from the Lumetri Panel as above.
Alternatively, you can get them by accessing the Basic Correction tab from the Lumetri Section of the Effects Control Panel.
4. Then, open the Input LUT dropdown menu and choose the premiere lut you want
Adobe Premiere Pro has preset input LUTs. However, you can also add your own by clicking browse. Doing so opens your computer’s File Explorer and you can locate your custom premiere luts. The software applies the premiere lut, after which you can use the tools to make adjustments.
Additionally, Adobe Premiere Pro allows you to install custom LUT files to use. Below is the process for macOS users.
- Create these target directories in your Adobe Premiere Installation files. • For shared devices
/Library/Application Support/Adobe/Common/LUTs/Creative
/Library/Application Support/Adobe/Common/LUTs/Technical
• You need to create these files if you have administrator access.
/Users//Library/Application Support/Adobe/Common/LUTs/Creative
/Users//Library/Application Support/Adobe/Common/LUTs/Technical - Copy your custom LUT files to each of the folders.
- These will be available in your Lumetri Panel next time you launch Adobe Premiere Pro.
The process is the same for Windows Users. However, the target directories are different.
- For shared devices:
C:\ Program Files\ Adobe\Common\LUTs\Creative
C:\ Program Files\ Adobe\Common\LUTs\Creative - You need to create these files if you have administrator access.
C:\Users\yourusername\AppData\Roaming\Adobe\Common\LUTs\Creative
C:\Users\yourusername\AppData\Roaming\Adobe\Common\LUTs\Technical
Adobe Premiere Pro accepts .look and .cube file types, allowing you more creative freedom. Additionally, you can save and export any custom premiere luts to use in other projects. The next section offers a step-by-step guide on how to do that.
Finally, Looks allow you to make quick adjustments to your videos using the presets available on the Lumetri Panel. You can access these from the Effects Panel. Furthermore, it also allows you to preview the result. The intensity of the look can vary depending on where the slider is on the effects panel.
How to save and export your LUTS?
Most filmmakers prefer to save their premier luts for later use. Here is how to do it:
- Follow the above process through to step 5.
- Once you finish your editing, click on the Lumetri Pop Up menu and choose Save Preset.
- Fill the respective fields with your custom information and click OK. The program will then save the clip to the location you specify.
- You can save custom luts in the following ways:
Scale only applies the new lut to the video. As such, all other luts you use are deleted. Therefore, if your video is one hour, your custom settings will run through the clip’s entire length.
Anchor To In Point only saves the section of the clip where your custom settings are active. Additionally, the software will add all pre-existing luts to the section without scaling. - Additionally, you can repeat the process and export your LUTs in the following formats:
.look exports the LUT as an Adobe Premiere Pro file to a location on your device.
.cube saves the Lumetri preset you can use on other color grading software. For example, you can use your .cube custom lut with Filmora.
For Win 7 or later (64-bit)
For macOS 10.12 or later
Finally, the above procedures only apply to certain versions of Adobe Premiere Pro. They may differ across devices. This is because Adobe releases new updates regularly to fix bugs and offer new functionality. So, keep checking regularly for any changes.
Conclusion
●Adobe Premiere Pro offers you fun luts to enhance the quality of your video. Additionally, the option to render videos in 4K quality allows you to output creations of the highest quality. Additionally, the option to save and export your LUTS to use with other programs like Filmora, means there is no limit to what you can create. Here is a link to some LUTs you can try on your next edit.
Best Ways to Blur Zoom Background for Free
Zoom’s blurred backdrop function, as the name indicates, distorts the background of a video conversation. Use this zoom blur background download free guide if you wish to keep your personal area hidden during Zoom conversations in order to protect your privacy. There is a backdrop with a zoom blur all throughout. It hides the turmoil or other version of a mess from your colleagues, and it just slightly makes your hair appear odd. You may learn how to blur your backdrop using different operating systems from this page. We’ll walk you through a workaround to get a blurred backdrop because the functionality is presently unavailable for mobile devices.
On your updated Zoom application, this new high res zoom background tool might be useful for a variety of reasons, whether you want to protect your privacy or conceal your filthy room. Consider a scenario in which you have a Zoom meeting but your usual workspace at home is occupied. Panic sets in because you don’t have time to clean everything up or locate a private, neutral location to set up. You have features built in into Zoom to use the zoom blurred background image that would cover the area behind you, including background blurring, that’s it. This simple toggleable feature is already present in Zoom and may be used to keep your area private or to make cluttered spaces uncertain. We’ll provide you a step-by-step tutorial in this post on how to activate blurred backdrop for your next meeting.
Part 1: How to blur Zoom background on Windows
Before and during meetings, users of the official Zoom desktop client for Windows have the option to blur the backdrop. Before a meeting, login into Zoom on the desktop application to activate backdrop blur. After that, choose Settings by clicking on the profile symbol in the upper left corner. Click the “Blur” option under “Backgrounds & Filters” after making your selection. The user may attend the meeting when the backdrop becomes blurry. Here are the steps to blur a Zoom backdrop during a meeting:
During a Zoom call on Windows 10, blur your backdrop as follows:
Step1Find the bar at the bottom of the meeting screen. To make it visible, you may need to move your mouse to the bottom.

Step2Find the “Stop Video” button, which has a chevron pointing upward.

Step3Then choose “Video Settings” > “Backgrounds & Filters” by clicking the arrow.

Step4Then choose “Blur,” and your backdrop will instantly seem blurred.

Part 2: How to blur Zoom background on Mac
Backdrop blur is the next best thing when a virtual background is unsuitable for a video conference but a consumer still needs privacy. As you can see from the description above, the blurred backdrop is just another style of the Zoom background. Customers may therefore directly adjust it from the Virtual Background setting area. Prior doing anything further, confirm that your MacBook is running the Zoom desktop client (software).
Before your Zoom call on a Mac, follow these instructions to blur your background:
Step1Start Zoom and log in to your account.

Step2In the next step, Click the “Settings” gear icon in the top-right corner and then select “Backgrounds & Filters” under Settings as shown below:

Step3Then choose “Blur,” and your backdrop will instantly seem blurred. You can also Select Stop Video by clicking the arrow next to it in the list of choices in the bar below the live video. A little list will start to appear. By using the “Choose Virtual Backdrop” option, you may choose a virtual background.
Step4Select “Blur” under the “Virtual Backgrounds” tab. You may choose a virtual backdrop from this page if you’d like. You need to verify that you have the right Zoom desktop program version and all the technical specs if you can’t locate the Blur option.
Part 3: How to Blur Zoom Background on iPhone
The option isn’t accessible on all Apple devices since a simulated or blurred backdrop requires more computing power. First, you should visit the Zoom virtual background system requirements page to see whether your device is supported. You should continue using Zoom without a virtual or blurred backdrop if your device doesn’t meet the criteria. To manually conceal your backdrop, consider standing close to a wall or sitting in a corner. Here are the instructions on how to blur your backdrop for Zoom meetings on iOS devices. Take these actions:
Step1Launch the Zoom app on your iOS phone in foremost step. To begin or join a new meeting, tap the “New Meeting” or “Join” icon.

Step2During the meeting, tap anywhere on the screen to access the controls that appear below the video.
Step3Select “More” by tapping the three-dot symbol.

Step4A brief list will start to appear. Next, on your iOS device, choose “Background and Filters.”

Step5Below your camera video, you’ll see a few possibilities. Tap “Blur” to make the background blurry.

Part 4: How to blur Zoom background on Android
Additionally, Zoom blur backdrops are the ideal option for first video conversations with clients, coworkers, or supervisors. On its Android app, Zoom offers customers the option to blur their backdrop. However, there is a catch: the function can only be activated once the user has entered a meeting. If a virtual backdrop isn’t your style on Android, you may choose to blur the background instead. Everything in the backdrop will be blurred, keeping just your picture apparent throughout the conversation. Remember that all of your next meetings will have the blur function turned on. How? Read on.
Step1Only while you’re in a meeting can you alter your backdrop. Tap the More icon in the bottom right corner after joining one.

Step2Select Virtual background after that. then choose a picture from the choices offered.

Step3The backdrop of a picture or video added from your gallery using the Add icon will likewise successfully blur the background on your Zoom Android device. Now place Zoom calls as usual, and the backdrop of your live video will be automatically blurred.
Conclusion
For individuals who prefer to obscure their surroundings while on a video conversation, Zoom’s blur background function is helpful. The function was added to the video-conferencing app in 2021 and has since gained popularity. The greatest thing you can do is choose a blur out backdrop if you can’t determine which of our Zoom background categories would best fit the video chat occasion. These are impartial backdrops that don’t necessarily depict any particular environment. They only provide a lovely, unobtrusive background that will take away any possible obstructions during the video connection. Perhaps a professional setting might be too much for a particular video chat, whilst a humorous backdrop wouldn’t work. In this situation, a blurred picture backdrop will be the difference between putting little to no effort into your call and being ready to portray yourself in the best possible way.
Zoom’s blurred backdrop function, as the name indicates, distorts the background of a video conversation. Use this zoom blur background download free guide if you wish to keep your personal area hidden during Zoom conversations in order to protect your privacy. There is a backdrop with a zoom blur all throughout. It hides the turmoil or other version of a mess from your colleagues, and it just slightly makes your hair appear odd. You may learn how to blur your backdrop using different operating systems from this page. We’ll walk you through a workaround to get a blurred backdrop because the functionality is presently unavailable for mobile devices.
On your updated Zoom application, this new high res zoom background tool might be useful for a variety of reasons, whether you want to protect your privacy or conceal your filthy room. Consider a scenario in which you have a Zoom meeting but your usual workspace at home is occupied. Panic sets in because you don’t have time to clean everything up or locate a private, neutral location to set up. You have features built in into Zoom to use the zoom blurred background image that would cover the area behind you, including background blurring, that’s it. This simple toggleable feature is already present in Zoom and may be used to keep your area private or to make cluttered spaces uncertain. We’ll provide you a step-by-step tutorial in this post on how to activate blurred backdrop for your next meeting.
Part 1: How to blur Zoom background on Windows
Before and during meetings, users of the official Zoom desktop client for Windows have the option to blur the backdrop. Before a meeting, login into Zoom on the desktop application to activate backdrop blur. After that, choose Settings by clicking on the profile symbol in the upper left corner. Click the “Blur” option under “Backgrounds & Filters” after making your selection. The user may attend the meeting when the backdrop becomes blurry. Here are the steps to blur a Zoom backdrop during a meeting:
During a Zoom call on Windows 10, blur your backdrop as follows:
Step1Find the bar at the bottom of the meeting screen. To make it visible, you may need to move your mouse to the bottom.
Step2Find the “Stop Video” button, which has a chevron pointing upward.
Step3Then choose “Video Settings” > “Backgrounds & Filters” by clicking the arrow.
Step4Then choose “Blur,” and your backdrop will instantly seem blurred.
Part 2: How to blur Zoom background on Mac
Backdrop blur is the next best thing when a virtual background is unsuitable for a video conference but a consumer still needs privacy. As you can see from the description above, the blurred backdrop is just another style of the Zoom background. Customers may therefore directly adjust it from the Virtual Background setting area. Prior doing anything further, confirm that your MacBook is running the Zoom desktop client (software).
Before your Zoom call on a Mac, follow these instructions to blur your background:
Step1Start Zoom and log in to your account.
Step2In the next step, Click the “Settings” gear icon in the top-right corner and then select “Backgrounds & Filters” under Settings as shown below:
Step3Then choose “Blur,” and your backdrop will instantly seem blurred. You can also Select Stop Video by clicking the arrow next to it in the list of choices in the bar below the live video. A little list will start to appear. By using the “Choose Virtual Backdrop” option, you may choose a virtual background.
Step4Select “Blur” under the “Virtual Backgrounds” tab. You may choose a virtual backdrop from this page if you’d like. You need to verify that you have the right Zoom desktop program version and all the technical specs if you can’t locate the Blur option.
Part 3: How to Blur Zoom Background on iPhone
The option isn’t accessible on all Apple devices since a simulated or blurred backdrop requires more computing power. First, you should visit the Zoom virtual background system requirements page to see whether your device is supported. You should continue using Zoom without a virtual or blurred backdrop if your device doesn’t meet the criteria. To manually conceal your backdrop, consider standing close to a wall or sitting in a corner. Here are the instructions on how to blur your backdrop for Zoom meetings on iOS devices. Take these actions:
Step1Launch the Zoom app on your iOS phone in foremost step. To begin or join a new meeting, tap the “New Meeting” or “Join” icon.
Step2During the meeting, tap anywhere on the screen to access the controls that appear below the video.
Step3Select “More” by tapping the three-dot symbol.
Step4A brief list will start to appear. Next, on your iOS device, choose “Background and Filters.”
Step5Below your camera video, you’ll see a few possibilities. Tap “Blur” to make the background blurry.
Part 4: How to blur Zoom background on Android
Additionally, Zoom blur backdrops are the ideal option for first video conversations with clients, coworkers, or supervisors. On its Android app, Zoom offers customers the option to blur their backdrop. However, there is a catch: the function can only be activated once the user has entered a meeting. If a virtual backdrop isn’t your style on Android, you may choose to blur the background instead. Everything in the backdrop will be blurred, keeping just your picture apparent throughout the conversation. Remember that all of your next meetings will have the blur function turned on. How? Read on.
Step1Only while you’re in a meeting can you alter your backdrop. Tap the More icon in the bottom right corner after joining one.
Step2Select Virtual background after that. then choose a picture from the choices offered.
Step3The backdrop of a picture or video added from your gallery using the Add icon will likewise successfully blur the background on your Zoom Android device. Now place Zoom calls as usual, and the backdrop of your live video will be automatically blurred.
Conclusion
For individuals who prefer to obscure their surroundings while on a video conversation, Zoom’s blur background function is helpful. The function was added to the video-conferencing app in 2021 and has since gained popularity. The greatest thing you can do is choose a blur out backdrop if you can’t determine which of our Zoom background categories would best fit the video chat occasion. These are impartial backdrops that don’t necessarily depict any particular environment. They only provide a lovely, unobtrusive background that will take away any possible obstructions during the video connection. Perhaps a professional setting might be too much for a particular video chat, whilst a humorous backdrop wouldn’t work. In this situation, a blurred picture backdrop will be the difference between putting little to no effort into your call and being ready to portray yourself in the best possible way.
Best Video Editors to Add Text to a Video
While it can be very easy to add text to an image, the same cannot be said when it comes to adding even the simplest text to a video. You will need video editing software that is designed with the necessary features to help you add text to your video.
There are very many programs in the market that can technically be used to add text to a video. But the ones we will look at are video editors that make the process easy, but also give you a wide range of options to customize your text in numerous ways.
Filmora
Filmora by Wondershare is one of the best video editors in the market. Its user interface is so easy to use that adding text to the video is a simple 3-step process. Aside from adding text to the video, Filmora also allows you to edit other aspects of the video including adding transitions, overlays, and animations to any section of the video.

Key Features:
- You can use Filmora to add text to any section of the video
- It gives you the freedom to move the text to any section of the video
- Customizing the text, you add to the video can be done in numerous ways including changing the color, and font and adding animations to the text.
- It offers numerous templates to choose from and different font styles that you can use
- It has a simple user interface that makes the video editing process very easy
- It has numerous other video editing capabilities that allow you to create and edit videos in different ways including splitting videos, trimming videos, and even merging videos clips into one
- You can upload the videos directly to YouTube after editing.
After Effects
Adobe After Effects is a motion picture editing program that you can also use to add text and other animations to your video. While you can use it to add simple text to the video, it is an ideal solution when your goal is to add advanced text animations. It is however by no means a simple solution, especially for beginners who may find it hard to get going with After Effects.

Key Features:
- You can add simple lines of text to any section of the video
- Text is easily customizable by changing the color, font, and size of the text
- You can also choose to change the entire text layer and add advanced animations and effects
- There are a lot of text, animations, and effects templates to choose from
- You can easily copy text from other Adobe applications to use in After Effects
Movavi Editor
Movavi video editor is another great video editor that you can use to add and edit text on a video. Like most similar tools it is designed to simplify the process, allowing you to add text to any section of the document, move the text to any location on the video and even add text effects to customize the text. It has a very simple user interface that allows you to do that quickly and easily.

Key Features:
- You can add text to any section of the video
- Customizing the text by changing the font, color and size is also very easy
- The user interface is very easy to use, allowing you to add even blocks of text very quickly
- You also have additional options to edit the video including splitting and merging the video or adjusting the brightness, saturation, and color.
iMovie
This is a built-in video editor that you will find on macOS and iOS devices. Even though it is free, iMovie has a lot of features that come in handy when you want to add and edit text on a video. The fact that it can be used on iOS devices is an added advantage when you want to edit videos on the go.

Key Features:
- It allows users to add transitions and effects to the text you add to the video
- It comes with a lot of title templates to choose from
- Adding animated text is also very simple including Sideways Drift, Lens Flare, and more
- You can customize the text in very many ways including adding fonts, drop shadows, changing the color, and even resizing or repositioning the text.
Camtasia
TechSmith Camtasia is one of the most popular tools to create and edit videos. Of the numerous features that you get when you choose to use Camtasia is adding and editing text to the video. It has numerous templates that can be used to customize the text you add in various ways.

Key Features:
- It gives you numerous options to add text to the images including text boxes, templates, and effects
- It has a speech-to-text feature that is perfect for adding captions and subtitles to the video
- You can easily customize the text by adding transitions and effects or even by simply changing the font, color, and size of the text
- The text can be moved to any section of the video
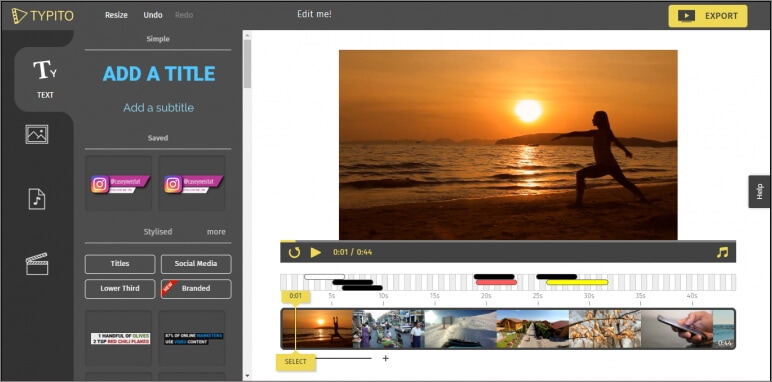
Typito
Typito is an online video editor with simple tools that can help you make changes to any video. designed to help YouTube content creators and video editors, Typito can be used to add all kinds of text and text effects to any video. It is accessible on all browsers and it is also very easy to use.
Key Features:
- It is very easy to use, allowing you to add text to any video in a few simple steps
- It has numerous templates to choose from
- Changing the font size, color, and style of the text is very easy
- You can publish videos directly to numerous video-sharing sites after editing
- It allows users to add animations, transitions, and effects to the text
Splice
Splice is an iOS app designed to help you add text to videos on iOS devices. Adding text to any video using Splice can be easily done using the overlay feature. It also has numerous other video editing features including allowing you to easily synchronize your videos and music, adding filters and transitions, and more.

Key Features:
- it has a simple user interface that makes adding text very easy
- You can customize the text in various ways including changing the font size, color and style or even adding various text effects
- Videos can be saved on the device or shared directly on social media apps like Facebook, Instagram, and YouTube
- It has numerous other video editing features including filters and animations
Clipomatic
If the text you want to add to the video is in the form of captions or subtitles, then Clipomatic is perhaps the best choice. It supports various languages including German, French, Portuguese, and even Chinese. You can also use it to add regular text to any video, reposition the text on any section of the video and customize the text in various ways.

Key Features:
- It is available for both Android and iOS
- Adding text to the video is very easy
- You can easily customize the text by changing the font color, and size and adding transitions and text effects
- It supports various languages, making it ideal for captions and subtitles
MySubtitle
MySubtitle is a simple but highly effective app that you can use to add text to your video. As the name suggests, this tool is ideal for adding subtitles and you can do that very easily by simply typing in the text and syncing the text to the video’s content.

Key Features:
- It is available for both iOS and Android devices
- You can type in your subtitles directly on the video
- Subtitles can then be paced to suit the video’s playback speed
- It is completely free to use
- You can share the videos you edit directly on various social media platforms
Free Download For Win 7 or later(64-bit)
Free Download For macOS 10.14 or later
Free Download For macOS 10.14 or later
Also read:
- Cropping Videos in VLC Step by Step
- In 2024, How to Color Grading in Final Cut Pro
- Updated So, in This Short Tutorial, Well Learn How to Create a Vintage 1980-Style Video with a Retro Effect that Will Leave Your Audience Yearning for More
- Updated What Is TS Format and How To Play TS Files for 2024
- Updated Do You Want to Make Your Photos and Videos Look Different From Others? There Are Many Lightroom LUTs Free, and They Make Your Media Content Stand Out From Others
- Things You Need to Know About Transparent PNG Remove and Convert
- In 2024, Srt File Creator
- New 2024 Approved 12 Impressive AI Video Ideas for Creating Engaging Video Content
- Updated Are You Eager to Discover the Method of Video Scaling in Filmora? You Are in the Right Place because This Discussion Will Cover the Content on This Matter
- In 2024, Within the Realm of Graphic Editing, People Also Ask How to Add Emoji to Photo. Stay Tuned to Walk Through the Best Possible Solutions in the IT Market
- New 2024 Approved Best 10 Mind-Blowing Video Collage Maker for PC
- New How to Trim Video in Quicktime Player on Mac
- 2024 Approved How to Speed Up Video with Canva Online Tool?
- New 2024 Approved The Availability of the Slow-Motion Feature on the iPhone Is Often Debated. This Article Will Guide You on How to Slow Down a Video on iPhone
- Updated 2024 Approved Have You Ever Heard Hyperlapse and Tume Lapse Videos? Do You Know the Differences Between Them? This Article Will Introduce the Concepts, Features and Differnces of Them
- 2024 Approved How to Polish Your Music Video Edits Using Filmora
- How Can I Catch the Regional Pokémon without Traveling On Nokia C210 | Dr.fone
- How to Use Face ID to Pay for Apple TV+ on iPhone 14 Pro Max
- In 2024, How to Unlock Xiaomi Redmi Note 13 5G Phone Pattern Lock without Factory Reset
- In 2024, Can I Bypass a Forgotten Phone Password Of Xiaomi 14 Ultra?
- The Most Useful Tips for Pokemon Go Ultra League On Apple iPhone 6 Plus | Dr.fone
- In 2024, How To Remove Passcode From Apple iPhone 15 Pro Max? Complete Guide | Dr.fone
- In 2024, The Magnificent Art of Pokemon Go Streaming On Apple iPhone 6? | Dr.fone
- 7 Solutions to Fix Chrome Crashes or Wont Open on Oppo Find X6 Pro | Dr.fone
- About Vivo T2 Pro 5G FRP Bypass
- Fake Android Location without Rooting For Your Honor 80 Pro Straight Screen Edition | Dr.fone
- In 2024, Forgot Locked iPhone SE (2020) Password? Learn the Best Methods To Unlock | Dr.fone
- Title: Updated Creative Ways to Add Green Screen Effects In Photoshop for 2024
- Author: Morgan
- Created at : 2024-04-24 01:04:53
- Updated at : 2024-04-25 01:04:53
- Link: https://ai-video-editing.techidaily.com/updated-creative-ways-to-add-green-screen-effects-in-photoshop-for-2024/
- License: This work is licensed under CC BY-NC-SA 4.0.
