
:max_bytes(150000):strip_icc():format(webp)/GettyImages-1218764238-30613399ad1b4cffab4ab474184b9c88.jpg)
Updated Detailed Tutorial to Rotate a Video in Cyberlink PowerDirector for 2024
Detailed Tutorial to Rotate a Video in Cyberlink PowerDirector
Video Editing is a craft that is highly dependent on various characteristics of your video. But the way one presents it or goes about filming clips also has a profound effect on the end product. And as you may know, not every aspect of a video production activity always goes without hiccups. But editing can come in clutch as it can easily solve minor problems like skewed footage that was shot at the wrong angle or is upside down (an issue that can happen while using mobile phones).
Thus, with this article, we will be looking at steps to rotate a video in Cyberlink PowerDirector to help you when required. We have also mentioned the steps you will need to follow in Wondershare Filmora.
Note: We documented the steps in this guide with PowerDirector 365 and WonderShare Filmora X.
Steps to Rotate Videos with CyberLink PowerDirector
Put yourself in a situation where you’ve just finished filming a project with your smartphone but end up realizing that the footage isn’t in the right orientation by default. While the error has an easy fix on most smartphones, you can also perform this action with video editing tools.
Also, while this form of rotating might be the most basic implementation of the feature, you can often use the feature to add a dynamic nature to your video with Keyframes.
Definition: Keyframes in Video Editing is a software feature that allows an editor to set start and endpoints (denoted by In and Out Markers), presenting the opportunity to custom clip properties between the two positions. The set changes occur gradually as the playhead continues moving through the clip. Properties that can undergo modification with this method are zoom, rotation, colors, positions, etc.
The process of rotating clips is fairly straightforward; once you have PowerDirector 365 open, follow the steps listed below.
If you do not have CyberLink PowerDirector 365, download the software by visiting Cyberlink’s official website.
Step 1: Create a new video project in Cyberlink PowerDirector 365 and choose Full Mode.

Note: Full Mode in Cyberlink PowerDirector 365 will provide users access to a full-featured video editing tool similar in function to Wondershare Filmora. The other option available is Ad Designer.
Step 2: Now, import media onto the Timeline from the Media Library.
For this guide, we used the pre-existing stock footage in Cyberlink PowerDirector.

Step 3: Now, click on the video file on the Timeline; this will activate the video in the Preview Window. And it will provide you with access to the rotation circle, allowing you to change the orientation of the source file.

EXTRA
Rotation added in the PiP Designer will function as a keyframe-based rotation action. Right-click on the video in the preview window, choose Edit and then Modify to access this menu.

Following this, you can click on the Motion Tab, go into Rotation Settings, and modify the angle with greater precision. In the Preview Window, you will now be able to see the rotating video.

An Easier Way to Crop Video with Wondershare Filmora
Though Cyberlink PowerDirector 365 is a powerful video editing tool, we felt its menus were not as simple to navigate. Accessing the rotate function while available in the forefront, the use of PiP Designer didn’t feel intuitive.
In Wondershare Filmora Video Editor , rotating footage only happens via the Edit Option, and this straightforward approach felt simple. As for those who want to use Keyframes, the integration of this feature right above the Timeline is an appreciated convenience.
This emphasis on quick accessibility is present with almost every function in Filmora, and we believe this to be a significant advantage. The use of modern and unique iconography also increases familiarity, an aspect that will always be welcoming to new and budding creators.
If you do not already have Wondershare Filmora, you can download the software by visiting the official website.
To help you learn how to use the rotate function and show you an example of the easy accessibility in Filmora, here is how you can use the feature to get the output you desire.
For Win 7 or later (64-bit)
For macOS 10.14 or later
Once you have a new project open in Filmora, follow the steps listed below.
Step 1: Import a Media File to edit into your Video Project.

Step 2: Drag the video clip onto the Timeline and then select it with a mouse click to activate further interactions.

Step 3: Choose the Edit Option (marked in Red).
This will bring up the Edit Window in the left-top corner of your screen.

Step 4: Click on the Transform Menu and use the Rotation Slider to edit the orientation.

Having read this stretch of the guide, we believe you may have noticed how Filmora is more user-friendly and accessible due to its menu layout.
BONUS
Click on the Keyframe Button (marked in Green) to access the Keyframe Menu that allows you to set points between which a decided amount of rotation can happen.

The Bottom Line
This marks the end of our guide on how to rotate video in PowerDirector 365 and Wondershare Filmora X. Now, while both software are high-capable tools, we feel the keyframe-based working on rotation in Filmora is a lot more intuitive and easy to use. The ability to only have number-based rotation within the edit menu is also a positive, as rotating with a swivel like in PowerDirector isn’t always the most accurate.
And lastly, the modern iconography-based design of Wondershare Filmora is a factor to keep in mind, as this increases usability manifolds.
Note: Full Mode in Cyberlink PowerDirector 365 will provide users access to a full-featured video editing tool similar in function to Wondershare Filmora. The other option available is Ad Designer.
Step 2: Now, import media onto the Timeline from the Media Library.
For this guide, we used the pre-existing stock footage in Cyberlink PowerDirector.
Step 3: Now, click on the video file on the Timeline; this will activate the video in the Preview Window. And it will provide you with access to the rotation circle, allowing you to change the orientation of the source file.
EXTRA
Rotation added in the PiP Designer will function as a keyframe-based rotation action. Right-click on the video in the preview window, choose Edit and then Modify to access this menu.
Following this, you can click on the Motion Tab, go into Rotation Settings, and modify the angle with greater precision. In the Preview Window, you will now be able to see the rotating video.
An Easier Way to Crop Video with Wondershare Filmora
Though Cyberlink PowerDirector 365 is a powerful video editing tool, we felt its menus were not as simple to navigate. Accessing the rotate function while available in the forefront, the use of PiP Designer didn’t feel intuitive.
In Wondershare Filmora Video Editor , rotating footage only happens via the Edit Option, and this straightforward approach felt simple. As for those who want to use Keyframes, the integration of this feature right above the Timeline is an appreciated convenience.
This emphasis on quick accessibility is present with almost every function in Filmora, and we believe this to be a significant advantage. The use of modern and unique iconography also increases familiarity, an aspect that will always be welcoming to new and budding creators.
If you do not already have Wondershare Filmora, you can download the software by visiting the official website.
To help you learn how to use the rotate function and show you an example of the easy accessibility in Filmora, here is how you can use the feature to get the output you desire.
For Win 7 or later (64-bit)
For macOS 10.14 or later
Once you have a new project open in Filmora, follow the steps listed below.
Step 1: Import a Media File to edit into your Video Project.
Step 2: Drag the video clip onto the Timeline and then select it with a mouse click to activate further interactions.
Step 3: Choose the Edit Option (marked in Red).
This will bring up the Edit Window in the left-top corner of your screen.
Step 4: Click on the Transform Menu and use the Rotation Slider to edit the orientation.
Having read this stretch of the guide, we believe you may have noticed how Filmora is more user-friendly and accessible due to its menu layout.
BONUS
Click on the Keyframe Button (marked in Green) to access the Keyframe Menu that allows you to set points between which a decided amount of rotation can happen.
The Bottom Line
This marks the end of our guide on how to rotate video in PowerDirector 365 and Wondershare Filmora X. Now, while both software are high-capable tools, we feel the keyframe-based working on rotation in Filmora is a lot more intuitive and easy to use. The ability to only have number-based rotation within the edit menu is also a positive, as rotating with a swivel like in PowerDirector isn’t always the most accurate.
And lastly, the modern iconography-based design of Wondershare Filmora is a factor to keep in mind, as this increases usability manifolds.
Guide: Cropping and Combining Content in Wondershare Filmora [Latest]
Video editing is one of the most essential tasks in a video project. It plays a role in creating videos that leave a lasting impression on your audience. From the initial raw footage to the final product, a video goes through several processes. One vital aspect of video editing is trimming and merging, which holds great importance for any video project.
The editing process changes the whole narrative of a video by adding more depth and feel to it. Through editing, you can remove unwanted segments, rearrange clips, and much more. Capturing and recording video is one thing, but bringing the best out of the raw files is another. To make your raw footage somewhat stunning, you have to sit in the editing room.
Part 1: How Does Trimming or Merging Videos Help Users?
Merging and trimming videos is an editing technique that offers many benefits. Here’s how these actions can help you in so many ways. Find out how it helps the users when they merge or trim a video:
Trimming Videos
- Trimming allows users to remove unwanted portions of a video. You can eliminate mistakes, irrelevant footage, or unnecessary pauses in the video. It also helps streamline the content and improve its overall quality.
- It can help adjust the pacing of a video by removing or shortening sections that may be too slow or lengthy. This ensures a more engaging and dynamic viewing experience.
- By trimming, you can select the best moments from a longer video. You can also create highlight reels that showcase the most important or exciting parts.
- Many social media platforms have specific time limitations for videos. It allows you to meet these requirements and share their content without compromising its essence.
Merging Videos
- The merging of videos enables you to combine multiple clips or segments into a single video. This technique is useful when users want to compile footage from different sources. It also creates a uniform narrative from separate scenes.
- Merging allows you to create montages or collages that showcase various moments or perspectives. This is often used in music videos, compilations, or video presentations.
- Doing this can make seamless transitions between different shots or scenes. This further creates a visually fluid experience for the viewer.
- It also helps you create a coherent storyline by combining different clips. You can use this technique to communicate ideas, emotions, or messages effectively.
Part 2: Wondershare Filmora: An Introduction to A Great Video Editor
Wondershare Filmora is a video editing tool that is created for almost everyone. This tool has it all, from simple edit options to more complicated ones. You can apply various kinds of filters and effects to your video. Additionally, you can change the color tone of your video project by making a few adjustments. However, this is not it, as you can even do trimming and merging in your project.
Trimming or Merging Videos Editor A cross-platform for making videos anywhere for all creators, providing trimming and merging videos functions.
Free Download Free Download Learn More

Besides all this, the tool offers more than you’re expectations. It exists for professionals, enthusiasts, and even those who have started learning how to edit. Moreover, you can import and export videos up to 4K resolution using Wondershare Filmora. Choose a suitable template, import your media files, and start editing your videos with this tool.
Key Features
- Almost all tools provide effects and filters, but Wondershare Filmora offers more. The tool provides free media assets, overlays, transitions, stickers, and more.
- Filmora enables you to add keyframes to your video. This feature will allow you to make changes and add effects to the particular frame.
- Moreover, you can add a virtual green screen in Wondershare Filmora. By using this feature, you can add VFX and other motion effects to your video.
Part 3: Guide to Cropping and Trimming Videos on Wondershare Filmora
You’re in luck if you want to learn about trimming and cropping videos using Wondershare Filmora. This portion will let you know how to crop a video and trim parts of it using this tool.
Filmora Tutorial - Basic Editing in Filmora
Free Download For Win 7 or later(64-bit)
Free Download For macOS 10.14 or later
Step 1Guide to Cropping Videos
To start cropping your video, open Wondershare Filmora and select “New Project” to create a new editing project. Import your video file by dragging and dropping it into the tool. Further, locate your video file in the tool and drag it into the timeline.

Step 2Proceed To Crop and Zoom Window
In the timeline window, look for the “Crop” button and select it, which is located right next to the “Split” option. However, you can press “Alt + C” as a shortcut to access the next screen. This will help you lead into the “Crop and Zoom” window.

Step 3Adjust the Crop
Crop the video by moving the edges accordingly using your mouse. Click and drag the edges inward or outward to define the new frame of your video. If desired, you can also change the “Ratio” by entering the dimensions in the given boxes. This allows you to set specific dimensions for your cropped video.

Step 4Apply the Crop and Save
When done with the cropping adjustments, click “Apply.” This will save the changes, and your video will be cropped based on your preferences. Lastly, make sure to save your file by selecting the “Export” option.

Trimming Methods and Guide
Free Download For Win 7 or later(64-bit)
Free Download For macOS 10.14 or later
01of 05Method 1: Trim Using Video Layer Edges
Step 1: First, import your video into Wondershare Filmora. Then, drag and drop the video onto the timeline and locate the edge of your video layer.

Step 2: Slide the left or right edge to trim the video according to your requirement. Release the edge when you are satisfied with the trimmed portion. Moreover, save your file by pressing the “Export” button.

02of 05Method 2: Trim Using Playhead Slider
Step 1: After importing your media file into the timeline, place the Playhead slider on your video layer at the desired trimming point. Click the “Scissor” icon displayed on the Playhead. The video will be trimmed at the Playhead position.

Step 2: Delete the unwanted portion of the video by selecting it and pressing the “Delete” key on your keyboard. Don’t forget to save your file by exporting it to your system.

03of 05Method 3: Trim Using Option Menu
Step 1: Once your video is in the timeline, move the Playhead slider to the point where you want to trim the video. Right-click on the video layer in the timeline to open a menu.
Step 2: Select “Trim Start to Playhead” to trim the video from the start to the Playback slider.
Step 3: Alternatively, you can select “Trim End to Playhead” to trim the video from the Playhead slider to the end.

04of 05Method 4: Trim Using Shortcut Keys
Step 1: Move the Playhead slider to the desired trimming point after bringing your video into the timeline.
Step 2: Press “Alt + [“ to trim the video from the beginning to the Playhead position.
Step 3: Contrary, you can press the shortcut keys “Alt + ]“ to trim the video from the Playhead position to the end.
05of 05Method 5: Trim Using Instant Cutter Tool
Step 1: Open Wondershare Filmora and select the “Media” button. Go to the “Import” drop-down menu and choose “Import with Instant Cutter Tool.” A new window will appear.

Step 2: Select “Open File” to import your media file into the new window. Once imported, use the sliders at the edges of the video to trim it. Adjust the sliders as needed to define the trimmed portion. Lastly, press “Export” to add a trimmed video to your project.

Part 4: Manual and Automated Techniques of Merging Content on Wondershare Filmora
Wondershare Filmora is an editing platform that makes editing simple for everyone. If you’re an enthusiast looking to learn basics like merging videos and cropping YouTube videos, you’re at the right place. In the part below, you will learn two methods to merge video in Filmora.
Free Download For Win 7 or later(64-bit)
Free Download For macOS 10.14 or later
Methods to merge video in Filmora
Manual Method To Merge Video Clips in Wondershare Filmora
Step 1Launch Wondershare Filmora
To merge two or more video clips using Wondershare Filmora, start by launching the software on your computer. In the editing window of Filmora, locate the “Click here to import” option and import the video clips you want to merge. This will bring the video to the preview window.

Step 2Arrange Clips in Timeline
Proceed to drag and drop each video clip, one by one, onto the timeline. Ensure that you place each clip layer right next to each other in the desired merging order.

Step 3Adjust and Export
Adjust the timeframe of your videos, if needed, by trimming or extending them on the timeline. Once you are satisfied with the arrangement, proceed to export the project. By exporting, your multiple video clips will be merged into a single video file.

Automated Method for Merging Videos in Wondershare Filmora
Step 1Importing Videos
Start by going to the import section and clicking the “Import” drop-down menu. As this opens a menu, select the option of “Import with Instant Cutter Tool.”

Step 2Merging Videos
Within the new window, locate the “Merge” option and click on it. Select the video clips you want to merge by accessing “Open.” Filmora will now import your video clips and merge them.

Step 3Exporting the Merged File
After your video clips have been successfully merged, it’s time to export the final result. In the same window, find the “Export” option and click on it. This will export the merged file directly to the editing window of Wondershare Filmora.

Conclusion
To conclude, video editing and post-production are tasks that polish your project. Editing fine-tunes your project, and the result is always better than the raw footage. Wondershare Filmora is a tool that makes it easy to edit your raw footage into an exceptional video. This tool has everything from trimming and merging to more advanced, like an AI-powered edit option.
For those who are in search to crop YouTube videos, they can surely stop by Filmora. They will get their required results in no time in a highly professional environment.
Free Download Free Download Learn More
Besides all this, the tool offers more than you’re expectations. It exists for professionals, enthusiasts, and even those who have started learning how to edit. Moreover, you can import and export videos up to 4K resolution using Wondershare Filmora. Choose a suitable template, import your media files, and start editing your videos with this tool.
Key Features
- Almost all tools provide effects and filters, but Wondershare Filmora offers more. The tool provides free media assets, overlays, transitions, stickers, and more.
- Filmora enables you to add keyframes to your video. This feature will allow you to make changes and add effects to the particular frame.
- Moreover, you can add a virtual green screen in Wondershare Filmora. By using this feature, you can add VFX and other motion effects to your video.
Part 3: Guide to Cropping and Trimming Videos on Wondershare Filmora
You’re in luck if you want to learn about trimming and cropping videos using Wondershare Filmora. This portion will let you know how to crop a video and trim parts of it using this tool.
Filmora Tutorial - Basic Editing in Filmora
Free Download For Win 7 or later(64-bit)
Free Download For macOS 10.14 or later
Step 1Guide to Cropping Videos
To start cropping your video, open Wondershare Filmora and select “New Project” to create a new editing project. Import your video file by dragging and dropping it into the tool. Further, locate your video file in the tool and drag it into the timeline.
Step 2Proceed To Crop and Zoom Window
In the timeline window, look for the “Crop” button and select it, which is located right next to the “Split” option. However, you can press “Alt + C” as a shortcut to access the next screen. This will help you lead into the “Crop and Zoom” window.
Step 3Adjust the Crop
Crop the video by moving the edges accordingly using your mouse. Click and drag the edges inward or outward to define the new frame of your video. If desired, you can also change the “Ratio” by entering the dimensions in the given boxes. This allows you to set specific dimensions for your cropped video.
Step 4Apply the Crop and Save
When done with the cropping adjustments, click “Apply.” This will save the changes, and your video will be cropped based on your preferences. Lastly, make sure to save your file by selecting the “Export” option.
Trimming Methods and Guide
Free Download For Win 7 or later(64-bit)
Free Download For macOS 10.14 or later
01of 05Method 1: Trim Using Video Layer Edges
Step 1: First, import your video into Wondershare Filmora. Then, drag and drop the video onto the timeline and locate the edge of your video layer.
Step 2: Slide the left or right edge to trim the video according to your requirement. Release the edge when you are satisfied with the trimmed portion. Moreover, save your file by pressing the “Export” button.
02of 05Method 2: Trim Using Playhead Slider
Step 1: After importing your media file into the timeline, place the Playhead slider on your video layer at the desired trimming point. Click the “Scissor” icon displayed on the Playhead. The video will be trimmed at the Playhead position.
Step 2: Delete the unwanted portion of the video by selecting it and pressing the “Delete” key on your keyboard. Don’t forget to save your file by exporting it to your system.
03of 05Method 3: Trim Using Option Menu
Step 1: Once your video is in the timeline, move the Playhead slider to the point where you want to trim the video. Right-click on the video layer in the timeline to open a menu.
Step 2: Select “Trim Start to Playhead” to trim the video from the start to the Playback slider.
Step 3: Alternatively, you can select “Trim End to Playhead” to trim the video from the Playhead slider to the end.
04of 05Method 4: Trim Using Shortcut Keys
Step 1: Move the Playhead slider to the desired trimming point after bringing your video into the timeline.
Step 2: Press “Alt + [“ to trim the video from the beginning to the Playhead position.
Step 3: Contrary, you can press the shortcut keys “Alt + ]“ to trim the video from the Playhead position to the end.
05of 05Method 5: Trim Using Instant Cutter Tool
Step 1: Open Wondershare Filmora and select the “Media” button. Go to the “Import” drop-down menu and choose “Import with Instant Cutter Tool.” A new window will appear.
Step 2: Select “Open File” to import your media file into the new window. Once imported, use the sliders at the edges of the video to trim it. Adjust the sliders as needed to define the trimmed portion. Lastly, press “Export” to add a trimmed video to your project.
Part 4: Manual and Automated Techniques of Merging Content on Wondershare Filmora
Wondershare Filmora is an editing platform that makes editing simple for everyone. If you’re an enthusiast looking to learn basics like merging videos and cropping YouTube videos, you’re at the right place. In the part below, you will learn two methods to merge video in Filmora.
Free Download For Win 7 or later(64-bit)
Free Download For macOS 10.14 or later
Methods to merge video in Filmora
Manual Method To Merge Video Clips in Wondershare Filmora
Step 1Launch Wondershare Filmora
To merge two or more video clips using Wondershare Filmora, start by launching the software on your computer. In the editing window of Filmora, locate the “Click here to import” option and import the video clips you want to merge. This will bring the video to the preview window.
Step 2Arrange Clips in Timeline
Proceed to drag and drop each video clip, one by one, onto the timeline. Ensure that you place each clip layer right next to each other in the desired merging order.
Step 3Adjust and Export
Adjust the timeframe of your videos, if needed, by trimming or extending them on the timeline. Once you are satisfied with the arrangement, proceed to export the project. By exporting, your multiple video clips will be merged into a single video file.
Automated Method for Merging Videos in Wondershare Filmora
Step 1Importing Videos
Start by going to the import section and clicking the “Import” drop-down menu. As this opens a menu, select the option of “Import with Instant Cutter Tool.”
Step 2Merging Videos
Within the new window, locate the “Merge” option and click on it. Select the video clips you want to merge by accessing “Open.” Filmora will now import your video clips and merge them.
Step 3Exporting the Merged File
After your video clips have been successfully merged, it’s time to export the final result. In the same window, find the “Export” option and click on it. This will export the merged file directly to the editing window of Wondershare Filmora.
Conclusion
To conclude, video editing and post-production are tasks that polish your project. Editing fine-tunes your project, and the result is always better than the raw footage. Wondershare Filmora is a tool that makes it easy to edit your raw footage into an exceptional video. This tool has everything from trimming and merging to more advanced, like an AI-powered edit option.
For those who are in search to crop YouTube videos, they can surely stop by Filmora. They will get their required results in no time in a highly professional environment.
Color Matching Is the Trickiest Part of Graphic Designing. Learn in Detail About Using Canva Color Match Ideally While Working on Your Pins, Social Media Posts, and Other Designs
How to Perfectly Use Canva Color Match?
An easy yet powerful editor
Numerous effects to choose from
Detailed tutorials provided by the official channel
Color combination is the essential thing that you need to keep in mind designing. It helps create eye-catchy designs and can create a positive impact on the target audience.

This is the greatest secret of creating attractive and wonderful designs. Reading further will help you to understand the Canva color match in detail. So, without any further dues, let’s get started!
In this article
01 [What is the Canva Color Picker?](#Part 1)
02 [Why Use the Color Match Tool?](#Part 2)
03 [How to Use Color Match in Canva to Match Your Brand](#Part 3)
04 [Alternative to Canva Color Match](#Part 4)
Part 1 What is the Canva Color Picker?
Canva is one of the simplest and easiest ways of creating great and eye-catchy graphic designs. Color combinations help us to make these designs more attractive. But earlier, there were some limitations in Canva regarding the color picker tool; designers had to use browser extensions like ColorZilla to match the color combinations perfectly. They faced many problems while selecting the perfect color of their choice while designing their pins, social media content, logos, online invitations, etc. They had to find the perfect color code of their choice from an external source and paste it into the Canva, which was simply very time-consuming.
The most-awaited color picker tool was introduced in Canva at the end of November 202This new design tool makes the design very convenient while using Canva for graphic designing. With this tool, you don’t need to spend hours searching for the right color that matches the background. Color picker helps you to find a perfect color match according to the image, logo, or anything else uploaded on Canva.

But before using this new color match tool, you must ensure that:
● You are using the updated version of the Canva desktop app.
● You have the latest version of the browsers like Chrome, Mozilla, Internet Explorer, etc.
Part 2 Why Use the Color Match Tool?

This color match tool is the most-demanded feature that has been updated on Canva. It helps choose the perfect color match very efficiently without wasting time and effort. It works like an eyedropper tool available in graphic designing software like Photoshop. It is elementary and valuable to use, and it saves a lot of time in creating attractive and wonderful designs.
It helps determine the different colors available in a particular image uploaded on the Canva app. You can easily choose the appropriate color by placing the tool in the place that has your desired color. It is a compassionate tool, so you should be very careful while choosing the color of your choice. You can press the ‘Esc’ button to exit the command without choosing any color.
This color match tool magically helps select the desired color in seconds without using any external color picker browser extension. This tool is readily available on the color pallet in the updated version of the Canva desktop app.
Part 3 How to Use Color Match in Canva to Match Your Brand
The color match tool is now inbuilt in the Canva desktop app, which is very easy and convenient. You need to download the Canva desktop app to use this feature from the official website of Canva.

The designers need to follow the simple steps given below to use the color match tool (eyedropper tool) in the updated version of the Canva desktop app:
● First of all, open the Canva desktop app.
● After this, open any design or image of your choice that you want to edit. This color match tool can work on any type of image, regardless of the shape and size.
● Now, select the particular part of the image whose color you want to change.
● After this, click on the color block available at the top corner to open the color customization options.
● A color pallet will open.
● On the top of the color pallet, you will see a ‘+’ (add new color) button, this button has a colorful square outline.
● After this, a color chart will appear under that button. You will see the color code written over there and an eyedropper tool will be available next to that color code (hex code).
● Click on this eyedropper tool and select the color of your choice either from the image or any other color available in Canva.
● After selecting the color tap on the particular part of the image whose color you want to change.
This is how you can change the color using the new color picker tool available in Canva and enjoy editing your images using the new Canva desktop app.
Part 4 Alternative to Canva Color Match
As we all know, Canva is the most accessible online graphic designing platform used for image editing and video editing. But there are certain limitations of using it, so here we have listed some of the other graphic designing tools for both image and video editing that can be used as an alternative to the Canva app:
● Visme: It is a drag and drops editing and graphic designing tool. Using; this tool is effortless to use, and you can easily create attractive presentations, infographics, social media graphics, logos, etc. This tool can be used by anyone like students (to create their school activities), educators (to create easy to learn infographics), business people (to create attractive presentations), graphic designers (to create different content), etc.
It contains a lot of features like:
● Data Visualization Tools
● Variety of Professionally Designed Easy to Use Templates
● Infographic Maker
● A Large Number of Editing Tools
● Animation Feature with Hover Effects
● Analytics Feature
● Adobe Spark: It is an online tool launched by Adobe. Although it can’t compete with professional software like Photoshop and Illustrator, it can be treated as the best alternative for Canva. It is used to create social media posts, logos, and graphic designs easily and efficiently. The only limitation it has is that non-designers and newcomers can’t use it without any knowledge of graphic design.
● PicMonkey: PicMonkey is another great alternative to Canva, just like Visme. It has many features that help both professional and non-professional designers create attractive and wonderful designs very easily and efficiently. It has many exciting features like photo re-toucher, pattern & effects tools, etc., just like Photoshop, but it is relatively easier to use and can be used by anyone who wants to create beautiful and creative graphic designs.
● ****Wondershare Filmora Video Editor **: Filmora is a video editing software and can be used as an alternative to Canva if you create and edit the videos to medium & advanced levels. It is used to create and edit short videos for social media and ad campaigns very quickly, with many features available in professional software like Adobe Premiere Pro. It is easy-to-use with an intuitive user interface that is very helpful for non-professional and less experienced video editors.
For Win 7 or later (64-bit)
For macOS 10.12 or later
● Key Takeaways from This Episode →
● It can be concluded that Canva is a fantastic graphic designing tool for all the non-professionals and newcomers in the field of design. It helps people create attractive and creative designs with less effort and less time consumption.
● No doubt, everything has its pros and cons. Similarly, Canva also has certain limitations compared to the other professional graphic designing tools like Photoshop, Illustrator, etc.
● But still, it is continuously updating and removing those limitations. For example- the new color match tool is introduced to this platform for easy and convenient graphic designing.
● This color match tool (eyedropper tool) was demanded by the designers who use Canva for their graphics and creating attractive social media posts, infographics, video editing, etc.
Color combination is the essential thing that you need to keep in mind designing. It helps create eye-catchy designs and can create a positive impact on the target audience.
This is the greatest secret of creating attractive and wonderful designs. Reading further will help you to understand the Canva color match in detail. So, without any further dues, let’s get started!
In this article
01 [What is the Canva Color Picker?](#Part 1)
02 [Why Use the Color Match Tool?](#Part 2)
03 [How to Use Color Match in Canva to Match Your Brand](#Part 3)
04 [Alternative to Canva Color Match](#Part 4)
Part 1 What is the Canva Color Picker?
Canva is one of the simplest and easiest ways of creating great and eye-catchy graphic designs. Color combinations help us to make these designs more attractive. But earlier, there were some limitations in Canva regarding the color picker tool; designers had to use browser extensions like ColorZilla to match the color combinations perfectly. They faced many problems while selecting the perfect color of their choice while designing their pins, social media content, logos, online invitations, etc. They had to find the perfect color code of their choice from an external source and paste it into the Canva, which was simply very time-consuming.
The most-awaited color picker tool was introduced in Canva at the end of November 202This new design tool makes the design very convenient while using Canva for graphic designing. With this tool, you don’t need to spend hours searching for the right color that matches the background. Color picker helps you to find a perfect color match according to the image, logo, or anything else uploaded on Canva.
But before using this new color match tool, you must ensure that:
● You are using the updated version of the Canva desktop app.
● You have the latest version of the browsers like Chrome, Mozilla, Internet Explorer, etc.
Part 2 Why Use the Color Match Tool?
This color match tool is the most-demanded feature that has been updated on Canva. It helps choose the perfect color match very efficiently without wasting time and effort. It works like an eyedropper tool available in graphic designing software like Photoshop. It is elementary and valuable to use, and it saves a lot of time in creating attractive and wonderful designs.
It helps determine the different colors available in a particular image uploaded on the Canva app. You can easily choose the appropriate color by placing the tool in the place that has your desired color. It is a compassionate tool, so you should be very careful while choosing the color of your choice. You can press the ‘Esc’ button to exit the command without choosing any color.
This color match tool magically helps select the desired color in seconds without using any external color picker browser extension. This tool is readily available on the color pallet in the updated version of the Canva desktop app.
Part 3 How to Use Color Match in Canva to Match Your Brand
The color match tool is now inbuilt in the Canva desktop app, which is very easy and convenient. You need to download the Canva desktop app to use this feature from the official website of Canva.
The designers need to follow the simple steps given below to use the color match tool (eyedropper tool) in the updated version of the Canva desktop app:
● First of all, open the Canva desktop app.
● After this, open any design or image of your choice that you want to edit. This color match tool can work on any type of image, regardless of the shape and size.
● Now, select the particular part of the image whose color you want to change.
● After this, click on the color block available at the top corner to open the color customization options.
● A color pallet will open.
● On the top of the color pallet, you will see a ‘+’ (add new color) button, this button has a colorful square outline.
● After this, a color chart will appear under that button. You will see the color code written over there and an eyedropper tool will be available next to that color code (hex code).
● Click on this eyedropper tool and select the color of your choice either from the image or any other color available in Canva.
● After selecting the color tap on the particular part of the image whose color you want to change.
This is how you can change the color using the new color picker tool available in Canva and enjoy editing your images using the new Canva desktop app.
Part 4 Alternative to Canva Color Match
As we all know, Canva is the most accessible online graphic designing platform used for image editing and video editing. But there are certain limitations of using it, so here we have listed some of the other graphic designing tools for both image and video editing that can be used as an alternative to the Canva app:
● Visme: It is a drag and drops editing and graphic designing tool. Using; this tool is effortless to use, and you can easily create attractive presentations, infographics, social media graphics, logos, etc. This tool can be used by anyone like students (to create their school activities), educators (to create easy to learn infographics), business people (to create attractive presentations), graphic designers (to create different content), etc.
It contains a lot of features like:
● Data Visualization Tools
● Variety of Professionally Designed Easy to Use Templates
● Infographic Maker
● A Large Number of Editing Tools
● Animation Feature with Hover Effects
● Analytics Feature
● Adobe Spark: It is an online tool launched by Adobe. Although it can’t compete with professional software like Photoshop and Illustrator, it can be treated as the best alternative for Canva. It is used to create social media posts, logos, and graphic designs easily and efficiently. The only limitation it has is that non-designers and newcomers can’t use it without any knowledge of graphic design.
● PicMonkey: PicMonkey is another great alternative to Canva, just like Visme. It has many features that help both professional and non-professional designers create attractive and wonderful designs very easily and efficiently. It has many exciting features like photo re-toucher, pattern & effects tools, etc., just like Photoshop, but it is relatively easier to use and can be used by anyone who wants to create beautiful and creative graphic designs.
● ****Wondershare Filmora Video Editor **: Filmora is a video editing software and can be used as an alternative to Canva if you create and edit the videos to medium & advanced levels. It is used to create and edit short videos for social media and ad campaigns very quickly, with many features available in professional software like Adobe Premiere Pro. It is easy-to-use with an intuitive user interface that is very helpful for non-professional and less experienced video editors.
For Win 7 or later (64-bit)
For macOS 10.12 or later
● Key Takeaways from This Episode →
● It can be concluded that Canva is a fantastic graphic designing tool for all the non-professionals and newcomers in the field of design. It helps people create attractive and creative designs with less effort and less time consumption.
● No doubt, everything has its pros and cons. Similarly, Canva also has certain limitations compared to the other professional graphic designing tools like Photoshop, Illustrator, etc.
● But still, it is continuously updating and removing those limitations. For example- the new color match tool is introduced to this platform for easy and convenient graphic designing.
● This color match tool (eyedropper tool) was demanded by the designers who use Canva for their graphics and creating attractive social media posts, infographics, video editing, etc.
How Did AI Video Games Act More Human Than Human?
How Did AI Video Games Act More Human Than Human?
An easy yet powerful editor
Numerous effects to choose from
Detailed tutorials provided by the official channel
The gaming world is ever-changing, with developers looking to create innovative ways to immerse players into their digital worlds. One such technology that has begun to sweep is AI in the game industry.
AI is a powerful tool in many ways to improve the gaming experience. It can make artificial intelligence in computer games more believable and add replayability and immersion to games, and we can expect to see even more impressive applications in the future.
In this article
01 [What Is AI in Gaming?](#Part 1)
02 [Why Does AI in Gaming Matter?](#Part 2)
03 [How AI Will Completely Change Video Games](#Part 3)
04 [8 Games with Incredible Artificial Intelligence](#Part 4)
05 [What AI Video Games Assets Do Filmora Have?](#Part 5)
Part 1 What Is AI in Gaming?
In simple terms, AI is a set of algorithms that allow a computer to learn and improve from experience. Although you can apply it in many ways, artificial intelligence in video games is usually helpful to create more intelligent and more believable non-player characters (NPCs).
For example, an AI system might be helpful to determine how an NPC reacts to the player’s actions. If the player tries to steal from an NPC, the AI might make the NPC angry and more likely to attack the player. Alternatively, if the player is friendly to an NPC, the AI game playing might make the NPC more likely to help the player in future interactions.
Part 2 Why Does AI in Gaming Matter?
One of the most vital aspects of AI in video games is that it can make games more believable and immersive for players. When games can convincingly simulate human-like behavior, it can be a much more enjoyable experience for gamers. AI can make NPCs seem more lifelike and make the game world feel more believable.
AI is also becoming increasingly important for creating procedural content. This is where the game generates content on its own, rather than relying on pre-made assets. For example, a game might use procedural generation to create random dungeons or quests that the player can explore. This can add a lot of replayability to a game, as the player never knows what they will encounter next.
Part 3 How AI Will Completely Change Video Games
It is not a secret that AI is changing the world as we know it. With its ability to enable computers to learn and improve from experience, AI is paving the way for a future where machines can handle more complex tasks. And nowhere is this more apparent than in the world of video gaming.
In the past, developers brought in AI primarily for simple things like making certain NPCs (non-player characters) move and act realistically. But now, artificial intelligence in video games is being used for much more complex tasks like generating procedural content and creating believable human-like behavior. This results in a new generation of AI game playing that are more immersive and playable.
Part 4 Games with Incredible Artificial Intelligence
Now, we will look into eight video games that signify why we need the best ai in video games.
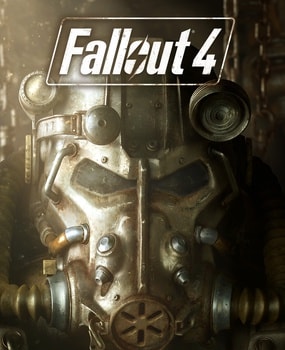
01Fallout 4
One of the most attractive examples of AI in video gaming is Fallout 4. This post-apocalyptic RPG features some of the most believable NPCs ever seen in a game. Each character is fully voiced, and they all have their unique personalities and backstories. The AI generates procedural content, meaning that the game world is always different each time you play.
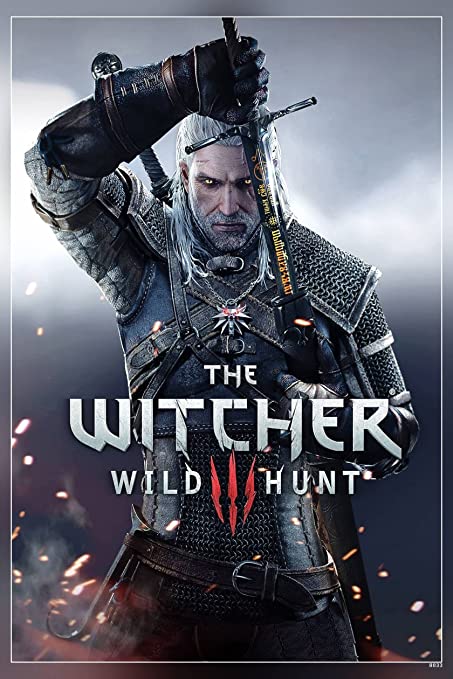
02The Witcher 3: Wild Hunt
The Witcher 3: Wild Hunt is one more great example of an AI video game. This open-world RPG features a vast array of believable NPCs, each with unique personality traits and motivations. The AI is also used to generate procedural content, resulting in a different game world every time you play.
03Grand Theft Auto V
Grand Theft Auto V is yet another example of AI being used to create believable human-like behavior. The NPCs in this play are some of the most lifelike and realistic ever seen. They react to the player’s actions in believable ways, and the AI is used to generate procedural content, resulting in a game world that is always different.

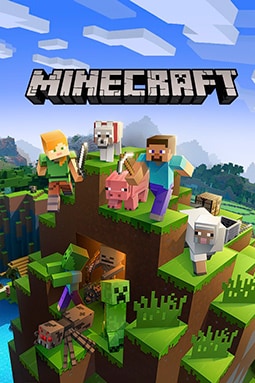
04Minecraft
Minecraft is a game that heavily uses procedural generation to create its content. The terrain and structures in the game are all generated on the fly by the AI, resulting in a different game world every time you play. What’s more, AI is also used to generate the behaviors of mobs (hostile creatures), making them more believable and lifelike.
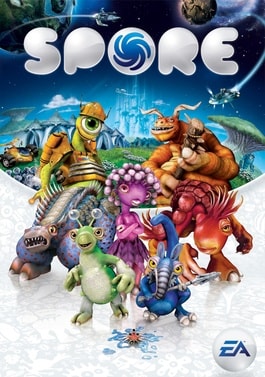
05Spore
Spore is an AI game play that is all about procedural generation. Every creature in the game is generated by AI, meaning that there are many possible creature designs. What’s more, AI is used to create creatures’ behaviors, making them more believable and lifelike.
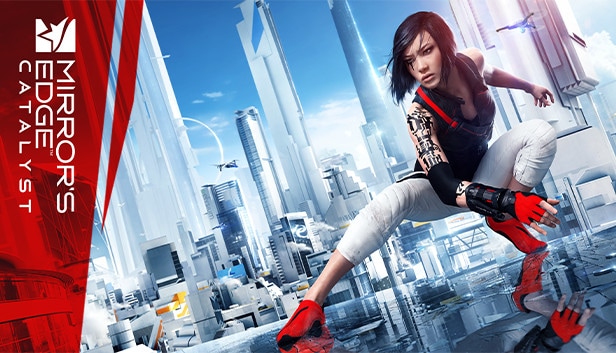
06Mirror’s Edge Catalyst
Mirror’s Edge Catalyst is a game that heavily uses AI to create its content. The levels in the game are all procedurally generated, meaning that they are different every time you play. This is made possible by the game’s AI, which produces the level layouts and obstacles on the fly.
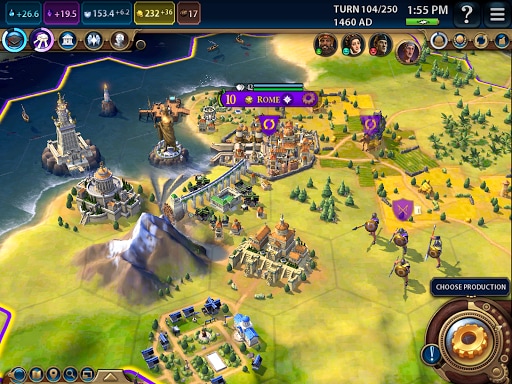
07Civilization VI
One of the most incredible examples of AI in video gaming is Civilization VI. This turn-based strategy game features some of the most believable NPCs ever seen in a game. Each character has its voice fully, and they all have unique personalities and backstories.
08Elite Dangerous
Elite Dangerous is a space simulation game that uses advanced AI to create believable and realistic human-like behavior. The NPCs in the game are some of the most lifelike and realistic ever seen. They react to the player’s actions in believable ways, and the AI is used to generate procedural content, resulting in a game world that is always different.

Part 5 What AI Video Games Assets Do Wondershare Filmora Video Editor Have?
With the increased use of AI in video games, most gamers have found gaming more enjoyable. However, an outstanding video editor has some assets that can significantly make AI video games better and more human. This video editor is one of the most sorted for and is called Filmora. Filmora is a great video editing software for creating stunning videos. It’s effortless to use and has various features to create professional-looking videos. It’s perfect for making videos for social media, YouTube, and other online platforms.
Its many features have a touch of artificial intelligence, making this program stand out from the other video editors and valuable for editing during ai video games creation.
Screen Recording
The Filmora screen recorder allows the user to concurrently record the screen and camera and the system and microphone audio. You can quickly record games, tutorials, YouTube videos, and other videos and then export them to YouTube, Vimeo, and other devices.
AI Portrait
The AI portrait function in Filmora video editor allows you to locate the human in your movie effortlessly and erase the background with a simple drag and click. There are also several portrait effects and AR stickers to add to your video editing enjoyment.
For Win 7 or later (64-bit)
For macOS 10.12 or later
Video Effects
Filmora customers can choose from various effects to utilize in their video editing software. It’s simple to create whatever effect you want with over 900 free effects, including drag-and-drop transitions, titles, filters, and motion components.
Do visit Wondershare Filmora exclusive website to know more about its latest upgrade and new features launch.
● Ending Thoughts →
● Thus, that was about what an ai video game is and why the characters act more like humans.
● So, as a video game lover, you can now explore the best of ai playing video games to have a personal experience of this new video gaming trend. Also, do try the Filmora software to see how you can change the looks and feel of your video game creation.
The gaming world is ever-changing, with developers looking to create innovative ways to immerse players into their digital worlds. One such technology that has begun to sweep is AI in the game industry.
AI is a powerful tool in many ways to improve the gaming experience. It can make artificial intelligence in computer games more believable and add replayability and immersion to games, and we can expect to see even more impressive applications in the future.
In this article
01 [What Is AI in Gaming?](#Part 1)
02 [Why Does AI in Gaming Matter?](#Part 2)
03 [How AI Will Completely Change Video Games](#Part 3)
04 [8 Games with Incredible Artificial Intelligence](#Part 4)
05 [What AI Video Games Assets Do Filmora Have?](#Part 5)
Part 1 What Is AI in Gaming?
In simple terms, AI is a set of algorithms that allow a computer to learn and improve from experience. Although you can apply it in many ways, artificial intelligence in video games is usually helpful to create more intelligent and more believable non-player characters (NPCs).
For example, an AI system might be helpful to determine how an NPC reacts to the player’s actions. If the player tries to steal from an NPC, the AI might make the NPC angry and more likely to attack the player. Alternatively, if the player is friendly to an NPC, the AI game playing might make the NPC more likely to help the player in future interactions.
Part 2 Why Does AI in Gaming Matter?
One of the most vital aspects of AI in video games is that it can make games more believable and immersive for players. When games can convincingly simulate human-like behavior, it can be a much more enjoyable experience for gamers. AI can make NPCs seem more lifelike and make the game world feel more believable.
AI is also becoming increasingly important for creating procedural content. This is where the game generates content on its own, rather than relying on pre-made assets. For example, a game might use procedural generation to create random dungeons or quests that the player can explore. This can add a lot of replayability to a game, as the player never knows what they will encounter next.
Part 3 How AI Will Completely Change Video Games
It is not a secret that AI is changing the world as we know it. With its ability to enable computers to learn and improve from experience, AI is paving the way for a future where machines can handle more complex tasks. And nowhere is this more apparent than in the world of video gaming.
In the past, developers brought in AI primarily for simple things like making certain NPCs (non-player characters) move and act realistically. But now, artificial intelligence in video games is being used for much more complex tasks like generating procedural content and creating believable human-like behavior. This results in a new generation of AI game playing that are more immersive and playable.
Part 4 Games with Incredible Artificial Intelligence
Now, we will look into eight video games that signify why we need the best ai in video games.
01Fallout 4
One of the most attractive examples of AI in video gaming is Fallout 4. This post-apocalyptic RPG features some of the most believable NPCs ever seen in a game. Each character is fully voiced, and they all have their unique personalities and backstories. The AI generates procedural content, meaning that the game world is always different each time you play.
02The Witcher 3: Wild Hunt
The Witcher 3: Wild Hunt is one more great example of an AI video game. This open-world RPG features a vast array of believable NPCs, each with unique personality traits and motivations. The AI is also used to generate procedural content, resulting in a different game world every time you play.
03Grand Theft Auto V
Grand Theft Auto V is yet another example of AI being used to create believable human-like behavior. The NPCs in this play are some of the most lifelike and realistic ever seen. They react to the player’s actions in believable ways, and the AI is used to generate procedural content, resulting in a game world that is always different.
04Minecraft
Minecraft is a game that heavily uses procedural generation to create its content. The terrain and structures in the game are all generated on the fly by the AI, resulting in a different game world every time you play. What’s more, AI is also used to generate the behaviors of mobs (hostile creatures), making them more believable and lifelike.
05Spore
Spore is an AI game play that is all about procedural generation. Every creature in the game is generated by AI, meaning that there are many possible creature designs. What’s more, AI is used to create creatures’ behaviors, making them more believable and lifelike.
06Mirror’s Edge Catalyst
Mirror’s Edge Catalyst is a game that heavily uses AI to create its content. The levels in the game are all procedurally generated, meaning that they are different every time you play. This is made possible by the game’s AI, which produces the level layouts and obstacles on the fly.
07Civilization VI
One of the most incredible examples of AI in video gaming is Civilization VI. This turn-based strategy game features some of the most believable NPCs ever seen in a game. Each character has its voice fully, and they all have unique personalities and backstories.
08Elite Dangerous
Elite Dangerous is a space simulation game that uses advanced AI to create believable and realistic human-like behavior. The NPCs in the game are some of the most lifelike and realistic ever seen. They react to the player’s actions in believable ways, and the AI is used to generate procedural content, resulting in a game world that is always different.
Part 5 What AI Video Games Assets Do Wondershare Filmora Video Editor Have?
With the increased use of AI in video games, most gamers have found gaming more enjoyable. However, an outstanding video editor has some assets that can significantly make AI video games better and more human. This video editor is one of the most sorted for and is called Filmora. Filmora is a great video editing software for creating stunning videos. It’s effortless to use and has various features to create professional-looking videos. It’s perfect for making videos for social media, YouTube, and other online platforms.
Its many features have a touch of artificial intelligence, making this program stand out from the other video editors and valuable for editing during ai video games creation.
Screen Recording
The Filmora screen recorder allows the user to concurrently record the screen and camera and the system and microphone audio. You can quickly record games, tutorials, YouTube videos, and other videos and then export them to YouTube, Vimeo, and other devices.
AI Portrait
The AI portrait function in Filmora video editor allows you to locate the human in your movie effortlessly and erase the background with a simple drag and click. There are also several portrait effects and AR stickers to add to your video editing enjoyment.
For Win 7 or later (64-bit)
For macOS 10.12 or later
Video Effects
Filmora customers can choose from various effects to utilize in their video editing software. It’s simple to create whatever effect you want with over 900 free effects, including drag-and-drop transitions, titles, filters, and motion components.
Do visit Wondershare Filmora exclusive website to know more about its latest upgrade and new features launch.
● Ending Thoughts →
● Thus, that was about what an ai video game is and why the characters act more like humans.
● So, as a video game lover, you can now explore the best of ai playing video games to have a personal experience of this new video gaming trend. Also, do try the Filmora software to see how you can change the looks and feel of your video game creation.
Also read:
- Updated In 2024, Based on Preferences, You Can Adjust the Speed of YouTube Videos. Learn How to Produce a YouTube Slow-Motion Video in This Article
- 2024 Approved This Article Is Regarding the Guideline for Splitting the Video Clips in Adobe After Effects. Here, You Will Also Know About the Most Appropriate Substitute, Wondershare Filmora. Being Economical, You Can Also Use It Practically
- Updated In 2024, Guide to Create Intro Video with KineMaster
- Offering The Best Understanding of Performing iMovie Slow Motion Video
- 2024 Approved Best Ideas for Time Lapse Video
- Updated In 2024, How to Create a Freeze Frame Sequence Effect
- New Top 12 Best Freeze Frame Video Editing Examples
- How to Add Adjustment Layer (Clip) in DaVinci Resolve for 2024
- To Closely Observe the Content on Screen, We Often Zoom in to Catch the Details. This Article Will Provide You with a Brief Note on How to Zoom in on YouTube Videos Quickly on Your Devices
- Updated Are You Searching for the Best Cinematic LUTs for Premiere Pro? You Are in the Right Place because This Article Is Dedicated to LUTs
- New Are You Interested in the Best LUTs ? Do You Want to Enhance Your Photos and Images with High-End Quality? Then, Quickly Step Into This Article for Mind-Blowing Facts on It
- New In 2024, How to Use OBS Chroma Key With/Without Green Screen
- New In This Article, We Will Introduce You Our Top 5 Picks of Websites and Software Converter Online to Convert Powerpoint to Mp4
- Top 10 Movie Trailer Voice Generators Windows, Mac, Android, iPhone for 2024
- New AR, or Augmented Reality, Is One of the Most Significant Technological Inventions. This Technology Is Used in Many Applications that We Use Daily, Like, Maps, Music, Video Games, Tourism, Sightseeing, Etc
- In 2024, Slow Down or Speed Up Videos Easily on PC, Online, and Phone
- Updated In 2024, 7 Best GoPro Video Editors for Mac
- New 2024 Approved 3 In-Camera Transitions Tricks To Make Videos Like a Pro
- Updated In 2024, How to Rotate Video in iMovie with Alternative
- Updated In 2024, Mask Tracking with Adobe Premiere Pro A Detailed Guide
- Updated Are You Convincingly Fascinated by the Whole Idea of Augmented Reality and Want to Level up Your Marketing Skills with an AR Integration? Rest Assured, Youve Found the Right Place
- 2024 Approved How to Make Cool COD Warzone Thumbnail
- New 2024 Approved Are You Tired of Long Video Edits? Do You Speed up the Video in Canva without a Hassle? Well, Stick with Us as We Guide You Through the Process Step by Step
- New 2024 Approved Keyframes Interval Everything You Need To Know
- Updated 2024 Approved How to Comment on YouTube Live Chat
- New Top 10 Text to Robot Voice Generators Windows, Mac, Android, iPhone
- New How to Add Video Effects with Movavi Slideshow Maker for 2024
- Updated In 2024, Complete Guide to Change Video Resolution in Filmora
- New Templates Increase the Editing Possibilities for Beginners and Professionals. Read This Article to Learn About some Customizable Slow-Motion CapCut Templates
- New In 2024, Whatre the Best Alternatives to Pexels?
- Updated How to Do Datamoshing Effect in After Effects?
- New In 2024, Progressive Solutions to Adding VHS Effects to Video with Ease
- New In 2024, Creative Ways to Add Green Screen Effects In Photoshop
- Updated Adding Shake Effects to Your Video With Alight Motion for 2024
- New Srt File Creator
- How to Use Frame Blending in Premiere Pro for 2024
- New How To Fade Audio With Movavi Editor for 2024
- The Glitch Filter Is Similar to an Error or a Distorted Effect in the Video. The Article Enables the Users to Get the VHS Filter in One of Their Travel Videos and Instagram Accounts for 2024
- New The Best Jump Cut Editing Tricks Make Your Videos Snappy! For 2024
- Updated How to Upload Videos to Twitch? Heres a Guide for Beginner for 2024
- 2024 Approved Whats The Best Laptops For Video Editing
- Updated How to Make Double Exposure Effect in Filmora
- Updated 2024 Approved How To Synchronize Your Audio And Videos Properly?
- Updated In 2024, TEXT REVEAL Animation | Easy Masking Filmora
- Updated Learn How to Merge Audio and Video Like a Pro with This Step-by-Step Guide to Using FFmpeg. Create Seamless Videos and Improve Your Video Production Skills for 2024
- Easy steps to recover deleted photos from Xiaomi 14 Ultra.
- In 2024, How to Unlock Apple iPhone XR without Passcode or Face ID
- Updated 15 Forgotten Cartoon Characters of All Time for 2024
- How Can You Cast Your Apple iPhone 14 Pro to Windows PC With Ease? | Dr.fone
- Unlock Apple ID without Phone Number On Apple iPhone 14 Pro
- How to Remove Forgotten PIN Of Your Realme 11 Pro
- Easy Guide to Samsung Galaxy A23 5G FRP Bypass With Best Methods
- What to Do if Google Play Services Keeps Stopping on Itel P55 | Dr.fone
- Top 12 Prominent Realme 11 Pro Fingerprint Not Working Solutions
- In 2024, 5 Ways to Transfer Music from ZTE Axon 40 Lite to Other Android Devices Easily | Dr.fone
- In 2024, Preparation to Beat Giovani in Pokemon Go For Google Pixel 8 | Dr.fone
- Fix Cant Take Screenshot Due to Security Policy on Xiaomi 13T | Dr.fone
- iPogo will be the new iSpoofer On Oppo A2? | Dr.fone
- In 2024, How to Track Apple iPhone 12 Pro Max Location without Installing Software? | Dr.fone
- How to See Someones Location on Apple iPhone 15 Plus | Dr.fone
- In 2024, Is GSM Flasher ADB Legit? Full Review To Bypass Your MotorolaFRP Lock
- In 2024, Here are Some Pro Tips for Pokemon Go PvP Battles On HTC U23 Pro | Dr.fone
- What are Location Permissions Life360 On Honor Play 7T? | Dr.fone
- 5 Hassle-Free Solutions to Fake Location on Find My Friends Of Vivo Y55s 5G (2023) | Dr.fone
- In 2024, How to Unlock Samsung Galaxy F54 5G Pattern Lock if Forgotten? 6 Ways
- How to use Device Manager to reinstall your hardware drivers in Windows 11/10
- Rootjunky APK To Bypass Google FRP Lock For Oppo Reno 11F 5G
- Unlocking the Power of Smart Lock A Beginners Guide for Xiaomi Redmi Note 12 4G Users
- 6 Fixes to Unfortunately WhatsApp has stopped Error Popups On Oppo A78 | Dr.fone
- In 2024, Latest way to get Shiny Meltan Box in Pokémon Go Mystery Box On Apple iPhone 14 | Dr.fone
- Does Life360 Notify When You Log Out On OnePlus 11R? | Dr.fone
- How to Unlock Nokia C22 Phone with Broken Screen
- Title: Updated Detailed Tutorial to Rotate a Video in Cyberlink PowerDirector for 2024
- Author: Morgan
- Created at : 2024-04-24 01:04:59
- Updated at : 2024-04-25 01:04:59
- Link: https://ai-video-editing.techidaily.com/updated-detailed-tutorial-to-rotate-a-video-in-cyberlink-powerdirector-for-2024/
- License: This work is licensed under CC BY-NC-SA 4.0.
