
:max_bytes(150000):strip_icc():format(webp)/set-top-dvr-1130767-f2aa7f11e3d2442b966d53b8aa2d25fd.png)
Updated How Did AI Video Games Act More Human Than Human?
How D AI Video Games Act More Human Than Human?
How Did AI Video Games Act More Human Than Human?
An easy yet powerful editor
Numerous effects to choose from
Detailed tutorials provided by the official channel
The gaming world is ever-changing, with developers looking to create innovative ways to immerse players into their digital worlds. One such technology that has begun to sweep is AI in the game industry.
AI is a powerful tool in many ways to improve the gaming experience. It can make artificial intelligence in computer games more believable and add replayability and immersion to games, and we can expect to see even more impressive applications in the future.
In this article
01 [What Is AI in Gaming?](#Part 1)
02 [Why Does AI in Gaming Matter?](#Part 2)
03 [How AI Will Completely Change Video Games](#Part 3)
04 [8 Games with Incredible Artificial Intelligence](#Part 4)
05 [What AI Video Games Assets Do Filmora Have?](#Part 5)
Part 1 What Is AI in Gaming?
In simple terms, AI is a set of algorithms that allow a computer to learn and improve from experience. Although you can apply it in many ways, artificial intelligence in video games is usually helpful to create more intelligent and more believable non-player characters (NPCs).
For example, an AI system might be helpful to determine how an NPC reacts to the player’s actions. If the player tries to steal from an NPC, the AI might make the NPC angry and more likely to attack the player. Alternatively, if the player is friendly to an NPC, the AI game playing might make the NPC more likely to help the player in future interactions.
Part 2 Why Does AI in Gaming Matter?
One of the most vital aspects of AI in video games is that it can make games more believable and immersive for players. When games can convincingly simulate human-like behavior, it can be a much more enjoyable experience for gamers. AI can make NPCs seem more lifelike and make the game world feel more believable.
AI is also becoming increasingly important for creating procedural content. This is where the game generates content on its own, rather than relying on pre-made assets. For example, a game might use procedural generation to create random dungeons or quests that the player can explore. This can add a lot of replayability to a game, as the player never knows what they will encounter next.
Part 3 How AI Will Completely Change Video Games
It is not a secret that AI is changing the world as we know it. With its ability to enable computers to learn and improve from experience, AI is paving the way for a future where machines can handle more complex tasks. And nowhere is this more apparent than in the world of video gaming.
In the past, developers brought in AI primarily for simple things like making certain NPCs (non-player characters) move and act realistically. But now, artificial intelligence in video games is being used for much more complex tasks like generating procedural content and creating believable human-like behavior. This results in a new generation of AI game playing that are more immersive and playable.
Part 4 Games with Incredible Artificial Intelligence
Now, we will look into eight video games that signify why we need the best ai in video games.
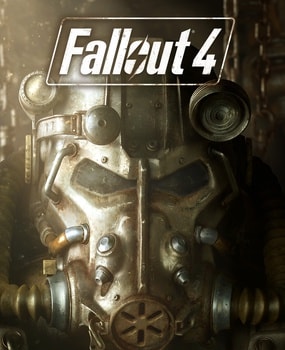
01Fallout 4
One of the most attractive examples of AI in video gaming is Fallout 4. This post-apocalyptic RPG features some of the most believable NPCs ever seen in a game. Each character is fully voiced, and they all have their unique personalities and backstories. The AI generates procedural content, meaning that the game world is always different each time you play.
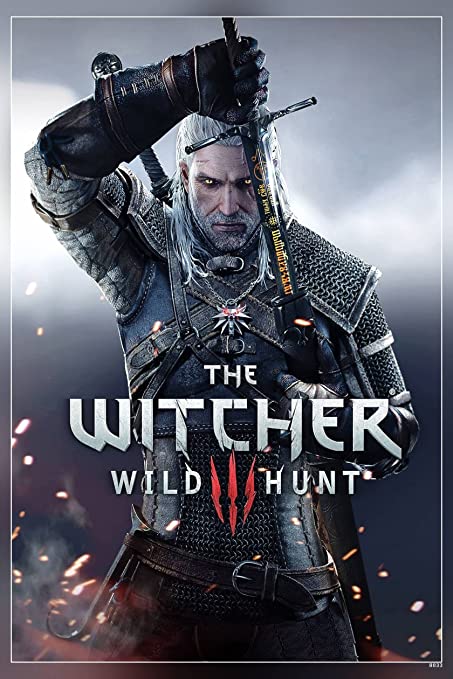
02The Witcher 3: Wild Hunt
The Witcher 3: Wild Hunt is one more great example of an AI video game. This open-world RPG features a vast array of believable NPCs, each with unique personality traits and motivations. The AI is also used to generate procedural content, resulting in a different game world every time you play.
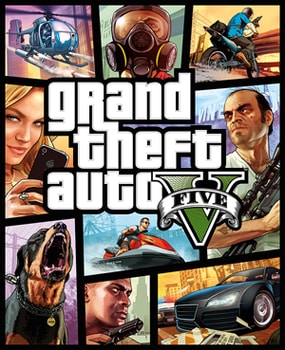
03Grand Theft Auto V
Grand Theft Auto V is yet another example of AI being used to create believable human-like behavior. The NPCs in this play are some of the most lifelike and realistic ever seen. They react to the player’s actions in believable ways, and the AI is used to generate procedural content, resulting in a game world that is always different.
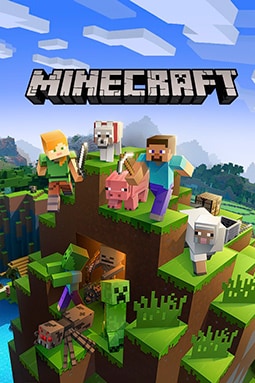
04Minecraft
Minecraft is a game that heavily uses procedural generation to create its content. The terrain and structures in the game are all generated on the fly by the AI, resulting in a different game world every time you play. What’s more, AI is also used to generate the behaviors of mobs (hostile creatures), making them more believable and lifelike.
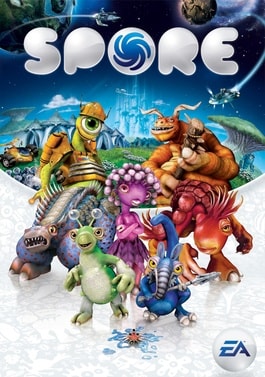
05Spore
Spore is an AI game play that is all about procedural generation. Every creature in the game is generated by AI, meaning that there are many possible creature designs. What’s more, AI is used to create creatures’ behaviors, making them more believable and lifelike.
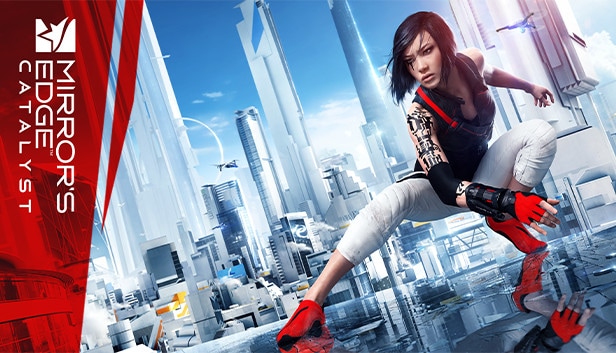
06Mirror’s Edge Catalyst
Mirror’s Edge Catalyst is a game that heavily uses AI to create its content. The levels in the game are all procedurally generated, meaning that they are different every time you play. This is made possible by the game’s AI, which produces the level layouts and obstacles on the fly.
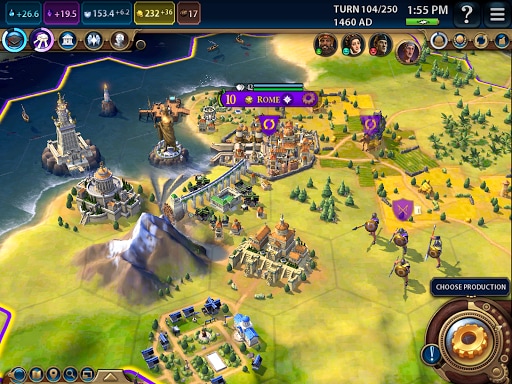
07Civilization VI
One of the most incredible examples of AI in video gaming is Civilization VI. This turn-based strategy game features some of the most believable NPCs ever seen in a game. Each character has its voice fully, and they all have unique personalities and backstories.
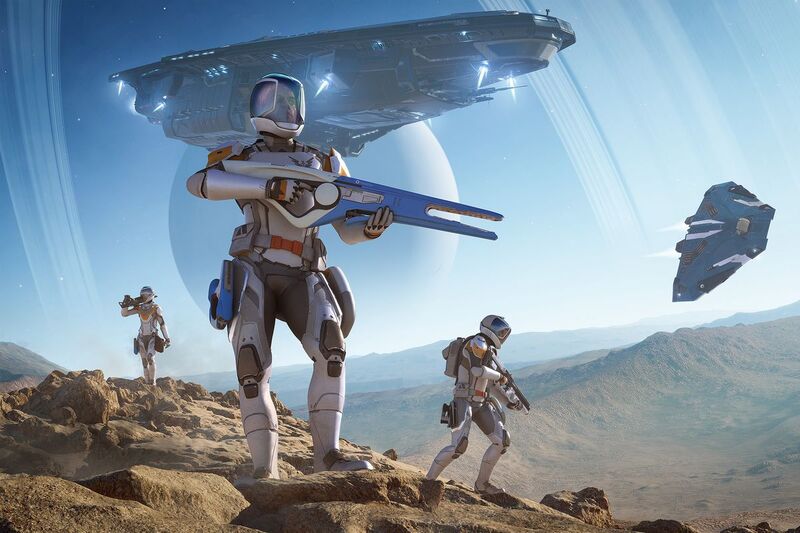
08Elite Dangerous
Elite Dangerous is a space simulation game that uses advanced AI to create believable and realistic human-like behavior. The NPCs in the game are some of the most lifelike and realistic ever seen. They react to the player’s actions in believable ways, and the AI is used to generate procedural content, resulting in a game world that is always different.
Part 5 What AI Video Games Assets Do Wondershare Filmora Video Editor Have?
With the increased use of AI in video games, most gamers have found gaming more enjoyable. However, an outstanding video editor has some assets that can significantly make AI video games better and more human. This video editor is one of the most sorted for and is called Filmora. Filmora is a great video editing software for creating stunning videos. It’s effortless to use and has various features to create professional-looking videos. It’s perfect for making videos for social media, YouTube, and other online platforms.
Its many features have a touch of artificial intelligence, making this program stand out from the other video editors and valuable for editing during ai video games creation.
Screen Recording
The Filmora screen recorder allows the user to concurrently record the screen and camera and the system and microphone audio. You can quickly record games, tutorials, YouTube videos, and other videos and then export them to YouTube, Vimeo, and other devices.
AI Portrait
The AI portrait function in Filmora video editor allows you to locate the human in your movie effortlessly and erase the background with a simple drag and click. There are also several portrait effects and AR stickers to add to your video editing enjoyment.
For Win 7 or later (64-bit)
For macOS 10.12 or later
Video Effects
Filmora customers can choose from various effects to utilize in their video editing software. It’s simple to create whatever effect you want with over 900 free effects, including drag-and-drop transitions, titles, filters, and motion components.
Do visit Wondershare Filmora exclusive website to know more about its latest upgrade and new features launch.
● Ending Thoughts →
● Thus, that was about what an ai video game is and why the characters act more like humans.
● So, as a video game lover, you can now explore the best of ai playing video games to have a personal experience of this new video gaming trend. Also, do try the Filmora software to see how you can change the looks and feel of your video game creation.
The gaming world is ever-changing, with developers looking to create innovative ways to immerse players into their digital worlds. One such technology that has begun to sweep is AI in the game industry.
AI is a powerful tool in many ways to improve the gaming experience. It can make artificial intelligence in computer games more believable and add replayability and immersion to games, and we can expect to see even more impressive applications in the future.
In this article
01 [What Is AI in Gaming?](#Part 1)
02 [Why Does AI in Gaming Matter?](#Part 2)
03 [How AI Will Completely Change Video Games](#Part 3)
04 [8 Games with Incredible Artificial Intelligence](#Part 4)
05 [What AI Video Games Assets Do Filmora Have?](#Part 5)
Part 1 What Is AI in Gaming?
In simple terms, AI is a set of algorithms that allow a computer to learn and improve from experience. Although you can apply it in many ways, artificial intelligence in video games is usually helpful to create more intelligent and more believable non-player characters (NPCs).
For example, an AI system might be helpful to determine how an NPC reacts to the player’s actions. If the player tries to steal from an NPC, the AI might make the NPC angry and more likely to attack the player. Alternatively, if the player is friendly to an NPC, the AI game playing might make the NPC more likely to help the player in future interactions.
Part 2 Why Does AI in Gaming Matter?
One of the most vital aspects of AI in video games is that it can make games more believable and immersive for players. When games can convincingly simulate human-like behavior, it can be a much more enjoyable experience for gamers. AI can make NPCs seem more lifelike and make the game world feel more believable.
AI is also becoming increasingly important for creating procedural content. This is where the game generates content on its own, rather than relying on pre-made assets. For example, a game might use procedural generation to create random dungeons or quests that the player can explore. This can add a lot of replayability to a game, as the player never knows what they will encounter next.
Part 3 How AI Will Completely Change Video Games
It is not a secret that AI is changing the world as we know it. With its ability to enable computers to learn and improve from experience, AI is paving the way for a future where machines can handle more complex tasks. And nowhere is this more apparent than in the world of video gaming.
In the past, developers brought in AI primarily for simple things like making certain NPCs (non-player characters) move and act realistically. But now, artificial intelligence in video games is being used for much more complex tasks like generating procedural content and creating believable human-like behavior. This results in a new generation of AI game playing that are more immersive and playable.
Part 4 Games with Incredible Artificial Intelligence
Now, we will look into eight video games that signify why we need the best ai in video games.
01Fallout 4
One of the most attractive examples of AI in video gaming is Fallout 4. This post-apocalyptic RPG features some of the most believable NPCs ever seen in a game. Each character is fully voiced, and they all have their unique personalities and backstories. The AI generates procedural content, meaning that the game world is always different each time you play.
02The Witcher 3: Wild Hunt
The Witcher 3: Wild Hunt is one more great example of an AI video game. This open-world RPG features a vast array of believable NPCs, each with unique personality traits and motivations. The AI is also used to generate procedural content, resulting in a different game world every time you play.
03Grand Theft Auto V
Grand Theft Auto V is yet another example of AI being used to create believable human-like behavior. The NPCs in this play are some of the most lifelike and realistic ever seen. They react to the player’s actions in believable ways, and the AI is used to generate procedural content, resulting in a game world that is always different.
04Minecraft
Minecraft is a game that heavily uses procedural generation to create its content. The terrain and structures in the game are all generated on the fly by the AI, resulting in a different game world every time you play. What’s more, AI is also used to generate the behaviors of mobs (hostile creatures), making them more believable and lifelike.
05Spore
Spore is an AI game play that is all about procedural generation. Every creature in the game is generated by AI, meaning that there are many possible creature designs. What’s more, AI is used to create creatures’ behaviors, making them more believable and lifelike.
06Mirror’s Edge Catalyst
Mirror’s Edge Catalyst is a game that heavily uses AI to create its content. The levels in the game are all procedurally generated, meaning that they are different every time you play. This is made possible by the game’s AI, which produces the level layouts and obstacles on the fly.
07Civilization VI
One of the most incredible examples of AI in video gaming is Civilization VI. This turn-based strategy game features some of the most believable NPCs ever seen in a game. Each character has its voice fully, and they all have unique personalities and backstories.
08Elite Dangerous
Elite Dangerous is a space simulation game that uses advanced AI to create believable and realistic human-like behavior. The NPCs in the game are some of the most lifelike and realistic ever seen. They react to the player’s actions in believable ways, and the AI is used to generate procedural content, resulting in a game world that is always different.
Part 5 What AI Video Games Assets Do Wondershare Filmora Video Editor Have?
With the increased use of AI in video games, most gamers have found gaming more enjoyable. However, an outstanding video editor has some assets that can significantly make AI video games better and more human. This video editor is one of the most sorted for and is called Filmora. Filmora is a great video editing software for creating stunning videos. It’s effortless to use and has various features to create professional-looking videos. It’s perfect for making videos for social media, YouTube, and other online platforms.
Its many features have a touch of artificial intelligence, making this program stand out from the other video editors and valuable for editing during ai video games creation.
Screen Recording
The Filmora screen recorder allows the user to concurrently record the screen and camera and the system and microphone audio. You can quickly record games, tutorials, YouTube videos, and other videos and then export them to YouTube, Vimeo, and other devices.
AI Portrait
The AI portrait function in Filmora video editor allows you to locate the human in your movie effortlessly and erase the background with a simple drag and click. There are also several portrait effects and AR stickers to add to your video editing enjoyment.
For Win 7 or later (64-bit)
For macOS 10.12 or later
Video Effects
Filmora customers can choose from various effects to utilize in their video editing software. It’s simple to create whatever effect you want with over 900 free effects, including drag-and-drop transitions, titles, filters, and motion components.
Do visit Wondershare Filmora exclusive website to know more about its latest upgrade and new features launch.
● Ending Thoughts →
● Thus, that was about what an ai video game is and why the characters act more like humans.
● So, as a video game lover, you can now explore the best of ai playing video games to have a personal experience of this new video gaming trend. Also, do try the Filmora software to see how you can change the looks and feel of your video game creation.
Step by Step to Cut Video in Adobe Premiere Pro
Video editing is an essential skill in a world that has a growing focus on creative fields. And if you work with videos, knowing which clips to use and where to cut is essential in conveying your story and increasing its impact. So, if you are a beginner and want to familiarise yourself with steps and terms used in video editing, in this article, we will go through the steps you will need to cut your video file in Adobe Premiere Pro and Wondershare Filmora.
This guide uses Adobe Premiere Pro 2022 and Wondershare Filmora X.
How to cut video in Adobe Premiere Pro?
Once you have Adobe Premiere Pro open on your computer, follow the steps listed below.
Step 1: Create a new project in Premiere Pro.

During project creation, we recommend keeping an eye on the file name set and the storage location; this can help reduce the time spent in locating the Premiere Project.

Step 2: Import a video file into Premiere Pro with a double click in the marked area and choose the file from its stored location.

Step 3: Double click on any imported media to activate it and send it to the Source Window.

You can continue to import more media by double-clicking within the marked area. For better organization, users can also create Bins, which are folders within a Premiere Pro File that are often in use to sort out imported media.
Users can create Bins with a right-click in the red box marked area (refer to image above).
Step 4: Select either the whole clip or a part of it from the Source Window and drag it onto the Timeline.

Step 5: Select the Razor Tool from the Tools Window. Now, pick the point where you want to introduce a cut and confirm with your left mouse button; this will split your video track into two parts.
Make a second cut where desired, following which you can move around the newly generated clip or delete it.

**Tip:**You can also select the Razor Tool by pressing C on the keyboard_._
We also recommend using the Snap in Timeline feature (activated with (S) on your keyboard or by choosing the magnet option), which will match your mouse pointer with the Playhead to ensure your cut will match the exact frame shown on your screen.
-—————————————————————————————————————————————-
Some more tips for Adobe Premiere Pro:
- Using the I and O keys on your keyboard while playing a video in the Source Window will allow you to set an In Pointand an Out Point. These markers will allow you to move a specific part of your video file into the Timeline, thus, reducing the amount of time spent making the right cut.
We have tagged the Mark In and Mark Out buttons with a Green Box in the image below.
- Clicking on the Step Frame Buttons [marked in Yellow] will also help increase the accuracy of your cut by allowing you to select the exact moment you desire.
- You can also mark a Point of Interest in your video file with the help of Markers in Premiere Pro. These afford you the ability to come back to the moment at a later time and see why it interested you in the first place, as editing sessions can often take hours at an end.

An alternative way to cut video with Wondershare Filmora
In Wondershare Filmora Video Editor , the steps to cut a video are simplified and don’t require as many steps as seen earlier. Opening the application throws you straight into a project, and following this, you can import a video file and begin editing. From the process you will learn below, it is easy to assume that Wondershare Filmora is more convenient for beginners and provides software features that match paid professional software.
For Win 7 or later (64-bit)
For macOS 10.14 or later
Note: If you don’t have Wondershare Filmora installed, you can get the video editor by visiting its official website . Once the setup program download completes, execute it and begin the installation process.
Once you have the editing software open, follow the steps listed below.
Step 1: Import a video file by clicking on the import window.
The default project setting for Filmora X is 1920x1080 at 25 frames per second. Users can change this to match their video file by going into Project Settings under the File tab or by accepting the automatic prompt that appears when dragging the video file onto the Timeline.

Note: If you have a PC with weak hardware, Wondershare Filmora gives you the option to create Video Proxies that will reduce the load on your computer by creating smaller clips that are lower in size, resulting in a smoother and faster experience. You can also do this in Premiere Pro, but Filmora does it for you automatically once given permission.
Step 2: Drag the video file onto the Timeline to begin previewing it in the Playback Window and commence editing operations.

Step 3: Locate where you want to cut in the video file and click on the orange scissors option to split the video file.

Tip: You can also use the keyboard shortcut (CTRL+B) to cut without using a mouse click, in case you make use of a trackpad while editing.
The Bottom Line
As said earlier, knowing where to cut is essential in improving the feel of your video, and we hope this guide showed you exactly how to perform the actions to create your best project. If you are a beginner, the simplistic approach of Wondershare Filmora will be more welcoming and easier to navigate. In addition, the software is also free to download, with added features that you can activate by paying a monthly, yearly, or one-time fee. Adobe Premiere Pro is an option worth considering if you plan on using third-party plugins and other applications from the Creative Cloud Suite.
During project creation, we recommend keeping an eye on the file name set and the storage location; this can help reduce the time spent in locating the Premiere Project.
Step 2: Import a video file into Premiere Pro with a double click in the marked area and choose the file from its stored location.
Step 3: Double click on any imported media to activate it and send it to the Source Window.
You can continue to import more media by double-clicking within the marked area. For better organization, users can also create Bins, which are folders within a Premiere Pro File that are often in use to sort out imported media.
Users can create Bins with a right-click in the red box marked area (refer to image above).
Step 4: Select either the whole clip or a part of it from the Source Window and drag it onto the Timeline.
Step 5: Select the Razor Tool from the Tools Window. Now, pick the point where you want to introduce a cut and confirm with your left mouse button; this will split your video track into two parts.
Make a second cut where desired, following which you can move around the newly generated clip or delete it.
**Tip:**You can also select the Razor Tool by pressing C on the keyboard_._
We also recommend using the Snap in Timeline feature (activated with (S) on your keyboard or by choosing the magnet option), which will match your mouse pointer with the Playhead to ensure your cut will match the exact frame shown on your screen.
-—————————————————————————————————————————————-
Some more tips for Adobe Premiere Pro:
- Using the I and O keys on your keyboard while playing a video in the Source Window will allow you to set an In Pointand an Out Point. These markers will allow you to move a specific part of your video file into the Timeline, thus, reducing the amount of time spent making the right cut.
We have tagged the Mark In and Mark Out buttons with a Green Box in the image below.
- Clicking on the Step Frame Buttons [marked in Yellow] will also help increase the accuracy of your cut by allowing you to select the exact moment you desire.
- You can also mark a Point of Interest in your video file with the help of Markers in Premiere Pro. These afford you the ability to come back to the moment at a later time and see why it interested you in the first place, as editing sessions can often take hours at an end.
An alternative way to cut video with Wondershare Filmora
In Wondershare Filmora Video Editor , the steps to cut a video are simplified and don’t require as many steps as seen earlier. Opening the application throws you straight into a project, and following this, you can import a video file and begin editing. From the process you will learn below, it is easy to assume that Wondershare Filmora is more convenient for beginners and provides software features that match paid professional software.
For Win 7 or later (64-bit)
For macOS 10.14 or later
Note: If you don’t have Wondershare Filmora installed, you can get the video editor by visiting its official website . Once the setup program download completes, execute it and begin the installation process.
Once you have the editing software open, follow the steps listed below.
Step 1: Import a video file by clicking on the import window.
The default project setting for Filmora X is 1920x1080 at 25 frames per second. Users can change this to match their video file by going into Project Settings under the File tab or by accepting the automatic prompt that appears when dragging the video file onto the Timeline.
Note: If you have a PC with weak hardware, Wondershare Filmora gives you the option to create Video Proxies that will reduce the load on your computer by creating smaller clips that are lower in size, resulting in a smoother and faster experience. You can also do this in Premiere Pro, but Filmora does it for you automatically once given permission.
Step 2: Drag the video file onto the Timeline to begin previewing it in the Playback Window and commence editing operations.
Step 3: Locate where you want to cut in the video file and click on the orange scissors option to split the video file.
Tip: You can also use the keyboard shortcut (CTRL+B) to cut without using a mouse click, in case you make use of a trackpad while editing.
The Bottom Line
As said earlier, knowing where to cut is essential in improving the feel of your video, and we hope this guide showed you exactly how to perform the actions to create your best project. If you are a beginner, the simplistic approach of Wondershare Filmora will be more welcoming and easier to navigate. In addition, the software is also free to download, with added features that you can activate by paying a monthly, yearly, or one-time fee. Adobe Premiere Pro is an option worth considering if you plan on using third-party plugins and other applications from the Creative Cloud Suite.
VN Video Editor Templates: A Game-Changer for Your Videos
Creating engaging and professional-looking videos can be difficult, especially if you need to familiarize yourself with video editing software. However, with the right tools, it can be a breeze. The VN Video Editor is a powerful and user-friendly software that allows you to create stunning videos easily.
One of the best things about VN Video Editor is that this app comes with a wide variety of templates that you can use to make your videos look even better. This article will share amazing templates for VN Video Editor that you can download for free.
These templates have been carefully crafted to help you create professional-looking videos in no time. Whether you’re creating videos for your business or YouTube channel or just for fun, these templates will take your videos to the next level. So, without further ado, let’s dive in and explore the best templates for VN Video Editor that you can use to make your videos stand out.

- Travel Vlog Template in VN Video Editor
- Production Introduction Video Template in VN Video Editor
- VN Cooking Vlog Template
- VN Fashion Video Template
- Beauty Video Template of VN Video Editor
Overview of VN Video Editor and Its Templates
VN Video Editor is a popular video editing software on desktop and mobile devices. The mobile version of VN Video Editor is available on both Google Play Store and App Store. The app’s mobile version is particularly useful for those who want to create and edit videos on the go. The app is user-friendly and intuitive, making it easy for anyone to create professional-looking videos.

One of the best features of VN Video Editor is its wide variety of templates, which makes it easy for users to create videos that look great in just a few minutes. In addition, the templates are very customizable; users can change the color and text and add their media files.
The templates are also useful for those who need to become more familiar with video editing and want to create professional-looking videos without spending much time on the editing process.
The templates include various styles and themes, such as modern, classic, and vintage. They also come with various layouts, such as split-screen and collage. Moreover, these templates can create a wide range of videos, from promotional and product demonstrations to travel vlogs and personal videos.
How To Use & Download VN Video Templates
Using templates in VN Video Editor is a great way to create professional-looking videos quickly and easily. The process is straightforward and can be done in just a few steps. Here’s a quick guide on how to use and download templates in VN Video Editor.
Step1 Download VN Video Editor and launch it on your mobile phone. Tap the “Template“ button.

Step2 Choose the free available templates you want to use.

Step3 Click the “Download“ button to download your template.

Step4 Click the “Use Template“ button to start the editing process.

Step5 Select the images or clips you want and click “Next.”

Step6 Make desired adjustments to your template.

Step7 Click the “Export“ button and adjust the “Export Settings.”

Step8 Click “Save“ and wait for your exported clip.

5 Amazing Templates in VN Video Editor
VN Video Editor is a powerful and user-friendly app with various templates. These templates can create a wide range of videos, from promotional and product demonstrations to travel vlogs and personal videos. This section will introduce you to 5 amazing templates you can use in VN Video Editor to create professional-looking videos.
1. Travel Vlog Template in VN Video Editor

This template is perfect for capturing the essence of your travels. It features a split-screen layout that lets you showcase multiple footage and locations at once, giving your audience a glimpse of all the exciting places you’ve visited. The template also includes customizable text and map animations to help you create a professional and engaging travel vlog.
2. Production Introduction Video Template in VN Video Editor

This template is designed to help you introduce your products or services professionally and engagingly. It features a clean and modern design highlighting your products and services and includes customizable text, product demonstrations, and animations to help create a video that stands out.
3. VN Cooking Vlog Template

This template is perfect for creating cooking videos that are both informative and engaging. It features a split-screen layout that lets you showcase multiple recipes and cooking techniques and includes customizable text and animations to help you create a professional cooking vlog.
4. VN Fashion Video Template

This template is perfect for creating fashion videos that are both stylish and engaging. It features a clean and modern design highlighting the latest fashion trends and includes customizable text and animations to help create a video that stands out in the fashion industry.
5. Beauty Video Template of VN Video Editor

This template is designed to help you create videos that showcase your beauty and skincare products professionally and engagingly. It features a clean and modern design highlighting your products and services and includes customizable text and animations to help create a video that stands out in the beauty industry.
Each template has its unique style and design and can be easily customized to match your brand or style. With the help of these templates, you can create professional-looking videos in no time.
20+ VN Code Video Templates
In addition to the templates that come with VN Video Editor, a wide variety of templates are available from other vloggers and creators. These templates are created by app users who have shared their designs for others to use. These templates are often more specialized and niche-focused than the templates that come with the app, making them ideal for creating videos on specific topics.
1. 10 VN Video Templates for Instagram Reel
This provides access to 10 VN Video Templates for Instagram Reel made by YouTuber Bagus Muhamad. These templates are designed to help you create engaging and professional-looking Instagram Reel videos quickly and easily.
These templates come in various styles and themes, such as modern, classic, and vintage. They also come with various layouts, such as split-screen and collage. All templates are fully customizable with the VN Video Editor. You can change the color and text and add your media files.
These templates are perfect for creating Instagram Reel videos that attract attention. With the help of these templates, you can create professional-looking videos in no time.
2. 10 VN Cinematic Video Templates
This provides access to 10 VN Cinematic Video Templates by YouTuber Dhemusz Official. These templates are designed to help you create cinematic and professional-looking videos quickly and easily.
They come in various styles and themes, such as modern, classic, and vintage. They also come with various layouts, such as split-screen and collage. All templates are fully customizable with the VN Video Editor, and you can change the color and text and add your media files to them.
These templates are perfect for creating videos with a cinematic feel and look, making them great for movie trailers, short films, and more. With the help of these templates, you can create professional-looking videos in no time.
3. 8 VN Video Templates
This provides access to a collection of 8 VN Video Templates created by YouTuber desiwithcamera. These templates offer a unique blend of style and functionality, making it easy for users to create professional-looking videos.
Each template boasts a different aesthetic, including modern, classic, and vintage themes and diverse layout options such as split-screen and collage. The templates are fully customizable with the VN Video Editor, enabling users to incorporate their media files, adjust colors and add texts, thus making it stand out from the crowd.
These templates suit various videos, such as product reviews, personal vlogs, and event videos. With these templates, you can elevate your video editing skills and create visually stunning videos in minutes.
[Bonus] VN’s Best Alternative - Filmora Mobile Video Editor
Filmora Mobile Video Editor is a great alternative to VN Video Editor. It is a powerful and user-friendly video editing app that allows you to create stunning videos on your mobile device. It comes with various templates and features similar to VN Video Editor.
Free Download For Win 7 or later(64-bit)
Free Download For macOS 10.14 or later

Here are some of the key template features of Filmora Mobile Video Editor:
- Variety of Templates: Filmora Mobile Video Editor offers a wide range of templates for various types of videos, such as travel vlogs, product reviews, and personal vlogs.
- Customizable Templates: Filmora Mobile Video Editor’s templates are fully customizable, allowing you to add your media files and text and adjust the colors to match your brand or style.
- Unique Templates: Filmora Mobile Video Editor provides unique templates with different themes and styles that are not commonly found in other video editing apps.
- Animated Templates: Filmora Mobile Video Editor has a variety of animated templates that add dynamic movement to your videos and give them a professional look.
- Split-screen templates: Filmora Mobile Video Editor also has a variety of split-screen templates that allow you to showcase multiple footages at once, giving your videos a unique and interesting look.
Using these templates, you can easily create professional-looking videos that stand out. The templates in Filmora Mobile Video Editor are perfect for those who need to become more familiar with video editing and want to create professional-looking videos without spending much time on the editing process.
Conclusion
VN Video Editor is a powerful and user-friendly video editing app with various templates to choose from. These templates are perfect for creating professional-looking videos quickly and easily.
However, Filmora Mobile Video Editor is also a great alternative for VN. It offers similar features, such as customizable templates and various templates for various types of videos. It also has unique preset templates not commonly found in other video editing apps, and its animated templates add dynamic movement to your videos, giving them a professional look.
Overview of VN Video Editor and Its Templates
VN Video Editor is a popular video editing software on desktop and mobile devices. The mobile version of VN Video Editor is available on both Google Play Store and App Store. The app’s mobile version is particularly useful for those who want to create and edit videos on the go. The app is user-friendly and intuitive, making it easy for anyone to create professional-looking videos.
One of the best features of VN Video Editor is its wide variety of templates, which makes it easy for users to create videos that look great in just a few minutes. In addition, the templates are very customizable; users can change the color and text and add their media files.
The templates are also useful for those who need to become more familiar with video editing and want to create professional-looking videos without spending much time on the editing process.
The templates include various styles and themes, such as modern, classic, and vintage. They also come with various layouts, such as split-screen and collage. Moreover, these templates can create a wide range of videos, from promotional and product demonstrations to travel vlogs and personal videos.
How To Use & Download VN Video Templates
Using templates in VN Video Editor is a great way to create professional-looking videos quickly and easily. The process is straightforward and can be done in just a few steps. Here’s a quick guide on how to use and download templates in VN Video Editor.
Step1 Download VN Video Editor and launch it on your mobile phone. Tap the “Template“ button.
Step2 Choose the free available templates you want to use.
Step3 Click the “Download“ button to download your template.
Step4 Click the “Use Template“ button to start the editing process.
Step5 Select the images or clips you want and click “Next.”
Step6 Make desired adjustments to your template.
Step7 Click the “Export“ button and adjust the “Export Settings.”
Step8 Click “Save“ and wait for your exported clip.
5 Amazing Templates in VN Video Editor
VN Video Editor is a powerful and user-friendly app with various templates. These templates can create a wide range of videos, from promotional and product demonstrations to travel vlogs and personal videos. This section will introduce you to 5 amazing templates you can use in VN Video Editor to create professional-looking videos.
1. Travel Vlog Template in VN Video Editor
This template is perfect for capturing the essence of your travels. It features a split-screen layout that lets you showcase multiple footage and locations at once, giving your audience a glimpse of all the exciting places you’ve visited. The template also includes customizable text and map animations to help you create a professional and engaging travel vlog.
2. Production Introduction Video Template in VN Video Editor
This template is designed to help you introduce your products or services professionally and engagingly. It features a clean and modern design highlighting your products and services and includes customizable text, product demonstrations, and animations to help create a video that stands out.
3. VN Cooking Vlog Template
This template is perfect for creating cooking videos that are both informative and engaging. It features a split-screen layout that lets you showcase multiple recipes and cooking techniques and includes customizable text and animations to help you create a professional cooking vlog.
4. VN Fashion Video Template
This template is perfect for creating fashion videos that are both stylish and engaging. It features a clean and modern design highlighting the latest fashion trends and includes customizable text and animations to help create a video that stands out in the fashion industry.
5. Beauty Video Template of VN Video Editor
This template is designed to help you create videos that showcase your beauty and skincare products professionally and engagingly. It features a clean and modern design highlighting your products and services and includes customizable text and animations to help create a video that stands out in the beauty industry.
Each template has its unique style and design and can be easily customized to match your brand or style. With the help of these templates, you can create professional-looking videos in no time.
20+ VN Code Video Templates
In addition to the templates that come with VN Video Editor, a wide variety of templates are available from other vloggers and creators. These templates are created by app users who have shared their designs for others to use. These templates are often more specialized and niche-focused than the templates that come with the app, making them ideal for creating videos on specific topics.
1. 10 VN Video Templates for Instagram Reel
This provides access to 10 VN Video Templates for Instagram Reel made by YouTuber Bagus Muhamad. These templates are designed to help you create engaging and professional-looking Instagram Reel videos quickly and easily.
These templates come in various styles and themes, such as modern, classic, and vintage. They also come with various layouts, such as split-screen and collage. All templates are fully customizable with the VN Video Editor. You can change the color and text and add your media files.
These templates are perfect for creating Instagram Reel videos that attract attention. With the help of these templates, you can create professional-looking videos in no time.
2. 10 VN Cinematic Video Templates
This provides access to 10 VN Cinematic Video Templates by YouTuber Dhemusz Official. These templates are designed to help you create cinematic and professional-looking videos quickly and easily.
They come in various styles and themes, such as modern, classic, and vintage. They also come with various layouts, such as split-screen and collage. All templates are fully customizable with the VN Video Editor, and you can change the color and text and add your media files to them.
These templates are perfect for creating videos with a cinematic feel and look, making them great for movie trailers, short films, and more. With the help of these templates, you can create professional-looking videos in no time.
3. 8 VN Video Templates
This provides access to a collection of 8 VN Video Templates created by YouTuber desiwithcamera. These templates offer a unique blend of style and functionality, making it easy for users to create professional-looking videos.
Each template boasts a different aesthetic, including modern, classic, and vintage themes and diverse layout options such as split-screen and collage. The templates are fully customizable with the VN Video Editor, enabling users to incorporate their media files, adjust colors and add texts, thus making it stand out from the crowd.
These templates suit various videos, such as product reviews, personal vlogs, and event videos. With these templates, you can elevate your video editing skills and create visually stunning videos in minutes.
[Bonus] VN’s Best Alternative - Filmora Mobile Video Editor
Filmora Mobile Video Editor is a great alternative to VN Video Editor. It is a powerful and user-friendly video editing app that allows you to create stunning videos on your mobile device. It comes with various templates and features similar to VN Video Editor.
Free Download For Win 7 or later(64-bit)
Free Download For macOS 10.14 or later
Here are some of the key template features of Filmora Mobile Video Editor:
- Variety of Templates: Filmora Mobile Video Editor offers a wide range of templates for various types of videos, such as travel vlogs, product reviews, and personal vlogs.
- Customizable Templates: Filmora Mobile Video Editor’s templates are fully customizable, allowing you to add your media files and text and adjust the colors to match your brand or style.
- Unique Templates: Filmora Mobile Video Editor provides unique templates with different themes and styles that are not commonly found in other video editing apps.
- Animated Templates: Filmora Mobile Video Editor has a variety of animated templates that add dynamic movement to your videos and give them a professional look.
- Split-screen templates: Filmora Mobile Video Editor also has a variety of split-screen templates that allow you to showcase multiple footages at once, giving your videos a unique and interesting look.
Using these templates, you can easily create professional-looking videos that stand out. The templates in Filmora Mobile Video Editor are perfect for those who need to become more familiar with video editing and want to create professional-looking videos without spending much time on the editing process.
Conclusion
VN Video Editor is a powerful and user-friendly video editing app with various templates to choose from. These templates are perfect for creating professional-looking videos quickly and easily.
However, Filmora Mobile Video Editor is also a great alternative for VN. It offers similar features, such as customizable templates and various templates for various types of videos. It also has unique preset templates not commonly found in other video editing apps, and its animated templates add dynamic movement to your videos, giving them a professional look.
Blender Is an Open-Source Cross-Platform 3D Graphics Program, but This Doesn’t Mean It’s a Low-Rent Option
Blender is an open-source cross-platform 3D graphics program, but this doesn’t mean it’s a low-rent option. Just like commercial packages like Lightwave 3D, it is also a very capable compositing package. Unlike Lightwave, it is a modern node-based compositor like Nuke or Fusion. It’s not what the software is designed for, but it does a bangup job of green screen compositing, as you will soon see.
Blender green screen uses technique of the chroma key a color is isolated (in our case the green of thegreen screen), or a particular luminance, it is removed and the area that was occupied by it becomes transparent, thus becoming part of the alpha channel. The transparent parts will thus show the video or the image below, which will thus define the environment in which the subject of the first movie will act.
How to Use Green Screen in Blender
So we need to pull these two elements into Blender and pull a key on the green bits to make the background show through in as naturalistic a way as possible. Blender is a node-based compositor which means the control mechanism is nodes or little LEGO blocks of love which you place on the screen and link with little strings which form your signal path.

Locate the drop-down (it goes up, actually, but you know what we mean) at the bottom of the view, and select “Movie Clip Editor.”
Click the “Open” button and choose and load your green screen footage. (You can also load sequences of images for uncompressed keys in this step if you have the space, and the footage is the right size.)
Once the clip is loaded, go back to the drop-down and select Node Editor.
The screen will be blank, but just go to the bottom of the view and click the middle button marked “Node Tree Type” to Display, and then check the Use Nodes and Backdrop buttons.
Select the “Render Layers” node, and because we won’t need it you can delete it (on the Mac this is the Forward Delete key). Then move the Compositing node out of the way because we won’t need it yet.
**Note: to zoom in and out of the nodes, use the centre scroll wheel of the mouse if you have it. To zoom in and out of the images you are working on, use the V and Alt-V keys.
**Compositing Nodes
Click the Add menu in the bar at the bottom of the view and select “Input -> Movie Clip.” Select the green screen clip you added in the Movie Clip Editor. This is the input. We have to push this through a keyer to remove the green and make those areas transparent.
**Important: in this program flow goes from left to right, so node inputs are on the left of a node, and outputs are on the right of a node.
Now select “Add -> Matte -> Keying” to add a keying node. Also “Add -> Output -> Viewer” to make the output from the key visible. Click on the little yellow dot next to Image output on the Input node, and drag it to Image input on the Keying node. Then drag the little dot next to Image output on the keying node, and drag it to the image input on the viewer node.
You now have to select the key colour, the colour which the keyer is changing to transparent. Click the Key Colour button on the Keying node, and this displays a colour selector. Click the eyedropper, and click on the image in the background somewhere on the green screen.
If you look carefully, you will see that there are some areas which still have a bit of colour and are not fully transparent. You can check this more accurately by dragging the string from the Matte output on the Keying node and linking to the input on the viewer. This is the key you have made. As you can see, the dark bits are supposed to be totally black, and there are still greys showing through. (This is because the source material wasn’t perfect.)
There are many different ways to fix this depending on the shot, but if it’s a reasonably well-shot green screen, all you will need to do is the following.
Adjust the Black Clip slider to expand the amount of greens which turn to black. Then adjust the White Clip to push the whites to prevent them from becoming transparent.
Once you have pure white and pure black, reconnect the image output of the keying node to the image input on the viewer, and you’ll see you have a decent key.
You can adjust the amount of fringing and spill (reflections from the green screen on the model), but generally the keyer does a good job of guessing that for you with a decently-shot green screen.
**Adding the background
After this, adding the background is more of the same with a slight twist. “Add -> Input -> Movie Clip,” navigate to your background clip and load it.
To blend the two layers, you have to make a mix of the two clips so that the background shows through the now transparent bits of the foreground.
“Add -> Colour -> Mix node”. Take the output from the background clip, and feed it to the top image input of the mix node. Take the output from the keying node, and feed it into the lower image input on the mix node.
Click the Alpha channel button next to the drop-down on the mix node.
And finally we have our key. The background is way too sharp and makes the green screen footage look really soft and crappy, so we need to soften the background. There is a really nice Bokeh Blur filter in blender for just this purpose to make the background look out of focus and add lots of gorgeous Bokeh blobs.
“Add -> Filter -> Bokeh Blur” and put it between the background clip and the mix. In Blender, if you add a node and place it over a string between two nodes, the string goes yellow, and dropping it will automatically insert the new node into the signal path connecting inputs and outputs.
Finally add an image to the Bokeh Blur for the shape you want the bokeh to be; we opted for a donut-shaped iris pattern.
To render out your video, connect the output of the Mix node to the input of the compositing node we left lying about earlier. It’s okay for this output to be connected to the input node of the viewer, too, as this means we see progress while rendering.
Make sure you are set up to render the right amount of frames at 30fps in the render panel on the far right. 30fps for 5 seconds (the duration of our clip) is 150 frames. Insert 150 where it says End Fr.
Select a place and a filename to output to in the Output panel further down the right-hand side. Then to render, select the info menu bar from the top-left drop-down, and finally choose “Render Menu -> Render Animation,” and the render will begin.
Wondershare Filmora
If you’re just starting out with video editing, or just want a simple program that works, Wondershare Filmora might be what you’re looking for. It has the essential tools, and anyone can learn to use it easily.
Wondershare Filmora is the one of best video editing software with cool features that compares to other competing video editing Softwares. Many video editing programs claim to offer professional results; Filmora is one of a few consumer-level tools that actually delivers.
For Win 7 or later (64-bit)
For macOS 10.12 or later
Installation Steps
- Click the icon in the center of the Media Library to add files directly.
- Go File > Import Media > Import Media Files.
- Drag and drop to the Media Library directly.
While importing a media file, Wondershar Filmora may ask you if you wish to create a proxy file to accelerate the editing process. Select “Yes” to have a fast video editing experience.

You can also import video clips using your Touch Bar controls if your computer has Touch Bar.
Related FAQs
How do I get rid of the green screen in blender?
This is achieved by Compositing Nodes: Click the Add menu in the bar at the bottom of the view and select “Input -> Movie Clip.” Select the green screen clip you added in the Movie Clip Editor. This is the input. We have to push this through a keyer to remove the green and make those areas transparent.
How do I get rid of objects in green screen?
This can be done by following these prompts: Select “Add -> Matte -> Keying” to add a keying node. Also “Add -> Output -> Viewer” to make the output from the key visible. Click on the little yellow dot next to Image output on the Input node, and drag it to Image input on the Keying node. Then drag the little dot next to Image output on the keying node, and drag it to the image input on the viewer node.
Conclusion
Obviously, to get the best green screen composites you have to shoot good “plates.” “Plates” are the main bits of the shot that you bolt together in movie visual effects. You have the foreground plate and the green screen bit with an actor filmed in front of a green screen. Then you have the background plate which is the bit you want to show through the green bits of the foreground, making the whole thing look as though the background and foreground were filmed at the same time.
For macOS 10.12 or later
Installation Steps
- Click the icon in the center of the Media Library to add files directly.
- Go File > Import Media > Import Media Files.
- Drag and drop to the Media Library directly.
While importing a media file, Wondershar Filmora may ask you if you wish to create a proxy file to accelerate the editing process. Select “Yes” to have a fast video editing experience.
You can also import video clips using your Touch Bar controls if your computer has Touch Bar.
Related FAQs
How do I get rid of the green screen in blender?
This is achieved by Compositing Nodes: Click the Add menu in the bar at the bottom of the view and select “Input -> Movie Clip.” Select the green screen clip you added in the Movie Clip Editor. This is the input. We have to push this through a keyer to remove the green and make those areas transparent.
How do I get rid of objects in green screen?
This can be done by following these prompts: Select “Add -> Matte -> Keying” to add a keying node. Also “Add -> Output -> Viewer” to make the output from the key visible. Click on the little yellow dot next to Image output on the Input node, and drag it to Image input on the Keying node. Then drag the little dot next to Image output on the keying node, and drag it to the image input on the viewer node.
Conclusion
Obviously, to get the best green screen composites you have to shoot good “plates.” “Plates” are the main bits of the shot that you bolt together in movie visual effects. You have the foreground plate and the green screen bit with an actor filmed in front of a green screen. Then you have the background plate which is the bit you want to show through the green bits of the foreground, making the whole thing look as though the background and foreground were filmed at the same time.
Also read:
- Want to Learn How to Add VHS Green Screen to Your Videos? This Guide Will Cover All the Details You Need to Know to Add This Effect to Your Videos and Make Them Stand Out for 2024
- New In 2024, WebM to GIF Converters (Online and Offline Solutions)
- In 2024, Learn How to Slow Down Time-Lapse Videos on Your iPhone to Make Detailed Slow-Motion Effects in Your Time-Lapse Captures
- Updated Have You Ever Wanted to Stop Your Video and Hold on to a Single Frame to Draw Attention to a Point or for Dramatic Flair? Good News! VEGAS Pro Makes It Easy to Do Just That. In This Tutorial, Well Look at How to Make Sony Vegas Freeze Frame
- New In 2024, How to Do Masking in After Effects Alternative Provided
- New 2024 Approved In This Article, You Will Learn Easy Ways to Edit Videos Using a Mouse in Wondershare Filmora. You Can Do Video Editing without a Keyboard After Reading This Article
- New How to Make a Video Slideshow in iMovie
- New 2024 Approved You Can Use It to Fix Videos that Are Not Aligned Properly or that Have Been Filmed Upside Down. A Handbrake Is a Popular Tool because It Is Easy to Use and It Has a Variety of Features
- New 10 Mind-Blowing Video Collage Maker for PC for 2024
- 2024 Approved How to Crop a Video in Davinci Resolve Step by Step
- 2024 Approved How To Change Text In Premiere Pro
- 2024 Approved How to Do Velocity Edits on PC
- New Find The Best Free Canon LUTs for 2024
- Best 12 Sony Vegas Slideshow Templates for Free Download for 2024
- Learn How Video Montages Were Used over Film History with Examples and the Types of Videos for Shorter Montages. Plus, Learn About the Best Software for It
- Updated 2024 Approved Enhance Social Media Posts with Transparent GIFs that Leave Your Peers in Awe
- Updated 4 Ways to Add White Border to Video on Mobile and Desktop
- Updated Your Recorded Video Footage Has some Visible Grains Making Your Video Noisy and Thus Hampering the Overall Viewing Experience. No Worries, as There AI Video Denoiser and Other Software Available to Correct the Issue for 2024
- New Best Ideas on Using Filmora Green Screen
- In 2024, How to Fix Pokemon Go Route Not Working On Lava Blaze 2? | Dr.fone
- How to Samsung Galaxy A15 4G Get Deleted Pictures Back with Ease and Safety?
- Full guide to Apple iPhone 6 Plus iCloud Bypass
- In 2024, Fake Android Location without Rooting For Your Vivo Y78t | Dr.fone
- How to Transfer Apple iPhone 7 Plus Data to iPhone 12 A Complete Guide | Dr.fone
- In 2024, Edit and Send Fake Location on Telegram For your Motorola Edge 40 Neo in 3 Ways | Dr.fone
- In 2024, 9 Mind-Blowing Tricks to Hatch Eggs in Pokemon Go Without Walking On Oppo A2 | Dr.fone
- In 2024, How To Remove Screen Lock PIN On Vivo Y28 5G Like A Pro 5 Easy Ways
- How to Change Your Poco C65 Location on life360 Without Anyone Knowing? | Dr.fone
- Simple ways to get recent calls back from X6
- Title: Updated How Did AI Video Games Act More Human Than Human?
- Author: Morgan
- Created at : 2024-05-19 05:12:00
- Updated at : 2024-05-20 05:12:00
- Link: https://ai-video-editing.techidaily.com/updated-how-did-ai-video-games-act-more-human-than-human/
- License: This work is licensed under CC BY-NC-SA 4.0.
