
:max_bytes(150000):strip_icc():format(webp)/GettyImages-1342255561-483b636ee00f40a1b3d91d1969b1aaf6.jpg)
Updated How to Concatenate Videos Using FFmpeg
How to Concatenate Videos Using FFmpeg
Video editing is a crucial aspect of creating content for many people. Whether you’re a YouTuber, a marketer, or just someone who wants to share videos with friends and family, being able to edit and manipulate your videos is key. One of the most basic video editing tasks is concatenating videos, which combines multiple files to create one cohesive video.
FFmpeg is a powerful tool that allows you to do just that, and in this guide, we’ll walk you through the process of FFmpeg concatenate videos. Whether a beginner or an experienced video editor, this guide will provide you with all the information you need to seamlessly merge your videos. From installation to execution, we’ll cover it all so you can streamline your video editing process.

Overview and Installation of FFmpeg
FFmpeg is free, open-source project that allows you to record, convert, and stream digital audio and video. It is a command-line tool widely used in video editing and transcoding. FFmpeg can be used to concatenate videos and other tasks, such as adding subtitles, changing video resolution, and more. It is available for Windows, Mac, and Linux, making it a versatile and accessible tool for anyone to use.
Here’s how to install FFmpeg:
Step1 Log in to your Ubuntu server via SSH and update the package index.
$ sudo apt update
Step2 Install FFmpeg and all the required dependencies
$ sudo apt install ffmpeg
Step3 Verify the version of FFmpeg that you’ve installed.
$ ffmpeg -version
Prerequisite
Before we merge videos using FFmpeg, we must understand the various methods available to us. FFmpeg offers three ways to concatenate videos: a demuxer, a filter, or a protocol. However, each method has its own set of considerations, and the best method for you will depend on the properties of the videos you’re working with.
It’s crucial to ensure that all encoding-related properties align with your chosen method. This includes the timebase, height and width, codecs, and pixel format. Some methods require the videos you’re merging to have the same encoding, while others allow for different encodings. It’s essential to keep this in mind to ensure that the final video is seamless without any breaks. Remember that these prerequisites will help you have a smooth process.
Concatenate Videos With Same Codecs Using FFmpeg
If the videos you want to concatenate have the same codec, you can use the FFmpeg “concat” demuxer or protocol to join them together. This simple and efficient method doesn’t require re-encoding the videos, saving time and preserving the original quality. This section will review the steps to concatenate videos using the “concat” demuxer and “concat” protocols in FFmpeg.
Merge Videos With the “Concat” Demuxer
The concat demuxer in FFmpeg allows you to join together multiple video files with the same codecs by reading a list of file paths from a text file and demuxing them in sequence. Each video starts where the previous one finishes without needing to re-encode the videos. Here’s how to do it:
Step1 Create a .txt file and list the paths of the video files you want to merge.
Join_video.txt
file /Users/Video/input1.mp4
file /Users/Video/input2.mp4
![]()
Note: You can add more than two video files.
Step2 Run the FFmpeg command:
ffmpeg -f concat -safe 0 -i join_video.txt -c copy output_demuxer.mp4
![]()
Note: -safe 0 is added to accept any file name.
-c copy will copy all the streams.
As this method allows you to “stream copy” the files instead of re-encoding them, the concatenation is very fast. This can be a good option if you have videos with the same codecs and want to join them quickly without losing quality.
Join Videos With the “Concat” Protocol
The concat protocol in FFmpeg allows you to join together multiple video files in a specific format that supports file-level concatenation, such as MPEG-2 TS. However, it cannot be used for other video formats like MP4 and WEBM.
Here’s how to use the “concat protocol:
Step1 Run the FFmpeg command:
ffmpeg -i “concat:input1.ts|input2.ts” -c copy output_protocol.ts
![]()
Note: The concat protocol allows you to “stream copy” the files by adding the option -c copy.
Step2 Input the file name of the video using this code:
ffmpeg -i “concat:input1.mp4|input2.mp4” -c copy output_protocol.mp4
![]()
Note: If you try to use this method on video formats that are not supported, only the first input video will be saved in the output video. And the video ends after the first video.
Although this method is limited in terms of supported video formats, it’s very easy to use if you merge videos in the supported formats. It’s a single command in the terminal without needing a text file. Additionally, using the -c copy option makes it efficient as it doesn’t require re-encoding, saving time.
Concatenate MP4 Video Files of Different Codecs & Resolutions Using FFmpeg
If the videos you want to concatenate have different codecs or resolutions, you can still use FFmpeg to join them together. However, this method requires re-encoding the videos, which can take longer and may result in a loss of quality. This section will cover the steps to concatenate videos with different codecs or resolutions using FFmpeg.
Here’s how to do it:
Step1 Provide the names of the input files to FFmpeg.
ffmpeg -i file1.mp4 -i file2.mp4 -i file3.mp4 \
Step2 Use the filter_complex filtergraph parameter to instruct FFmpeg from where to take the audio and video.
-filter_complex “[0:v] [0:a] [1:v] [1:a] [2:v] [2:a]
![]()
Note: [0:v][0:a] means FFmpeg needs to take the video and audio from the 0th video (file1.mp4).
Step3 Tell FFmpeg to concatenate three files (n=3).
concat=n=3:v=1:a=1 [vv] [aa]“ \
![]()
Note: The v=1:a=1 implies one stream for the audio and one stream for the video.
Step4 Map these audio and video outputs to the final video container. This is done as follows:
-map “[vv]“ -map “[aa]“ mergedVideo.mp4
It is important to note that this method requires re-encoding the videos, which can take more time and may result in a loss of quality. However, it offers the flexibility of filtering the videos before concatenating them. The filter_complex method in FFmpeg allows you to concatenate videos of different codecs and resolutions. The final step is to map the audio and video outputs to the final video container. This can be done using the -map command.
Concatenate Videos With Multiple Audio Streams Using FFmpeg
Concatenating videos with multiple audio streams can be more complex than concatenating videos with a single audio stream. This section will cover the steps to concatenate videos with multiple audio streams using FFmpeg. We’ll be using the filter_complex method in FFmpeg, which allows you to manipulate and concatenate multiple audio and video streams in a single command. This method is more advanced but allows you to join videos with different audio streams and create a final video with multiple audio tracks.
Step1 Specify the input files and opening.mkv, episode.mkv, and ending.mkv:
$ ffmpeg -i opening.mkv -i episode.mkv -i ending.mkv -filter_complex
Step2 Use the filter_complex parameter in FFmpeg to specify the input streams for the video and audio.
[0:0] [0:1] [0:2] [1:0] [1:1] [1:2] [2:0] [2:1] [2:2]
![]()
Note: Single video stream ([0:0], [1:0], [2:0])
Dual audio streams ([0:1][0:2], [1:1][1:2], [2:1][2:2])
Step3 Use the concat filter to specify that you want to concatenate 3 files (n=3) with 1 video stream (v=1) and 2 audio streams (a=2). Specify the output streams as [v], [a1], [a2]:
concat=n=3:v=1:a=2 [v] [a1] [a2]
Step4 Use the -map option to map the output streams to the final video container:
-map ‘[v]‘ -map ‘[a1]‘ -map ‘[a2]‘ output.mkv
[Bonus] Join Videos Together With Filmora
While FFmpeg offers a wide range of options for joining videos together, it can have a steep learning curve for some users. An alternative method for joining videos is using Filmora. Wondershare Filmora is a user-friendly video editing software that allows you to easily join multiple videos. It’s a great option for users new to video editing or needing experience with command-line tools like FFmpeg.
Free Download For Win 7 or later(64-bit)
Free Download For macOS 10.14 or later
Filmora has a simple drag-and-drop interface, making adding, arranging, and editing videos and audio tracks easy. Additionally, it offers various features like split, trim, crop, merge, and more. It also has various effects, transitions, and animations to enhance the overall look of your video. With Filmora, you can create professional-looking videos with minimal effort.
How-to Steps
Here’s how to merge videos using Filmora:
Step1 Open Filmora and click “New Project.”

Step2 Go to “File“ > “Import Media“ > “Import Media Files“ to add your video files to the media library.

Step3 Drag and drop the files you want to merge from the media library to the timeline, and then you’ll get the merged video seamlessly.

Step4 Edit your video.

Step5 After editing, click the “Export“ tab to save your videos.

Conclusion
FFmpeg is a powerful tool that allows you to concatenate videos in various ways. Whether you’re working with videos of the same codecs and resolutions or videos with multiple audio streams, FFmpeg can handle it. However, for users new to video editing or needing experience with command-line tools, using Filmora can be a more user-friendly option. It offers a simple drag-and-drop interface and a variety of features and effects to enhance the overall look of your video.
Step2 Run the FFmpeg command:
ffmpeg -f concat -safe 0 -i join_video.txt -c copy output_demuxer.mp4
![]()
Note: -safe 0 is added to accept any file name.
-c copy will copy all the streams.
As this method allows you to “stream copy” the files instead of re-encoding them, the concatenation is very fast. This can be a good option if you have videos with the same codecs and want to join them quickly without losing quality.
Join Videos With the “Concat” Protocol
The concat protocol in FFmpeg allows you to join together multiple video files in a specific format that supports file-level concatenation, such as MPEG-2 TS. However, it cannot be used for other video formats like MP4 and WEBM.
Here’s how to use the “concat protocol:
Step1 Run the FFmpeg command:
ffmpeg -i “concat:input1.ts|input2.ts” -c copy output_protocol.ts
![]()
Note: The concat protocol allows you to “stream copy” the files by adding the option -c copy.
Step2 Input the file name of the video using this code:
ffmpeg -i “concat:input1.mp4|input2.mp4” -c copy output_protocol.mp4
![]()
Note: If you try to use this method on video formats that are not supported, only the first input video will be saved in the output video. And the video ends after the first video.
Although this method is limited in terms of supported video formats, it’s very easy to use if you merge videos in the supported formats. It’s a single command in the terminal without needing a text file. Additionally, using the -c copy option makes it efficient as it doesn’t require re-encoding, saving time.
Concatenate MP4 Video Files of Different Codecs & Resolutions Using FFmpeg
If the videos you want to concatenate have different codecs or resolutions, you can still use FFmpeg to join them together. However, this method requires re-encoding the videos, which can take longer and may result in a loss of quality. This section will cover the steps to concatenate videos with different codecs or resolutions using FFmpeg.
Here’s how to do it:
Step1 Provide the names of the input files to FFmpeg.
ffmpeg -i file1.mp4 -i file2.mp4 -i file3.mp4 \
Step2 Use the filter_complex filtergraph parameter to instruct FFmpeg from where to take the audio and video.
-filter_complex “[0:v] [0:a] [1:v] [1:a] [2:v] [2:a]
![]()
Note: [0:v][0:a] means FFmpeg needs to take the video and audio from the 0th video (file1.mp4).
Step3 Tell FFmpeg to concatenate three files (n=3).
concat=n=3:v=1:a=1 [vv] [aa]“ \
![]()
Note: The v=1:a=1 implies one stream for the audio and one stream for the video.
Step4 Map these audio and video outputs to the final video container. This is done as follows:
-map “[vv]“ -map “[aa]“ mergedVideo.mp4
It is important to note that this method requires re-encoding the videos, which can take more time and may result in a loss of quality. However, it offers the flexibility of filtering the videos before concatenating them. The filter_complex method in FFmpeg allows you to concatenate videos of different codecs and resolutions. The final step is to map the audio and video outputs to the final video container. This can be done using the -map command.
Concatenate Videos With Multiple Audio Streams Using FFmpeg
Concatenating videos with multiple audio streams can be more complex than concatenating videos with a single audio stream. This section will cover the steps to concatenate videos with multiple audio streams using FFmpeg. We’ll be using the filter_complex method in FFmpeg, which allows you to manipulate and concatenate multiple audio and video streams in a single command. This method is more advanced but allows you to join videos with different audio streams and create a final video with multiple audio tracks.
Step1 Specify the input files and opening.mkv, episode.mkv, and ending.mkv:
$ ffmpeg -i opening.mkv -i episode.mkv -i ending.mkv -filter_complex
Step2 Use the filter_complex parameter in FFmpeg to specify the input streams for the video and audio.
[0:0] [0:1] [0:2] [1:0] [1:1] [1:2] [2:0] [2:1] [2:2]
![]()
Note: Single video stream ([0:0], [1:0], [2:0])
Dual audio streams ([0:1][0:2], [1:1][1:2], [2:1][2:2])
Step3 Use the concat filter to specify that you want to concatenate 3 files (n=3) with 1 video stream (v=1) and 2 audio streams (a=2). Specify the output streams as [v], [a1], [a2]:
concat=n=3:v=1:a=2 [v] [a1] [a2]
Step4 Use the -map option to map the output streams to the final video container:
-map ‘[v]‘ -map ‘[a1]‘ -map ‘[a2]‘ output.mkv
[Bonus] Join Videos Together With Filmora
While FFmpeg offers a wide range of options for joining videos together, it can have a steep learning curve for some users. An alternative method for joining videos is using Filmora. Wondershare Filmora is a user-friendly video editing software that allows you to easily join multiple videos. It’s a great option for users new to video editing or needing experience with command-line tools like FFmpeg.
Free Download For Win 7 or later(64-bit)
Free Download For macOS 10.14 or later
Filmora has a simple drag-and-drop interface, making adding, arranging, and editing videos and audio tracks easy. Additionally, it offers various features like split, trim, crop, merge, and more. It also has various effects, transitions, and animations to enhance the overall look of your video. With Filmora, you can create professional-looking videos with minimal effort.
How-to Steps
Here’s how to merge videos using Filmora:
Step1 Open Filmora and click “New Project.”
Step2 Go to “File“ > “Import Media“ > “Import Media Files“ to add your video files to the media library.
Step3 Drag and drop the files you want to merge from the media library to the timeline, and then you’ll get the merged video seamlessly.
Step4 Edit your video.
Step5 After editing, click the “Export“ tab to save your videos.
Conclusion
FFmpeg is a powerful tool that allows you to concatenate videos in various ways. Whether you’re working with videos of the same codecs and resolutions or videos with multiple audio streams, FFmpeg can handle it. However, for users new to video editing or needing experience with command-line tools, using Filmora can be a more user-friendly option. It offers a simple drag-and-drop interface and a variety of features and effects to enhance the overall look of your video.
How to Color Grade Your Picture in LightRoom
Create High-Quality Video - Wondershare Filmora
An easy and powerful YouTube video editor
Numerous video and audio effects to choose from
Detailed tutorials are provided by the official channel
Every budding photographer knows what Photoshop is Adobe Lightroom (officially Adobe Photoshop Lightroom) is the newer and more advanced version of Photoshop. Compared with other alternatives of Lightroom , Lightroom helps photographers import, modify, manipulate, find, organize, and manage their images as an image editing software. Lightroom combines photo management and photo editing in one.
One of the most amazing things about Lightroom is its autosave or nondestructive feature. Once you edit your photos, Lightroom instantly saves and stores them in your Lightroom catalog. With its inbuilt-presets, Lightroom makes working on your project so much easy and fun.
You can leverage Lightroom’s unique features to perform different types of tasks. However, in this article, you’ll learn color grading in Lightroom and how to make it work.
In this article
03 How To Color Grade Your Picture in LightRoom
What Is Color Grading?
Color grading is one of the essential processes for creating the perfect video and image content. Like with color correction, color grading helps enhance the appearance of your image or video and makes it appealing to viewers. However, unlike color correction, it focuses on creating stylistic or cinematic effects rather than rectifying mistakes in the image.
Color grading enhances an already edited or otherwise perfect image or video. So, in color grading, you are not trying to balance out colors or make your pictures look natural to the human eyes. Color correction does all that. Instead, with color grading, you aim to “paint over” a color-corrected content to evoke specific emotions or moods in the viewers.
Colors carry different emotions or visual tones. So, they’re essential in the post-production process to manipulate viewers into specific moods that tell your story best. In other words, color grading aligns your viewer’s emotions to the central theme in your story.

For example, if your image or video’s theme is passion, power, violence, or danger, red portrays them perfectly. Meanwhile, blue does it when you wish to evoke calmness and melancholy in your viewers.
Other examples include:
- pink for beauty, innocence, and femininity,
- Green for nature, darkness, and corruption
- Purple for fantasies, and the mystical
- Yellow for obsession, sickness, and naivety
- Orange for warmth, friendliness, youth, and happiness
Have you noticed that turning your pictures black and white makes them look timeless? That’s color grading in action.
Color Grading in LightRoom
Are you amazed by the thrilling power of color grading to manipulate viewers’ emotions? Are you wondering how you can achieve that effect seamlessly? Then, you don’t need to worry about it. With Adobe Photoshop Lightroom, you too can make magic.
Since Lightroom is an advanced photo editor, it has a lot to offer in features. Unfortunately, this may also mean that it can be complex to understand, especially if you’re new to photo editing. So, first things first, you must understand the color grading panel in Lightroom to appreciate it better.
Lightroom’s color grading panel is right beneath the HSL panel in the Develop Panel. It serves as a replacement for the Split Toning Panel from earlier versions, so it’s pretty easy to find.
The color grading panel comprises five small icons, three color wheels, and a blending/balance slider:
● The Five Small Icons
Lightroom’s small icons are a 3-way default layout, shadows, mid-tones, highlights, and global. With 3-way, you can manipulate the highlights, shadows, and mid-tones. Mid-tones, highlights, and shadows hide all color wheels, excluding the necessary ones that adjust them.
Meanwhile, Global combines and blends the highlights, mid-tones, and shadow adjustments no matter the luminosity. Global ensures that the color wheels work harmoniously.
When adjusting icons, it’s best to use each color wheel one after another one. You’ll get better and more precise outcomes that way compared to using them together.
● Lightroom’s Color Wheels
You can view Lightroom’s three-color wheels through the 3-way default layout. The color wheels help to enhance distinct image parts by providing various color hues. It also allows you to introduce saturation through an adjustable knob.
Each lightroom’s color wheels feature a luminance slide beneath them that adjusts color brightness. Between the luminance slide and the wheel is a visible eye icon that you can use to turn the effects on or off.
● The Blending and Balance Slider
The blending and balance sliders offer you advanced control over how your colors look after introducing them. With the blending slider, you can control the color distinctiveness between highlights and shadows. In other words, this feature helps to merge colors to produce a much more balanced and beautiful result.
The balance slider adjusts altered mid-tones, highlights, and shadows to balance the effects. By default, the slider is set at 0 in the middle and allows you to move it in opposite directions for distinct effects. For example, you can use this tool to balance shadows with over-concentrated colors.
While the above features are visible to everyone in the 3-way view, there are two more hidden sliders. You may only view them when editing highlights, shadows, mid-tones, or the global color wheels. They’re the hue and saturation sliders that you can only uncover by clicking on the arrow below the eye icon.
There’s no idea why the hue and saturation sliders aren’t visible in the 3-way view. That’s especially when you discover that they do the all-important job of making minor but precise changes to final adjustments. This produces an excellent fine-tuned outcome and gives your image a professional finish.

How To Color Grade Your Picture in LightRoom
If you wish to use the color grading Lightroom tool to enhance photos, here’s a comprehensive guide for you. You’ll learn the best practices to apply when using the specific Lightroom features to produce your desired effects:
● Pick Your Color Scheme
What’s color grading without the right colors? Choosing an appropriate color scheme is one of the essential steps in Lightroom color grading. That’s because it sets the tone for the next steps. If you choose the wrong colors, you won’t get the excellent result you desire no matter how hard you try.
First, take a good look at your picture and its visible colors. Then think of the colors that compliment or contrast with them. For example, you should base images with red highlights around red. You can also try colors close to red in the color wheel, like orange.
Once you’ve found the colors that suit your image, you’re ready for the next steps in your color grading process. However, more than just adding colors, you must also pay attention to contrasting colors during processing. If you find such unwanted colors, use the HSL panel to pale them out.
● Prioritize Precision
In earlier paragraphs, you learned that working with the highlights, shadows, and mid-tones individually is best. That’s because individual adjustments are a painstaking process that guarantees the most accurate results. This makes a lot of difference in the final product compared to when you work with the wheel.
Working on the shadows, highlights, and mid-tones individually also connects to the hue and saturation sliders. So you remember how vital these hidden sliders are? You wouldn’t be able to access them by working on the tools one after another. Take that as your reward for being detail-oriented.
● Increase Saturation Values
Sometimes, the effect of one tool tells on another. For example, leaving your saturation values below may render your hue slider ineffective. To avoid that confusion, it’s best to increase your saturation levels to some values higher than your preferred one.
Yes, it wouldn’t look nice initially as you adjust the hue. However, it will ensure that you get the perfect color for your image. You can always go back to adjust the saturation to your choice values later on.
● Use Color Wheels To Find Color, Use Shadows to Refine
When discussing how to choose your color scheme, you must have understood how vital the color wheel is in finding harmonious hues. However, picking your preferred color isn’t the complete process. You must learn to fine-tune your chosen color by using the hue slider. Do this after adjusting the saturation to your preferred level as in the previous step. The result is always mind-blowing.

● Learn the Short Cuts
There are some shortcuts to learn when color grading in Lightroom to enhance accuracy and convenience. For example, option (Mac)/Alt (Windows) gives you better control over your image’s outcomes. Option/Alt + Up will increase saturation by one while the shift key adjusts it. You can use Command (Mac)/Ctrl (Windows) to adjust the hue. Also, the reset button on the right side of your panel takes you back to your initial image.
● Extra Tips
These best practices will help you to achieve excellent results:
- Don’t color grade without understanding the psychology of colors. Know what colors convey different moods or emotions.
- Be sure to work with high-quality pictures. Color grading isn’t magic; it wouldn’t correct an already lousy image.
- Shooting your pictures in RAW gives you more color control.
Conclusion
● Now that you’ve learned how to color grade using Lightroom, there’s no limit to what you can achieve. You can now explore your creative side with so much fun. However, know that you will likely not get it right the first time. Perfection comes with consistent practice or trial and error.
Every budding photographer knows what Photoshop is Adobe Lightroom (officially Adobe Photoshop Lightroom) is the newer and more advanced version of Photoshop. Compared with other alternatives of Lightroom , Lightroom helps photographers import, modify, manipulate, find, organize, and manage their images as an image editing software. Lightroom combines photo management and photo editing in one.
One of the most amazing things about Lightroom is its autosave or nondestructive feature. Once you edit your photos, Lightroom instantly saves and stores them in your Lightroom catalog. With its inbuilt-presets, Lightroom makes working on your project so much easy and fun.
You can leverage Lightroom’s unique features to perform different types of tasks. However, in this article, you’ll learn color grading in Lightroom and how to make it work.
In this article
03 How To Color Grade Your Picture in LightRoom
What Is Color Grading?
Color grading is one of the essential processes for creating the perfect video and image content. Like with color correction, color grading helps enhance the appearance of your image or video and makes it appealing to viewers. However, unlike color correction, it focuses on creating stylistic or cinematic effects rather than rectifying mistakes in the image.
Color grading enhances an already edited or otherwise perfect image or video. So, in color grading, you are not trying to balance out colors or make your pictures look natural to the human eyes. Color correction does all that. Instead, with color grading, you aim to “paint over” a color-corrected content to evoke specific emotions or moods in the viewers.
Colors carry different emotions or visual tones. So, they’re essential in the post-production process to manipulate viewers into specific moods that tell your story best. In other words, color grading aligns your viewer’s emotions to the central theme in your story.
For example, if your image or video’s theme is passion, power, violence, or danger, red portrays them perfectly. Meanwhile, blue does it when you wish to evoke calmness and melancholy in your viewers.
Other examples include:
- pink for beauty, innocence, and femininity,
- Green for nature, darkness, and corruption
- Purple for fantasies, and the mystical
- Yellow for obsession, sickness, and naivety
- Orange for warmth, friendliness, youth, and happiness
Have you noticed that turning your pictures black and white makes them look timeless? That’s color grading in action.
Color Grading in LightRoom
Are you amazed by the thrilling power of color grading to manipulate viewers’ emotions? Are you wondering how you can achieve that effect seamlessly? Then, you don’t need to worry about it. With Adobe Photoshop Lightroom, you too can make magic.
Since Lightroom is an advanced photo editor, it has a lot to offer in features. Unfortunately, this may also mean that it can be complex to understand, especially if you’re new to photo editing. So, first things first, you must understand the color grading panel in Lightroom to appreciate it better.
Lightroom’s color grading panel is right beneath the HSL panel in the Develop Panel. It serves as a replacement for the Split Toning Panel from earlier versions, so it’s pretty easy to find.
The color grading panel comprises five small icons, three color wheels, and a blending/balance slider:
● The Five Small Icons
Lightroom’s small icons are a 3-way default layout, shadows, mid-tones, highlights, and global. With 3-way, you can manipulate the highlights, shadows, and mid-tones. Mid-tones, highlights, and shadows hide all color wheels, excluding the necessary ones that adjust them.
Meanwhile, Global combines and blends the highlights, mid-tones, and shadow adjustments no matter the luminosity. Global ensures that the color wheels work harmoniously.
When adjusting icons, it’s best to use each color wheel one after another one. You’ll get better and more precise outcomes that way compared to using them together.
● Lightroom’s Color Wheels
You can view Lightroom’s three-color wheels through the 3-way default layout. The color wheels help to enhance distinct image parts by providing various color hues. It also allows you to introduce saturation through an adjustable knob.
Each lightroom’s color wheels feature a luminance slide beneath them that adjusts color brightness. Between the luminance slide and the wheel is a visible eye icon that you can use to turn the effects on or off.
● The Blending and Balance Slider
The blending and balance sliders offer you advanced control over how your colors look after introducing them. With the blending slider, you can control the color distinctiveness between highlights and shadows. In other words, this feature helps to merge colors to produce a much more balanced and beautiful result.
The balance slider adjusts altered mid-tones, highlights, and shadows to balance the effects. By default, the slider is set at 0 in the middle and allows you to move it in opposite directions for distinct effects. For example, you can use this tool to balance shadows with over-concentrated colors.
While the above features are visible to everyone in the 3-way view, there are two more hidden sliders. You may only view them when editing highlights, shadows, mid-tones, or the global color wheels. They’re the hue and saturation sliders that you can only uncover by clicking on the arrow below the eye icon.
There’s no idea why the hue and saturation sliders aren’t visible in the 3-way view. That’s especially when you discover that they do the all-important job of making minor but precise changes to final adjustments. This produces an excellent fine-tuned outcome and gives your image a professional finish.
How To Color Grade Your Picture in LightRoom
If you wish to use the color grading Lightroom tool to enhance photos, here’s a comprehensive guide for you. You’ll learn the best practices to apply when using the specific Lightroom features to produce your desired effects:
● Pick Your Color Scheme
What’s color grading without the right colors? Choosing an appropriate color scheme is one of the essential steps in Lightroom color grading. That’s because it sets the tone for the next steps. If you choose the wrong colors, you won’t get the excellent result you desire no matter how hard you try.
First, take a good look at your picture and its visible colors. Then think of the colors that compliment or contrast with them. For example, you should base images with red highlights around red. You can also try colors close to red in the color wheel, like orange.
Once you’ve found the colors that suit your image, you’re ready for the next steps in your color grading process. However, more than just adding colors, you must also pay attention to contrasting colors during processing. If you find such unwanted colors, use the HSL panel to pale them out.
● Prioritize Precision
In earlier paragraphs, you learned that working with the highlights, shadows, and mid-tones individually is best. That’s because individual adjustments are a painstaking process that guarantees the most accurate results. This makes a lot of difference in the final product compared to when you work with the wheel.
Working on the shadows, highlights, and mid-tones individually also connects to the hue and saturation sliders. So you remember how vital these hidden sliders are? You wouldn’t be able to access them by working on the tools one after another. Take that as your reward for being detail-oriented.
● Increase Saturation Values
Sometimes, the effect of one tool tells on another. For example, leaving your saturation values below may render your hue slider ineffective. To avoid that confusion, it’s best to increase your saturation levels to some values higher than your preferred one.
Yes, it wouldn’t look nice initially as you adjust the hue. However, it will ensure that you get the perfect color for your image. You can always go back to adjust the saturation to your choice values later on.
● Use Color Wheels To Find Color, Use Shadows to Refine
When discussing how to choose your color scheme, you must have understood how vital the color wheel is in finding harmonious hues. However, picking your preferred color isn’t the complete process. You must learn to fine-tune your chosen color by using the hue slider. Do this after adjusting the saturation to your preferred level as in the previous step. The result is always mind-blowing.
● Learn the Short Cuts
There are some shortcuts to learn when color grading in Lightroom to enhance accuracy and convenience. For example, option (Mac)/Alt (Windows) gives you better control over your image’s outcomes. Option/Alt + Up will increase saturation by one while the shift key adjusts it. You can use Command (Mac)/Ctrl (Windows) to adjust the hue. Also, the reset button on the right side of your panel takes you back to your initial image.
● Extra Tips
These best practices will help you to achieve excellent results:
- Don’t color grade without understanding the psychology of colors. Know what colors convey different moods or emotions.
- Be sure to work with high-quality pictures. Color grading isn’t magic; it wouldn’t correct an already lousy image.
- Shooting your pictures in RAW gives you more color control.
Conclusion
● Now that you’ve learned how to color grade using Lightroom, there’s no limit to what you can achieve. You can now explore your creative side with so much fun. However, know that you will likely not get it right the first time. Perfection comes with consistent practice or trial and error.
5 Tips for Faster Editing in Filmora
It’s an indisputable fact that editing is an essential aspect of video creation, and it’s what brings your initial idea to life. However, it can be very daunting and time-consuming, especially when working on a video project containing lots of footage.
In this post, we will walk you through the five best tips that can come in handy to operate fast and smoothly while editing videos of any size. All you just need is the Filmora video editor. You don’t even require technical knowledge.
1. Organize your Media
Since a video project usually has various elements, keeping track of them can take a lot of work. So, the first editing step should be to organize the files so that it is easy to follow them. To do that, you need to do the following;
Create a Folder for Each Media File in your Project
Creating folders involves sorting your video files into various categories, thus making it easy for you to look into specific files and find the missing ones quickly when you need them. For example, you can create a folder for A roll, B roll, Photos, Audio, Sound FX, Music, and Drone Footage. Follow the steps below to see how you can use Filmora to create a folder for each file in your video project;
Step1 Launch Filmora and click Create Project.

Step2 Navigate to the bottom left corner before the Timeline > click the Folder icon from there, as shown in the image below;

Step3 Click on the folder icon until you reach the total number of folders you need to categorize your video files.
Right-click on each folder and name it accordingly.

After you name each folder, use the Import button to upload each video files you need to edit your video.

![]()
Note: since the media files you import into your project get the name associated with the code given by the source, it becomes hard to capture a specific file while editing. You need to rename each of the elements you imported for easier access.
Step4 Rename all imported files. To rename your imported files, right-click on them to add a preferred name. Then, click Rename from the pop-up list to name the files.

2. The Use of Proxies
Another tip that enhances a quick editing process is the use of proxies. Proxies can be described as low-resolution versions of your video files. So, if you’re working on video files that drag back playback speed, like 4K footage, you can create a proxy to enable your PC to handle the file seamlessly.
A tool like Filmora editor can help create proxies of your video file flawlessly. You just have to follow the steps below;
Step1 Locate the large video file you imported to Filmora and right-click it. Then, select Create Proxy File.

Step2 You should see the proxy icon at the bottom right corner of your video once it completes. This takes only a few minutes.

Step3 Drag-n-drop the video to the timeline and perform the necessary editing. Afterward, use the Export button to save the file to your PC.

3. Keep Your Videos and Audio Tracks Organized
This is similar to our first tip, and fortunately, the Filmora video editor facilitates this kind of operation quickly and easily. It involves organizing video and audio clips in the timeline while editing. For instance, use video track #1 for graphics or text, #2 for your B roll, and #1 for the main footage taken.
You will also do the same for Audio, for instance, Audio track #1 for music, Audio track #2 for dialogues, and many more. This will allow you to edit various clips simultaneously, making the editing process faster and easier. Here are the steps to use this tip;
Step1 Click on the Add icon at the left side of the Timeline and select Add Video Track or Add Audio Track to add more timelines for your clips.

Step2 Drag-n-drop the video clips and audio clips to the relevant timeline.

4. Keyboard Shortcuts
These are commands on the keyboard of your pc that will enable you to edit your projects easily and quickly. Various options can be available by keying in specific orders rather than going through a long process using the mouse. This knowledge can be a real time-saver when handling projects. To get more enlightened on the setup in Filmora, follow the steps outlined below;
Step1 Open Filmora and click File from the top side.
Step2 Select Keyboard Shortcuts from the drop-down list.

Step3 The new pop-up window on your PC screen will display all shortcuts you can employ while using Filmora, and the interesting part is that you can customize the shortcut keys to your preference. Moreover, you can freely switch keyboard shortcuts between Filmora, Adobe Premiere Pro, and Final Cut Pro.

Step4 For clicking CTRL+ALT+N will allow you to create a new folder for your file.
5. Edit in Stages
Our final tip is to edit in stages. Yes, it is necessary to edit in stages when dealing with editing work. This helps to limit the time you spend on a project. In the beginning, you should do a rough cut. You can begin by editing the A roll at first and then move on to edit the B roll, moving on to the Sound FX, Music, Graphics, and Color Correction, and then reviewing the entire project before exporting it.
In case while editing the A roll, you find something that requires a quick fix in its audio, focus on it and, if possible, use a marker icon to describe it. This will help you not get confused once you get to the Audio stage. See the steps to use Filmora to do this below;
Step1 Firstly, focus on your video footage. Move them to the required timeline.

Step2 Next, move your B-roll to the relevant timeline. Then, apply the required editing.
Step3 Afterward, move drag-n-drop the audio clips to the timeline and apply the needed edits.

Repeat the process for different operations in stages until you finish.
Conclusion
The editing process is about having a free mind where creativity is the primary focus. When you can do that, you will be able to complete your projects in a short time and work on various tasks simultaneously. The tips discussed in this article will go a long way in helping you handle your projects using Filmora.
You can use Filmora to edit videos and other media files downloaded from YouTube, Vimeo, and many more video-sharing sites. Follow these tips and make editing your video projects quite easy and fast.
Free Download For Win 7 or later(64-bit)
Free Download For macOS 10.14 or later
Step4 Rename all imported files. To rename your imported files, right-click on them to add a preferred name. Then, click Rename from the pop-up list to name the files.
2. The Use of Proxies
Another tip that enhances a quick editing process is the use of proxies. Proxies can be described as low-resolution versions of your video files. So, if you’re working on video files that drag back playback speed, like 4K footage, you can create a proxy to enable your PC to handle the file seamlessly.
A tool like Filmora editor can help create proxies of your video file flawlessly. You just have to follow the steps below;
Step1 Locate the large video file you imported to Filmora and right-click it. Then, select Create Proxy File.
Step2 You should see the proxy icon at the bottom right corner of your video once it completes. This takes only a few minutes.
Step3 Drag-n-drop the video to the timeline and perform the necessary editing. Afterward, use the Export button to save the file to your PC.
3. Keep Your Videos and Audio Tracks Organized
This is similar to our first tip, and fortunately, the Filmora video editor facilitates this kind of operation quickly and easily. It involves organizing video and audio clips in the timeline while editing. For instance, use video track #1 for graphics or text, #2 for your B roll, and #1 for the main footage taken.
You will also do the same for Audio, for instance, Audio track #1 for music, Audio track #2 for dialogues, and many more. This will allow you to edit various clips simultaneously, making the editing process faster and easier. Here are the steps to use this tip;
Step1 Click on the Add icon at the left side of the Timeline and select Add Video Track or Add Audio Track to add more timelines for your clips.
Step2 Drag-n-drop the video clips and audio clips to the relevant timeline.
4. Keyboard Shortcuts
These are commands on the keyboard of your pc that will enable you to edit your projects easily and quickly. Various options can be available by keying in specific orders rather than going through a long process using the mouse. This knowledge can be a real time-saver when handling projects. To get more enlightened on the setup in Filmora, follow the steps outlined below;
Step1 Open Filmora and click File from the top side.
Step2 Select Keyboard Shortcuts from the drop-down list.
Step3 The new pop-up window on your PC screen will display all shortcuts you can employ while using Filmora, and the interesting part is that you can customize the shortcut keys to your preference. Moreover, you can freely switch keyboard shortcuts between Filmora, Adobe Premiere Pro, and Final Cut Pro.
Step4 For clicking CTRL+ALT+N will allow you to create a new folder for your file.
5. Edit in Stages
Our final tip is to edit in stages. Yes, it is necessary to edit in stages when dealing with editing work. This helps to limit the time you spend on a project. In the beginning, you should do a rough cut. You can begin by editing the A roll at first and then move on to edit the B roll, moving on to the Sound FX, Music, Graphics, and Color Correction, and then reviewing the entire project before exporting it.
In case while editing the A roll, you find something that requires a quick fix in its audio, focus on it and, if possible, use a marker icon to describe it. This will help you not get confused once you get to the Audio stage. See the steps to use Filmora to do this below;
Step1 Firstly, focus on your video footage. Move them to the required timeline.
Step2 Next, move your B-roll to the relevant timeline. Then, apply the required editing.
Step3 Afterward, move drag-n-drop the audio clips to the timeline and apply the needed edits.
Repeat the process for different operations in stages until you finish.
Conclusion
The editing process is about having a free mind where creativity is the primary focus. When you can do that, you will be able to complete your projects in a short time and work on various tasks simultaneously. The tips discussed in this article will go a long way in helping you handle your projects using Filmora.
You can use Filmora to edit videos and other media files downloaded from YouTube, Vimeo, and many more video-sharing sites. Follow these tips and make editing your video projects quite easy and fast.
Free Download For Win 7 or later(64-bit)
Free Download For macOS 10.14 or later
How D AI Video Games Act More Human Than Human?
How Did AI Video Games Act More Human Than Human?
An easy yet powerful editor
Numerous effects to choose from
Detailed tutorials provided by the official channel
The gaming world is ever-changing, with developers looking to create innovative ways to immerse players into their digital worlds. One such technology that has begun to sweep is AI in the game industry.
AI is a powerful tool in many ways to improve the gaming experience. It can make artificial intelligence in computer games more believable and add replayability and immersion to games, and we can expect to see even more impressive applications in the future.
In this article
01 [What Is AI in Gaming?](#Part 1)
02 [Why Does AI in Gaming Matter?](#Part 2)
03 [How AI Will Completely Change Video Games](#Part 3)
04 [8 Games with Incredible Artificial Intelligence](#Part 4)
05 [What AI Video Games Assets Do Filmora Have?](#Part 5)
Part 1 What Is AI in Gaming?
In simple terms, AI is a set of algorithms that allow a computer to learn and improve from experience. Although you can apply it in many ways, artificial intelligence in video games is usually helpful to create more intelligent and more believable non-player characters (NPCs).
For example, an AI system might be helpful to determine how an NPC reacts to the player’s actions. If the player tries to steal from an NPC, the AI might make the NPC angry and more likely to attack the player. Alternatively, if the player is friendly to an NPC, the AI game playing might make the NPC more likely to help the player in future interactions.
Part 2 Why Does AI in Gaming Matter?
One of the most vital aspects of AI in video games is that it can make games more believable and immersive for players. When games can convincingly simulate human-like behavior, it can be a much more enjoyable experience for gamers. AI can make NPCs seem more lifelike and make the game world feel more believable.
AI is also becoming increasingly important for creating procedural content. This is where the game generates content on its own, rather than relying on pre-made assets. For example, a game might use procedural generation to create random dungeons or quests that the player can explore. This can add a lot of replayability to a game, as the player never knows what they will encounter next.
Part 3 How AI Will Completely Change Video Games
It is not a secret that AI is changing the world as we know it. With its ability to enable computers to learn and improve from experience, AI is paving the way for a future where machines can handle more complex tasks. And nowhere is this more apparent than in the world of video gaming.
In the past, developers brought in AI primarily for simple things like making certain NPCs (non-player characters) move and act realistically. But now, artificial intelligence in video games is being used for much more complex tasks like generating procedural content and creating believable human-like behavior. This results in a new generation of AI game playing that are more immersive and playable.
Part 4 Games with Incredible Artificial Intelligence
Now, we will look into eight video games that signify why we need the best ai in video games.
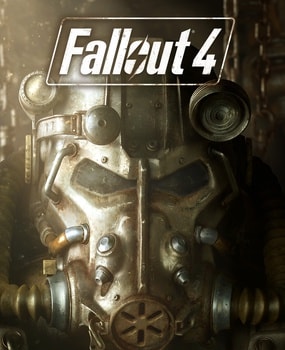
01Fallout 4
One of the most attractive examples of AI in video gaming is Fallout 4. This post-apocalyptic RPG features some of the most believable NPCs ever seen in a game. Each character is fully voiced, and they all have their unique personalities and backstories. The AI generates procedural content, meaning that the game world is always different each time you play.
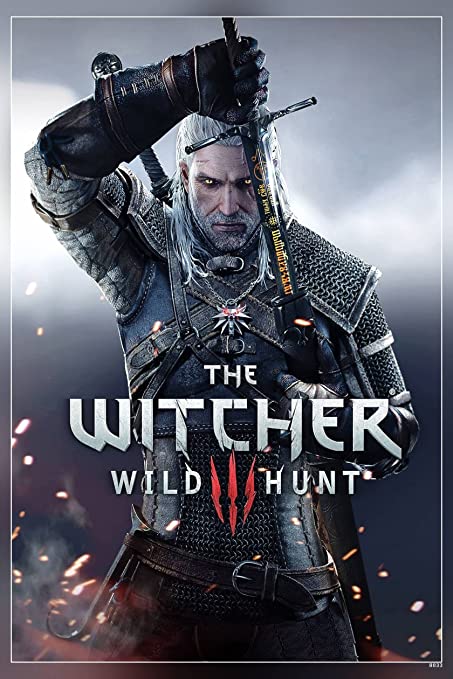
02The Witcher 3: Wild Hunt
The Witcher 3: Wild Hunt is one more great example of an AI video game. This open-world RPG features a vast array of believable NPCs, each with unique personality traits and motivations. The AI is also used to generate procedural content, resulting in a different game world every time you play.
03Grand Theft Auto V
Grand Theft Auto V is yet another example of AI being used to create believable human-like behavior. The NPCs in this play are some of the most lifelike and realistic ever seen. They react to the player’s actions in believable ways, and the AI is used to generate procedural content, resulting in a game world that is always different.

04Minecraft
Minecraft is a game that heavily uses procedural generation to create its content. The terrain and structures in the game are all generated on the fly by the AI, resulting in a different game world every time you play. What’s more, AI is also used to generate the behaviors of mobs (hostile creatures), making them more believable and lifelike.

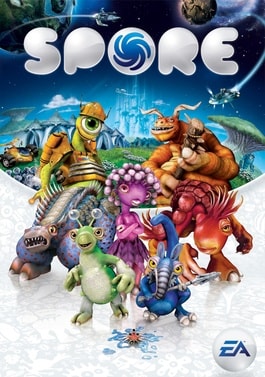
05Spore
Spore is an AI game play that is all about procedural generation. Every creature in the game is generated by AI, meaning that there are many possible creature designs. What’s more, AI is used to create creatures’ behaviors, making them more believable and lifelike.
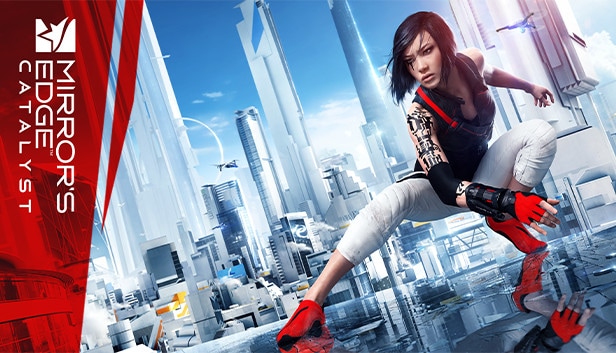
06Mirror’s Edge Catalyst
Mirror’s Edge Catalyst is a game that heavily uses AI to create its content. The levels in the game are all procedurally generated, meaning that they are different every time you play. This is made possible by the game’s AI, which produces the level layouts and obstacles on the fly.
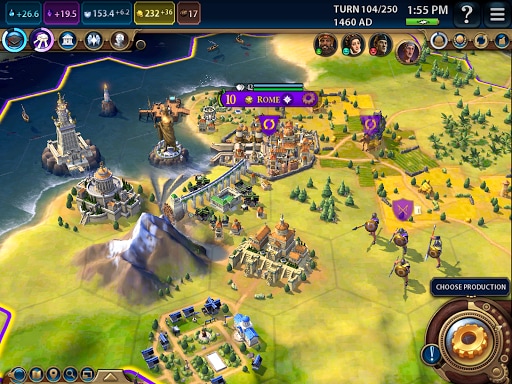
07Civilization VI
One of the most incredible examples of AI in video gaming is Civilization VI. This turn-based strategy game features some of the most believable NPCs ever seen in a game. Each character has its voice fully, and they all have unique personalities and backstories.
08Elite Dangerous
Elite Dangerous is a space simulation game that uses advanced AI to create believable and realistic human-like behavior. The NPCs in the game are some of the most lifelike and realistic ever seen. They react to the player’s actions in believable ways, and the AI is used to generate procedural content, resulting in a game world that is always different.

Part 5 What AI Video Games Assets Do Wondershare Filmora Video Editor Have?
With the increased use of AI in video games, most gamers have found gaming more enjoyable. However, an outstanding video editor has some assets that can significantly make AI video games better and more human. This video editor is one of the most sorted for and is called Filmora. Filmora is a great video editing software for creating stunning videos. It’s effortless to use and has various features to create professional-looking videos. It’s perfect for making videos for social media, YouTube, and other online platforms.
Its many features have a touch of artificial intelligence, making this program stand out from the other video editors and valuable for editing during ai video games creation.
Screen Recording
The Filmora screen recorder allows the user to concurrently record the screen and camera and the system and microphone audio. You can quickly record games, tutorials, YouTube videos, and other videos and then export them to YouTube, Vimeo, and other devices.
AI Portrait
The AI portrait function in Filmora video editor allows you to locate the human in your movie effortlessly and erase the background with a simple drag and click. There are also several portrait effects and AR stickers to add to your video editing enjoyment.
For Win 7 or later (64-bit)
For macOS 10.12 or later
Video Effects
Filmora customers can choose from various effects to utilize in their video editing software. It’s simple to create whatever effect you want with over 900 free effects, including drag-and-drop transitions, titles, filters, and motion components.
Do visit Wondershare Filmora exclusive website to know more about its latest upgrade and new features launch.
● Ending Thoughts →
● Thus, that was about what an ai video game is and why the characters act more like humans.
● So, as a video game lover, you can now explore the best of ai playing video games to have a personal experience of this new video gaming trend. Also, do try the Filmora software to see how you can change the looks and feel of your video game creation.
The gaming world is ever-changing, with developers looking to create innovative ways to immerse players into their digital worlds. One such technology that has begun to sweep is AI in the game industry.
AI is a powerful tool in many ways to improve the gaming experience. It can make artificial intelligence in computer games more believable and add replayability and immersion to games, and we can expect to see even more impressive applications in the future.
In this article
01 [What Is AI in Gaming?](#Part 1)
02 [Why Does AI in Gaming Matter?](#Part 2)
03 [How AI Will Completely Change Video Games](#Part 3)
04 [8 Games with Incredible Artificial Intelligence](#Part 4)
05 [What AI Video Games Assets Do Filmora Have?](#Part 5)
Part 1 What Is AI in Gaming?
In simple terms, AI is a set of algorithms that allow a computer to learn and improve from experience. Although you can apply it in many ways, artificial intelligence in video games is usually helpful to create more intelligent and more believable non-player characters (NPCs).
For example, an AI system might be helpful to determine how an NPC reacts to the player’s actions. If the player tries to steal from an NPC, the AI might make the NPC angry and more likely to attack the player. Alternatively, if the player is friendly to an NPC, the AI game playing might make the NPC more likely to help the player in future interactions.
Part 2 Why Does AI in Gaming Matter?
One of the most vital aspects of AI in video games is that it can make games more believable and immersive for players. When games can convincingly simulate human-like behavior, it can be a much more enjoyable experience for gamers. AI can make NPCs seem more lifelike and make the game world feel more believable.
AI is also becoming increasingly important for creating procedural content. This is where the game generates content on its own, rather than relying on pre-made assets. For example, a game might use procedural generation to create random dungeons or quests that the player can explore. This can add a lot of replayability to a game, as the player never knows what they will encounter next.
Part 3 How AI Will Completely Change Video Games
It is not a secret that AI is changing the world as we know it. With its ability to enable computers to learn and improve from experience, AI is paving the way for a future where machines can handle more complex tasks. And nowhere is this more apparent than in the world of video gaming.
In the past, developers brought in AI primarily for simple things like making certain NPCs (non-player characters) move and act realistically. But now, artificial intelligence in video games is being used for much more complex tasks like generating procedural content and creating believable human-like behavior. This results in a new generation of AI game playing that are more immersive and playable.
Part 4 Games with Incredible Artificial Intelligence
Now, we will look into eight video games that signify why we need the best ai in video games.
01Fallout 4
One of the most attractive examples of AI in video gaming is Fallout 4. This post-apocalyptic RPG features some of the most believable NPCs ever seen in a game. Each character is fully voiced, and they all have their unique personalities and backstories. The AI generates procedural content, meaning that the game world is always different each time you play.
02The Witcher 3: Wild Hunt
The Witcher 3: Wild Hunt is one more great example of an AI video game. This open-world RPG features a vast array of believable NPCs, each with unique personality traits and motivations. The AI is also used to generate procedural content, resulting in a different game world every time you play.
03Grand Theft Auto V
Grand Theft Auto V is yet another example of AI being used to create believable human-like behavior. The NPCs in this play are some of the most lifelike and realistic ever seen. They react to the player’s actions in believable ways, and the AI is used to generate procedural content, resulting in a game world that is always different.
04Minecraft
Minecraft is a game that heavily uses procedural generation to create its content. The terrain and structures in the game are all generated on the fly by the AI, resulting in a different game world every time you play. What’s more, AI is also used to generate the behaviors of mobs (hostile creatures), making them more believable and lifelike.
05Spore
Spore is an AI game play that is all about procedural generation. Every creature in the game is generated by AI, meaning that there are many possible creature designs. What’s more, AI is used to create creatures’ behaviors, making them more believable and lifelike.
06Mirror’s Edge Catalyst
Mirror’s Edge Catalyst is a game that heavily uses AI to create its content. The levels in the game are all procedurally generated, meaning that they are different every time you play. This is made possible by the game’s AI, which produces the level layouts and obstacles on the fly.
07Civilization VI
One of the most incredible examples of AI in video gaming is Civilization VI. This turn-based strategy game features some of the most believable NPCs ever seen in a game. Each character has its voice fully, and they all have unique personalities and backstories.
08Elite Dangerous
Elite Dangerous is a space simulation game that uses advanced AI to create believable and realistic human-like behavior. The NPCs in the game are some of the most lifelike and realistic ever seen. They react to the player’s actions in believable ways, and the AI is used to generate procedural content, resulting in a game world that is always different.
Part 5 What AI Video Games Assets Do Wondershare Filmora Video Editor Have?
With the increased use of AI in video games, most gamers have found gaming more enjoyable. However, an outstanding video editor has some assets that can significantly make AI video games better and more human. This video editor is one of the most sorted for and is called Filmora. Filmora is a great video editing software for creating stunning videos. It’s effortless to use and has various features to create professional-looking videos. It’s perfect for making videos for social media, YouTube, and other online platforms.
Its many features have a touch of artificial intelligence, making this program stand out from the other video editors and valuable for editing during ai video games creation.
Screen Recording
The Filmora screen recorder allows the user to concurrently record the screen and camera and the system and microphone audio. You can quickly record games, tutorials, YouTube videos, and other videos and then export them to YouTube, Vimeo, and other devices.
AI Portrait
The AI portrait function in Filmora video editor allows you to locate the human in your movie effortlessly and erase the background with a simple drag and click. There are also several portrait effects and AR stickers to add to your video editing enjoyment.
For Win 7 or later (64-bit)
For macOS 10.12 or later
Video Effects
Filmora customers can choose from various effects to utilize in their video editing software. It’s simple to create whatever effect you want with over 900 free effects, including drag-and-drop transitions, titles, filters, and motion components.
Do visit Wondershare Filmora exclusive website to know more about its latest upgrade and new features launch.
● Ending Thoughts →
● Thus, that was about what an ai video game is and why the characters act more like humans.
● So, as a video game lover, you can now explore the best of ai playing video games to have a personal experience of this new video gaming trend. Also, do try the Filmora software to see how you can change the looks and feel of your video game creation.
Also read:
- How to Polish Your Music Video Edits Using Filmora
- New In 2024, How to Create LUTs with LUTs Generator
- 2024 Approved How To Add Motion Blur On CapCut? (IPhone & Android)
- Looking for the Different Ar Video Effects to Include in Your Film? Check Out This Article for the Best 10 Augmented Reality Effects and the Fun Ar Effects in Filmora
- Updated In 2024, How to Zoom Picture in Picture Easy Solution
- New 2024 Approved How to Loop Videos on Android Phones
- In 2024, In This Article, You Will Learn How to Record Creative Cinematic Videos Using a Smartphone and Edit the Video with Wondershare Filmora
- New Free LUTs for OBS How to Use Them?
- New 2024 Approved Ultimate Guidelines to Help You Use VLC Media Player Better
- Updated In 2024, Any Video May Be Enhanced Using Adobe Premiere Transitions. If You Are Looking to Learn How to Add Fade to Black in Premiere Pro? Then, Check Out This Fade to Black Transition Premiere Pro Guide to Learn the Trick
- Updated In 2024, Want to Capture Captivating, Detailed Videos? If Yes, Then You Need to Learn the Recording of Super Slow Motion Videos. In This Article, I Will Show You How to Record a Super Slow-Motion Video on Your Android and iPhone
- Updated Do You Wish to Make Your Discord PFP an Attention-Seeker? If Yes, Try the Animated Discord PFP. Lets Go over Essential Facts on the Topic, Including How to Get an Animated Discord PFP for 2024
- Updated Are You Eager to Discover the Method of Video Scaling in Filmora? You Are in the Right Place because This Discussion Will Cover the Content on This Matter
- In 2024, Ultimate Guide on How to Film Better in Public
- Updated Wondering How to Edit a Video to Slow Motion on iPhone and Android Devices? Find Out How to Use Wondershare Filmora to Create and Edit Slo Mo Videos in a Few Clicks for 2024
- In 2024, Explore a Variety of Inexpensive Camera Models Suitable for Making Slow-Motion Footage without Compromising Quality
- How to Easily Convert SRT to VTT
- Updated 10 Mind-Blowing Video Collage Maker for PC for 2024
- In 2024, How to Uue Adobe Lightroom Color Grading
- Are You Finding It Difficult to Freeze-Frame in After Effects? Note that Freeze-Frame Takes only a Few Seconds, and, in This Tutorial, We Will Guide You on How to Create and Add Frame Hold in After Effects
- Updated The Ultimate Guide to Use LUTS to Color Grade on iPhone
- New In 2024, Best Android Apps For Creating Slow Motion Videos
- New The Best Cinematic LUTs in The Market for 2024
- Are You in a Funny Chat with a Friend and Want to Send a GIF but Couldnt Find One? Here We Will Provide You with the Top Image for GIF Converters. So, Let Us See How to Turn Images Into GIFs Very Quickly for 2024
- Updated Detailed Steps to Rotate Videos Using Kdenlive for 2024
- Are You a Gaming YouTuber or Content Creator Whose Main Game Is COD Warzone? How Kickass Are Your Warzone Thumbnails? Heres a Guide on How to Make One for Free
- New In 2024, Now, You Can Also Apply the Stranger Things Upside Down Effect to Your Video! This Effect Combines Camera Tricks and Video Editing Within Filmora to Transition From the Normal World Into the Upside Down
- Updated In 2024, How to Vlog? A Beginners Guide to Start Vlogging
- Updated Step-by-Step Guide to Speed Up and Slow Down a Video
- Are You Convincingly Fascinated by the Whole Idea of Augmented Reality and Want to Level up Your Marketing Skills with an AR Integration? Rest Assured, Youve Found the Right Place
- New Easiest Fix Included! Top 5 Ways to Convert HDR to SDR Videos
- Updated The Ultimate Guide to Slideshow Maker with Music for 2024
- New 2024 Approved Create Amazing Slow-Motion Videos 8 Affordable Slow-Motion Cameras
- In 2024, Best Free Video Editing Software to Boost Your Content Creation
- New 2024 Approved Best Video Editors to Add Text to a Video
- In 2024, Top 5 Tracking Apps to Track Samsung Galaxy S23+ without Them Knowing | Dr.fone
- Recover lost data from Poco C65
- How To Check if Your Lenovo ThinkPhone Is Unlocked
- Easy Steps on How To Create a New Apple ID Account On iPhone 12 mini | Dr.fone
- How to Fix Apple iPhone 8 Find My Friends No Location Found? | Dr.fone
- How to Repair Broken video files of Vivo Y100 5G on Mac?
- Three Solutions to Hard Reset Google Pixel 7a? | Dr.fone
- Still Using Pattern Locks with Xiaomi Mix Fold 3? Tips, Tricks and Helpful Advice
- Detailed guide of ispoofer for pogo installation On Apple iPhone 15 Pro | Dr.fone
- How to Reset Gmail Password on Infinix Smart 8 HD Devices
- How to Restore Deleted Reno 8T 5G Photos An Easy Method Explained.
- How to Cast Samsung Galaxy M14 4G Screen to PC Using WiFi | Dr.fone
- In 2024, How to Unlock iPhone 6 When We Dont Have Apple ID or Password?
- In 2024, Hassle-Free Ways to Remove FRP Lock on Vivo T2 5G Phones with/without a PC
- In 2024, What Is an AI Presentation Maker?
- What are Location Permissions Life360 On Realme Narzo 60 5G? | Dr.fone
- In 2024, A Comprehensive Guide to Apple iPhone 8 Blacklist Removal Tips and Tools | Dr.fone
- In 2024, Is GSM Flasher ADB Legit? Full Review To Bypass Your Tecno Camon 20 Premier 5GFRP Lock
- In 2024, The Ultimate Guide How to Bypass Swipe Screen to Unlock on Itel A60 Device
- In 2024, Full Guide to Fix iToolab AnyGO Not Working On Itel P40+ | Dr.fone
- Talkshoplive Reviews & Pro Tips Is This the Live Commerce Tool You Need, In 2024
- How To Recover Lost Data from Apple iPhone 12 Pro? | Dr.fone
- The Most Useful Tips for Pokemon Go Ultra League On Samsung Galaxy S23 Ultra | Dr.fone
- Fix Poco F5 Pro 5G Android System Webview Crash 2024 Issue | Dr.fone
- How To Fake GPS On Oppo A1x 5G For Mobile Legends? | Dr.fone
- How to Mirror Lava Yuva 2 Pro to Mac? | Dr.fone
- Authentication Error Occurred on Realme 11 Pro+? Here Are 10 Proven Fixes | Dr.fone
- Apply These Techniques to Improve How to Detect Fake GPS Location On Asus ROG Phone 8 | Dr.fone
- Unlock Your Xiaomi Redmi Note 13 Pro+ 5G Phone with Ease The 3 Best Lock Screen Removal Tools
- 3uTools Virtual Location Not Working On Samsung Galaxy A14 4G? Fix Now | Dr.fone
- Why Your WhatsApp Location is Not Updating and How to Fix On Nokia C02 | Dr.fone
- Easy Guide to Vivo Y100 FRP Bypass With Best Methods
- Remove Google FRP Lock on Infinix Note 30
- New In 2024, How to Make a Video a Live Photo 2023
- 5 Quick Methods to Bypass OnePlus FRP
- Title: Updated How to Concatenate Videos Using FFmpeg
- Author: Morgan
- Created at : 2024-05-19 05:12:01
- Updated at : 2024-05-20 05:12:01
- Link: https://ai-video-editing.techidaily.com/updated-how-to-concatenate-videos-using-ffmpeg/
- License: This work is licensed under CC BY-NC-SA 4.0.
