:max_bytes(150000):strip_icc():format(webp)/ps6-concept-trailer-64aac5b7323041ad93d7535eccf7df40.png)
Updated How to Create a Custom Sequence Preset in Premiere Pro

How to Create a Custom Sequence Preset in Premiere Pro
You’ve probably heard of Adobe Premiere Pro – it’s a top-tier video editing software that’s widely recognized in the market. But have you delved into the nitty-gritty of sequence presets? A custom sequence preset is your best friend for maintaining consistency across projects.
It allows users to save specific settings for sequence attributes like frame rate, resolution, and audio settings. Instead of reconfiguring these settings for each new project, a custom sequence preset lets you jump right into editing. Now, how do you create one? Keep reading!
Part 1: How to Create a Custom Sequence in Premiere Pro
Creating a custom sequence is like tailoring a shirt to fit you perfectly. Here’s a step-by-step guide to help you do just that:
Step 1: Displays the New Sequence Window
Begin by launching Adobe Premiere Pro. Once opened, navigate to the top menu and select File > New > Sequence. This will open up the New Sequence window, where all the magic happens!
Step 2: Change the Editing Mode to Custom in the Settings Panel
You’ll see several tabs in the New Sequence window, but we will focus on the “Settings” tab for our purposes. Click on it.
Here, you’ll find the ‘Editing Mode’ dropdown menu. By default, it’s set to a specific format like ‘DSLR’ or ‘AVCHD.’ Change this to ‘Custom.’ This will unlock a plethora of options for you to play with.
Deep Dive into Settings:
- Frame Size: Define your video’s width and height. Remember, 1920x1080 is Full HD, and 3840x2160 is 4K. Choose based on your project needs.
- Frame Rate: 24fps is the cinematic standard, but if you’re creating content for TV or web, 30fps or 60fps might be more suitable.
- Pixel Aspect Ratio: Stick with ‘Square Pixels’ unless you have a specific reason to do otherwise.
- Fields: Choose ‘No Fields’ for progressive footage. If you’re unsure, this is a safe bet.
- Audio Settings: Here, you can configure the sample rate, among other things. 48000Hz is standard for video.
Step 3: Give the New Preset a Name and Save It
Once you’ve customized the settings to your satisfaction, it’s time to save this configuration for future use. At the bottom of the New Sequence window, you’ll see a ‘Save Preset’ button. Click on it.
A pop-up window will show up, requesting you to provide a name for your new preset. Choose something descriptive so you can easily recognize it later. Once named, click ‘OK’.
Your custom sequence preset is now saved and will appear under the ‘Custom’ folder in the ‘Sequence Presets’ tab.
Part 2: Why Custom Sequence Presets are Essential for Efficient Editing
As you delve deeper into video editing, you’ll begin to appreciate the little things that shave off minutes from your workflow, allowing you to dedicate more time to the creative process. This is precisely where the utility of custom sequence presets in Premiere Pro comes into play. But why are these presets so crucial?
- Consistency Across Projects: If you’re managing multiple projects or a series of videos, having a standard format ensures that all your content has a uniform look and feel. Consistency is a hallmark of professional-grade content. It’s not just about the visuals – maintaining a uniform audio quality and format is equally significant. With a preset, you no longer need to remember the minutiae of each setting, ensuring consistency effortlessly.
- Speed Up Your Workflow: Every minute you spend adjusting the sequence settings is a minute less you have for cutting, color correcting, audio mixing, or adding those special effects that make your videos pop. Over time, those minutes can add up to hours. By using a custom sequence preset, you can jump straight into the creative part of editing without the preliminary setup.
- Avoid Common Mistakes: Have you ever rendered an entire project only to find that the frame rate was off or the audio was set to the wrong sample rate? These kinds of errors can occur when setting up a new sequence from scratch each time. By relying on a preset, you mitigate the risks of such oversights.
- Personalized Templates for Different Platforms: Different platforms may have varying preferred settings. For instance, the ideal video format for YouTube might differ from that of Instagram or TikTok. Instead of Googling these settings each time, you can have a custom sequence preset ready for each platform, ensuring your content is optimized wherever it’s destined.
- Ease of Collaboration: If you’re working as part of a team, having standard sequence presets ensures everyone is on the same page. This is particularly handy when multiple editors are working on different segments of the same project. With custom presets, you’re not just aligning sequences but also visions.
Incorporating this practice into your editing routine might initially seem trivial, but its benefits compound with time.
Part 3: Summary
Creating a custom sequence preset in Adobe Premiere Pro isn’t just about streamlining your workflow – it’s about ensuring consistency across your projects.
By saving your most-used settings, you’re creating a base template that can be pulled up any time, granting you more time for the creative process.
Adobe Premiere Pro’s interface is designed to make tasks like these intuitive, so even if you’re a beginner, with a bit of practice, you’ll be creating custom sequence presets like a pro.
Best Video Editing Courses Online with Certificate
The best way to learn video editing is from people who are experts in the field. Plus, getting a certification is a nice bonus that can more easily land you a great job when you’re done. With that said, we’re offering a comprehensive list of the best video editing courses with certification — ones you’ll be glad to complete.
Read below to find out all about these courses. What they teach, who they are from, and how they will benefit you.
List of the Best Online Video Editing Courses With Certification
You’re about to see a list of video editing courses categorized into four groups. Each caters to specific needs that will help you make a better decision.
Courses With Certification for Popular Video Editor Platforms
| Course Name | Vendor |
|---|---|
| Premiere Pro CC for Beginners: Video Editing in Premiere | Udemy |
| Video Editing in DaVinci Resolve 18/17 | Udemy |
| DaVinci Resolve Fundamentals | LinkedIn Learning |
| PowerDirector 15 – Video Editing for PC Users | Udemy |
| Mastering Final Cut Pro | Coursera |
| Learning Final Cut Pro X – Video Editing Mastery | Udemy |
Video Editing Tutorials - Mastering The Basics
| Course Name | Vendor |
|---|---|
| Video Production Essentials | Fiverr Learn |
| Free Video Editing Courses and Tutorials | Udemy |
| Introduction to Video Editing | |
| Video editing fundamentals | |
| Online Video Editing Classes | Skillshare |
| The Complete Video Production Bootcamp | Udemy |
Video Editing Courses With Certification For Mobile Users
| Course Name | Vendor |
|---|---|
| Smartphone Video For Beginners – iPhone Video Editing Course | Udemy |
Cinematic Level Video Editing Courses
| Course Name | Vendor |
|---|---|
| VIDEO EDITING. Techniques loved by pro broadcast filmmakers | Udemy |
| The History of Film and Video Editing |
What You Will Learn From Each Course
Each video editing course online with certification offers something unique. Below, you can see a detailed comparison between all of them. As a result, you’ll know exactly which course to choose and which video editing tool to start with.
1. Courses With Certification for Popular Video Editor Platforms
First, let’s break down all the courses in this group. You’ll learn about its ratings, duration, contents, and more.
Premiere Pro CC for Beginners: Video Editing in Premiere

Initially, this course dives into the basics of video editing. Then, you get into more advanced topics that will help you distinguish yourself from the complete beginners.
- Vendor: Udemy
- Cost: $19.99
- Duration: 24.5 hours
- Rating: 4.7 / 5
- Level: Beginner-Advanced
Key topics inside this course:
- How to export your videos for High-Definition Playback and 4K
- Video color correction
- How to apply visual effects
- Design clean and modern titles for any video
- The editing process of a video from beginning to end
- Load the perfect settings at the start of each project
- Color grading
- Edit green screen footage
- How to add motion to titles, photos, and videos
At the end of the course, you’ll have the skills necessary to edit an entire video from start to finish. Additionally, you’ll know your way around Adobe Premiere Pro. Most of the topics taught inside will be enough to help you land a video editing job or edit your videos professionally.
Video Editing in DaVinci Resolve 18/17

With this video editing course, you will master editing in DaVinci Resolve. It includes beginner lessons, as well as a few advanced editing techniques. Over 30.000 students have currently completed it.
- Vendor: Udemy
- Cost: $84.99
- Duration: 11.5 hours
- Rating: 4.6 / 5
- Level: Beginner-Advanced
Key topics inside this course:
- How to add effects to videos in DaVinci Resolve
- Color Grading with multiple tools
- Master different types of Nodes
- Complete tests doing various projects
- Cut page quick and easy video editing
- Adding motion graphics
- Effective color-correcting methods
- Using Color Wheels, Power windows, Scopes, Curves, Qualifiers, and more
This course aims to teach you how to use DaVinci Resolve. After you’ve mastered the platform, the mentor shows you various tips and tricks to edit videos more professionally using this tool.
PowerDirector 15 - Video Editing for PC Users
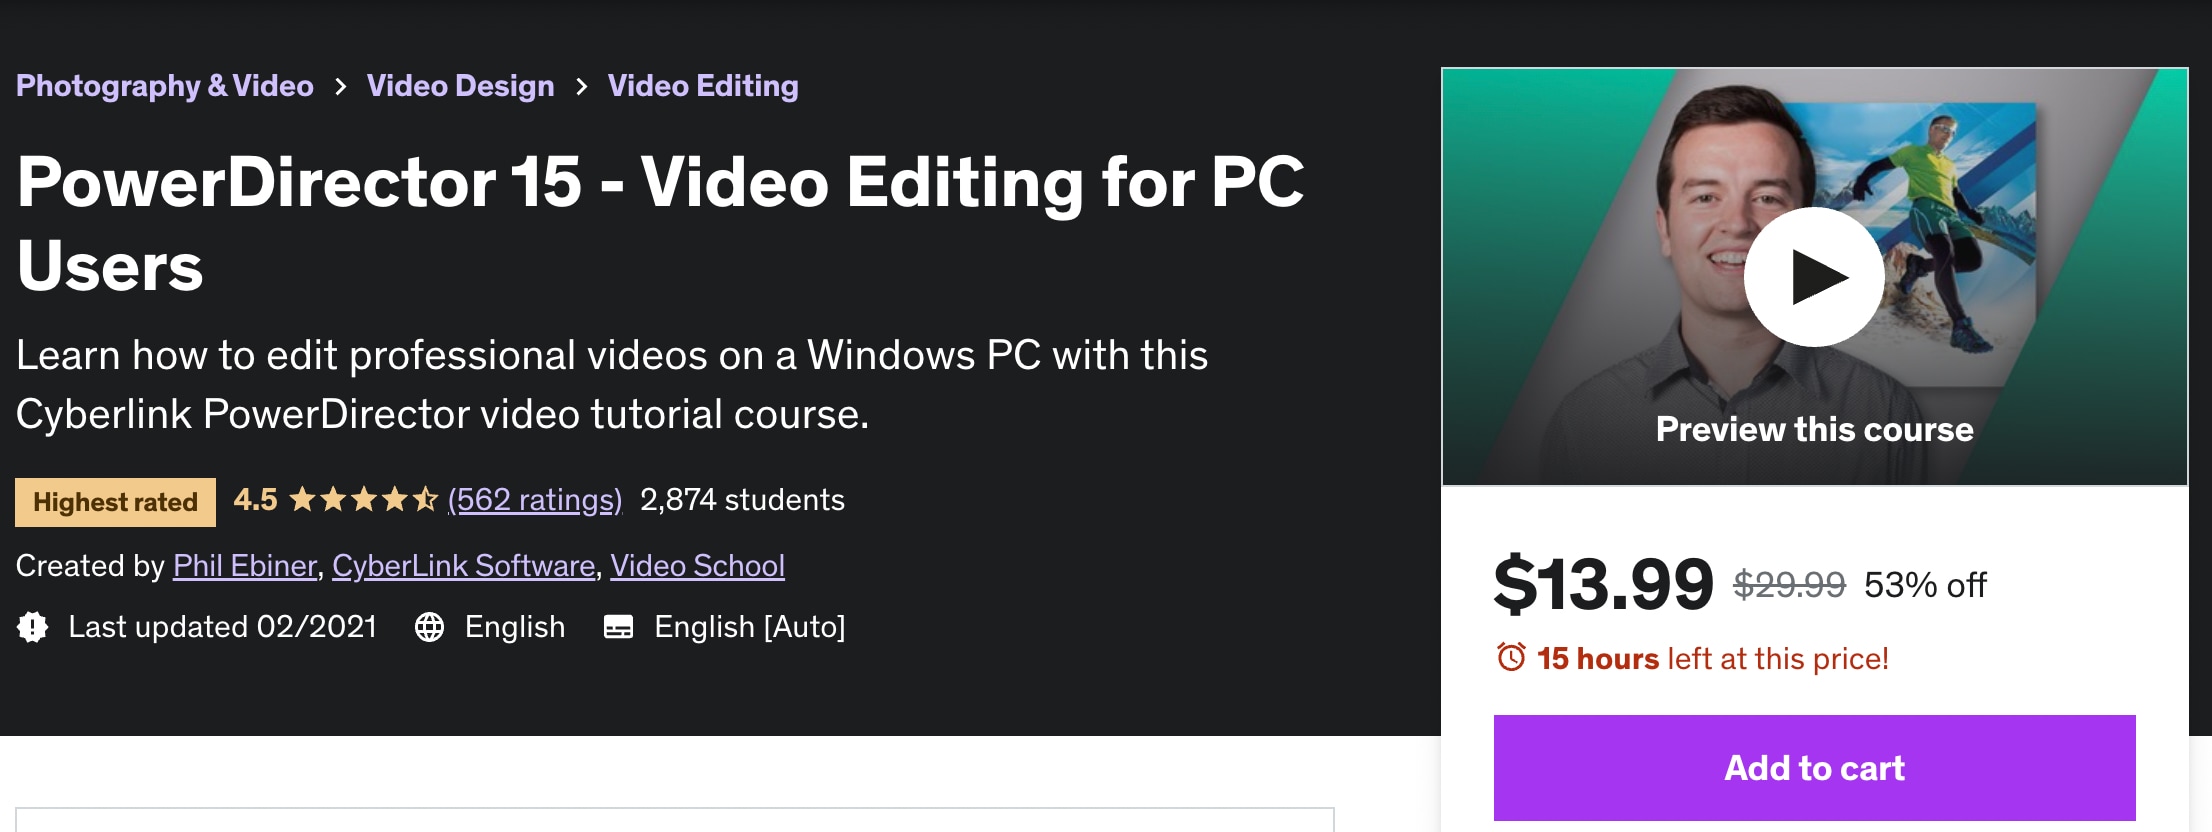
Power Director 15 is a great app to learn video editing if you’re a Windows user. This course covers everything necessary for you to know your way around this program quickly.
- Vendor: Udemy
- Cost: $13.99
- Duration: 4h
- Rating: 4.5 / 5
- Level: Beginner
Key topics inside this course:
- How to export high-quality videos for any device or platform
- How to use every feature in Power Director, including the newest ones
- Add professional titles and animated graphics to any video
- Master using blend modes, masks, and the action camera center
The knowledge in this video editing course online with certification will allow you to edit videos the way you envision. You will have the ability to create anything you want, and deliver exceptional results.

Mastering Final Cut Pro is an online video editing course with certification that grants you the knowledge to use this tool. In addition, you and over 30.000 other students get to learn from Apple Certified trainers.
- Vendor: Coursera
- Cost: $49
- Duration: 40h
- Rating: 4.5 / 5
- Level: Beginner
Key topics inside this course:
- The best ways to import and export project files with Final Cut Pro
- How to apply effects and modern transitions
- Creating a project and editing a video from start to finish
- Change the timing of clips
This is the perfect course if you’ve never used Final Cut Pro. It’s beginner-friendly and takes you through every step of using the platform, from creating a project to editing it and finally exporting a high-quality video.
Learning Final Cut Pro X – Video Editing Mastery
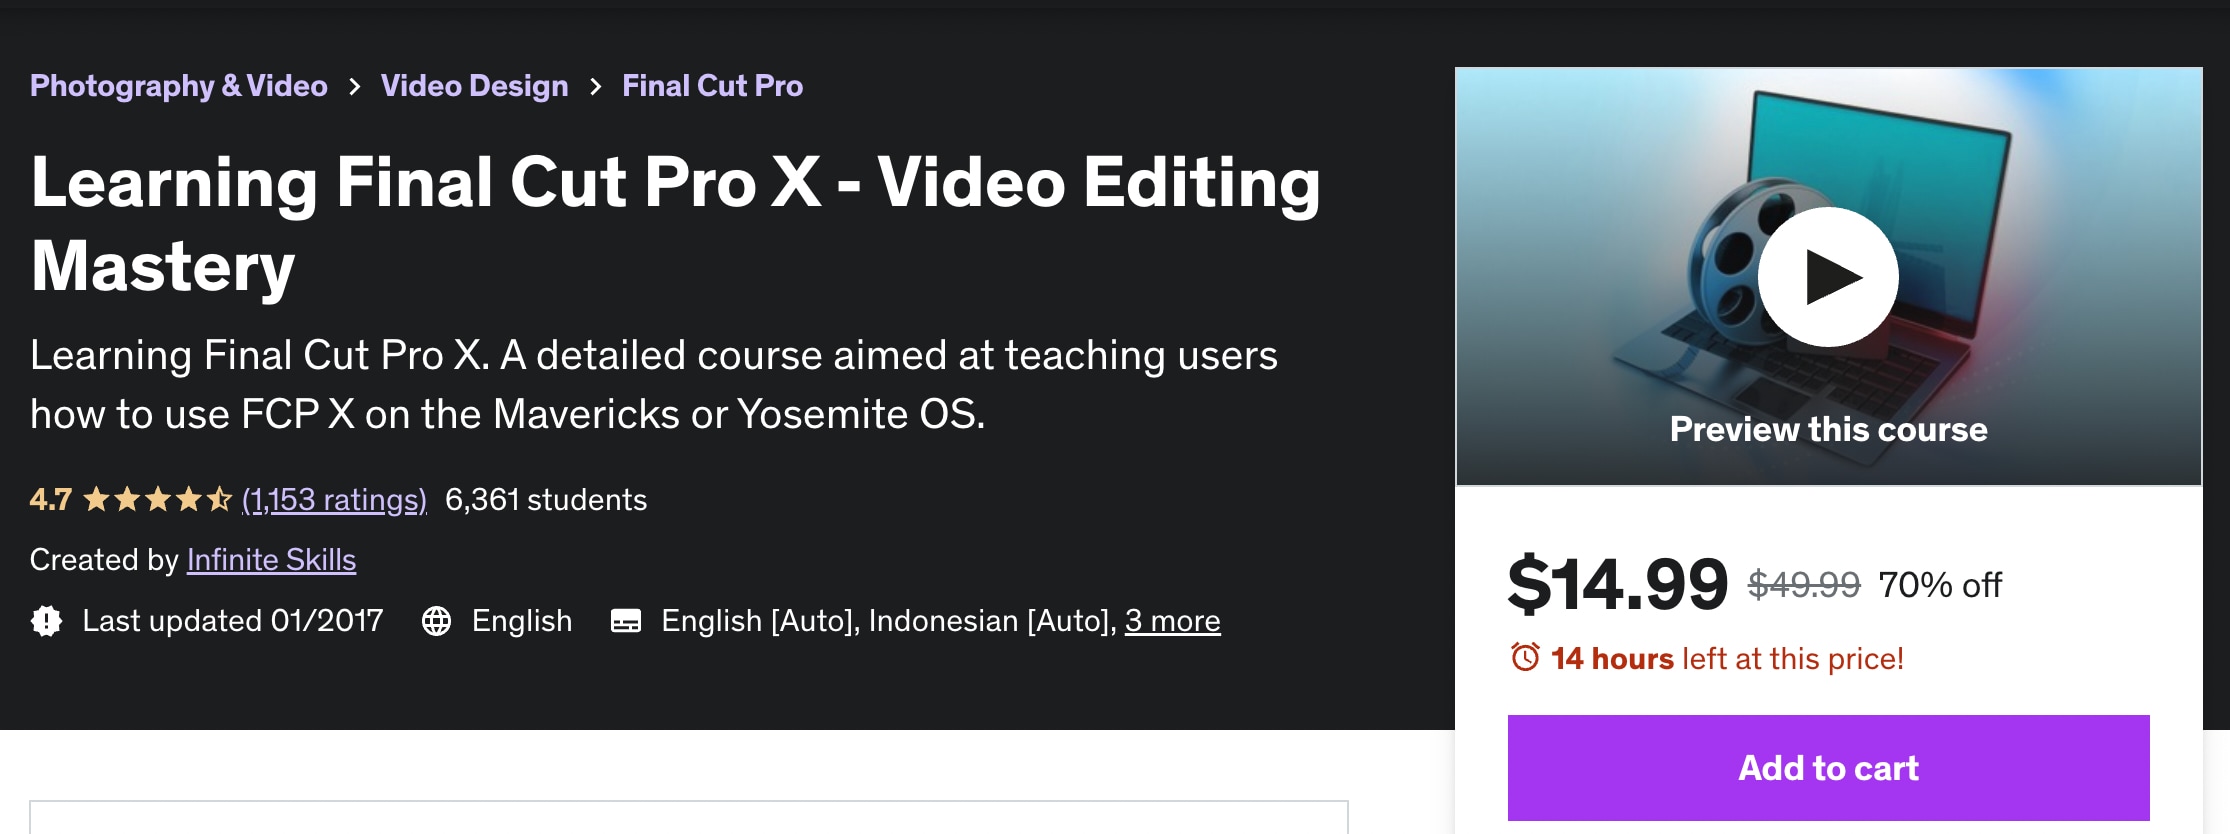
This is a video editing course for anyone using Mavericks OS. It’s designed to take full advantage of this Operating System alongside the Final Cut Pro X platform.
- Vendor: Udemy
- Cost: $14.99
- Duration: 6h 30min
- Rating: 4.7 / 5
- Level: Beginner
Key topics inside this course:
- Mastering the user interface and choosing your preferences
- Learning helpful shortcuts to speed up your workflow
- Best and quickest methods to import media
- How to organize your clips
- Using the timeline
- Working with effects, keyframes, compounds clips, and audio clips
- How to use generators and white screens
- The best export settings and other tips
If you’ve ever wanted to master Final Cut Pro X, there’s no better place to go. This course is designed to start on a beginner-friendly level. But, it moves to more advanced lessons later down the line.
2. Video Editing Tutorials - Mastering The Basics
The following video editing courses include lessons mainly on the basics of video editing. They won’t focus on any specific platform or tool. Instead, you’ll be learning the most important principles of creating a high-quality and modern video.
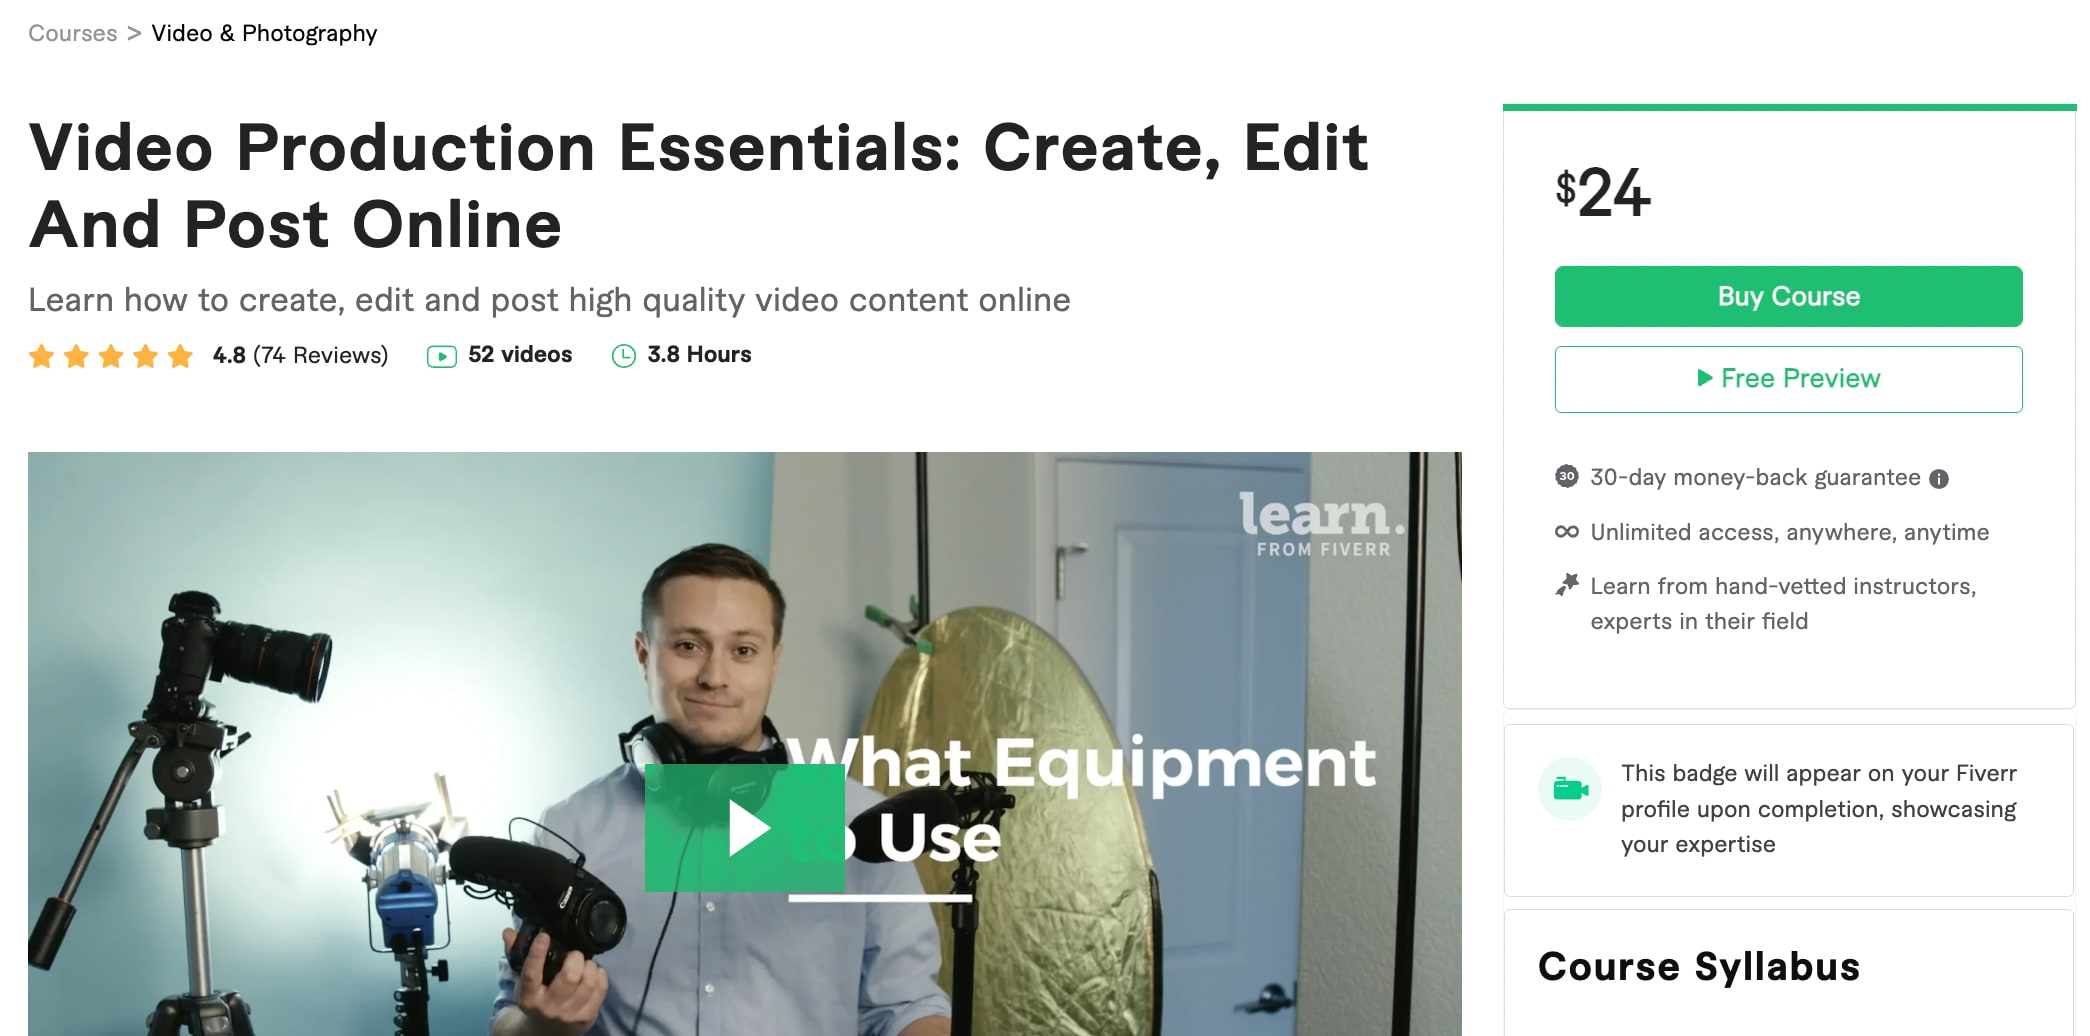
A fairly simple course designed to teach you the process of creating and editing a video from scratch. This is one of the best video editing courses online, featuring several professional mentors.
- Vendor: Fiverr Learn
- Cost: $24
- Duration: 6h 38min
- Rating: 4.8 / 5
- Level: Beginner to Intermediate
Key topics inside this course:
- What equipment to use for professional video editing
- How to shoot high-quality video with your smartphone
- Professional video and audio recording techniques
- Exporting settings for high-quality online viewing
- Fundamentals of using a DSLR or Mirrorless camera
- Create high-converting CTAs for your videos
The course will help you understand crucial facts about many different types of videos that are in demand today. You’ll learn how to use and navigate video editing tools to create anything you can imagine. The mentors even offer a few tips for growing your own Youtube channel.
Free Video Editing Courses and Tutorials
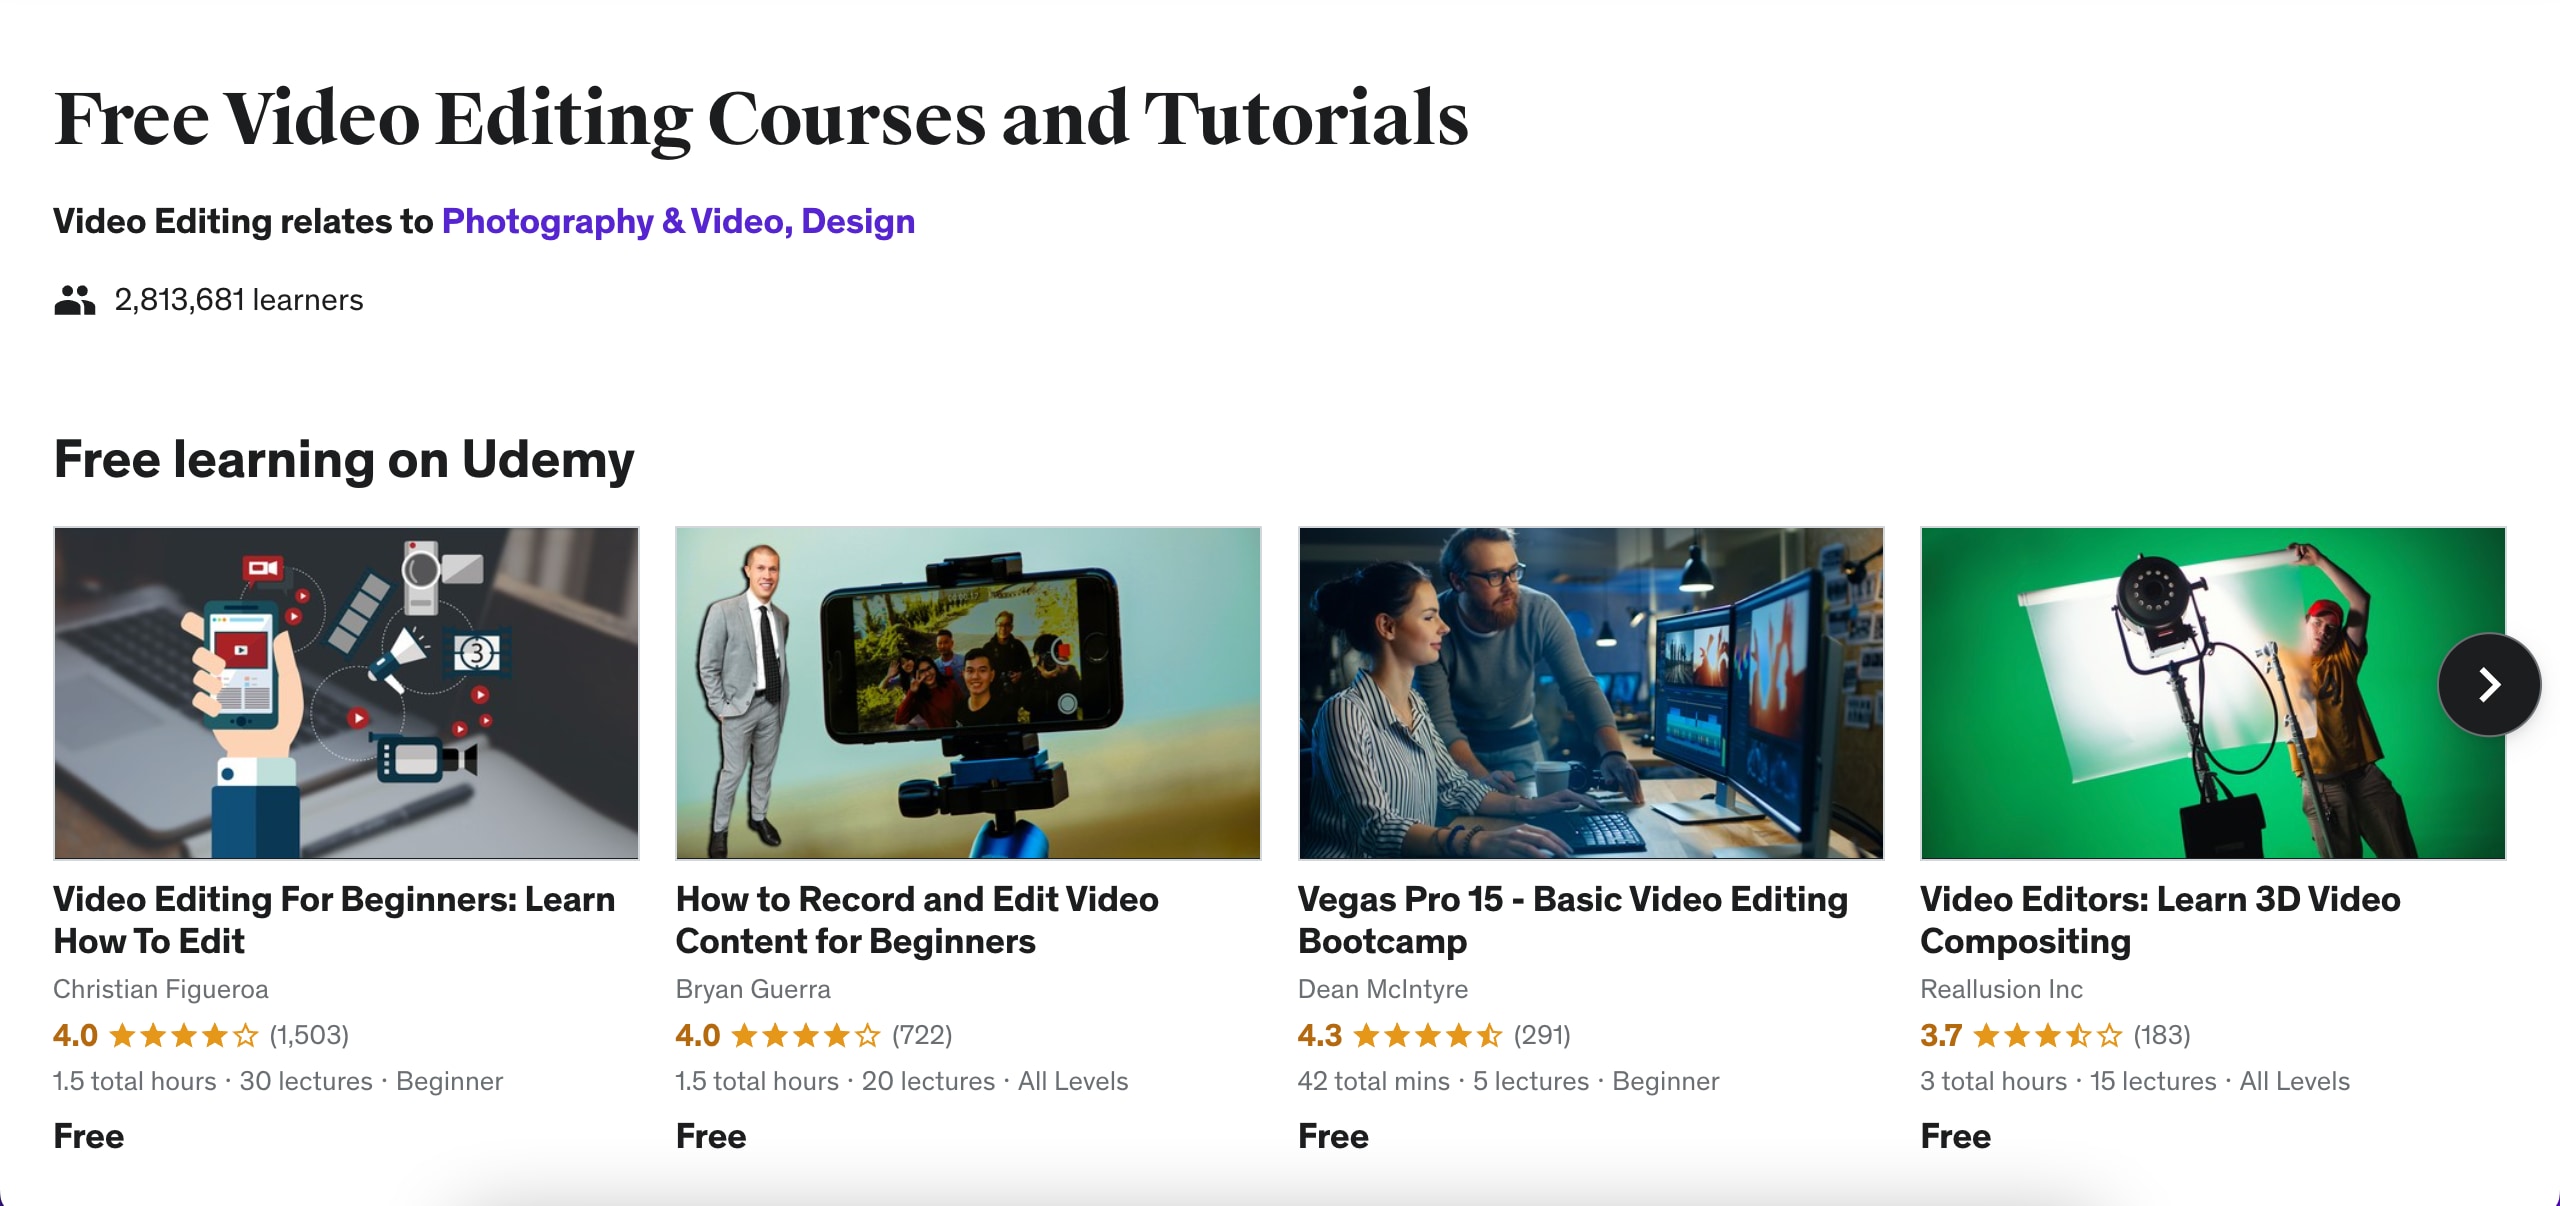
This pick is slightly different. Here, you can see a list of a few of the best video editing courses that are completely free. They are still taught by experts and offer plenty of useful knowledge, especially for beginners.
- Vendor: Udemy
- Cost: Free
- Duration: Unknown
- Rating: Varies
- Level: Beginner to Intermediate
Key topics inside this course:
- Beginner lessons on editing all types of videos
- How to record professional video content
- Beginner lessons for many different video editing platforms
- 3D Video Composition
- Understand how to use Premiere Pro
- Video editing on your smartphone
- Camtasia 9 Mastery Course
- How to create social media marketing videos
This is a list of many different video editing courses that are free on Udemy. Millions of members have enrolled and are learning for free. Best of all, it’s a great way to dive into video editing for free. Then, you can choose some of the paid ones for more advanced lessons.
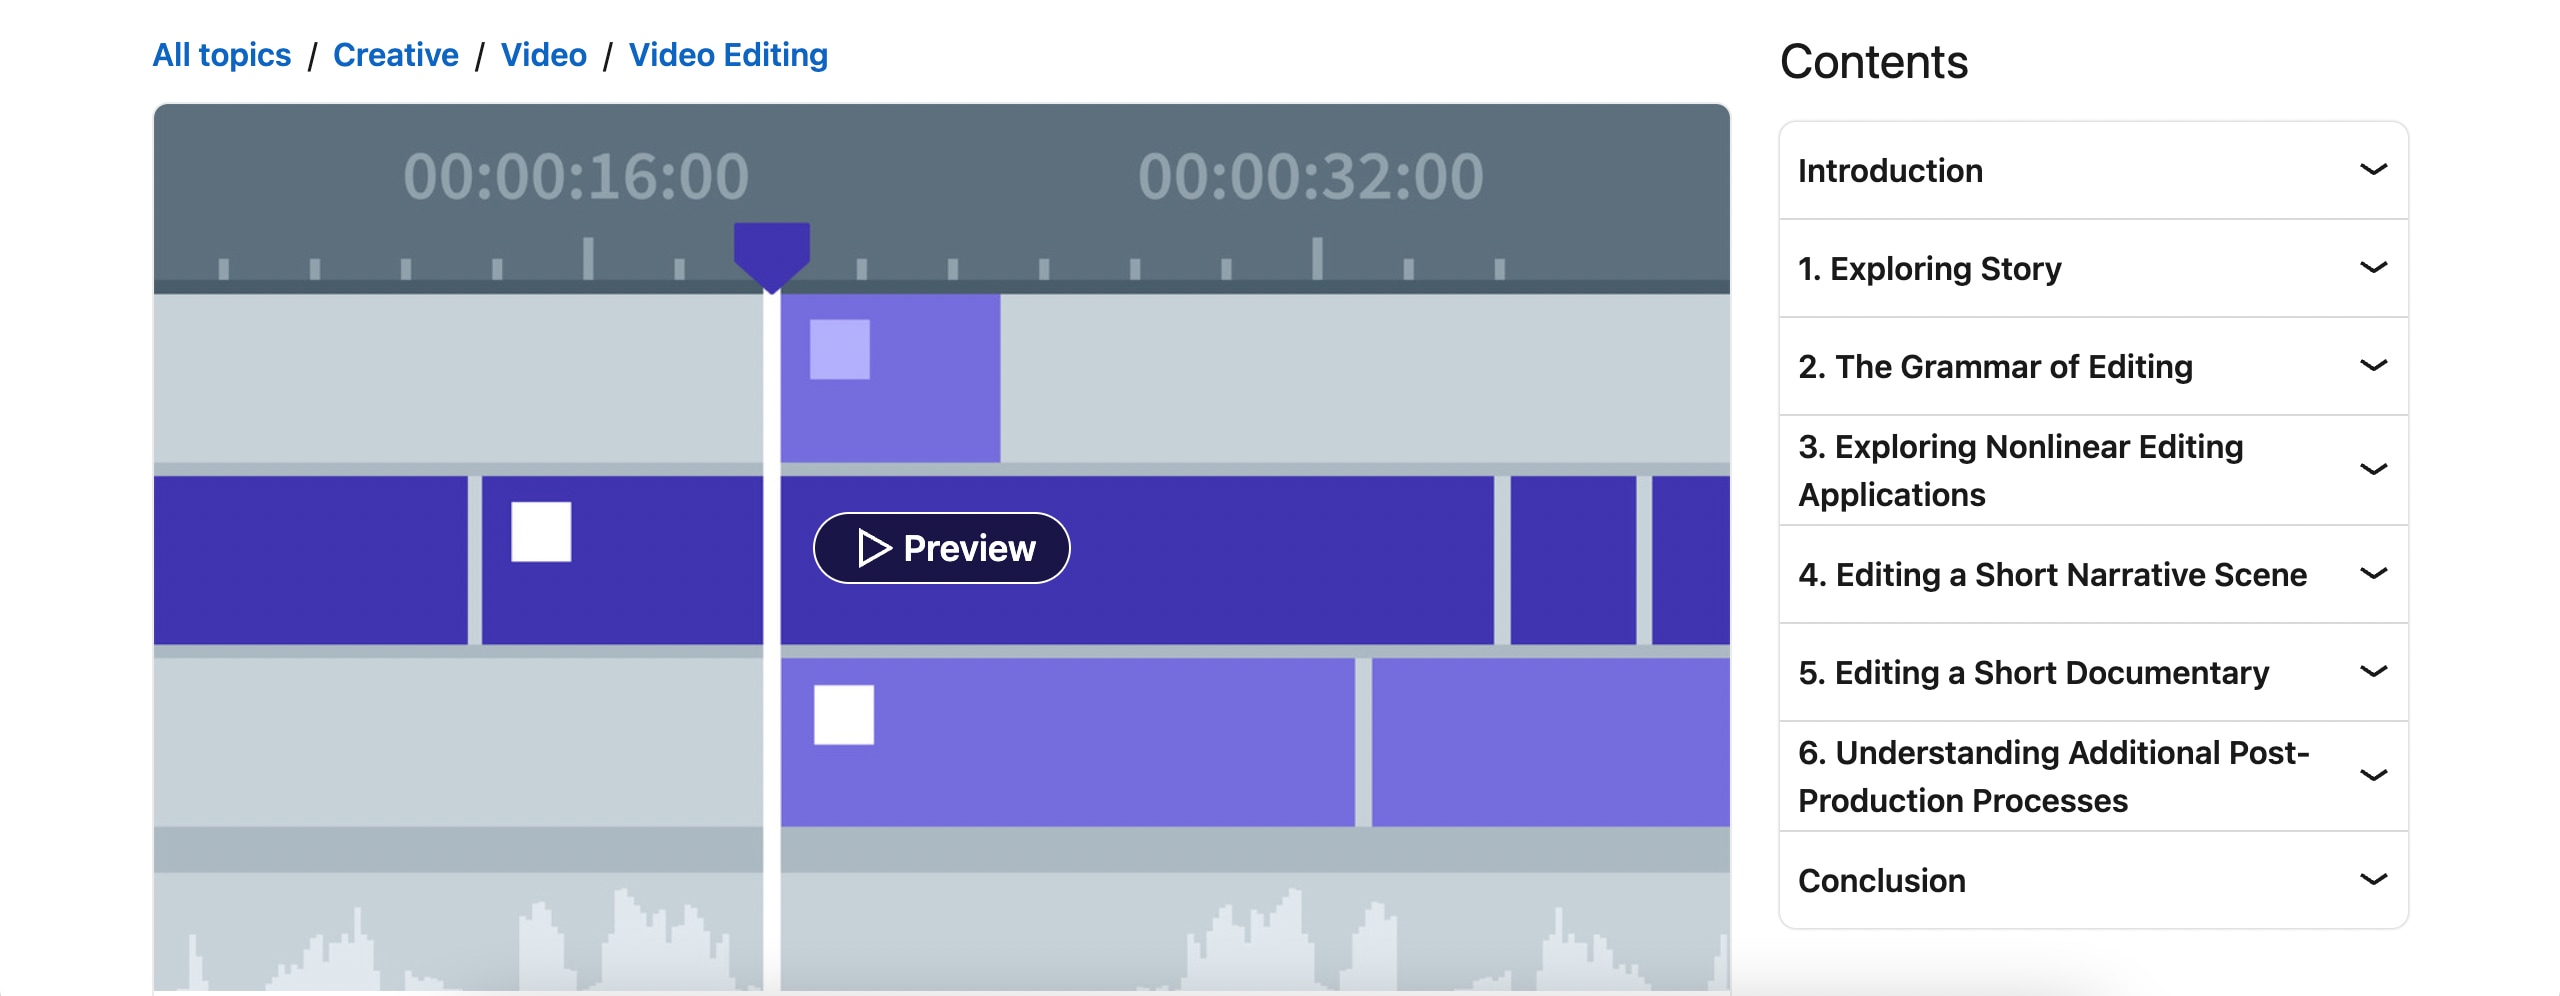
This course gives you a LinkedIn Learning Certificate and the knowledge to edit your first-ever video. There are 6 different lesson categories that you will enjoy going through. Each one focuses on another skill or principle.
- Vendor: LinkedIn Learning
- Cost: $34.99
- Duration: 2h 53min
- Rating: 4.7 / 5
- Level: Beginner
Key topics inside this course:
- The importance of storytelling in video editing
- Structures and transitions
- Timing and pacing
- Shot composition
- Comparing different editing applications
- Track-based editing vs. storyline-based editing
- Organizing your files
- How to edit a short documentary
- Audio editing lessons
- Post-production processes
This course offers a video editing certification that proves you’re well accustomed to the basic principles of this skill. You will know your way around different editing platforms. You will learn how to edit modern videos. And you will know exactly where to focus your efforts for improving yourself and your skills next.
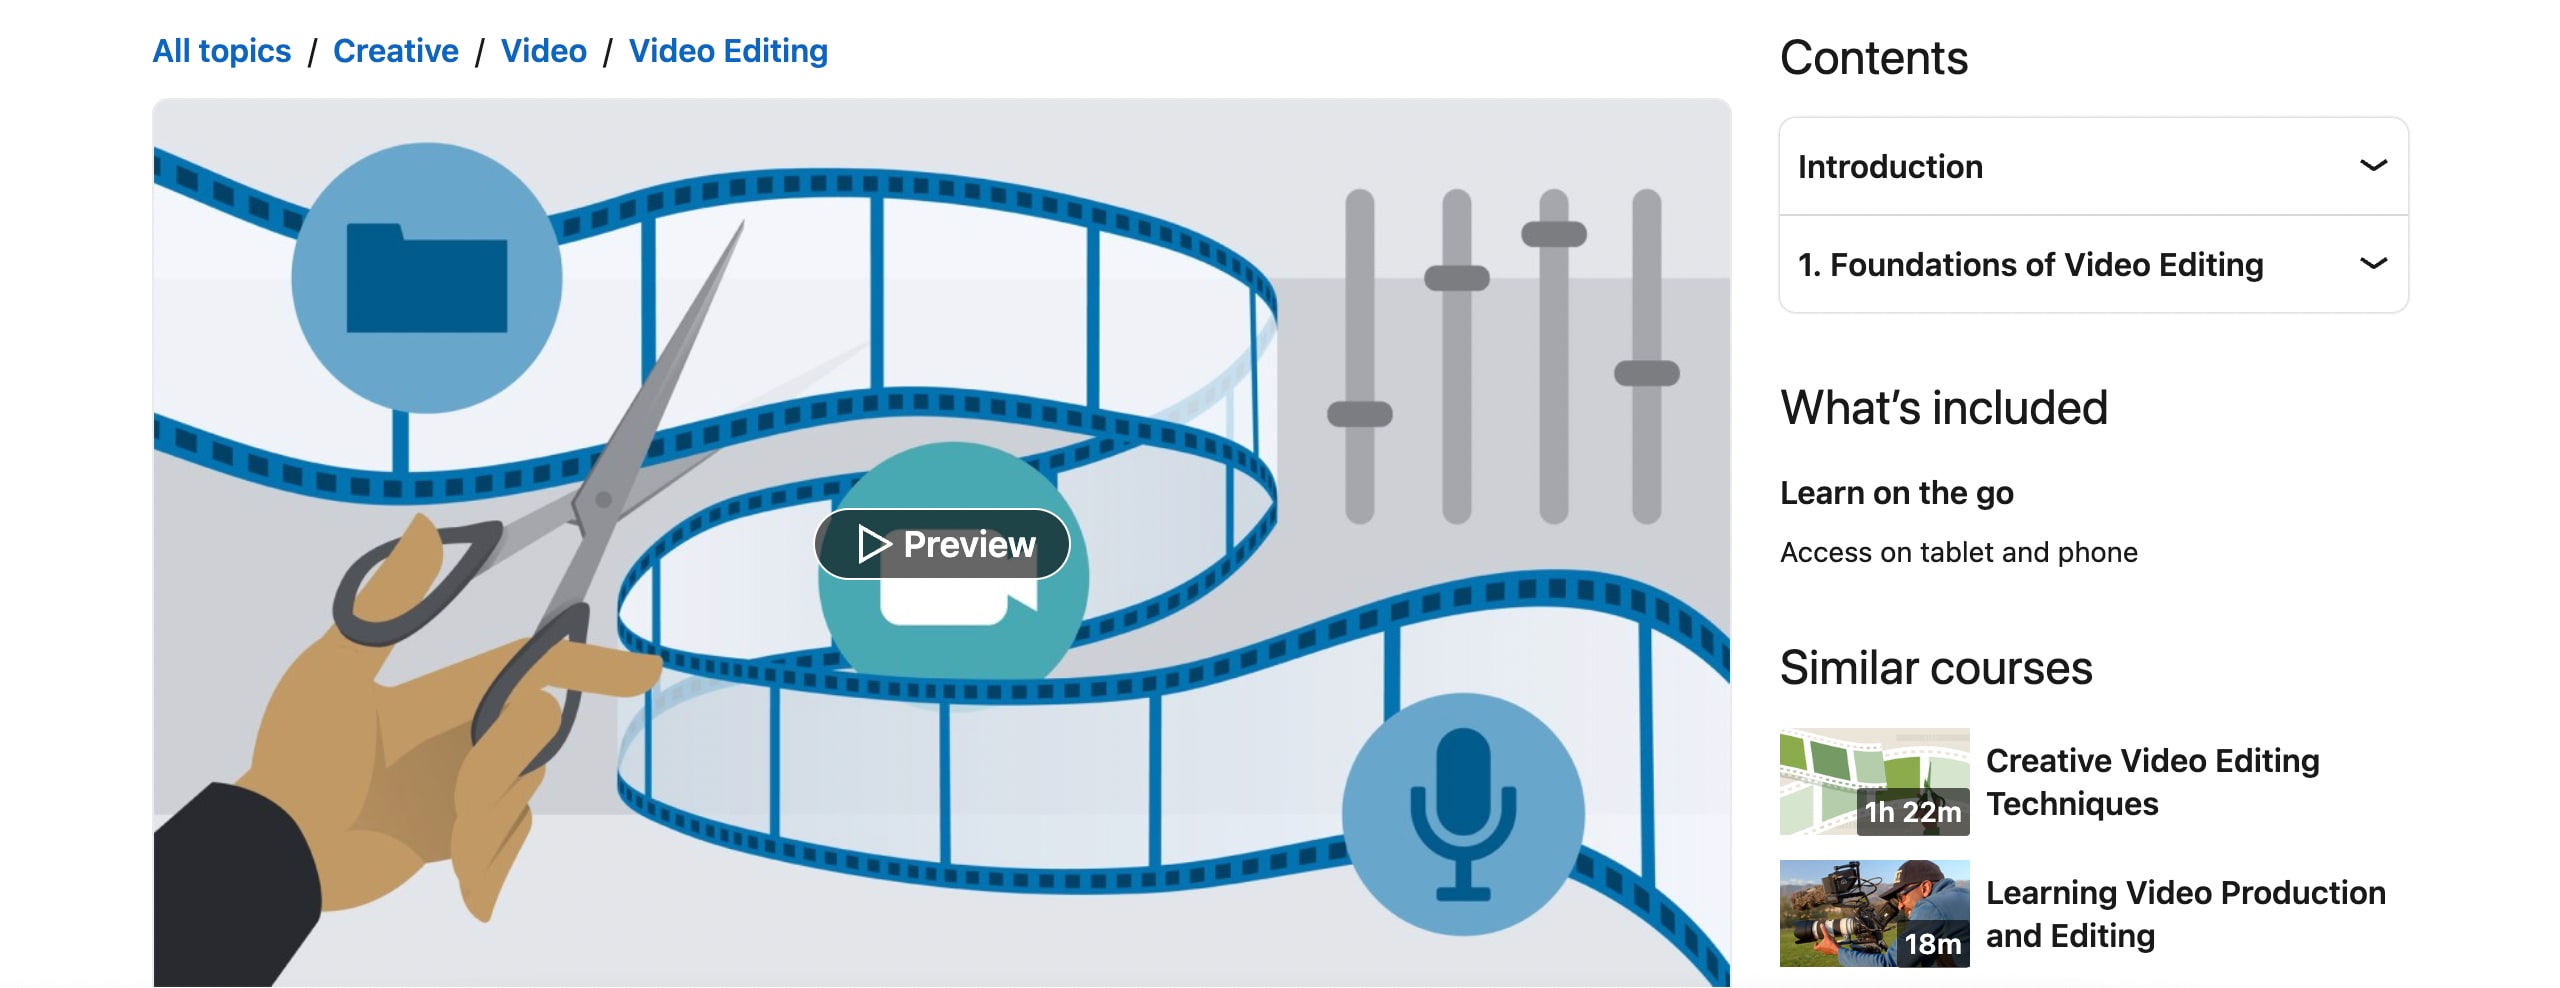
This course features essential video editing foundations in one exciting program. It’s a short course designed to introduce you to video editing. To be more precise, you will mainly learn about the post-production process of video editing.
- Vendor: LinkedIn Learning
- Cost: LinkedIn Learning Membership Only ($39.99)
- Duration: 37min
- Rating: 4.7 / 5
- Level: Beginner
Key topics inside this course:
- Trimming or fine-tuning the product
- Audio editing process
- How to add images to your videos
- Video effects tutorials
- Color correction
- How to use text to your advantage
- Export and delivery settings
This certificate will prove that you know what it takes to edit a video professionally. It tells us that you are familiar with all the different parts that come together to create a video worth watching.
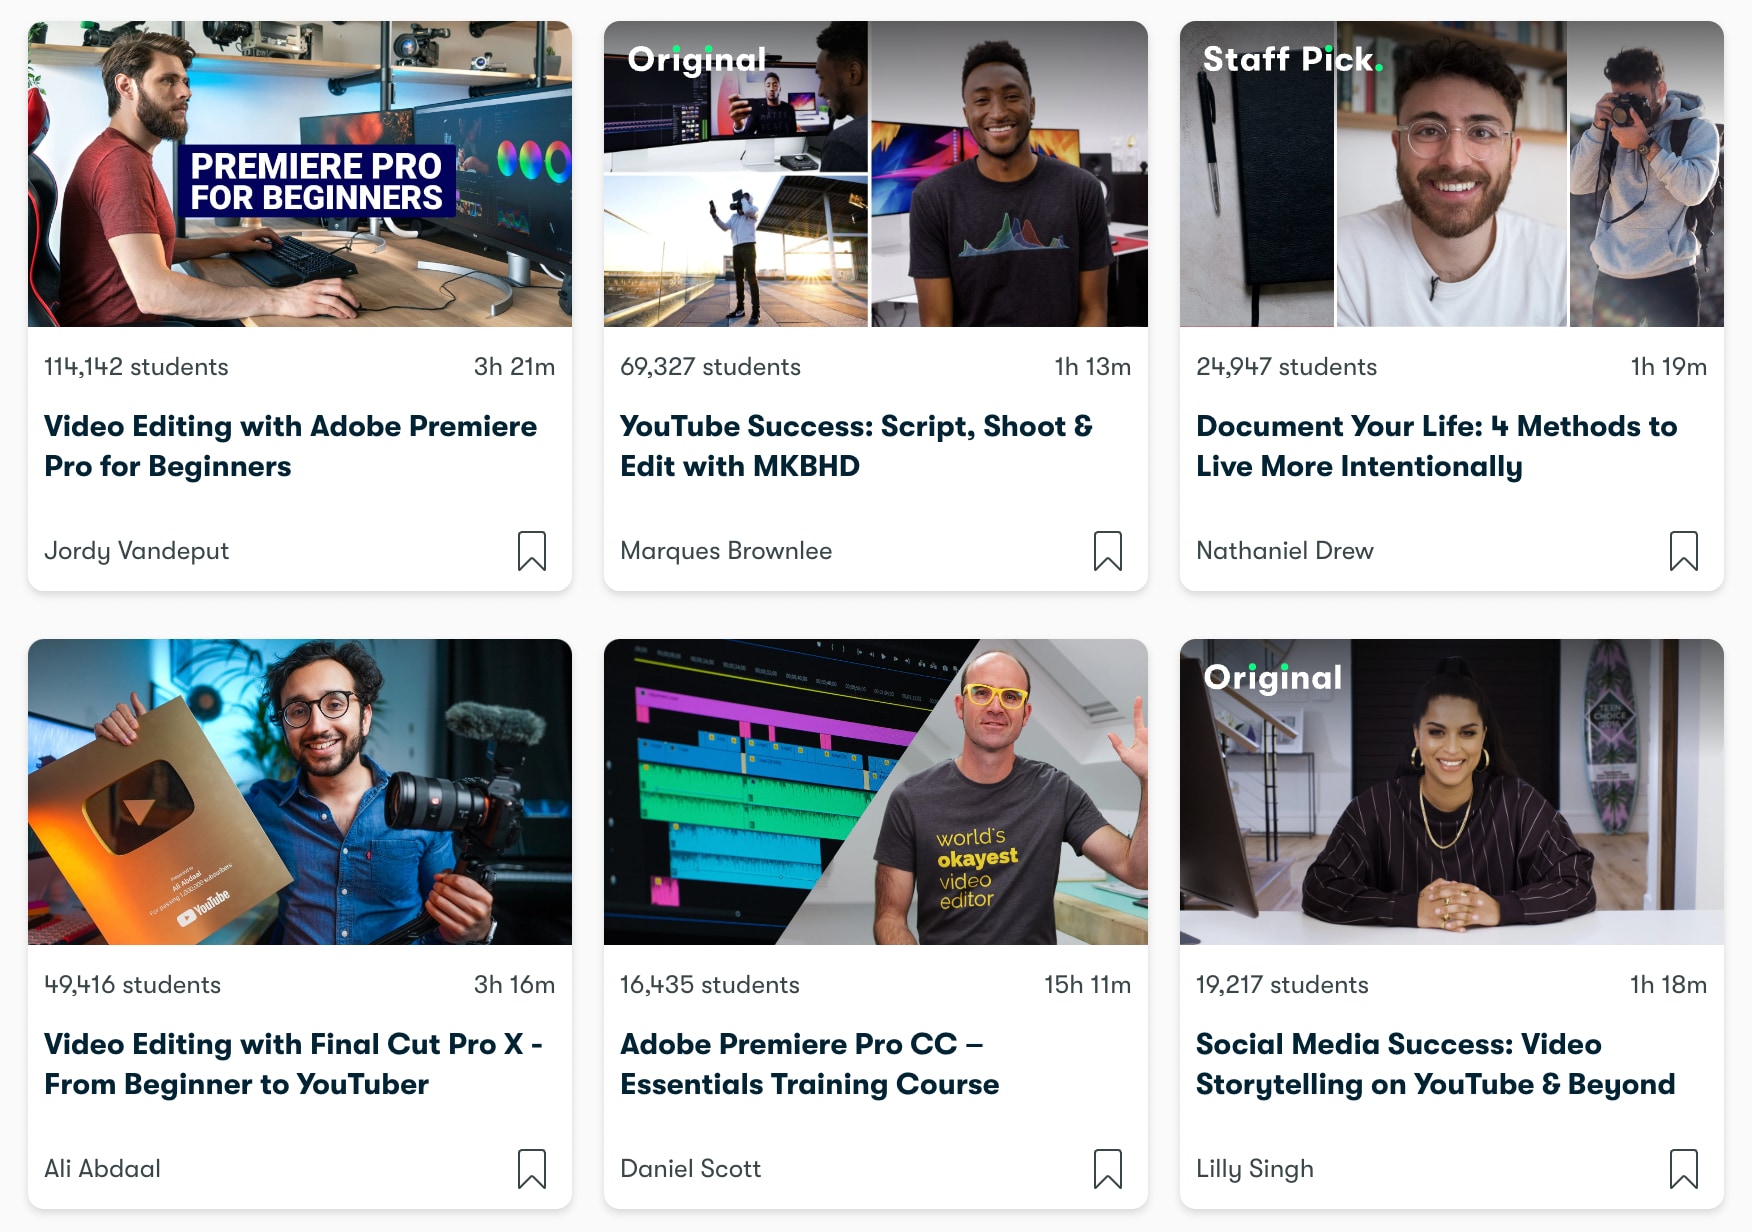
This is a list of video editing courses by some of the most popular video editors on the planet. You’ll learn from huge names such as Marques Brownies, Nathaniel Drew, Jordy Vandeput, and many more. So, pick your favorite, and start learning.
- Vendor: Skillshare
- Cost: Depends
- Duration: 37min
- Rating: Varies
- Level: From Beginner to Pro
Key topics inside this course:
- How to create mind-blowing Youtube videos
- Adobe Premiere Pro for Beginners
- How to document your life
- Final Cut Pro X - Beginner to Youtuber
- Introduction to Filmmaking
- Mastering TikTok videos
- iPhone Filmmaking
- Advanced training for all video editing apps
There are courses for all skill levels here. You can start as a complete beginner and finish as a master who knows how to create a worthwhile video. Or, you can choose one that improves your current skills.
The Complete Video Production Bootcamp
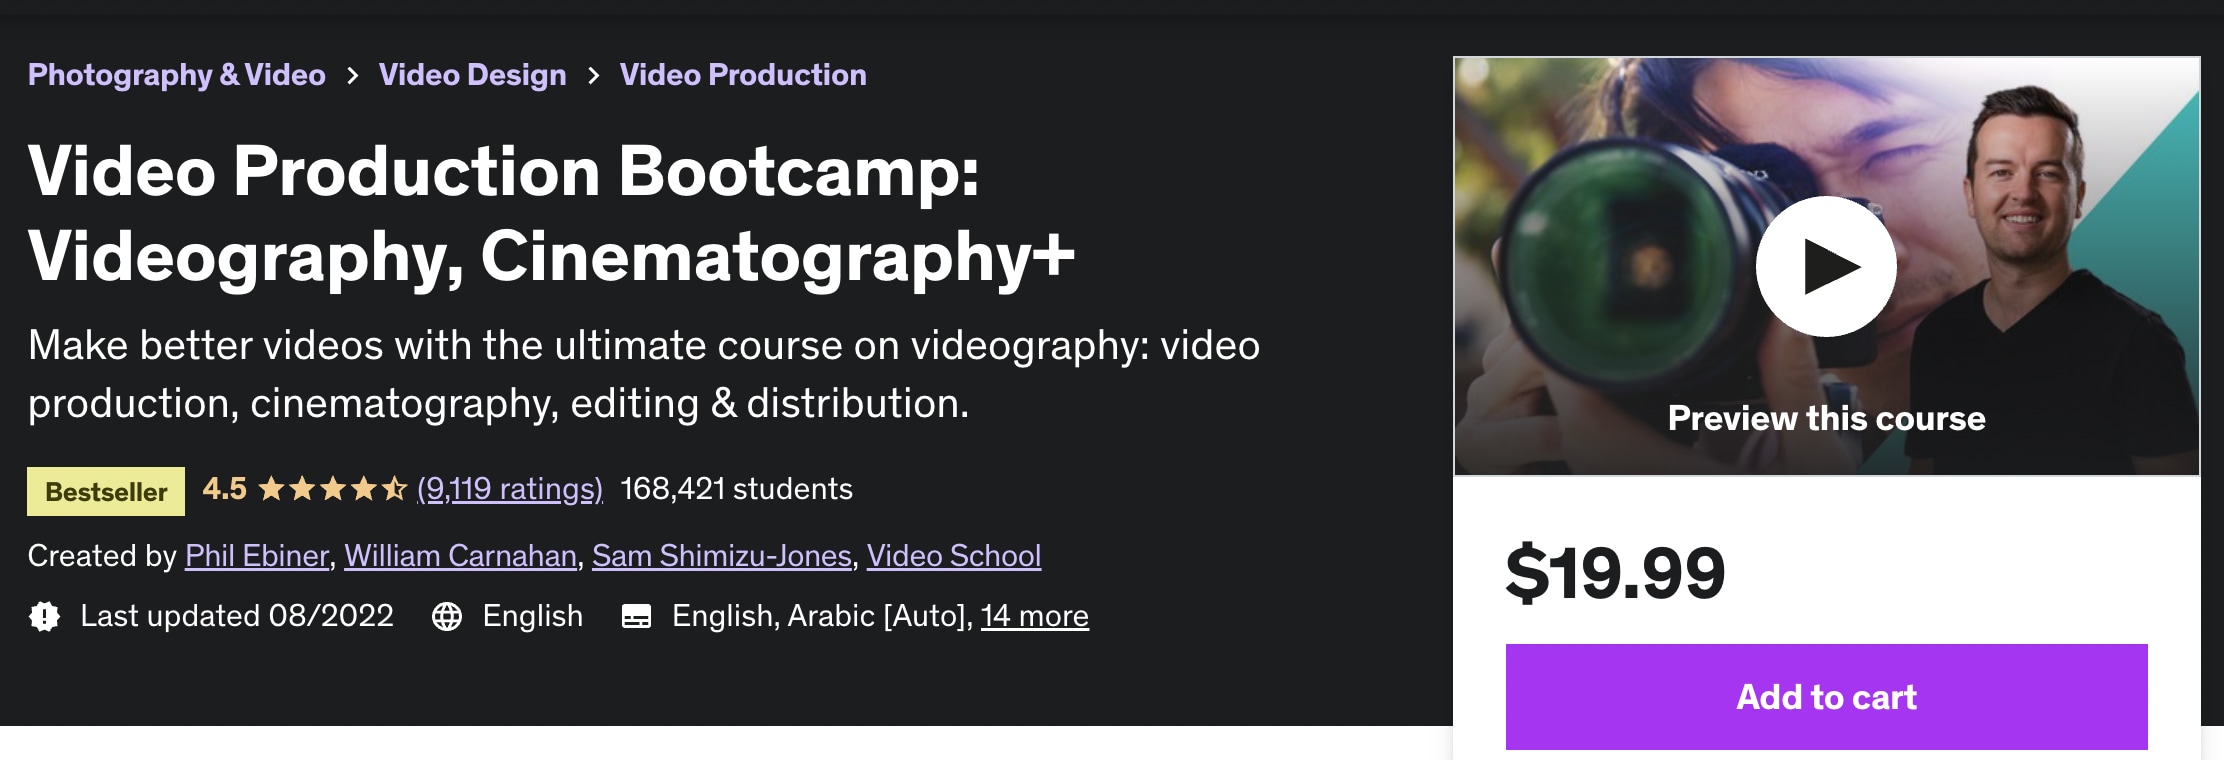
A nine-hour course on everything video editing related. To be more precise, you will dive into video production tutorials, cinematography, editing & distribution, and more. Companies like Nasdaq, Box, NetApp, and more offer this course to their employees.
- Vendor: Udemy
- Cost: $19.99
- Duration: 9h
- Rating: 4.5 / 5
- Level: Beginner
Key topics inside this course:
- Video storytelling
- How to record better audio
- Tips for posting videos online
- Discover the best equipment to use
- How to set up the perfect lighting
- How to get more engagement on your videos
- Create professional videos with any equipment
Over 160.000 students have benefited from the contents of this course. It dives into both beginner and advanced video editing lessons. So even if you don’t have any experience in this, you will still easily understand everything taught inside.
3. Video Editing Courses With Certification For Mobile Users
The courses you will see in this list are exclusively for mobile users. You can still make great videos on your mobile device if you don’t have a computer. All of the knowledge you need for this is below.
Smartphone Video For Beginners – iPhone Video Editing Course
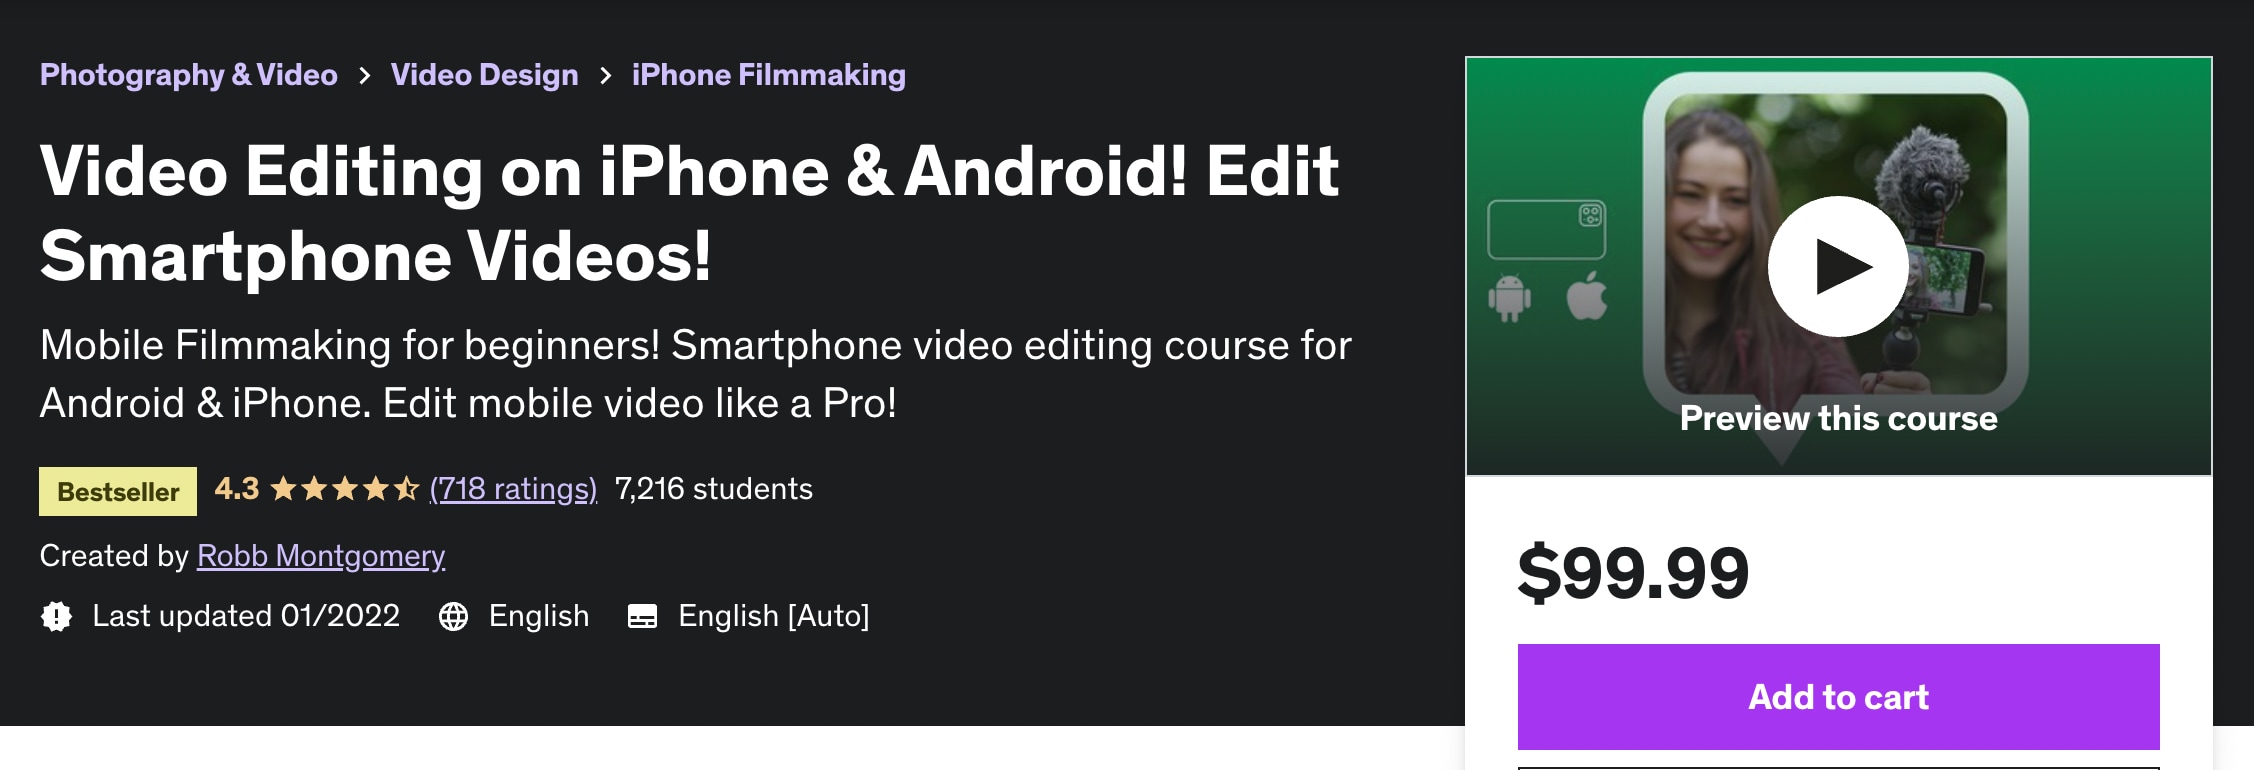
Dive into five hours of content teaching you how to create unbelievable videos on your phone. You’ll be surprised by how it’s possible to create such professional videos on a smartphone.
- Vendor: Udemy
- Cost: $99.99
- Duration: 5h
- Rating: 4.3 / 5
- Level: Beginner
Key topics inside this course:
- Must-have gear for editing on a smartphone (Affordable options)
- How to set up your phone’s camera for optimal results
- Must-have free apps for professional smartphone video editing
- Using gimbals, action cams, and drones with your phone
- Video storytelling on a smartphone
- Phone resolutions, frame rates, ProRes, color space, and more
- How to make Cinematic shots, hit the right angles, and similar
This outstanding course will give you a certification proving you’re one of the rare video editors who can create wonders from their phones. From now on, you can’t use the excuse that you don’t have an excellent PC to create amazing videos.
4. Cinematic Level Video Editing Courses
The final category will introduce you to video editing courses online with certification for cinematic-level skills. Completing these courses will prove you are a master video editor who knows no bounds.
VIDEO EDITING. Techniques loved by pro broadcast filmmakers
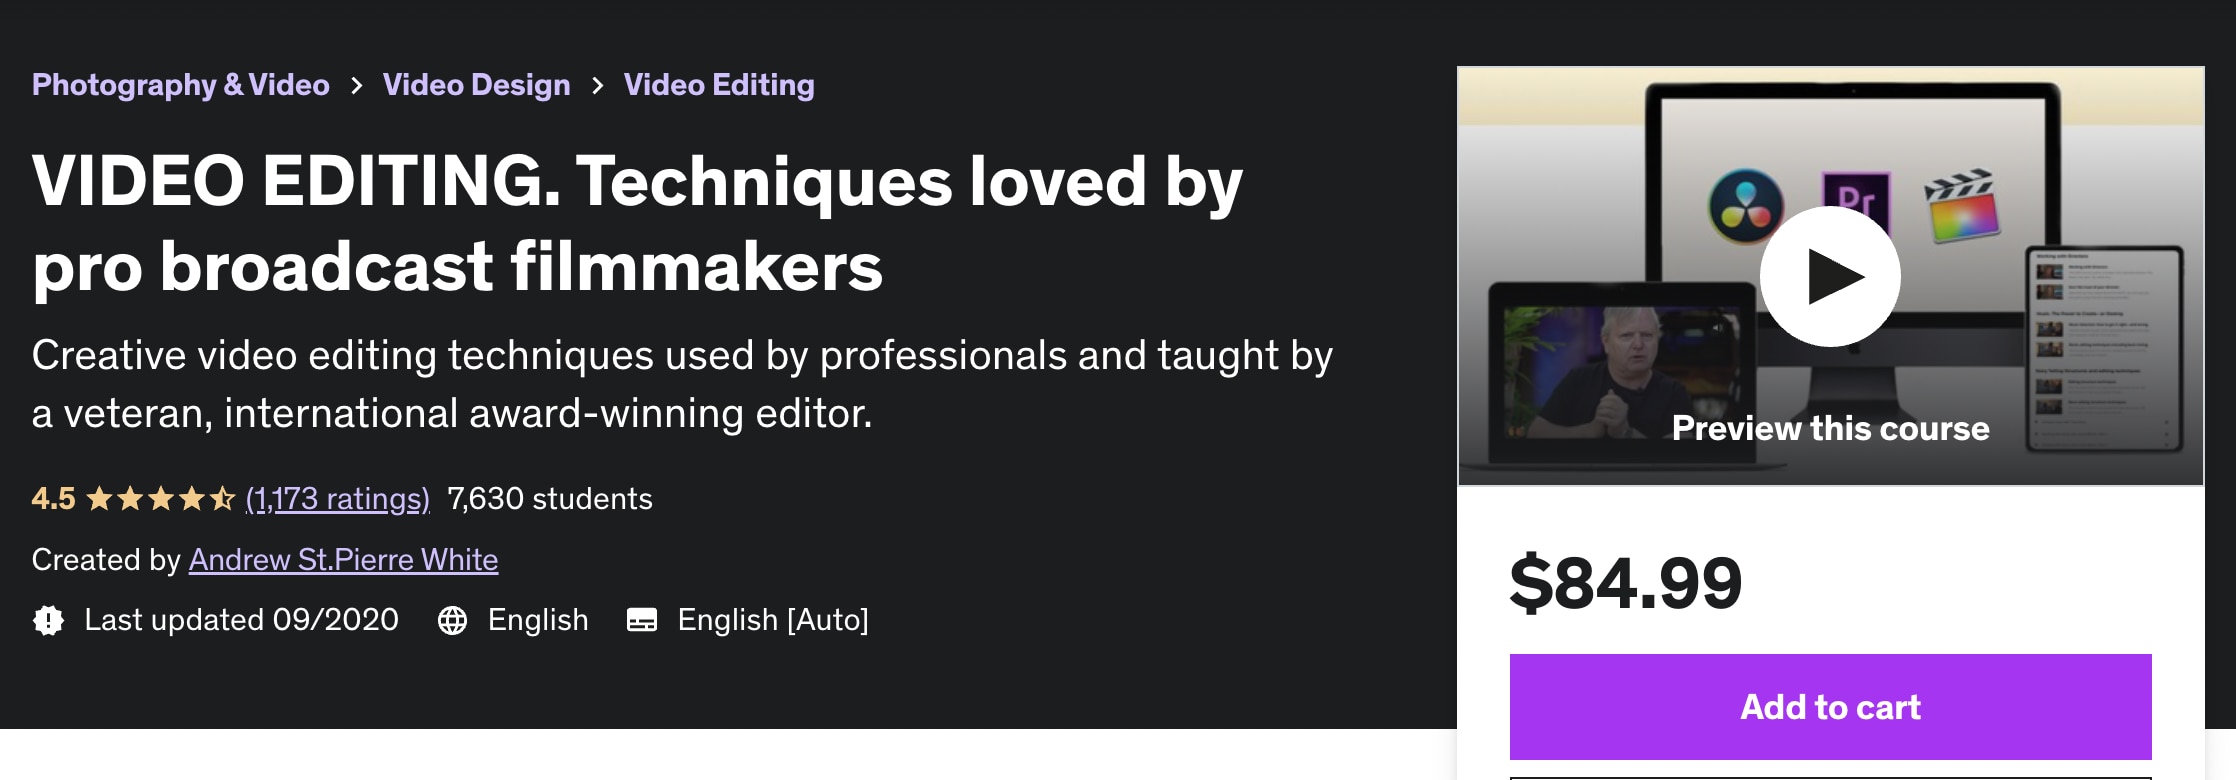
Your teacher for this course will be Andrew St.Pierre White, an award-winning video editing veteran. He will teach you tips and tricks used by professionals to this day. Timeless advice that will take your career to the next level.
- Vendor: Udemy
- Cost: $84.99
- Duration: 3h 30min
- Rating: 4.5 / 5
- Level: Advanced to Pro
Key topics inside this course:
- How to entertain and inspire any audience
- Understand the balance between good editing and good content
- Amazing techniques used in TV production
- Turn great editing into great results
- Turn amateur videos into professional productions
- Most common mistakes filmmakers make
Once you know the basics of video editing, this course will take your skills to the next level. You will learn how the big players make professional videos that capture massive audiences. Plus, your mentor will show you how to work with big names in this industry.
The History of Film and Video Editing
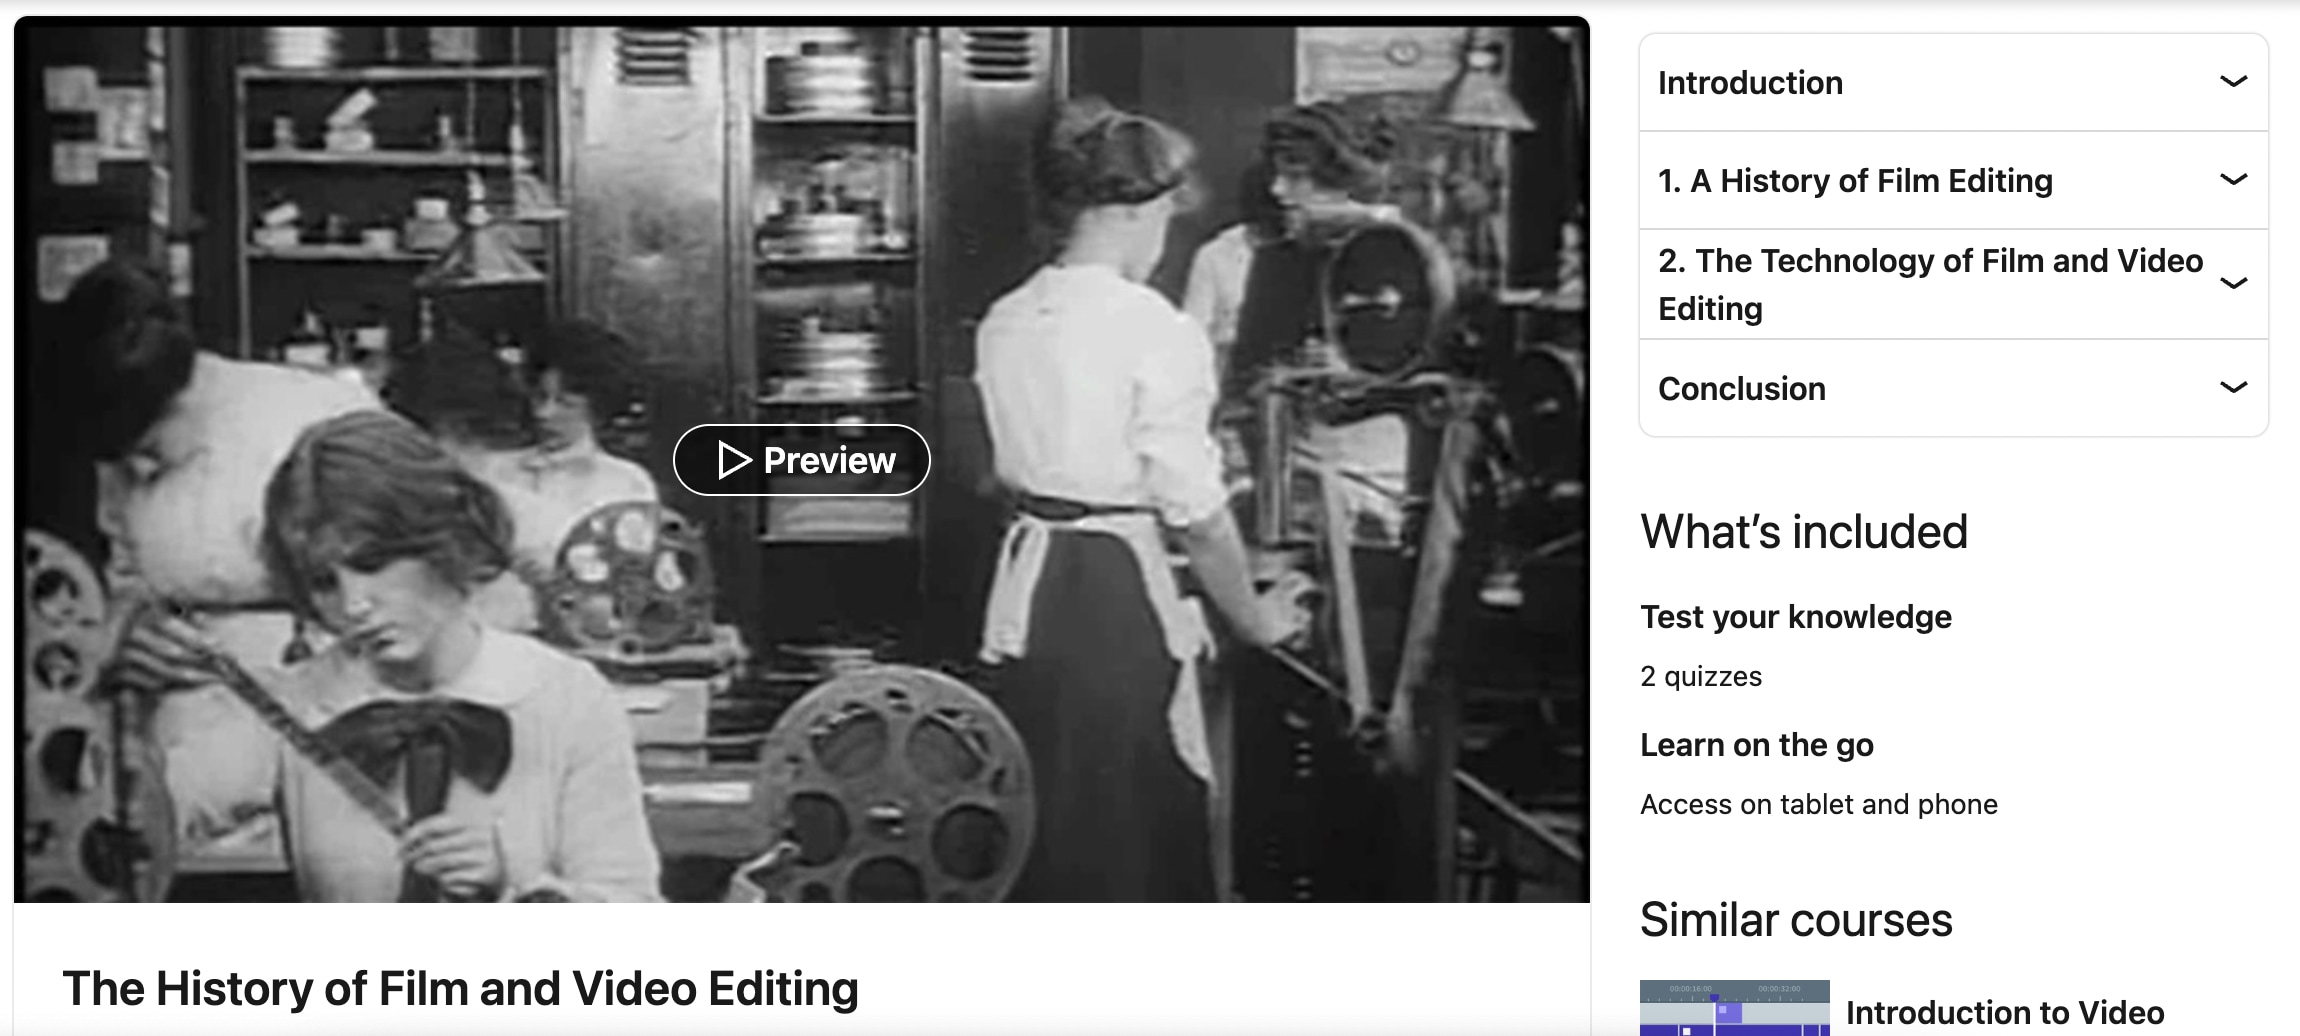
Never underestimate how much history can teach you. Completing this course will teach you more about video editing than many pro filmmakers. Find out how video editing has progressed through the last century.
- Vendor: LinkedIn Learning
- Cost: $34.99
- Duration: 2h 10min
- Rating: 4.8 / 5
- Level: Everyone
Key topics inside this course:
- Early days of photography and film
- Continuity editing and montage theory
- When sound was born
- Establishing the standards for editing
- Evolution of editing techniques
- Technology
- The rise of the digital era
By learning the history of video editing, you will be more aware. You will realize what people love to see and detect patterns. These patterns will guide you toward becoming a professional video editor.
Make Your Video Editing Journey Easier
Now that we’re done with learning, it’s time to start doing. You already have enough fantastic courses to learn everything necessary to edit videos professionally. But now, how do you use your skills and achieve the easiest and quickest results?
Your best option is to use the Filmora video editor.
What Is Filmora and Filmora?
It’s as powerful as Adobe Premiere Pro but more straightforward to navigate. In addition, Filmora lets you command an arsenal of unique tools necessary for creating modern videos.
Free Download For Win 7 or later(64-bit)
Free Download For macOS 10.14 or later
Anyone on both Windows and Mac can use Filmora. In addition, if you’re a mobile user, you can download Filmora and enjoy the same benefits.
Aside from its easy-to-use interface, Filmora is packed with editing resources that will never leave you wondering how or what to do next. Of course, you can watch the free Youtube tutorials to master the platform entirely.
For example, we have prepared you with a video tutorial below to start your video editing journey with no delay!
Lastly, you can easily export in any format necessary for your project. It doesn’t get easier than this.
Conclusion
The video editing certification online courses you see here are more than enough to prepare you. You will learn everything it takes to edit any video. Use this information wisely and take advantage of this beautiful opportunity to become one of the best video editors.
Video Editing Tutorials - Mastering The Basics
| Course Name | Vendor |
|---|---|
| Video Production Essentials | Fiverr Learn |
| Free Video Editing Courses and Tutorials | Udemy |
| Introduction to Video Editing | |
| Video editing fundamentals | |
| Online Video Editing Classes | Skillshare |
| The Complete Video Production Bootcamp | Udemy |
Video Editing Courses With Certification For Mobile Users
| Course Name | Vendor |
|---|---|
| Smartphone Video For Beginners – iPhone Video Editing Course | Udemy |
Cinematic Level Video Editing Courses
| Course Name | Vendor |
|---|---|
| VIDEO EDITING. Techniques loved by pro broadcast filmmakers | Udemy |
| The History of Film and Video Editing |
What You Will Learn From Each Course
Each video editing course online with certification offers something unique. Below, you can see a detailed comparison between all of them. As a result, you’ll know exactly which course to choose and which video editing tool to start with.
1. Courses With Certification for Popular Video Editor Platforms
First, let’s break down all the courses in this group. You’ll learn about its ratings, duration, contents, and more.
Premiere Pro CC for Beginners: Video Editing in Premiere

Initially, this course dives into the basics of video editing. Then, you get into more advanced topics that will help you distinguish yourself from the complete beginners.
- Vendor: Udemy
- Cost: $19.99
- Duration: 24.5 hours
- Rating: 4.7 / 5
- Level: Beginner-Advanced
Key topics inside this course:
- How to export your videos for High-Definition Playback and 4K
- Video color correction
- How to apply visual effects
- Design clean and modern titles for any video
- The editing process of a video from beginning to end
- Load the perfect settings at the start of each project
- Color grading
- Edit green screen footage
- How to add motion to titles, photos, and videos
At the end of the course, you’ll have the skills necessary to edit an entire video from start to finish. Additionally, you’ll know your way around Adobe Premiere Pro. Most of the topics taught inside will be enough to help you land a video editing job or edit your videos professionally.
Video Editing in DaVinci Resolve 18/17

With this video editing course, you will master editing in DaVinci Resolve. It includes beginner lessons, as well as a few advanced editing techniques. Over 30.000 students have currently completed it.
- Vendor: Udemy
- Cost: $84.99
- Duration: 11.5 hours
- Rating: 4.6 / 5
- Level: Beginner-Advanced
Key topics inside this course:
- How to add effects to videos in DaVinci Resolve
- Color Grading with multiple tools
- Master different types of Nodes
- Complete tests doing various projects
- Cut page quick and easy video editing
- Adding motion graphics
- Effective color-correcting methods
- Using Color Wheels, Power windows, Scopes, Curves, Qualifiers, and more
This course aims to teach you how to use DaVinci Resolve. After you’ve mastered the platform, the mentor shows you various tips and tricks to edit videos more professionally using this tool.
PowerDirector 15 - Video Editing for PC Users

Power Director 15 is a great app to learn video editing if you’re a Windows user. This course covers everything necessary for you to know your way around this program quickly.
- Vendor: Udemy
- Cost: $13.99
- Duration: 4h
- Rating: 4.5 / 5
- Level: Beginner
Key topics inside this course:
- How to export high-quality videos for any device or platform
- How to use every feature in Power Director, including the newest ones
- Add professional titles and animated graphics to any video
- Master using blend modes, masks, and the action camera center
The knowledge in this video editing course online with certification will allow you to edit videos the way you envision. You will have the ability to create anything you want, and deliver exceptional results.

Mastering Final Cut Pro is an online video editing course with certification that grants you the knowledge to use this tool. In addition, you and over 30.000 other students get to learn from Apple Certified trainers.
- Vendor: Coursera
- Cost: $49
- Duration: 40h
- Rating: 4.5 / 5
- Level: Beginner
Key topics inside this course:
- The best ways to import and export project files with Final Cut Pro
- How to apply effects and modern transitions
- Creating a project and editing a video from start to finish
- Change the timing of clips
This is the perfect course if you’ve never used Final Cut Pro. It’s beginner-friendly and takes you through every step of using the platform, from creating a project to editing it and finally exporting a high-quality video.
Learning Final Cut Pro X – Video Editing Mastery

This is a video editing course for anyone using Mavericks OS. It’s designed to take full advantage of this Operating System alongside the Final Cut Pro X platform.
- Vendor: Udemy
- Cost: $14.99
- Duration: 6h 30min
- Rating: 4.7 / 5
- Level: Beginner
Key topics inside this course:
- Mastering the user interface and choosing your preferences
- Learning helpful shortcuts to speed up your workflow
- Best and quickest methods to import media
- How to organize your clips
- Using the timeline
- Working with effects, keyframes, compounds clips, and audio clips
- How to use generators and white screens
- The best export settings and other tips
If you’ve ever wanted to master Final Cut Pro X, there’s no better place to go. This course is designed to start on a beginner-friendly level. But, it moves to more advanced lessons later down the line.
2. Video Editing Tutorials - Mastering The Basics
The following video editing courses include lessons mainly on the basics of video editing. They won’t focus on any specific platform or tool. Instead, you’ll be learning the most important principles of creating a high-quality and modern video.

A fairly simple course designed to teach you the process of creating and editing a video from scratch. This is one of the best video editing courses online, featuring several professional mentors.
- Vendor: Fiverr Learn
- Cost: $24
- Duration: 6h 38min
- Rating: 4.8 / 5
- Level: Beginner to Intermediate
Key topics inside this course:
- What equipment to use for professional video editing
- How to shoot high-quality video with your smartphone
- Professional video and audio recording techniques
- Exporting settings for high-quality online viewing
- Fundamentals of using a DSLR or Mirrorless camera
- Create high-converting CTAs for your videos
The course will help you understand crucial facts about many different types of videos that are in demand today. You’ll learn how to use and navigate video editing tools to create anything you can imagine. The mentors even offer a few tips for growing your own Youtube channel.
Free Video Editing Courses and Tutorials

This pick is slightly different. Here, you can see a list of a few of the best video editing courses that are completely free. They are still taught by experts and offer plenty of useful knowledge, especially for beginners.
- Vendor: Udemy
- Cost: Free
- Duration: Unknown
- Rating: Varies
- Level: Beginner to Intermediate
Key topics inside this course:
- Beginner lessons on editing all types of videos
- How to record professional video content
- Beginner lessons for many different video editing platforms
- 3D Video Composition
- Understand how to use Premiere Pro
- Video editing on your smartphone
- Camtasia 9 Mastery Course
- How to create social media marketing videos
This is a list of many different video editing courses that are free on Udemy. Millions of members have enrolled and are learning for free. Best of all, it’s a great way to dive into video editing for free. Then, you can choose some of the paid ones for more advanced lessons.

This course gives you a LinkedIn Learning Certificate and the knowledge to edit your first-ever video. There are 6 different lesson categories that you will enjoy going through. Each one focuses on another skill or principle.
- Vendor: LinkedIn Learning
- Cost: $34.99
- Duration: 2h 53min
- Rating: 4.7 / 5
- Level: Beginner
Key topics inside this course:
- The importance of storytelling in video editing
- Structures and transitions
- Timing and pacing
- Shot composition
- Comparing different editing applications
- Track-based editing vs. storyline-based editing
- Organizing your files
- How to edit a short documentary
- Audio editing lessons
- Post-production processes
This course offers a video editing certification that proves you’re well accustomed to the basic principles of this skill. You will know your way around different editing platforms. You will learn how to edit modern videos. And you will know exactly where to focus your efforts for improving yourself and your skills next.

This course features essential video editing foundations in one exciting program. It’s a short course designed to introduce you to video editing. To be more precise, you will mainly learn about the post-production process of video editing.
- Vendor: LinkedIn Learning
- Cost: LinkedIn Learning Membership Only ($39.99)
- Duration: 37min
- Rating: 4.7 / 5
- Level: Beginner
Key topics inside this course:
- Trimming or fine-tuning the product
- Audio editing process
- How to add images to your videos
- Video effects tutorials
- Color correction
- How to use text to your advantage
- Export and delivery settings
This certificate will prove that you know what it takes to edit a video professionally. It tells us that you are familiar with all the different parts that come together to create a video worth watching.

This is a list of video editing courses by some of the most popular video editors on the planet. You’ll learn from huge names such as Marques Brownies, Nathaniel Drew, Jordy Vandeput, and many more. So, pick your favorite, and start learning.
- Vendor: Skillshare
- Cost: Depends
- Duration: 37min
- Rating: Varies
- Level: From Beginner to Pro
Key topics inside this course:
- How to create mind-blowing Youtube videos
- Adobe Premiere Pro for Beginners
- How to document your life
- Final Cut Pro X - Beginner to Youtuber
- Introduction to Filmmaking
- Mastering TikTok videos
- iPhone Filmmaking
- Advanced training for all video editing apps
There are courses for all skill levels here. You can start as a complete beginner and finish as a master who knows how to create a worthwhile video. Or, you can choose one that improves your current skills.
The Complete Video Production Bootcamp

A nine-hour course on everything video editing related. To be more precise, you will dive into video production tutorials, cinematography, editing & distribution, and more. Companies like Nasdaq, Box, NetApp, and more offer this course to their employees.
- Vendor: Udemy
- Cost: $19.99
- Duration: 9h
- Rating: 4.5 / 5
- Level: Beginner
Key topics inside this course:
- Video storytelling
- How to record better audio
- Tips for posting videos online
- Discover the best equipment to use
- How to set up the perfect lighting
- How to get more engagement on your videos
- Create professional videos with any equipment
Over 160.000 students have benefited from the contents of this course. It dives into both beginner and advanced video editing lessons. So even if you don’t have any experience in this, you will still easily understand everything taught inside.
3. Video Editing Courses With Certification For Mobile Users
The courses you will see in this list are exclusively for mobile users. You can still make great videos on your mobile device if you don’t have a computer. All of the knowledge you need for this is below.
Smartphone Video For Beginners – iPhone Video Editing Course

Dive into five hours of content teaching you how to create unbelievable videos on your phone. You’ll be surprised by how it’s possible to create such professional videos on a smartphone.
- Vendor: Udemy
- Cost: $99.99
- Duration: 5h
- Rating: 4.3 / 5
- Level: Beginner
Key topics inside this course:
- Must-have gear for editing on a smartphone (Affordable options)
- How to set up your phone’s camera for optimal results
- Must-have free apps for professional smartphone video editing
- Using gimbals, action cams, and drones with your phone
- Video storytelling on a smartphone
- Phone resolutions, frame rates, ProRes, color space, and more
- How to make Cinematic shots, hit the right angles, and similar
This outstanding course will give you a certification proving you’re one of the rare video editors who can create wonders from their phones. From now on, you can’t use the excuse that you don’t have an excellent PC to create amazing videos.
4. Cinematic Level Video Editing Courses
The final category will introduce you to video editing courses online with certification for cinematic-level skills. Completing these courses will prove you are a master video editor who knows no bounds.
VIDEO EDITING. Techniques loved by pro broadcast filmmakers

Your teacher for this course will be Andrew St.Pierre White, an award-winning video editing veteran. He will teach you tips and tricks used by professionals to this day. Timeless advice that will take your career to the next level.
- Vendor: Udemy
- Cost: $84.99
- Duration: 3h 30min
- Rating: 4.5 / 5
- Level: Advanced to Pro
Key topics inside this course:
- How to entertain and inspire any audience
- Understand the balance between good editing and good content
- Amazing techniques used in TV production
- Turn great editing into great results
- Turn amateur videos into professional productions
- Most common mistakes filmmakers make
Once you know the basics of video editing, this course will take your skills to the next level. You will learn how the big players make professional videos that capture massive audiences. Plus, your mentor will show you how to work with big names in this industry.
The History of Film and Video Editing

Never underestimate how much history can teach you. Completing this course will teach you more about video editing than many pro filmmakers. Find out how video editing has progressed through the last century.
- Vendor: LinkedIn Learning
- Cost: $34.99
- Duration: 2h 10min
- Rating: 4.8 / 5
- Level: Everyone
Key topics inside this course:
- Early days of photography and film
- Continuity editing and montage theory
- When sound was born
- Establishing the standards for editing
- Evolution of editing techniques
- Technology
- The rise of the digital era
By learning the history of video editing, you will be more aware. You will realize what people love to see and detect patterns. These patterns will guide you toward becoming a professional video editor.
Make Your Video Editing Journey Easier
Now that we’re done with learning, it’s time to start doing. You already have enough fantastic courses to learn everything necessary to edit videos professionally. But now, how do you use your skills and achieve the easiest and quickest results?
Your best option is to use the Filmora video editor.
What Is Filmora and Filmora?
It’s as powerful as Adobe Premiere Pro but more straightforward to navigate. In addition, Filmora lets you command an arsenal of unique tools necessary for creating modern videos.
Free Download For Win 7 or later(64-bit)
Free Download For macOS 10.14 or later
Anyone on both Windows and Mac can use Filmora. In addition, if you’re a mobile user, you can download Filmora and enjoy the same benefits.
Aside from its easy-to-use interface, Filmora is packed with editing resources that will never leave you wondering how or what to do next. Of course, you can watch the free Youtube tutorials to master the platform entirely.
For example, we have prepared you with a video tutorial below to start your video editing journey with no delay!
Lastly, you can easily export in any format necessary for your project. It doesn’t get easier than this.
Conclusion
The video editing certification online courses you see here are more than enough to prepare you. You will learn everything it takes to edit any video. Use this information wisely and take advantage of this beautiful opportunity to become one of the best video editors.
Create an Awesome Logo Reveal with Logo Intro Templates
Almost every business has a logo, which they use to depict their character and unique values. However, static logos are soon becoming a thing of the past. Companies are now turning to animated logos to wow their audience. Perhaps a logo intro is the missing piece you need to create a buzz around your brand and grab the attention of any onlooker.
The article below will discuss the importance of logo reveals, how they can benefit your company and how to make one for yourself.

Importance of Logo Reveals in Your Intro Video
- First and foremost, logo reveal add some spice to your image. A slight motion could go a long way in giving the viewer a unique perspective on your logo.
- Secondly, logo reveal intro videos set you apart from your competitors. Any slight similarities between logos can be easily forgotten when you create an animated clip of your logo. Logo reveals also boost brand awareness because the animation is etched in your clients’ minds, making it easy to remember.
- Lastly, free logo intro templates evoke positive emotions, which cause your audience to associate your brand with good things.
Benefits of Using Logo Reveal Intro Video With Templates
- The first benefit of using a logo intro template is that it is pretty fast to make. In less than 5 minutes, you will have your video ready to use. You don’t need to go through a learning curve to make the video. The pre-made templates make your work easy, taking the tedium out of the entire process.
- As you continue trying to put your business out there, it would help to consider the cost. A free logo intro template is an affordable way to spread the word about your business and won’t leave a massive dent in your pockets.
- Lastly, logo reveal intro videos with templates are fun to design. It is interesting to see all the shapes and forms come together to form the final result.
How To Make a Logo Reveal Intro Video With Templates
Now that you know what a logo reveal is and how it can benefit your company, you are probably very eager to learn how to make one for yourself. Wondershare Filmora is an example of an efficient tool you can use to create a logo reveal intro video with templates.
Free Download For Win 7 or later(64-bit)
Free Download For macOS 10.14 or later
Since this platform has numerous features, we will only discuss the template feature. Wondershare Filmora has more than 1000 templates you can use to create a stunning logo reveal video. If you are unsatisfied with the stock videos within the template, you can replace them with unique videos from your internal storage.
A bonus point is that Filmora allows you to share your favorite templates with other creators who want to give creating a logo reveal video a trial.
How-to steps
Below is a simple step-by-step guide to making a logo reveal intro video with Filmora.
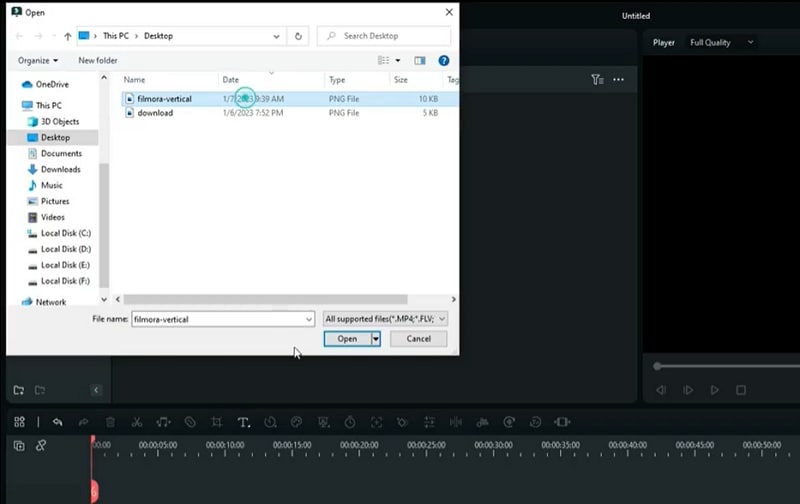
Step1 Upload videos from your internal storage.
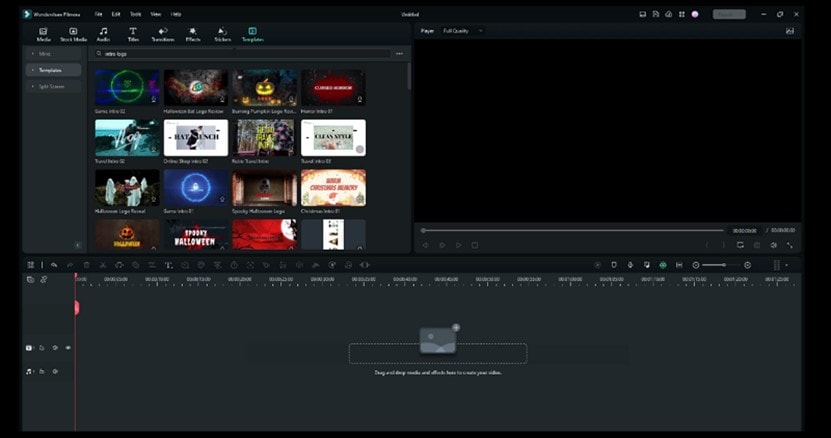
Step2 Select the “Templates” tab and type “Intro logo” in the search bar to narrow down your search.
Step3 Choose a template that tickles your fancy and drag it to the track below.
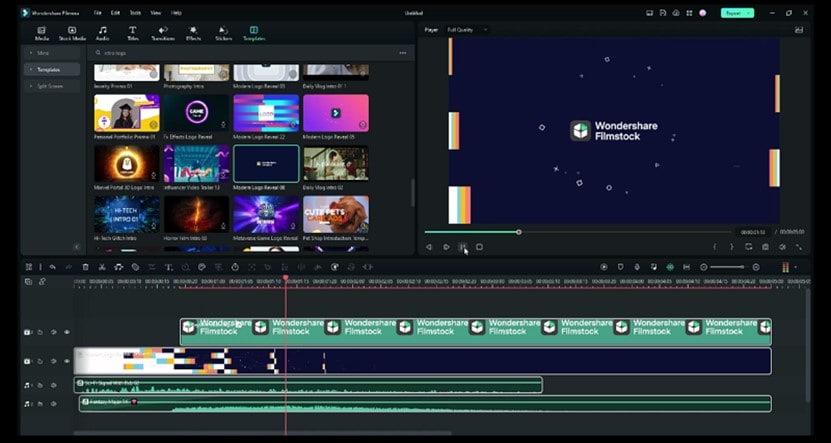
Step4 Drag your own logo to the track to replace the sample one.

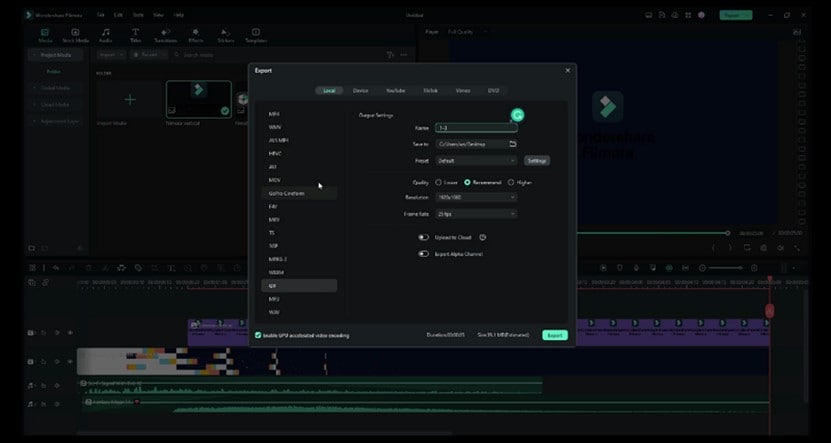
Step5 Export your video as an MP4 and save a copy to your internal storage.
Tips for a Fantastic Logo Intro
We hope the comprehensive guide above was easy to follow and inspired you to try your hand at creating your own logo reveal video. Without further ado, let’s discuss some tips for a fantastic logo intro.
- Start by conducting ample research to find as many intro videos as possible before attempting to make your own. Watching and learning will allow you to figure out what works and what you shouldn’t do. You might also discover many resources to make a fantastic intro video you missed.
- Understand what message your company intends to send and tailor your intro video to portray it as accurately as possible. For instance, you could create a fun video to relay that your brand is easygoing.
- It wouldn’t be a great idea to show your entire logo all at once. You could create anticipation by showing tiny bits of your logo in each frame till the final logo covers the screen.
- Design your video in a manner that keeps your audience glued to the screen. The dynamism will keep the viewer watching because they don’t want to miss what comes next.
- Though it is not mandatory, you could end the video on a dark background, such as pitch black, to ensure your logo is clearly visible to your audience.
- The most important tip is to keep the video short, so you don’t bore your audience. The average attention span for most viewers is shorter than 15 seconds, meaning any video longer than that will cause them to click away from your video.
People Also Ask
Before we bid you goodbye, let’s answer some commonly asked questions about template intro logo and logo reveals.
Q1. What Is a Logo Intro?
You have probably seen a logo intro before, even though you didn’t know what you were looking at. A logo intro is a short clip of a company’s logo that features before a movie.
Recently, companies have started warming up to logo intros to create a lasting impression on their visitors and prospective clients. You could use a logo intro to portray your unique character and encapsulate what you stand for. In addition, a logo intro is a sure way to gain a competitive advantage over your rivals.
Q2. What Is a Logo Reveal?
Contrary to the logo intro that features at the beginning of the clip, a logo reveal comes at the tail end. This short animation is a depiction of your logo, which helps cement your marketing strategy and display your brand in a more interactive manner.
A logo reveal is also known as a logo stinger or sting. Since the average attention span of Internet users is pretty short, it would be a great idea to keep the logo reveal to a maximum of 10 seconds. The shorter the video, the higher the chance your audience will grasp your message and remember your brand.
Q3. What Are the 5 Rules of a Good Logo?
You cannot create an unforgettable logo reveal without designing the logo first. Since your company logo appears on almost anything concerning your business, it would be wise to make a valiant effort to ensure it fits the bill. Below are some of the qualities of a good logo.
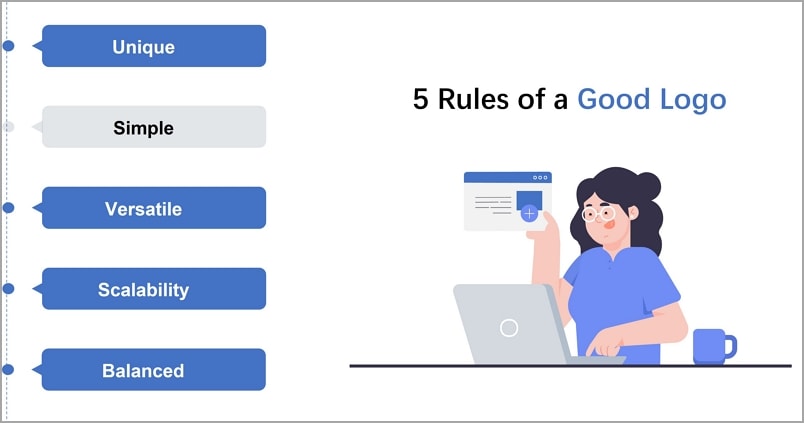
Unique
It would be a shame if your logo looked like someone else’s. Ensure your logo is your own creation and can easily be associated with your brand. Copying someone else’s logo could make your audience mistake you for someone else.
Simple
Complex logos are hard to recognize. They are also much harder to enlarge or reduce. It would help to incorporate strong lines and letters into your logo as opposed to thinner ones.
Versatile
Your logo should look good with or without colour. If you must add colour, ensure you don’t exceed four colours in the design. Remember that printing your logo when it contains too many colours becomes an expensive affair.
Scalability
It would help to ensure that your logo looks good in a big or small size. Remember that you will use your logo on letterheads and perhaps on large banners.
Balanced
Lastly, you should ensure that no element within your logo overpowers the rest. Ensure you keep all the elements in the centre because an asymmetrical logo with all the details in the corner doesn’t look aesthetically pleasing.
Q4. What Are the 7 Elements of a Good Logo?
The seven elements of a good logo include the following.

Simplicity
A simple design is far more superior to an overly complicated one. You could draw inspiration from brands like Nike.
Memorability
A good logo is one that your audience can remember off-head. Simple doesn’t always have to mean simplistic.
Timelessness
Trends come and go, but a timeless logo will remain appropriate in the years to come. It is not uncommon for some brands to retain their logos for more than a decade.
Relevance
It would be wise to ensure your logo relates to your industry in one way or the other.
High-quality typography
The wrong font on your logo can negatively impact your business. Your typography should also be easy to read from afar.
Well-balanced colors
Your choice of colors can subconsciously influence your target audience’s buying decisions and how they perceive you. For instance, blue communicates honesty and reliability, while yellow elicits feelings of happiness.
Versatility
Lastly, it would be wise to ensure that you can use your logo in numerous instances, like on a letterhead or on your social media platforms.
Conclusion
We cannot dispute a logo’s importance to your overall brand image. Your logo helps you communicate your unique message to your target audience and prospective clients. Instead of sticking with the bland, old-fashioned static logo, you have now learned a new way to animate your logo and add some spice. We hope the suggestions in this article will help you create an excellent logo reveal intro video that keeps your audience hooked and craving more.
Free Download For macOS 10.14 or later
Since this platform has numerous features, we will only discuss the template feature. Wondershare Filmora has more than 1000 templates you can use to create a stunning logo reveal video. If you are unsatisfied with the stock videos within the template, you can replace them with unique videos from your internal storage.
A bonus point is that Filmora allows you to share your favorite templates with other creators who want to give creating a logo reveal video a trial.
How-to steps
Below is a simple step-by-step guide to making a logo reveal intro video with Filmora.
Step1 Upload videos from your internal storage.

Step2 Select the “Templates” tab and type “Intro logo” in the search bar to narrow down your search.

Step3 Choose a template that tickles your fancy and drag it to the track below.

Step4 Drag your own logo to the track to replace the sample one.

Step5 Export your video as an MP4 and save a copy to your internal storage.

Tips for a Fantastic Logo Intro
We hope the comprehensive guide above was easy to follow and inspired you to try your hand at creating your own logo reveal video. Without further ado, let’s discuss some tips for a fantastic logo intro.
- Start by conducting ample research to find as many intro videos as possible before attempting to make your own. Watching and learning will allow you to figure out what works and what you shouldn’t do. You might also discover many resources to make a fantastic intro video you missed.
- Understand what message your company intends to send and tailor your intro video to portray it as accurately as possible. For instance, you could create a fun video to relay that your brand is easygoing.
- It wouldn’t be a great idea to show your entire logo all at once. You could create anticipation by showing tiny bits of your logo in each frame till the final logo covers the screen.
- Design your video in a manner that keeps your audience glued to the screen. The dynamism will keep the viewer watching because they don’t want to miss what comes next.
- Though it is not mandatory, you could end the video on a dark background, such as pitch black, to ensure your logo is clearly visible to your audience.
- The most important tip is to keep the video short, so you don’t bore your audience. The average attention span for most viewers is shorter than 15 seconds, meaning any video longer than that will cause them to click away from your video.
People Also Ask
Before we bid you goodbye, let’s answer some commonly asked questions about template intro logo and logo reveals.
Q1. What Is a Logo Intro?
You have probably seen a logo intro before, even though you didn’t know what you were looking at. A logo intro is a short clip of a company’s logo that features before a movie.
Recently, companies have started warming up to logo intros to create a lasting impression on their visitors and prospective clients. You could use a logo intro to portray your unique character and encapsulate what you stand for. In addition, a logo intro is a sure way to gain a competitive advantage over your rivals.
Q2. What Is a Logo Reveal?
Contrary to the logo intro that features at the beginning of the clip, a logo reveal comes at the tail end. This short animation is a depiction of your logo, which helps cement your marketing strategy and display your brand in a more interactive manner.
A logo reveal is also known as a logo stinger or sting. Since the average attention span of Internet users is pretty short, it would be a great idea to keep the logo reveal to a maximum of 10 seconds. The shorter the video, the higher the chance your audience will grasp your message and remember your brand.
Q3. What Are the 5 Rules of a Good Logo?
You cannot create an unforgettable logo reveal without designing the logo first. Since your company logo appears on almost anything concerning your business, it would be wise to make a valiant effort to ensure it fits the bill. Below are some of the qualities of a good logo.

Unique
It would be a shame if your logo looked like someone else’s. Ensure your logo is your own creation and can easily be associated with your brand. Copying someone else’s logo could make your audience mistake you for someone else.
Simple
Complex logos are hard to recognize. They are also much harder to enlarge or reduce. It would help to incorporate strong lines and letters into your logo as opposed to thinner ones.
Versatile
Your logo should look good with or without colour. If you must add colour, ensure you don’t exceed four colours in the design. Remember that printing your logo when it contains too many colours becomes an expensive affair.
Scalability
It would help to ensure that your logo looks good in a big or small size. Remember that you will use your logo on letterheads and perhaps on large banners.
Balanced
Lastly, you should ensure that no element within your logo overpowers the rest. Ensure you keep all the elements in the centre because an asymmetrical logo with all the details in the corner doesn’t look aesthetically pleasing.
Q4. What Are the 7 Elements of a Good Logo?
The seven elements of a good logo include the following.

Simplicity
A simple design is far more superior to an overly complicated one. You could draw inspiration from brands like Nike.
Memorability
A good logo is one that your audience can remember off-head. Simple doesn’t always have to mean simplistic.
Timelessness
Trends come and go, but a timeless logo will remain appropriate in the years to come. It is not uncommon for some brands to retain their logos for more than a decade.
Relevance
It would be wise to ensure your logo relates to your industry in one way or the other.
High-quality typography
The wrong font on your logo can negatively impact your business. Your typography should also be easy to read from afar.
Well-balanced colors
Your choice of colors can subconsciously influence your target audience’s buying decisions and how they perceive you. For instance, blue communicates honesty and reliability, while yellow elicits feelings of happiness.
Versatility
Lastly, it would be wise to ensure that you can use your logo in numerous instances, like on a letterhead or on your social media platforms.
Conclusion
We cannot dispute a logo’s importance to your overall brand image. Your logo helps you communicate your unique message to your target audience and prospective clients. Instead of sticking with the bland, old-fashioned static logo, you have now learned a new way to animate your logo and add some spice. We hope the suggestions in this article will help you create an excellent logo reveal intro video that keeps your audience hooked and craving more.
Why You Should Master Slideshows In Lightroom, Fresh Insight?
Why You Should Master Slideshows in Lightroom, Fresh Insight
An easy yet powerful editor
Numerous effects to choose from
Detailed tutorials provided by the official channel
Adobe Lightroom is an image manipulation software which is developed by Adobe Inc. It is used for editing, importing, saving and sharing a large no. of digital images. Lightroom editing functions include HSL, colour grading, lens correction, white balance, the transformation of spot removal, red-eye correction and adjustment brushing. Lightroom has a feature of slideshow module which you must have heard about it before.
The process of creating a slideshow video can be time-consuming but once you have created it, you can rewind your memories in just 3-4 minutes. If you want you can share the video on your social media accounts.
In this article
01 [What is Lightroom and What Advantages Does It Have for Making Slideshows](#Part 1)
02 [What Does Slideshows in Lightroom Do to Different Groups of People](#Part 2)
03 [How to Create a Professional-looking Slideshow with Lightroom](#Part 3)
04 [Hot FAQs About Slideshows in Lightroom](#Part 4)
Part 1 What is lightroom and what advantages does it have for making slideshows?
Lightroom helps in editing the images and it allows the users to edit the images by using external features. Photographers usually like working on the lightroom because it is a very popular and easy tool. It is perfect for beginners and graphic designers who are looking for an easy and straightforward editor.
Lightroom is used for image retouching. Lightroom includes improving the color tone, color balance, cropping, filters, removing red-eye effect, and many more things. Lightroom supports some the image formats like JPEG, PSD, PNG and TIFF. You can also edit the raw images.
Advantages
● Easy to use - The lightroom interface is less complex, which makes it easy to use especially for the newcomers.
● Tidy interface - In lightroom, it is easier to search for images as it gathers the metadata on each image on its own. So you can find the image with a very specific date, time, resolution, model, etc.
● Editing capabilities - With editing capabilities like contrast, exposure, clarity, warmth, and saturation, Lightroom can give the desired look to the image which photographers want to create.
Part 2 What do slideshows in Lightroom do to a different group of people?
01Enable or Disable People View
If you are a beginner and people view is disabled, all pre-existing face model data is deleted from lightroom servers. Lightroom will no longer analyze new images and will not group them in clusters automatically. You need to enable it so that the lightroom desktop can analyze images in the cloud to identify people and form clusters in people’s view.
02View people in your photos
● In the My Photos panel at the upper-left side of the screen, select People to view the people view. You can access People clusters in which each cluster contains images of a particular person. Below the cover photo of each cluster, you can see the total number of photos for each person.
● To view photos of that person you can click on any cluster. In the cluster at the upper right corner of the screen, you can view the total number of photos.
03Sort options in People View
To sort People clusters follow the steps:
● In the My Photos panel at the upper left side of the screen, select People to view People View.
● Click on the three dots at the upper right corner of the screen, from the drop-down list select Sort By, and then select the following option:
● First Name: Sort the clusters in the alphabetical order of the first name.
● Last Name: Sort the clusters in the alphabetical order of the last name.
● Count: Sort the clusters with the highest number of photos to the least no. of photos in a cluster.
Part 3 How to create a professional-looking slideshow with Lightroom?
Do you know that you can create a professional-looking slideshow using lightroom? Here are some steps that you can follow to make a professional-looking slideshow.
Step 1 - Photo selection
The first thing you have to do is select the images you want to include in making the slideshow. There are a lot of ways to do this in Lightroom.
● In the grid view select the photos you want to include. Select CTRL (CMD) key and click on each image.
● Add those images to Quick Collection because it is easiest to work with. Click the B key to add them to the quick collection.
● It will be added to the collection panel when you will name the collection for the slideshow.
Step 2 - Arrange the photos
Now, it is time for arranging the photos in a sequence in which you want them to watch in a slideshow. If you want to rearrange them simply drag and drop each image in the grid view where you want to make them appear in a slideshow.
Try to arrange the photos in such a way so that they can tell a story to the viewers who are watching it.
Step 3 – Create a slideshow
Once you have arranged the photos in a sequence, then create a slideshow.
● Click on the ‘slideshow’ menu given at the top of your screen.
● This will lead you to the slideshow module view in lightroom.
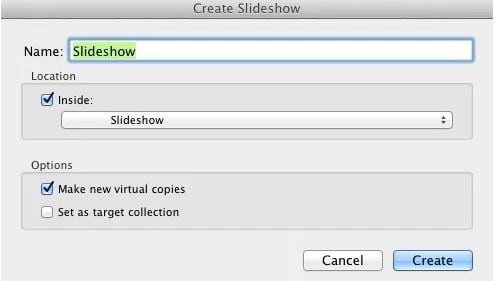
● Click on the ‘Create Slideshow’ given at the top right of the central panel.
● Add a name to your slideshow and then click on create.
● Once you have created it and named your slideshow, all the changes will be automatically saved in lightroom.
Step 4 – Select a template for a slideshow
From the template browser given on the left-hand side panel, you can select a template for your slideshow. Before adding anything, do a run-through on your slideshow to see how it looks.
Step 5 – Designing the lightroom slideshow
You can customize your slideshow to make it more professional. You can make following changes or enrichments by using the features given at the right-hand side panel:
● Titles - You can add text, company logo, introduction or any other important information. You can easily add these things in your slideshow in lightroom.
● Watermarks and overlays - You can add watermarks and custom overlay text in every slide you want to by using the overlays windows.
● Layout - You can change the spacing for each slide by unselecting the Link All Box and selecting the ratio which you prefer. Although the program automatically sets the spacing for each slide.
● Options – You can add a frame or you can change the border it allows you to select how your images are going to be displayed in each slide.
● Background – You can add a background to enhance an image, not to divert attention from it. You can add an image as your background or add any colour as your background. You can create background by using various options available.
● Music – You can add music of your choice using an mp3 file.
● Transitions - Setting a transitions between the slides can really make a huge impact on your overall experience. You can use the auto option or you can set the transitions manually.
Step - 6 Completion of slideshow
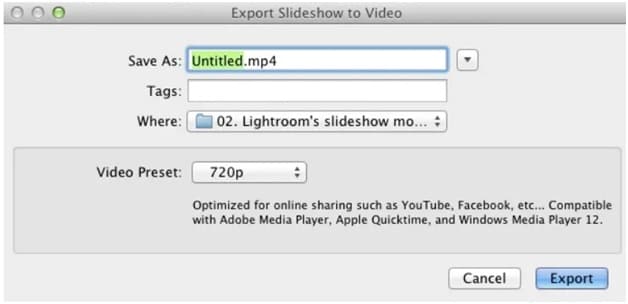
Once you have made all the desired changes, you can press “Play” option to run the slideshow. If you still want to make any changes you can go back and change whatever you like. Once it’s done and you are happy with the results it’s time to export the slideshow in the form of video or PDF.
Part 4 Hot FAQs about slideshow in lightroom
Q1. How can you make a slideshow in lightroom?
A. You can create a slideshow by using the slideshow module in lightroom, where you can select templates, layouts, add tiles or songs, choose transitions and playback options.
Q2. Where is the slideshow module in lightroom?
A. Start by clicking on ‘slideshow’ option given at the top menu of your screen. This will open the slideshow module view in lightroom. The right and left panels in slideshow module will look different than the ones in the library module.
Q3. How can you change the sequence of the photos in slideshow lightroom?
A. You can control the order of the photos in a Lightroom folder by dragging and dropping each image from one place to the other in the filmstrip view. To rearrange grab the image and drag on it until you see a black bar appear between two images.
Q4. What is the transition effect in slideshow?
A. Transitions are often called – the movement you see when slide changes to another slide in a slideshow. They are different from animation effect. You can set it manually or with an auto option.
Q5. How to make your slideshow more attractive?
A. There are a lot of options to make your look slideshow more attractive. By using the beautiful template, layouts, background and adding transitions with the perfect time ratio. This will enhance the look of your slideshow and will make it more attractive.
If you are not able to follow the interface of lightroom you can consider Filmora for making attractive slideshows. Wondershare Filmora Video Editor allows you to crop, pan and zoom the slideshow automatically or manually by applying pan and zoom photo placement. It has its own music track and sound effect gallery that allows you to customize the slideshows. Filmora allows you to record your own voiceovers as well. It has also fade-in, fade-out effects with amazing transitions. It exports the videos at resolutions of up to 4K.
For Win 7 or later (64-bit)
For macOS 10.12 or later
● Ending Thoughts →
● Adobe Lightroom is one of the best software for making slideshows due to its amazing features like color grading, red eye correction, transformation of spot removal, white balance etc.
● Lightroom has a feature of slideshow module in which you can create quality slideshow presentations for your business.
● If you are not able to use lightroom you can consider using Filmora for creating amazing slideshows.
Adobe Lightroom is an image manipulation software which is developed by Adobe Inc. It is used for editing, importing, saving and sharing a large no. of digital images. Lightroom editing functions include HSL, colour grading, lens correction, white balance, the transformation of spot removal, red-eye correction and adjustment brushing. Lightroom has a feature of slideshow module which you must have heard about it before.
The process of creating a slideshow video can be time-consuming but once you have created it, you can rewind your memories in just 3-4 minutes. If you want you can share the video on your social media accounts.
In this article
01 [What is Lightroom and What Advantages Does It Have for Making Slideshows](#Part 1)
02 [What Does Slideshows in Lightroom Do to Different Groups of People](#Part 2)
03 [How to Create a Professional-looking Slideshow with Lightroom](#Part 3)
04 [Hot FAQs About Slideshows in Lightroom](#Part 4)
Part 1 What is lightroom and what advantages does it have for making slideshows?
Lightroom helps in editing the images and it allows the users to edit the images by using external features. Photographers usually like working on the lightroom because it is a very popular and easy tool. It is perfect for beginners and graphic designers who are looking for an easy and straightforward editor.
Lightroom is used for image retouching. Lightroom includes improving the color tone, color balance, cropping, filters, removing red-eye effect, and many more things. Lightroom supports some the image formats like JPEG, PSD, PNG and TIFF. You can also edit the raw images.
Advantages
● Easy to use - The lightroom interface is less complex, which makes it easy to use especially for the newcomers.
● Tidy interface - In lightroom, it is easier to search for images as it gathers the metadata on each image on its own. So you can find the image with a very specific date, time, resolution, model, etc.
● Editing capabilities - With editing capabilities like contrast, exposure, clarity, warmth, and saturation, Lightroom can give the desired look to the image which photographers want to create.
Part 2 What do slideshows in Lightroom do to a different group of people?
01Enable or Disable People View
If you are a beginner and people view is disabled, all pre-existing face model data is deleted from lightroom servers. Lightroom will no longer analyze new images and will not group them in clusters automatically. You need to enable it so that the lightroom desktop can analyze images in the cloud to identify people and form clusters in people’s view.
02View people in your photos
● In the My Photos panel at the upper-left side of the screen, select People to view the people view. You can access People clusters in which each cluster contains images of a particular person. Below the cover photo of each cluster, you can see the total number of photos for each person.
● To view photos of that person you can click on any cluster. In the cluster at the upper right corner of the screen, you can view the total number of photos.
03Sort options in People View
To sort People clusters follow the steps:
● In the My Photos panel at the upper left side of the screen, select People to view People View.
● Click on the three dots at the upper right corner of the screen, from the drop-down list select Sort By, and then select the following option:
● First Name: Sort the clusters in the alphabetical order of the first name.
● Last Name: Sort the clusters in the alphabetical order of the last name.
● Count: Sort the clusters with the highest number of photos to the least no. of photos in a cluster.
Part 3 How to create a professional-looking slideshow with Lightroom?
Do you know that you can create a professional-looking slideshow using lightroom? Here are some steps that you can follow to make a professional-looking slideshow.
Step 1 - Photo selection
The first thing you have to do is select the images you want to include in making the slideshow. There are a lot of ways to do this in Lightroom.
● In the grid view select the photos you want to include. Select CTRL (CMD) key and click on each image.
● Add those images to Quick Collection because it is easiest to work with. Click the B key to add them to the quick collection.
● It will be added to the collection panel when you will name the collection for the slideshow.
Step 2 - Arrange the photos
Now, it is time for arranging the photos in a sequence in which you want them to watch in a slideshow. If you want to rearrange them simply drag and drop each image in the grid view where you want to make them appear in a slideshow.
Try to arrange the photos in such a way so that they can tell a story to the viewers who are watching it.
Step 3 – Create a slideshow
Once you have arranged the photos in a sequence, then create a slideshow.
● Click on the ‘slideshow’ menu given at the top of your screen.
● This will lead you to the slideshow module view in lightroom.
● Click on the ‘Create Slideshow’ given at the top right of the central panel.
● Add a name to your slideshow and then click on create.
● Once you have created it and named your slideshow, all the changes will be automatically saved in lightroom.
Step 4 – Select a template for a slideshow
From the template browser given on the left-hand side panel, you can select a template for your slideshow. Before adding anything, do a run-through on your slideshow to see how it looks.
Step 5 – Designing the lightroom slideshow
You can customize your slideshow to make it more professional. You can make following changes or enrichments by using the features given at the right-hand side panel:
● Titles - You can add text, company logo, introduction or any other important information. You can easily add these things in your slideshow in lightroom.
● Watermarks and overlays - You can add watermarks and custom overlay text in every slide you want to by using the overlays windows.
● Layout - You can change the spacing for each slide by unselecting the Link All Box and selecting the ratio which you prefer. Although the program automatically sets the spacing for each slide.
● Options – You can add a frame or you can change the border it allows you to select how your images are going to be displayed in each slide.
● Background – You can add a background to enhance an image, not to divert attention from it. You can add an image as your background or add any colour as your background. You can create background by using various options available.
● Music – You can add music of your choice using an mp3 file.
● Transitions - Setting a transitions between the slides can really make a huge impact on your overall experience. You can use the auto option or you can set the transitions manually.
Step - 6 Completion of slideshow
Once you have made all the desired changes, you can press “Play” option to run the slideshow. If you still want to make any changes you can go back and change whatever you like. Once it’s done and you are happy with the results it’s time to export the slideshow in the form of video or PDF.

Part 4 Hot FAQs about slideshow in lightroom
Q1. How can you make a slideshow in lightroom?
A. You can create a slideshow by using the slideshow module in lightroom, where you can select templates, layouts, add tiles or songs, choose transitions and playback options.
Q2. Where is the slideshow module in lightroom?
A. Start by clicking on ‘slideshow’ option given at the top menu of your screen. This will open the slideshow module view in lightroom. The right and left panels in slideshow module will look different than the ones in the library module.
Q3. How can you change the sequence of the photos in slideshow lightroom?
A. You can control the order of the photos in a Lightroom folder by dragging and dropping each image from one place to the other in the filmstrip view. To rearrange grab the image and drag on it until you see a black bar appear between two images.
Q4. What is the transition effect in slideshow?
A. Transitions are often called – the movement you see when slide changes to another slide in a slideshow. They are different from animation effect. You can set it manually or with an auto option.
Q5. How to make your slideshow more attractive?
A. There are a lot of options to make your look slideshow more attractive. By using the beautiful template, layouts, background and adding transitions with the perfect time ratio. This will enhance the look of your slideshow and will make it more attractive.
If you are not able to follow the interface of lightroom you can consider Filmora for making attractive slideshows. Wondershare Filmora Video Editor allows you to crop, pan and zoom the slideshow automatically or manually by applying pan and zoom photo placement. It has its own music track and sound effect gallery that allows you to customize the slideshows. Filmora allows you to record your own voiceovers as well. It has also fade-in, fade-out effects with amazing transitions. It exports the videos at resolutions of up to 4K.
For Win 7 or later (64-bit)
For macOS 10.12 or later
● Ending Thoughts →
● Adobe Lightroom is one of the best software for making slideshows due to its amazing features like color grading, red eye correction, transformation of spot removal, white balance etc.
● Lightroom has a feature of slideshow module in which you can create quality slideshow presentations for your business.
● If you are not able to use lightroom you can consider using Filmora for creating amazing slideshows.
Adobe Lightroom is an image manipulation software which is developed by Adobe Inc. It is used for editing, importing, saving and sharing a large no. of digital images. Lightroom editing functions include HSL, colour grading, lens correction, white balance, the transformation of spot removal, red-eye correction and adjustment brushing. Lightroom has a feature of slideshow module which you must have heard about it before.
The process of creating a slideshow video can be time-consuming but once you have created it, you can rewind your memories in just 3-4 minutes. If you want you can share the video on your social media accounts.
In this article
01 [What is Lightroom and What Advantages Does It Have for Making Slideshows](#Part 1)
02 [What Does Slideshows in Lightroom Do to Different Groups of People](#Part 2)
03 [How to Create a Professional-looking Slideshow with Lightroom](#Part 3)
04 [Hot FAQs About Slideshows in Lightroom](#Part 4)
Part 1 What is lightroom and what advantages does it have for making slideshows?
Lightroom helps in editing the images and it allows the users to edit the images by using external features. Photographers usually like working on the lightroom because it is a very popular and easy tool. It is perfect for beginners and graphic designers who are looking for an easy and straightforward editor.
Lightroom is used for image retouching. Lightroom includes improving the color tone, color balance, cropping, filters, removing red-eye effect, and many more things. Lightroom supports some the image formats like JPEG, PSD, PNG and TIFF. You can also edit the raw images.
Advantages
● Easy to use - The lightroom interface is less complex, which makes it easy to use especially for the newcomers.
● Tidy interface - In lightroom, it is easier to search for images as it gathers the metadata on each image on its own. So you can find the image with a very specific date, time, resolution, model, etc.
● Editing capabilities - With editing capabilities like contrast, exposure, clarity, warmth, and saturation, Lightroom can give the desired look to the image which photographers want to create.
Part 2 What do slideshows in Lightroom do to a different group of people?
01Enable or Disable People View
If you are a beginner and people view is disabled, all pre-existing face model data is deleted from lightroom servers. Lightroom will no longer analyze new images and will not group them in clusters automatically. You need to enable it so that the lightroom desktop can analyze images in the cloud to identify people and form clusters in people’s view.
02View people in your photos
● In the My Photos panel at the upper-left side of the screen, select People to view the people view. You can access People clusters in which each cluster contains images of a particular person. Below the cover photo of each cluster, you can see the total number of photos for each person.
● To view photos of that person you can click on any cluster. In the cluster at the upper right corner of the screen, you can view the total number of photos.
03Sort options in People View
To sort People clusters follow the steps:
● In the My Photos panel at the upper left side of the screen, select People to view People View.
● Click on the three dots at the upper right corner of the screen, from the drop-down list select Sort By, and then select the following option:
● First Name: Sort the clusters in the alphabetical order of the first name.
● Last Name: Sort the clusters in the alphabetical order of the last name.
● Count: Sort the clusters with the highest number of photos to the least no. of photos in a cluster.
Part 3 How to create a professional-looking slideshow with Lightroom?
Do you know that you can create a professional-looking slideshow using lightroom? Here are some steps that you can follow to make a professional-looking slideshow.
Step 1 - Photo selection
The first thing you have to do is select the images you want to include in making the slideshow. There are a lot of ways to do this in Lightroom.
● In the grid view select the photos you want to include. Select CTRL (CMD) key and click on each image.
● Add those images to Quick Collection because it is easiest to work with. Click the B key to add them to the quick collection.
● It will be added to the collection panel when you will name the collection for the slideshow.
Step 2 - Arrange the photos
Now, it is time for arranging the photos in a sequence in which you want them to watch in a slideshow. If you want to rearrange them simply drag and drop each image in the grid view where you want to make them appear in a slideshow.
Try to arrange the photos in such a way so that they can tell a story to the viewers who are watching it.
Step 3 – Create a slideshow
Once you have arranged the photos in a sequence, then create a slideshow.
● Click on the ‘slideshow’ menu given at the top of your screen.
● This will lead you to the slideshow module view in lightroom.
● Click on the ‘Create Slideshow’ given at the top right of the central panel.
● Add a name to your slideshow and then click on create.
● Once you have created it and named your slideshow, all the changes will be automatically saved in lightroom.
Step 4 – Select a template for a slideshow
From the template browser given on the left-hand side panel, you can select a template for your slideshow. Before adding anything, do a run-through on your slideshow to see how it looks.
Step 5 – Designing the lightroom slideshow
You can customize your slideshow to make it more professional. You can make following changes or enrichments by using the features given at the right-hand side panel:
● Titles - You can add text, company logo, introduction or any other important information. You can easily add these things in your slideshow in lightroom.
● Watermarks and overlays - You can add watermarks and custom overlay text in every slide you want to by using the overlays windows.
● Layout - You can change the spacing for each slide by unselecting the Link All Box and selecting the ratio which you prefer. Although the program automatically sets the spacing for each slide.
● Options – You can add a frame or you can change the border it allows you to select how your images are going to be displayed in each slide.
● Background – You can add a background to enhance an image, not to divert attention from it. You can add an image as your background or add any colour as your background. You can create background by using various options available.
● Music – You can add music of your choice using an mp3 file.
● Transitions - Setting a transitions between the slides can really make a huge impact on your overall experience. You can use the auto option or you can set the transitions manually.
Step - 6 Completion of slideshow
Once you have made all the desired changes, you can press “Play” option to run the slideshow. If you still want to make any changes you can go back and change whatever you like. Once it’s done and you are happy with the results it’s time to export the slideshow in the form of video or PDF.

Part 4 Hot FAQs about slideshow in lightroom
Q1. How can you make a slideshow in lightroom?
A. You can create a slideshow by using the slideshow module in lightroom, where you can select templates, layouts, add tiles or songs, choose transitions and playback options.
Q2. Where is the slideshow module in lightroom?
A. Start by clicking on ‘slideshow’ option given at the top menu of your screen. This will open the slideshow module view in lightroom. The right and left panels in slideshow module will look different than the ones in the library module.
Q3. How can you change the sequence of the photos in slideshow lightroom?
A. You can control the order of the photos in a Lightroom folder by dragging and dropping each image from one place to the other in the filmstrip view. To rearrange grab the image and drag on it until you see a black bar appear between two images.
Q4. What is the transition effect in slideshow?
A. Transitions are often called – the movement you see when slide changes to another slide in a slideshow. They are different from animation effect. You can set it manually or with an auto option.
Q5. How to make your slideshow more attractive?
A. There are a lot of options to make your look slideshow more attractive. By using the beautiful template, layouts, background and adding transitions with the perfect time ratio. This will enhance the look of your slideshow and will make it more attractive.
If you are not able to follow the interface of lightroom you can consider Filmora for making attractive slideshows. Wondershare Filmora Video Editor allows you to crop, pan and zoom the slideshow automatically or manually by applying pan and zoom photo placement. It has its own music track and sound effect gallery that allows you to customize the slideshows. Filmora allows you to record your own voiceovers as well. It has also fade-in, fade-out effects with amazing transitions. It exports the videos at resolutions of up to 4K.
For Win 7 or later (64-bit)
For macOS 10.12 or later
● Ending Thoughts →
● Adobe Lightroom is one of the best software for making slideshows due to its amazing features like color grading, red eye correction, transformation of spot removal, white balance etc.
● Lightroom has a feature of slideshow module in which you can create quality slideshow presentations for your business.
● If you are not able to use lightroom you can consider using Filmora for creating amazing slideshows.
Adobe Lightroom is an image manipulation software which is developed by Adobe Inc. It is used for editing, importing, saving and sharing a large no. of digital images. Lightroom editing functions include HSL, colour grading, lens correction, white balance, the transformation of spot removal, red-eye correction and adjustment brushing. Lightroom has a feature of slideshow module which you must have heard about it before.
The process of creating a slideshow video can be time-consuming but once you have created it, you can rewind your memories in just 3-4 minutes. If you want you can share the video on your social media accounts.
In this article
01 [What is Lightroom and What Advantages Does It Have for Making Slideshows](#Part 1)
02 [What Does Slideshows in Lightroom Do to Different Groups of People](#Part 2)
03 [How to Create a Professional-looking Slideshow with Lightroom](#Part 3)
04 [Hot FAQs About Slideshows in Lightroom](#Part 4)
Part 1 What is lightroom and what advantages does it have for making slideshows?
Lightroom helps in editing the images and it allows the users to edit the images by using external features. Photographers usually like working on the lightroom because it is a very popular and easy tool. It is perfect for beginners and graphic designers who are looking for an easy and straightforward editor.
Lightroom is used for image retouching. Lightroom includes improving the color tone, color balance, cropping, filters, removing red-eye effect, and many more things. Lightroom supports some the image formats like JPEG, PSD, PNG and TIFF. You can also edit the raw images.
Advantages
● Easy to use - The lightroom interface is less complex, which makes it easy to use especially for the newcomers.
● Tidy interface - In lightroom, it is easier to search for images as it gathers the metadata on each image on its own. So you can find the image with a very specific date, time, resolution, model, etc.
● Editing capabilities - With editing capabilities like contrast, exposure, clarity, warmth, and saturation, Lightroom can give the desired look to the image which photographers want to create.
Part 2 What do slideshows in Lightroom do to a different group of people?
01Enable or Disable People View
If you are a beginner and people view is disabled, all pre-existing face model data is deleted from lightroom servers. Lightroom will no longer analyze new images and will not group them in clusters automatically. You need to enable it so that the lightroom desktop can analyze images in the cloud to identify people and form clusters in people’s view.
02View people in your photos
● In the My Photos panel at the upper-left side of the screen, select People to view the people view. You can access People clusters in which each cluster contains images of a particular person. Below the cover photo of each cluster, you can see the total number of photos for each person.
● To view photos of that person you can click on any cluster. In the cluster at the upper right corner of the screen, you can view the total number of photos.
03Sort options in People View
To sort People clusters follow the steps:
● In the My Photos panel at the upper left side of the screen, select People to view People View.
● Click on the three dots at the upper right corner of the screen, from the drop-down list select Sort By, and then select the following option:
● First Name: Sort the clusters in the alphabetical order of the first name.
● Last Name: Sort the clusters in the alphabetical order of the last name.
● Count: Sort the clusters with the highest number of photos to the least no. of photos in a cluster.
Part 3 How to create a professional-looking slideshow with Lightroom?
Do you know that you can create a professional-looking slideshow using lightroom? Here are some steps that you can follow to make a professional-looking slideshow.
Step 1 - Photo selection
The first thing you have to do is select the images you want to include in making the slideshow. There are a lot of ways to do this in Lightroom.
● In the grid view select the photos you want to include. Select CTRL (CMD) key and click on each image.
● Add those images to Quick Collection because it is easiest to work with. Click the B key to add them to the quick collection.
● It will be added to the collection panel when you will name the collection for the slideshow.
Step 2 - Arrange the photos
Now, it is time for arranging the photos in a sequence in which you want them to watch in a slideshow. If you want to rearrange them simply drag and drop each image in the grid view where you want to make them appear in a slideshow.
Try to arrange the photos in such a way so that they can tell a story to the viewers who are watching it.
Step 3 – Create a slideshow
Once you have arranged the photos in a sequence, then create a slideshow.
● Click on the ‘slideshow’ menu given at the top of your screen.
● This will lead you to the slideshow module view in lightroom.
● Click on the ‘Create Slideshow’ given at the top right of the central panel.
● Add a name to your slideshow and then click on create.
● Once you have created it and named your slideshow, all the changes will be automatically saved in lightroom.
Step 4 – Select a template for a slideshow
From the template browser given on the left-hand side panel, you can select a template for your slideshow. Before adding anything, do a run-through on your slideshow to see how it looks.
Step 5 – Designing the lightroom slideshow
You can customize your slideshow to make it more professional. You can make following changes or enrichments by using the features given at the right-hand side panel:
● Titles - You can add text, company logo, introduction or any other important information. You can easily add these things in your slideshow in lightroom.
● Watermarks and overlays - You can add watermarks and custom overlay text in every slide you want to by using the overlays windows.
● Layout - You can change the spacing for each slide by unselecting the Link All Box and selecting the ratio which you prefer. Although the program automatically sets the spacing for each slide.
● Options – You can add a frame or you can change the border it allows you to select how your images are going to be displayed in each slide.
● Background – You can add a background to enhance an image, not to divert attention from it. You can add an image as your background or add any colour as your background. You can create background by using various options available.
● Music – You can add music of your choice using an mp3 file.
● Transitions - Setting a transitions between the slides can really make a huge impact on your overall experience. You can use the auto option or you can set the transitions manually.
Step - 6 Completion of slideshow
Once you have made all the desired changes, you can press “Play” option to run the slideshow. If you still want to make any changes you can go back and change whatever you like. Once it’s done and you are happy with the results it’s time to export the slideshow in the form of video or PDF.

Part 4 Hot FAQs about slideshow in lightroom
Q1. How can you make a slideshow in lightroom?
A. You can create a slideshow by using the slideshow module in lightroom, where you can select templates, layouts, add tiles or songs, choose transitions and playback options.
Q2. Where is the slideshow module in lightroom?
A. Start by clicking on ‘slideshow’ option given at the top menu of your screen. This will open the slideshow module view in lightroom. The right and left panels in slideshow module will look different than the ones in the library module.
Q3. How can you change the sequence of the photos in slideshow lightroom?
A. You can control the order of the photos in a Lightroom folder by dragging and dropping each image from one place to the other in the filmstrip view. To rearrange grab the image and drag on it until you see a black bar appear between two images.
Q4. What is the transition effect in slideshow?
A. Transitions are often called – the movement you see when slide changes to another slide in a slideshow. They are different from animation effect. You can set it manually or with an auto option.
Q5. How to make your slideshow more attractive?
A. There are a lot of options to make your look slideshow more attractive. By using the beautiful template, layouts, background and adding transitions with the perfect time ratio. This will enhance the look of your slideshow and will make it more attractive.
If you are not able to follow the interface of lightroom you can consider Filmora for making attractive slideshows. Wondershare Filmora Video Editor allows you to crop, pan and zoom the slideshow automatically or manually by applying pan and zoom photo placement. It has its own music track and sound effect gallery that allows you to customize the slideshows. Filmora allows you to record your own voiceovers as well. It has also fade-in, fade-out effects with amazing transitions. It exports the videos at resolutions of up to 4K.
For Win 7 or later (64-bit)
For macOS 10.12 or later
● Ending Thoughts →
● Adobe Lightroom is one of the best software for making slideshows due to its amazing features like color grading, red eye correction, transformation of spot removal, white balance etc.
● Lightroom has a feature of slideshow module in which you can create quality slideshow presentations for your business.
● If you are not able to use lightroom you can consider using Filmora for creating amazing slideshows.
Also read:
- 2024 Approved Easy Way to Inset Text in Video
- Top Online Video Background Changers Transform Your Videos with Ease for 2024
- Updated 10 Amazing Anime Character Designs to Inspire You for 2024
- New 2024 Approved How to Make a Custom Slide Show in PowerPoint
- New In 2024, Basic Introduction for LumaFusion Color Grading
- New In 2024, Learn How to Use 3D Camera Tracking in Adobe After Effects and Take Your Skills to the Next Level
- Updated 2024 Approved Splitting Audio From Video in Sony Vegas Step by Step
- New How to Create a Special Animated Transition in Filmora in Just 2 Minutes. This Simple Step-by-Step Guide Will Show You the Easy Way for 2024
- Blender - A Video Editor for Every Professional
- New In 2024, This Article Aims to Show You How to Export Videos in Filmora
- 2024 Approved Simple Tricks Make 3D GIF Production of Inspiration Pop up Constantly
- TOP 10 Types of Video Framing From Novice to Master for 2024
- How to Zoom Webcam on PC
- Updated 2024 Approved Camtasia Vs Captivate - Which to Choose?
- In 2024, Looking for a Way to Edit Your Profile Picture for Telegram? Heres an Easy and Quick Guide on How to Change, Delete and Hide Your Profile Picture with Simple Steps
- 2024 Approved Best Slow Motion Camera Apps for Best Content Creation
- Updated Are You Aware that You Can Create Your Own Lower Thirds for Video? Read This Article for a Tutorial on How to Customize One for 2024
- New In 2024, Know How to Make a Video Background Transparent? Export Transparent Background Video After Adding Effects. Steps to Remove White Background From Video
- Are You Excited to Learn About a Video Maker with a Song? Do You Want to Create a Video Embedded with Audio Tracks to Entertain the Viewers? Then, This Guide Assists You to Build Interesting Videos Along with Songs Precisely
- Perfect Moody LUTs for VN Editor An Overview
- 2024 Approved How to Edit Recorded Video
- Updated In 2024, 3 Actionable Ways to Create Countdown Animation for Videos
- New Discord Is the Future of Networking. After All, It Is Here to Stay. Have You Heard of the Discord Animated Avatar? If Yes, You Understand Its Power and if Not, Ensure You Study This Article for More Information
- New Based on Preferences, You Can Adjust the Speed of YouTube Videos. Learn How to Produce a YouTube Slow-Motion Video in This Article for 2024
- Updated How to Put a Filter on a Video in iMovie for 2024
- 2024 Approved Slow Down or Speed Up Videos Easily on PC, Online, and Phone
- Updated Discover the Top 10 Video Editing Apps with Templates for Professional-Grade Results. Edit Like a Pro with These Tools for 2024
- New In 2024, The Top Tips for Becoming a Good Podcast Host Are Presented in This Article. How to Start and End the Podcast Show Is All Set Below. You Can Also Learn About the Ways to Call Guests to Your Show
- New In 2024, The Ultimate Wedding Videography Checklist
- Updated Change Speed of a Video on iPhone for 2024
- 2024 Approved Are You an Apple User Interested in Adding a Slow-Mo to Their Videos? This Article Features an Exceptional Procedure for Creating Slow-Mo in iMovie
- New In 2024, TEXT REVEAL Animation | Easy Masking Filmora
- Updated 2024 Approved How To Add Fade In Windows Video Editor
- Discovering The Best Wedding LUTs for Premiere Pro | An Overview for 2024
- Updated 2024 Approved How to Add Transitions in Adobe Premiere Pro
- New Detailed Steps to Rotate Videos Using Kdenlive
- In 2024, What Does It Mean to Color Grade Your Images, and Why Is It so Important? Does It Mean the Same Thing as a Color Correction? Read on to Gather All the Information You Need on Color Grading Photography
- New Are You Looking for the Best App to Prank Your Friends? Here Is a Complete Guide on the Funcall App, How to Use It to Change Your Voice, and Its Best Alternatives for 2024
- In 2024, How to Create Cinematic Style Videos? Easy Guide for Beginners
- 2024 Approved Do You Wish to Convert GIF to Animated PNG? Then, You Need to Know About Using a GIF to APNG Converter to Help You Carry This Process Out in No Time. Read On
- Updated Do You Seek to Blur Out Your Video and Photo to Display some Motion Blur? This Article Provides a List of the Best Motion Blur Apps for Videos and Photos for 2024
- In 2024, Want to Speed up Your Video to Shorten Its Duration and Make It More Entertaining? Here Is How to Speed up Videos in Final Cut Pro. Get a Better Alternative to FCP to Speed up Videos
- 2024 Approved Looking for a Way to Edit Your Profile Picture for Telegram? Heres an Easy and Quick Guide on How to Change, Delete and Hide Your Profile Picture with Simple Steps
- New In 2024, How to Export Video From iMovie
- New In 2024, Do You Need to Convert TXT to SRT to Add Subtitles to Your Videos? Here Are Three Effective Ways You Can Do It Effortlessly
- Updated 2024 Approved Some of the Top Sites to Replace a Sky Background in Videos
- Updated 2024 Approved 5 Tips for Faster Editing in Filmora
- In 2024, Top Ways to Make Fast Motion Video on iPhone Solved
- How to Unlock Apple iPhone 14 Plus Online? Here are 6 Easy Ways
- Possible solutions to restore deleted pictures from Vivo V30.
- Guide on How To Remove Apple ID From Apple iPhone X
- In 2024, Catch or Beat Sleeping Snorlax on Pokemon Go For Oppo Reno 11 Pro 5G | Dr.fone
- How to share/fake gps on Uber for OnePlus 12 | Dr.fone
- In 2024, Best SolarMovie Alternatives-Watch Movies Free Online
- In 2024, Full Guide to Unlock Your Infinix GT 10 Pro
- Cellular Network Not Available for Voice Calls On Motorola Razr 40 Ultra | Dr.fone
- Complete guide for recovering pictures files on V27e.
- In 2024, How to Fix when Apple Account Locked From Apple iPhone 11?
- How To Activate and Use Life360 Ghost Mode On Xiaomi Redmi 12 | Dr.fone
- Latest Guide How To Bypass Vivo T2x 5G FRP Without Computer
- In 2024, Hassle-Free Ways to Remove FRP Lock from Tecno Spark 20 Pro+ Phones with/without a PC
- Three Solutions to Hard Reset Honor X8b? | Dr.fone
- How To Simulate GPS Movement With Location Spoofer On OnePlus 12R? | Dr.fone
- Full Guide to Fix iToolab AnyGO Not Working On Vivo Y100i | Dr.fone
- 6 Ways to Change Spotify Location On Your Apple iPhone 13 | Dr.fone
- New What Is an AI Script Generator? | Wondershare Virbo Glossary for 2024
- Fix Cant Take Screenshot Due to Security Policy on Samsung Galaxy M34 5G | Dr.fone
- 8 Quick Fixes Unfortunately, Snapchat has Stopped on Vivo Y78+ | Dr.fone
- How to Fix My Itel A60 Location Is Wrong | Dr.fone
- Fix App Not Available in Your Country Play Store Problem on OnePlus Nord CE 3 Lite 5G | Dr.fone
- In 2024, 9 Best Phone Monitoring Apps for Oppo K11x | Dr.fone
- Prank Your Friends! Easy Ways to Fake and Share Google Maps Location On Nubia Red Magic 9 Pro | Dr.fone
- Hard Resetting an Itel P40 Device Made Easy | Dr.fone
- In 2024, The Top 5 Android Apps That Use Fingerprint Sensor to Lock Your Apps On Poco C51
- Full Guide How To Fix Connection Is Not Private on OnePlus Ace 2V | Dr.fone
- In 2024, Hassle-Free Ways to Remove FRP Lock from Oppo Reno 9A Phones with/without a PC
- In 2024, How to Bypass Apple iPhone 12 Pro Passcode Easily Video Inside | Dr.fone
- How to Use Google Assistant on Your Lock Screen Of Infinix Smart 8 Phone
- How to Use Google Assistant on Your Lock Screen Of Realme 11 Pro Phone
- Title: Updated How to Create a Custom Sequence Preset in Premiere Pro
- Author: Morgan
- Created at : 2024-05-19 05:12:01
- Updated at : 2024-05-20 05:12:01
- Link: https://ai-video-editing.techidaily.com/updated-how-to-create-a-custom-sequence-preset-in-premiere-pro/
- License: This work is licensed under CC BY-NC-SA 4.0.


