:max_bytes(150000):strip_icc():format(webp)/the-best-halloween-live-wallpaper-for-2019-4691483-019a40e91504436ca9fc9f1944d89c15.jpg)
Updated How to Make Double Exposure Effect in Filmora

How to Make Double Exposure Effect in Filmora
Are you an aspiring video creator, or do you enjoy editing videos that captivate your viewers’ attention? In this digital era, it is essential to edit your videos by using tools that can help you produce a masterpiece and will impress your audience. With Filmora Video Editor, it is easier to create polished and professional-looking videos that stand out from the rest.
Free Download For Win 7 or later(64-bit)
Free Download For macOS 10.14 or later
To start your creative journey, you can hone your skills by focusing on at least one technique and progressively learning new skills. One of the various video editing techniques you can employ is double exposure. This method is based on an old technique in photography in which a film is exposed twice to create a single image. This article shows you how to use the same method to combine two or more video clips and create a double exposure effect.
You can create artistic videos that tell various stories and captivate viewers by using Filmora. The following steps describe how to create a double exposure effect in Filmora.
Step1 Download the Filmora application
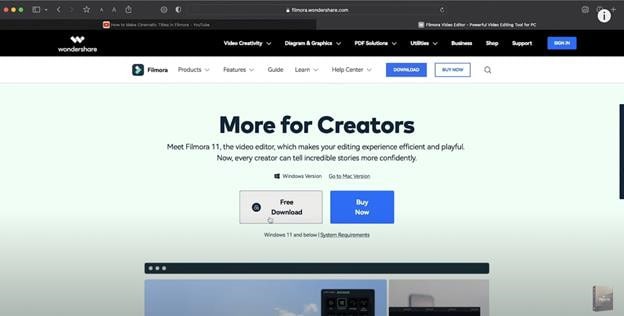
Before you start editing, click https://bit.ly/3tav2d5 to download the Filmora app. On the page that appears, click the Free Download option. Then, the Filmora installer is automatically downloaded. To start installing Filmora, double-click the installer and click Agree to agree with the terms and conditions. Then, wait for approximately 2 minutes for the installation to complete.
Step2 Start a new project in Filmora
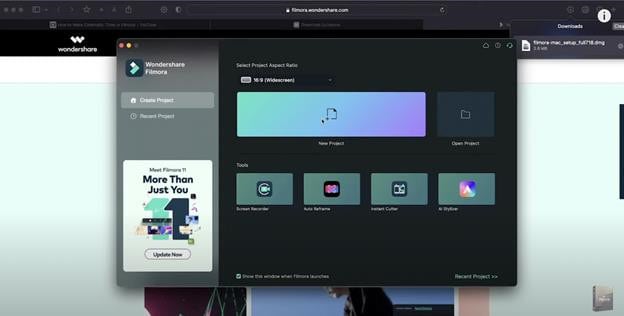
After a successful installation, the app automatically runs, and you can start editing videos. Click New Project to start a project on a clean canvas.
Before starting a new project, we recommend you plan a theme for your videos. You can incorporate different elements into your videos to convey a dramatic, light, or fun theme. This step will help you communicate the mood and message you want to convey to the audience.
Step3 Select a foreground video
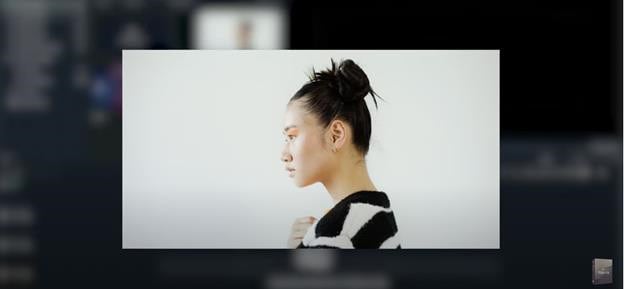
To create a trendy double exposure effect, record a video clip with a white or neutral background. Then, import the specified video to Filmora. In the second layer of the video editing pane, drag the video.
The first video is called the foreground video, which serves as the base video to achieve the desired double exposure effect. It is important to choose neutral or calm colors to make it easier for you to remove the background and highlight the main subject of your video.
Step4 Edit the foreground video
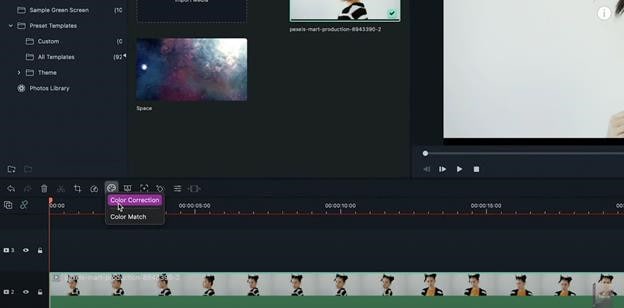
Edit the foreground video by adjusting the color settings. Click the Color Correction icon to open the color settings. In the Advanced Color Tuning box that appears, click Adjust. In this article, the value of Exposure is set to 18, and Contrast is set to 28. Then, Vibrance and Saturation are set to -100. In the Light settings, the values of Highlights and Shadows are set to -100, Whites is set to 0, and Blacks is set to -30. You can experiment and play with the settings based on the theme that you want to achieve.
Step5 Select a background video
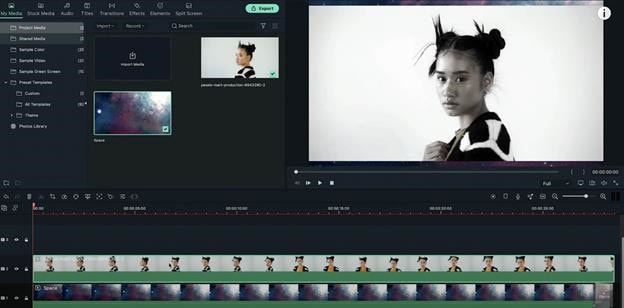
For the background video, select a video clip and import the video to Filmora. Then, drag the video in a layer below the foreground video.
When you select a background video, make sure that the video is vibrant, colorful, and has lots of texture. For example, you can select landscapes, flowers, leaves, textured patterns, city lights, sunsets, or other graphic components. The colors and lighting in the background video significantly impact the final output’s overall appearance.
Step6 Blend the foreground and background videos
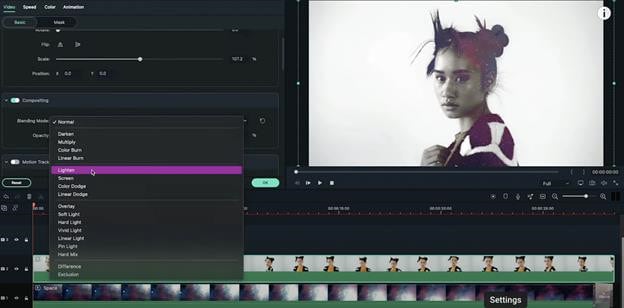
If you want to produce a perfect double-exposed video, blending layers is properly essential. To do this, double click the foreground video. Go to the Compositing option and set Blending Mode to Lighten. You can also configure Blending Mode based on your preference.
The steps that are outlined in this article can help you apply double exposure effects to your videos. You can modify your videos to your preferences by using all the resources that Filmora provides.
A simple video clip with a double-exposure effect adds a dramatic and dreamy effect to it. The creator can work with colors, exposures, and brightness to achieve a double-exposure effect. This technique provides creative results and allows the video creator to tell a story to the audience in a manner that a plain video clip cannot convey. It is useful, especially when editing personal or professional videos, such as documentaries, wedding videos, travel vlogs, and other artistic works.
Before, the double-exposure effect could only be achieved by using cameras and specialized photographic skills. These days, creators can use Filmora Video Editor to replicate the double-exposure effect in just a few simple steps. Filmora Video Editor is an easy-to-use tool that has helped over 85 million video creators from 150 countries around the world. Videos are compatible with iPhone, iPad, Samsung, Amazon, HTC, PSP, and many more. You can also watch quality videos in AVI, VOB, MP4, WMV, 3GP, MKV, AVI, and more.
To help you save time, Filmora simplifies complex features and frequently improves its services by adding new features such as speed ramping, masking, auto beat sync, and auto synchronization. The video editor also allows creators to have more creative freedom over their videos and share their outputs on different platforms such as YouTube, Facebook, and Instagram.
For more information, you can visit http://www.wondershare.com/ or visit the social media accounts of Filmora to get the most recent launches and updates.
Download Filmora Video Editor now and tell the world your creative stories.
Free Download For macOS 10.14 or later
To start your creative journey, you can hone your skills by focusing on at least one technique and progressively learning new skills. One of the various video editing techniques you can employ is double exposure. This method is based on an old technique in photography in which a film is exposed twice to create a single image. This article shows you how to use the same method to combine two or more video clips and create a double exposure effect.
You can create artistic videos that tell various stories and captivate viewers by using Filmora. The following steps describe how to create a double exposure effect in Filmora.
Step1 Download the Filmora application

Before you start editing, click https://bit.ly/3tav2d5 to download the Filmora app. On the page that appears, click the Free Download option. Then, the Filmora installer is automatically downloaded. To start installing Filmora, double-click the installer and click Agree to agree with the terms and conditions. Then, wait for approximately 2 minutes for the installation to complete.
Step2 Start a new project in Filmora

After a successful installation, the app automatically runs, and you can start editing videos. Click New Project to start a project on a clean canvas.
Before starting a new project, we recommend you plan a theme for your videos. You can incorporate different elements into your videos to convey a dramatic, light, or fun theme. This step will help you communicate the mood and message you want to convey to the audience.
Step3 Select a foreground video

To create a trendy double exposure effect, record a video clip with a white or neutral background. Then, import the specified video to Filmora. In the second layer of the video editing pane, drag the video.
The first video is called the foreground video, which serves as the base video to achieve the desired double exposure effect. It is important to choose neutral or calm colors to make it easier for you to remove the background and highlight the main subject of your video.
Step4 Edit the foreground video

Edit the foreground video by adjusting the color settings. Click the Color Correction icon to open the color settings. In the Advanced Color Tuning box that appears, click Adjust. In this article, the value of Exposure is set to 18, and Contrast is set to 28. Then, Vibrance and Saturation are set to -100. In the Light settings, the values of Highlights and Shadows are set to -100, Whites is set to 0, and Blacks is set to -30. You can experiment and play with the settings based on the theme that you want to achieve.
Step5 Select a background video

For the background video, select a video clip and import the video to Filmora. Then, drag the video in a layer below the foreground video.
When you select a background video, make sure that the video is vibrant, colorful, and has lots of texture. For example, you can select landscapes, flowers, leaves, textured patterns, city lights, sunsets, or other graphic components. The colors and lighting in the background video significantly impact the final output’s overall appearance.
Step6 Blend the foreground and background videos

If you want to produce a perfect double-exposed video, blending layers is properly essential. To do this, double click the foreground video. Go to the Compositing option and set Blending Mode to Lighten. You can also configure Blending Mode based on your preference.
The steps that are outlined in this article can help you apply double exposure effects to your videos. You can modify your videos to your preferences by using all the resources that Filmora provides.
A simple video clip with a double-exposure effect adds a dramatic and dreamy effect to it. The creator can work with colors, exposures, and brightness to achieve a double-exposure effect. This technique provides creative results and allows the video creator to tell a story to the audience in a manner that a plain video clip cannot convey. It is useful, especially when editing personal or professional videos, such as documentaries, wedding videos, travel vlogs, and other artistic works.
Before, the double-exposure effect could only be achieved by using cameras and specialized photographic skills. These days, creators can use Filmora Video Editor to replicate the double-exposure effect in just a few simple steps. Filmora Video Editor is an easy-to-use tool that has helped over 85 million video creators from 150 countries around the world. Videos are compatible with iPhone, iPad, Samsung, Amazon, HTC, PSP, and many more. You can also watch quality videos in AVI, VOB, MP4, WMV, 3GP, MKV, AVI, and more.
To help you save time, Filmora simplifies complex features and frequently improves its services by adding new features such as speed ramping, masking, auto beat sync, and auto synchronization. The video editor also allows creators to have more creative freedom over their videos and share their outputs on different platforms such as YouTube, Facebook, and Instagram.
For more information, you can visit http://www.wondershare.com/ or visit the social media accounts of Filmora to get the most recent launches and updates.
Download Filmora Video Editor now and tell the world your creative stories.
Free Download For macOS 10.14 or later
To start your creative journey, you can hone your skills by focusing on at least one technique and progressively learning new skills. One of the various video editing techniques you can employ is double exposure. This method is based on an old technique in photography in which a film is exposed twice to create a single image. This article shows you how to use the same method to combine two or more video clips and create a double exposure effect.
You can create artistic videos that tell various stories and captivate viewers by using Filmora. The following steps describe how to create a double exposure effect in Filmora.
Step1 Download the Filmora application

Before you start editing, click https://bit.ly/3tav2d5 to download the Filmora app. On the page that appears, click the Free Download option. Then, the Filmora installer is automatically downloaded. To start installing Filmora, double-click the installer and click Agree to agree with the terms and conditions. Then, wait for approximately 2 minutes for the installation to complete.
Step2 Start a new project in Filmora

After a successful installation, the app automatically runs, and you can start editing videos. Click New Project to start a project on a clean canvas.
Before starting a new project, we recommend you plan a theme for your videos. You can incorporate different elements into your videos to convey a dramatic, light, or fun theme. This step will help you communicate the mood and message you want to convey to the audience.
Step3 Select a foreground video

To create a trendy double exposure effect, record a video clip with a white or neutral background. Then, import the specified video to Filmora. In the second layer of the video editing pane, drag the video.
The first video is called the foreground video, which serves as the base video to achieve the desired double exposure effect. It is important to choose neutral or calm colors to make it easier for you to remove the background and highlight the main subject of your video.
Step4 Edit the foreground video

Edit the foreground video by adjusting the color settings. Click the Color Correction icon to open the color settings. In the Advanced Color Tuning box that appears, click Adjust. In this article, the value of Exposure is set to 18, and Contrast is set to 28. Then, Vibrance and Saturation are set to -100. In the Light settings, the values of Highlights and Shadows are set to -100, Whites is set to 0, and Blacks is set to -30. You can experiment and play with the settings based on the theme that you want to achieve.
Step5 Select a background video

For the background video, select a video clip and import the video to Filmora. Then, drag the video in a layer below the foreground video.
When you select a background video, make sure that the video is vibrant, colorful, and has lots of texture. For example, you can select landscapes, flowers, leaves, textured patterns, city lights, sunsets, or other graphic components. The colors and lighting in the background video significantly impact the final output’s overall appearance.
Step6 Blend the foreground and background videos

If you want to produce a perfect double-exposed video, blending layers is properly essential. To do this, double click the foreground video. Go to the Compositing option and set Blending Mode to Lighten. You can also configure Blending Mode based on your preference.
The steps that are outlined in this article can help you apply double exposure effects to your videos. You can modify your videos to your preferences by using all the resources that Filmora provides.
A simple video clip with a double-exposure effect adds a dramatic and dreamy effect to it. The creator can work with colors, exposures, and brightness to achieve a double-exposure effect. This technique provides creative results and allows the video creator to tell a story to the audience in a manner that a plain video clip cannot convey. It is useful, especially when editing personal or professional videos, such as documentaries, wedding videos, travel vlogs, and other artistic works.
Before, the double-exposure effect could only be achieved by using cameras and specialized photographic skills. These days, creators can use Filmora Video Editor to replicate the double-exposure effect in just a few simple steps. Filmora Video Editor is an easy-to-use tool that has helped over 85 million video creators from 150 countries around the world. Videos are compatible with iPhone, iPad, Samsung, Amazon, HTC, PSP, and many more. You can also watch quality videos in AVI, VOB, MP4, WMV, 3GP, MKV, AVI, and more.
To help you save time, Filmora simplifies complex features and frequently improves its services by adding new features such as speed ramping, masking, auto beat sync, and auto synchronization. The video editor also allows creators to have more creative freedom over their videos and share their outputs on different platforms such as YouTube, Facebook, and Instagram.
For more information, you can visit http://www.wondershare.com/ or visit the social media accounts of Filmora to get the most recent launches and updates.
Download Filmora Video Editor now and tell the world your creative stories.
Free Download For macOS 10.14 or later
To start your creative journey, you can hone your skills by focusing on at least one technique and progressively learning new skills. One of the various video editing techniques you can employ is double exposure. This method is based on an old technique in photography in which a film is exposed twice to create a single image. This article shows you how to use the same method to combine two or more video clips and create a double exposure effect.
You can create artistic videos that tell various stories and captivate viewers by using Filmora. The following steps describe how to create a double exposure effect in Filmora.
Step1 Download the Filmora application

Before you start editing, click https://bit.ly/3tav2d5 to download the Filmora app. On the page that appears, click the Free Download option. Then, the Filmora installer is automatically downloaded. To start installing Filmora, double-click the installer and click Agree to agree with the terms and conditions. Then, wait for approximately 2 minutes for the installation to complete.
Step2 Start a new project in Filmora

After a successful installation, the app automatically runs, and you can start editing videos. Click New Project to start a project on a clean canvas.
Before starting a new project, we recommend you plan a theme for your videos. You can incorporate different elements into your videos to convey a dramatic, light, or fun theme. This step will help you communicate the mood and message you want to convey to the audience.
Step3 Select a foreground video

To create a trendy double exposure effect, record a video clip with a white or neutral background. Then, import the specified video to Filmora. In the second layer of the video editing pane, drag the video.
The first video is called the foreground video, which serves as the base video to achieve the desired double exposure effect. It is important to choose neutral or calm colors to make it easier for you to remove the background and highlight the main subject of your video.
Step4 Edit the foreground video

Edit the foreground video by adjusting the color settings. Click the Color Correction icon to open the color settings. In the Advanced Color Tuning box that appears, click Adjust. In this article, the value of Exposure is set to 18, and Contrast is set to 28. Then, Vibrance and Saturation are set to -100. In the Light settings, the values of Highlights and Shadows are set to -100, Whites is set to 0, and Blacks is set to -30. You can experiment and play with the settings based on the theme that you want to achieve.
Step5 Select a background video

For the background video, select a video clip and import the video to Filmora. Then, drag the video in a layer below the foreground video.
When you select a background video, make sure that the video is vibrant, colorful, and has lots of texture. For example, you can select landscapes, flowers, leaves, textured patterns, city lights, sunsets, or other graphic components. The colors and lighting in the background video significantly impact the final output’s overall appearance.
Step6 Blend the foreground and background videos

If you want to produce a perfect double-exposed video, blending layers is properly essential. To do this, double click the foreground video. Go to the Compositing option and set Blending Mode to Lighten. You can also configure Blending Mode based on your preference.
The steps that are outlined in this article can help you apply double exposure effects to your videos. You can modify your videos to your preferences by using all the resources that Filmora provides.
A simple video clip with a double-exposure effect adds a dramatic and dreamy effect to it. The creator can work with colors, exposures, and brightness to achieve a double-exposure effect. This technique provides creative results and allows the video creator to tell a story to the audience in a manner that a plain video clip cannot convey. It is useful, especially when editing personal or professional videos, such as documentaries, wedding videos, travel vlogs, and other artistic works.
Before, the double-exposure effect could only be achieved by using cameras and specialized photographic skills. These days, creators can use Filmora Video Editor to replicate the double-exposure effect in just a few simple steps. Filmora Video Editor is an easy-to-use tool that has helped over 85 million video creators from 150 countries around the world. Videos are compatible with iPhone, iPad, Samsung, Amazon, HTC, PSP, and many more. You can also watch quality videos in AVI, VOB, MP4, WMV, 3GP, MKV, AVI, and more.
To help you save time, Filmora simplifies complex features and frequently improves its services by adding new features such as speed ramping, masking, auto beat sync, and auto synchronization. The video editor also allows creators to have more creative freedom over their videos and share their outputs on different platforms such as YouTube, Facebook, and Instagram.
For more information, you can visit http://www.wondershare.com/ or visit the social media accounts of Filmora to get the most recent launches and updates.
Download Filmora Video Editor now and tell the world your creative stories.
How To Add Motion Blur On CapCut? (IPhone & Android)
Do you know what adds a realistic effect to videos? Professionals add various types of effects to the videos to create artistic perspective flawlessly. Usually, the process of adding effects to the videos happens in the post-production phase, where professionals utilize various software. One of the commonly added effects is the motion blur effect which creates a subtle motion in the video.
In this article, we will address how to do motion blur on CapCut with simple steps. So, continue reading this guide to learn an easy and simple way of creating motion blur in your videos.
Part 1: Why Should You Add Motion Blur to Videos?
The motion blur effect changes the perspective of moving objects in a film or video. If you have created an animated video, you must add a motion blur effect to make the movement of objects or characters natural. Moreover, it gives a realistic touch to your videos by describing a particular movement in the video. That’s why adding a motion blur effect in videos is necessary, as, without this effect, the video would look choppy.
To introduce a motion blur effect, you can find multiple tools and video editors. However, if you want to try professional software, CapCut is a trustworthy option. This tool has a pre-made motion blur effect that you can instantly add within seconds. So, if you have already downloaded CapCut, upgrade to its latest version to try its built-in motion blur effect. Continue reading this article to find out about motion blur CapCut.
Part 2: How to Add Motion Blur to Videos on CapCut?
Are you excited to add a motion blur effect using CapCut? CapCut is a popular video editor, especially for TikTok, through which you can execute professional video editing easily. In this section, we will guide you on how to add motion blur on CapCut using your iPhone and Android.
1. On iPhone
CapCut is available on App Store , through which you can easily download it on your iPhone. To add a motion blur effect to your video on iPhone, check the below steps:
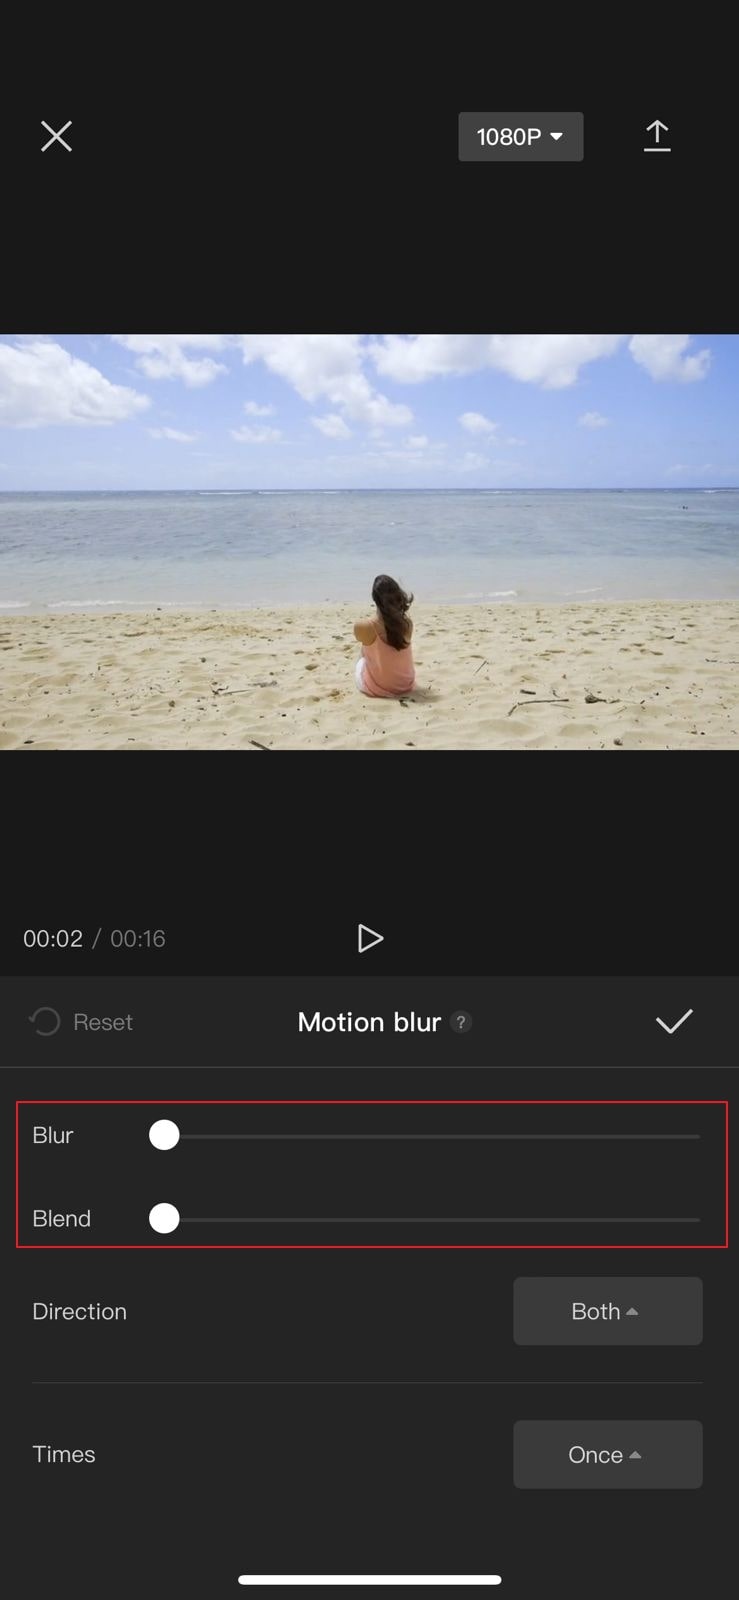
Step1 After adding the desired video clip in CapCut, select it and scroll in the right direction until you can locate the “Motion Blur” option. Now tap on “Motion Blur” and increase its “Blur” and “Blend” strength according to your choice. You can also increase the Blend value accordingly.
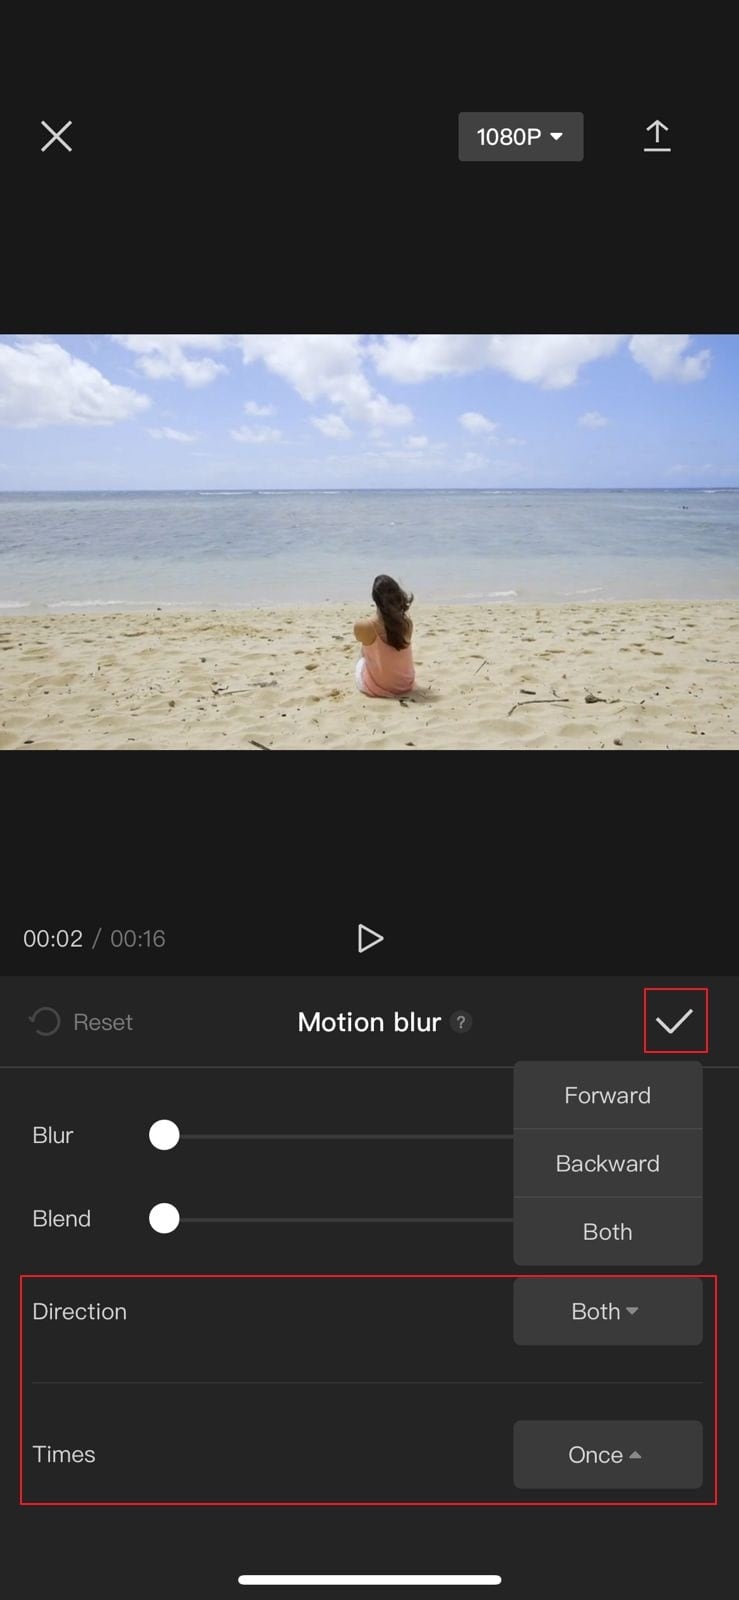
Step2 Moreover, you can choose the direction and times of the motion blur effect. Once you are done, tap on the “Tick” icon. After some seconds, the motion blur effect will be applied to your video.
2. On Android
Android users can also take benefit from the CapCut app. Once you have successfully downloaded the CapCut app on your Android phone from Play Store , follow the below instructions:
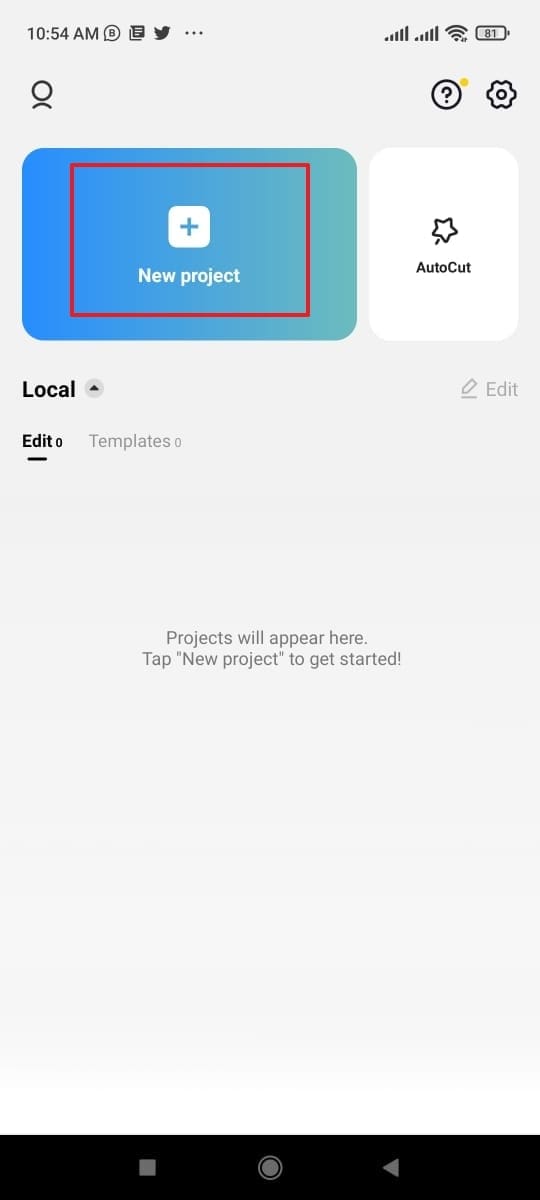
Step1 Open the CapCut app and tap on the “New Project” option. By doing so, upload the video from your phone on its interface.
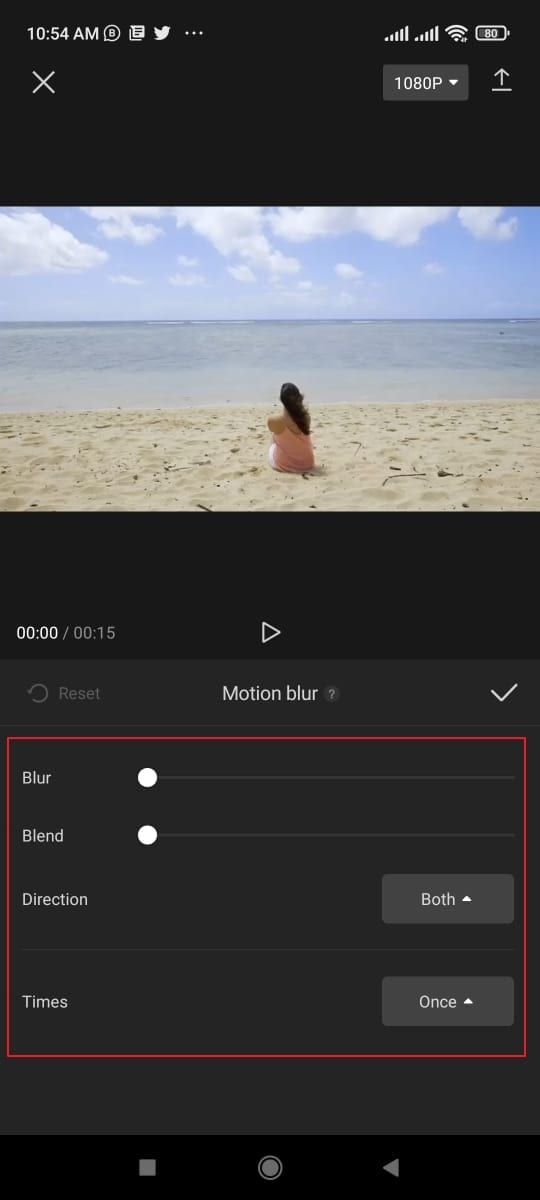
Step2 After uploading, select the clip and scroll in the right direction. From there, select the “Motion Blur” option and choose “Blur” strength and “Blend” value. You can also select the “Direction” and “Times” values from the options. Once done, tap on the “Tick” option to add a motion blur effect to your video successfully.
Part 3: The Best Alternative to CapCut to Add Motion Blur On Mobile
If you want alternatives to CapCut for creating a motion blur effect flawlessly, this part of the article can help you. You can find the best 3 apps in this section that are capable of generating a motion blur effect easily.
1. Videoleap
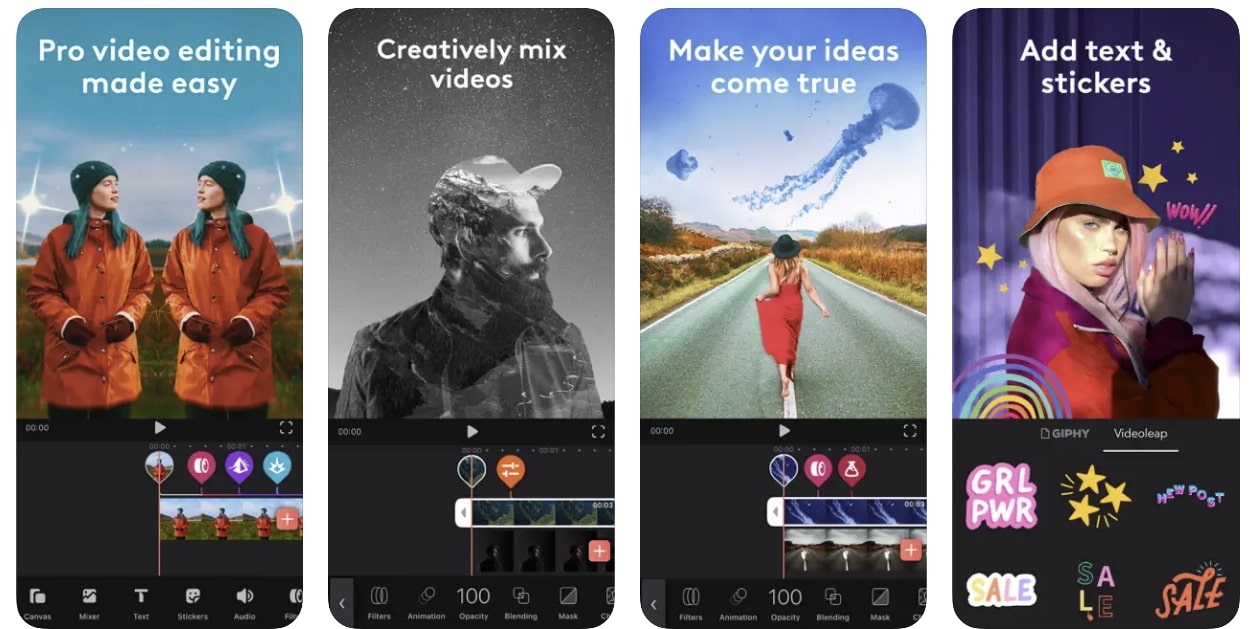
Videoleap is a popular editing app that is available for both iOS and Android users. Using this app, you can add text to your videos by selecting the font, color, opacity, and other elements. Moreover, you can add an audio clip to your video effectively using this app. Furthermore, you can also adjust the brightness, saturation, and other components of the video.
Besides being a powerful video editor, you can also use this tool to add a motion blur to your video. You can use its different filters and effects to create a motion blur effect. This tool offers complete customization freedom so that you can generate your preferred effect easily.
Key Features
- This tool offers over 100 different sound effects that you can add to your video for more engagement.
- You can check your final video in full screen comfortably on this tool.
- This video editor also provides multiple creator video templates through which you can create professional videos.
Pros
- This tool offers small tutorials with every feature to provide you with complete guidance.
- You can execute layer-based editing through this app to add effects, videos, images, and other elements efficiently.
Cons
- This tool does not include a built-in motion effect. Thus, you have to create a motion blur effect on this app through customization.
Tutorial: To see and learn how to use Videoleap effectively, you can see a quick tutorial following this link: https://www.youtube.com/watch?v=e7twWHCVT8U .
2. NSMB – Motion Blur Video
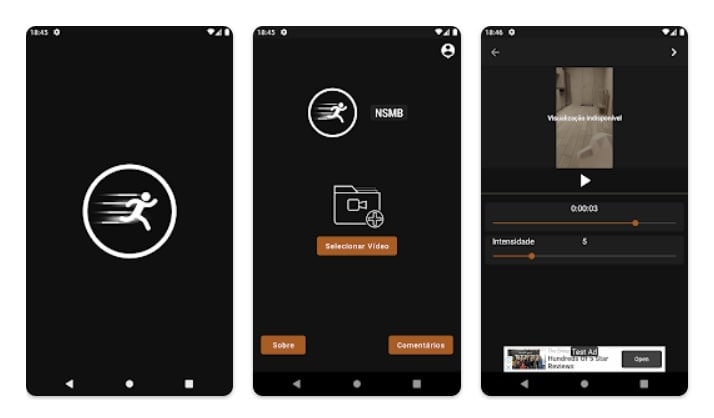
NSMB is a special app that can also work offline to add a motion blur effect to your videos. It has a simple interface that allows you to add a motion blur effect to your video instantly. Once you have uploaded the video on this app, you can easily apply the motion blur effect with a single tap.
Moreover, this app does not distort the quality of your video after adding the motion blur effect. Thus, it’s an efficient app that enables you to add a motion blur to your videos without manual effort.
Download: Android
Key Features
- This app easily supports Android 5.0 OS and above.
- It’s a simple and lightweight app that won’t take up storage space on your phone.
- This app has more than 1M downloads which tell its reliability.
Pros
- This app will add the function of ‘Preview,” through which you will be able to see your final results easily.
- You can adjust the strength of the added motion blur using the slider in this app.
Cons
- This app has limited options and does not offer vast features for video editing.
Tutorial: Do you want to learn how to use this app? Here is a simple and easy video tutorial that you can watch to learn how to use this tool: https://www.youtube.com/shorts/Nm%5FxEMQc6zg .
3. Node Video – Pro Video Editor
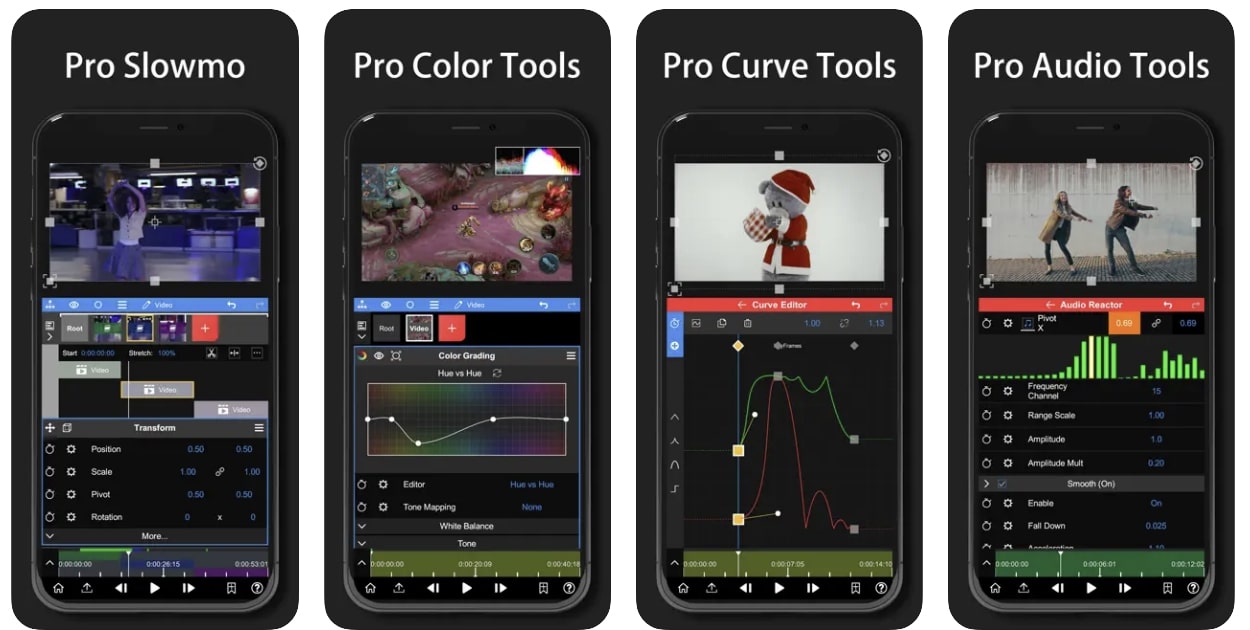
Node Video is a complete professional tool as it offers various editing features that can help you. You can discover tons of advanced editing tools on this app, such as keyframe animation, pen tool, motion tracker, puppet pin, etc. It also provides 3D renders that can assist you in mapping your videos to 3D models.
It also offers various types of effects and filters that can transform your video effectively. Moreover, you can also add a motion blur effect from this tool to your video within seconds. It has a built-in motion blur effect that can be added instantly without complications.
Key Features
- Apart from the motion blur effect, this tool contains various sorts of other effects such as gaussian blur, radial blur, cross blur, directional blur, etc.
- The rendering speed of this app is extremely fast to provide you with fast results.
- Its advanced features can automatically separate backgrounds and human faces instantly.
Pros
- Using this tool, you can edit the audio in the video clip by changing properties and effects.
- You can modify the color grading of your video by modifying lift, gamma, and gain elements.
Cons
- To continuously use this app, you have to buy its subscription plans.
Tutorial: In this video tutorial, you can find authentic instructions to use Node Video without any hassle. Thus, visit this video link to check the tutorial: https://www.youtube.com/watch?v=z9lq8XXCmss .
Comparison
Apps like NSMB and Node Video work efficiently as they contain built-in motion blur effects. They work similarly to CapCut, as you can easily add a motion blur effect to your videos automatically. However, these apps provide limited options to choose the area and amount of effect. So, if you want to add customization to your videos proficiently, you can try Videoleap.
Conclusion
Motion blur effect can immensely change the dynamic of your professional videos. If you want to instruct about specific movements in your video, the motion blur effect can enhance it easily. In this article, we have shed light on how to do motion blur on CapCut. For more options, we have also provided three alternatives to CapCut for your additional help.
Tutorial: To see and learn how to use Videoleap effectively, you can see a quick tutorial following this link: https://www.youtube.com/watch?v=e7twWHCVT8U .
2. NSMB – Motion Blur Video
NSMB is a special app that can also work offline to add a motion blur effect to your videos. It has a simple interface that allows you to add a motion blur effect to your video instantly. Once you have uploaded the video on this app, you can easily apply the motion blur effect with a single tap.
Moreover, this app does not distort the quality of your video after adding the motion blur effect. Thus, it’s an efficient app that enables you to add a motion blur to your videos without manual effort.

Download: Android
Key Features
- This app easily supports Android 5.0 OS and above.
- It’s a simple and lightweight app that won’t take up storage space on your phone.
- This app has more than 1M downloads which tell its reliability.
Pros
- This app will add the function of ‘Preview,” through which you will be able to see your final results easily.
- You can adjust the strength of the added motion blur using the slider in this app.
Cons
- This app has limited options and does not offer vast features for video editing.
Tutorial: Do you want to learn how to use this app? Here is a simple and easy video tutorial that you can watch to learn how to use this tool: https://www.youtube.com/shorts/Nm%5FxEMQc6zg .
3. Node Video – Pro Video Editor
Node Video is a complete professional tool as it offers various editing features that can help you. You can discover tons of advanced editing tools on this app, such as keyframe animation, pen tool, motion tracker, puppet pin, etc. It also provides 3D renders that can assist you in mapping your videos to 3D models.
It also offers various types of effects and filters that can transform your video effectively. Moreover, you can also add a motion blur effect from this tool to your video within seconds. It has a built-in motion blur effect that can be added instantly without complications.

Key Features
- Apart from the motion blur effect, this tool contains various sorts of other effects such as gaussian blur, radial blur, cross blur, directional blur, etc.
- The rendering speed of this app is extremely fast to provide you with fast results.
- Its advanced features can automatically separate backgrounds and human faces instantly.
Pros
- Using this tool, you can edit the audio in the video clip by changing properties and effects.
- You can modify the color grading of your video by modifying lift, gamma, and gain elements.
Cons
- To continuously use this app, you have to buy its subscription plans.
Tutorial: In this video tutorial, you can find authentic instructions to use Node Video without any hassle. Thus, visit this video link to check the tutorial: https://www.youtube.com/watch?v=z9lq8XXCmss .
Comparison
Apps like NSMB and Node Video work efficiently as they contain built-in motion blur effects. They work similarly to CapCut, as you can easily add a motion blur effect to your videos automatically. However, these apps provide limited options to choose the area and amount of effect. So, if you want to add customization to your videos proficiently, you can try Videoleap.
Conclusion
Motion blur effect can immensely change the dynamic of your professional videos. If you want to instruct about specific movements in your video, the motion blur effect can enhance it easily. In this article, we have shed light on how to do motion blur on CapCut. For more options, we have also provided three alternatives to CapCut for your additional help.
How To Make a Timelapse in After Effects
Time-Lapse movies are great for a variety of projects; you can use them as establishing shots in sitcoms, corporate marketing videos, and they can make lovely backgrounds for animated slideshows. A time-lapse video is essentially a series of photographs taken at regular intervals to depict how the environment changes gradually over a shorter period of time. In this article, we’ll demonstrate how you may quickly and easily build an After Effects time-lapse effect.
With that said, let’s start!
Step 1. Create a new composition
Calculating your composition length to accommodate the frame rate and number of images is the first step in generating a time-lapse video.
- Verify the number of images you have for your Sequence.
- New Composition Creation. Selecting a frame rate: A time lapse film produced at 30 frames per second will flow smoothly, but you can select any frame rate you like.
- To determine the duration of your composition, divide the number of photographs you have by the frame rate you’ve chosen. For instance, if you use 600 photos at 30 frames per second, your composition will last 20 seconds.
Step 2. Import your images
You are prepared to make a time-lapse sequence if all of your photographs are saved to the same folder and are in the same order. If you are working directly from your Camera, you will likely have Camera Raw files, although this procedure works with PNG and JPEG sequences.
- Press Command/Control I on your keyboard or select File > Import. Find the folder holding your image sequence.
- To begin, select the first picture in the sequence. If all of your images have accurate names, After Effects will be able to identify a sequence of images.
- Make sure the Force Alphabetical Order and Camera Raw Sequence checkboxes are selected. Your Time-Lapse Sequence will display in the Project Browser Panel after you click Import.
- Once you’ve watched how it plays, you can adjust the Frame Rate by right-clicking the Sequence in the Project Browser and selecting Interpret Footage > Main.
- To update your time-lapse, modify the Frame Rate setting and click OK.

Step 3. Create movements
- After Effects’ Time-Lapse Sequence can be used just like any other standalone clip. This implies that you may give your time-lapse clip movement by adding Keyframes and Effects.
- Place your Playhead at the beginning of the clip after choosing the Image Sequence. Make a keyframe for the scale or position.
- To generate a second Keyframe for the value of your choice, move to the end of the clip. Make any necessary Clip modifications.
- Right-click on the timeline, choose New > Adjustment Layer, then add your effects to the Adjustment Layer to add effects like noise and grain.
Step 4. Create slow motion from a video
You can import your video after you’ve shot it to prepare it for editing. The same steps, including naming your photos in order, must be taken for the Time Lapse sequence. It may be advantageous to entirely rename both your Image Sequence and Performer clip.
- Drag the finished Time Lapse sequence to your Timeline after completing it as previously explained.
- Over the Time Lapse, add the Performer Clip to the Timeline.
- Choose Time>Time Stretch by performing a right-click on the performer clip.
- You can alter the Stretch Factor or Duration in the dialogue box. When you alter one parameter, the other will reflect the new Stretch Factor or Duration for you.
Step 5. Make an overlay
You can alter the Stretch Factor or Duration in the dialogue box. When you alter one parameter, the other will reflect the new Stretch Factor or Duration for you.
- Find Luma Key in the Effect Control Panel and drag it to your clip.
- Change the Key Type setting in the Effect Control Panel to Key Out Brighter.
- The Threshold, Tolerance, and Edge settings should be adjusted until only the silhouette is visible.
- Use the Pen or Mask Tool to create a circle around the parts you want to delete if you discover any corners of your clip that are still visible.
- Add any Effects, such as Light Leaks, to your Adjustment Layer by choosing “Right-click > New > Adjustment layer.”

After Effects CC must be opened, a new project must be created, the Import File menu option must be selected, and the appropriate folder containing the altered still images must be located and selected before the time-lapse photos can be turned into a film. You need to make sure that the JPEG Series box is checked, as well as the Force Alphabetical Order box.
Once you have clicked on the first image in the sequence. The time-lapse video that you uploaded appears in the project library. After performing a right-click on the filename, select “New Comp from Selection” from the context menu.
Step 6. Exporting your video
After getting our sequence to perform some kind of slow, understated animation so that it appears as though the camera is moving dramatically, we will need to export a video file. Go to File > Export > Add to Render Queue, then open the Render Queue dialog box by going to Window > Render Queue. From there, you can choose the Output Module and change the settings in the options dialog box. Finally, choose the Output To option and select the location on your computer where you would like to save the video clip that we are currently rendering and exporting.

Conclusion
No matter how you make your time lapse videos, After Effects has a ton of features you can use to modify and enhance the way they look. Now that you are familiar with the fundamentals, you can play with the Frame Rates and Composition options. Check out this helpful manual for more information on Time Stretching and Remapping in After Effects.
Free Download For Win 7 or later(64-bit)
Free Download For macOS 10.14 or later
Free Download For macOS 10.14 or later
The Ultimate Guide to Slideshow Maker with Music
The Ultimate Guide to Slideshow Maker with Music
An easy yet powerful editor
Numerous effects to choose from
Detailed tutorials provided by the official channel
A slideshow maker can also work towards developing an engaging professional presentation. Something to pique the interest of your co-workers at your next meeting or persuade potential clients that you are the best choice for their business.
If the tool you’re using doesn’t include a simple drag-and-drop feature, extensive formatting options, or smooth transitions, coming up with a customised slideshow can take a long time. As a result, we researched and reviewed the finest slideshow-creating software for Windows and Mac, apps for iPhone and Android, as well as an online slideshow maker with music.
In this article
01 [5 Slideshows Created with Music Software](#Part 1)
02 [The Top 5 Apps for Creating a Music Slideshow](#Part 2)
03 [5 Online Slideshows Made with Music Maker](#Part 3)
04 [How to Create a Photo Slideshow with Music](#Part 4)
Part 1 Slideshows Created with Music Software
● SmartSHOW in 3D
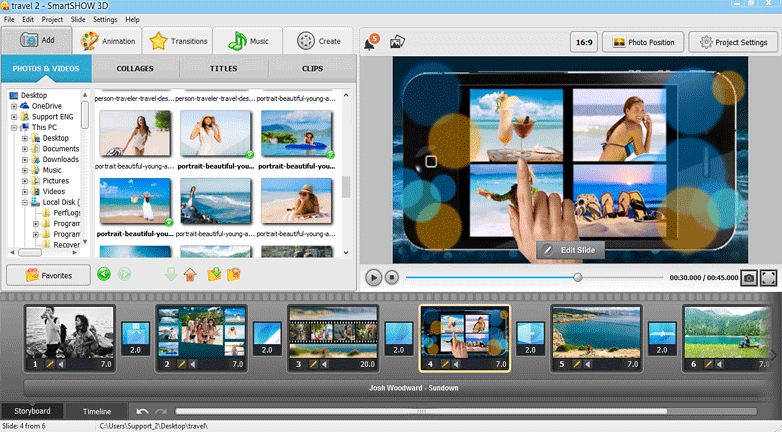
SmartSHOW 3D allows you to combine your favourite photos and music to create amazing presentations to share with friends and family. You don’t need to have any technical knowledge to add motion to your still photographs. Fade-ins, wipes, gradients, and 3D transitions are some of the transition effects you can use. Even if you’re not tech-savvy, SmartSHOW 3D allows you to create a professional slideshow with music.
Compatibility: Windows
Features:
● Make slideshows from photos, videos, and music.
● Effects and templates
● Various music tracks
● Burn the DVD after it has been converted to DVD format.
● PhotoStage Slideshow Creator
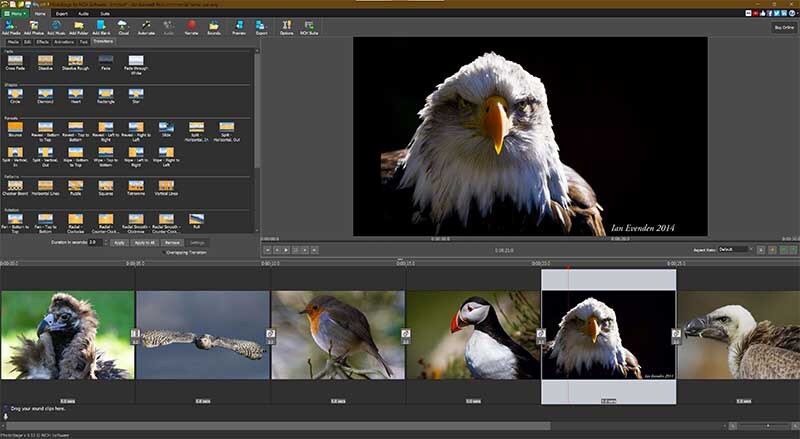
PhotoStage is another software programme for creating slideshows. Thousands of photographs and video snippets can be used to create presentations. Text, effects, music, and voice-over can all be easily added. Brightness, saturation, colour, and other aspects of your photographs and movies can all be tweaked.
Quick Create allows you to quickly create a slideshow, including pans, zooms, and fades. After that, you can burn your slideshow on a CD, upload it to the internet, or save it.
Compatibility: Windows, Mac.
Features:
● The Slidehow Wizard
● Image editing software
● Effects and transitions
● Optimize for the web and mobile devices, burn to a DVD, or save as a video.
● Kizoa-Slideshow Maker Online
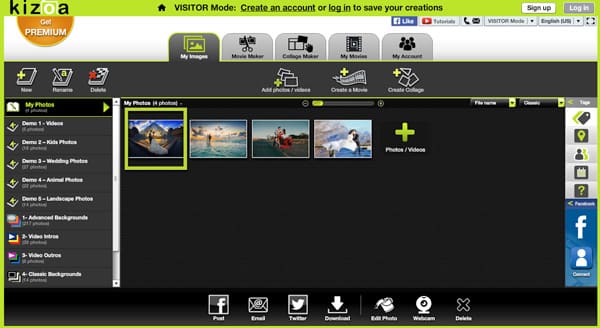
Adapt your slides to any screen with up to seven different aspect ratios with Kizoa. No matter what kind of TV, computer, smartphone, or tablet you use, you’ll have the standard size slideshow.
The intelligent cropping tool will recommend the optimal cropping option for your photos based on the format you select, allowing you to fill the screen as much as possible without leaving out important details.
Compatibility: Windows, Mac.
Features:
● Seven different aspect ratios are available.
● Slideshows can be viewed on television.
● Variety of formats.
● PowerDirector
There are hundreds of transitions, video effects, and themed slideshow templates to pick from in this free slideshow maker. Instead of generic slides and monotonous text, professionals may use PowerDirector to create compelling corporate slideshows for meetings, professional showcases, and industry conferences.
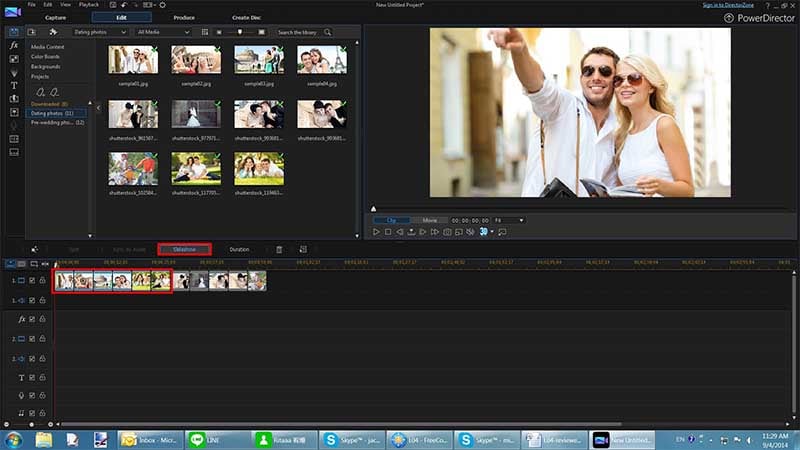
Compatibility: Windows, Mac.
Features:
● Interfaces for Storyboards, Timelines, and Slideshows
● Overlays, titles, and transitions
● The ability to generate a wide range of visual effects
● Audio and colour correction software.
● SlideLab
The high-quality transitions, filters, and music in SlideLab make it a great choice for beginners who enjoy sharing their lives with their friends. The app also includes a built-in sharing platform that allows users to make and share films on Instagram or YouTube with a single swipe.
SlideLab has the ability to export projects as PDF and PPTX files, which can then be opened in PowerPoint and Keynote.
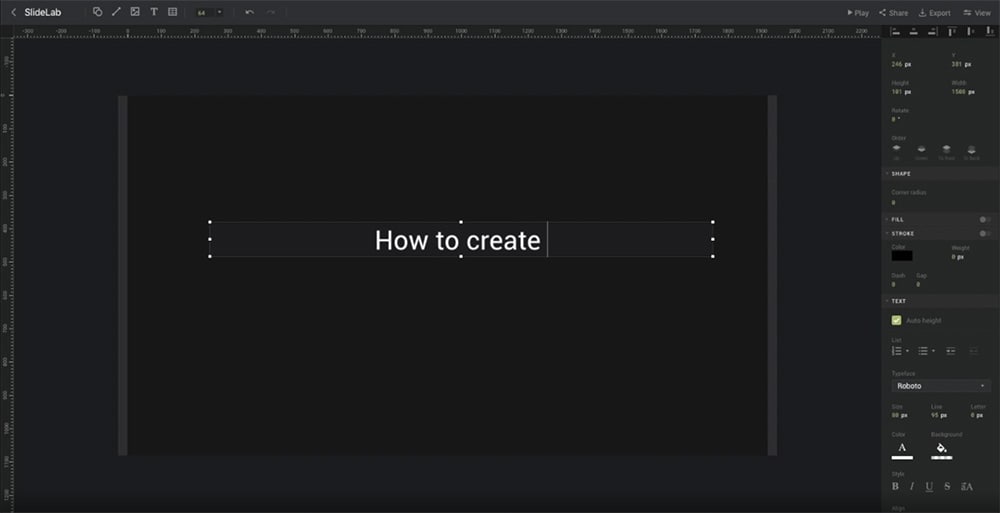
Compatibility: Windows, Mac
Features:
● Professional interactive presentations.
● Workflow and export are both simple.
● Share it with one click.
Part 2 The Top 5 Apps for Creating a Music Slideshow
Here are five of the greatest free slideshow makers with music applications for iPhone users to check out:
01SlideLab
SlideLab is a fantastic presentation software with music. According to Vine and Instagram, you can change the start point of your music or the length of the slideshow video.
The programme also includes fantastic features that make your job easier. Awesome photo filters, various transitions, photo zooming, cropping, rotating, and flipping tools, and more are included.

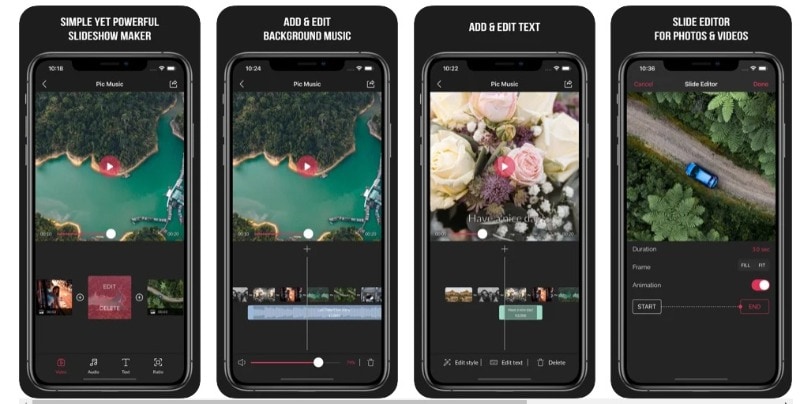
02Pic Music
Pic Music is one of the most popular slideshow, video, and quotation generators for SnapChat, Instagram, Tumblr, and Viddy. The entertaining and user-friendly app lets you combine music and images to create a film.
Users can upload music from their libraries or record their own voices, and they can even select which part of the audio/song to play. Slideshow previews will also be available within the app.
03Filmora
The quick and easy video editor is ideal for mixing video clips, images, effects, and audio into a single film. In comparison to other alternatives, it enables users to incorporate lengthier popular music snippets, and users can choose the right soundtrack for their videos.
After you’ve downloaded Filmora, you’ll be able to take use of its extensive features, which will make your job easier. It allows you to apply filters, reorder your greatest bits, zoom and crop your videos/photos, combine selfies/snaps into a single film with your favorite song, and publish the resulting slideshow video to practically all social media sites, among other things.
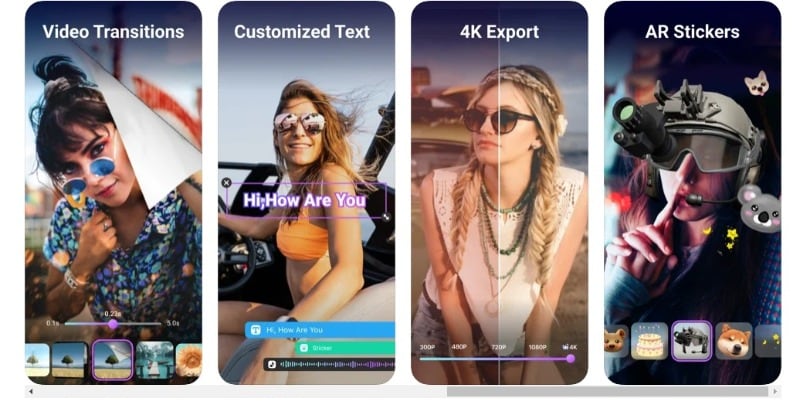
04Slide-show video maker
Slide-show Video Maker is an excellent choice if you want to make photo or video slideshows from your Photo Library, Instagram, or Facebook and afterwards add your own music. It allows you to quickly and easily create slideshow videos.
Simply choose your videos and photographs, add transitions and music, choose the slideshow duration, filters, and text if wanted.

05Animoto
Animoto lets you create slideshow films with music using various video clips and photographs from your camera roll or iCloud.
The software includes a built-in music library with hundreds of songs, over 50 slick video styles to pick from, a video clip cutter, captions for photographs, intro cards, and several other useful features. Email, SMS, Facebook, and Twitter can all be used to share the final slideshow videos.

Here are 5 of the greatest video slideshow generator apps for Android users to download for free:
06Magisto Video Editor
Magisto Video Editor turns videos and photos into marvelous video stories that you can share with your friends and family. After you’ve uploaded photographs or videos from your gallery, the app lets you to add music from the Magisto music library or your iPhone to create a stunning presentation. You may then send them to your friends and family via WhatsApp, YouTube, Facebook and Instagram.

07KlipMix Free Video Editor
KlipMix is a fantastic, user-friendly tool. In just a minute, anyone can combine several photos/videos, add their preferred music, and make an incredible slideshow presentation. It allows you to change the duration of each photo or video’s display, unselect and rearrange photos with touch and drag and share the final slideshow video with family and friends.
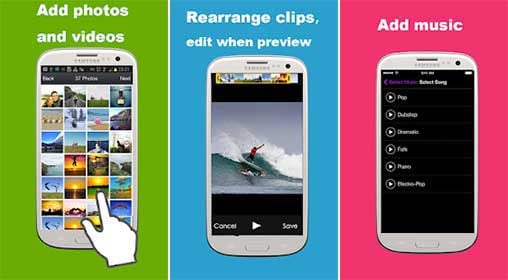
08Slidegram
You can upload 100 photographs at a time and combine them in one video with Slidegram loaded on your smartphone. The slideshow pictures with music consists of only a few stages, including selecting photographs from a gallery, previewing and sorting them, adding your favorite music, setting the slideshow video’s time, and sharing it on social media.

09PicMotion
PicMotion makes professional video slideshows and photo slideshows with music that can be uploaded on any social networking platform. After installing the programme, you may build slideshows from photos or videos and enhance them by adding music from your collection or recording and adding your charming voice to the movie.
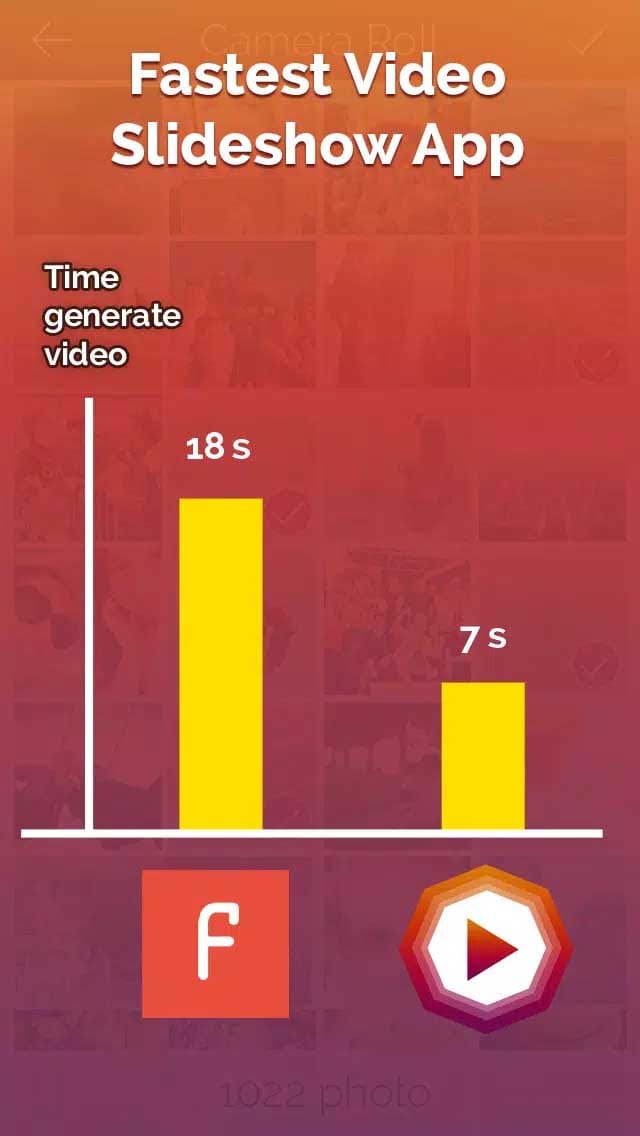
10Slideshow Maker
This music slideshow programme is simple to use, and everyone can make beautiful videos from images in under a minute. It’s absolutely free, and your slideshows will not have a watermark. Users can add their preferred music to the slideshow and the finished product can be shared with their friends on YouTube or Facebook. The f t Free Slideshow Maker enables you to rotate images, unselect and reorganize them using touch and drag, as well as change the duration of each picture’s display.

Part 3 Online Slideshows Made with Music Maker
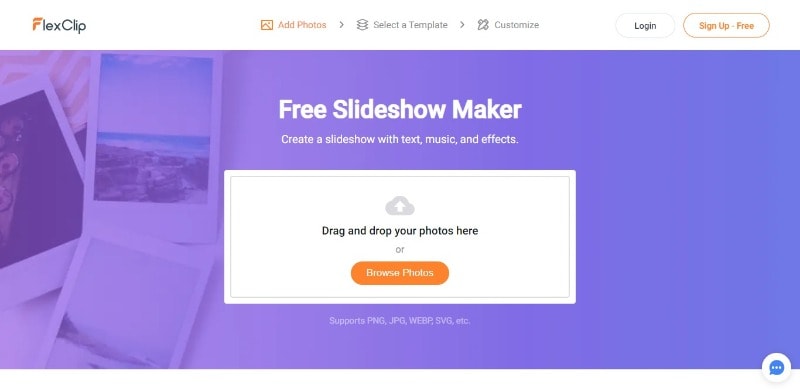
01FlexClip
FlexClip is a music-and-effects-enabled internet slideshow creator. It’s at the top because current video templates allow anyone to make a slideshow by dragging and dropping, and effects like transitions, animations, filters, frames, and extensive music resources can help those who are specialists in slideshow creation realize all of their ideas. Aside from that, all layouts, effects, and music are completely free!
Features:
● Watermark free
● Supports HD resolution
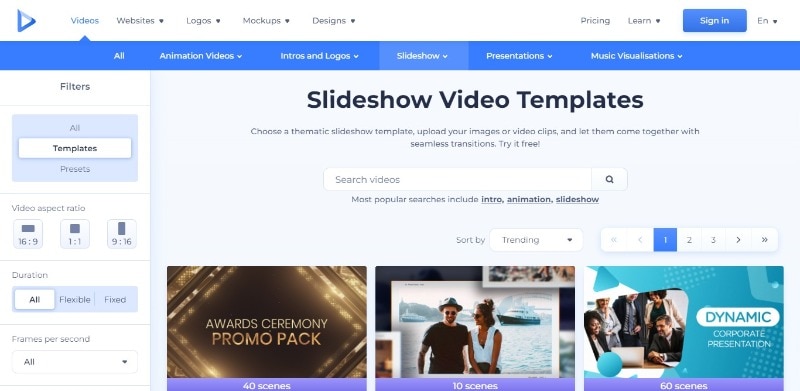
02Renderforest
Professional presentation software Renderforest promotes simplicity as well. Choose a stunning template, and then add photographs and music to complete your photo slideshow. It features a lot of 3D effects that make your presentation look more professional. The music selection may be limited.
Features:
● Beautiful templates are available on.
● Making a photo slideshow is quite simple.
03Smilebox
Smilebox’s slideshow creator has templates for any event, including family gatherings, holidays, and simply for fun. You may need to upgrade to the premium edition of this slideshow generator to gain access to the music collection and some effects.
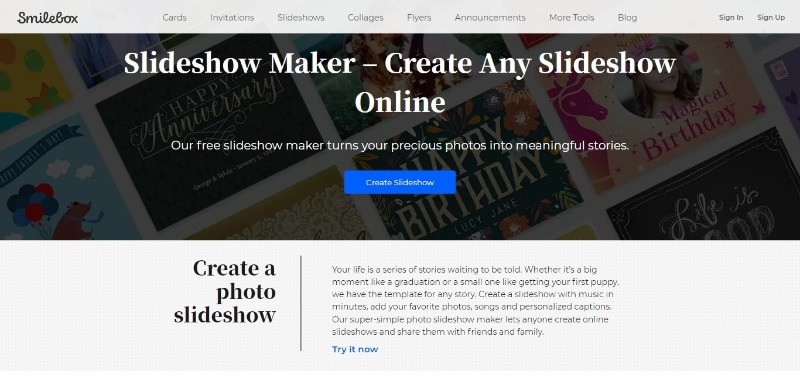
Features:
● The user interface is simple and straightforward.
● Numerous templates to choose from.
● All templates are categorized so you can quickly find the ones you need.
04Motionden
Motionden includes a large picture media library and numerous stunning templates. It’s also a three-step slideshow builder that you can use to quickly create a slideshow.
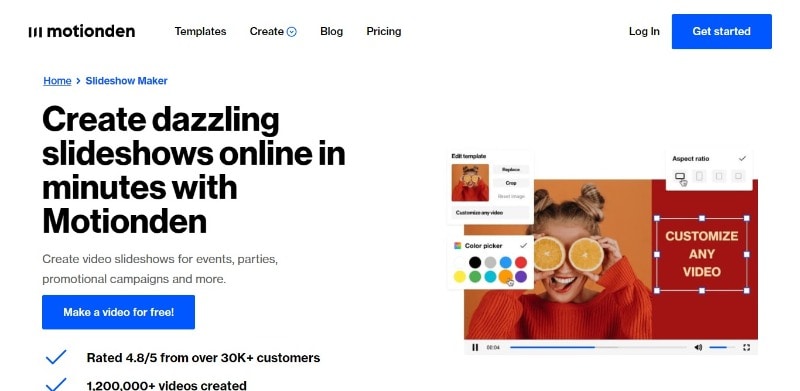
Features:
● All of the templates are lovely.
● All of the templates have intros so you know where to use them.
05Kizoa
Kizoa allows you to make slideshows with images, movies, and music, which you can then distribute via email, blogs, Facebook, YouTube, or even burn to DVD. Its key features include the ability to add text, music, transitions, and effects. Although it has a lot of music and materials, you have to upgrade to get access to them.
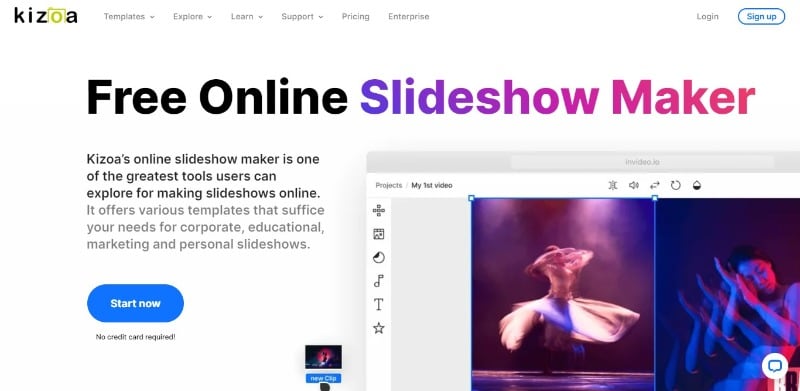
Features:
● Beginners friendly.
● The slideshow templates from Kizoa are excellent.
Part 4 How to Create a Photo Slideshow with Music
If you’re looking for the greatest free slideshow software, we’d recommend Wondershare Filmora Video Editor . It makes it simple to generate high-quality videos as well as slideshows. Furthermore, its user-friendly interface and extensive feature set make it suitable for users of all skill levels, allowing anyone to create a video slideshow in only a few minutes.
For Win 7 or later (64-bit)
For macOS 10.12 or later
The benefits of using Filmora to create a video slideshow include:
The sound effects and music tracks in the royalty-free audio library are suitable for a variety of scenarios.
● There are a lot of transitions and filters to make the slideshow look amazing.
● There are various text templates to help you annotate more effectively.
Let your imagination run wild with editing tools that are both powerful and easy to use.
Step 1: Uploading Images and Videos to Filmora
Once the video editor has loaded, go to the Media tab’s Import menu and select Import a Media Folder. Navigate to the folder containing the materials for your slideshow, select it with a click, then hit OK to import it into your project.
Step 2: Position the Media Files on the Timeline
Simply select a file to be added to the timeline and drag and drop it to the preferred location. Repeat this method for all of the images you’d like to include in your slideshow, then organise them in the same order as they’ll appear in the presentation.
Step 3: Avoid Hard Cuts Between Slides by Using Transitions
A hard cut between two photographs can break the flow of your slideshow, but you can simply correct this by transitioning gently from one slide to the next.
If you double-click a transition after it’s been added to the timeline, you’ll be sent to the Transition Setting Window, where you can define the default duration for all transitions you add to a slideshow and choose your preferred transition mode.
Step 4: Enhance the colours in your slideshow with filters and overlays.
The Effects tab, which is next to the Transitions tab, contains a variety of visual effects that desaturate or brighten the colours in your images. Filmora’s visual effects are divided into filter and overlay categories, each with its own subcategories such as Lomography, Sepia Tone, and Light Leaks.
Step 5: Incorporating Motion Graphics Elements into Slides
Hundreds of motion graphics templates are available in the Elements tab, which you can rapidly add to the timeline.
Step 6: Creating Slideshow Soundtracks and Recording Voiceovers
Select the Record Voiceover tool from the Record drop-down menu on the Media tab. When the Record Audio window appears on the screen, select the microphone you’ll use to record the narration and press the Record button.
You may use Filmora’s large library of music and sound effects for free. Simply navigate to the Audio tab and browse the subcategories of Electronic, Young & Bright, and Rock until you select the perfect song for the slideshow’s soundtrack.
Step 7: Exporting Slideshows from Filmora
The final step in the process of creating a slideshow in Filmora is to export the project. Click on the Export button and wait for the Export window to appear on the screen. You can then select the output file format, set a preferred frame rate or resolution for your slideshow, or export
● Ending Thoughts →
● Bye-bye to the limits and restraints of other slideshow creators.
● Instead, download the slideshow generator with music that suits your needs and requirements from our revised apps and software today and start producing unique, customized slideshows.
● Let us know what we missed and stay in touch with us for more such blogs.
A slideshow maker can also work towards developing an engaging professional presentation. Something to pique the interest of your co-workers at your next meeting or persuade potential clients that you are the best choice for their business.
If the tool you’re using doesn’t include a simple drag-and-drop feature, extensive formatting options, or smooth transitions, coming up with a customised slideshow can take a long time. As a result, we researched and reviewed the finest slideshow-creating software for Windows and Mac, apps for iPhone and Android, as well as an online slideshow maker with music.
In this article
01 [5 Slideshows Created with Music Software](#Part 1)
02 [The Top 5 Apps for Creating a Music Slideshow](#Part 2)
03 [5 Online Slideshows Made with Music Maker](#Part 3)
04 [How to Create a Photo Slideshow with Music](#Part 4)
Part 1 Slideshows Created with Music Software
● SmartSHOW in 3D
SmartSHOW 3D allows you to combine your favourite photos and music to create amazing presentations to share with friends and family. You don’t need to have any technical knowledge to add motion to your still photographs. Fade-ins, wipes, gradients, and 3D transitions are some of the transition effects you can use. Even if you’re not tech-savvy, SmartSHOW 3D allows you to create a professional slideshow with music.

Compatibility: Windows
Features:
● Make slideshows from photos, videos, and music.
● Effects and templates
● Various music tracks
● Burn the DVD after it has been converted to DVD format.
● PhotoStage Slideshow Creator
PhotoStage is another software programme for creating slideshows. Thousands of photographs and video snippets can be used to create presentations. Text, effects, music, and voice-over can all be easily added. Brightness, saturation, colour, and other aspects of your photographs and movies can all be tweaked.
Quick Create allows you to quickly create a slideshow, including pans, zooms, and fades. After that, you can burn your slideshow on a CD, upload it to the internet, or save it.

Compatibility: Windows, Mac.
Features:
● The Slidehow Wizard
● Image editing software
● Effects and transitions
● Optimize for the web and mobile devices, burn to a DVD, or save as a video.
● Kizoa-Slideshow Maker Online
Adapt your slides to any screen with up to seven different aspect ratios with Kizoa. No matter what kind of TV, computer, smartphone, or tablet you use, you’ll have the standard size slideshow.
The intelligent cropping tool will recommend the optimal cropping option for your photos based on the format you select, allowing you to fill the screen as much as possible without leaving out important details.

Compatibility: Windows, Mac.
Features:
● Seven different aspect ratios are available.
● Slideshows can be viewed on television.
● Variety of formats.
● PowerDirector
There are hundreds of transitions, video effects, and themed slideshow templates to pick from in this free slideshow maker. Instead of generic slides and monotonous text, professionals may use PowerDirector to create compelling corporate slideshows for meetings, professional showcases, and industry conferences.

Compatibility: Windows, Mac.
Features:
● Interfaces for Storyboards, Timelines, and Slideshows
● Overlays, titles, and transitions
● The ability to generate a wide range of visual effects
● Audio and colour correction software.
● SlideLab
The high-quality transitions, filters, and music in SlideLab make it a great choice for beginners who enjoy sharing their lives with their friends. The app also includes a built-in sharing platform that allows users to make and share films on Instagram or YouTube with a single swipe.
SlideLab has the ability to export projects as PDF and PPTX files, which can then be opened in PowerPoint and Keynote.

Compatibility: Windows, Mac
Features:
● Professional interactive presentations.
● Workflow and export are both simple.
● Share it with one click.
Part 2 The Top 5 Apps for Creating a Music Slideshow
Here are five of the greatest free slideshow makers with music applications for iPhone users to check out:
01SlideLab
SlideLab is a fantastic presentation software with music. According to Vine and Instagram, you can change the start point of your music or the length of the slideshow video.
The programme also includes fantastic features that make your job easier. Awesome photo filters, various transitions, photo zooming, cropping, rotating, and flipping tools, and more are included.

02Pic Music
Pic Music is one of the most popular slideshow, video, and quotation generators for SnapChat, Instagram, Tumblr, and Viddy. The entertaining and user-friendly app lets you combine music and images to create a film.
Users can upload music from their libraries or record their own voices, and they can even select which part of the audio/song to play. Slideshow previews will also be available within the app.

03Filmora
The quick and easy video editor is ideal for mixing video clips, images, effects, and audio into a single film. In comparison to other alternatives, it enables users to incorporate lengthier popular music snippets, and users can choose the right soundtrack for their videos.
After you’ve downloaded Filmora, you’ll be able to take use of its extensive features, which will make your job easier. It allows you to apply filters, reorder your greatest bits, zoom and crop your videos/photos, combine selfies/snaps into a single film with your favorite song, and publish the resulting slideshow video to practically all social media sites, among other things.

04Slide-show video maker
Slide-show Video Maker is an excellent choice if you want to make photo or video slideshows from your Photo Library, Instagram, or Facebook and afterwards add your own music. It allows you to quickly and easily create slideshow videos.
Simply choose your videos and photographs, add transitions and music, choose the slideshow duration, filters, and text if wanted.

05Animoto
Animoto lets you create slideshow films with music using various video clips and photographs from your camera roll or iCloud.
The software includes a built-in music library with hundreds of songs, over 50 slick video styles to pick from, a video clip cutter, captions for photographs, intro cards, and several other useful features. Email, SMS, Facebook, and Twitter can all be used to share the final slideshow videos.

Here are 5 of the greatest video slideshow generator apps for Android users to download for free:
06Magisto Video Editor
Magisto Video Editor turns videos and photos into marvelous video stories that you can share with your friends and family. After you’ve uploaded photographs or videos from your gallery, the app lets you to add music from the Magisto music library or your iPhone to create a stunning presentation. You may then send them to your friends and family via WhatsApp, YouTube, Facebook and Instagram.

07KlipMix Free Video Editor
KlipMix is a fantastic, user-friendly tool. In just a minute, anyone can combine several photos/videos, add their preferred music, and make an incredible slideshow presentation. It allows you to change the duration of each photo or video’s display, unselect and rearrange photos with touch and drag and share the final slideshow video with family and friends.

08Slidegram
You can upload 100 photographs at a time and combine them in one video with Slidegram loaded on your smartphone. The slideshow pictures with music consists of only a few stages, including selecting photographs from a gallery, previewing and sorting them, adding your favorite music, setting the slideshow video’s time, and sharing it on social media.

09PicMotion
PicMotion makes professional video slideshows and photo slideshows with music that can be uploaded on any social networking platform. After installing the programme, you may build slideshows from photos or videos and enhance them by adding music from your collection or recording and adding your charming voice to the movie.

10Slideshow Maker
This music slideshow programme is simple to use, and everyone can make beautiful videos from images in under a minute. It’s absolutely free, and your slideshows will not have a watermark. Users can add their preferred music to the slideshow and the finished product can be shared with their friends on YouTube or Facebook. The f t Free Slideshow Maker enables you to rotate images, unselect and reorganize them using touch and drag, as well as change the duration of each picture’s display.

Part 3 Online Slideshows Made with Music Maker
01FlexClip
FlexClip is a music-and-effects-enabled internet slideshow creator. It’s at the top because current video templates allow anyone to make a slideshow by dragging and dropping, and effects like transitions, animations, filters, frames, and extensive music resources can help those who are specialists in slideshow creation realize all of their ideas. Aside from that, all layouts, effects, and music are completely free!

Features:
● Watermark free
● Supports HD resolution
02Renderforest
Professional presentation software Renderforest promotes simplicity as well. Choose a stunning template, and then add photographs and music to complete your photo slideshow. It features a lot of 3D effects that make your presentation look more professional. The music selection may be limited.

Features:
● Beautiful templates are available on.
● Making a photo slideshow is quite simple.
03Smilebox
Smilebox’s slideshow creator has templates for any event, including family gatherings, holidays, and simply for fun. You may need to upgrade to the premium edition of this slideshow generator to gain access to the music collection and some effects.

Features:
● The user interface is simple and straightforward.
● Numerous templates to choose from.
● All templates are categorized so you can quickly find the ones you need.
04Motionden
Motionden includes a large picture media library and numerous stunning templates. It’s also a three-step slideshow builder that you can use to quickly create a slideshow.

Features:
● All of the templates are lovely.
● All of the templates have intros so you know where to use them.
05Kizoa
Kizoa allows you to make slideshows with images, movies, and music, which you can then distribute via email, blogs, Facebook, YouTube, or even burn to DVD. Its key features include the ability to add text, music, transitions, and effects. Although it has a lot of music and materials, you have to upgrade to get access to them.

Features:
● Beginners friendly.
● The slideshow templates from Kizoa are excellent.
Part 4 How to Create a Photo Slideshow with Music
If you’re looking for the greatest free slideshow software, we’d recommend Wondershare Filmora Video Editor . It makes it simple to generate high-quality videos as well as slideshows. Furthermore, its user-friendly interface and extensive feature set make it suitable for users of all skill levels, allowing anyone to create a video slideshow in only a few minutes.
For Win 7 or later (64-bit)
For macOS 10.12 or later
The benefits of using Filmora to create a video slideshow include:
The sound effects and music tracks in the royalty-free audio library are suitable for a variety of scenarios.
● There are a lot of transitions and filters to make the slideshow look amazing.
● There are various text templates to help you annotate more effectively.
Let your imagination run wild with editing tools that are both powerful and easy to use.
Step 1: Uploading Images and Videos to Filmora
Once the video editor has loaded, go to the Media tab’s Import menu and select Import a Media Folder. Navigate to the folder containing the materials for your slideshow, select it with a click, then hit OK to import it into your project.
Step 2: Position the Media Files on the Timeline
Simply select a file to be added to the timeline and drag and drop it to the preferred location. Repeat this method for all of the images you’d like to include in your slideshow, then organise them in the same order as they’ll appear in the presentation.
Step 3: Avoid Hard Cuts Between Slides by Using Transitions
A hard cut between two photographs can break the flow of your slideshow, but you can simply correct this by transitioning gently from one slide to the next.
If you double-click a transition after it’s been added to the timeline, you’ll be sent to the Transition Setting Window, where you can define the default duration for all transitions you add to a slideshow and choose your preferred transition mode.
Step 4: Enhance the colours in your slideshow with filters and overlays.
The Effects tab, which is next to the Transitions tab, contains a variety of visual effects that desaturate or brighten the colours in your images. Filmora’s visual effects are divided into filter and overlay categories, each with its own subcategories such as Lomography, Sepia Tone, and Light Leaks.
Step 5: Incorporating Motion Graphics Elements into Slides
Hundreds of motion graphics templates are available in the Elements tab, which you can rapidly add to the timeline.
Step 6: Creating Slideshow Soundtracks and Recording Voiceovers
Select the Record Voiceover tool from the Record drop-down menu on the Media tab. When the Record Audio window appears on the screen, select the microphone you’ll use to record the narration and press the Record button.
You may use Filmora’s large library of music and sound effects for free. Simply navigate to the Audio tab and browse the subcategories of Electronic, Young & Bright, and Rock until you select the perfect song for the slideshow’s soundtrack.
Step 7: Exporting Slideshows from Filmora
The final step in the process of creating a slideshow in Filmora is to export the project. Click on the Export button and wait for the Export window to appear on the screen. You can then select the output file format, set a preferred frame rate or resolution for your slideshow, or export
● Ending Thoughts →
● Bye-bye to the limits and restraints of other slideshow creators.
● Instead, download the slideshow generator with music that suits your needs and requirements from our revised apps and software today and start producing unique, customized slideshows.
● Let us know what we missed and stay in touch with us for more such blogs.
A slideshow maker can also work towards developing an engaging professional presentation. Something to pique the interest of your co-workers at your next meeting or persuade potential clients that you are the best choice for their business.
If the tool you’re using doesn’t include a simple drag-and-drop feature, extensive formatting options, or smooth transitions, coming up with a customised slideshow can take a long time. As a result, we researched and reviewed the finest slideshow-creating software for Windows and Mac, apps for iPhone and Android, as well as an online slideshow maker with music.
In this article
01 [5 Slideshows Created with Music Software](#Part 1)
02 [The Top 5 Apps for Creating a Music Slideshow](#Part 2)
03 [5 Online Slideshows Made with Music Maker](#Part 3)
04 [How to Create a Photo Slideshow with Music](#Part 4)
Part 1 Slideshows Created with Music Software
● SmartSHOW in 3D
SmartSHOW 3D allows you to combine your favourite photos and music to create amazing presentations to share with friends and family. You don’t need to have any technical knowledge to add motion to your still photographs. Fade-ins, wipes, gradients, and 3D transitions are some of the transition effects you can use. Even if you’re not tech-savvy, SmartSHOW 3D allows you to create a professional slideshow with music.

Compatibility: Windows
Features:
● Make slideshows from photos, videos, and music.
● Effects and templates
● Various music tracks
● Burn the DVD after it has been converted to DVD format.
● PhotoStage Slideshow Creator
PhotoStage is another software programme for creating slideshows. Thousands of photographs and video snippets can be used to create presentations. Text, effects, music, and voice-over can all be easily added. Brightness, saturation, colour, and other aspects of your photographs and movies can all be tweaked.
Quick Create allows you to quickly create a slideshow, including pans, zooms, and fades. After that, you can burn your slideshow on a CD, upload it to the internet, or save it.

Compatibility: Windows, Mac.
Features:
● The Slidehow Wizard
● Image editing software
● Effects and transitions
● Optimize for the web and mobile devices, burn to a DVD, or save as a video.
● Kizoa-Slideshow Maker Online
Adapt your slides to any screen with up to seven different aspect ratios with Kizoa. No matter what kind of TV, computer, smartphone, or tablet you use, you’ll have the standard size slideshow.
The intelligent cropping tool will recommend the optimal cropping option for your photos based on the format you select, allowing you to fill the screen as much as possible without leaving out important details.

Compatibility: Windows, Mac.
Features:
● Seven different aspect ratios are available.
● Slideshows can be viewed on television.
● Variety of formats.
● PowerDirector
There are hundreds of transitions, video effects, and themed slideshow templates to pick from in this free slideshow maker. Instead of generic slides and monotonous text, professionals may use PowerDirector to create compelling corporate slideshows for meetings, professional showcases, and industry conferences.

Compatibility: Windows, Mac.
Features:
● Interfaces for Storyboards, Timelines, and Slideshows
● Overlays, titles, and transitions
● The ability to generate a wide range of visual effects
● Audio and colour correction software.
● SlideLab
The high-quality transitions, filters, and music in SlideLab make it a great choice for beginners who enjoy sharing their lives with their friends. The app also includes a built-in sharing platform that allows users to make and share films on Instagram or YouTube with a single swipe.
SlideLab has the ability to export projects as PDF and PPTX files, which can then be opened in PowerPoint and Keynote.

Compatibility: Windows, Mac
Features:
● Professional interactive presentations.
● Workflow and export are both simple.
● Share it with one click.
Part 2 The Top 5 Apps for Creating a Music Slideshow
Here are five of the greatest free slideshow makers with music applications for iPhone users to check out:
01SlideLab
SlideLab is a fantastic presentation software with music. According to Vine and Instagram, you can change the start point of your music or the length of the slideshow video.
The programme also includes fantastic features that make your job easier. Awesome photo filters, various transitions, photo zooming, cropping, rotating, and flipping tools, and more are included.

02Pic Music
Pic Music is one of the most popular slideshow, video, and quotation generators for SnapChat, Instagram, Tumblr, and Viddy. The entertaining and user-friendly app lets you combine music and images to create a film.
Users can upload music from their libraries or record their own voices, and they can even select which part of the audio/song to play. Slideshow previews will also be available within the app.

03Filmora
The quick and easy video editor is ideal for mixing video clips, images, effects, and audio into a single film. In comparison to other alternatives, it enables users to incorporate lengthier popular music snippets, and users can choose the right soundtrack for their videos.
After you’ve downloaded Filmora, you’ll be able to take use of its extensive features, which will make your job easier. It allows you to apply filters, reorder your greatest bits, zoom and crop your videos/photos, combine selfies/snaps into a single film with your favorite song, and publish the resulting slideshow video to practically all social media sites, among other things.

04Slide-show video maker
Slide-show Video Maker is an excellent choice if you want to make photo or video slideshows from your Photo Library, Instagram, or Facebook and afterwards add your own music. It allows you to quickly and easily create slideshow videos.
Simply choose your videos and photographs, add transitions and music, choose the slideshow duration, filters, and text if wanted.

05Animoto
Animoto lets you create slideshow films with music using various video clips and photographs from your camera roll or iCloud.
The software includes a built-in music library with hundreds of songs, over 50 slick video styles to pick from, a video clip cutter, captions for photographs, intro cards, and several other useful features. Email, SMS, Facebook, and Twitter can all be used to share the final slideshow videos.

Here are 5 of the greatest video slideshow generator apps for Android users to download for free:
06Magisto Video Editor
Magisto Video Editor turns videos and photos into marvelous video stories that you can share with your friends and family. After you’ve uploaded photographs or videos from your gallery, the app lets you to add music from the Magisto music library or your iPhone to create a stunning presentation. You may then send them to your friends and family via WhatsApp, YouTube, Facebook and Instagram.

07KlipMix Free Video Editor
KlipMix is a fantastic, user-friendly tool. In just a minute, anyone can combine several photos/videos, add their preferred music, and make an incredible slideshow presentation. It allows you to change the duration of each photo or video’s display, unselect and rearrange photos with touch and drag and share the final slideshow video with family and friends.

08Slidegram
You can upload 100 photographs at a time and combine them in one video with Slidegram loaded on your smartphone. The slideshow pictures with music consists of only a few stages, including selecting photographs from a gallery, previewing and sorting them, adding your favorite music, setting the slideshow video’s time, and sharing it on social media.

09PicMotion
PicMotion makes professional video slideshows and photo slideshows with music that can be uploaded on any social networking platform. After installing the programme, you may build slideshows from photos or videos and enhance them by adding music from your collection or recording and adding your charming voice to the movie.

10Slideshow Maker
This music slideshow programme is simple to use, and everyone can make beautiful videos from images in under a minute. It’s absolutely free, and your slideshows will not have a watermark. Users can add their preferred music to the slideshow and the finished product can be shared with their friends on YouTube or Facebook. The f t Free Slideshow Maker enables you to rotate images, unselect and reorganize them using touch and drag, as well as change the duration of each picture’s display.

Part 3 Online Slideshows Made with Music Maker
01FlexClip
FlexClip is a music-and-effects-enabled internet slideshow creator. It’s at the top because current video templates allow anyone to make a slideshow by dragging and dropping, and effects like transitions, animations, filters, frames, and extensive music resources can help those who are specialists in slideshow creation realize all of their ideas. Aside from that, all layouts, effects, and music are completely free!

Features:
● Watermark free
● Supports HD resolution
02Renderforest
Professional presentation software Renderforest promotes simplicity as well. Choose a stunning template, and then add photographs and music to complete your photo slideshow. It features a lot of 3D effects that make your presentation look more professional. The music selection may be limited.

Features:
● Beautiful templates are available on.
● Making a photo slideshow is quite simple.
03Smilebox
Smilebox’s slideshow creator has templates for any event, including family gatherings, holidays, and simply for fun. You may need to upgrade to the premium edition of this slideshow generator to gain access to the music collection and some effects.

Features:
● The user interface is simple and straightforward.
● Numerous templates to choose from.
● All templates are categorized so you can quickly find the ones you need.
04Motionden
Motionden includes a large picture media library and numerous stunning templates. It’s also a three-step slideshow builder that you can use to quickly create a slideshow.

Features:
● All of the templates are lovely.
● All of the templates have intros so you know where to use them.
05Kizoa
Kizoa allows you to make slideshows with images, movies, and music, which you can then distribute via email, blogs, Facebook, YouTube, or even burn to DVD. Its key features include the ability to add text, music, transitions, and effects. Although it has a lot of music and materials, you have to upgrade to get access to them.

Features:
● Beginners friendly.
● The slideshow templates from Kizoa are excellent.
Part 4 How to Create a Photo Slideshow with Music
If you’re looking for the greatest free slideshow software, we’d recommend Wondershare Filmora Video Editor . It makes it simple to generate high-quality videos as well as slideshows. Furthermore, its user-friendly interface and extensive feature set make it suitable for users of all skill levels, allowing anyone to create a video slideshow in only a few minutes.
For Win 7 or later (64-bit)
For macOS 10.12 or later
The benefits of using Filmora to create a video slideshow include:
The sound effects and music tracks in the royalty-free audio library are suitable for a variety of scenarios.
● There are a lot of transitions and filters to make the slideshow look amazing.
● There are various text templates to help you annotate more effectively.
Let your imagination run wild with editing tools that are both powerful and easy to use.
Step 1: Uploading Images and Videos to Filmora
Once the video editor has loaded, go to the Media tab’s Import menu and select Import a Media Folder. Navigate to the folder containing the materials for your slideshow, select it with a click, then hit OK to import it into your project.
Step 2: Position the Media Files on the Timeline
Simply select a file to be added to the timeline and drag and drop it to the preferred location. Repeat this method for all of the images you’d like to include in your slideshow, then organise them in the same order as they’ll appear in the presentation.
Step 3: Avoid Hard Cuts Between Slides by Using Transitions
A hard cut between two photographs can break the flow of your slideshow, but you can simply correct this by transitioning gently from one slide to the next.
If you double-click a transition after it’s been added to the timeline, you’ll be sent to the Transition Setting Window, where you can define the default duration for all transitions you add to a slideshow and choose your preferred transition mode.
Step 4: Enhance the colours in your slideshow with filters and overlays.
The Effects tab, which is next to the Transitions tab, contains a variety of visual effects that desaturate or brighten the colours in your images. Filmora’s visual effects are divided into filter and overlay categories, each with its own subcategories such as Lomography, Sepia Tone, and Light Leaks.
Step 5: Incorporating Motion Graphics Elements into Slides
Hundreds of motion graphics templates are available in the Elements tab, which you can rapidly add to the timeline.
Step 6: Creating Slideshow Soundtracks and Recording Voiceovers
Select the Record Voiceover tool from the Record drop-down menu on the Media tab. When the Record Audio window appears on the screen, select the microphone you’ll use to record the narration and press the Record button.
You may use Filmora’s large library of music and sound effects for free. Simply navigate to the Audio tab and browse the subcategories of Electronic, Young & Bright, and Rock until you select the perfect song for the slideshow’s soundtrack.
Step 7: Exporting Slideshows from Filmora
The final step in the process of creating a slideshow in Filmora is to export the project. Click on the Export button and wait for the Export window to appear on the screen. You can then select the output file format, set a preferred frame rate or resolution for your slideshow, or export
● Ending Thoughts →
● Bye-bye to the limits and restraints of other slideshow creators.
● Instead, download the slideshow generator with music that suits your needs and requirements from our revised apps and software today and start producing unique, customized slideshows.
● Let us know what we missed and stay in touch with us for more such blogs.
A slideshow maker can also work towards developing an engaging professional presentation. Something to pique the interest of your co-workers at your next meeting or persuade potential clients that you are the best choice for their business.
If the tool you’re using doesn’t include a simple drag-and-drop feature, extensive formatting options, or smooth transitions, coming up with a customised slideshow can take a long time. As a result, we researched and reviewed the finest slideshow-creating software for Windows and Mac, apps for iPhone and Android, as well as an online slideshow maker with music.
In this article
01 [5 Slideshows Created with Music Software](#Part 1)
02 [The Top 5 Apps for Creating a Music Slideshow](#Part 2)
03 [5 Online Slideshows Made with Music Maker](#Part 3)
04 [How to Create a Photo Slideshow with Music](#Part 4)
Part 1 Slideshows Created with Music Software
● SmartSHOW in 3D
SmartSHOW 3D allows you to combine your favourite photos and music to create amazing presentations to share with friends and family. You don’t need to have any technical knowledge to add motion to your still photographs. Fade-ins, wipes, gradients, and 3D transitions are some of the transition effects you can use. Even if you’re not tech-savvy, SmartSHOW 3D allows you to create a professional slideshow with music.

Compatibility: Windows
Features:
● Make slideshows from photos, videos, and music.
● Effects and templates
● Various music tracks
● Burn the DVD after it has been converted to DVD format.
● PhotoStage Slideshow Creator
PhotoStage is another software programme for creating slideshows. Thousands of photographs and video snippets can be used to create presentations. Text, effects, music, and voice-over can all be easily added. Brightness, saturation, colour, and other aspects of your photographs and movies can all be tweaked.
Quick Create allows you to quickly create a slideshow, including pans, zooms, and fades. After that, you can burn your slideshow on a CD, upload it to the internet, or save it.

Compatibility: Windows, Mac.
Features:
● The Slidehow Wizard
● Image editing software
● Effects and transitions
● Optimize for the web and mobile devices, burn to a DVD, or save as a video.
● Kizoa-Slideshow Maker Online
Adapt your slides to any screen with up to seven different aspect ratios with Kizoa. No matter what kind of TV, computer, smartphone, or tablet you use, you’ll have the standard size slideshow.
The intelligent cropping tool will recommend the optimal cropping option for your photos based on the format you select, allowing you to fill the screen as much as possible without leaving out important details.

Compatibility: Windows, Mac.
Features:
● Seven different aspect ratios are available.
● Slideshows can be viewed on television.
● Variety of formats.
● PowerDirector
There are hundreds of transitions, video effects, and themed slideshow templates to pick from in this free slideshow maker. Instead of generic slides and monotonous text, professionals may use PowerDirector to create compelling corporate slideshows for meetings, professional showcases, and industry conferences.

Compatibility: Windows, Mac.
Features:
● Interfaces for Storyboards, Timelines, and Slideshows
● Overlays, titles, and transitions
● The ability to generate a wide range of visual effects
● Audio and colour correction software.
● SlideLab
The high-quality transitions, filters, and music in SlideLab make it a great choice for beginners who enjoy sharing their lives with their friends. The app also includes a built-in sharing platform that allows users to make and share films on Instagram or YouTube with a single swipe.
SlideLab has the ability to export projects as PDF and PPTX files, which can then be opened in PowerPoint and Keynote.

Compatibility: Windows, Mac
Features:
● Professional interactive presentations.
● Workflow and export are both simple.
● Share it with one click.
Part 2 The Top 5 Apps for Creating a Music Slideshow
Here are five of the greatest free slideshow makers with music applications for iPhone users to check out:
01SlideLab
SlideLab is a fantastic presentation software with music. According to Vine and Instagram, you can change the start point of your music or the length of the slideshow video.
The programme also includes fantastic features that make your job easier. Awesome photo filters, various transitions, photo zooming, cropping, rotating, and flipping tools, and more are included.

02Pic Music
Pic Music is one of the most popular slideshow, video, and quotation generators for SnapChat, Instagram, Tumblr, and Viddy. The entertaining and user-friendly app lets you combine music and images to create a film.
Users can upload music from their libraries or record their own voices, and they can even select which part of the audio/song to play. Slideshow previews will also be available within the app.

03Filmora
The quick and easy video editor is ideal for mixing video clips, images, effects, and audio into a single film. In comparison to other alternatives, it enables users to incorporate lengthier popular music snippets, and users can choose the right soundtrack for their videos.
After you’ve downloaded Filmora, you’ll be able to take use of its extensive features, which will make your job easier. It allows you to apply filters, reorder your greatest bits, zoom and crop your videos/photos, combine selfies/snaps into a single film with your favorite song, and publish the resulting slideshow video to practically all social media sites, among other things.

04Slide-show video maker
Slide-show Video Maker is an excellent choice if you want to make photo or video slideshows from your Photo Library, Instagram, or Facebook and afterwards add your own music. It allows you to quickly and easily create slideshow videos.
Simply choose your videos and photographs, add transitions and music, choose the slideshow duration, filters, and text if wanted.

05Animoto
Animoto lets you create slideshow films with music using various video clips and photographs from your camera roll or iCloud.
The software includes a built-in music library with hundreds of songs, over 50 slick video styles to pick from, a video clip cutter, captions for photographs, intro cards, and several other useful features. Email, SMS, Facebook, and Twitter can all be used to share the final slideshow videos.

Here are 5 of the greatest video slideshow generator apps for Android users to download for free:
06Magisto Video Editor
Magisto Video Editor turns videos and photos into marvelous video stories that you can share with your friends and family. After you’ve uploaded photographs or videos from your gallery, the app lets you to add music from the Magisto music library or your iPhone to create a stunning presentation. You may then send them to your friends and family via WhatsApp, YouTube, Facebook and Instagram.

07KlipMix Free Video Editor
KlipMix is a fantastic, user-friendly tool. In just a minute, anyone can combine several photos/videos, add their preferred music, and make an incredible slideshow presentation. It allows you to change the duration of each photo or video’s display, unselect and rearrange photos with touch and drag and share the final slideshow video with family and friends.

08Slidegram
You can upload 100 photographs at a time and combine them in one video with Slidegram loaded on your smartphone. The slideshow pictures with music consists of only a few stages, including selecting photographs from a gallery, previewing and sorting them, adding your favorite music, setting the slideshow video’s time, and sharing it on social media.

09PicMotion
PicMotion makes professional video slideshows and photo slideshows with music that can be uploaded on any social networking platform. After installing the programme, you may build slideshows from photos or videos and enhance them by adding music from your collection or recording and adding your charming voice to the movie.

10Slideshow Maker
This music slideshow programme is simple to use, and everyone can make beautiful videos from images in under a minute. It’s absolutely free, and your slideshows will not have a watermark. Users can add their preferred music to the slideshow and the finished product can be shared with their friends on YouTube or Facebook. The f t Free Slideshow Maker enables you to rotate images, unselect and reorganize them using touch and drag, as well as change the duration of each picture’s display.

Part 3 Online Slideshows Made with Music Maker
01FlexClip
FlexClip is a music-and-effects-enabled internet slideshow creator. It’s at the top because current video templates allow anyone to make a slideshow by dragging and dropping, and effects like transitions, animations, filters, frames, and extensive music resources can help those who are specialists in slideshow creation realize all of their ideas. Aside from that, all layouts, effects, and music are completely free!

Features:
● Watermark free
● Supports HD resolution
02Renderforest
Professional presentation software Renderforest promotes simplicity as well. Choose a stunning template, and then add photographs and music to complete your photo slideshow. It features a lot of 3D effects that make your presentation look more professional. The music selection may be limited.

Features:
● Beautiful templates are available on.
● Making a photo slideshow is quite simple.
03Smilebox
Smilebox’s slideshow creator has templates for any event, including family gatherings, holidays, and simply for fun. You may need to upgrade to the premium edition of this slideshow generator to gain access to the music collection and some effects.

Features:
● The user interface is simple and straightforward.
● Numerous templates to choose from.
● All templates are categorized so you can quickly find the ones you need.
04Motionden
Motionden includes a large picture media library and numerous stunning templates. It’s also a three-step slideshow builder that you can use to quickly create a slideshow.

Features:
● All of the templates are lovely.
● All of the templates have intros so you know where to use them.
05Kizoa
Kizoa allows you to make slideshows with images, movies, and music, which you can then distribute via email, blogs, Facebook, YouTube, or even burn to DVD. Its key features include the ability to add text, music, transitions, and effects. Although it has a lot of music and materials, you have to upgrade to get access to them.

Features:
● Beginners friendly.
● The slideshow templates from Kizoa are excellent.
Part 4 How to Create a Photo Slideshow with Music
If you’re looking for the greatest free slideshow software, we’d recommend Wondershare Filmora Video Editor . It makes it simple to generate high-quality videos as well as slideshows. Furthermore, its user-friendly interface and extensive feature set make it suitable for users of all skill levels, allowing anyone to create a video slideshow in only a few minutes.
For Win 7 or later (64-bit)
For macOS 10.12 or later
The benefits of using Filmora to create a video slideshow include:
The sound effects and music tracks in the royalty-free audio library are suitable for a variety of scenarios.
● There are a lot of transitions and filters to make the slideshow look amazing.
● There are various text templates to help you annotate more effectively.
Let your imagination run wild with editing tools that are both powerful and easy to use.
Step 1: Uploading Images and Videos to Filmora
Once the video editor has loaded, go to the Media tab’s Import menu and select Import a Media Folder. Navigate to the folder containing the materials for your slideshow, select it with a click, then hit OK to import it into your project.
Step 2: Position the Media Files on the Timeline
Simply select a file to be added to the timeline and drag and drop it to the preferred location. Repeat this method for all of the images you’d like to include in your slideshow, then organise them in the same order as they’ll appear in the presentation.
Step 3: Avoid Hard Cuts Between Slides by Using Transitions
A hard cut between two photographs can break the flow of your slideshow, but you can simply correct this by transitioning gently from one slide to the next.
If you double-click a transition after it’s been added to the timeline, you’ll be sent to the Transition Setting Window, where you can define the default duration for all transitions you add to a slideshow and choose your preferred transition mode.
Step 4: Enhance the colours in your slideshow with filters and overlays.
The Effects tab, which is next to the Transitions tab, contains a variety of visual effects that desaturate or brighten the colours in your images. Filmora’s visual effects are divided into filter and overlay categories, each with its own subcategories such as Lomography, Sepia Tone, and Light Leaks.
Step 5: Incorporating Motion Graphics Elements into Slides
Hundreds of motion graphics templates are available in the Elements tab, which you can rapidly add to the timeline.
Step 6: Creating Slideshow Soundtracks and Recording Voiceovers
Select the Record Voiceover tool from the Record drop-down menu on the Media tab. When the Record Audio window appears on the screen, select the microphone you’ll use to record the narration and press the Record button.
You may use Filmora’s large library of music and sound effects for free. Simply navigate to the Audio tab and browse the subcategories of Electronic, Young & Bright, and Rock until you select the perfect song for the slideshow’s soundtrack.
Step 7: Exporting Slideshows from Filmora
The final step in the process of creating a slideshow in Filmora is to export the project. Click on the Export button and wait for the Export window to appear on the screen. You can then select the output file format, set a preferred frame rate or resolution for your slideshow, or export
● Ending Thoughts →
● Bye-bye to the limits and restraints of other slideshow creators.
● Instead, download the slideshow generator with music that suits your needs and requirements from our revised apps and software today and start producing unique, customized slideshows.
● Let us know what we missed and stay in touch with us for more such blogs.
Also read:
- 2024 Approved 5 Tips for Aquasoft Slideshow
- New Color Matching Is the Trickiest Part of Graphic Designing. Learn in Detail About Using Canva Color Match Ideally While Working on Your Pins, Social Media Posts, and Other Designs
- Read This Article to Learn How to Convert Your Slow-Motion Videos Into Normal-Speed Videos in a Few Simple Steps and Methods. So, Stick to the End
- New In 2024, How to Create LUTs with LUTs Generator
- Updated What Slideshow Templates Can Teach You About Aesthetic
- Updated Detailed Steps to Rotate Videos Using Kdenlive for 2024
- New In 2024, This Post Will Make You Learn Anything and Everything About Animated GIFs, the Ways to Use Cool Gifs in My Marketing, and How to Create Unique Custom Animated Gifs
- Updated Best Guide for Setting TikTok Countdown Timer for 2024
- Slow Down the GIF to Emphasize Details Better. To Do so, Read This Guide and Learn to Use the Best Platforms for Slow-Motion GIFs for 2024
- IMovie Review – Is It The Best Video Editor for Mac Users?
- Best Ways to Add Photos to Tik Tok Video
- New Easy Way to Combine Several Xvid Files Into One Windows, Mac,Android
- How to Add Adjustment Layer (Clip) in DaVinci Resolve, In 2024
- New Recommended Video Background Online Changers for 2024
- New If You Want to Know More About the Basics of Final Cut Pro, It Would Be Helpful to Watch a Beginner Tutorial, with the Length of only 20 Minutes, an Introduction of the Whole Program
- Updated Best Tips for Better Event Videography
- Top 10 Movie Trailer Voice Generators Windows, Mac, Android, iPhone
- Updated 2024 Approved How To Synchronize Your Audio And Videos Properly?
- Updated Whats an AV1 Format and How Does It Impact Your Life, In 2024
- Updated In 2024, Do You Want to Know How to Make a Collage in Lightroom? It Doesnt Matter Whether You Are a Novice or a Professional; This Guide Will Teach You to Do It Well
- New In 2024, Unlock Your Video Editing Potential With Filmora From Wondershare
- New 2024 Approved Want to Add Freeze Frame Effect to Your Video on Your Device? Here Are the Steps to Add Freeze Frame on PC, Mac, Smartphone as Well as Online From Any Device
- In 2024, Easily Cut Large Videos Faster on Mac 7 Solutions Included
- How To Cut Videos For Instagram On Mac for 2024
- Split Videos in the Lightworks Step by Step
- In 2024, Do You Wish to Know How FFmpeg Can Remove Audio From a Video? If Yes, Keep Scrolling This Guide to Remove Audio From Video with FFmpeg and Other Alternative Software
- Updated Best 10 Anime Movies for All Time
- Updated Top Tricks for Learning Photo Slideshow for 2024
- Updated If You Are Looking for an Open-Source, Cross-Platform Video Editor, Shotcut Is a Great Choice? But Is It Truly the Best Video Editor or Is There a Better Alternative Available?
- Updated How to Create a Slideshow GIF for 2024
- Ultimate Guide on How to Plan and Storyboard a Music Video
- Top iOS Solutions Finding Premium Slow Motion Apps For Video Creation
- In 2024, 18 Video Editors Weve Tested Heres What We Learned
- Updated In 2024, Top 5 Free Online Video Filter Editors
- In 2024, 5 Simple Tools to Merge Video and Audio Online
- Updated 2024 Approved How to Make an Instant Slideshow on Mac
- New In 2024, Quick Answer What Is a Transparent Logo and Why Do You Need It
- Updated If You Are Looking for an Open-Source, Cross-Platform Video Editor, Shotcut Is a Great Choice for 2024 But Is It Truly the Best Video Editor or Is There a Better Alternative Available?
- Updated Learn How to Add Dynamic Shake Effects to Your Videos Using Alight Motion. Our Step-by-Step Guide Makes It Easy to Create Cinematic Footage
- In 2024, While Emojis Have High End Credibility Towards Different Media Utilities, People Also Ask About Ways and Methods to Add Emoji to iPhone. Be Here to Get the Easiest Solutions to the Query
- New In 2024, How To Make a Photo Collage in Microsoft Word
- New In 2024, How to Make Blender Render Transparent Background
- New With Looping Videos, People Stay on Your Site Longer, Boosting Engagement. With Video Being Watched on Mobile over 3X More than Any Other Content, Its an Essential Part of Mobile Advertising for 2024
- MAGIX Vegas Pro Review A Professional Video Editing Software
- New In 2024, How to Rotate Video in iMovie with Alternative
- Guide to Add Transition Effects in Premiere Pro for 2024
- How to Do Perfect Match Paint 100 the Easy Way for 2024
- Updated | Zoom In and Zoom Out on YouTube for 2024
- The Top English Voice Generator To Convert Text Into Desired Accent
- In 2024, Hacks to do pokemon go trainer battles For Tecno Spark Go (2023) | Dr.fone
- Disabled iPhone 15 How to Unlock a Disabled iPhone 15? | Dr.fone
- How to Successfully Bypass iCloud Activation Lock from Apple iPhone 15 Pro
- How to recover deleted contacts from 105 Classic.
- How to Successfully Bypass iCloud Activation Lock from Apple iPhone XS
- App Wont Open on Your Motorola Razr 40 Ultra? Here Are All Fixes | Dr.fone
- In 2024, CatchEmAll Celebrate National Pokémon Day with Virtual Location On Realme 11X 5G | Dr.fone
- Updated What Is an AI Script Generator for 2024
- The Complete Guide to Vivo Y28 5G FRP Bypass Everything You Need to Know
- In 2024, How to Track a Lost Sony Xperia 10 V for Free? | Dr.fone
- 4 Easy Ways for Your Infinix Hot 40 Pro Hard Reset | Dr.fone
- How to Transfer Videos from Motorola Moto G13 to iPad | Dr.fone
- In 2024, 9 Best French Video Translators Online and Download Options
- How to Reset Realme 11X 5G without Losing Data | Dr.fone
- 2024 Approved 10 Best Free AI Video Generators with Innovative and Advanced Algorithms
- How to create an electronic signature online for .jpeg
- In 2024, Why Apple Account Disabled From your iPhone 12 Pro Max? How to Fix
- How To Change Your Apple ID Password On your iPhone XR | Dr.fone
- 11 Best Location Changers for Tecno Spark 20 Pro | Dr.fone
- In 2024, Edit and Send Fake Location on Telegram For your Samsung Galaxy S23 Ultra in 3 Ways | Dr.fone
- Two Ways to Track My Boyfriends Samsung Galaxy S23 Tactical Edition without Him Knowing | Dr.fone
- Ever-Changing Era of AI Video Translation A Reality to Be Fulfilled
- Failed to play MP4 movies with Samsung Galaxy S23 Tactical Edition
- In 2024, Top 5 Tracking Apps to Track Xiaomi Redmi A2 without Them Knowing | Dr.fone
- How to Reset Apple ID and Apple Password From Apple iPhone XR
- How To Use Allshare Cast To Turn On Screen Mirroring On Tecno Camon 20 Premier 5G | Dr.fone
- Title: Updated How to Make Double Exposure Effect in Filmora
- Author: Morgan
- Created at : 2024-05-19 05:12:18
- Updated at : 2024-05-20 05:12:18
- Link: https://ai-video-editing.techidaily.com/updated-how-to-make-double-exposure-effect-in-filmora/
- License: This work is licensed under CC BY-NC-SA 4.0.

