
:max_bytes(150000):strip_icc():format(webp)/GettyImages-944229620-9cff560054804b72a431e9492c7445b4.jpg)
Updated How to Make Hand Shake Effect with Final Cut Pro for 2024
How to Make Hand Shake Effect with Final Cut Pro

Are you struggling to attract audiences to your videos? If so, you may consider adding effects to them during your editing process. Most video editing software includes preset video effects to create and publish attractive videos quickly. For example, Final Cut Pro is a video editing software for Apple devices and includes lots of editing tools and video effects. Here is a detailed guide on how to apply the Final Cut Pro camera shake effect to your videos.
- What are hand shake effects for
- What kind of shots are best for such an effect
- Is it better to hand shake when shooting or add the effects
Part1: When Do You Need a Hand Shake Effect?

Adding effects to your videos is a great way to make them more impactful. However, you need to apply them correctly for them to be effective. The following information explores different aspects of the Final Cut Pro camera shake effect, including its definition, why video creators use it, and how best to apply it.
What are hand shake effects for?
Hand shake effects are video adjustments you apply to specific scenes that make the shot vibrate. Depending on the software you use, there are multiple variations of the effect. In addition, developers refer to it by different names. For example, Final Cut Pro users know it as the earthquake effect, which is a preset video effect in most versions of the software.
Typically, video creators use the Final Cut Pro camera shake effect to add energy to their videos. As such, their scenes are more dramatic and encourage you to pay more attention to the video. For example, you can apply the effect to indicate the arrival of the villain in your video. In addition, the effect will be more impactful if the villain is a giant.
You can also use the camera shake video effect for the following purposes:
- Break the monotony in a scene. Applying this scene after a long dialogue scene will give your audience a brief respite, allowing them to regain their focus.
- The camera shake effect can also be an effective tool to build your brand identity. Instead of applying it during the screenplay, you can use it in the end credits to introduce your logo to audiences. Furthermore, you can include a creative sound track for additional emphasis.
What kind of shots are best for such an effect?
The best shot to apply the camera shake effect are still shots. This is because they give you extra creative room with the scene since the subjects are facing the camera directly from a level angle. As such, you can customize unique motion patterns for each subject when applying the camera shake effect.
Is it better to hand shake when shooting or add the effects?
Although it may seem tempting to physically shake the camera when shooting, most filmmakers prefer to add the effect during editing. This is because shaking the camera during shooting may result in unusable shots in post-production. For example, shooting a car scene from a hand-held camera in the passenger seat often results in shaky footage. As such, video creators mount the camera on a tripod to capture still shots and then add the camera shake during post-production.
Part2: How to Add a hand shake effect with FCPX?
The following is a step-to-step guide on how to add a hand shake effect on Final Cut Pro X. However, you need to meet the following requirements for the process to work.
A licensed copy of Final Cut Pro X

The camera shake effect is only available with the full version of Final Cut Pro X. In addition, you will access all variations of the effect with the full version.
A compatible video file
Apple’s Final Cut Pro X is compatible with the following video file formats:
- QuickTime formats.
- Apple ProRes
- Apple Animation Codec
- XF-AVC
- Container files, such as3GP, AVI, and MP4.
Camera shake effect plugins
The video editing software comes with preset camera shake effects, which you can find in the Effects Browser. However, you can also download compatible plugins from established sources, such as the Camera Shake Effects pack from Motion Array.
Once you have everything in place, follow the below steps.
- Import your desired video clip to the Final Cut Pro X workspace. Your video will appear in the timeline section at the bottom of your workspace.

- Select the section where you want to add the camera shake effect. In addition, you need to set the in and out points from the timeline. For example, Mac users can set these points by pressing the Iand O keys, respectively.
- Then, select the Shakefrom the Effects browser and search for Hand Held.

- Drag the effect over your selection to apply the effect.
- You can also make additional adjustments to your hand-held shake effect from the inspector panel.

For example, you can prevent black borders from appearing with the effect by increasing the Scale attribute to 105%. Scroll to the bottom right section of your workspace to the Inspector Panel, and click on Scale to make the adjustment.
Part3: How to add hand shake effect in the simplest way?
If the above guide is too complicated for you, Wondershare Filmora offers you the simplest way to add the hand shake effect to your videos.

The program is a stand-alone video editor for Windows and macOS users. It comes with a variety of preset camera shaking effects, including
- Up-down shaking
- Extreme shaking
- Chaos shaking
- Sideways shaking
Free Download For Win 7 or later(64-bit)
Free Download For macOS 10.14 or later
The above effects offer various shaking intensities and patterns to help you achieve your desired effect. In addition, you will need to purchase a license to access the different versions of the hand shake video effect. Once you have Wondershare Filmora running on your device, follow the below steps to add the hand shake effect to your videos.
1. Import your video
Click on the Import tab on your user interface and select Import Media Files. Then, drag and drop the files you want to edit to your timeline from the resulting window.
2. Applying Wondershare Filmora’s hand shake effect
Click on the Effects tab from the user interface and then select Filters. Next, proceed to the Shake subcategory to view all available presets. Currently, the program has eight camera shake presets, which you can preview using the pop-up thumbnail on your workspace.
Once you identify your desired effect, drag and drop it over the video selection, you want to apply it. You can make further adjustments using the sliders on the effect’s sub menu. For example, you can vary the duration of the effect by adjusting the frequency and intensity sliders.
Finally, click on Ok to apply the hand shake effect to your video and save the changes.
3. Exporting your final project
Wondershare Filmora allows you to export your completed projects to external locations, such as external hard drives and cloud storage. In addition, you can directly upload your videos to YouTube and Vimeo from the workspace.
Here is how to export videos from Filmora:
- Click on the Exporttab from the program’s main menu.
- Identify your file destination from the options on the Export The latest version of Filmora allows file exports to your local storage, YouTube, Vimeo, and DVD.
- Select your file format from the left menu and click Exporton the bottom right corner to finalize the process. Some of the available file formats include MP4, WMV, and FLV.
Kindly note that the above guide is for the latest version of Wondershare Filmora. As such, confirm that you have the latest edition before using it. Alternatively, you can download the latest version for free from the Filmora website.
FAQs
1. What are the minimum system requirements to run Film Cut Pro X?
According to Apple, your device needs to have the below minimum system requirements.
- 4 gigabytes of RAM. However, running the program on a device with 8 GB RAM allows you to work with 4K videos and perform 360-degree video editing seamlessly.
- A dedicated graphics processing unit with at least 1 GB of VRAM.
- About 4.5 GB of storage space for Final Cut Pro’s system files.
- An active internet connection to enable access to online customer support and additional features.
- You will also need a Blu-ray recorder to export videos directly to DVDs.
- Finally, your device should be running macOS 11.5.1 or later.
2. Can you import custom hand shake effects to Final Cut Pro?
Yes, you can import custom hand shake effects to your licensed version of Final Cut Pro. However, always install custom plugins from verifiable sites to prevent the installation of malicious software such as spyware. Some of the sites to consider consist of Motion Array, Studio Binder, and FCPX Free. For example, you can check out these 10 free plugins for Final Cut Pro from Filmora .
- A licensed copy of Final Cut Pro X
- A compatible video file
- Camera shake effect plugins
- How to add hand shake effect in the simplest way
Part1: When Do You Need a Hand Shake Effect?
Adding effects to your videos is a great way to make them more impactful. However, you need to apply them correctly for them to be effective. The following information explores different aspects of the Final Cut Pro camera shake effect, including its definition, why video creators use it, and how best to apply it.
What are hand shake effects for?
Hand shake effects are video adjustments you apply to specific scenes that make the shot vibrate. Depending on the software you use, there are multiple variations of the effect. In addition, developers refer to it by different names. For example, Final Cut Pro users know it as the earthquake effect, which is a preset video effect in most versions of the software.
Typically, video creators use the Final Cut Pro camera shake effect to add energy to their videos. As such, their scenes are more dramatic and encourage you to pay more attention to the video. For example, you can apply the effect to indicate the arrival of the villain in your video. In addition, the effect will be more impactful if the villain is a giant.
You can also use the camera shake video effect for the following purposes:
- Break the monotony in a scene. Applying this scene after a long dialogue scene will give your audience a brief respite, allowing them to regain their focus.
- The camera shake effect can also be an effective tool to build your brand identity. Instead of applying it during the screenplay, you can use it in the end credits to introduce your logo to audiences. Furthermore, you can include a creative sound track for additional emphasis.
What kind of shots are best for such an effect?
The best shot to apply the camera shake effect are still shots. This is because they give you extra creative room with the scene since the subjects are facing the camera directly from a level angle. As such, you can customize unique motion patterns for each subject when applying the camera shake effect.
Is it better to hand shake when shooting or add the effects?
Although it may seem tempting to physically shake the camera when shooting, most filmmakers prefer to add the effect during editing. This is because shaking the camera during shooting may result in unusable shots in post-production. For example, shooting a car scene from a hand-held camera in the passenger seat often results in shaky footage. As such, video creators mount the camera on a tripod to capture still shots and then add the camera shake during post-production.
Part2: How to Add a hand shake effect with FCPX?
The following is a step-to-step guide on how to add a hand shake effect on Final Cut Pro X. However, you need to meet the following requirements for the process to work.
A licensed copy of Final Cut Pro X
The camera shake effect is only available with the full version of Final Cut Pro X. In addition, you will access all variations of the effect with the full version.
A compatible video file
Apple’s Final Cut Pro X is compatible with the following video file formats:
- QuickTime formats.
- Apple ProRes
- Apple Animation Codec
- XF-AVC
- Container files, such as3GP, AVI, and MP4.
Camera shake effect plugins
The video editing software comes with preset camera shake effects, which you can find in the Effects Browser. However, you can also download compatible plugins from established sources, such as the Camera Shake Effects pack from Motion Array.
Once you have everything in place, follow the below steps.
- Import your desired video clip to the Final Cut Pro X workspace. Your video will appear in the timeline section at the bottom of your workspace.
- Select the section where you want to add the camera shake effect. In addition, you need to set the in and out points from the timeline. For example, Mac users can set these points by pressing the Iand O keys, respectively.
- Then, select the Shakefrom the Effects browser and search for Hand Held.
- Drag the effect over your selection to apply the effect.
- You can also make additional adjustments to your hand-held shake effect from the inspector panel.
For example, you can prevent black borders from appearing with the effect by increasing the Scale attribute to 105%. Scroll to the bottom right section of your workspace to the Inspector Panel, and click on Scale to make the adjustment.
Part3: How to add hand shake effect in the simplest way?
If the above guide is too complicated for you, Wondershare Filmora offers you the simplest way to add the hand shake effect to your videos.
The program is a stand-alone video editor for Windows and macOS users. It comes with a variety of preset camera shaking effects, including
- Up-down shaking
- Extreme shaking
- Chaos shaking
- Sideways shaking
Free Download For Win 7 or later(64-bit)
Free Download For macOS 10.14 or later
The above effects offer various shaking intensities and patterns to help you achieve your desired effect. In addition, you will need to purchase a license to access the different versions of the hand shake video effect. Once you have Wondershare Filmora running on your device, follow the below steps to add the hand shake effect to your videos.
1. Import your video
Click on the Import tab on your user interface and select Import Media Files. Then, drag and drop the files you want to edit to your timeline from the resulting window.
2. Applying Wondershare Filmora’s hand shake effect
Click on the Effects tab from the user interface and then select Filters. Next, proceed to the Shake subcategory to view all available presets. Currently, the program has eight camera shake presets, which you can preview using the pop-up thumbnail on your workspace.
Once you identify your desired effect, drag and drop it over the video selection, you want to apply it. You can make further adjustments using the sliders on the effect’s sub menu. For example, you can vary the duration of the effect by adjusting the frequency and intensity sliders.
Finally, click on Ok to apply the hand shake effect to your video and save the changes.
3. Exporting your final project
Wondershare Filmora allows you to export your completed projects to external locations, such as external hard drives and cloud storage. In addition, you can directly upload your videos to YouTube and Vimeo from the workspace.
Here is how to export videos from Filmora:
- Click on the Exporttab from the program’s main menu.
- Identify your file destination from the options on the Export The latest version of Filmora allows file exports to your local storage, YouTube, Vimeo, and DVD.
- Select your file format from the left menu and click Exporton the bottom right corner to finalize the process. Some of the available file formats include MP4, WMV, and FLV.
Kindly note that the above guide is for the latest version of Wondershare Filmora. As such, confirm that you have the latest edition before using it. Alternatively, you can download the latest version for free from the Filmora website.
FAQs
1. What are the minimum system requirements to run Film Cut Pro X?
According to Apple, your device needs to have the below minimum system requirements.
- 4 gigabytes of RAM. However, running the program on a device with 8 GB RAM allows you to work with 4K videos and perform 360-degree video editing seamlessly.
- A dedicated graphics processing unit with at least 1 GB of VRAM.
- About 4.5 GB of storage space for Final Cut Pro’s system files.
- An active internet connection to enable access to online customer support and additional features.
- You will also need a Blu-ray recorder to export videos directly to DVDs.
- Finally, your device should be running macOS 11.5.1 or later.
2. Can you import custom hand shake effects to Final Cut Pro?
Yes, you can import custom hand shake effects to your licensed version of Final Cut Pro. However, always install custom plugins from verifiable sites to prevent the installation of malicious software such as spyware. Some of the sites to consider consist of Motion Array, Studio Binder, and FCPX Free. For example, you can check out these 10 free plugins for Final Cut Pro from Filmora .
Add Text Animation to A Video Online
Do you want to make a creative video? Do you want your presentation or video to be easy to follow and entertaining? You can take the video to another level with the help of text animation. This article will discuss how to add text animation to online videos. You can use a good video editor from where you can select fresh styles and make the best video from there. One of the simplest ways to elevate your movie from good to excellent is with understandable text animation.
Text animation and short captions can broaden the audience for your content as more consumers view videos without sound these days. It matters what fonts you use in the videos, and they establish the mood and facilitate interaction with most viewers who rely on video captions. Add text, alter the font, add transitions, and use text effects to draw the user’s attention as they scroll. Please continue reading to discover how simple it is to make interactive video titles, words, and supers.
1. Use Kapwing animation text editor
(https://www.kapwing.com/animated-text-video-maker )
You can use the potent online editor Kapwing to add animated text to videos online, utilizing music, videos, GIFs, and images. There are no downloads required because everything is already present inside the browser. Kapwing is a capable tool for content production that is simple enough for everyone to use. The majority of video formats, GIF and image, including avi, png, jpg, gif, MOV, mp4, and more, are supported by Kapwing.
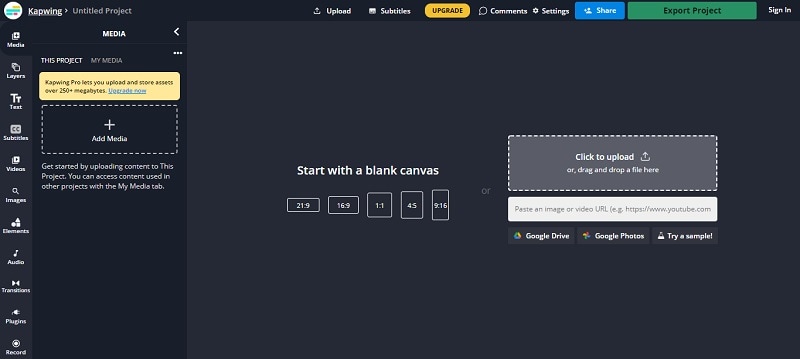
Step1 Upload the Video to Kapwing
You can open Kapwing with the device and tap on “Start Editing” to open up Kapwimg studio. After that, one can use the drag and drop option to upload the video in the studio. You can click on upload or use the link to upload.
If you have a more than 250 MB video, then you will require the Pro version.
Step2 Add the Text
When the video gets uploaded, now you can add your text. You must click the “Text” option on the left and type the text. After that, you can pick your favorite color, background, and color to add style.
You will always want that your text to get animated, but it doesn’t mean that you will have to use explosive fonts or funky or bright, which are very funky. The animation will make your text look attractive, and you can experiment with the colors and fonts to find the best combination.
Step3 Animate the Text
Now the fun part starts; choose the text box present on the right side and click on the “Animate” tab. It will allow the user to select animations like fade, flicker, hue rotates, and many more. Choose the speed according to your requirement, and if you want to change the background and color, you can do it too.
Use “Apply To” for applying this animation in the outro, intro, or both. It will help you to make the text fade out, fade in, or transition out and in with animation. Now the animation library has nine options:
- Drop: It appears on top of the text box
- Flicker: This one is like a candle’s flicker, and text flashes disappear and appear before staying.
- Fade: Opacity can be changed from 0% to 100%.
- Pop:- This grows the text more extensive than the text box and shrinks back to the place.
- Reveal:- Rolls from the left side to the right side
- Wipe:- Rolls from the left side to the right side with a colored background.
- Vibrate: The text box shakes in every direction.
- Hue rotates:- Colour of text cycles through the hue values..
You can use a timeline to adjust the animation’s termination when you set text animation. You can even drag that layer after the start time or use it on end/start time sliders to decrease or increase the time of your video. Text animation can get started when the cursor reaches the start time.
Step4 Export
The video with animated text is now ready to boom. You can click on “Export Video” present at the top and wait for the process. After that, you can download that video and use the links to share it on your social media platform.
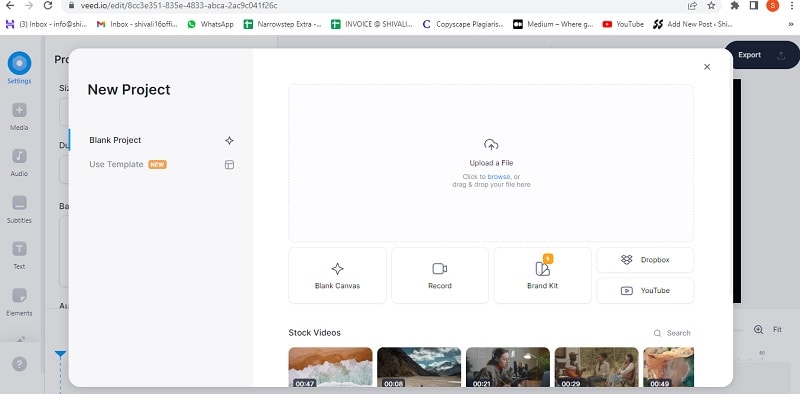
2. Use veed.io text video editor
(https://www.veed.io/create/text-video-maker )
Veed is one of the best video editor text effects online, which allows you to add text to online videos. You can easily add style, color, text, and font in a few clicks. You can upload the video and tap the text to get started. Add title and text or select handwriting font. One can select it from templates. Change transparency, alignment, and font size of the text.
This online software is perfect for creating attractive videos on social media. This is free, which omits the usage of expensive software. It is much easier to avoid many complex video editor apps. With the help of VEED, you can create an excellent video without any experience and do it with a few clicks. Let’s see how to add animated text to photos online.
Step1 Upload the video
Tap on “Choose Video” and choose the file you want to upload on VEED. One can even use the drag and drop option from the folder to the editor.
Step2 Add text
After that, you can add the text by tapping on the “Text” option on the left menu. You can select the text style and start typing.
Step3 Export
Save the video with the text you placed by tapping on “Export.” The video gets saved in an MP4 file.
3. Use Animaker text maker
(https://www.animaker.com/text-animation-maker )
The Animaker is one of the best-animated video makers. This app offers the best collection of charts, BGs, and animated characters. With the help of Animaker, you can make the text disappear or appear off-screen in the best way. After you finish your video, you can download the format in MP4.
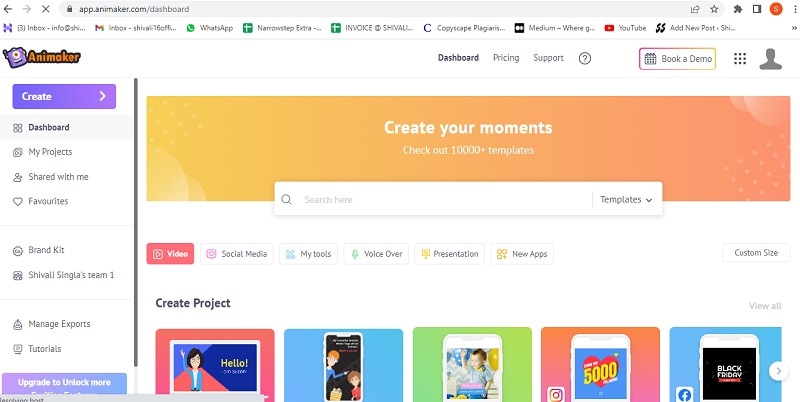
Step1 Upload the video clip
First, you can upload your video clip present on top that you wish to add text animation.
- Tap on the “Upload section” on the bottom left. You can upload your video where you wish to add the animated text.
- The video will get uploaded to “My Files.”
- Click on the uploaded video in the library to load it on the workspace.
Step2 Add text to the video
- You can add text in their text section
- In the next section, one can find two different text types. At the top, you will discover plain text options, and at the bottom, you can find pre-designed boxes seasoned at Animaker.
Let’s see how you can use pre-built text boxes.
- Tap on pre-built designs for your text animation. One can see the text appearing in the center of the workspace, and you can click it and type new text if you want to customize it.
- You can notice widespread options appearing with your text. It is known as the item menu. It will allow the user to modify their text. One can change font size, color, style, etc. Your text will come with pre-defined effects, which will help you to animate text instantly.
- You must have noticed that the purple color bar appears on the timeline, representing the duration of the text visible in the video. For example, if you want that text to get visible between 4rth to 8th seconds, then you will have to drag the edges of that purple bar to the same duration.
To see the scene, you must click on the play button on top of the timeline.
Let’s check the other ways of adding animated text to the video. In the previous one, you have seen how you can add text animation using pre-built boxes. Now you will get to know about doing it by using blank boxes.
- Start tapping the “text section”. Select the bank textbox.
- Click on them and then opt to add new text.
- Opt for clicking the cog icon that is there in the item menu.
- You will notice the settings tab that is on the screen’s right side.
- You can easily opt for the customization of the text in the way you wish. You can start by modifying the style of the font. One can change the size and color of the font as well.
- Use these options and opt for the application of enter and/or exit effects to text. Now, opt to click on the effect option to get more than 50 options. You can select the effect from there.
- Once the animation effect is applied to your timeline, you can notice the pink part in the bar i.e. purple. This completes creating text animation by using Animaker.
Step3 Download the Video
- You can visit the publish option in the right window to download the video.
- Tap on the “download video” option for downloading.
Conclusion
Now, you are aware of how to add text animation to video online and the three best video editors that will help you add animated text to your videos. At this point, you can choose the best one according to your needs and usage. These steps will help you create a unique and good video that will be easy to understand and entertaining.
Free Download For Win 7 or later(64-bit)
Free Download For macOS 10.14 or later
Free Download For macOS 10.14 or later
How to Create Intro Video with Filmora
If you’re just starting out as a YouTuber, you should have an introductory video, especially when people don’t know you that well yet. When you want to start a YouTube career one of the things you need to think about is How to make a YouTube intro video.
Whether you’re a beginner or a pro, knowing how to create a video intro for YouTube can help you introduce your audience to your content, pique their interest and boost your brand. Stand out and engage your audience with quick and easy YouTube intro animations. Not sure how to make a YouTube intro? We’ve built this guide on how to make a video intro using Wondershare Filmora an editing software.
- Start by introducing yourself
- Get into details
- Add a call to action
- Add personalization to your video
- Video length
What is Intro Video
There are also different ways of using the intro video, it can be used in business, in YouTube channels and others.
Introductory videos are short videos which you personally introduce yourself, your business, your brands and your brand’s mission and show your personality to your audience.
Introductory videos can help you stand out from the competition and gain favorability because you’re talking to your users on a personal level. People love seeing faces behind a brand, having an introductory video will ensure that people remember you.
YouTube intro videos are short, introductory clips that play at the beginning of a YouTube channel. They usually include the tittle of the YouTube channel, brand features like logos and colors animation and an accompanying snippet of music.
As the word suggest, intro are visuals that mark the beginning of a video. Likewise, outro are the closing visuals that appear at the end of the video. The two are widely used in educational, entertaining, business videos, webcasts, podcast, corporate presentations and the like. There are several reasons why an intro are vital elements of any professional video.
It goes without saying that intros should not be too complicated or to confusing. Other wise they will fail in their purpose and will drive the audience away. Instead, they should be simply but thoughtfully designed.
YouTube intro Videos usually include:
- Memorable background music
- Text and titles
- Stickers and GIFs
- Emojis

Goal of a Video Introduction to Follow
Making intro video is not just only in doing a YouTube channel but you can also use this guide for any businesses like brand presentation, educational etc.
Step1 Start by introducing yourself.
Step2 Get into details.
Step3 Add a call to action.
Step4 Add personalization to your video.
Step5 Video Length.
1. Start by introducing yourself
You can always start your intro by introducing yourself but don’t just state your name and what
you do, tell them why you do it, what your core values are and what motivates and dives you to
do this kind of career. Because you all know doing vlog on YouTube is a job, work, and a career.
Share emotions with your audience, and help them relate to you. Doing so is going to help you stand out immediately from the crowd and get audiences interested enough to watch the remainder of your video’s content.
2. Get into details
Tip is always direct to the point, add a few facts about yourself, like your interest or previous experiences or who you are as a person. If you are a business owner and would want to talk about your business you can always share how it started.
If we are talking about the YouTube intro video. Every good YouTube intro video usually includes beneficial information for subscribers and viewers. Add any short important text that you feel is necessary from the video titles, your YouTube channel name, and social media handles. Keep your informative text in a consistent format and branding style.
3. Add a call to action
if you have successfully maintained the interest of your viewer until the very end of your video, use this opportunity to invite them to engage with your content more. It’s worth including a call to action in each video. Take a full advantage of YouTube to provide your audience with your social media channels and maybe a link or two to your other videos that might interest them,
4. Add personalization to your video
Even though an intro can be more than logo animation, the latter should still be a part of it. Otherwise, there’s a sense that something is messing. Include eye catchy visuals effects to your videos to stands out, so that people can easily remember your YouTube channel.

5. Video length
A long intro, even if it’s spectacular, can get boring once your audience has seen it a few times. An ideal length for intros is up to 8-10 seconds only. Just enough time to deliver your message and branding, and hook audiences in for the rest of the video. Any longer than that, and you might lose viewers who are waiting to see the video that they clicked on.
In the era of social media, tempting distractions and short attention spans, it’s critical to keep your content as short and sharp as you can.
How to Create Intro Video using Filmora
Wondershare Filmora is an editing software that is available to download in google. This software is easy to use and includes products for a range of users from beginner to intermediate. Common features of Filmora include a timeline, preview window and effects library that you can use to create a nice and creative introduction video for your YouTube channel.
Free Download For Win 7 or later(64-bit)
Free Download For macOS 10.14 or later
Free trails are available to demo the product before purchasing. Pricing options for the various programs are available on the official Filmora website.

Start your own design from scratch or you can search for a YouTube video template
Select the best video that you like to be your intro, either create a video introducing yourself or just a video with some creative effects.
First you can check the Stock Media and go click some GIFs find your best fit and start customizing. You can always download some free template online that you think much better to used.

Add ready made animated graphic stickers to your YouTube intro videos by dragging and dropping them into design. Just choose “Elements” and then “Stickers” to browse a library of options.

Change the image on your YouTube intro video by uploading your own or choosing from millions of free photos, graphics, and illustration in Filmora library.
Start editing your videos to make them look seamless and professional on any platforms. Whether it’s on a widescreen, tablet, or mobile device. Click some effects to add some creative design on your intro videos.
You can split, resize trim or cut your videos to tailor it to your needs.
Change the text and insert your own channel title and tagline. You can also change the font style, color, and size to better suit your brand look.
Finally, add music to your YouTube intro video by uploading a clip from a stock music of Filmora library. You can also make your own YouTube intro music using instrument or digital tools

Conclusion
Hope with these tips, you’ll be able to create quality video introductions that draw the audience in and help them get to know you better. Introduce your brand, explain your business, and connect with your prospective customers like never before. Whether your intro clips start off your YouTube videos or plays after the teaser clip, YouTube intro videos can be a valuable tool for any creator.
Remember your video doesn’t have to be a high-budget production or you don’t have to spend a lot of money on making a creative video. You could create a video that works with pretty much of any smartphone today. Have fun creating your introductions videos, set a positive mind and positive creation will come out.
What is Intro Video
There are also different ways of using the intro video, it can be used in business, in YouTube channels and others.
Introductory videos are short videos which you personally introduce yourself, your business, your brands and your brand’s mission and show your personality to your audience.
Introductory videos can help you stand out from the competition and gain favorability because you’re talking to your users on a personal level. People love seeing faces behind a brand, having an introductory video will ensure that people remember you.
YouTube intro videos are short, introductory clips that play at the beginning of a YouTube channel. They usually include the tittle of the YouTube channel, brand features like logos and colors animation and an accompanying snippet of music.
As the word suggest, intro are visuals that mark the beginning of a video. Likewise, outro are the closing visuals that appear at the end of the video. The two are widely used in educational, entertaining, business videos, webcasts, podcast, corporate presentations and the like. There are several reasons why an intro are vital elements of any professional video.
It goes without saying that intros should not be too complicated or to confusing. Other wise they will fail in their purpose and will drive the audience away. Instead, they should be simply but thoughtfully designed.
YouTube intro Videos usually include:
- Memorable background music
- Text and titles
- Stickers and GIFs
- Emojis
Goal of a Video Introduction to Follow
Making intro video is not just only in doing a YouTube channel but you can also use this guide for any businesses like brand presentation, educational etc.
Step1 Start by introducing yourself.
Step2 Get into details.
Step3 Add a call to action.
Step4 Add personalization to your video.
Step5 Video Length.
1. Start by introducing yourself
You can always start your intro by introducing yourself but don’t just state your name and what
you do, tell them why you do it, what your core values are and what motivates and dives you to
do this kind of career. Because you all know doing vlog on YouTube is a job, work, and a career.
Share emotions with your audience, and help them relate to you. Doing so is going to help you stand out immediately from the crowd and get audiences interested enough to watch the remainder of your video’s content.
2. Get into details
Tip is always direct to the point, add a few facts about yourself, like your interest or previous experiences or who you are as a person. If you are a business owner and would want to talk about your business you can always share how it started.
If we are talking about the YouTube intro video. Every good YouTube intro video usually includes beneficial information for subscribers and viewers. Add any short important text that you feel is necessary from the video titles, your YouTube channel name, and social media handles. Keep your informative text in a consistent format and branding style.
3. Add a call to action
if you have successfully maintained the interest of your viewer until the very end of your video, use this opportunity to invite them to engage with your content more. It’s worth including a call to action in each video. Take a full advantage of YouTube to provide your audience with your social media channels and maybe a link or two to your other videos that might interest them,
4. Add personalization to your video
Even though an intro can be more than logo animation, the latter should still be a part of it. Otherwise, there’s a sense that something is messing. Include eye catchy visuals effects to your videos to stands out, so that people can easily remember your YouTube channel.
5. Video length
A long intro, even if it’s spectacular, can get boring once your audience has seen it a few times. An ideal length for intros is up to 8-10 seconds only. Just enough time to deliver your message and branding, and hook audiences in for the rest of the video. Any longer than that, and you might lose viewers who are waiting to see the video that they clicked on.
In the era of social media, tempting distractions and short attention spans, it’s critical to keep your content as short and sharp as you can.
How to Create Intro Video using Filmora
Wondershare Filmora is an editing software that is available to download in google. This software is easy to use and includes products for a range of users from beginner to intermediate. Common features of Filmora include a timeline, preview window and effects library that you can use to create a nice and creative introduction video for your YouTube channel.
Free Download For Win 7 or later(64-bit)
Free Download For macOS 10.14 or later
Free trails are available to demo the product before purchasing. Pricing options for the various programs are available on the official Filmora website.
Start your own design from scratch or you can search for a YouTube video template
Select the best video that you like to be your intro, either create a video introducing yourself or just a video with some creative effects.
First you can check the Stock Media and go click some GIFs find your best fit and start customizing. You can always download some free template online that you think much better to used.
Add ready made animated graphic stickers to your YouTube intro videos by dragging and dropping them into design. Just choose “Elements” and then “Stickers” to browse a library of options.
Change the image on your YouTube intro video by uploading your own or choosing from millions of free photos, graphics, and illustration in Filmora library.
Start editing your videos to make them look seamless and professional on any platforms. Whether it’s on a widescreen, tablet, or mobile device. Click some effects to add some creative design on your intro videos.
You can split, resize trim or cut your videos to tailor it to your needs.
Change the text and insert your own channel title and tagline. You can also change the font style, color, and size to better suit your brand look.
Finally, add music to your YouTube intro video by uploading a clip from a stock music of Filmora library. You can also make your own YouTube intro music using instrument or digital tools
Conclusion
Hope with these tips, you’ll be able to create quality video introductions that draw the audience in and help them get to know you better. Introduce your brand, explain your business, and connect with your prospective customers like never before. Whether your intro clips start off your YouTube videos or plays after the teaser clip, YouTube intro videos can be a valuable tool for any creator.
Remember your video doesn’t have to be a high-budget production or you don’t have to spend a lot of money on making a creative video. You could create a video that works with pretty much of any smartphone today. Have fun creating your introductions videos, set a positive mind and positive creation will come out.
Detailed Tutorial to Rotate Videos in Cyberlink PowerDirector
Video Editing is a craft that is highly dependent on various characteristics of your video. But the way one presents it or goes about filming clips also has a profound effect on the end product. And as you may know, not every aspect of a video production activity always goes without hiccups. But editing can come in clutch as it can easily solve minor problems like skewed footage that was shot at the wrong angle or is upside down (an issue that can happen while using mobile phones).
Thus, with this article, we will be looking at steps to rotate a video in Cyberlink PowerDirector to help you when required. We have also mentioned the steps you will need to follow in Wondershare Filmora.
Note: We documented the steps in this guide with PowerDirector 365 and WonderShare Filmora X.
Steps to Rotate Videos with CyberLink PowerDirector
Put yourself in a situation where you’ve just finished filming a project with your smartphone but end up realizing that the footage isn’t in the right orientation by default. While the error has an easy fix on most smartphones, you can also perform this action with video editing tools.
Also, while this form of rotating might be the most basic implementation of the feature, you can often use the feature to add a dynamic nature to your video with Keyframes.
Definition: Keyframes in Video Editing is a software feature that allows an editor to set start and endpoints (denoted by In and Out Markers), presenting the opportunity to custom clip properties between the two positions. The set changes occur gradually as the playhead continues moving through the clip. Properties that can undergo modification with this method are zoom, rotation, colors, positions, etc.
The process of rotating clips is fairly straightforward; once you have PowerDirector 365 open, follow the steps listed below.
If you do not have CyberLink PowerDirector 365, download the software by visiting Cyberlink’s official website.
Step 1: Create a new video project in Cyberlink PowerDirector 365 and choose Full Mode.

Note: Full Mode in Cyberlink PowerDirector 365 will provide users access to a full-featured video editing tool similar in function to Wondershare Filmora. The other option available is Ad Designer.
Step 2: Now, import media onto the Timeline from the Media Library.
For this guide, we used the pre-existing stock footage in Cyberlink PowerDirector.

Step 3: Now, click on the video file on the Timeline; this will activate the video in the Preview Window. And it will provide you with access to the rotation circle, allowing you to change the orientation of the source file.

EXTRA
Rotation added in the PiP Designer will function as a keyframe-based rotation action. Right-click on the video in the preview window, choose Edit and then Modify to access this menu.

Following this, you can click on the Motion Tab, go into Rotation Settings, and modify the angle with greater precision. In the Preview Window, you will now be able to see the rotating video.

An Easier Way to Crop Video with Wondershare Filmora
Though Cyberlink PowerDirector 365 is a powerful video editing tool, we felt its menus were not as simple to navigate. Accessing the rotate function while available in the forefront, the use of PiP Designer didn’t feel intuitive.
In Wondershare Filmora Video Editor , rotating footage only happens via the Edit Option, and this straightforward approach felt simple. As for those who want to use Keyframes, the integration of this feature right above the Timeline is an appreciated convenience.
This emphasis on quick accessibility is present with almost every function in Filmora, and we believe this to be a significant advantage. The use of modern and unique iconography also increases familiarity, an aspect that will always be welcoming to new and budding creators.
If you do not already have Wondershare Filmora, you can download the software by visiting the official website.
To help you learn how to use the rotate function and show you an example of the easy accessibility in Filmora, here is how you can use the feature to get the output you desire.
For Win 7 or later (64-bit)
For macOS 10.14 or later
Once you have a new project open in Filmora, follow the steps listed below.
Step 1: Import a Media File to edit into your Video Project.

Step 2: Drag the video clip onto the Timeline and then select it with a mouse click to activate further interactions.

Step 3: Choose the Edit Option (marked in Red).
This will bring up the Edit Window in the left-top corner of your screen.

Step 4: Click on the Transform Menu and use the Rotation Slider to edit the orientation.

Having read this stretch of the guide, we believe you may have noticed how Filmora is more user-friendly and accessible due to its menu layout.
BONUS
Click on the Keyframe Button (marked in Green) to access the Keyframe Menu that allows you to set points between which a decided amount of rotation can happen.

The Bottom Line
This marks the end of our guide on how to rotate video in PowerDirector 365 and Wondershare Filmora X. Now, while both software are high-capable tools, we feel the keyframe-based working on rotation in Filmora is a lot more intuitive and easy to use. The ability to only have number-based rotation within the edit menu is also a positive, as rotating with a swivel like in PowerDirector isn’t always the most accurate.
And lastly, the modern iconography-based design of Wondershare Filmora is a factor to keep in mind, as this increases usability manifolds.
Note: Full Mode in Cyberlink PowerDirector 365 will provide users access to a full-featured video editing tool similar in function to Wondershare Filmora. The other option available is Ad Designer.
Step 2: Now, import media onto the Timeline from the Media Library.
For this guide, we used the pre-existing stock footage in Cyberlink PowerDirector.
Step 3: Now, click on the video file on the Timeline; this will activate the video in the Preview Window. And it will provide you with access to the rotation circle, allowing you to change the orientation of the source file.
EXTRA
Rotation added in the PiP Designer will function as a keyframe-based rotation action. Right-click on the video in the preview window, choose Edit and then Modify to access this menu.
Following this, you can click on the Motion Tab, go into Rotation Settings, and modify the angle with greater precision. In the Preview Window, you will now be able to see the rotating video.
An Easier Way to Crop Video with Wondershare Filmora
Though Cyberlink PowerDirector 365 is a powerful video editing tool, we felt its menus were not as simple to navigate. Accessing the rotate function while available in the forefront, the use of PiP Designer didn’t feel intuitive.
In Wondershare Filmora Video Editor , rotating footage only happens via the Edit Option, and this straightforward approach felt simple. As for those who want to use Keyframes, the integration of this feature right above the Timeline is an appreciated convenience.
This emphasis on quick accessibility is present with almost every function in Filmora, and we believe this to be a significant advantage. The use of modern and unique iconography also increases familiarity, an aspect that will always be welcoming to new and budding creators.
If you do not already have Wondershare Filmora, you can download the software by visiting the official website.
To help you learn how to use the rotate function and show you an example of the easy accessibility in Filmora, here is how you can use the feature to get the output you desire.
For Win 7 or later (64-bit)
For macOS 10.14 or later
Once you have a new project open in Filmora, follow the steps listed below.
Step 1: Import a Media File to edit into your Video Project.
Step 2: Drag the video clip onto the Timeline and then select it with a mouse click to activate further interactions.
Step 3: Choose the Edit Option (marked in Red).
This will bring up the Edit Window in the left-top corner of your screen.
Step 4: Click on the Transform Menu and use the Rotation Slider to edit the orientation.
Having read this stretch of the guide, we believe you may have noticed how Filmora is more user-friendly and accessible due to its menu layout.
BONUS
Click on the Keyframe Button (marked in Green) to access the Keyframe Menu that allows you to set points between which a decided amount of rotation can happen.
The Bottom Line
This marks the end of our guide on how to rotate video in PowerDirector 365 and Wondershare Filmora X. Now, while both software are high-capable tools, we feel the keyframe-based working on rotation in Filmora is a lot more intuitive and easy to use. The ability to only have number-based rotation within the edit menu is also a positive, as rotating with a swivel like in PowerDirector isn’t always the most accurate.
And lastly, the modern iconography-based design of Wondershare Filmora is a factor to keep in mind, as this increases usability manifolds.
Also read:
- New How To Create Transparent Background On Picsart for 2024
- Updated 2024 Approved 8 Ways To Live Stream Pre-Recorded Video
- In 2024, Things About Transparent PNG Remove and Convert
- New 2024 Approved How to Create A Freeze Frame Sequence in Video
- In 2024, How to Add Background to Video With/Without a Green Screen
- Basic Knowledge About WMV Format and Best WMV Video Editor for 2024
- New Kdenlive Video Editor Review
- In This Article, We Will Discuss What Lens Distortion Is, How It May Be Fixed, and the Factors You Need to Pay Attention to Avoid Lens Distortion when Taking or Recording Videos
- Do You Want to Know All About Video Frame Rates and Speed? Wondershare Filmora Will Help You to Get More Information on This Matter for 2024
- Updated In 2024, If You Want to Prompt Your eCommerce Business in Facebook, Then Using Facebook Video Ads Is One of the Effective Methods. This Post Will Show You How to Edit Videos for Facebook Advertisement
- New In 2024, Best Method to Split Video Into Parts Online
- Updated 2024 Approved Create Eye-Catching Slow-Motion Videos to Set Your Own Trend. For This Purpose, Read This Article to Find and Learn to Use CapCuts New Slow-Motion Templates
- Updated In 2024, Do You Want to Watch Videos in QuickTime with Subtitles in Your Desired Language? Here Are Different Ways to Add Subtitles in QuickTime Player
- Updated Free Green Screen Mobile Frame Downloads
- Updated Looking for the Best Websites for 3D Text PNG? Weve Covered You with Our Top 8 Picks for Your Upcoming Work
- Updated How to Make a PowerPoint Looping Slideshow
- Updated How to Make Foggy Text Reflection Effect
- 2024 Approved The Complete Guide to Zoho Slides with Ease
- Updated In 2024, How To Quickly Create A Screen Print Effect In Photoshop Detailed Guide
- New Create Promotional Video
- New 2024 Approved Google Meet Green Screen Is the Latest Addition to the Virtual Meeting App. It Is a Crucial Feature as It Allows Users to Maintain a Semblance of Privacy Through Virtual Backgrounds
- Best 7 Color Match Paint Apps for 2024
- New Troubleshoot Snapchat Camera Zoomed in Issue for 2024
- Updated Are You Looking for Ways to Add Background to Green Screen Video Online? Worry Not, as in This Article; We Shall Discuss Using a Green Screen Background Adder in Filmora for 2024
- Updated How To Change Text Color In Premiere Pro for 2024
- New In 2024, In This Article, Youll Find Four Solutions for Rotating Your Go-Pro Videos. The Following Tools Will Be Used for This Purpose
- 2024 Approved Making a Countdown Timer Video Like a Pro Isnt a Problem Anymore. Follow the Steps Mentioned in This Guide and Create an Impressive Countdown Timer for Your Videos
- New AVI Editors for Windows 11/10/8.1/8/7 Easily Edit AVI Files on PC for 2024
- 2024 Approved Use This Color Match Paint Technique to Find the Exact Shade of Any Hue You Have in Mind for Your Paint Project. Match the Paint to Your Desired Color Even without Knowing the Paint Name or Brand with Automotive Paint Matching
- Updated If You Want to Prompt Your eCommerce Business in Facebook, Then Using Facebook Video Ads Is One of the Effective Methods. This Post Will Show You How to Edit Videos for Facebook Advertisement
- Updated 7 Best MP4 Video Editors on Mac Edit MP4 Videos Easily for 2024
- Updated How to Resize FLV Videos EfficientlyWindows, Mac, Android, iPhone & Online
- In 2024, Unlock the Power of Shotcut The Ultimate Guide to Rotating Videos
- Updated In 2024, A Comprehensive Guide to Slow Motion YouTube Videos and How to Manage Them
- Updated 2024 Approved How to Use Visual Effect for Zoom
- In 2024, Comprehensive Guide to Add LUTs in Premiere Pro with Ease
- New AVI Video Format How to Open, Play, Edit AVI File?
- Troubleshoot Snapchat Camera Zoomed in Issue 4 Tips
- If You Want an App to Make Videos with Pictures and Music for Social Media Posts, We Are with the Best Apps to Make Videos with Music and Pictures for 2024
- New Video Inspiration for Birthday Slideshow
- New 2024 Approved Step by Step to Crop Videos with CyberLink PowerDirector
- New How to Zoom Picture in Picture Easy Solution
- Top 7 Phone Number Locators To Track Realme Narzo 60 5G Location | Dr.fone
- Perfect Guide To Excel in TikTok Live Shopping
- Recover your pictures after Nubia Red Magic 8S Pro+ has been deleted.
- Troubleshooting Guide How to Fix an Unresponsive Meizu 21 Pro Screen | Dr.fone
- Unova Stone Pokémon Go Evolution List and How Catch Them For Realme V30T | Dr.fone
- Play Store Not Working On Google Pixel 8? 8 Solutions Inside | Dr.fone
- In 2024, AddROM Bypass An Android Tool to Unlock FRP Lock Screen For your Asus ROG Phone 7
- How To Transfer Data From Apple iPhone SE To Other iPhone 12 Pro Max devices? | Dr.fone
- In 2024, How to fix iCloud lock from your iPhone SE (2022) and iPad
- In 2024, How can I get more stardust in pokemon go On Vivo V27e? | Dr.fone
- How To Update or Downgrade Apple iPhone 12 Pro Without iTunes? | Dr.fone
- Title: Updated How to Make Hand Shake Effect with Final Cut Pro for 2024
- Author: Morgan
- Created at : 2024-04-24 01:06:18
- Updated at : 2024-04-25 01:06:18
- Link: https://ai-video-editing.techidaily.com/updated-how-to-make-hand-shake-effect-with-final-cut-pro-for-2024/
- License: This work is licensed under CC BY-NC-SA 4.0.
