
Updated How to Rotate AVI in Vertical/Portrait Orientation Windows, Mac,Andro for 2024
How to Rotate AVI in Vertical/Portrait Orientation [Windows, Mac,Andro

Video editing is the process of cutting and rearranging multiple clips or segments of video to create a new and more improved video. This involves adding titles, animations, sound effects, music and more. Video editing has not ceased to follow the trend of technology as it keeps thriving tirelessly through the ages. With advancement springing forth from many sides, video editing followed every pace to ensure it’s not left behind. This largely involves gadgets, computers and smartphones.
Before the advent of smartphones, computers have been the only video editing tools, and that culture is preserved even till date as its use has spread round the world. It is therefore evident that film making cannot bypass this process. Improvements have been made over the years on video editing softwares for computers to stay up to date as regards features and usability. There are other video editors which were introduced, and are still being updated such as Adobe Premiere Pro, Final Cut, Filmora and so on. As the case is today, smartphones have proven to be relevant in the process; they have also come up with video editing applications such as Power Video Director, InShot, Filmora for Android, Kinemaster and many more for Android, iPhone and iPads.
This article aims at giving guides and steps on how to rotate AVI videos using different softwares on different PCs (Windows and Mac) and smartphones (Android and iPhone). This does not leave online video editing softwares behind also.
WHAT IS AVI?

AVI means Audio Video Interleave. It’s a multimedia container format introduced by Microsoft in November 1992 as part of its video for Windows technology. AVI files can contain both audio and video data in a file container that allows synchronous audio-with-video playback.
KDENLIVE – FREE FOR WINDOWS

Introduced in 2002, Kdenlive has a good quality and design. The design is straightforward, user-friendly which makes you know what you are getting into, as well as the actual quality of the effects that you might want to apply to your video while editing. Overall, it looks really professional, neat and organized.
HOW TO ROTATE AVI VIDEO IN KDENLIVE
- STEP 1 - Launch Kdenlive on your Windows and import the video from where you have saved it locally. Drag and drop video on timeline

- STEP 2 - Select video effects and in the search box, type ‘rotate’ and click on it. Click on effects, then select video effects
- STEP 3 - Drag the video to the timeline and go to effects, then drag and drop the ‘rotate’ effect on the clip.

ALTERNATIVE WAY TO ROTATE AVI VIDEO ON KDENLIVE
- STEP 1 - Create a vertical project: create profile, select size, 1080 x 1920 and select aspect ratio: 9:16. Afterwards, there will be a vertical outline on your program window. Import your video to the project bin and drag it to the timeline
- STEP 2 - Go to effects, then click on ‘transform’ and double-click on it
- STEP 3 - Go to the down-right part of your screen and click on ‘rotation’ and highlight to change the number to whichever is ideal for your screen; you can change it to 270. This will make it rotate but will not fill the screen yet. Highlight the size and change it to 180 an hit the ‘enter’ key.
OPENSHOT – FREE FOR WINDOWS
OpenShot Video Editor is a free and open-source video editor for Windows, macOS, Linux, and Chrome OS. The project started in August 2008 by Jonathan Thomas, with the objective of providing a stable, free, and friendly to use video editor.

HOW TO ROTATE AVI VIDEO ON OPENSHOT
- STEP 1 - Launch OpenShot on your Windows and import your clip form where you’ve saved it locally

- STEP 2 - Drag and drop footage on your timeline and click on the ‘play’ button to check your footage. Right click on the footage and an option box will appear

- STEP 3 - Click on rotate; you can choose to rotate either left or right. Rotate till it ideally fits the screen

ALTERNATIVE WAY TO ROTATE AVI VIDEO ON OPEN SHOT
- STEP 1 - Launch OpenShot on your Windows and drag your footage to the timeline.
- STEP 2 - Right click on your video and select properties.
- STEP 3 - Go to rotation and change the value, and your video will rotate
ADOBE PREMIERE PRO – PAID FOR WINDOWS

Introduced in 2003, Adobe Premiere Pro is known to be a video editing software. It has a lot of features that can be used in the process of editing. It’s capable of editing feature movies such as Hollywood and the likes.
HOW TO ROTATE AVI VIDEO ON ADOBE PREMIERE PRO – FIXING A LANDSCAPE SHOT
- STEP 1 - Go to sequence and click on sequence settings

- STEP 2 - Click on frame size and type in 3840; for the horizontal, type in 2160 and then proceed to click ok
FIXING A PORTRAIT SHOT
- Put your play-head (the thin line that moves over the clips on your timeline) on the clip on the timeline
- Go to the top and click on ‘Editing’, then you go to effects control

- Go to ‘scale’, and type in the number according to the degree you desire to effect
your rotation. However, your video will be just perfect if you type in -90

ALTERNATIVE WAY TO ROTATE AVI VIDEO ON ADOBE PREMIERE PRO
- STEP 1 - Go to the effects window and search for ‘flip’
- STEP 2 - Click on ‘Transform’. You can then decide to do a horizontal flip or a vertical flip
- STEP 3 - All you need to do is click and drag it on to your clip and it will flip, whether horizontal or vertical
- STEP 4 - It is easy to remedy when you click and drag the other to place on your footage, whether horizontal or vertical.
TO ROTATE YOUR CLIP
- STEP 1 - Highlight your footage on the timeline and go to your effects controls window. Underneath ‘motion’, there is the perimeter of rotation. If you click and drag the mouse on the number, it will rotate either clockwise or counter-clockwise. Also, you can type in whatever rotation amount you want

- STEP 2 - It’s also worth mentioning that when you rotate a clip, you’re always rotating around the inker point (the little blue cross in a circle). You can click and drag this through the program monitor to any point on the clip and start rotating it around the inker point. In fact, it doesn’t have to be on the clip; you can make the inker point up further and rotate, and will still rotate around the inker point. If you don’t see this on your program monitor, that’s because you haven’t highlighted the motion.

- STEP 3 - A good tip is using guides to help you level and horizontal or whether you are working with on-screen. To get a slant perfectly leveled, there’s an easy way to reference a straight line on your program monitor. On the bottom right of your program monitor is the button [a plus (+) button] editor. Click on it and a box full of tools will pop up which you can work with. Click ‘add show rulers’, ‘show guides’ and ‘safe margins’


- STEP 4 - In the ruler section, take your mouse, click and drag it down to the little crosses of your safe margins. The same goes for the vertical ruler; click and drag over. That will create a new guide. For your footage, what you might need to do is get your horizontal guide down to your horizon view. You can go to your rotation and rotate your footage to get straight with your guide. If you are left with black bars at the corners, take off your safe margin rulers and guides and then zoom in on your footage and take off the black bars. To do this, go back to your effect controls

- STEP 5 - Instead of doing rotation, you scale by clicking and sliding the mouse on the number to the right


iMOVIE – FREE FOR MAC

iMovie is a preinstalled video editing application developed by Apple Inc. for macOS, Ios, and iPadOS devices. It was originally released in 1999 as a Mac OS 8 application bundle with the first FireWire-enabled consumer Mac model, the iMac DV. With iMovie, you can create professional-looking videos without an editing degree.
HOW TO ROTATE AVI VIDEO IN iMOVIE
- STEP 1 - Run iMovie on your PC and create a new project by clicking ‘create new’ and selecting ‘movie’. Import your footage: Click on the arrow pointing downwards just below your menu bar, and select the video from wherever it is saved locally.

- STEP 2 - Click on the video once it’s imported; make sure it has the yellow boundary on it. Click and drag it onto the timeline
- STEP 3 - Leave your play-head on the footage and go just above your program window and click on the crop icon, the third from the left. Afterwards, a rotate ion will show just by the right above the program monitor. There are actually two buttons to rotate in either direction. You can save time by clicking the correct direction for whichever way your videos need to be rotated


- STEP 4 - Your videos is rotated; you can go ahead and save

FILMORA – PAID FOR MAC

Formerly known as Wondershare Video Editor as at when it first launched in 2015, Filmora Video Editor is a video editing software that helps businesses create and distribute white-labeled marketing videos. Filmora is an easy-to-use video editing software for a beginner. It supports 50 above formats, 4k editing, Filmstock effects store, all basic and advanced editing tools in the most easily accessible and used manner.
For Win 7 or later (64-bit)
For macOS 10.14 or later
HOW TO ROTATE AVI VIDEO IN FILMORA
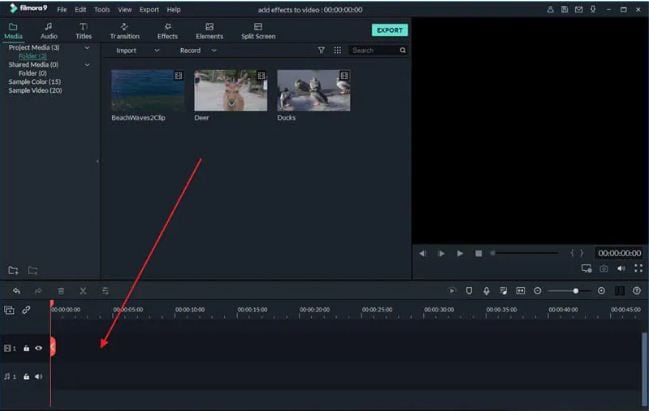
- STEP 1 - Run Filmora on your PC, import your video from where it has been locally saved and drag to the timeline
- STEP 2 - Go to file, and select ‘project settings’. By default, the video is recorded on portrait – 9:11, so change the aspect ratio to 16:9


- STEP 3 - Go to your timeline and double-click your footage. A box of options will pop up beside the program monitor. Simply go to rotate and click and slide to rotate. It may be difficult to line it up even and straight. Just go to the program monitor and click on the little line and drag; it makes it easier to align


- STEP 4 - Go to ‘scale’ and slide it to the right to make it fill the screen. Your video is rotated and ready to be previewed
VIDEOLEAP – PAID FOR ANDROID AND iPHONE

Videoleap includes the usual basic cutting and pasting tools, plus greenscreen aspect ratios, slow-mo and fast motion, audio editing, and unlimited undo and redo actions. Access to the app and premium features is available with a subscription for $7.99/month, or with additional discounts if bought as a one-time purchase or multiple month bundles.
HOW TO ROTATE AVI VIDEO IN VIDEOLEAP
- STEP 1 - Launch Videoleap on your android and Import your footage from where you have saved it locally. Tap on ‘transform’, and then tap on rotate, then tap on rotate as many times as it takes so that it can be ideally fit


- STEP 2 - Change the format from 16:9 (YouTube format) to 9:16 (for TikTok). To do that, deselect the clip, tap on canvas, and then choose 9:16. Play the clip to preview and save.

INSHOT – FREE FOR ANDROID

InShot app is an all-in-one visual content editing app. It allows you to create videos, edit photos, and create image collages. The app has plenty of features too. You can trim clips, change the speed of your footage, and add filters, music and text. InShot is a free mobile application that you can download on your Windows to create or edit videos and photos.
HOW TO ROTATE AVI VIDEO ON INSHOT
- STEP 1 - Import your video from where you have locally saved it
- STEP 2 - Tap on the clip, and swipe the toolbar to the left to find the ‘rotate’ icon. When you tap on ‘rotate’, it will rotate your video to your left; you can keep rotating till it’s ideally fit


QUICKTIME VIDEO EDITOR – FREE FOR MAC

- Open your video on your PC using the Quicktime program. Go to ‘edit’ and click on ‘rotate left’; keep clicking until your video ideally fits the screen. Your video is rotated successfully. Preview, save and export your video.


VLLO – PAID FOR ANDROID

VLLO is a super easy video editor. Beginner and casual users will enjoy editing video with its intuitive but precise control abled split, txt, BGM and transition. For the pro editors, premium paid features are also ready with Chroma-Key, PIP, mosaic and keyframe animations.
HOW TO ROTATE AVI VIDEO IN VLLO – LANDSCAPE TO PORTRAIT
- STEP 1 - Import your footage from where you have saved it locally and change aspect ratio to 16:9 and select the ‘fill’ icon.

- STEP 2 - On your timeline, click on the footage and select the curved arrow icon to rotate as you click and drag. You can choose to rotate either ways, and your video is rotated, and ready to be previewed and saved

VEED – ONLINE/CLOUD-BASED VIDEO EDITOR

VEED.IO is an online video editing platform that makes creating videos easy and accessible to everyone. Millions of creators around the world use our products to tell stories, create content, grow their audience and more.
HOW TO ROTATE AVI VIDEO ONLINE USING VEED – PORTRAIT TO LANDSCAPE
- STEP 1 - Create an account online on Veed – Visit <www.veed.io>

- STEP 2 - Click the ‘view project’ button and import/upload footage form where it has been saved locally

- STEP 3 - Go to ‘edit video’ and select ‘adjust’. Go to rotation and click and drag to the right and to the left for your video to fit ideally

- STEP 4 - You can export your video once it is rotated
ALTRNATIVE WAY TO ROTATE AVI VIDEO ONLINE USING VEED
- STEP 1 - Import your footage and drag it to the timeline
- STEP 2 - Click on ‘try sample’ or ‘upload video’

- STEP 3 - Click on ‘rotate’. Click to rotate either ways, 90 degrees
- STEP 4 - Go to crop and choose whether ‘vertical’ or ‘landscape’ to get rid of the bars

WEVIDEO – ONLINE/CLOUD-BASED VIDEO EDITOR
WeVideo is an online, cloud-based video editing platform that works in web browsers and on mobile devices. The company was originally founded in 2011 in Europe. Their main headquarters is in Mountain View, California with a team based in Romania.
HOW TO ROTATE AVI VIDEO ON WEVIDEO ONLINE
- STEP 1 - Import your footage and drag it to the timeline

- STEP 2 - Click on the little pencil icon right above the timeline

- STEP 3 - That will open up your editor, popping up a box full of option. Select the ‘transform’ tab, then two arrows right in front of ‘rotation’ till it fits: two clicks for 180, and one click for 90. Adjust it as needed, and save changes to preview.

Video editing is the process of cutting and rearranging multiple clips or segments of video to create a new and more improved video. This involves adding titles, animations, sound effects, music and more. Video editing has not ceased to follow the trend of technology as it keeps thriving tirelessly through the ages. With advancement springing forth from many sides, video editing followed every pace to ensure it’s not left behind. This largely involves gadgets, computers and smartphones.
Before the advent of smartphones, computers have been the only video editing tools, and that culture is preserved even till date as its use has spread round the world. It is therefore evident that film making cannot bypass this process. Improvements have been made over the years on video editing softwares for computers to stay up to date as regards features and usability. There are other video editors which were introduced, and are still being updated such as Adobe Premiere Pro, Final Cut, Filmora and so on. As the case is today, smartphones have proven to be relevant in the process; they have also come up with video editing applications such as Power Video Director, InShot, Filmora for Android, Kinemaster and many more for Android, iPhone and iPads.
This article aims at giving guides and steps on how to rotate AVI videos using different softwares on different PCs (Windows and Mac) and smartphones (Android and iPhone). This does not leave online video editing softwares behind also.
WHAT IS AVI?
AVI means Audio Video Interleave. It’s a multimedia container format introduced by Microsoft in November 1992 as part of its video for Windows technology. AVI files can contain both audio and video data in a file container that allows synchronous audio-with-video playback.
KDENLIVE – FREE FOR WINDOWS
Introduced in 2002, Kdenlive has a good quality and design. The design is straightforward, user-friendly which makes you know what you are getting into, as well as the actual quality of the effects that you might want to apply to your video while editing. Overall, it looks really professional, neat and organized.
HOW TO ROTATE AVI VIDEO IN KDENLIVE
- STEP 1 - Launch Kdenlive on your Windows and import the video from where you have saved it locally. Drag and drop video on timeline
- STEP 2 - Select video effects and in the search box, type ‘rotate’ and click on it. Click on effects, then select video effects
- STEP 3 - Drag the video to the timeline and go to effects, then drag and drop the ‘rotate’ effect on the clip.
ALTERNATIVE WAY TO ROTATE AVI VIDEO ON KDENLIVE
- STEP 1 - Create a vertical project: create profile, select size, 1080 x 1920 and select aspect ratio: 9:16. Afterwards, there will be a vertical outline on your program window. Import your video to the project bin and drag it to the timeline
- STEP 2 - Go to effects, then click on ‘transform’ and double-click on it
- STEP 3 - Go to the down-right part of your screen and click on ‘rotation’ and highlight to change the number to whichever is ideal for your screen; you can change it to 270. This will make it rotate but will not fill the screen yet. Highlight the size and change it to 180 an hit the ‘enter’ key.
OPENSHOT – FREE FOR WINDOWS
OpenShot Video Editor is a free and open-source video editor for Windows, macOS, Linux, and Chrome OS. The project started in August 2008 by Jonathan Thomas, with the objective of providing a stable, free, and friendly to use video editor.
HOW TO ROTATE AVI VIDEO ON OPENSHOT
- STEP 1 - Launch OpenShot on your Windows and import your clip form where you’ve saved it locally
- STEP 2 - Drag and drop footage on your timeline and click on the ‘play’ button to check your footage. Right click on the footage and an option box will appear
- STEP 3 - Click on rotate; you can choose to rotate either left or right. Rotate till it ideally fits the screen
ALTERNATIVE WAY TO ROTATE AVI VIDEO ON OPEN SHOT
- STEP 1 - Launch OpenShot on your Windows and drag your footage to the timeline.
- STEP 2 - Right click on your video and select properties.
- STEP 3 - Go to rotation and change the value, and your video will rotate
ADOBE PREMIERE PRO – PAID FOR WINDOWS
Introduced in 2003, Adobe Premiere Pro is known to be a video editing software. It has a lot of features that can be used in the process of editing. It’s capable of editing feature movies such as Hollywood and the likes.
HOW TO ROTATE AVI VIDEO ON ADOBE PREMIERE PRO – FIXING A LANDSCAPE SHOT
- STEP 1 - Go to sequence and click on sequence settings
- STEP 2 - Click on frame size and type in 3840; for the horizontal, type in 2160 and then proceed to click ok
FIXING A PORTRAIT SHOT
- Put your play-head (the thin line that moves over the clips on your timeline) on the clip on the timeline
- Go to the top and click on ‘Editing’, then you go to effects control
- Go to ‘scale’, and type in the number according to the degree you desire to effect
your rotation. However, your video will be just perfect if you type in -90
ALTERNATIVE WAY TO ROTATE AVI VIDEO ON ADOBE PREMIERE PRO
- STEP 1 - Go to the effects window and search for ‘flip’
- STEP 2 - Click on ‘Transform’. You can then decide to do a horizontal flip or a vertical flip
- STEP 3 - All you need to do is click and drag it on to your clip and it will flip, whether horizontal or vertical
- STEP 4 - It is easy to remedy when you click and drag the other to place on your footage, whether horizontal or vertical.
TO ROTATE YOUR CLIP
- STEP 1 - Highlight your footage on the timeline and go to your effects controls window. Underneath ‘motion’, there is the perimeter of rotation. If you click and drag the mouse on the number, it will rotate either clockwise or counter-clockwise. Also, you can type in whatever rotation amount you want
- STEP 2 - It’s also worth mentioning that when you rotate a clip, you’re always rotating around the inker point (the little blue cross in a circle). You can click and drag this through the program monitor to any point on the clip and start rotating it around the inker point. In fact, it doesn’t have to be on the clip; you can make the inker point up further and rotate, and will still rotate around the inker point. If you don’t see this on your program monitor, that’s because you haven’t highlighted the motion.
- STEP 3 - A good tip is using guides to help you level and horizontal or whether you are working with on-screen. To get a slant perfectly leveled, there’s an easy way to reference a straight line on your program monitor. On the bottom right of your program monitor is the button [a plus (+) button] editor. Click on it and a box full of tools will pop up which you can work with. Click ‘add show rulers’, ‘show guides’ and ‘safe margins’
- STEP 4 - In the ruler section, take your mouse, click and drag it down to the little crosses of your safe margins. The same goes for the vertical ruler; click and drag over. That will create a new guide. For your footage, what you might need to do is get your horizontal guide down to your horizon view. You can go to your rotation and rotate your footage to get straight with your guide. If you are left with black bars at the corners, take off your safe margin rulers and guides and then zoom in on your footage and take off the black bars. To do this, go back to your effect controls
- STEP 5 - Instead of doing rotation, you scale by clicking and sliding the mouse on the number to the right
iMOVIE – FREE FOR MAC
iMovie is a preinstalled video editing application developed by Apple Inc. for macOS, Ios, and iPadOS devices. It was originally released in 1999 as a Mac OS 8 application bundle with the first FireWire-enabled consumer Mac model, the iMac DV. With iMovie, you can create professional-looking videos without an editing degree.
HOW TO ROTATE AVI VIDEO IN iMOVIE
- STEP 1 - Run iMovie on your PC and create a new project by clicking ‘create new’ and selecting ‘movie’. Import your footage: Click on the arrow pointing downwards just below your menu bar, and select the video from wherever it is saved locally.
- STEP 2 - Click on the video once it’s imported; make sure it has the yellow boundary on it. Click and drag it onto the timeline
- STEP 3 - Leave your play-head on the footage and go just above your program window and click on the crop icon, the third from the left. Afterwards, a rotate ion will show just by the right above the program monitor. There are actually two buttons to rotate in either direction. You can save time by clicking the correct direction for whichever way your videos need to be rotated
- STEP 4 - Your videos is rotated; you can go ahead and save
FILMORA – PAID FOR MAC
Formerly known as Wondershare Video Editor as at when it first launched in 2015, Filmora Video Editor is a video editing software that helps businesses create and distribute white-labeled marketing videos. Filmora is an easy-to-use video editing software for a beginner. It supports 50 above formats, 4k editing, Filmstock effects store, all basic and advanced editing tools in the most easily accessible and used manner.
For Win 7 or later (64-bit)
For macOS 10.14 or later
HOW TO ROTATE AVI VIDEO IN FILMORA
- STEP 1 - Run Filmora on your PC, import your video from where it has been locally saved and drag to the timeline
- STEP 2 - Go to file, and select ‘project settings’. By default, the video is recorded on portrait – 9:11, so change the aspect ratio to 16:9
- STEP 3 - Go to your timeline and double-click your footage. A box of options will pop up beside the program monitor. Simply go to rotate and click and slide to rotate. It may be difficult to line it up even and straight. Just go to the program monitor and click on the little line and drag; it makes it easier to align
- STEP 4 - Go to ‘scale’ and slide it to the right to make it fill the screen. Your video is rotated and ready to be previewed
VIDEOLEAP – PAID FOR ANDROID AND iPHONE
Videoleap includes the usual basic cutting and pasting tools, plus greenscreen aspect ratios, slow-mo and fast motion, audio editing, and unlimited undo and redo actions. Access to the app and premium features is available with a subscription for $7.99/month, or with additional discounts if bought as a one-time purchase or multiple month bundles.
HOW TO ROTATE AVI VIDEO IN VIDEOLEAP
- STEP 1 - Launch Videoleap on your android and Import your footage from where you have saved it locally. Tap on ‘transform’, and then tap on rotate, then tap on rotate as many times as it takes so that it can be ideally fit
- STEP 2 - Change the format from 16:9 (YouTube format) to 9:16 (for TikTok). To do that, deselect the clip, tap on canvas, and then choose 9:16. Play the clip to preview and save.
INSHOT – FREE FOR ANDROID
InShot app is an all-in-one visual content editing app. It allows you to create videos, edit photos, and create image collages. The app has plenty of features too. You can trim clips, change the speed of your footage, and add filters, music and text. InShot is a free mobile application that you can download on your Windows to create or edit videos and photos.
HOW TO ROTATE AVI VIDEO ON INSHOT
- STEP 1 - Import your video from where you have locally saved it
- STEP 2 - Tap on the clip, and swipe the toolbar to the left to find the ‘rotate’ icon. When you tap on ‘rotate’, it will rotate your video to your left; you can keep rotating till it’s ideally fit
QUICKTIME VIDEO EDITOR – FREE FOR MAC
- Open your video on your PC using the Quicktime program. Go to ‘edit’ and click on ‘rotate left’; keep clicking until your video ideally fits the screen. Your video is rotated successfully. Preview, save and export your video.
VLLO – PAID FOR ANDROID
VLLO is a super easy video editor. Beginner and casual users will enjoy editing video with its intuitive but precise control abled split, txt, BGM and transition. For the pro editors, premium paid features are also ready with Chroma-Key, PIP, mosaic and keyframe animations.
HOW TO ROTATE AVI VIDEO IN VLLO – LANDSCAPE TO PORTRAIT
- STEP 1 - Import your footage from where you have saved it locally and change aspect ratio to 16:9 and select the ‘fill’ icon.
- STEP 2 - On your timeline, click on the footage and select the curved arrow icon to rotate as you click and drag. You can choose to rotate either ways, and your video is rotated, and ready to be previewed and saved
VEED – ONLINE/CLOUD-BASED VIDEO EDITOR
VEED.IO is an online video editing platform that makes creating videos easy and accessible to everyone. Millions of creators around the world use our products to tell stories, create content, grow their audience and more.
HOW TO ROTATE AVI VIDEO ONLINE USING VEED – PORTRAIT TO LANDSCAPE
- STEP 1 - Create an account online on Veed – Visit <www.veed.io>
- STEP 2 - Click the ‘view project’ button and import/upload footage form where it has been saved locally
- STEP 3 - Go to ‘edit video’ and select ‘adjust’. Go to rotation and click and drag to the right and to the left for your video to fit ideally
- STEP 4 - You can export your video once it is rotated
ALTRNATIVE WAY TO ROTATE AVI VIDEO ONLINE USING VEED
- STEP 1 - Import your footage and drag it to the timeline
- STEP 2 - Click on ‘try sample’ or ‘upload video’
- STEP 3 - Click on ‘rotate’. Click to rotate either ways, 90 degrees
- STEP 4 - Go to crop and choose whether ‘vertical’ or ‘landscape’ to get rid of the bars
WEVIDEO – ONLINE/CLOUD-BASED VIDEO EDITOR
WeVideo is an online, cloud-based video editing platform that works in web browsers and on mobile devices. The company was originally founded in 2011 in Europe. Their main headquarters is in Mountain View, California with a team based in Romania.
HOW TO ROTATE AVI VIDEO ON WEVIDEO ONLINE
- STEP 1 - Import your footage and drag it to the timeline
- STEP 2 - Click on the little pencil icon right above the timeline
- STEP 3 - That will open up your editor, popping up a box full of option. Select the ‘transform’ tab, then two arrows right in front of ‘rotation’ till it fits: two clicks for 180, and one click for 90. Adjust it as needed, and save changes to preview.
Finding Best GIF Websites Is Easy as Pie — Here’s What You Should Know
Finding Best GIF Websites Is Easy as Pie — Here’s What You Should Know
An easy yet powerful editor
Numerous effects to choose from
Detailed tutorials provided by the official channel
Want a heap of the most exiting GIFs? Here are the best websites to visit.
In this article
01 [10 Sites for Finding the Perfect GIF](#Part 1)
02 [How to Use Animated GIF Makers](#Part 2)
03 [5 Stunning Examples of Gifs in Web Design](#Part 3)
Part 1 Sites for Finding the Perfect GIF
Information was never so expressive until GIFs came up as delivery platform. Looking through the frame of content diversity and effective delivery, there’s possibly nothing that is left untouched by these short, precise and creative snippets. When the talk is about long term user credibility, creativity is one thing, while reach is the other.
No doubt about the creative aspect, but the convenient availability holds equal importance. However captivating a utility nay be, you would certainly not be interested to spend quality time searching the apt content. Let’s take a look at some of the most popular and convenient GIF website that will surely put a full stop on your search spree for a relatable GIF.
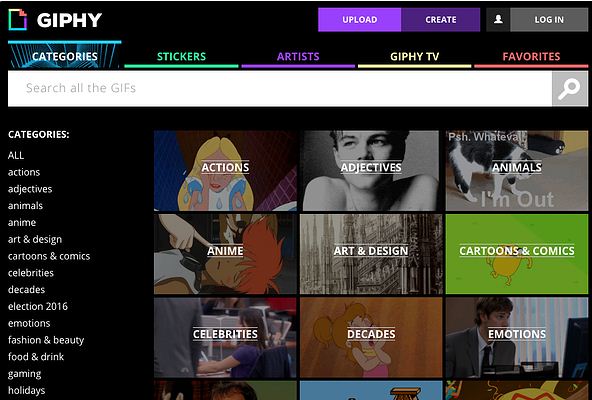
01GIPHY
Initially launched as a GIF search engine, thin is a complete storehouse on almost everything that you can possibly think of. The extensive content library of this site is all set to meet your most specific content requirements in less than a blink’s time. You get an access to quality content in music, science, nature and what not on this free GIF website.
Talking of search flexibility, GIPHY is known to have the most advanced and updated search bar that ensures that top quality and fresh content is always at the hand of its users. You can browse through the vast GIF categories of the site or look for your exact content using a specific search keyword.
02Reddit
You can regard this site as a GIF membership community, where you can find a variety of impressive sub-reddits in the GIF category. The best part is, you will never find recursive content on any two or more sub-reddits as each one is developed and updated keeping different content specifications in mind.

You are given access to even finer content libraries in some particular sub-reddits that follow a sequential guideline to filter their entries according to user preferences. Some popular sub-reddits are listed below:
03Tumblr
Originally a blogging site, Tumblr is simply heaven for creating and sharing GIFs across media platforms. What’s interesting about the site is its content categorization, where bloggers on the site group relatable content under specific categories, which facilitates an easy, quick and hassle free search. Most of the GIF content on the site is either created in Photoshop or taken from across the web.
While the site has exciting GIF content for almost every scenario, the comedy genre is the st5arb attraction of this GIF platform. The huge comic content library of the site has hilarious memes and GIFs that will certainly leave you rolling over the floor. To enjoy your favorite content daily, you just need to search a relatable hashtag and follow some blogs on your searched content.

04Gfycat
This one lands among the most preferred GIF sites and is packed with an enormous inventory of memes and GIFs. Not just this, this one is a free GIF maker website that allows you to convert videos from almost every media platform into GIFs, independent of the video file format via its ‘Video to GIF Converter’ tool.
You can set a daily dose of your favorite, exciting GIF content by using either the search bar or the ‘Selection Menu’ in the left of the site’s Home page. You can even browse through latest GIF categories by navigating to the ‘Trending’ and ‘Explore’ sections.

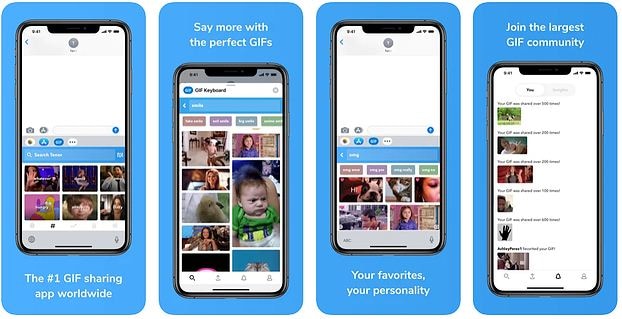
05Tenor
You can prefer this site to enjoy your favorite GIFs on your PC or iOS device. The site gives you the liberty to share GIFs and memes directly from its library into any of your Instant Messaging chats or community conversations on social media platforms.
All you need to do is navigate to the Tenor search bar, put in a suitable keyword and there you can see loads of GIF content on your screen in less than a second’s time. With periodic updates and a cohesive interface, this site is your storehouse of latest and trendy GIFs, anytime and anywhere.
06Reaction GIFs
This site is known for having an exact content database for almost every thought that crosses your mind. It serves you with a refined search mechanism, having a different pathway for every search, depending on the content you are looking for. This is a perfect aid to get exactly what you want, without having to fuss out with unwanted stuff.
Talking of search methods, you will find a drop-down menu at the right to search GIFs that express ‘Emotions’ or one word answers (preferably a ‘Yes’ or a ‘No’). If you want something related to a more specific category, you can browse through the ‘Galleries’ and ‘Tags’ of the site (categories, like, OMG, LOL, etc).

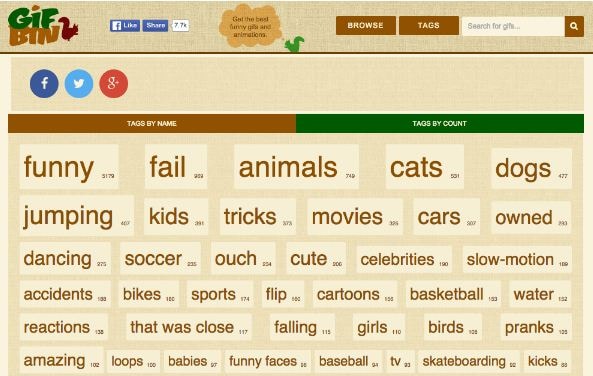
07GIFbin
This is again a trunk of latest, funny and entertaining GIFs tom watch and share. On this site, you get to add search filters, like, ‘Most Viewed’, ‘Latest’, ‘Top Rated’, etc., that refine your search to fetch exactly what you are looking for. You are also free to use ‘Search Tags’ grouped according to name and search count on the site.
The tag names are standard keywords (like, animals, sports, nature, etc.) and the count feature keeps a track of the most frequent searches, thus allowing you to find out your favorite GIFs in a more explicit manner. If you are clueless about anything specific, don’t worry. Hit the ‘Random GIFs’ button to explore a whole new world of fun and excitement.
08Imgur
This site is popular in the meme world as a GIF sub-reddit that has explicitly no text threads. You can take this one as a free, GIF hosting and sharing website. While you can find loads of quality content on the site convenient to almost any genre, it is a leader in comic and funny GIFs. You can use different search tags for hilarious movie snippets, or some other fun element of your liking. This site’s image library is a hub of latest and nostalgic content.

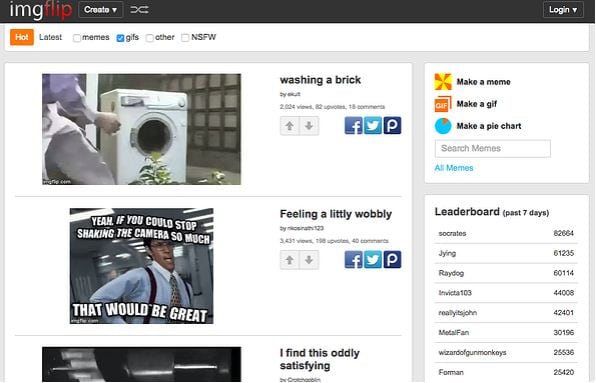
09Imgflip
This is one more hotspot for relatable GIFs and memes. The best thing about the site is that it has separate search pathways to refine your search in cohesion with your content preference. Some common pathways are explained below:
● Browse the site’s homepage for the latest and trending GIF content.
● Simplify your search on specific content pages using the ‘Random’, ‘Next’ or ‘Previous’ navigation options.
● Prefer using ‘Image Hotkeys’ on the content pages.
● Try on ‘Tagging’ specific content pages (sunrise, snowfall, cats, etc.).
If you like competing with fellow visitors on the site, you can experiment with creating GIFs of your own and get ranked on the creator scoreboard. Bag a high vote count to get your GIF trending on the site.
10Gyazo
Last on the list, this is a somewhat different site in terms of features and search constraints. The exclusively unique ’Screen Capture’ feature of this site allows you to take a video of your device screen and use it to create a GIF of your own, making itself a quick and effective ‘Video to GIF Converter’ tool.
You will require creating an account on the site to maintain a library of your searched contents, which you can either tag on the site or downloaded to your device. You can further, export and share your creations across media platforms through this site.

Part 2 How to Use Animated GIF Makers
Landing into the creative and exciting world of GIFs, you can easily get motivated to try hands on making your own GIFs. The online market is a pool of solutions that claim of adhering to this concern in the most effective ways. When looking for the best GIF maker tools and software, you can definitely count upon the following choices:
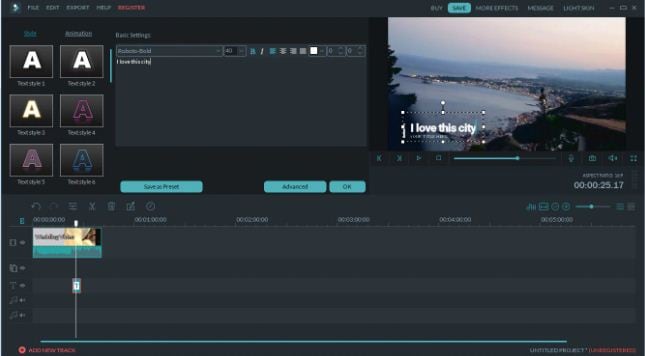
01**Wondershare Filmora Video Editor **
This one is undoubtedly the best GIF creator software in current times. Using the plethora of audio-visual features, effects and image filters that are offered by this tool, creating animated GIFs is a spic and span process. The software grants you the liberty to play with and explore your editing skills to generate professional quality GIFs within minutes.

Wondershare Filmora - Best Video Editor for Mac/Windows
5,481,435 people have downloaded it.
Build unique custom animations without breaking a sweat.
Focus on creating epic stories and leave the details to Filmora’s auto features.
Start a creative adventure with drag & drop effects and endless possibilities.
Filmora simplifies advanced features to save you time and effort.
Filmora cuts out repetition so you can move on to your next creative breakthrough.
Here’s how you can use this software to become a pro at creating GIFs:
● Step 1: Import Required Media Files
To begin with, select any desired set of images or a particular video file to the Filmora timeline. You don’t need to be format specific; the software is compatible with over 150 different file formats.
● Step 2: Drag Files to Edit
Once you are done with selecting the files, you need to drag the same to the Filmora Editor Timeline, where you can transform the file contents with your editing skills.
● Step 3: Let’s Get Editing.
In the editor window, you are free tom choose from a range of effects, tools and filters suitable to your GIF content to give your artwork a new and engaging look. You can experiment with the cutting, cropping and trimming tools or play with effects, like, overlays, rotation and speed adjustments and even add texts to deliver messages that intensify your GIF.
● Step 4: Time to Save and Share.
Now is the time to save your work locally to your device using the .gif extension with your created file, as well as share it among your peers on social communities.

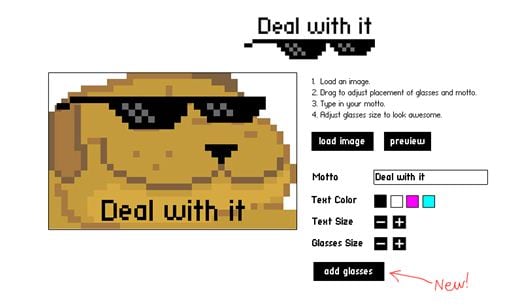
03Deal With It
This one is an online GIF maker tool that allows you to make top quality animated GIFs within a few seconds and you don’t even need to take up any third party software installation. Creating GIFs with this user friendly, clean interface and quick GIF generator utility is an absolute fun, to say the least.
Once you are done creating, the tools gives you the liberty to experiment with effects like, texts and glasses that would further intensify your GIF to the next level, and the best part is, all of this is available to you without having to spend a penny out of your pocket.
Explained below is the step wise user guide to use this tool for creating GIFs:
● Step 1:
Navigate to official website of the GIF creator tool.
● Step 2:
Choose a desired locally saved image from your device and upload it in the tool’s editor window. To do this, click on the ‘Load Image’ button.
● Step 3:
You can now modify the uploaded image with text and glasses. This is it. Your GIF is ready to save and export.

03LunaPic
This one lands among the most preferred GIF maker tools available across the web. It comes with a clean interface, is free to use and does not require any third party software installation. You can create catchy and interesting GIF banners, or make captivating, animated GIF files with a series of still images using this tool. However, this GIF maker does not give you the liberty to take up editing and speed or accuracy modifications on your creation.
You need to follow the steps explained below to create your own GIF with LunaPic:
● Step 1:
Open the official site of LunaPic in your web browser.
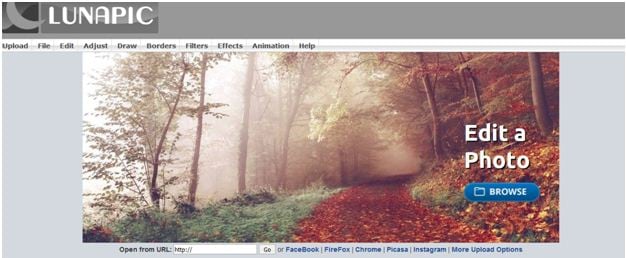
● Step 2:
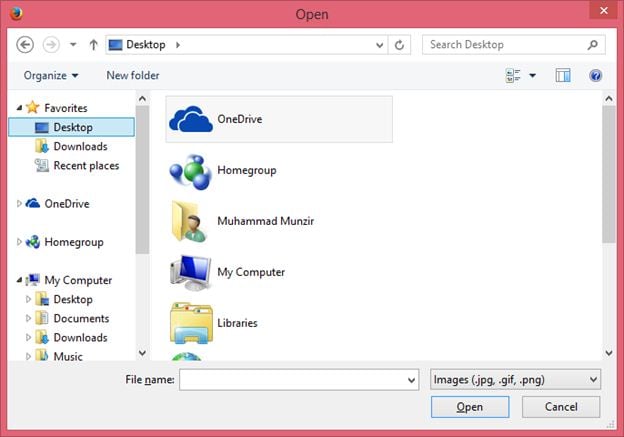
Upload a desired one or a set of images you wish to use for making your GIF on the site. To do this, select a group of images from your device and tap ‘Upload’
.

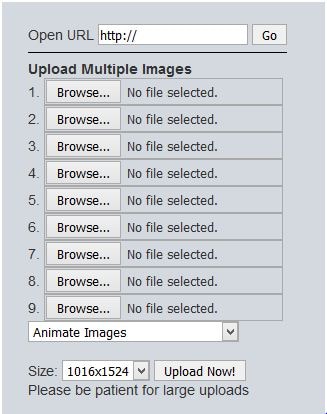
● Step 3:
Once uploaded, you can use your creativity to play with the effects library of the site and edit your images in its editing interface.
● Step 4:
When satisfied, choose the file type as GIF and hit the ‘Save’ option at the bottom. This will save your creation locally in your device, once the file conversion gets completed.
Image Name: Finding-best-gif-websites-is-easy-as-pie—here’s-what-you-should-know-22
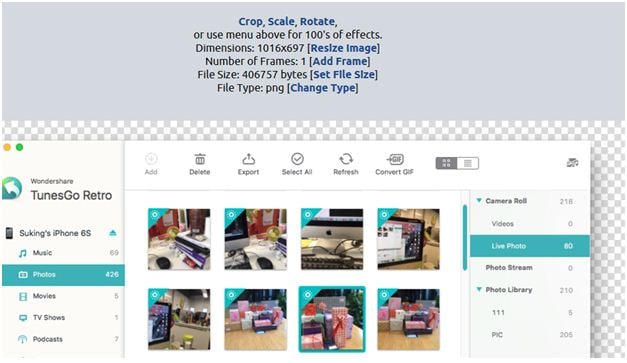
04Wondershare TunesGo
This one is another efficient animated GIF creator utility on the internet. Available to you as free online software, this tool promises you an amazing and hassle free GIF making experience. You can either create stunning GIFs of your own, or convert video files and even live photos into the same using this software. It allows you to set time slots for file conversions and make speed and flow adjustments for GIF frames, along with offering a plethora of editing effects to play with.
Here’s the know-how of using this software to create top quality animated GIFs:
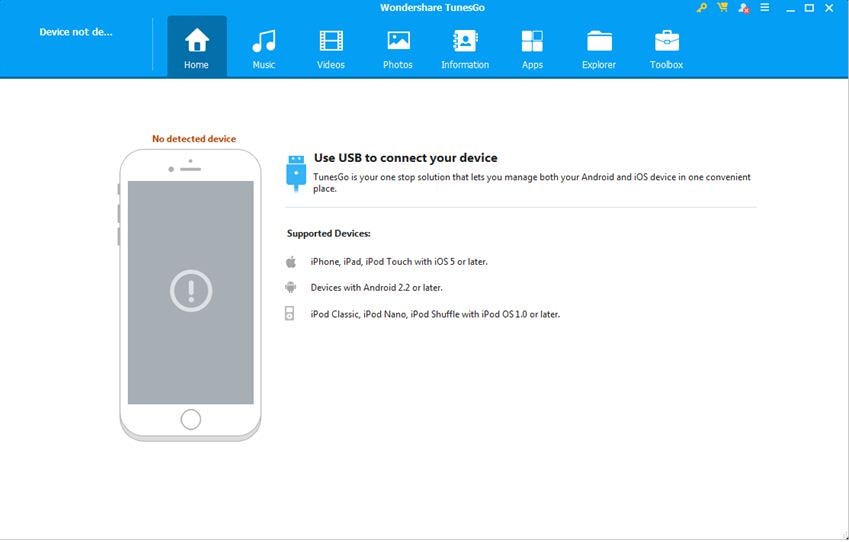
● Step 1: Download and Launch the Software
Pay a visit to the official TunesGo website to download the software. Begin with installing and launching the same on your preferred device. When you finish, click on the ‘Toolbox’ tab at the top in the welcome screen.
● Step 2: Upload Media Files
In the software’s opening interface, choose the GIF Maker tool. In the following window that pops-up, click on ‘Add’ to upload the desired media files saved in your device, you want to create a GIF with.
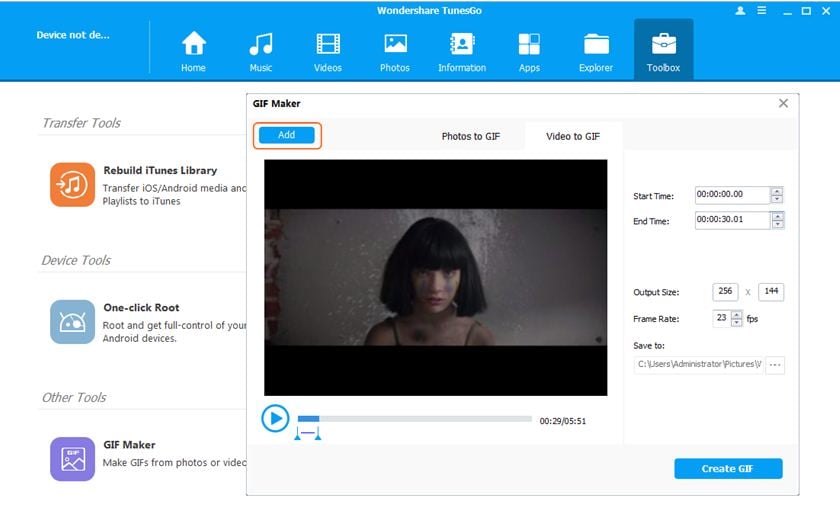
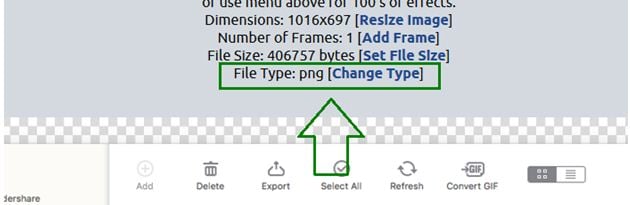
● Step 3: Convert to GIF
Set the media file to GIF conversion time and tap the ‘Create GIF’ button in the bottom-right to initiate the conversion process.

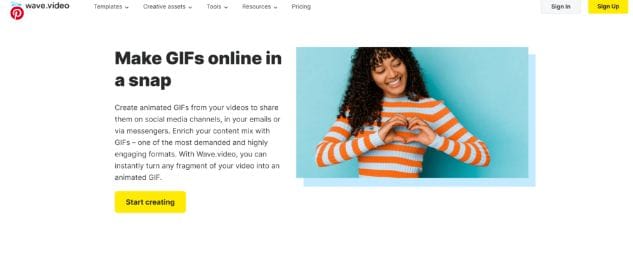
05Wave.video
This one is among the latest GIF maker tools that allow you to create animated GIFs from videos. What’s quite interesting about this Gif creation platform is, you can trim videos to the exact part depending on your content preference before beginning with the conversion process. You can also save your creation as a group of trimmed clips. It is a user friendly, free access online tool that does not ask you to install any third party software, and GIF creation with its mess-free interface is absolute fun.

Take the steps listed below to make GIFs with this online tool:
● Step 1: Choose a Project
To start working with this tool, you need to create an account on its official site. Having done that, just log into your account and upload a desired video you would like to use for creating a GIF. You have a choice to select a locally saved video, choose one from the templates available on the site or create something of your own.
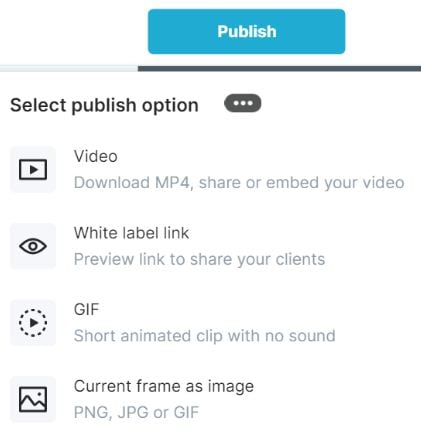
● Step 2: Customization and Publishing
It is now time to try hands on editing your video with stunning effects like, overlays glasses, etc., or add impactful elements, such as, texts, stickers, etc., to make your artwork more impressive. When you are happy, navigate to the top-right and tap ‘Publish’. From the menu that drops down, select ‘GIF’.
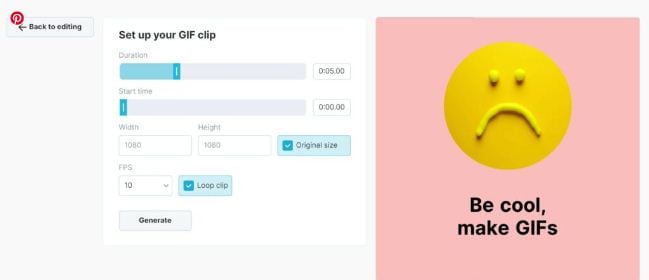
● Step 3: Download Your Creation
Select the section of your video you wish to convert into a GIF and proceed to fix the GIF start time and play duration. Check for any frame resize requirements, set an adequate frame rate and lastly, click on the ‘Loop Clip’ checkbox. This will produce an infinite loop GIF. When everything seems perfect, tap on ‘Generate’ followed by ‘Download’ to save your creation and share it on social media.
Part 3 5 Stunning Examples of Gifs in Web Design
The credibility of GIFs in market oriented content sharing and information publishing evidently does not require an introduction. These attractive snippets are expert means of business growth and customer appealing strategy planning to address attract a massive target audience within seconds.
Now that you are quite accustomed with the market reliability of GIFs, you may visibly feel motivated to use them to improvise your product websites for a next level market approach. However, before you plunge into using GIFs for your brand promotion, consider sparing a few minutes to browse through some top class product based GIFs to enhance your GIF creation and implementation aptitude.
Described below are some eye-catching examples of GIF for website background, you should certainly look forward to using in your business campaigns:
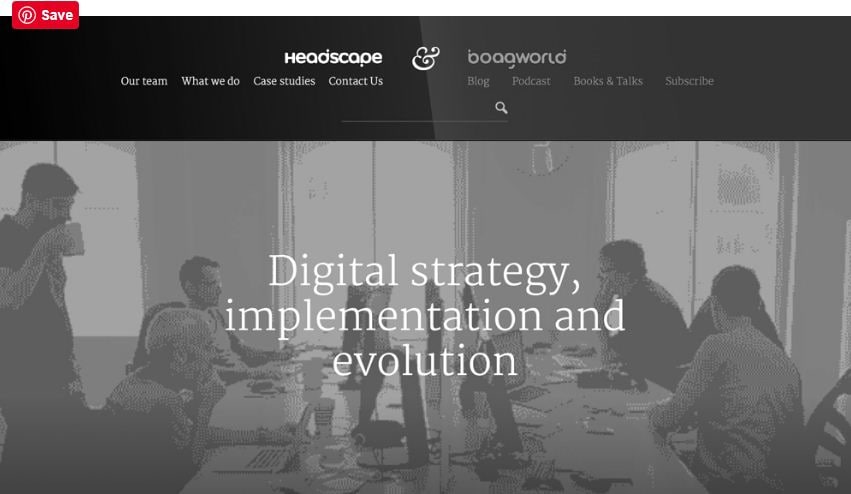
01Headscape
Having its roots in the United Kingdom, this is a top rated, digital media design corporation that excels in providing web design solutions to a diverse global clientele. Their unique idea of using GIFs in grayscale to depict conducive business settings is just perfect.
The monochromatic color balance with parallax scrolls makes this GIF all the more impactful. You can find impressive ways of using GIFs with a professional instinct on the company website and begin to add appeal to your market buildup strategies.
02Invision
This is another high ranked application marketing site that uses GIF for website background to improvise its product promotion. Equipped with a preset world class page makeover, the site’s look and appeal simply gets a boost with floating-text animated GIFs on an otherwise normal webpage.
As you move further on the Invision homepage, you will get to see a demonstration of the site’s prototype tool through GIFs that explain its working functionalities in the most interesting and convenient manner, thus putting forward and outrageously professional and effective marketing strategy.
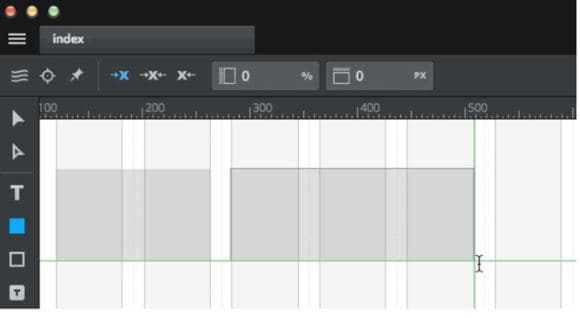
03Macaw
This one is an excellent design utility that is equally suited to both web designers as well as site developers. On visiting the tool’s homepage, you are welcomed with a streamlined text setting on a black and white theme. Move a bit downwards, and there you see a cluster of animated GIFs in action to get you familiar with the interface and usage pattern of the Macaw design utility with utmost ease. It is convenient enough to make you feel as if you are actually using the tool.

04Giant Ant
Established as a creative firm, this one is known for its appealing website design. As you navigate through the site, you will find a still image complemented by cohesive text overlays. Beneath that, there are caricature forms of everyday objects, but the real magic happens when you click on a particular object and woosh. It instantly turns into an animated GIF. This explicit style of infusing dynamism to your website is simply awesome, to say the least.
05Tinke
This is intuitively a fitness tracker that keeps a record of your system vitals in the most effective manner. But that’s not all. The tracker website is equally amazing, setting the perfect example of using GIFs to improve market buildup. The site majorly utilizes the parallax scroll effect with animated GIFs to facilitate a live demonstration of the tracker functionality, coupled with an iPhone user guide and ways of sharing relatable content with fellow users.
● Key Takeaways from This Episode →
● Surfing the internet, you will land across some of the best GIF creator and downloader sites that are flooded with brilliant GIF content suited for almost every purpose.
● You can create your own animated GIFs on any GIF maker website or enjoy pre-made stuff to your heart’s content, where using Filmora is certainly the best choice. To explore something more exciting, try hands on using GIFs for product marketing and brand promotions on your business sites.
Want a heap of the most exiting GIFs? Here are the best websites to visit.
In this article
01 [10 Sites for Finding the Perfect GIF](#Part 1)
02 [How to Use Animated GIF Makers](#Part 2)
03 [5 Stunning Examples of Gifs in Web Design](#Part 3)
Part 1 Sites for Finding the Perfect GIF
Information was never so expressive until GIFs came up as delivery platform. Looking through the frame of content diversity and effective delivery, there’s possibly nothing that is left untouched by these short, precise and creative snippets. When the talk is about long term user credibility, creativity is one thing, while reach is the other.
No doubt about the creative aspect, but the convenient availability holds equal importance. However captivating a utility nay be, you would certainly not be interested to spend quality time searching the apt content. Let’s take a look at some of the most popular and convenient GIF website that will surely put a full stop on your search spree for a relatable GIF.
01GIPHY
Initially launched as a GIF search engine, thin is a complete storehouse on almost everything that you can possibly think of. The extensive content library of this site is all set to meet your most specific content requirements in less than a blink’s time. You get an access to quality content in music, science, nature and what not on this free GIF website.
Talking of search flexibility, GIPHY is known to have the most advanced and updated search bar that ensures that top quality and fresh content is always at the hand of its users. You can browse through the vast GIF categories of the site or look for your exact content using a specific search keyword.
02Reddit
You can regard this site as a GIF membership community, where you can find a variety of impressive sub-reddits in the GIF category. The best part is, you will never find recursive content on any two or more sub-reddits as each one is developed and updated keeping different content specifications in mind.
You are given access to even finer content libraries in some particular sub-reddits that follow a sequential guideline to filter their entries according to user preferences. Some popular sub-reddits are listed below:
03Tumblr
Originally a blogging site, Tumblr is simply heaven for creating and sharing GIFs across media platforms. What’s interesting about the site is its content categorization, where bloggers on the site group relatable content under specific categories, which facilitates an easy, quick and hassle free search. Most of the GIF content on the site is either created in Photoshop or taken from across the web.
While the site has exciting GIF content for almost every scenario, the comedy genre is the st5arb attraction of this GIF platform. The huge comic content library of the site has hilarious memes and GIFs that will certainly leave you rolling over the floor. To enjoy your favorite content daily, you just need to search a relatable hashtag and follow some blogs on your searched content.
04Gfycat
This one lands among the most preferred GIF sites and is packed with an enormous inventory of memes and GIFs. Not just this, this one is a free GIF maker website that allows you to convert videos from almost every media platform into GIFs, independent of the video file format via its ‘Video to GIF Converter’ tool.
You can set a daily dose of your favorite, exciting GIF content by using either the search bar or the ‘Selection Menu’ in the left of the site’s Home page. You can even browse through latest GIF categories by navigating to the ‘Trending’ and ‘Explore’ sections.
05Tenor
You can prefer this site to enjoy your favorite GIFs on your PC or iOS device. The site gives you the liberty to share GIFs and memes directly from its library into any of your Instant Messaging chats or community conversations on social media platforms.
All you need to do is navigate to the Tenor search bar, put in a suitable keyword and there you can see loads of GIF content on your screen in less than a second’s time. With periodic updates and a cohesive interface, this site is your storehouse of latest and trendy GIFs, anytime and anywhere.
06Reaction GIFs
This site is known for having an exact content database for almost every thought that crosses your mind. It serves you with a refined search mechanism, having a different pathway for every search, depending on the content you are looking for. This is a perfect aid to get exactly what you want, without having to fuss out with unwanted stuff.
Talking of search methods, you will find a drop-down menu at the right to search GIFs that express ‘Emotions’ or one word answers (preferably a ‘Yes’ or a ‘No’). If you want something related to a more specific category, you can browse through the ‘Galleries’ and ‘Tags’ of the site (categories, like, OMG, LOL, etc).
07GIFbin
This is again a trunk of latest, funny and entertaining GIFs tom watch and share. On this site, you get to add search filters, like, ‘Most Viewed’, ‘Latest’, ‘Top Rated’, etc., that refine your search to fetch exactly what you are looking for. You are also free to use ‘Search Tags’ grouped according to name and search count on the site.
The tag names are standard keywords (like, animals, sports, nature, etc.) and the count feature keeps a track of the most frequent searches, thus allowing you to find out your favorite GIFs in a more explicit manner. If you are clueless about anything specific, don’t worry. Hit the ‘Random GIFs’ button to explore a whole new world of fun and excitement.
08Imgur
This site is popular in the meme world as a GIF sub-reddit that has explicitly no text threads. You can take this one as a free, GIF hosting and sharing website. While you can find loads of quality content on the site convenient to almost any genre, it is a leader in comic and funny GIFs. You can use different search tags for hilarious movie snippets, or some other fun element of your liking. This site’s image library is a hub of latest and nostalgic content.
09Imgflip
This is one more hotspot for relatable GIFs and memes. The best thing about the site is that it has separate search pathways to refine your search in cohesion with your content preference. Some common pathways are explained below:
● Browse the site’s homepage for the latest and trending GIF content.
● Simplify your search on specific content pages using the ‘Random’, ‘Next’ or ‘Previous’ navigation options.
● Prefer using ‘Image Hotkeys’ on the content pages.
● Try on ‘Tagging’ specific content pages (sunrise, snowfall, cats, etc.).
If you like competing with fellow visitors on the site, you can experiment with creating GIFs of your own and get ranked on the creator scoreboard. Bag a high vote count to get your GIF trending on the site.
10Gyazo
Last on the list, this is a somewhat different site in terms of features and search constraints. The exclusively unique ’Screen Capture’ feature of this site allows you to take a video of your device screen and use it to create a GIF of your own, making itself a quick and effective ‘Video to GIF Converter’ tool.
You will require creating an account on the site to maintain a library of your searched contents, which you can either tag on the site or downloaded to your device. You can further, export and share your creations across media platforms through this site.
Part 2 How to Use Animated GIF Makers
Landing into the creative and exciting world of GIFs, you can easily get motivated to try hands on making your own GIFs. The online market is a pool of solutions that claim of adhering to this concern in the most effective ways. When looking for the best GIF maker tools and software, you can definitely count upon the following choices:
01**Wondershare Filmora Video Editor **
This one is undoubtedly the best GIF creator software in current times. Using the plethora of audio-visual features, effects and image filters that are offered by this tool, creating animated GIFs is a spic and span process. The software grants you the liberty to play with and explore your editing skills to generate professional quality GIFs within minutes.
Wondershare Filmora - Best Video Editor for Mac/Windows
5,481,435 people have downloaded it.
Build unique custom animations without breaking a sweat.
Focus on creating epic stories and leave the details to Filmora’s auto features.
Start a creative adventure with drag & drop effects and endless possibilities.
Filmora simplifies advanced features to save you time and effort.
Filmora cuts out repetition so you can move on to your next creative breakthrough.
Here’s how you can use this software to become a pro at creating GIFs:
● Step 1: Import Required Media Files
To begin with, select any desired set of images or a particular video file to the Filmora timeline. You don’t need to be format specific; the software is compatible with over 150 different file formats.
● Step 2: Drag Files to Edit
Once you are done with selecting the files, you need to drag the same to the Filmora Editor Timeline, where you can transform the file contents with your editing skills.
● Step 3: Let’s Get Editing.
In the editor window, you are free tom choose from a range of effects, tools and filters suitable to your GIF content to give your artwork a new and engaging look. You can experiment with the cutting, cropping and trimming tools or play with effects, like, overlays, rotation and speed adjustments and even add texts to deliver messages that intensify your GIF.
● Step 4: Time to Save and Share.
Now is the time to save your work locally to your device using the .gif extension with your created file, as well as share it among your peers on social communities.
03Deal With It
This one is an online GIF maker tool that allows you to make top quality animated GIFs within a few seconds and you don’t even need to take up any third party software installation. Creating GIFs with this user friendly, clean interface and quick GIF generator utility is an absolute fun, to say the least.
Once you are done creating, the tools gives you the liberty to experiment with effects like, texts and glasses that would further intensify your GIF to the next level, and the best part is, all of this is available to you without having to spend a penny out of your pocket.
Explained below is the step wise user guide to use this tool for creating GIFs:
● Step 1:
Navigate to official website of the GIF creator tool.
● Step 2:
Choose a desired locally saved image from your device and upload it in the tool’s editor window. To do this, click on the ‘Load Image’ button.
● Step 3:
You can now modify the uploaded image with text and glasses. This is it. Your GIF is ready to save and export.
03LunaPic
This one lands among the most preferred GIF maker tools available across the web. It comes with a clean interface, is free to use and does not require any third party software installation. You can create catchy and interesting GIF banners, or make captivating, animated GIF files with a series of still images using this tool. However, this GIF maker does not give you the liberty to take up editing and speed or accuracy modifications on your creation.
You need to follow the steps explained below to create your own GIF with LunaPic:
● Step 1:
Open the official site of LunaPic in your web browser.
● Step 2:
Upload a desired one or a set of images you wish to use for making your GIF on the site. To do this, select a group of images from your device and tap ‘Upload’
.
● Step 3:
Once uploaded, you can use your creativity to play with the effects library of the site and edit your images in its editing interface.
● Step 4:
When satisfied, choose the file type as GIF and hit the ‘Save’ option at the bottom. This will save your creation locally in your device, once the file conversion gets completed.
Image Name: Finding-best-gif-websites-is-easy-as-pie—here’s-what-you-should-know-22
04Wondershare TunesGo
This one is another efficient animated GIF creator utility on the internet. Available to you as free online software, this tool promises you an amazing and hassle free GIF making experience. You can either create stunning GIFs of your own, or convert video files and even live photos into the same using this software. It allows you to set time slots for file conversions and make speed and flow adjustments for GIF frames, along with offering a plethora of editing effects to play with.
Here’s the know-how of using this software to create top quality animated GIFs:
● Step 1: Download and Launch the Software
Pay a visit to the official TunesGo website to download the software. Begin with installing and launching the same on your preferred device. When you finish, click on the ‘Toolbox’ tab at the top in the welcome screen.
● Step 2: Upload Media Files
In the software’s opening interface, choose the GIF Maker tool. In the following window that pops-up, click on ‘Add’ to upload the desired media files saved in your device, you want to create a GIF with.
● Step 3: Convert to GIF
Set the media file to GIF conversion time and tap the ‘Create GIF’ button in the bottom-right to initiate the conversion process.
05Wave.video
This one is among the latest GIF maker tools that allow you to create animated GIFs from videos. What’s quite interesting about this Gif creation platform is, you can trim videos to the exact part depending on your content preference before beginning with the conversion process. You can also save your creation as a group of trimmed clips. It is a user friendly, free access online tool that does not ask you to install any third party software, and GIF creation with its mess-free interface is absolute fun.
Take the steps listed below to make GIFs with this online tool:
● Step 1: Choose a Project
To start working with this tool, you need to create an account on its official site. Having done that, just log into your account and upload a desired video you would like to use for creating a GIF. You have a choice to select a locally saved video, choose one from the templates available on the site or create something of your own.
● Step 2: Customization and Publishing
It is now time to try hands on editing your video with stunning effects like, overlays glasses, etc., or add impactful elements, such as, texts, stickers, etc., to make your artwork more impressive. When you are happy, navigate to the top-right and tap ‘Publish’. From the menu that drops down, select ‘GIF’.
● Step 3: Download Your Creation
Select the section of your video you wish to convert into a GIF and proceed to fix the GIF start time and play duration. Check for any frame resize requirements, set an adequate frame rate and lastly, click on the ‘Loop Clip’ checkbox. This will produce an infinite loop GIF. When everything seems perfect, tap on ‘Generate’ followed by ‘Download’ to save your creation and share it on social media.
Part 3 5 Stunning Examples of Gifs in Web Design
The credibility of GIFs in market oriented content sharing and information publishing evidently does not require an introduction. These attractive snippets are expert means of business growth and customer appealing strategy planning to address attract a massive target audience within seconds.
Now that you are quite accustomed with the market reliability of GIFs, you may visibly feel motivated to use them to improvise your product websites for a next level market approach. However, before you plunge into using GIFs for your brand promotion, consider sparing a few minutes to browse through some top class product based GIFs to enhance your GIF creation and implementation aptitude.
Described below are some eye-catching examples of GIF for website background, you should certainly look forward to using in your business campaigns:
01Headscape
Having its roots in the United Kingdom, this is a top rated, digital media design corporation that excels in providing web design solutions to a diverse global clientele. Their unique idea of using GIFs in grayscale to depict conducive business settings is just perfect.
The monochromatic color balance with parallax scrolls makes this GIF all the more impactful. You can find impressive ways of using GIFs with a professional instinct on the company website and begin to add appeal to your market buildup strategies.
02Invision
This is another high ranked application marketing site that uses GIF for website background to improvise its product promotion. Equipped with a preset world class page makeover, the site’s look and appeal simply gets a boost with floating-text animated GIFs on an otherwise normal webpage.
As you move further on the Invision homepage, you will get to see a demonstration of the site’s prototype tool through GIFs that explain its working functionalities in the most interesting and convenient manner, thus putting forward and outrageously professional and effective marketing strategy.
03Macaw
This one is an excellent design utility that is equally suited to both web designers as well as site developers. On visiting the tool’s homepage, you are welcomed with a streamlined text setting on a black and white theme. Move a bit downwards, and there you see a cluster of animated GIFs in action to get you familiar with the interface and usage pattern of the Macaw design utility with utmost ease. It is convenient enough to make you feel as if you are actually using the tool.
04Giant Ant
Established as a creative firm, this one is known for its appealing website design. As you navigate through the site, you will find a still image complemented by cohesive text overlays. Beneath that, there are caricature forms of everyday objects, but the real magic happens when you click on a particular object and woosh. It instantly turns into an animated GIF. This explicit style of infusing dynamism to your website is simply awesome, to say the least.
05Tinke
This is intuitively a fitness tracker that keeps a record of your system vitals in the most effective manner. But that’s not all. The tracker website is equally amazing, setting the perfect example of using GIFs to improve market buildup. The site majorly utilizes the parallax scroll effect with animated GIFs to facilitate a live demonstration of the tracker functionality, coupled with an iPhone user guide and ways of sharing relatable content with fellow users.
● Key Takeaways from This Episode →
● Surfing the internet, you will land across some of the best GIF creator and downloader sites that are flooded with brilliant GIF content suited for almost every purpose.
● You can create your own animated GIFs on any GIF maker website or enjoy pre-made stuff to your heart’s content, where using Filmora is certainly the best choice. To explore something more exciting, try hands on using GIFs for product marketing and brand promotions on your business sites.
KineMaster Templates 101: How to Get the Most Out of Video Templates
Creating videos has always been challenging, especially with the advent of mobile video editing apps like KineMaster. This app is for professionals and amateur content creators who want to take their videos to the next level. With KineMaster, you can easily edit, enhance and share your videos in no time. One of the best features that KineMaster offers is the ability to use video templates.
This article will guide you through using and downloading KineMaster templates. We will also share some alternative templates that you can use to elevate your video creation. Whether you’re a beginner or an advanced user, this guide will give you all the information you need to create stunning videos with KineMaster. So, let’s get started!

Overview of KineMaster & Its Video Templates
KineMaster is a powerful video editing app that allows users to create professional-looking videos on their mobile devices. It is available on both Android and iOS platforms.
With a wide range of features like multi-layer video, chroma key, and blending modes, KineMaster empowers users to edit their videos with precision and creativity. It is also one of the first mobile video editing apps that supports multiple video layers and audio keyframes.
KineMaster also provides a variety of video templates for different purposes, such as intro, outro, social media posts, and more. These templates are pre-designed and include different elements such as animation, text, and effects.
KineMaster templates provide an easy way for users to create videos with professional looks and styles. Templates are also customizable, so you can add photos, videos, and text to match your brand or style. This feature of KineMaster saves time for users to create the video from scratch and make the editing process much more seamless.
How To Use & Download KineMaster Video Templates?
KineMaster video templates are a great way to quickly create professional-looking videos without starting from scratch. With a wide range of templates to choose from, you can easily find one that suits your needs.
Whether you’re a beginner or an advanced user, these steps will provide you with all the information you need to get the most out of KineMaster’s video templates.
Step 1. Launch the KineMaster app and go to “Video Templates.“

Step 2. Search for a template category you want to use.

Step 3. Choose your template design.

Step 4. Tap the “Mix“ button to download the template.

Step 5. Edit the template to your preference. You can replace the clips with your video.

Step 6. Change the resolution of your video and tap the “Save as Video“ button to save your work.

Filmora for Mobile - KineMaster’s Alternative
Filmora for mobile is an alternative video editing app that provides features similar to KineMaster. It is a user-friendly app designed for amateur and professional content creators. The app is available on both Android and iOS platforms. Some of its key features include:
- A wide range of video effects, including filters, overlays, and elements.
- A library of music and sound effects to enhance your videos
- A variety of text and title templates for adding captions and subtitles.
- Multi-layer video editing allows you to add text, stickers, and more to your videos.
- A dedicated social media export feature that allows you to quickly share your videos on different platforms.
- A wide range of resolution and aspect ratio options.
- In-app purchase options for extra features and assets
Video Templates of Filmora - Alternative to KineMaster Template
Just like KineMaster, Filmora also offers a wide range of video templates to help users create professional-looking videos quickly. These templates include different elements such as animations, text, and effects. These templates are pre-designed and customizable, allowing users to add photos, videos, and text to match their brand or style.
Filmora also provides the feature of customizing these templates according to the user’s preference, making them flexible and versatile. The templates are regularly updated with new options and designs to match the latest trends and styles.
How To Use Video Templates of Filmora for Mobile in Video Editing?
This section will show you how to use Filmora’s video templates to enhance your video editing skills. With step-by-step instructions and visual aids, this guide will make it easy for you to use Filmora’s video templates to take your videos to the next level.
Step 1. Install and launch the Filmora app on your device.
Step 2. Tap the “Template“ button on the lower right part of the interface.

Step 3. Choose the template you want to use.

Step 4. Tap the “Make Video“ button to download the template.

Step 5. Add the required number of clips to edit the template, then tap “Next.”

Step 6. You can preview the video and edit it if necessary.

Step 7. Tap the “Export“ button to save your video.

KineMaster vs. Filmora Comparison
KineMaster and Filmora are powerful video editing apps that offer a wide range of features and tools for creating professional-looking videos. In the table below, we will compare the two apps side-by-side, highlighting the similarities and differences between the two. This will help you decide which app best fits your video editing needs.
| KineMaster | Wondershare Filmora | |
|---|---|---|
| Operating System | Android and iOS | Android and iOS |
| App Store Rating | 4.7 out of 5 | 4.7 out of 5 |
| Google Play Store Rating | 4.1 out of 5 | 4.7 out of 5 |
| Pricing | Free and offers In-App PurchasesPremium Subscriptions - $79.99 | Free and offers In-App Purchases |
| Number of Templates | 800+ Templates | 1000+ Templates |
KineMaster is a powerful video editing app available on Android and iOS platforms. It has a rating of 4.7 out of 5 on the App Store and 4.1 out of 5 on the Google Play Store. The app is free to download and use but offers in-app purchases for additional features and assets. Users can also opt for a premium subscription, priced at $79.99 per year.
One of the key features of KineMaster is its templates. These templates are suitable for various purposes, like intros, outros, social media posts, etc. It offers more than 1000 templates, giving the user more options.
KineMaster is an ideal app for amateur and professional content creators who want to take their videos to the next level. This app is great for YouTubers, Social media influencers, and small businesses looking to create engaging video content.
Filmora is another alternative video editing app available on Android and iOS platforms. It has a 4.7 out of 5 on both the App Store and the Google Play Store. Like KineMaster, Filmora is free to download and use, but it also offers in-app purchases for additional features and assets.
Filmora’s key feature is also its templates. It offers a wide range of pre-designed video templates, including animations, text, and effects. Users can customize these templates by adding photos, videos, and text to match their brand or style. It also offers more than 1000 templates, making it a great choice for users looking for various options.
Filmora is an ideal app for both amateur and professional content creators. Its user-friendly interface makes it perfect for beginners new to video editing, while its powerful features make it suitable for advanced users.
People Also Ask
Whether you’re a beginner or an advanced user, this section will provide the answers you need to make an informed decision.
Q1. Does KineMaster Have Watermarks?
KineMaster does have a watermark feature for the free version of the app. When you edit a video using the app’s free version, it will add a KineMaster watermark to the bottom-right corner of your video. However, you can remove this watermark by purchasing the full version of the app or by subscribing to the KineMaster Premium.
Q2. Is KineMaster Copyright Free?
KineMaster is not a copyright-free app, but it allows you to use copyright-free music and other media within the app. KineMaster has a library of royalty-free music and sound effects that you can use in your videos without fearing copyright infringement. However, you are responsible for ensuring that all media you use within the app is not protected by copyright.
Q3. Can KineMaster Videos Be Monetized on YouTube?
Yes, KineMaster videos can be monetized on YouTube. As long as your videos adhere to YouTube’s community guidelines and terms of service, you can monetize them on the platform.
Conclusion
KineMaster and Filmora are both powerful and versatile video editing apps that are great options for anyone looking to create professional-looking videos quickly and easily. Both apps offer a wide range of features, including templates, and are available on Android and iOS platforms.
Ultimately, the best app for you will depend on your specific needs and preferences. Consider factors such as pricing, features, and the number of templates when making your decision. Both apps are great choices, but Filmora may be more suitable for beginners.
Top 10 Sound Extractors to Extract Sound From Video
It often happens that we get so engrossed in a movie or video and fall exceptionally hard for all elements. This can prompt us to extract sounds from videos, like the background music, a voiceover, or dialogue between characters.
Safe sound extraction from any type of video file will require the help of the best sound extractor software. Wondering about which you should try out? Go through this list, and then make up your mind.
- Adobe Premiere Pro
- Filmora
- iMovie
- VLC
- Online Audio Converter
- Audio Converter
- FFmpeg
- QuickTime
- Audio Extractor
- ASPOSE
- Practical Tips to Choose the Best One to Extract Sound from Videos
- Hot FAQs on Extract Sound from Videos
Top 10 Sound Extractors for Extracting Sound from video
We researched and found many software options for extracting Sound from video. After careful checking, we found 10 options with high-quality functions and performance levels. We recommend you consider them for pulling audio from video files- here’s why.
1. Adobe Premiere Pro
Adobe Premiere Pro is one of the top-level video editors available with various functions and pre-set filters/effects. So, one can customize the videos and audio as they require, like extracting Sound from video and saving them.

How to Download: Website
Compatible OS: Windows, Mac
Price: Individuals- USD 20.99/month. License for Teams- USD 35.99. All Apps-related plans.
Main Features:
- Pre-set templates are available in high-quality resolutions.
- Customize your titles and video edits.
- Automatically adjusts color matching in scenes.
- Robust text-to-speech function with multi-language support.
Pros
- Share easily across the platform with cloud support.
- Access to diverse stock media with Adobe membership.
- Supports many file formats like / (), MPEG-2, Apple ProRes, MPEG-4, native camera formats, etc.
Cons
- No perpetual license support.
- Strict eligibility rules to qualify for student-teacher plans.
Best for Users: Professionals and organization-based users, like teachers, can use this for personal and teaching-related video editing steps.
2. Filmora
If you want a software sound extractor that provides a wide range of audio editing functions, Filmora is one that we would recommend. While it is firstly a video editor, you can use audio-based editing functions like sound stabilization, extraction, visualization, audio ducking, silence detection, and more.

Free Download For Win 7 or later(64-bit)
Free Download For macOS 10.14 or later
Compatible OS: Windows, Mac
Price: Free, Annual- USD 49.99, Perpetual- USD 89.99
Main Features:
- The audio visualization feature analyzes and virtually shows beats.
- Detect silent sections in the video and remove them.
- Many audio stabilization settings like Denoise and Equalizer.
- Vital TTS/STT functions for voiceovers.
Pros
- Multiple video/audio formats are supported.
- Pre-set sound effects are present.
- Adjust the volume of videos during editing.
Cons
- Upgrade plan to remove ads.
- Audio output is mainly available in MP3.
How to use for extracting music from videos:
Step1 Download and install Filmora 11 .
Step2 Click on New Project.
Step3 Press “Click here to import Media” > choose file folder > Insert.

Step4 Drag file to editor timeline > Cut the file to a set suitable size for your audio extraction.
Step5 Click on the Edit icon from the list of icons above the timeline.
Step6 Press on Audio > Make adjustments for settings like Fade in/Face out, Equalizer, Pitch, etc.

Step7 Click Export > Local > MP3. Make changes as needed.

Step8 Hit the Export button.
Best for Users: Pro-level and beginner-level professionals and home-based users who want a comprehensive, feature-rich platform for video/audio editing can benefit from this.
3. iMovie
Mac and iOS users benefit significantly from this video editing software to create dynamic movie-quality videos. One major part of movies is the soundtrack, and you can use this software to add easily, control, and extract the sound clips.

How to Download: Mac App Store , Apple App Store
Compatible OS: Mac, iOS
Price: Free
Main Features:
- Pre-set storyboard available for optimized and thematic video edits.
- Royalty-free audio files in the library.
- You can add voiceovers.
- Add pre-set sound effects or customize them, like removing/adding audio clips.
Pros
- Sound aligns precisely with video.
- Multiple effects, filters, and editing tools are available.
- Simple sharing via social media accounts.
Cons
- Only available for iOS 15.1+ and such newest versions of Apple devices.
- You cannot access it without an Apple ID.
Best for Users: Professional video editors with diverse movie-like presentation-making needs can use this.
4. VLC
VLC is a well-known Windows-based media player that is accessible as a Chrome extension and has mobile app versions. While you can use it mainly to view videos, the software can easily cut out sound clips from the video here.

How to Download: Microsoft Store , Apple App Store , Google Play Store , Chrome Web Store
Compatible OS: Windows, iOS, Chromebook, Android
Price: Free
Main Features:
- Script the command line VLC-based invocations.
- Play different types of files with multi-format support.
- Use the in-built equalizer to optimize sound quality/effects.
- Sync with or create a new video stream.
Pros
- The software assures quick functions with all features.
- No codec installation is necessary.
- Keyboard shortcuts for specific actions.
Cons
- Difficult to search and open files.
- Not very customizable.
Best for Users: People can use VLC Media Player to stream or play videos and even make some minor adjustments/extraction.
5. Online Audio Converter
This is one of the more straightforward tools to add video files and extract Sound from video with some quick steps. The Online Audio Converter supports a wide range of video formats. You just have to add one file by dragging and dropping it from your device memory, inserting its URL, or uploading it via the cloud. Then, press the Start Extracting command.

How to Download: Website
Compatible OS: Windows, Mac, Online
Price: Monthly- USD 29.95, Annual- USD 39.95, Lifetime- USD 59.95
Main Features:
- Add files either directly through the device or the cloud.
- Insert video URL for audio extraction from online video.
- Supports multiple video file formats like MPEG, MOV, AVI, and MP4.
- Scroll to select extraction end and start points.
Pros
- Only allows videos with 500MB or smaller size.
- Straightforward three steps for the whole extraction process.
- Zero quality loss after an extraction.
Cons
- Customization options are limited.
- The main audio format supported is MP3 for extraction.
Best for Users: Beginners and pro-level users who want to extract Sound from video files quickly.
6. Audio Converter
The Audio Converter app can efficiently pull out audio clips from video and is compatible with many such media formats. You can use this to cut and trim your file, mainly to decide how much of the audio will extract. Then, play it to see the quality of the output file.

How to Download: Apple App Store
Compatible OS: iOS
Price: Free, Pro- USD 2.99.
Main Features:
- Extract sound from video in formats like M4A, MP3, OGG, M4R, FLAC, etc.
- Insert videos in formats like MP4, 3G2, 3GP, MOV, MKV, WMV, and more.
- Trim the audio to smaller sections for extraction.
- The media player version supports all audio/video types.
Pros
- Supports a wide variety of audio/video formats.
- A simple media player function is also available.
- It is compatible with many languages.
Cons
- App size of 143.1 MB can feel high to some users.
- Basic-level functions only.
Best for Users: People who want to extract Sound from video files to create ringtones can use this best.
7. FFmpeg
FFmpeg is one of the most trustworthy platforms for converting and extracting Sound from video. It is an open-source solution and comes with complete multi-media management work. This is mainly used for easily streaming, converting, and recording video/audio projects.

How to Download: Website
Compatible OS: Windows, Mac, etc.
Price: Free
Main Features:
- Audio filters are available, like virtualbass and tiltshelf.
- Video editing filters like colormap, blurdetect, and pixelize are available.
- Enhance dialog and extract sound clips.
- Constantly updating features.
Pros
- This has open-source benefits.
- No excessive installation steps are necessary.
- Supports a wide range of encoding benefits.
Cons
- One must have some sort of technical knowledge to use this.
- Finding the right features or solutions takes some time.
Best for Users: Developers with better technical knowledge can use this dynamic open-source platform for video/audio editing.
8. QuickTime
You can also use this Mac-based video player on Windows to watch different videos easily. Besides the streaming benefits, you can install plugins to optimize its available features, like adding the ability to record/edit video files.

How to Download: Website
Compatible OS: Mac, Windows
Price: Free
Main Features:
- Stream videos and even extract Sound from the files.
- Supports many video formats in the player.
- Record audio on this media player.
- Import files from other Mac products like Final Cut Pro and iMovie.
Pros
- Works on both Windows and Mac.
- Pre-set effects and filters are available that one can edit.
- Simple interface for beginners.
Cons
- Unnecessary bloatware installation is needed.
- Playback support is lacking.
Best for Users: New users can simply operate this media player to watch videos and learn the extraction process.
9. Audio Extractor
You can use this conversion and extraction software to do many editing functions, like changing, cutting, and extracting video/audio files. The supported format here is MP3 and WAV - choose which you find compatible with your final project. You can decide and extract from specific sections.

How to Download: Google Play Store
Compatible OS: Android
Price: Free with in-app purchases of USD 1.99- USD 6.99 for each item.
Main Features:
- Change audio file size and format.
- View/delete components through the app directly.
- Preview video/sound file.
- Trim/extract sounds from videos easily with the converter.
Pros <path d=”M7 22H4C3.46957 22 2.96086 21.7893 2.58579 21.4142C2.21071 21.0391 2 20.5304 2 20V13C2 12.4696 2.21071 11.9609 2.58579 11.5858C2.96086 11.2107 3.46957 11 4 11H7M14 9V5C14 4.20435
Top 10 Sound Extractors for Extracting Sound from video
We researched and found many software options for extracting Sound from video. After careful checking, we found 10 options with high-quality functions and performance levels. We recommend you consider them for pulling audio from video files- here’s why.
1. Adobe Premiere Pro
Adobe Premiere Pro is one of the top-level video editors available with various functions and pre-set filters/effects. So, one can customize the videos and audio as they require, like extracting Sound from video and saving them.
How to Download: Website
Compatible OS: Windows, Mac
Price: Individuals- USD 20.99/month. License for Teams- USD 35.99. All Apps-related plans.
Main Features:
- Pre-set templates are available in high-quality resolutions.
- Customize your titles and video edits.
- Automatically adjusts color matching in scenes.
- Robust text-to-speech function with multi-language support.
Pros
- Share easily across the platform with cloud support.
- Access to diverse stock media with Adobe membership.
- Supports many file formats like / (), MPEG-2, Apple ProRes, MPEG-4, native camera formats, etc.
Cons
- No perpetual license support.
- Strict eligibility rules to qualify for student-teacher plans.
Best for Users: Professionals and organization-based users, like teachers, can use this for personal and teaching-related video editing steps.
2. Filmora
If you want a software sound extractor that provides a wide range of audio editing functions, Filmora is one that we would recommend. While it is firstly a video editor, you can use audio-based editing functions like sound stabilization, extraction, visualization, audio ducking, silence detection, and more.
Free Download For Win 7 or later(64-bit)
Free Download For macOS 10.14 or later
Compatible OS: Windows, Mac
Price: Free, Annual- USD 49.99, Perpetual- USD 89.99
Main Features:
- The audio visualization feature analyzes and virtually shows beats.
- Detect silent sections in the video and remove them.
- Many audio stabilization settings like Denoise and Equalizer.
- Vital TTS/STT functions for voiceovers.
Pros
- Multiple video/audio formats are supported.
- Pre-set sound effects are present.
- Adjust the volume of videos during editing.
Cons
- Upgrade plan to remove ads.
- Audio output is mainly available in MP3.
How to use for extracting music from videos:
Step1 Download and install Filmora 11 .
Step2 Click on New Project.
Step3 Press “Click here to import Media” > choose file folder > Insert.
Step4 Drag file to editor timeline > Cut the file to a set suitable size for your audio extraction.
Step5 Click on the Edit icon from the list of icons above the timeline.
Step6 Press on Audio > Make adjustments for settings like Fade in/Face out, Equalizer, Pitch, etc.
Step7 Click Export > Local > MP3. Make changes as needed.
Step8 Hit the Export button.
Best for Users: Pro-level and beginner-level professionals and home-based users who want a comprehensive, feature-rich platform for video/audio editing can benefit from this.
3. iMovie
Mac and iOS users benefit significantly from this video editing software to create dynamic movie-quality videos. One major part of movies is the soundtrack, and you can use this software to add easily, control, and extract the sound clips.
How to Download: Mac App Store , Apple App Store
Compatible OS: Mac, iOS
Price: Free
Main Features:
- Pre-set storyboard available for optimized and thematic video edits.
- Royalty-free audio files in the library.
- You can add voiceovers.
- Add pre-set sound effects or customize them, like removing/adding audio clips.
Pros
- Sound aligns precisely with video.
- Multiple effects, filters, and editing tools are available.
- Simple sharing via social media accounts.
Cons
- Only available for iOS 15.1+ and such newest versions of Apple devices.
- You cannot access it without an Apple ID.
Best for Users: Professional video editors with diverse movie-like presentation-making needs can use this.
4. VLC
VLC is a well-known Windows-based media player that is accessible as a Chrome extension and has mobile app versions. While you can use it mainly to view videos, the software can easily cut out sound clips from the video here.
How to Download: Microsoft Store , Apple App Store , Google Play Store , Chrome Web Store
Compatible OS: Windows, iOS, Chromebook, Android
Price: Free
Main Features:
- Script the command line VLC-based invocations.
- Play different types of files with multi-format support.
- Use the in-built equalizer to optimize sound quality/effects.
- Sync with or create a new video stream.
Pros
- The software assures quick functions with all features.
- No codec installation is necessary.
- Keyboard shortcuts for specific actions.
Cons
- Difficult to search and open files.
- Not very customizable.
Best for Users: People can use VLC Media Player to stream or play videos and even make some minor adjustments/extraction.
5. Online Audio Converter
This is one of the more straightforward tools to add video files and extract Sound from video with some quick steps. The Online Audio Converter supports a wide range of video formats. You just have to add one file by dragging and dropping it from your device memory, inserting its URL, or uploading it via the cloud. Then, press the Start Extracting command.
How to Download: Website
Compatible OS: Windows, Mac, Online
Price: Monthly- USD 29.95, Annual- USD 39.95, Lifetime- USD 59.95
Main Features:
- Add files either directly through the device or the cloud.
- Insert video URL for audio extraction from online video.
- Supports multiple video file formats like MPEG, MOV, AVI, and MP4.
- Scroll to select extraction end and start points.
Pros
- Only allows videos with 500MB or smaller size.
- Straightforward three steps for the whole extraction process.
- Zero quality loss after an extraction.
Cons
- Customization options are limited.
- The main audio format supported is MP3 for extraction.
Best for Users: Beginners and pro-level users who want to extract Sound from video files quickly.
6. Audio Converter
The Audio Converter app can efficiently pull out audio clips from video and is compatible with many such media formats. You can use this to cut and trim your file, mainly to decide how much of the audio will extract. Then, play it to see the quality of the output file.
How to Download: Apple App Store
Compatible OS: iOS
Price: Free, Pro- USD 2.99.
Main Features:
- Extract sound from video in formats like M4A, MP3, OGG, M4R, FLAC, etc.
- Insert videos in formats like MP4, 3G2, 3GP, MOV, MKV, WMV, and more.
- Trim the audio to smaller sections for extraction.
- The media player version supports all audio/video types.
Pros
- Supports a wide variety of audio/video formats.
- A simple media player function is also available.
- It is compatible with many languages.
Cons
- App size of 143.1 MB can feel high to some users.
- Basic-level functions only.
Best for Users: People who want to extract Sound from video files to create ringtones can use this best.
7. FFmpeg
FFmpeg is one of the most trustworthy platforms for converting and extracting Sound from video. It is an open-source solution and comes with complete multi-media management work. This is mainly used for easily streaming, converting, and recording video/audio projects.
How to Download: Website
Compatible OS: Windows, Mac, etc.
Price: Free
Main Features:
- Audio filters are available, like virtualbass and tiltshelf.
- Video editing filters like colormap, blurdetect, and pixelize are available.
- Enhance dialog and extract sound clips.
- Constantly updating features.
Pros
- This has open-source benefits.
- No excessive installation steps are necessary.
- Supports a wide range of encoding benefits.
Cons
- One must have some sort of technical knowledge to use this.
- Finding the right features or solutions takes some time.
Best for Users: Developers with better technical knowledge can use this dynamic open-source platform for video/audio editing.
8. QuickTime
You can also use this Mac-based video player on Windows to watch different videos easily. Besides the streaming benefits, you can install plugins to optimize its available features, like adding the ability to record/edit video files.
How to Download: Website
Compatible OS: Mac, Windows
Price: Free
Main Features:
- Stream videos and even extract Sound from the files.
- Supports many video formats in the player.
- Record audio on this media player.
- Import files from other Mac products like Final Cut Pro and iMovie.
Pros
- Works on both Windows and Mac.
- Pre-set effects and filters are available that one can edit.
- Simple interface for beginners.
Cons
- Unnecessary bloatware installation is needed.
- Playback support is lacking.
Best for Users: New users can simply operate this media player to watch videos and learn the extraction process.
9. Audio Extractor
You can use this conversion and extraction software to do many editing functions, like changing, cutting, and extracting video/audio files. The supported format here is MP3 and WAV - choose which you find compatible with your final project. You can decide and extract from specific sections.
How to Download: Google Play Store
Compatible OS: Android
Price: Free with in-app purchases of USD 1.99- USD 6.99 for each item.
Main Features:
- Change audio file size and format.
- View/delete components through the app directly.
- Preview video/sound file.
- Trim/extract sounds from videos easily with the converter.
Pros <path d=”M7 22H4C3.46957 22 2.96086 21.7893 2.58579 21.4142C2.21071 21.0391 2 20.5304 2 20V13C2 12.4696 2.21071 11.9609 2.58579 11.5858C2.96086 11.2107 3.46957 11 4 11H7M14 9V5C14 4.20435
Also read:
- 10 Creative AR Teaching Examples to Tell You What Is AR in Teaching for 2024
- New 2024 Approved How to Add Effects on TikTok
- How-To Tutorials of Kapwing Collage Maker for 2024
- How to Make Transparent Background in Canva
- Updated 2024 Approved 8 Tips to Apply Cinematic Color Grading to Your Videos
- Updated In 2024, Top 15 LUTS to Buy
- Best 8 Online MPEG to GIF Converters
- Updated How to Add a Lower Third to Your Video
- How to Create Educational Teaching Videos in An Outstanding Way?
- In 2024, A Guide to Speed up a Video on Splice
- Updated Bored with Those Normal Background Images and that Ordinary Still Capture Feel? Take Your Creativity to the Next Level with Amazing Image Transparency Ideas for 2024
- New Top 10 Best Slideshow Makers with Music
- New How to Merge FLV Files Windows, Mac,Android, iPhone & Online
- Updated Do You Want to Make Your Photos and Videos Look Different From Others? There Are Many Lightroom LUTs Free, and They Make Your Media Content Stand Out From Others
- In 2024, Best Dark Moody LUTs During Editing
- In 2024, Are You Planning to Make a Product Review Video but Wondering How to Set up Your Background? If so, Then Youre in the Right Place. This Post Will Show You How to Adjust the Background to Black for Your Product Review Video
- New In 2024, 7 Solutions Cut Video For Instagram On Mac
- Updated Guide to Synchronizing Your Audio And Videos Properly?
- New How Did AI Video Games Act More Human Than Human, In 2024
- 2024 Approved Using One of the Best Converter Tools to Turn GIFs Into PNG or JPG. Here, Learn About the Ten Best Ones for Different Operating Systems, with Details on Features, Prices, and More
- New 7 Solutions to Edit GoPro Video on Mac for 2024
- New 2024 Approved What If YouTube Zoom to Fill Not Working?
- Top 5 Ways To Convert Hdr To Sdr Videos for 2024
- Updated Mastering DaVinci Resolve Scopes A Comprehensive Guide
- New 2024 Approved How to Create Realistic Fire Effects
- Have You Ever Heard Bokeh Effects for Videos? Do You Know that You Can Make Your Own Bokeh Video Easily with some Software. This Article Will Introduce You How to Make a Bokeh Effect Video with Steps for 2024
- New In 2024, Top Applications That Can Help Apply The Best VHS Camera Effect
- How to Create Cinematic Style Videos for 2024
- New How To Use Face Tracking In After Effects To Make Your Videos Pop
- Updated Best Guide of 8 Photo Collage Apps for PC
- Converting Files Is Easy with the Right Tools, and Likewise, GIF to JPG Conversion Is. Choose the Best Tool and Get the Expected Results Within the Blink of an Eye for 2024
- Updated Add Effects to Video Online
- 2024 Approved How to Add Subtitles in QuickTime Player?
- In 2024, In This Article, We Will Show You How to Rotate Videos Using Obs
- A Full Review of Leeming LUT Pro
- In 2024, How to Export Video From iMovie
- New 2024 Approved How to Create a Bokeh Effect
- New In 2024, 10 Innovative AR Teaching Examples to Tell You What Is AR in Teaching
- New 2024 Approved Create a Transparent Image in Minimal Steps with Right Tools. Try Out Best Transparent Maker and Know How to Use Them. In No Time, the Desired Image Will Be Right There with You
- Looking Forward to Making up Your Career in Video Editing? Land in Here to Learn About the Credibility of some Popular Video Editing Courses
- How To Erase an iPhone 12 mini Without Apple ID Password?
- In 2024, About Tecno Phantom V Fold FRP Bypass
- Where Is the Best Place to Catch Dratini On Oppo A59 5G | Dr.fone
- In 2024, Easily Unlock Your Xiaomi Redmi Note 12 Pro+ 5G Device SIM
- 7 Solutions to Fix Error Code 963 on Google Play Of Samsung Galaxy F15 5G | Dr.fone
- In 2024, 10 Fake GPS Location Apps on Android Of your Vivo V30 Pro | Dr.fone
- Prank Your Friends! Easy Ways to Fake and Share Google Maps Location On Poco X5 | Dr.fone
- Realme GT Neo 5 Not Receiving Texts? 10 Hassle-Free Solutions Here | Dr.fone
- Top 15 Augmented Reality Games Like Pokémon GO To Play On Apple iPhone 13 | Dr.fone
- 4 Ways to Transfer Music from Asus ROG Phone 7 Ultimate to iPhone | Dr.fone
- How To Change Your SIM PIN Code on Your Realme 12 Pro+ 5G Phone
- In 2024, Here are Some Pro Tips for Pokemon Go PvP Battles On Oppo K11x | Dr.fone
- In 2024, How To Pause Life360 Location Sharing For Samsung Galaxy F14 5G | Dr.fone
- About Xiaomi Redmi A2 FRP Bypass
- How to Downgrade iPhone 14 to an Older Version? | Dr.fone
- In 2024, Pokémon Go Cooldown Chart On Apple iPhone 11 Pro Max | Dr.fone
- In 2024, 8 Best Apps for Screen Mirroring Poco X5 Pro PC | Dr.fone
- In 2024, How to Unlock Apple iPhone 6 Plus With an Apple Watch & What to Do if It Doesnt Work
- Title: Updated How to Rotate AVI in Vertical/Portrait Orientation Windows, Mac,Andro for 2024
- Author: Morgan
- Created at : 2024-04-24 01:06:28
- Updated at : 2024-04-25 01:06:28
- Link: https://ai-video-editing.techidaily.com/updated-how-to-rotate-avi-in-verticalportrait-orientation-windows-macandro-for-2024/
- License: This work is licensed under CC BY-NC-SA 4.0.
