
:max_bytes(150000):strip_icc():format(webp)/the-11-best-whatsapp-tricks-and-tips-in-2020-4782877-fd12628437f34b85ac38f1a9ac95637e.jpg)
Updated In 2024, 10 Best Mp3 Visualizers Windows, Mac, Android, iPhone & Online
10 Best Mp3 Visualizers [Windows, Mac, Android, iPhone & Online]
Best Audio Visualizer and Video Editor
Make your music video come alive with Filmora Audio Visualizer. The effect will intelligently match the sound in your video while also adding dynamic effects.
Free Download Free Download Free Download Learn More >

A music visualizer application produces animated graphics based on beats, volume, rhythm, and frequency spectrum. These apps show various animations for various photographs and even provide templates for creating a particular animation. Music visualizers turn music into numbers highlighted in lines, circles, and other visuals using a mathematical formulae-based algorithm.
The 10 best mp3 visualizers for Windows, Mac, Android, iPhone and Online are listed below:
1. Offeo

Supported system: Online
Introduction:
OFFEO is a music visualizer that allows you to generate visuals. In addition, beats and audio tracks can be synced with this application.
Features:
- Assists you in improving your music track.
- Professional design templates are available.
- It has a simple drag-and-drop interface.
- It does not require the installation of any software.
- Each video frame has customizable choices.
Price: Offeo offers a 30-day free trial, and a premium account costs around $19/month.
Cons:
- Most of the templates are for short videos (5-7 seconds).
2. Magic Music Visuals

Supported system: Windows
Introduction:
Magic Music Visuals is a powerful audio visualizer for Windows that allows users to create whatever they want. The program is entirely customizable and includes MIDI and live audio capability. In addition, the program generates a variety of designs that spin in different directions depending on the volume and frequency of sound.
Features:
- It shows rotating pictures and 3D models that move to the beat of the music.
- A basic UI makes it simple to use.
- Users can upload cover art.
- Allows for live camera modification in real-time.
Price: A free trial version with nearly full functionality is available, and a $44.95 premium version for one PC.
Cons:
- It requires the ideal software configuration of the system.
3. Musicvid

Supported system: Windows/Mac
Introduction:
A web-based application called Musicvid is another music visualizer for Windows and Mac. It has a long history and is extremely popular all around the world. It enables users to create professional-looking graphics that include sound and animation. Because it is a web-based application, users do not need to install it on their computer; however, they will require a decent internet connection. There are a variety of templates available to aid in the creation process.
Features:
- Chrome and Firefox are supported.
- It includes comprehensive instruction.
- Users can export the final visualization directly from the browser.
Price: $0
Cons:
- Requires fast internet speed to function.
4. Kapwing

Supported system: Windows/Mac
Introduction:
Kapwing is a video editing application that adds a professional-looking waveform to any video. It assists you in changing the color, speed, and position of your waves.
Features:
- Your videos can be shared on any social media platform.
- There are no advertisements in this application.
- The video does not contain any watermarks.
- You can use any browser to see your clips.
- Allows you to include a logo in your video.
- Shapes can be used in your video clips.
Price: Free to use but can be upgraded to PRO at $16/month (Limited time offer).
Cons:
- Although the application can upload 4K UHD videos, it cannot export files simultaneously.
5. AudioVision Music Player
Supported system: Android
Introduction:
This program is a music player that helps you filter music by genres, playlists, or artists and be a great music visualization tool. The music visualizer from AudioVision comes with six different visual skins that are entirely customizable and provide nearly limitless visualization options. For example, you can adjust the Sensitivity, Bar and Border Width, and Color settings to match the music genre you’re now listening to. In addition, the software is only 1.6MB in size, so even if you don’t have a lot of storage space on your phone, you can visualize music and make unique screensavers.
Features:
- It offers a vast collection of customizable options
- User-friendly application with easy to use interface
- Customize sound wave appearance
Price: $0
Cons:
- Difficult to refresh songs
- Poor functionality
6. Alien Worlds - Music Visualizer

Supported system: Android, iOS
Introduction:
If you opt to install this music visualizer on your mobile device, you will undoubtedly be stunning. Choose from 47 radio channels in the Alien Worlds app, which play a variety of music genres such as rock, techno, trance, and ambient. As a result, its musical representations are always one-of-a-kind. Your results will be different each time you use the program. Furthermore, there are over a hundred different settings to personalize and adjust visuals in almost any way you like. To unlock all of the app’s features, you’ll need to upgrade to the $1.99 Premium version.
Features:
- Digital Impulse has 47 radio channels with music styles such as a house, trance, disco, ambient, rock, and techno.
- Use the up and down arrow buttons to adjust the speed of the visual effects.
- The visual effects are generated at random, which means that the effects shown will differ each time the program is used.
Price: The software is free; however, in-app purchases are available.
Cons:
- Lacks variations in tools and limited product quality.
7. Staella

Supported system: iOS
Introduction:
Controlling the noir, hue, and contrast of the colors are just a few of the settings available in the STAELLA app. There are various graphic packages, but you can only get them if you pay for them in-app. STAELLA is incredibly simple to use; all you have to do is choose a song and enjoy the software’s images. The app’s real-time audio-reactive engine generates visuals from sounds exceptionally instantly. If you upgrade to the Pro edition, you’ll record all of your music visualizations and save them as GIF or MOV files.
Features:
- Generate instant sound visuals
- Music Video Maker and Visual Music Player without Editing
- Music and photos can be imported. Visuals that can be changed.
- Audio Reactive System in Real-Time
- Boost your musical experience
Price: The software is free; however, in-app purchases are available.
Cons:
- Derails the music quality
8. Veed

Supported system: Online
Introduction:
Veed, which is an effective way to turn your music into videos with waveform, is next on the list of music visualizer software. The entire procedure is completed online, with the finished product saved in MP4 format. It was created to promote music on social media by adding waveforms, audio spectrums, and audiograms to make it look and sound more engaging.
Features:
- Choose your waveforms and animated audiograms.
- In the final video, add your photos or sketches.
- A cloud-based online application.
- Share your material on social media sites like Twitter, Instagram, and Facebook.
Price: Limited version is free, basic is $12, and Pro is $24 per month.
Cons:
- Limited options are available in the free plan.
9. Renderforest Music Visualizer

Supported system: Windows/Mac
Introduction:
Renderforest is a free music visualizer that makes it simple to produce visually appealing material. It’s a web-based application that works with a variety of browsers. YouTubers use it to create professional-looking intros and outros. There are numerous visualization templates from which to pick.
Features:
- It has a large selection of visualization templates.
- This online music visualizer application sends you your final video through email.
- Create professional YouTube channel intros and outros.
- Animations and presentations that explain things.
- Business video editing tools that save you time.
- Use commercial videos or upload your video files.
Price: With limited possibilities, it’s free. Individualized plans are offered for a fee.
Cons:
- Limited styles when creating audio visualizations.
10. Project M - Music Visualizer

Supported system: Android/iOs
Introduction:
One notable difference exists between the iOS and Android versions of the ProjectM app. The iOS version of the app has a media player; however, the Android version does not. Regardless, both program versions have excellent audio visualization features that let you generate images from a wide range of music types. As a result, ProjectM is one of the most excellent music visualization apps for Android and iOS.
Features:
- It has hundreds of visual effects, multi-touch interactive visualizations, and Chromecast compatibility.
- Various additional modes available, like the Immersive Option for KitKat smartphones
- Live Wallpaper mode, which generates animated wallpapers for your Smartphone.
- Visual Effect Browser & Search
- Auto-detects sound from Microphone and Music Players
Price: On the Google Play Store, it’s free, but there are adverts; on the App Store, it’s $2.99.
Cons:
- There are no presets included with the projectM library.
A music visualizer application produces animated graphics based on beats, volume, rhythm, and frequency spectrum. These apps show various animations for various photographs and even provide templates for creating a particular animation. Music visualizers turn music into numbers highlighted in lines, circles, and other visuals using a mathematical formulae-based algorithm.
The 10 best mp3 visualizers for Windows, Mac, Android, iPhone and Online are listed below:
1. Offeo
Supported system: Online
Introduction:
OFFEO is a music visualizer that allows you to generate visuals. In addition, beats and audio tracks can be synced with this application.
Features:
- Assists you in improving your music track.
- Professional design templates are available.
- It has a simple drag-and-drop interface.
- It does not require the installation of any software.
- Each video frame has customizable choices.
Price: Offeo offers a 30-day free trial, and a premium account costs around $19/month.
Cons:
- Most of the templates are for short videos (5-7 seconds).
2. Magic Music Visuals
Supported system: Windows
Introduction:
Magic Music Visuals is a powerful audio visualizer for Windows that allows users to create whatever they want. The program is entirely customizable and includes MIDI and live audio capability. In addition, the program generates a variety of designs that spin in different directions depending on the volume and frequency of sound.
Features:
- It shows rotating pictures and 3D models that move to the beat of the music.
- A basic UI makes it simple to use.
- Users can upload cover art.
- Allows for live camera modification in real-time.
Price: A free trial version with nearly full functionality is available, and a $44.95 premium version for one PC.
Cons:
- It requires the ideal software configuration of the system.
3. Musicvid
Supported system: Windows/Mac
Introduction:
A web-based application called Musicvid is another music visualizer for Windows and Mac. It has a long history and is extremely popular all around the world. It enables users to create professional-looking graphics that include sound and animation. Because it is a web-based application, users do not need to install it on their computer; however, they will require a decent internet connection. There are a variety of templates available to aid in the creation process.
Features:
- Chrome and Firefox are supported.
- It includes comprehensive instruction.
- Users can export the final visualization directly from the browser.
Price: $0
Cons:
- Requires fast internet speed to function.
4. Kapwing
Supported system: Windows/Mac
Introduction:
Kapwing is a video editing application that adds a professional-looking waveform to any video. It assists you in changing the color, speed, and position of your waves.
Features:
- Your videos can be shared on any social media platform.
- There are no advertisements in this application.
- The video does not contain any watermarks.
- You can use any browser to see your clips.
- Allows you to include a logo in your video.
- Shapes can be used in your video clips.
Price: Free to use but can be upgraded to PRO at $16/month (Limited time offer).
Cons:
- Although the application can upload 4K UHD videos, it cannot export files simultaneously.
5. AudioVision Music Player
Supported system: Android
Introduction:
This program is a music player that helps you filter music by genres, playlists, or artists and be a great music visualization tool. The music visualizer from AudioVision comes with six different visual skins that are entirely customizable and provide nearly limitless visualization options. For example, you can adjust the Sensitivity, Bar and Border Width, and Color settings to match the music genre you’re now listening to. In addition, the software is only 1.6MB in size, so even if you don’t have a lot of storage space on your phone, you can visualize music and make unique screensavers.
Features:
- It offers a vast collection of customizable options
- User-friendly application with easy to use interface
- Customize sound wave appearance
Price: $0
Cons:
- Difficult to refresh songs
- Poor functionality
6. Alien Worlds - Music Visualizer
Supported system: Android, iOS
Introduction:
If you opt to install this music visualizer on your mobile device, you will undoubtedly be stunning. Choose from 47 radio channels in the Alien Worlds app, which play a variety of music genres such as rock, techno, trance, and ambient. As a result, its musical representations are always one-of-a-kind. Your results will be different each time you use the program. Furthermore, there are over a hundred different settings to personalize and adjust visuals in almost any way you like. To unlock all of the app’s features, you’ll need to upgrade to the $1.99 Premium version.
Features:
- Digital Impulse has 47 radio channels with music styles such as a house, trance, disco, ambient, rock, and techno.
- Use the up and down arrow buttons to adjust the speed of the visual effects.
- The visual effects are generated at random, which means that the effects shown will differ each time the program is used.
Price: The software is free; however, in-app purchases are available.
Cons:
- Lacks variations in tools and limited product quality.
7. Staella
Supported system: iOS
Introduction:
Controlling the noir, hue, and contrast of the colors are just a few of the settings available in the STAELLA app. There are various graphic packages, but you can only get them if you pay for them in-app. STAELLA is incredibly simple to use; all you have to do is choose a song and enjoy the software’s images. The app’s real-time audio-reactive engine generates visuals from sounds exceptionally instantly. If you upgrade to the Pro edition, you’ll record all of your music visualizations and save them as GIF or MOV files.
Features:
- Generate instant sound visuals
- Music Video Maker and Visual Music Player without Editing
- Music and photos can be imported. Visuals that can be changed.
- Audio Reactive System in Real-Time
- Boost your musical experience
Price: The software is free; however, in-app purchases are available.
Cons:
- Derails the music quality
8. Veed
Supported system: Online
Introduction:
Veed, which is an effective way to turn your music into videos with waveform, is next on the list of music visualizer software. The entire procedure is completed online, with the finished product saved in MP4 format. It was created to promote music on social media by adding waveforms, audio spectrums, and audiograms to make it look and sound more engaging.
Features:
- Choose your waveforms and animated audiograms.
- In the final video, add your photos or sketches.
- A cloud-based online application.
- Share your material on social media sites like Twitter, Instagram, and Facebook.
Price: Limited version is free, basic is $12, and Pro is $24 per month.
Cons:
- Limited options are available in the free plan.
9. Renderforest Music Visualizer
Supported system: Windows/Mac
Introduction:
Renderforest is a free music visualizer that makes it simple to produce visually appealing material. It’s a web-based application that works with a variety of browsers. YouTubers use it to create professional-looking intros and outros. There are numerous visualization templates from which to pick.
Features:
- It has a large selection of visualization templates.
- This online music visualizer application sends you your final video through email.
- Create professional YouTube channel intros and outros.
- Animations and presentations that explain things.
- Business video editing tools that save you time.
- Use commercial videos or upload your video files.
Price: With limited possibilities, it’s free. Individualized plans are offered for a fee.
Cons:
- Limited styles when creating audio visualizations.
10. Project M - Music Visualizer
Supported system: Android/iOs
Introduction:
One notable difference exists between the iOS and Android versions of the ProjectM app. The iOS version of the app has a media player; however, the Android version does not. Regardless, both program versions have excellent audio visualization features that let you generate images from a wide range of music types. As a result, ProjectM is one of the most excellent music visualization apps for Android and iOS.
Features:
- It has hundreds of visual effects, multi-touch interactive visualizations, and Chromecast compatibility.
- Various additional modes available, like the Immersive Option for KitKat smartphones
- Live Wallpaper mode, which generates animated wallpapers for your Smartphone.
- Visual Effect Browser & Search
- Auto-detects sound from Microphone and Music Players
Price: On the Google Play Store, it’s free, but there are adverts; on the App Store, it’s $2.99.
Cons:
- There are no presets included with the projectM library.
| Best 8 Online GIF to APNG Converters
Great Video Converter - Wondershare Filmora
Provide abundant video effects - A creative video editor
Powerful color correction and grading
Detailed tutorials provided by the official channel
The GIF image format is a bitmap image format that supports up to 8 bits per pixel. APNG (Animated Portable Network Graphics) is a format for animated images that supports 24 bits per pixel and 8 bits of transparency, which is not available in GIFs. Backward compatibility with non-animated PNG files is also maintained.
Because the initial frame of an APNG file saves as a regular PNG stream, it can display by most conventional PNG decoders. Extra chunks can hold frame speed data and different animation frames (as provided by the original PNG specification).
Is APNG superior to GIF? APNG files are smaller and have more outstanding quality than GIF files. However, GIF is more compatible than APNG. Firefox, Safari, Google Chrome, and Opera support APNG, while practically all online browsers support GIF.
Let’s look at the top 8 best GIFs to APNG converters now.
In this article
Part 1: Best 8 GIF to APNG Converters
Part 2: How to Convert a GIF to APNG
Part 3: FAQs
Part 1. Best 8 GIF to APNG Converters
Here are the top 8 GIFs to APNG converters to look out for
1. EZgif

Ezgif.com is a free, easy-to-use toolset for making and modifying animated GIFs. Besides some basic video editing, we also offer editing and conversions for various other picture formats, like animated WebP, PNG, MNG, and FLIF. GIF maker, video to GIF converter, and photo resizer are three of our most popular online utilities.
In addition, EZgif lets you edit GIFs before converting them to APNG.
Features:
- ImageMagick - conducts most picture editing tasks such as resizing, optimization, cropping, etc.
- Making, optimizing, trimming, and resizing animated GIFs with gifsicle and lossygif.
- For video conversions and editing, use FFmpeg (the genuine one).
- This video to GIF converter online has a low conversion rate.
- This free online GIF banner maker can assist you in creating GIF banners.
- This online GIF creator has an extremely user-friendly UI.
- This web program’s impressive capabilities are completely free to use.
- This GIF converter online maintains high-quality GIF conversion.
- You can make GIFs from videos in seconds.
Pros
The program at ezgif.com is entirely secure to use.
Users do not have to install any other programs for the software to work.
The application is simple and allows users to create GIFs online without exerting any effort.
Cons
Because there is a problem in the program, the result of this online GIF maker from photographs degrades. Hence it is not advised for high professional use.
2. FreeConvert

FreeConvert is a GIF to APNG converter that can convert photos, videos, audio files, documents, eBooks, and units, among other formats. It can upload GIFs from your device, Google Drive, Dropbox, or a URL, and it can batch convert many GIFs to animated PNG files without sacrificing quality. FreeConvert is a safe program because it automatically deletes converted files after two hours.
Features:
- You can convert numerous files at once without sacrificing quality.
- It provides a variety of output file types.
- You can choose from your device (computer, smartphone, etc.) or a Dropbox or Google Drive account to select your files.
Pros
It’s as simple as uploading your GIF files and clicking convert.
Convert a GIF to APNG(animated PNG) while keeping the original GIF’s animation quality.
It is entirely free and works with any web browser.
All files are encrypted using 256-bit SSL and erased after two hours.
Cons
Limited services for free users
3. Aconvert

Aconvert is another free online GIF to APNG converter. It not only converts GIFs to APNG but also compresses, resizes, merges, crops, and rotates GIFs. GIFs can be stored on your device or online storage services after being uploaded from local, online storage services or a URL.
The uploaded image file can be up to 200 MB in size.
My favorite software is AVS Image Converter, which can convert GIF to APNG and APNG to GIF. Furthermore, its ability to support a wide range of image formats and editing capabilities such as Watermarks, Filters, Image Corrections, and others is fantastic.
Features:
- It supports large file conversion of up to 200MB
- It can also resize and rotate GIF file
- It supports a wide range of image formats
- Edits watermark
Pros
Simple user interface
File compression settings get support across platforms
Multiplatform
Free and can be used on a web browser
Cons
Limited services for free users.
4. AVS Image Converter

AVS Image Converter for Windows is a free GIF to APNG converter. You can use it to convert animated GIF files into animated PNG files. This software can convert GIFs to APNGs and APNGs to animated GIFs. Aside from APNG and GIF, this shareware accepts various additional image and project formats as input, including BMP, JPEG, TIFF, TGA, PCX, PSD, PDD, and more. Unlike input types, only JPEG, PDF, GIF, PNG (APNG), TIFF, BMP, TGA, and RAS are the output formats. You can convert several photos from one format to another using our GIF to APNG converter’s batch conversion.
Features:
- It supports a variety of formats.
- It converts in batches.
- Convert animated GIFs into animated PNG files
Pros
Processes large groups of images
It’s possible to utilize it from the command line.
Presets for various dimensions
Multiple input formats are supported.
Allows you to convert photos to PDF.
Multiple effects are applied.
Cons
There are no individual presets.
Displays advertisements
5. Real World Paint
RealWorld Paint - portable image editor (rw-designer.com)

Another free GIF to APNG converter for Windows is RealWorld Paint. It can also convert an APNG file back to a GIF. Additionally, format conversions between PNG, JPEG, GIF, WEBP, animated WEBP, and other formats are possible. The prime benefit of this software is that it can work with projects created by various famous photo editors, including Photoshop, Paint.Net, GIMP, and others.
You can also add, edit, and improve frames in GIF files and simple conversion. When you open a GIF file in it, an editor area appears, right below which you can see all of the GIF file’s frames.
Features:
- Supports a wide range of file types
- Easy to use interface
- Doesn’t consume a lot of hardware resources
- Can convert in a few minutes
Pros
Transformation of a particular area
Multi-platform
Folder selection is simple.
Set the conversion quality quickly.
Cons
For novices, it’s a bit difficult.
Only the premium version is available.
6. Convertio

Convertio is a competitor to Browserling in terms of simplicity. Convertio, on the other hand, outnumbers the former in terms of picture formats supported. Convertio can also convert GIFs to TGA, PSD, JPG, TIFF, ICO, etc. Unfortunately, it lacks image editing capabilities.
Features:
- The file size is unrestricted.
- There is no restriction to how many conversions you can do at once.
- Priority number one.
- Every day, you have an unlimited number of conversion minutes.
- The maximum conversion time per file is unlimited.
- Pages with no advertisements.
Pros
Allows you to convert files by dragging and dropping them.
The ETA is less than 2 minutes, and the conversion is quick.
There are 3 membership options.
Cons
After 24 hours/manually, files saved on the server/cloud gets removed.
7. Onlineconvertfree

Onlineconvertfree is a lovely PNG converter that works with all standard image formats. You can create a PNG file from various formats, including GIF, JPG, HTML, TIFF, RAW, and more. Users may crop, clip, rotate, flip, and perform many other editing actions on their files.
Features:
- It has offline access for quick connectivity and document access.
- Even when an internet connection is unavailable, this helps speed up the entire document management process.
- The software comes with a free version that includes all of the basic capabilities
- Individuals and small enterprises will find it very affordable due to this.
- It supports a Variety of Formats
Pros
Converted files are simple to upload and download.
You can convert almost any file to your preferred format.
There is no need to give personal information such as an email address.
It offers three subscription tiers, all of which are ad-free.
Cons
This is a free service with a limit of two files per conversion.
8. Zamzar

Zamzar is the easiest online GIF to APNG converter on this list. It has numbered steps that make it extremely simple to use. You may convert GIF to PNG, TIFF, TGA, JPG, BMP, and other image formats on Zamzar.
Features:
- Uploading files by dragging and dropping them and speedier file conversions.
- All Zamzar subscribers get high-speed downloads.
- Email files to be converted.
- You can stream the converted videos and audio to your iPhone, iPad, and iPod.
Pros
Allows you to convert files from URLs. Batch conversion is supported.
Presets a three-step method that is quite easy to follow.
Over 1200 file formats are supported.
Multiplatform
File compression settings are now supported.
Developers will appreciate the API.
Cons
File size restricted to 50 MB on free accounts for uploads.
Like other online tools, it lacks OCR.
Part 2. How to Convert a GIF to APNG
Follow the 3 simple steps to convert GIF to animated PNG
Step 1: Choose Files
Select several files on your computer using the “Choose Files” button or the dropdown menu to select an online file from a URL, Google Drive, or Dropbox. The file size of an image can be up to 200 megabytes. You can use a file analyzer to gain detailed information about a source image, including its size, resolution, quality, and transparent color.

Step 2: Choose Image Format
Determine the image format, quality, and size you want to use. You choose to use the original image size or select “Change width and height” and enter a custom image size. 1920x1080 is an example of a [width]x[height] format. Only a few image formats support the picture quality choice, such as JPG, WEBP, or AVIF. The value ranges from 1 (lowest picture quality and highest compression) to 100 (highest image quality and lowest compression) (best quality but least effective compression). If this field is left blank, the converter will use the estimated quality of your input image if found; otherwise, 92 by default. JPG, PNG, TIFF, GIF, HEIC, BMP, PS, PSD, WEBP, TGA, DDS, EXR, J2K, PNM, or SVG are examples of target image formats.

Step 3: Click on Convert Now
Click the “Convert Now” option to begin the batch conversion. If one server fails, it will automatically attempt another; please be patient while converting. The resultant files will be in the “Conversion Results” section. Click the icon to display the QR code for the file or save it to an online storage like Google Drive or Dropbox.

Part 3. FAQ
1. What Is APNG (Animated Portable Network Graphics )
The .apng (Animated Portable Network Graphics) extension is an unofficial extension to the Portable Network Graphics format (PNG ). It is a series of frames (a PNG image) that represent an animation sequence, producing a visual effect comparable to a GIF. APNG files support 24-bit pictures with 8-bit transparency. You can convert non-animated GIF files to APNG format. APNG files have the same.png extension as PNG files and can be opened by software like Mozilla Firefox, Chrome with APNG compatibility, and iOS 10’s iMessage apps.
2. How to Create APNG File?
Step 1: Select Image
Click File > Open to bring up the photo you wish to convert to PNG.

Step 2: Click Open
Click “Open” when you’ve navigated to your picture.

Step 3: Go to Save As
After you’ve opened the file, go to File > Save As.

Step 4: Save
Make sure PNG is selected from the drop-down list of formats in the following box, then click “Save.”

Step 5: Compress
The compression rate is set to “Best” by default, but the Save Options box contains a few extras to check if you want a bit more control over the compression of your file. The file size will be determined by changing the compression rate; the higher the value, the less compression will be utilized when saving your image.

3. How Do I Save Something as APNG?
Here are the steps to take when saving an image as APNG
Step 1: Open Paint
Open an image-editing program on your computer, such as Paint for Windows or Paintbrush for Mac. Simply double-click the software’s icon on your desktop, or choose it from your applications list.
Step 2: Go to saved Images
Open the image you already saved. Navigate to the window where you saved the image. Click-hold it, drag it, and drop it onto the editor to display the image.
Step 3: Resize Image
Make changes to the image. You can resize or rescale the image before saving it as a PNG file, and you can even add text using your software’s Text tool. This is, however, wholly optional.
Step 4: Choose Save as
PNG is the top format for saving images. Choose “Save as” from the “File” menu in the editor’s upper left corner.
In the File Name window, provide the name you want for the file.
Under the File Name field, click the “Save as type” drop-down option to see all of the image’s possible formats.
Click “Save” after selecting “PNG.” The file will be saved as a PNG file in the same directory as the original.
Conclusion
After getting to know the eight best GIF to APNG converters, you can utilize them efficiently when converting files. Also, we provided answers to frequently asked questions to help increase your knowledge of what an APNG is and how to save and create an APNG file.
Now explore these and convert GIF to animated PNG.
The GIF image format is a bitmap image format that supports up to 8 bits per pixel. APNG (Animated Portable Network Graphics) is a format for animated images that supports 24 bits per pixel and 8 bits of transparency, which is not available in GIFs. Backward compatibility with non-animated PNG files is also maintained.
Because the initial frame of an APNG file saves as a regular PNG stream, it can display by most conventional PNG decoders. Extra chunks can hold frame speed data and different animation frames (as provided by the original PNG specification).
Is APNG superior to GIF? APNG files are smaller and have more outstanding quality than GIF files. However, GIF is more compatible than APNG. Firefox, Safari, Google Chrome, and Opera support APNG, while practically all online browsers support GIF.
Let’s look at the top 8 best GIFs to APNG converters now.
In this article
Part 1: Best 8 GIF to APNG Converters
Part 2: How to Convert a GIF to APNG
Part 3: FAQs
Part 1. Best 8 GIF to APNG Converters
Here are the top 8 GIFs to APNG converters to look out for
1. EZgif
Ezgif.com is a free, easy-to-use toolset for making and modifying animated GIFs. Besides some basic video editing, we also offer editing and conversions for various other picture formats, like animated WebP, PNG, MNG, and FLIF. GIF maker, video to GIF converter, and photo resizer are three of our most popular online utilities.
In addition, EZgif lets you edit GIFs before converting them to APNG.
Features:
- ImageMagick - conducts most picture editing tasks such as resizing, optimization, cropping, etc.
- Making, optimizing, trimming, and resizing animated GIFs with gifsicle and lossygif.
- For video conversions and editing, use FFmpeg (the genuine one).
- This video to GIF converter online has a low conversion rate.
- This free online GIF banner maker can assist you in creating GIF banners.
- This online GIF creator has an extremely user-friendly UI.
- This web program’s impressive capabilities are completely free to use.
- This GIF converter online maintains high-quality GIF conversion.
- You can make GIFs from videos in seconds.
Pros
The program at ezgif.com is entirely secure to use.
Users do not have to install any other programs for the software to work.
The application is simple and allows users to create GIFs online without exerting any effort.
Cons
Because there is a problem in the program, the result of this online GIF maker from photographs degrades. Hence it is not advised for high professional use.
2. FreeConvert
FreeConvert is a GIF to APNG converter that can convert photos, videos, audio files, documents, eBooks, and units, among other formats. It can upload GIFs from your device, Google Drive, Dropbox, or a URL, and it can batch convert many GIFs to animated PNG files without sacrificing quality. FreeConvert is a safe program because it automatically deletes converted files after two hours.
Features:
- You can convert numerous files at once without sacrificing quality.
- It provides a variety of output file types.
- You can choose from your device (computer, smartphone, etc.) or a Dropbox or Google Drive account to select your files.
Pros
It’s as simple as uploading your GIF files and clicking convert.
Convert a GIF to APNG(animated PNG) while keeping the original GIF’s animation quality.
It is entirely free and works with any web browser.
All files are encrypted using 256-bit SSL and erased after two hours.
Cons
Limited services for free users
3. Aconvert
Aconvert is another free online GIF to APNG converter. It not only converts GIFs to APNG but also compresses, resizes, merges, crops, and rotates GIFs. GIFs can be stored on your device or online storage services after being uploaded from local, online storage services or a URL.
The uploaded image file can be up to 200 MB in size.
My favorite software is AVS Image Converter, which can convert GIF to APNG and APNG to GIF. Furthermore, its ability to support a wide range of image formats and editing capabilities such as Watermarks, Filters, Image Corrections, and others is fantastic.
Features:
- It supports large file conversion of up to 200MB
- It can also resize and rotate GIF file
- It supports a wide range of image formats
- Edits watermark
Pros
Simple user interface
File compression settings get support across platforms
Multiplatform
Free and can be used on a web browser
Cons
Limited services for free users.
4. AVS Image Converter
AVS Image Converter for Windows is a free GIF to APNG converter. You can use it to convert animated GIF files into animated PNG files. This software can convert GIFs to APNGs and APNGs to animated GIFs. Aside from APNG and GIF, this shareware accepts various additional image and project formats as input, including BMP, JPEG, TIFF, TGA, PCX, PSD, PDD, and more. Unlike input types, only JPEG, PDF, GIF, PNG (APNG), TIFF, BMP, TGA, and RAS are the output formats. You can convert several photos from one format to another using our GIF to APNG converter’s batch conversion.
Features:
- It supports a variety of formats.
- It converts in batches.
- Convert animated GIFs into animated PNG files
Pros
Processes large groups of images
It’s possible to utilize it from the command line.
Presets for various dimensions
Multiple input formats are supported.
Allows you to convert photos to PDF.
Multiple effects are applied.
Cons
There are no individual presets.
Displays advertisements
5. Real World Paint
RealWorld Paint - portable image editor (rw-designer.com)
Another free GIF to APNG converter for Windows is RealWorld Paint. It can also convert an APNG file back to a GIF. Additionally, format conversions between PNG, JPEG, GIF, WEBP, animated WEBP, and other formats are possible. The prime benefit of this software is that it can work with projects created by various famous photo editors, including Photoshop, Paint.Net, GIMP, and others.
You can also add, edit, and improve frames in GIF files and simple conversion. When you open a GIF file in it, an editor area appears, right below which you can see all of the GIF file’s frames.
Features:
- Supports a wide range of file types
- Easy to use interface
- Doesn’t consume a lot of hardware resources
- Can convert in a few minutes
Pros
Transformation of a particular area
Multi-platform
Folder selection is simple.
Set the conversion quality quickly.
Cons
For novices, it’s a bit difficult.
Only the premium version is available.
6. Convertio
Convertio is a competitor to Browserling in terms of simplicity. Convertio, on the other hand, outnumbers the former in terms of picture formats supported. Convertio can also convert GIFs to TGA, PSD, JPG, TIFF, ICO, etc. Unfortunately, it lacks image editing capabilities.
Features:
- The file size is unrestricted.
- There is no restriction to how many conversions you can do at once.
- Priority number one.
- Every day, you have an unlimited number of conversion minutes.
- The maximum conversion time per file is unlimited.
- Pages with no advertisements.
Pros
Allows you to convert files by dragging and dropping them.
The ETA is less than 2 minutes, and the conversion is quick.
There are 3 membership options.
Cons
After 24 hours/manually, files saved on the server/cloud gets removed.
7. Onlineconvertfree
Onlineconvertfree is a lovely PNG converter that works with all standard image formats. You can create a PNG file from various formats, including GIF, JPG, HTML, TIFF, RAW, and more. Users may crop, clip, rotate, flip, and perform many other editing actions on their files.
Features:
- It has offline access for quick connectivity and document access.
- Even when an internet connection is unavailable, this helps speed up the entire document management process.
- The software comes with a free version that includes all of the basic capabilities
- Individuals and small enterprises will find it very affordable due to this.
- It supports a Variety of Formats
Pros
Converted files are simple to upload and download.
You can convert almost any file to your preferred format.
There is no need to give personal information such as an email address.
It offers three subscription tiers, all of which are ad-free.
Cons
This is a free service with a limit of two files per conversion.
8. Zamzar
Zamzar is the easiest online GIF to APNG converter on this list. It has numbered steps that make it extremely simple to use. You may convert GIF to PNG, TIFF, TGA, JPG, BMP, and other image formats on Zamzar.
Features:
- Uploading files by dragging and dropping them and speedier file conversions.
- All Zamzar subscribers get high-speed downloads.
- Email files to be converted.
- You can stream the converted videos and audio to your iPhone, iPad, and iPod.
Pros
Allows you to convert files from URLs. Batch conversion is supported.
Presets a three-step method that is quite easy to follow.
Over 1200 file formats are supported.
Multiplatform
File compression settings are now supported.
Developers will appreciate the API.
Cons
File size restricted to 50 MB on free accounts for uploads.
Like other online tools, it lacks OCR.
Part 2. How to Convert a GIF to APNG
Follow the 3 simple steps to convert GIF to animated PNG
Step 1: Choose Files
Select several files on your computer using the “Choose Files” button or the dropdown menu to select an online file from a URL, Google Drive, or Dropbox. The file size of an image can be up to 200 megabytes. You can use a file analyzer to gain detailed information about a source image, including its size, resolution, quality, and transparent color.
Step 2: Choose Image Format
Determine the image format, quality, and size you want to use. You choose to use the original image size or select “Change width and height” and enter a custom image size. 1920x1080 is an example of a [width]x[height] format. Only a few image formats support the picture quality choice, such as JPG, WEBP, or AVIF. The value ranges from 1 (lowest picture quality and highest compression) to 100 (highest image quality and lowest compression) (best quality but least effective compression). If this field is left blank, the converter will use the estimated quality of your input image if found; otherwise, 92 by default. JPG, PNG, TIFF, GIF, HEIC, BMP, PS, PSD, WEBP, TGA, DDS, EXR, J2K, PNM, or SVG are examples of target image formats.
Step 3: Click on Convert Now
Click the “Convert Now” option to begin the batch conversion. If one server fails, it will automatically attempt another; please be patient while converting. The resultant files will be in the “Conversion Results” section. Click the icon to display the QR code for the file or save it to an online storage like Google Drive or Dropbox.
Part 3. FAQ
1. What Is APNG (Animated Portable Network Graphics )
The .apng (Animated Portable Network Graphics) extension is an unofficial extension to the Portable Network Graphics format (PNG ). It is a series of frames (a PNG image) that represent an animation sequence, producing a visual effect comparable to a GIF. APNG files support 24-bit pictures with 8-bit transparency. You can convert non-animated GIF files to APNG format. APNG files have the same.png extension as PNG files and can be opened by software like Mozilla Firefox, Chrome with APNG compatibility, and iOS 10’s iMessage apps.
2. How to Create APNG File?
Step 1: Select Image
Click File > Open to bring up the photo you wish to convert to PNG.
Step 2: Click Open
Click “Open” when you’ve navigated to your picture.
Step 3: Go to Save As
After you’ve opened the file, go to File > Save As.
Step 4: Save
Make sure PNG is selected from the drop-down list of formats in the following box, then click “Save.”
Step 5: Compress
The compression rate is set to “Best” by default, but the Save Options box contains a few extras to check if you want a bit more control over the compression of your file. The file size will be determined by changing the compression rate; the higher the value, the less compression will be utilized when saving your image.
3. How Do I Save Something as APNG?
Here are the steps to take when saving an image as APNG
Step 1: Open Paint
Open an image-editing program on your computer, such as Paint for Windows or Paintbrush for Mac. Simply double-click the software’s icon on your desktop, or choose it from your applications list.
Step 2: Go to saved Images
Open the image you already saved. Navigate to the window where you saved the image. Click-hold it, drag it, and drop it onto the editor to display the image.
Step 3: Resize Image
Make changes to the image. You can resize or rescale the image before saving it as a PNG file, and you can even add text using your software’s Text tool. This is, however, wholly optional.
Step 4: Choose Save as
PNG is the top format for saving images. Choose “Save as” from the “File” menu in the editor’s upper left corner.
In the File Name window, provide the name you want for the file.
Under the File Name field, click the “Save as type” drop-down option to see all of the image’s possible formats.
Click “Save” after selecting “PNG.” The file will be saved as a PNG file in the same directory as the original.
Conclusion
After getting to know the eight best GIF to APNG converters, you can utilize them efficiently when converting files. Also, we provided answers to frequently asked questions to help increase your knowledge of what an APNG is and how to save and create an APNG file.
Now explore these and convert GIF to animated PNG.
Change Speed of a Video on iPhone
Versatile Video Editor - Wondershare Filmora
An easy and powerful editor
Numerous effects to choose from
Detailed tutorials provided by the official channel
Do you want to know how to slow down a video on iPhone? Or maybe you want to know how to speed a video up on iPhone.
There might be times you need to speed up or slow down a video that you shoot on iPhone. There are apps and built-in option that allows you to adjust the video’s speed.
This guide will help you out of this problem with step by step process to speed up and slow down iPhone videos.
Let’s get started.
Best Free App for Changing Video Speed on iPhone
Want to know how to slow a video down on iPhone or speed it up? There are numerous apps that let you do this, but not all of them are free and intuitive. However, there’s one such option that stands out from the crowd for its free access and variety of other video editing tools.
Wondershare Filmora is an iOS app available on Apple App Store. You can download the app and install it on your iPhone.
It is essentially a video editing app with an intuitive interface. It can help you speed up videos, slow down videos, or record slowmo iPhone videos that can be shared on social media platforms.
In addition to changing video speed, you can do some basic video editing as well. It includes text effects, stickers effects, music, PIP, and more.
How to Slow Down A Video on iPhone?
Looking for how to slow down a video on iPhone? Keep reading and you’ll find out shortly exactly how to do it.
Have you ever seen a movie trailer and thought that the slow-motion effect looked really cool? Well, you can get the same effect on any of your videos. You can even reverse the effect and speed up your video to create some interesting video effects.
Whatever your reason for slowing down a video, it’s easy to change the speed of your clip using iMovie on iPhone.
Here’s how you can do it:
- You need to have iMovie app installed on your iPhone. If it’s already installed, launch iMovie on your iPhone and start a new project.
- Now, tap the plus sign that’s at the start of the Projects screen.

- Now, a pop-up window will appear where you need to select Movie.

- Now, find and select the video you want to slow down and tap Create Movie button at the center bottom of the screen.

- Now move the playhead to the start of the timeline and tap to select the video. At this point, you’ll see the timeline highlighted in yellow color.
- Look at the bottom of the screen and you’ll find the Speed button with the speedometer icon. Tap the Speed icon and a sliding bar will appear.

- To slow down the video, move the sliding bar to the left side, which’s towards the tortoise. It indicates that the speed of the video will decrease.

- Now click the Play button to preview and then tap Done.
How to Speed Up Videos on iPhone?
Do you want to know how to speed up a video on iPhone? Keep reading to find out.
There are plenty of reasons why you might want to speed up a video. Maybe it’s an educational video that is really slow and boring or it has been recorded in slo-mo. It might be the reason that the video is long and slow, and your audience will get bored midway.
Whatever the reason, speeding up a video is easy to do on iPhone.
Let’s look into two different methods to speed up video on iPhone.
The first method works for videos originally recorded in slo-mo mode on iPhone.
Speed up slo-mo videos using the Photos app
The easiest way to speed up slo-mo videos is using the Photos app that comes pre-installed on iPhone.
Just follow these steps to speed up slo-mo videos:
- Open the Photos app on your iPhone.
- Tap Albums.
- Now, scroll down and tap Slo-mo.

- Tap the slo-mo video you want to speed up.
- Once the video is open, tap Edit.
- You’ll see a set of vertical lines on the bottom of the screen. The vertical lines indicate the video’s speed at that point. Closer lines mean normal speed and a wider distance between lines indicates that the section is in slow motion.

- You can hold and drag a bar and bring it closer to the other one to speed up the slo-mo section of the video. Bringing the lines closer indicates the video is at normal speed.
- Once you have changed the speed, tap Done.

Speed up iPhone videos using iMovie app
Here’s how you can speed up a video on iPhone with iMovie app:
- Launch iMovie on your iPhone and start a new project.
- Now, tap the plus sign visible at the start of the Projects screen.
- A pop-up screen will appear where you need to select Movie.
- Now, you can find and select the video you’re looking to speed up on iPhone. Once sleected, tap Create Movie button at the center bottom of the screen.
- Now move the playhead to the start of the timeline and tap to select the video. At this point, you’ll see the timeline highlighted in yellow color.
- Look at the bottom of the screen and you’ll find the Speed icon. Tap the Speed icon and a sliding bar will appear with a tortoise on its left side and a hare on the right side.
- To speed up the time-lapse video, move the slider to the right side.
- Now click the Play button to preview and then tap Done.
After increasing the speed of the video on iPhone, you can save it or share on your social media accounts or with your friends via messaging apps.
Bonus Tip: How to Change up the speed of a video in Wondershare Filmora
In case you have a video stored on your computer and you need to adjust its speed, you can use Wondershare Filmora.
With Wondershare Filmora, you have the ability to adjust a video’s speed. Flipping through your editing options will reveal your options for doing so. You can increase or decrease the speed of the video with just a few simple clicks.
There are plenty of options around how much you can speed up/down. In fact, you can set a custom speed.
Let’s see how you can slow down and speed up a video using Wondershare Filmora.
How to speed a video up with Filmora
Follow these steps to increase the speed of the video using Wondershare Filmora:
- Download and install Wondershare Filmora on your computer.
- Launch Filmora and click the on new project, or you can just drag and drop the file that you want to edit.

- Click the Import button to load your file or drag and drop the file directly.

- Once imported, you need to drag the file to the timeline.

- Now that the video is on timeline, you need to click the Speed icon and select the Fast option. You can increase the speed by 2x, 4x, 8x, and so on. You can also set a custom speed using Custom Speed option.

- Save the file and use it the way you want.
How to slow down a video using Filmora
To slow down a video using Filmora, you need to follow the below steps:
- Make sure you have Wondershare Filmora installed on your computer.
- Launch Filmora and click the Import button. The browse file window will appear where you need to select the file you want to slow down. You can also drag and drop the file directly.
- Once imported to the media library, drag the file to the timeline.
- Now that the video is on the timeline, click the Speed icon. Since you want to slow down the video, select the Slow option. Filmora lets you slow down a video by 0.5x, 0.25x, 0.1x, 0.05x, and 0.01x. You can also set a custom speed.
- Now, click the Render button to apply the settings.
- Save the file and use it the way you want.
Conclusion
That’s really it! Changing video playback speed on your iPhone couldn’t be simpler, and it will help you save time by leaving you with shorter videos to edit.
We explained the step-by-step process to let you know how to slow down a video on iPhone or speed it up. With the help of a built-in method to speed up slo-mo video and using apps like iMovie and Filmora, you can easily speed up or slow down videos on your iPhone.
When it comes to changing the video’s speed on your computer, Wondershare Filmora is an excellent choice.
We hope this guide helps you to change the speed of videos on your iPhone – without scratching your head.
Do you want to know how to slow down a video on iPhone? Or maybe you want to know how to speed a video up on iPhone.
There might be times you need to speed up or slow down a video that you shoot on iPhone. There are apps and built-in option that allows you to adjust the video’s speed.
This guide will help you out of this problem with step by step process to speed up and slow down iPhone videos.
Let’s get started.
Best Free App for Changing Video Speed on iPhone
Want to know how to slow a video down on iPhone or speed it up? There are numerous apps that let you do this, but not all of them are free and intuitive. However, there’s one such option that stands out from the crowd for its free access and variety of other video editing tools.
Wondershare Filmora is an iOS app available on Apple App Store. You can download the app and install it on your iPhone.
It is essentially a video editing app with an intuitive interface. It can help you speed up videos, slow down videos, or record slowmo iPhone videos that can be shared on social media platforms.
In addition to changing video speed, you can do some basic video editing as well. It includes text effects, stickers effects, music, PIP, and more.
How to Slow Down A Video on iPhone?
Looking for how to slow down a video on iPhone? Keep reading and you’ll find out shortly exactly how to do it.
Have you ever seen a movie trailer and thought that the slow-motion effect looked really cool? Well, you can get the same effect on any of your videos. You can even reverse the effect and speed up your video to create some interesting video effects.
Whatever your reason for slowing down a video, it’s easy to change the speed of your clip using iMovie on iPhone.
Here’s how you can do it:
- You need to have iMovie app installed on your iPhone. If it’s already installed, launch iMovie on your iPhone and start a new project.
- Now, tap the plus sign that’s at the start of the Projects screen.
- Now, a pop-up window will appear where you need to select Movie.
- Now, find and select the video you want to slow down and tap Create Movie button at the center bottom of the screen.
- Now move the playhead to the start of the timeline and tap to select the video. At this point, you’ll see the timeline highlighted in yellow color.
- Look at the bottom of the screen and you’ll find the Speed button with the speedometer icon. Tap the Speed icon and a sliding bar will appear.
- To slow down the video, move the sliding bar to the left side, which’s towards the tortoise. It indicates that the speed of the video will decrease.
- Now click the Play button to preview and then tap Done.
How to Speed Up Videos on iPhone?
Do you want to know how to speed up a video on iPhone? Keep reading to find out.
There are plenty of reasons why you might want to speed up a video. Maybe it’s an educational video that is really slow and boring or it has been recorded in slo-mo. It might be the reason that the video is long and slow, and your audience will get bored midway.
Whatever the reason, speeding up a video is easy to do on iPhone.
Let’s look into two different methods to speed up video on iPhone.
The first method works for videos originally recorded in slo-mo mode on iPhone.
Speed up slo-mo videos using the Photos app
The easiest way to speed up slo-mo videos is using the Photos app that comes pre-installed on iPhone.
Just follow these steps to speed up slo-mo videos:
- Open the Photos app on your iPhone.
- Tap Albums.
- Now, scroll down and tap Slo-mo.
- Tap the slo-mo video you want to speed up.
- Once the video is open, tap Edit.
- You’ll see a set of vertical lines on the bottom of the screen. The vertical lines indicate the video’s speed at that point. Closer lines mean normal speed and a wider distance between lines indicates that the section is in slow motion.
- You can hold and drag a bar and bring it closer to the other one to speed up the slo-mo section of the video. Bringing the lines closer indicates the video is at normal speed.
- Once you have changed the speed, tap Done.
Speed up iPhone videos using iMovie app
Here’s how you can speed up a video on iPhone with iMovie app:
- Launch iMovie on your iPhone and start a new project.
- Now, tap the plus sign visible at the start of the Projects screen.
- A pop-up screen will appear where you need to select Movie.
- Now, you can find and select the video you’re looking to speed up on iPhone. Once sleected, tap Create Movie button at the center bottom of the screen.
- Now move the playhead to the start of the timeline and tap to select the video. At this point, you’ll see the timeline highlighted in yellow color.
- Look at the bottom of the screen and you’ll find the Speed icon. Tap the Speed icon and a sliding bar will appear with a tortoise on its left side and a hare on the right side.
- To speed up the time-lapse video, move the slider to the right side.
- Now click the Play button to preview and then tap Done.
After increasing the speed of the video on iPhone, you can save it or share on your social media accounts or with your friends via messaging apps.
Bonus Tip: How to Change up the speed of a video in Wondershare Filmora
In case you have a video stored on your computer and you need to adjust its speed, you can use Wondershare Filmora.
With Wondershare Filmora, you have the ability to adjust a video’s speed. Flipping through your editing options will reveal your options for doing so. You can increase or decrease the speed of the video with just a few simple clicks.
There are plenty of options around how much you can speed up/down. In fact, you can set a custom speed.
Let’s see how you can slow down and speed up a video using Wondershare Filmora.
How to speed a video up with Filmora
Follow these steps to increase the speed of the video using Wondershare Filmora:
- Download and install Wondershare Filmora on your computer.
- Launch Filmora and click the on new project, or you can just drag and drop the file that you want to edit.
- Click the Import button to load your file or drag and drop the file directly.
- Once imported, you need to drag the file to the timeline.
- Now that the video is on timeline, you need to click the Speed icon and select the Fast option. You can increase the speed by 2x, 4x, 8x, and so on. You can also set a custom speed using Custom Speed option.
- Save the file and use it the way you want.
How to slow down a video using Filmora
To slow down a video using Filmora, you need to follow the below steps:
- Make sure you have Wondershare Filmora installed on your computer.
- Launch Filmora and click the Import button. The browse file window will appear where you need to select the file you want to slow down. You can also drag and drop the file directly.
- Once imported to the media library, drag the file to the timeline.
- Now that the video is on the timeline, click the Speed icon. Since you want to slow down the video, select the Slow option. Filmora lets you slow down a video by 0.5x, 0.25x, 0.1x, 0.05x, and 0.01x. You can also set a custom speed.
- Now, click the Render button to apply the settings.
- Save the file and use it the way you want.
Conclusion
That’s really it! Changing video playback speed on your iPhone couldn’t be simpler, and it will help you save time by leaving you with shorter videos to edit.
We explained the step-by-step process to let you know how to slow down a video on iPhone or speed it up. With the help of a built-in method to speed up slo-mo video and using apps like iMovie and Filmora, you can easily speed up or slow down videos on your iPhone.
When it comes to changing the video’s speed on your computer, Wondershare Filmora is an excellent choice.
We hope this guide helps you to change the speed of videos on your iPhone – without scratching your head.
Step-by-Step Guide to Storyboard
Step-by-Step Guide to Storyboard
An easy yet powerful editor
Numerous effects to choose from
Detailed tutorials provided by the official channel
In this article
01 [The Fundamentals to Get You Started on Storyboard](#Part 1)
02 [How to Turn a Script into a Storyboard?](#Part 2)
03 [Storyboard Q&A](#Part 3)
Part 1 The Fundamentals to Get You Started on Storyboard
Speaking in the light of blooming your creative skills and abilities, the realm of graphic and video editing has managed to unleash a never ending and dimensionless canvas to experiment with your skills. Talking of the most recent add-ons to the already long list of utilities, storyboards have emerged as a revolution in the field of motion graphic customization and design.
Diving a bit deeper into understanding the credibility of storyboards, let us move ahead with having an insight of different aspects and elements of the same in the upcoming sections of this article:
What is a Storyboard?
Attempting to define a storyboard, you can regard the utility as a sequential setup of sketches, images, elements and illustrations that create a road map to address a video editing task. Dividing the entire process into a series of individual processes, the aforesaid facility caters to ease out the video creation task.
Moving ahead to draft a technical explanation of storyboards, they are a collection of chronologically arranged drawings, supplemented with video customization elements, such as dialogues, camera direction and other allied detailing. The fundamental merit of these visual arrangements lies in the sequential and scene unfolding of a video footage.
This in turn, works to simplify the film creation process, while ensuring the latter’s cohesiveness and facilitating the elimination of errors and inconsistencies. It is a common mistake to regard storyboards as a midway and optional utility, these trial and error representations are quite essential to ensure a flawless video output in the final stage of design. The facility works additionally to minimize unnecessary production delays, while significantly cutting down on the overall creation cost.
Having a visibility more or less similar to a comic strip, storyboards have a varying scale of design, ranging from being modestly simple to explicitly complex, in cohesion with the specific creation requirements. These visual scripts are mostly hand crafted, through there are a host of storyboard creation software packages and programs available in the IT design market, as well as across the web.
Extending our discussion a bit further, let us have a walk-through of the essential storyboard categories and types in what follows next:
● Traditional Storyboards
These are a logically placed sequence of hand crafted drawings in ink or pencil for representing the video filming chronology, prior to the start of the actual creation process. You can conveniently observe the sequential arrangement of your video elements through these storyboards by placing them at a suitable space, like your studio wall.
You are granted the liberty to add as much detailing to these drawings as you wish, while using them for filming either a single or a series of film shots. These easily editable storyboards are often supplemented with written text notes for describing the events of a specific scene.

● Thumbnail Storyboards
These are rather small storyboards, mostly of a postage stamp size, that depict a sequence of the video elements and scenes on separate paper pieces. Owing to their miniature size, these storyboards are relatively easier to craft, require a lesser creation time and have much fewer details in comparison to their traditional counterparts.
This category of storyboards comes credible in catering a quick jot down of video creation ideas, before you proceed to analyze each element in a more comprehensive manner through the traditional alternatives.
● Animated Storyboards
This class of storyboards comes into play when you aim to craft complex video outlines, while supplementing the same with additional elements of music and dialogues. These are designed essentially to depict the general scene flow through the characteristics of time and pace in a series of animated sketches.
As of creating these storyboards, there is a diversity of online and software based utilities to address the concern. Such facilities work to integrate the images within a sketch into a single video, while adding life to the footage within a span of several minutes. The creation process is quite simple, without a download or software learning requirement.
01What are the Advantages of Using a Storyboard?
Now that you have developed a fundamental understanding of what is a storyboard, it is of great importance to know the utility is not just limited to crafting a sequential video script. There are a heap of additional merits that come at your disposal when you opt to create an outline for a visual footage with the facility. Discussing along the line, let us have a walk-through of the benefits of working with storyboards in what follows next:
02Merits of Using Storyboards
● Cut Down on Errors and Unnecessary Costs
Encountering mistakes in the video creation process is a rather common incident, but can cause serious and undesired financial implications. While using the storyboard facility does not absolutely guarantee the absence of errors, it can work to potentially reduce the intensity and financial impact involved in fixing the issue. With a little bit of extra effort and employing your creative assets, you can bring down the cumulative video creation cost to a significant level.
● Get a Futuristic Preview of Your Video
When you have crafted a storyboard for a video you are about to create, it becomes quite easy to visualize the sequential flow of the latter’s elements and scenes. This in turn, grants you the liberty to decide on the suitability of particular shots in a close observation. While you can choose to retain the perfect ones, there is a chance to improvise the video pieces that fall short of the credibility mark.
You are additionally facilitated with the scope of crafting a series of storyboards for a specific video creation idea. This allows a comparative analysis of the different film design prospects, so that you can easily pick the best and most cohesive presentation sequence and style with respect to the liking and interest of your target audience.
● Simplify the Video Creation Process
The storyboard utility is advantageous in providing you with a clear and targeted vision to proceed with the video production process. Functioning more like a road map, the utility caters to guide you at every step of creating, styling, customizing and animating your footage. The overall impact of using the facility is an improved working efficiency, surety of following the right direction and saving a lot of precious time.
● Develop an Enhanced Collaboration with Your Creative Team
If you are working with software based storyboarding assets, most of the times you may be facilitated with an option to share and collaborate your work. Apart from being the perfect stage to discuss the different ideas of video production, storyboard collaboration works to extend a cohesive response from your creative team to deliver a high end video production output by having enough to discuss about crafting, improving and styling the footage.
● Bring In Potential Investors
A well-crafted storyboard is a concise and futuristic representation of a video or film creation project that you are planning to take on the floors. You can use these cost effective ideas to put forward the blueprint of your craft, production creativity and vision in front of your targeted project investors.
This will in turn, give you an exact idea of their funding constraints, while simultaneously letting the investors have a deep insight about what to expect in the final production output. What’s best is, you don’t need high end accessories to showcase your art. An normal paper and pencil drawing will work fine.
03Great and Rare Storyboard Examples
Walking through the significance and benefits of working with storyboards can be a sufficient motivation to try hands at crafting out your own art pieces with the facility. It is however, always a smart choice to observe and study some actual creation examples to improvise your understanding of the concept to proceed with a greater confidence towards the production process.
Adhering to the concern, here are a few state of the art storyboard creation examples to boost up your familiarity and confidence to work with these video scripts. You can additionally draw out a diversity of ideas and thoughts to use in your project from these examples.
● Spiderman 2 Action Sequence
The following is an animated storyboard example from the classic Spiderman 2 movie released in 2004. The drawing represents a fight sequence between the hero Spiderman and Dr Octopus, his villainous counterpart at the top of a high speed moving train. Being a visually spectacular piece of graphic art, the video script aims to showcase a clear depiction of the moving elements within each of the sequentially arranged shots in a specific direction. This facilitates a concise and exact understanding of the final production output requirement by the video creation team.
● Tomorrow Never Dies
The following video storyboard aims at depicting an escape sequence from the Tomorrow Never Dies flick, centered on the adventures of James Bond, the epic fictional detective. While the latter is customary to dramatic refuges, this one claims to be an inaugural attempt under a big production banner.
Extending the lineage of the top rated storyboards, this video script also targets the depiction of the pivotal shots to be filmed out. A few of the elements include James Bond attempting to cut through the rope with a gigantic knife, an inversely panned shot of a banner being torn from the center, and the mid-air swinging of James Bond with his lady love.
● The Sound of Music
If you are fascinated towards creating musical video and film production, referring the following storyboard can present before you an expansive and impressive set of ideas. This storyboard was essentially crafted by Maurice Zuberano for sketching out the musical and dance sequences of the movie, The Sound of Music. While the aforesaid storyboard bears the closest possible resemblance to the original scene in the film, you can take a look at the same to achieve a notable perfection in video scripting.
Part 2 How to Turn a Script into a Storyboard?
Crafting storyboards for video production is a wise step to avail a series of economic and design centered benefits. While the utility works to define a sequential arrangement of shots and elements in a specific video scene, the real effort lies in converting a text centered movie or scene script into a storyboard. Talking of the ways to address this concern, let us discuss about these storyboard essentials in some detail in what follows next:
What Comes First – Script or Storyboard?
Before beginning to comment on the sequence of the aforesaid elements within a film production process, let us first proceed to have an understanding of the terms in a fundamental sense. A script is essentially a text based document that presents a cumulative picture of the video story by unveiling the latter’s storyline and theme. Storyboards on the other hand, are pictorial representations of sequentially arranged shots of the movie with a much more comprehensive detailing.
Going through the above definitions, the obvious and logical sequence of filming out a video is quite clear with scripts preceding the storyboards. Talking a bit on the credibility aspect of these video production stages, the film’s script caters to provide an elementary insight into some of the most essential visual commands. Crafting a storyboard on the other hand, is dedicated towards depicting a detailed follow through of each shot in line with the events described in the script.
Working towards a classic and professional video production task, hence demands a drafting of the latter’s script, which is then succeeded by crafting a storyboard. This facilitates a seamless and easy video creation process with lesser ambiguities. Having talked enough about scripts and storyboards, let us now move ahead with creating storyboards from a film script in the following section:
User’s Guide to Transform a Script into a Storyboard
Step 1: Identify and Pen Down an Amazing Content Idea
Begin with identifying a captivating story idea that you desire of implementing into a video production.

When you have found one, proceed to jot down the same in relatable and cohesive text to keep a record of the same.

This will help you to structurize the plot of your story and decide the flow of the events occurring within.
Step 2: Let’s Start Storyboarding!
Move ahead to planning the sequential placement of shots and scenes of the story in line with the script that you have just created. It is a great idea to pick an array of 4-6 movement shots for a particular scene, so that you can have a sufficient cell spacing to expand the detailing of shot elements. This further caters to a convenient and spatial arrangement of the cells on a standard sized paper.
You can now start to create your storyboard by adding labels to the scenes, penning down the directions, including the specific character dialogues and suitable images.
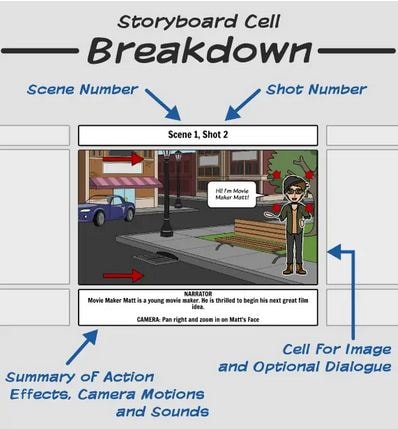
Step 3: Prepare a Layout of Your Storyboards
When you are done with adding all the elements of the script into the storyboard cells, proceed to lay them out in a specific pattern. This step comes quite handy in checking for the continuity and detailing accuracy of the depicted shots. You can further, improvise the elements if needed, or advance to the next step if everything seems fine.
,
Step 4: Revise Your Craft
Being an experienced and professional worker, you may well proceed to start filming your video at this stage. In an otherwise case however, you may need to make a revision of the crafted storyboard for a much more detailed and comprehensive observation. You can work to include an elusive paly of effects, lighting cues, background music and characters, camera motions, and a series of additional elements that seem to uplift your creation.
Paying attention to the aspect or revising your storyboards caters to a much more improvised and professionally sound presentation of your video production idea in front of the target audience. If not so, you can make your roughly crafted storyboard shine on with a little bit of extra and finer detailing, and that is it! Your story is ready to strike the floors!
How Can I Get Better at Storyboarding?
Speaking in the light of film production assets and utilities, storyboarding is more of a creative art rather than a customary process or production stage. While it requires consistent effort and practice to master the craft, adhering to some handy tips and tricks can be of great help to improve your skills at creating expressive and finely detailed storyboards.
Heading towards sorting the aforesaid query, the following section presents a concise description of a few amazing and unique storyboard creation guidelines and tricks to present the storyboarding craft at its best:
● Stop Aiming to Become a Perfectionist
Considering the fact that you are crafting the storyboard just for the purpose of depicting a sequence of video shots, do not aim at defining every element in comprehensive detail. Instead of making a fresh attempt to depict every minor change, pay more attention towards highlighting the significant points of action within a particular scene.
● Prefer Numbering the Storyboard Panels
Since the storyboard you are creating works as a blueprint for the video creation team, it should be convenient to understand and navigate through. Presenting the cells of your storyboard in a numbered sequence tends to provide an easy follow through of the same to the rest of your viewers.
● Explore Your Imagination
Your storyboard happens to be the inaugural representation of your video production idea and script in front of the potential audience. You should hence, proceed with the latter’s crafting process while keeping a close reference with the drafted script. Also, it becomes greatly important to add the imaginative element to your creation to avoid creating an bland and customary impression on the audience.
● Feedback Has a Great Importance
Make sure to showcase your storyboard to your project investors, prior to beginning with the film creation process. This will aid you with an escape from the unnecessary changes that can pop out from the audience at the last minute, leading to an unwanted financial expense. Pay attention to gather and work on the feedback of the viewers and start the actual creation process only after everything seems to be well settled.
● Enjoy Your Work
Enjoying the different aspects of your work is the key to achieve mastery at your craft and a welcoming response from the audience. Accepted that the storyboarding process is mind straining and time consuming, but taking on the challenge with a fun centered attitude will let your hard work shine on in front of the viewers.
Creating Storyboards with Wondershare Filmora
Creating storyboards in the traditional paper and pencil format is undoubtedly an absolute fun activity, but it has the limitations of a customary image drawing. If you want to supplement the contents of your storyboard with additional elements of animations, effects, background themes and music, it would be better to work with storyboard creator software.
Browsing through the heap of alternatives across the web and the IT market, you can conveniently choose to work with the Wondershare Wondershare Filmora Video Editor to address the concern. The obvious reason behind the huge preference ratio of the software is its feature rich library. The editor’s customization space houses a plethora of theme centered storyboard templates, along with extensive diversities of audio-visual effects, filters and elements to adorn your craft with elegance and appropriate detailing at the same time.
For Win 7 or later (64-bit)
For macOS 10.12 or later
Part 3 Storyboard Q&A
● How can the storyboard creation process be quickly addressed?
When aiming to quickly address the concern of creating storyboards, picking up an online template is a better option in comparison to the traditional pencil and paper drawing. As of working with the web based alternatives, you can add sketches, scripts and notes within the storyboard cells to make them more impressive and detailed.
● What should be the ideal expanse of a storyboard?
There is no hard and fast rule to decide the optimum number of cells or pages for your storyboard. The page count may have variations in line with the content and detailing of the scenes they are crafted to showcase.
● Is it essential to include every shot within the storyboard?
On a general note, every shot within your script does not require an inclusion within the storyboard. The answer to this query however, largely depends on the intensity of detailing you wish to add and the diversity of ideas and elements you want to incorporate within the storyboard of a specific film scene.
● What are the essentials of a good storyboard?
When attempting to create a good storyboard, pay attention to the fluent transition of the text centered ideas into pictorial representations. Your video script should possess the right quantity of information to make anyone easily understand the content depiction without having a prior walk-through of your script. Abstain from creating an information overflow either, lest you would end up hiding away the relevant details.
● What are the major parts of a storyboard?
A well-crafted storyboard comprises of 4 important elements. There are namely, the subject of the shot or scene, a suitable and cohesive background, a properly angled camera shot of the main character within the scene and a responsive camera movement.
● Ending Thoughts →
● Storyboards are considered as crucial elements of the video customization process with the domain of professional film production.
● When turning your text based script into a storyboard, pay enough heed towards assuring a seamless transition of words into relevant images.
● If you are concerned about choosing a reliable software alternative to work with crafting storyboards, you can end your search by picking the Wondershare Filmora editor program.
In this article
01 [The Fundamentals to Get You Started on Storyboard](#Part 1)
02 [How to Turn a Script into a Storyboard?](#Part 2)
03 [Storyboard Q&A](#Part 3)
Part 1 The Fundamentals to Get You Started on Storyboard
Speaking in the light of blooming your creative skills and abilities, the realm of graphic and video editing has managed to unleash a never ending and dimensionless canvas to experiment with your skills. Talking of the most recent add-ons to the already long list of utilities, storyboards have emerged as a revolution in the field of motion graphic customization and design.
Diving a bit deeper into understanding the credibility of storyboards, let us move ahead with having an insight of different aspects and elements of the same in the upcoming sections of this article:
What is a Storyboard?
Attempting to define a storyboard, you can regard the utility as a sequential setup of sketches, images, elements and illustrations that create a road map to address a video editing task. Dividing the entire process into a series of individual processes, the aforesaid facility caters to ease out the video creation task.
Moving ahead to draft a technical explanation of storyboards, they are a collection of chronologically arranged drawings, supplemented with video customization elements, such as dialogues, camera direction and other allied detailing. The fundamental merit of these visual arrangements lies in the sequential and scene unfolding of a video footage.
This in turn, works to simplify the film creation process, while ensuring the latter’s cohesiveness and facilitating the elimination of errors and inconsistencies. It is a common mistake to regard storyboards as a midway and optional utility, these trial and error representations are quite essential to ensure a flawless video output in the final stage of design. The facility works additionally to minimize unnecessary production delays, while significantly cutting down on the overall creation cost.
Having a visibility more or less similar to a comic strip, storyboards have a varying scale of design, ranging from being modestly simple to explicitly complex, in cohesion with the specific creation requirements. These visual scripts are mostly hand crafted, through there are a host of storyboard creation software packages and programs available in the IT design market, as well as across the web.
Extending our discussion a bit further, let us have a walk-through of the essential storyboard categories and types in what follows next:
● Traditional Storyboards
These are a logically placed sequence of hand crafted drawings in ink or pencil for representing the video filming chronology, prior to the start of the actual creation process. You can conveniently observe the sequential arrangement of your video elements through these storyboards by placing them at a suitable space, like your studio wall.
You are granted the liberty to add as much detailing to these drawings as you wish, while using them for filming either a single or a series of film shots. These easily editable storyboards are often supplemented with written text notes for describing the events of a specific scene.
● Thumbnail Storyboards
These are rather small storyboards, mostly of a postage stamp size, that depict a sequence of the video elements and scenes on separate paper pieces. Owing to their miniature size, these storyboards are relatively easier to craft, require a lesser creation time and have much fewer details in comparison to their traditional counterparts.
This category of storyboards comes credible in catering a quick jot down of video creation ideas, before you proceed to analyze each element in a more comprehensive manner through the traditional alternatives.
● Animated Storyboards
This class of storyboards comes into play when you aim to craft complex video outlines, while supplementing the same with additional elements of music and dialogues. These are designed essentially to depict the general scene flow through the characteristics of time and pace in a series of animated sketches.
As of creating these storyboards, there is a diversity of online and software based utilities to address the concern. Such facilities work to integrate the images within a sketch into a single video, while adding life to the footage within a span of several minutes. The creation process is quite simple, without a download or software learning requirement.
01What are the Advantages of Using a Storyboard?
Now that you have developed a fundamental understanding of what is a storyboard, it is of great importance to know the utility is not just limited to crafting a sequential video script. There are a heap of additional merits that come at your disposal when you opt to create an outline for a visual footage with the facility. Discussing along the line, let us have a walk-through of the benefits of working with storyboards in what follows next:
02Merits of Using Storyboards
● Cut Down on Errors and Unnecessary Costs
Encountering mistakes in the video creation process is a rather common incident, but can cause serious and undesired financial implications. While using the storyboard facility does not absolutely guarantee the absence of errors, it can work to potentially reduce the intensity and financial impact involved in fixing the issue. With a little bit of extra effort and employing your creative assets, you can bring down the cumulative video creation cost to a significant level.
● Get a Futuristic Preview of Your Video
When you have crafted a storyboard for a video you are about to create, it becomes quite easy to visualize the sequential flow of the latter’s elements and scenes. This in turn, grants you the liberty to decide on the suitability of particular shots in a close observation. While you can choose to retain the perfect ones, there is a chance to improvise the video pieces that fall short of the credibility mark.
You are additionally facilitated with the scope of crafting a series of storyboards for a specific video creation idea. This allows a comparative analysis of the different film design prospects, so that you can easily pick the best and most cohesive presentation sequence and style with respect to the liking and interest of your target audience.
● Simplify the Video Creation Process
The storyboard utility is advantageous in providing you with a clear and targeted vision to proceed with the video production process. Functioning more like a road map, the utility caters to guide you at every step of creating, styling, customizing and animating your footage. The overall impact of using the facility is an improved working efficiency, surety of following the right direction and saving a lot of precious time.
● Develop an Enhanced Collaboration with Your Creative Team
If you are working with software based storyboarding assets, most of the times you may be facilitated with an option to share and collaborate your work. Apart from being the perfect stage to discuss the different ideas of video production, storyboard collaboration works to extend a cohesive response from your creative team to deliver a high end video production output by having enough to discuss about crafting, improving and styling the footage.
● Bring In Potential Investors
A well-crafted storyboard is a concise and futuristic representation of a video or film creation project that you are planning to take on the floors. You can use these cost effective ideas to put forward the blueprint of your craft, production creativity and vision in front of your targeted project investors.
This will in turn, give you an exact idea of their funding constraints, while simultaneously letting the investors have a deep insight about what to expect in the final production output. What’s best is, you don’t need high end accessories to showcase your art. An normal paper and pencil drawing will work fine.
03Great and Rare Storyboard Examples
Walking through the significance and benefits of working with storyboards can be a sufficient motivation to try hands at crafting out your own art pieces with the facility. It is however, always a smart choice to observe and study some actual creation examples to improvise your understanding of the concept to proceed with a greater confidence towards the production process.
Adhering to the concern, here are a few state of the art storyboard creation examples to boost up your familiarity and confidence to work with these video scripts. You can additionally draw out a diversity of ideas and thoughts to use in your project from these examples.
● Spiderman 2 Action Sequence
The following is an animated storyboard example from the classic Spiderman 2 movie released in 2004. The drawing represents a fight sequence between the hero Spiderman and Dr Octopus, his villainous counterpart at the top of a high speed moving train. Being a visually spectacular piece of graphic art, the video script aims to showcase a clear depiction of the moving elements within each of the sequentially arranged shots in a specific direction. This facilitates a concise and exact understanding of the final production output requirement by the video creation team.
● Tomorrow Never Dies
The following video storyboard aims at depicting an escape sequence from the Tomorrow Never Dies flick, centered on the adventures of James Bond, the epic fictional detective. While the latter is customary to dramatic refuges, this one claims to be an inaugural attempt under a big production banner.
Extending the lineage of the top rated storyboards, this video script also targets the depiction of the pivotal shots to be filmed out. A few of the elements include James Bond attempting to cut through the rope with a gigantic knife, an inversely panned shot of a banner being torn from the center, and the mid-air swinging of James Bond with his lady love.
● The Sound of Music
If you are fascinated towards creating musical video and film production, referring the following storyboard can present before you an expansive and impressive set of ideas. This storyboard was essentially crafted by Maurice Zuberano for sketching out the musical and dance sequences of the movie, The Sound of Music. While the aforesaid storyboard bears the closest possible resemblance to the original scene in the film, you can take a look at the same to achieve a notable perfection in video scripting.
Part 2 How to Turn a Script into a Storyboard?
Crafting storyboards for video production is a wise step to avail a series of economic and design centered benefits. While the utility works to define a sequential arrangement of shots and elements in a specific video scene, the real effort lies in converting a text centered movie or scene script into a storyboard. Talking of the ways to address this concern, let us discuss about these storyboard essentials in some detail in what follows next:
What Comes First – Script or Storyboard?
Before beginning to comment on the sequence of the aforesaid elements within a film production process, let us first proceed to have an understanding of the terms in a fundamental sense. A script is essentially a text based document that presents a cumulative picture of the video story by unveiling the latter’s storyline and theme. Storyboards on the other hand, are pictorial representations of sequentially arranged shots of the movie with a much more comprehensive detailing.
Going through the above definitions, the obvious and logical sequence of filming out a video is quite clear with scripts preceding the storyboards. Talking a bit on the credibility aspect of these video production stages, the film’s script caters to provide an elementary insight into some of the most essential visual commands. Crafting a storyboard on the other hand, is dedicated towards depicting a detailed follow through of each shot in line with the events described in the script.
Working towards a classic and professional video production task, hence demands a drafting of the latter’s script, which is then succeeded by crafting a storyboard. This facilitates a seamless and easy video creation process with lesser ambiguities. Having talked enough about scripts and storyboards, let us now move ahead with creating storyboards from a film script in the following section:
User’s Guide to Transform a Script into a Storyboard
Step 1: Identify and Pen Down an Amazing Content Idea
Begin with identifying a captivating story idea that you desire of implementing into a video production.
When you have found one, proceed to jot down the same in relatable and cohesive text to keep a record of the same.
This will help you to structurize the plot of your story and decide the flow of the events occurring within.
Step 2: Let’s Start Storyboarding!
Move ahead to planning the sequential placement of shots and scenes of the story in line with the script that you have just created. It is a great idea to pick an array of 4-6 movement shots for a particular scene, so that you can have a sufficient cell spacing to expand the detailing of shot elements. This further caters to a convenient and spatial arrangement of the cells on a standard sized paper.
You can now start to create your storyboard by adding labels to the scenes, penning down the directions, including the specific character dialogues and suitable images.
Step 3: Prepare a Layout of Your Storyboards
When you are done with adding all the elements of the script into the storyboard cells, proceed to lay them out in a specific pattern. This step comes quite handy in checking for the continuity and detailing accuracy of the depicted shots. You can further, improvise the elements if needed, or advance to the next step if everything seems fine.
,
Step 4: Revise Your Craft
Being an experienced and professional worker, you may well proceed to start filming your video at this stage. In an otherwise case however, you may need to make a revision of the crafted storyboard for a much more detailed and comprehensive observation. You can work to include an elusive paly of effects, lighting cues, background music and characters, camera motions, and a series of additional elements that seem to uplift your creation.
Paying attention to the aspect or revising your storyboards caters to a much more improvised and professionally sound presentation of your video production idea in front of the target audience. If not so, you can make your roughly crafted storyboard shine on with a little bit of extra and finer detailing, and that is it! Your story is ready to strike the floors!
How Can I Get Better at Storyboarding?
Speaking in the light of film production assets and utilities, storyboarding is more of a creative art rather than a customary process or production stage. While it requires consistent effort and practice to master the craft, adhering to some handy tips and tricks can be of great help to improve your skills at creating expressive and finely detailed storyboards.
Heading towards sorting the aforesaid query, the following section presents a concise description of a few amazing and unique storyboard creation guidelines and tricks to present the storyboarding craft at its best:
● Stop Aiming to Become a Perfectionist
Considering the fact that you are crafting the storyboard just for the purpose of depicting a sequence of video shots, do not aim at defining every element in comprehensive detail. Instead of making a fresh attempt to depict every minor change, pay more attention towards highlighting the significant points of action within a particular scene.
● Prefer Numbering the Storyboard Panels
Since the storyboard you are creating works as a blueprint for the video creation team, it should be convenient to understand and navigate through. Presenting the cells of your storyboard in a numbered sequence tends to provide an easy follow through of the same to the rest of your viewers.
● Explore Your Imagination
Your storyboard happens to be the inaugural representation of your video production idea and script in front of the potential audience. You should hence, proceed with the latter’s crafting process while keeping a close reference with the drafted script. Also, it becomes greatly important to add the imaginative element to your creation to avoid creating an bland and customary impression on the audience.
● Feedback Has a Great Importance
Make sure to showcase your storyboard to your project investors, prior to beginning with the film creation process. This will aid you with an escape from the unnecessary changes that can pop out from the audience at the last minute, leading to an unwanted financial expense. Pay attention to gather and work on the feedback of the viewers and start the actual creation process only after everything seems to be well settled.
● Enjoy Your Work
Enjoying the different aspects of your work is the key to achieve mastery at your craft and a welcoming response from the audience. Accepted that the storyboarding process is mind straining and time consuming, but taking on the challenge with a fun centered attitude will let your hard work shine on in front of the viewers.
Creating Storyboards with Wondershare Filmora
Creating storyboards in the traditional paper and pencil format is undoubtedly an absolute fun activity, but it has the limitations of a customary image drawing. If you want to supplement the contents of your storyboard with additional elements of animations, effects, background themes and music, it would be better to work with storyboard creator software.
Browsing through the heap of alternatives across the web and the IT market, you can conveniently choose to work with the Wondershare Wondershare Filmora Video Editor to address the concern. The obvious reason behind the huge preference ratio of the software is its feature rich library. The editor’s customization space houses a plethora of theme centered storyboard templates, along with extensive diversities of audio-visual effects, filters and elements to adorn your craft with elegance and appropriate detailing at the same time.
For Win 7 or later (64-bit)
For macOS 10.12 or later
Part 3 Storyboard Q&A
● How can the storyboard creation process be quickly addressed?
When aiming to quickly address the concern of creating storyboards, picking up an online template is a better option in comparison to the traditional pencil and paper drawing. As of working with the web based alternatives, you can add sketches, scripts and notes within the storyboard cells to make them more impressive and detailed.
● What should be the ideal expanse of a storyboard?
There is no hard and fast rule to decide the optimum number of cells or pages for your storyboard. The page count may have variations in line with the content and detailing of the scenes they are crafted to showcase.
● Is it essential to include every shot within the storyboard?
On a general note, every shot within your script does not require an inclusion within the storyboard. The answer to this query however, largely depends on the intensity of detailing you wish to add and the diversity of ideas and elements you want to incorporate within the storyboard of a specific film scene.
● What are the essentials of a good storyboard?
When attempting to create a good storyboard, pay attention to the fluent transition of the text centered ideas into pictorial representations. Your video script should possess the right quantity of information to make anyone easily understand the content depiction without having a prior walk-through of your script. Abstain from creating an information overflow either, lest you would end up hiding away the relevant details.
● What are the major parts of a storyboard?
A well-crafted storyboard comprises of 4 important elements. There are namely, the subject of the shot or scene, a suitable and cohesive background, a properly angled camera shot of the main character within the scene and a responsive camera movement.
● Ending Thoughts →
● Storyboards are considered as crucial elements of the video customization process with the domain of professional film production.
● When turning your text based script into a storyboard, pay enough heed towards assuring a seamless transition of words into relevant images.
● If you are concerned about choosing a reliable software alternative to work with crafting storyboards, you can end your search by picking the Wondershare Filmora editor program.
Also read:
- Updated With This Article, We Will Be Looking at Steps to Rotate a Video in Cyberlink PowerDirector to Help You when Required. We Have Also Mentioned the Steps You Will Need to Follow in Wondershare Filmora for 2024
- New Top Free Video Editing Software Enhance Your Content with These Essential Tools
- What Can Be Better than Converting Apple Video Format Into Other Formats so that You Can Use the Files Easily. We Have a Few Options that You Can Use for This Purpose for 2024
- 2 Actionable Ways to Extract Subtitles From MKV Videos without Quality Loss for 2024
- How to Slow-Mo YouTube Videos
- Updated Detailed Tutorial to Rotate Videos in Cyberlink PowerDirector for 2024
- 2024 Approved A Guide to Find a High-Quality Video Marketing Agency
- Detailed Tutorial to Resize Your Video in VLC
- Updated In 2024, This Article Provides Helpful Tips for Creating Better Film Footage in Public Places. Learn How to Choose the Right Angle and Re-Record the Audio with Filmora
- New 2024 Approved 20 Best Text To Speech Software Windows, Mac, Android, iPhone & O
- In 2024, Find Out How to Add Subtitles in the VLC Media Player on Your Windows and Mac System with Quick and Simple Instructions
- New 2024 Approved How to Color Correct in OBS
- Updated How to Perform Mask Tracking Discovering the Best Methods for 2024
- How to Convert Videos to Slow Motion? Complete Guide
- New In 2024, Lets Introduce the Top 5 Applications to Add a Song to a Video for Free with some Amazing Sound and Visual Effects
- New Discover 30+ Amazing Templates for VN Video Editor to Elevate Your Videos. Create Professional-Looking Videos with Ease for 2024
- Updated In 2024, The Glitch Effect Shows Errors and Flaws in the Image or a Video. The Write-Up Presents the Complete Procedure of Adding Premiere Pros Glitch Effect and Introduces Eight Free Glitch Effects
- How To Use Virtual Green Screen to Shoot Video for 2024
- The Complete Guide to Make a Text Collage
- In 2024, Lets Look at Four Different Ways of Merging Audios and Videos. The Tools Will Help You Craft High-End Videos without Involving Any Complex Steps. You Can Make Your Videos Beautiful by Using the Following Easy to Use Tools
- 10 Best Free Text to Speech Software Windows, Mac,Android, iPhone & Online
- New Create Amazing Slow-Motion Videos 8 Affordable Slow-Motion Cameras for 2024
- Updated In 2024, Kdenlive Review – Is It The Best Video Editor?
- 5 Tried-And-True Ways to GIF Making
- In 2024, Text Animation Intro Tutorial in Filmora
- How to Cast Realme 11X 5G Screen to PC Using WiFi | Dr.fone
- How to Screen Mirroring OnePlus 12? | Dr.fone
- Preparation to Beat Giovani in Pokemon Go For Tecno Spark 10 4G | Dr.fone
- Updated Nurturing the Spirit Through the Top 10 Intellectual Anime Websites
- How to Transfer Data After Switching From Vivo Y100A to Latest Samsung | Dr.fone
- 3 Ways for Android Pokemon Go Spoofing On Itel A60 | Dr.fone
- 8 Ultimate Fixes for Google Play Your Lava Blaze Pro 5G Isnt Compatible | Dr.fone
- Best Android Data Recovery - Retrieve Lost Photos from Nubia .
- Easy steps to recover deleted videos from X6 Pro
- The Updated Method to Bypass Honor Magic5 Ultimate FRP
- Hard Reset Nokia G42 5G in 3 Efficient Ways | Dr.fone
- Does Airplane Mode Turn off GPS Location On Apple iPhone 13 mini? | Dr.fone
- How to Fix Life360 Shows Wrong Location On Apple iPhone 7? | Dr.fone
- How to Factory Reset Honor V Purse If I Forgot Security Code or Password? | Dr.fone
- New What Is AI Advertising?
- In 2024, The Easy Way to Remove an Apple ID from Your MacBook For your iPhone 7
- Updated 2024 Approved Must-Read Learn From Deepfake Scandals & Protect Your Stream
- In 2024, How Do You Get Sun Stone Evolutions in Pokémon For Samsung Galaxy A15 5G? | Dr.fone
- 4 solution to get rid of pokemon fail to detect location On Apple iPhone 15 | Dr.fone
- Title: Updated In 2024, 10 Best Mp3 Visualizers Windows, Mac, Android, iPhone & Online
- Author: Morgan
- Created at : 2024-05-19 05:12:47
- Updated at : 2024-05-20 05:12:47
- Link: https://ai-video-editing.techidaily.com/updated-in-2024-10-best-mp3-visualizers-windows-mac-android-iphone-and-online/
- License: This work is licensed under CC BY-NC-SA 4.0.
