
:max_bytes(150000):strip_icc():format(webp)/computerkeyboard-5c070d3ec9e77c0001b19701.jpg)
Updated In 2024, 10 Best Music Video Templates to Make Your Video Popular
10 Best Music Video Templates to Make Your Video Popular
Music is essentially the food to the soul. A good song could pull you out of a bad mood or cheer you up when you feel low. You could also use music to motivate you to do tedious tasks, like tackling a mountain of dishes at the sink. In addition to having a catchy beat and rhythm, a good song should accompany a well-executed music video.
If you are a novice and new to the music industry, you might wonder how to make your video look stunning and polished to excite your fans. This article will discuss the ten best templates on Filmstock and how to incorporate them into your music video.

- Retro Music Visualization Background Video Template
- Audio Visualization Intro Template for Your Music Video
- Visualizer Overlays Pack Templates for Music Videos
- Audio Visualization Music Video Template
- Audio Spectrum Template for Music Video
- Music Playlist Video Title Pack Template Free for Download
- Lyrics for Music Video Templates
- Music Event Templates Pack for Your Video
- VJ Looping Backgrounds Templates for Music Videos
- EDM Logo Templates for Music Videos
- How To Edit Your Next Music Video With Templates Using Filmora for Desktop
- How To Use Music Video Templates With Filmora for Mobile
- Tips for Editing Your Music Videos
10 Best Music Video Templates
Without dilly-dallying too much, let’s look at some amazing templates from Filmstock you can use to edit your music videos.
1. Retro Music Visualization Background Video Template
The looping background in our first music video template removes the tedium from editing. Once you ensure your soundtrack is flawless, the template takes it to a whole new level, almost like giving it a facelift. The bright neon and pastel colors are sure to keep your audience glued to their screens, unable to look away from the masterpiece before their eyes.
2. Audio Visualization Intro Template for Your Music Video
This audio visualization intro template is beautifully designed and easy to use for even the least experienced editor. All you need to do is pair it with your favorite soundtrack; the template will match it to the audio animation. This intro template is compatible with Filmora 9.6 and above and comes with 12 titles and 12 effects. Sadly, there are no transitions here.
3. Visualizer Overlays Pack Templates for Music Videos
Perhaps your music videos are a bit bland, or your audience has grown used to a particular editing style. This music template video is a sure way to refresh your videos and introduce your audience to a whole new side of you. Even though it contains plenty of bright colors similar to other templates on our list, we guarantee it shines bright uniquely.
4. Audio Visualization Music Video Template
Podcasts are a new type of content where the viewers can plug in their headphones and listen to you rant while they complete their chores. You could take your podcast videos to the next level using this audio visualization template, which is easy to use and contains deep, rich colors that are easy on the eyes.
5. Audio Spectrum Template for Music Video
There is no shortage of templates with beautiful bold colors on our list. This audio spectrum template is definitely one of them. It also contains geometric shapes and futuristic designs to wow your audience.
6. Music Playlist Video Title Pack Template Free for Download
Some viewers prefer to watch one long video with their favorite artist’s songs bundled up in one place. This template for music video can provide the perfect background for your viewers as they enjoy their beloved songs.
7. Lyrics for Music Video Templates
This fun template takes the boredom out of any music video and allows your audience to enjoy both the auditory and visual experience simultaneously. The lyrics for music video templates are suitable for Filmora 9.6 and above and come with a whopping 16 titles, 17 elements, and four transitions.
8. Music Event Templates Pack for Your Video
The eighth music video template on our list is inspired by concerts and dance clubs, even though it is not as loud or chaotic. This template is compatible with Filmora 9.6 and above and comes with 14 titles, ten elements, four effects, and two transitions. Since you will be adding your own audio track, it’s not such a bummer that it doesn’t come with music.
9. VJ Looping Backgrounds Templates for Music Videos
The modern and futuristic look in the VJ looping background template makes it a great choice for concert-type videos or anything related to sci-fi. The bright colors are hard to miss and will wow your audience.
The VJ looping background template is easy to incorporate into any project, and within a few simple clicks, your video is ready for viewing. You can use this template with Filmora 9.6 and above. However, it only comes with 36 elements. There are no titles, transitions, or effects.
10. EDM Logo Templates for Music Videos
Last but not least, this EDM logo template is compatible with Filmora 9.6 or above and comes with six titles, eight elements, and two effects. Unfortunately, the package doesn’t include any transitions. This electronic video template is perfect for concerts and festival-related music videos that are anything but laid-back.
How To Edit Your Next Music Video With Templates Using Filmora for Desktop
Having seen the beautiful templates for your music video discussed above, you might wonder how you could use them in your next music video to increase traffic to your channel. Wondershare Filmora is an excellent editing tool that can help you achieve exactly that. The desktop version is free to download, not to mention its feature-rich interface and templates you can’t possibly exhaust.
Free Download For Win 7 or later(64-bit)
Free Download For macOS 10.14 or later
Below is a step-by-step guide on how to edit your video with a music video template**.**
Step1 Launch Filmora for desktop on your device and click on the logo to import media from your internal storage. Alternatively, you could drag and drop the files in the designated region as shown.

Step2 Navigate to the “Template” tab and wait for a drop-down menu to appear on the left side of the screen. Select the “Music” tab and wait a few seconds for the platform to download all the available music templates. Click the template that tickles your fancy and drag it to the timeline as shown below.

Step3 Select the “Media” tab at the top of the page. Drag your soundtrack and music video to the timeline and click “Replace” to remove the sample footage that comes with the template.

Step4 Customize your video by adding effects, transitions, and stickers as you see fit. View the changes you have made in the Player window of the platform. Once you are happy with the outcome, click “Export” to save a copy of the final video to your device.

If you want to add more custom designs to your music video, watch the video below to learn more:
How To Use Music Video Templates With Filmora for Mobile
Suppose you want to use your mobile phone to edit a short video clip. Filmora has a mobile app, which is no different from the desktop app, except that it is optimized for smartphones and tablets. The installation is pretty easy, and the interface is very user-friendly.
Stick around to learn how to use Filmora for mobile to edit your video with a free music video template.
Step1 Launch the app on your mobile phone and select the “Template” tab.

Step2 Navigate to the “Lyrics” or “Music Beats” tab to start perusing music video templates on the app.

Step3 Choose a template you like and tap on the “Make Video” button.

Step4 import your music video or photos from your internal storage. Select “Go >” to apply the changes.

Step5 Preview the resulting footage and click “Export” once you are happy with the outcome.

Step6 You can share the video directly on any of your social media platforms. Alternatively, if you want to download the edited video to your device, select “More.”

Tips for Editing Your Music Videos
Now that you have the ideal editing tool to take your videos from drab to fab, here are a few tips to help you along the way.
- Ensure you set the output file to the appropriate resolution to avoid lowering the quality of the video you edit.
- Resist the temptation to insert the artsy shots before you lay a basic framework. It would be wise to focus on the musician’s performance before you insert shots of the beautiful scenery.
- As you edit, it would help to create a storyline that matches the lyrics. You could create a simple story or a complex one.
- Since your computer might struggle to process numerous 4k videos, it would help to create proxy files as early as possible so you can save your progress along the way.
- During filming, create and collect your favorite b-roll shots. These clips provide extra information or context to anyone watching your music video.
- Ensure you match the video to the beat and look out for areas where the performer sings along. We guarantee your fans will notice the slightest delay between the song and the performer in the video.
- Once the music video looks polished and synchronized, you can adjust brightness, contrast, and exposure and change the white balance.
- Lastly, you could begin or end the video with the artists’ credits, such as their names or logo. Since it is a relevant piece of information, ensure this segment of the video grabs the viewers’ attention.
Conclusion
If you want your song to go viral, you ought to put in the work and make the video as good as the soundtrack. Nothing is as bad as a good song with a poorly executed video. Your fans will definitely criticize you for it, making the ratings go down.
Fortunately, the guidelines in this article will set you on the right path and help you make a polished-looking music video in no time.
10 Best Music Video Templates
Without dilly-dallying too much, let’s look at some amazing templates from Filmstock you can use to edit your music videos.
1. Retro Music Visualization Background Video Template
The looping background in our first music video template removes the tedium from editing. Once you ensure your soundtrack is flawless, the template takes it to a whole new level, almost like giving it a facelift. The bright neon and pastel colors are sure to keep your audience glued to their screens, unable to look away from the masterpiece before their eyes.
2. Audio Visualization Intro Template for Your Music Video
This audio visualization intro template is beautifully designed and easy to use for even the least experienced editor. All you need to do is pair it with your favorite soundtrack; the template will match it to the audio animation. This intro template is compatible with Filmora 9.6 and above and comes with 12 titles and 12 effects. Sadly, there are no transitions here.
3. Visualizer Overlays Pack Templates for Music Videos
Perhaps your music videos are a bit bland, or your audience has grown used to a particular editing style. This music template video is a sure way to refresh your videos and introduce your audience to a whole new side of you. Even though it contains plenty of bright colors similar to other templates on our list, we guarantee it shines bright uniquely.
4. Audio Visualization Music Video Template
Podcasts are a new type of content where the viewers can plug in their headphones and listen to you rant while they complete their chores. You could take your podcast videos to the next level using this audio visualization template, which is easy to use and contains deep, rich colors that are easy on the eyes.
5. Audio Spectrum Template for Music Video
There is no shortage of templates with beautiful bold colors on our list. This audio spectrum template is definitely one of them. It also contains geometric shapes and futuristic designs to wow your audience.
6. Music Playlist Video Title Pack Template Free for Download
Some viewers prefer to watch one long video with their favorite artist’s songs bundled up in one place. This template for music video can provide the perfect background for your viewers as they enjoy their beloved songs.
7. Lyrics for Music Video Templates
This fun template takes the boredom out of any music video and allows your audience to enjoy both the auditory and visual experience simultaneously. The lyrics for music video templates are suitable for Filmora 9.6 and above and come with a whopping 16 titles, 17 elements, and four transitions.
8. Music Event Templates Pack for Your Video
The eighth music video template on our list is inspired by concerts and dance clubs, even though it is not as loud or chaotic. This template is compatible with Filmora 9.6 and above and comes with 14 titles, ten elements, four effects, and two transitions. Since you will be adding your own audio track, it’s not such a bummer that it doesn’t come with music.
9. VJ Looping Backgrounds Templates for Music Videos
The modern and futuristic look in the VJ looping background template makes it a great choice for concert-type videos or anything related to sci-fi. The bright colors are hard to miss and will wow your audience.
The VJ looping background template is easy to incorporate into any project, and within a few simple clicks, your video is ready for viewing. You can use this template with Filmora 9.6 and above. However, it only comes with 36 elements. There are no titles, transitions, or effects.
10. EDM Logo Templates for Music Videos
Last but not least, this EDM logo template is compatible with Filmora 9.6 or above and comes with six titles, eight elements, and two effects. Unfortunately, the package doesn’t include any transitions. This electronic video template is perfect for concerts and festival-related music videos that are anything but laid-back.
How To Edit Your Next Music Video With Templates Using Filmora for Desktop
Having seen the beautiful templates for your music video discussed above, you might wonder how you could use them in your next music video to increase traffic to your channel. Wondershare Filmora is an excellent editing tool that can help you achieve exactly that. The desktop version is free to download, not to mention its feature-rich interface and templates you can’t possibly exhaust.
Free Download For Win 7 or later(64-bit)
Free Download For macOS 10.14 or later
Below is a step-by-step guide on how to edit your video with a music video template**.**
Step1 Launch Filmora for desktop on your device and click on the logo to import media from your internal storage. Alternatively, you could drag and drop the files in the designated region as shown.
Step2 Navigate to the “Template” tab and wait for a drop-down menu to appear on the left side of the screen. Select the “Music” tab and wait a few seconds for the platform to download all the available music templates. Click the template that tickles your fancy and drag it to the timeline as shown below.
Step3 Select the “Media” tab at the top of the page. Drag your soundtrack and music video to the timeline and click “Replace” to remove the sample footage that comes with the template.
Step4 Customize your video by adding effects, transitions, and stickers as you see fit. View the changes you have made in the Player window of the platform. Once you are happy with the outcome, click “Export” to save a copy of the final video to your device.
If you want to add more custom designs to your music video, watch the video below to learn more:
How To Use Music Video Templates With Filmora for Mobile
Suppose you want to use your mobile phone to edit a short video clip. Filmora has a mobile app, which is no different from the desktop app, except that it is optimized for smartphones and tablets. The installation is pretty easy, and the interface is very user-friendly.
Stick around to learn how to use Filmora for mobile to edit your video with a free music video template.
Step1 Launch the app on your mobile phone and select the “Template” tab.
Step2 Navigate to the “Lyrics” or “Music Beats” tab to start perusing music video templates on the app.
Step3 Choose a template you like and tap on the “Make Video” button.
Step4 import your music video or photos from your internal storage. Select “Go >” to apply the changes.
Step5 Preview the resulting footage and click “Export” once you are happy with the outcome.
Step6 You can share the video directly on any of your social media platforms. Alternatively, if you want to download the edited video to your device, select “More.”
Tips for Editing Your Music Videos
Now that you have the ideal editing tool to take your videos from drab to fab, here are a few tips to help you along the way.
- Ensure you set the output file to the appropriate resolution to avoid lowering the quality of the video you edit.
- Resist the temptation to insert the artsy shots before you lay a basic framework. It would be wise to focus on the musician’s performance before you insert shots of the beautiful scenery.
- As you edit, it would help to create a storyline that matches the lyrics. You could create a simple story or a complex one.
- Since your computer might struggle to process numerous 4k videos, it would help to create proxy files as early as possible so you can save your progress along the way.
- During filming, create and collect your favorite b-roll shots. These clips provide extra information or context to anyone watching your music video.
- Ensure you match the video to the beat and look out for areas where the performer sings along. We guarantee your fans will notice the slightest delay between the song and the performer in the video.
- Once the music video looks polished and synchronized, you can adjust brightness, contrast, and exposure and change the white balance.
- Lastly, you could begin or end the video with the artists’ credits, such as their names or logo. Since it is a relevant piece of information, ensure this segment of the video grabs the viewers’ attention.
Conclusion
If you want your song to go viral, you ought to put in the work and make the video as good as the soundtrack. Nothing is as bad as a good song with a poorly executed video. Your fans will definitely criticize you for it, making the ratings go down.
Fortunately, the guidelines in this article will set you on the right path and help you make a polished-looking music video in no time.
What Is the Best MP4 Cutters for YouTubers on Mac?
Most times, Youtubers need to cut out unnecessary parts from their videos while customizing intros and outros. A common reason is to ensure that videos are engaging and interactive while preventing any lagging. In addition, an aesthetically pleasing video keeps its viewers hooked throughout the video. That’s why cutting MP4 videos are essential for being a Youtuber. However, the question becomes, which is the best MP4 cutter for Youtubers on Mac? This article answers that question succinctly; let’s take a look.
What You Should Know About YouTube Video

YouTubers upload over 300 hours of video content to the platform every second. These videos cut across every niche and topic. There’s scarcely a topic you’re looking for that you won’t find a video or two discussing on YouTube. So as a YouTuber, you have to find ways to keep up and stand out from the crowd. You’ll need engaging videos that will hold your target audience’s attention so much that they will subscribe for more.
However, if the video is too long or your car doesn’t hit the right frame, it will disengage your audience. Additionally, you want a video seamlessly woven together to form a polished video. This makes MP4 cutting an essential part of the YouTube video creation process. There’s no need to purchase pricey editing equipment anymore; you can simply cut your MP4 videos from the comfort of your home. This article explores the best MP4 cutters for YouTubers on Mac; let’s take a look.
Best MP4 Cutter for YouTubers on Mac - Filmroa Video Editor

Supported System: Mac and Windows
Filmora Video Editor makes it relatively easy to cut and edit your videos like a professional. This MP4 cutter is a great option, even if you don’t have video editing skills. It offers an intuitive user interface that makes it an excellent choice for experts and novices. It also provides you with the crucial editing tools to create amazing YouTube videos after cutting your MP4 video files. With this editing tool, you’re sure to produce videos your subscribers enjoy.
With Filmora, you can add effects, color grades, and texts to your videos. There’s also a library filled with royalty-free audio you can explore. After cutting your MP4, you can use templates from this MP4 cutter to create an intro for your YouTube videos. Filmora has many features that will save you a lot of time, and using it to cut MP4 is relatively easy.
For Win 7 or later (64-bit)
For macOS 10.14 or later
Pros
- It offers an intuitive user interface
- There are several effects and overlays to utilize
- Fast rendering of videos
- Offers varying output formats
- Ideal for beginners and experts
Cons
- No DVD Menu
Steps to Cut MP4 Video for YouTubers on Mac Using Filmora
Cutting videos on Filmora is relatively easy. You have to first download and install Filmora on your device. Below are the steps to cut MP4 videos to your preference using Wondershare Filmora.
Step 1: Import MP4 Files
There are two ways you can add MP4 files to this MP4 cutter. You can either click the ‘import’ button and choose the file from your media library or drag the mp4 file to your album. After dragging to the album, drag from the album to the timeline.

Step 2: Cut MP4 Files

After importing your file, you’re ready to cut. First, simply move the indicator to the ideal position you want by dragging the top of the indicator and slider bar. Then, click the scissor button to cut once you move to your preferred time.
You can also delete any part of the MP4 file you don’t want by hitting the ‘delete’ option. If you cut various clips out of the MP4 file, you can rearrange them with the ‘drag and drop tool.
Step 3: Save and Share Cut MP4 File

Now, you can save your newly cut video file by clicking the ‘file’ button at the left corner of the Filmora software and selecting ‘save as’ from the options. The output window will appear, and you can choose the format and if you want to share directly to YouTube. Pick the option that meets your need, and you’re good to go.
More Free MP4 Cutter for YouTubers on Mac to Cut MP4 Videos
Although Wondershare Filmora is the best video cutter for YouTubers on Mac, there are free MP4 cutters you can utilize to cut your videos from the comfort of your home easily. Below, we’ve reviewed the top three options you should consider.
PowerDirector Essential

Supported System: Windows and Mac
If you’re looking for a free MP4 video cutter that ensures fast processing of videos, you should try PowerDirector Essential. This MP4 cutter allows you easily cut your YouTube videos irrespective of your experience level. You’ll be able to cut and edit your YouTube videos within a couple of minutes. In addition, PowerDirector Essential is versatile and allows you to either use the storyboard mode or timeline editor for your cutting needs.
Apart from splitting and cutting tools, you can also explore its library of stylized transitions if you want to significantly upgrade the appearance of your YouTube video professionally. YouTubers want a video cutter that offers video editing features to create your visual effects. This MP4 cutter is excellent for beginners because of its intuitive interface that you can master in minutes. You can also ensure your video has amazing audio and clear video before sharing it on YouTube. If you want high-quality, Hollywood-style videos, this is the best free MP4 cutter to achieve that.
Pros
- It supports several input and output video formats
- Easy cutting and exporting process
- Intuitive and user-friendly interface
- Ideal for beginners
- It offers various video editing tools to enhance your video
Cons
- Some features are only available on the Windows version
How to Cut Video for YouTube on Mac Using PowerDirector Essential
If you want to learn how to easily cut MP4 files using PowerDirector on a Mac computer, follow the steps below.
- Step 1: You have to download PowerDirector software on your Mac and install it. After installation, launch the software, and you’re ready to begin the cutting process.
- Step 2: Now, import the video into PowerDirector by clicking ‘import media file’ and choosing the ideal video file from your media library.

- Step 3: Add the video to your timeline and hover over the right or left edge of the video track. This would make an adjustment arrow appear on both sides of the video file.

- Step 4: Drag the arrows to the point you would like to cut and choose the ‘scissors’ button.

- Step 5: After cutting, go to the ‘produce’ tab and choose ‘online’ if you want to upload a video directly to YouTube. You can also choose to save to your Mac. Choose the output format and location and click ‘start’ to save your newly cut video.
iMovie

Supported System: Mac
iMovie is a free MP4 cutter that’s built into Mac. Therefore, there’s no need to carry out downloads or installation to utilize this editing software. Although it only offers basic editing features, it is excellent if you only want to cut MP4 video files. iMovie is great for beginners as it features a user-friendly interface that’s easy to navigate.
It is the best option for YouTubers because it allows you to crop, trim and arrange video clips in just a few minutes. Additionally, you can add visual effects to your video while also editing the audio file to enhance your video. It also allows you to link your YouTube account to share directly. Therefore, if you’re looking for an MP4 cutter to carry out quick trimming on your videos, iMovie is amongst the best free MP4 cutters.
Pros
- Easy to use and ideal for beginners
- It supports major video formats and allows you to change the output format
- Allows you to store videos in iCloud or share them directly to YouTube
- Free on Mac device
- It offers essential editing tools to enhance your video
Cons
- Editing features are limited
Steps to Cut MP4 Video for YouTube on Mac Using iMovie
This section will explain how you can cut a clip in iMovie within a few minutes. Below are the easy steps you have to follow.
- Step 1: Launch iMovie on Mac and choose ‘import file’ to select the video you want to cut.
- Step 2: To enter full-editing windows, double-click the project. At the end of the video editor, you’ll see the video editor.

- Step 3: Drag the playhead to the position you would like to cut from, and then click on it. Do this for both sides of the video.

- Step 4: Now, click ‘modify’ and choose the ‘split clip’ option to cut the selected part out.

You can delete the rest of the video by selecting it and hitting ‘delete’ on your keyboard.

- Step 5: Finally, save your newly cut video or export it to YouTube directly by clicking ‘export’ under the ‘file’ section.
OpenShot

Supported System: Windows, Mac, and Linux
OpenShot is another free, open-source MP4 cutter that you can easily use on your Mac device. It offers an intuitive interface that makes it easy to drag videos to the interface. Apart from cutting videos, other features are available like scaling, resizing, rotation, trimming, and many more. This YouTube video cutter also provides hundreds of transitions and effects to enhance your YouTube video and make it stand out amongst other Youtube videos. However, this video cutter is only an excellent choice for beginners because it lacks many advanced features.
Pros
- It is easy to use and ideal for beginners
- It offers a sleek interface for easy navigation
- Offers basic editing features
- Versatile and a cross-platform MP4 cutter
Cons
- No advanced features
- It crashes easily
Steps to Cut MP4 for YouTube on Mac Using OpenShot
OpenShot is relatively easy to use and only requires a few steps to cut your MP4 file and upload it to YouTube. Below are the easy steps to follow to cut MP4 for YouTube on Openshot.
- Step 1: First, download the MP4 cutter on your Mac and install it to begin.
- Step 2: Afterward, launch the app and add the video to cut by clicking’ import.’ Alternatively, you can simply drag the video into the app to begin.
- Step 3: Once you get the video on the timeline, drag the red line on both sides of the video to the position you want the video to start and begin.

- Step 4: Right-click on the marker and choose what you want to keep. Next, isolate the fragments from the clip you would like to keep.
- Step 5: Click the fragment you want to delete and press delete on your keyboard. You have to remove the fragments manually until your preferred result remains.
- Step 6: Choose ‘export video’ from the File tab to save your MP4 file. You can change the output format or save it as an MP4.

- Step 7: you can also share videos to your YouTube account; you have to link the YouTube account first.
More Paid MP4 Cutter for YouTubers on Mac to Cut MP4 Videos
Most times, free MP4 cutters offer limited features to enhance your YouTube video. However, there are paid MP4 cutters that will efficiently cut your MP4 files and provide advanced editing tools.
Adobe Premiere Pro

Supported System: Mac and Windows
Advanced editing software that supports different file types, including MP4, is Adobe Premier Pro. This MP4 cutter allows you to quickly trim, split, and cut your MP4. Its intuitive and fast-responding interface ensures that your video is ready within a few minutes. Beyond cutting, there are several other advanced editing features that the editing software offers you. Some include filters, chroma-key, VR editing, color adjustment, and audio editing tools to take your YouTube video to the next level.
Adobe Premiere Pro is not the best option for beginners because of its steep learning curve. However, if you have ample experience with video editing tools and want to professionally cut and edit your YouTube video, this paid MP4 cutter is worth the cost and effort. ‘
Pros
- Advanced video editing features
- Intuitive user interface
- Responsive speed
- Ideal for professional editing
Cons
- Steep learning curve
- Quite pricey
Step to Cut MP4 for YouTube on Mac Using Adobe Premiere Pro
Although Adobe Premiere Pro has an interface that’s quite intimidating to non-professionals, the steps below help simplify cutting your MP4 files for YouTube.
- Firstly, download Adobe Premiere Pro on your Mac and install it.
- After installation, launch the app and select ‘new project’ on the homepage. It will require you to name the new project and choose where you want to save it. Afterward, click ‘ok’ to begin.

- Next, go to ‘file’ and select ‘import from media’ to import the MP4 file you would like to cut. Alternatively, you can simply drag the file to the timeline.

- Next, pick the ripple edit tool and go to the beginning of the video. Drag the handle with the arrow to your desired point. Repeat this at the end of the video.

- Finally, press Q to cut the MP4 clip to the left of the blade. Next, press W to cut the clip to the right.

- Now you can save your file to your preferred file location.
Movavi Video Editor

Supported System: Mac and Windows
This is an efficient MP4 cutter that helps you remove unnecessary scenes from your YouTube videos. The timeline offers you markers that allow you easily locate the start and end scene of the video you would like to remove. Apart from cutting videos, this tool provides several premium features you can use to make your video look professional. Movavi offers a free trial you can use to determine if this editor is the best option for you. However, it comes with a Movavi watermark that you can only eliminate with the paid option.
Movavi Video Editor can add transitions, music tracks, chroma-key effects, special effects, and many more exciting features to ensure a top-quality result. Furthermore, its intuitive interface makes it relatively easy for beginners and professionals to use. Therefore, you don’t have to worry about a stiff learning curve. With Movavi, you can also change the output format to switch from MP4 to another commonly supported format.
Pros
- Simple and easy to use
- Supports various input and output formats
- Provides YouTubers with basic and advanced features
- Ideal for beginners and professionals
Cons
- Video rendering is slow for large files
- The trial version comes with a Movavi watermark
Steps to Cut MP4 for YouTube on Mac Using Movavi Video Editor
For cutting your video on Mac using Movavi video editor, you can follow the steps outlined below.
- First, download and install Movavi Video Editor on your Mac.
- After installing Movavi, launch the editor and click the ‘add files’ button to add your MP4 file.

- Once the file shows up in the media bin, drag it to the timeline to start editing your video.
- To cut your MP4 video, move the red marker at the beginning of the video to where you would like to cut. Repeat this process at the end of the video by moving to where you prefer your video to end.
- Next, click the split button to cut this clip from the rest of the video.

- Now, select the fragments you don’t want and hit the delete button to remove them immediately.

- You can also add several filters to your video if you would like to enhance your video.
- You can now save your video by hitting the ‘export’ button. You can choose different formats and video quality for your newly cut video. Select the folder to save to and click the ‘save’ button.

Davinci Resolve

Supported System: Windows and Mac
Davinci Resolve is a favorite for YouTubers who want their videos to look like Hollywood videos. However, this MP4 cutter is aimed at the professional market and supports different input and output formats for your video. Davinci Resolve offers you a variety of professional features and also supports 8k videos. In addition, it provides advanced video cutting features to ensure your video looks excellent even after cutting. You can also combine video clips after cutting without it looking unprofessional.
Although this video cutter software isn’t the best option for beginners, professional editors are sure to be satisfied with the features this editor offers. It also allows you to export directly to various social media platforms, including YouTube, to save space and time.
Pros
- Basic and advanced editing tools
- Fast rendering of videos
- Supports major video formats and video resolutions
- It offers several special effects to make your video more engaging
Cons
- Not the right option for amateurs
Steps to Cut MP4 for YouTube on Mac Using Davinci Resolve
Cutting your MP4 file on Davinci Resolve is relatively easy. The cut tool helps you cut your YouTube video within seconds. Simply follow the steps outlined below.
- First, download and install the Davinci Resolve on your Mac. After installation, launch the MP4 cutter to begin.
- Next, create a new timeline and choose the ‘edit’ mode to begin.

- Import your video by pressing ‘Command+I’ on your keyboard. Alternatively, you can simply drag the video on the timeline.
- Now, select the cut tool and drag the marker from the beginning to where you would like to cut. Repeat this process at the end of the video.
- Afterward, click the blade button to cut your file to your desired size.

- You can now save your file by hitting the ‘export’ button and choosing your preferred file location.
Which Should I Choose, Free or Paid MP4 Cutter?
You need to consider several factors when you’re choosing the right MP4 cutter. First, you have to consider the type of video you would be editing. For YouTube, you need an MP4 cutter that also offers several video editing features you can use to enhance your video. There’s also a need to consider the available formats and quality you can export in and if the MP4 cutter allows you to add visual effects to make your video stand out on YouTube.
Another factor to consider when choosing between a paid or free MP4 cutter for YouTubers on Mac is your experience level. Are you a professional, or you’re looking for some basic app to simply cut your video? Some paid options take you step-by-step through the process of cutting your MP4 file. This type of MP4 cutter helps you advance your skill. This feature is essential because the more you know, the more you’re willing to learn.
Note that most free MP4 cutters offer limited features. Alternatively, some paid MP4 cutters are only suitable for professionals or have a steep subscription to consider. Consider your budget and if any of the editors offer you the tools you need while being affordable. You need to carefully consider if a free tool is what you’re looking for or if you don’t mind paying for more functionality.
FAQs about cutting MP4 video
- What tools should I look for in an MP4 cutter? You should look for basic cutting tools like trimming, slicing and joining. However, you also want an MP4 cutter that offers several editing features to enhance your YouTube video.
- What do most YouTubers use in cutting their videos? From our experience, most YouTubers use the MP4 cutters provided below. You need to note that some are free while some are paid. Simply pick the cutter that fits your needs.
- How can I improve my video cutting and editing skills? You need a lot of practice to learn how to cut and edit videos professionally. It’s also vital to pick software that allows you to develop your editing and cutting skills with time.
- What is the best video cutting and editing software for YouTube novices? If you’re a novice on YouTube, you can start with any basic MP4 cutter on your device. However, we recommend Wondershare Filmora if you want to develop your cutting and editing skills.
Final Thoughts
Cutting MP4 for your YouTube content is a part of becoming a professional YouTuber. When looking for an MP4 cutter that’s reliable and versatile, the goal is to get the job done without any issue. We’ve reviewed the best MP4 cutters for YouTubers on Mac in this guide. You can choose between free or paid software, depending on your needs. However, the best MP4 cutter for YouTubers on Mac is Wondershare Filmore because it is ideal for beginners and professionals. It also offers you a variety of editing features at an affordable cost.
YouTubers upload over 300 hours of video content to the platform every second. These videos cut across every niche and topic. There’s scarcely a topic you’re looking for that you won’t find a video or two discussing on YouTube. So as a YouTuber, you have to find ways to keep up and stand out from the crowd. You’ll need engaging videos that will hold your target audience’s attention so much that they will subscribe for more.
However, if the video is too long or your car doesn’t hit the right frame, it will disengage your audience. Additionally, you want a video seamlessly woven together to form a polished video. This makes MP4 cutting an essential part of the YouTube video creation process. There’s no need to purchase pricey editing equipment anymore; you can simply cut your MP4 videos from the comfort of your home. This article explores the best MP4 cutters for YouTubers on Mac; let’s take a look.
Best MP4 Cutter for YouTubers on Mac - Filmroa Video Editor
Supported System: Mac and Windows
Filmora Video Editor makes it relatively easy to cut and edit your videos like a professional. This MP4 cutter is a great option, even if you don’t have video editing skills. It offers an intuitive user interface that makes it an excellent choice for experts and novices. It also provides you with the crucial editing tools to create amazing YouTube videos after cutting your MP4 video files. With this editing tool, you’re sure to produce videos your subscribers enjoy.
With Filmora, you can add effects, color grades, and texts to your videos. There’s also a library filled with royalty-free audio you can explore. After cutting your MP4, you can use templates from this MP4 cutter to create an intro for your YouTube videos. Filmora has many features that will save you a lot of time, and using it to cut MP4 is relatively easy.
For Win 7 or later (64-bit)
For macOS 10.14 or later
Pros
- It offers an intuitive user interface
- There are several effects and overlays to utilize
- Fast rendering of videos
- Offers varying output formats
- Ideal for beginners and experts
Cons
- No DVD Menu
Steps to Cut MP4 Video for YouTubers on Mac Using Filmora
Cutting videos on Filmora is relatively easy. You have to first download and install Filmora on your device. Below are the steps to cut MP4 videos to your preference using Wondershare Filmora.
Step 1: Import MP4 Files
There are two ways you can add MP4 files to this MP4 cutter. You can either click the ‘import’ button and choose the file from your media library or drag the mp4 file to your album. After dragging to the album, drag from the album to the timeline.
Step 2: Cut MP4 Files
After importing your file, you’re ready to cut. First, simply move the indicator to the ideal position you want by dragging the top of the indicator and slider bar. Then, click the scissor button to cut once you move to your preferred time.
You can also delete any part of the MP4 file you don’t want by hitting the ‘delete’ option. If you cut various clips out of the MP4 file, you can rearrange them with the ‘drag and drop tool.
Step 3: Save and Share Cut MP4 File
Now, you can save your newly cut video file by clicking the ‘file’ button at the left corner of the Filmora software and selecting ‘save as’ from the options. The output window will appear, and you can choose the format and if you want to share directly to YouTube. Pick the option that meets your need, and you’re good to go.
More Free MP4 Cutter for YouTubers on Mac to Cut MP4 Videos
Although Wondershare Filmora is the best video cutter for YouTubers on Mac, there are free MP4 cutters you can utilize to cut your videos from the comfort of your home easily. Below, we’ve reviewed the top three options you should consider.
PowerDirector Essential
Supported System: Windows and Mac
If you’re looking for a free MP4 video cutter that ensures fast processing of videos, you should try PowerDirector Essential. This MP4 cutter allows you easily cut your YouTube videos irrespective of your experience level. You’ll be able to cut and edit your YouTube videos within a couple of minutes. In addition, PowerDirector Essential is versatile and allows you to either use the storyboard mode or timeline editor for your cutting needs.
Apart from splitting and cutting tools, you can also explore its library of stylized transitions if you want to significantly upgrade the appearance of your YouTube video professionally. YouTubers want a video cutter that offers video editing features to create your visual effects. This MP4 cutter is excellent for beginners because of its intuitive interface that you can master in minutes. You can also ensure your video has amazing audio and clear video before sharing it on YouTube. If you want high-quality, Hollywood-style videos, this is the best free MP4 cutter to achieve that.
Pros
- It supports several input and output video formats
- Easy cutting and exporting process
- Intuitive and user-friendly interface
- Ideal for beginners
- It offers various video editing tools to enhance your video
Cons
- Some features are only available on the Windows version
How to Cut Video for YouTube on Mac Using PowerDirector Essential
If you want to learn how to easily cut MP4 files using PowerDirector on a Mac computer, follow the steps below.
- Step 1: You have to download PowerDirector software on your Mac and install it. After installation, launch the software, and you’re ready to begin the cutting process.
- Step 2: Now, import the video into PowerDirector by clicking ‘import media file’ and choosing the ideal video file from your media library.
- Step 3: Add the video to your timeline and hover over the right or left edge of the video track. This would make an adjustment arrow appear on both sides of the video file.
- Step 4: Drag the arrows to the point you would like to cut and choose the ‘scissors’ button.
- Step 5: After cutting, go to the ‘produce’ tab and choose ‘online’ if you want to upload a video directly to YouTube. You can also choose to save to your Mac. Choose the output format and location and click ‘start’ to save your newly cut video.
iMovie
Supported System: Mac
iMovie is a free MP4 cutter that’s built into Mac. Therefore, there’s no need to carry out downloads or installation to utilize this editing software. Although it only offers basic editing features, it is excellent if you only want to cut MP4 video files. iMovie is great for beginners as it features a user-friendly interface that’s easy to navigate.
It is the best option for YouTubers because it allows you to crop, trim and arrange video clips in just a few minutes. Additionally, you can add visual effects to your video while also editing the audio file to enhance your video. It also allows you to link your YouTube account to share directly. Therefore, if you’re looking for an MP4 cutter to carry out quick trimming on your videos, iMovie is amongst the best free MP4 cutters.
Pros
- Easy to use and ideal for beginners
- It supports major video formats and allows you to change the output format
- Allows you to store videos in iCloud or share them directly to YouTube
- Free on Mac device
- It offers essential editing tools to enhance your video
Cons
- Editing features are limited
Steps to Cut MP4 Video for YouTube on Mac Using iMovie
This section will explain how you can cut a clip in iMovie within a few minutes. Below are the easy steps you have to follow.
- Step 1: Launch iMovie on Mac and choose ‘import file’ to select the video you want to cut.
- Step 2: To enter full-editing windows, double-click the project. At the end of the video editor, you’ll see the video editor.
- Step 3: Drag the playhead to the position you would like to cut from, and then click on it. Do this for both sides of the video.
- Step 4: Now, click ‘modify’ and choose the ‘split clip’ option to cut the selected part out.
You can delete the rest of the video by selecting it and hitting ‘delete’ on your keyboard.
- Step 5: Finally, save your newly cut video or export it to YouTube directly by clicking ‘export’ under the ‘file’ section.
OpenShot
Supported System: Windows, Mac, and Linux
OpenShot is another free, open-source MP4 cutter that you can easily use on your Mac device. It offers an intuitive interface that makes it easy to drag videos to the interface. Apart from cutting videos, other features are available like scaling, resizing, rotation, trimming, and many more. This YouTube video cutter also provides hundreds of transitions and effects to enhance your YouTube video and make it stand out amongst other Youtube videos. However, this video cutter is only an excellent choice for beginners because it lacks many advanced features.
Pros
- It is easy to use and ideal for beginners
- It offers a sleek interface for easy navigation
- Offers basic editing features
- Versatile and a cross-platform MP4 cutter
Cons
- No advanced features
- It crashes easily
Steps to Cut MP4 for YouTube on Mac Using OpenShot
OpenShot is relatively easy to use and only requires a few steps to cut your MP4 file and upload it to YouTube. Below are the easy steps to follow to cut MP4 for YouTube on Openshot.
- Step 1: First, download the MP4 cutter on your Mac and install it to begin.
- Step 2: Afterward, launch the app and add the video to cut by clicking’ import.’ Alternatively, you can simply drag the video into the app to begin.
- Step 3: Once you get the video on the timeline, drag the red line on both sides of the video to the position you want the video to start and begin.
- Step 4: Right-click on the marker and choose what you want to keep. Next, isolate the fragments from the clip you would like to keep.
- Step 5: Click the fragment you want to delete and press delete on your keyboard. You have to remove the fragments manually until your preferred result remains.
- Step 6: Choose ‘export video’ from the File tab to save your MP4 file. You can change the output format or save it as an MP4.
- Step 7: you can also share videos to your YouTube account; you have to link the YouTube account first.
More Paid MP4 Cutter for YouTubers on Mac to Cut MP4 Videos
Most times, free MP4 cutters offer limited features to enhance your YouTube video. However, there are paid MP4 cutters that will efficiently cut your MP4 files and provide advanced editing tools.
Adobe Premiere Pro
Supported System: Mac and Windows
Advanced editing software that supports different file types, including MP4, is Adobe Premier Pro. This MP4 cutter allows you to quickly trim, split, and cut your MP4. Its intuitive and fast-responding interface ensures that your video is ready within a few minutes. Beyond cutting, there are several other advanced editing features that the editing software offers you. Some include filters, chroma-key, VR editing, color adjustment, and audio editing tools to take your YouTube video to the next level.
Adobe Premiere Pro is not the best option for beginners because of its steep learning curve. However, if you have ample experience with video editing tools and want to professionally cut and edit your YouTube video, this paid MP4 cutter is worth the cost and effort. ‘
Pros
- Advanced video editing features
- Intuitive user interface
- Responsive speed
- Ideal for professional editing
Cons
- Steep learning curve
- Quite pricey
Step to Cut MP4 for YouTube on Mac Using Adobe Premiere Pro
Although Adobe Premiere Pro has an interface that’s quite intimidating to non-professionals, the steps below help simplify cutting your MP4 files for YouTube.
- Firstly, download Adobe Premiere Pro on your Mac and install it.
- After installation, launch the app and select ‘new project’ on the homepage. It will require you to name the new project and choose where you want to save it. Afterward, click ‘ok’ to begin.
- Next, go to ‘file’ and select ‘import from media’ to import the MP4 file you would like to cut. Alternatively, you can simply drag the file to the timeline.
- Next, pick the ripple edit tool and go to the beginning of the video. Drag the handle with the arrow to your desired point. Repeat this at the end of the video.
- Finally, press Q to cut the MP4 clip to the left of the blade. Next, press W to cut the clip to the right.
- Now you can save your file to your preferred file location.
Movavi Video Editor
Supported System: Mac and Windows
This is an efficient MP4 cutter that helps you remove unnecessary scenes from your YouTube videos. The timeline offers you markers that allow you easily locate the start and end scene of the video you would like to remove. Apart from cutting videos, this tool provides several premium features you can use to make your video look professional. Movavi offers a free trial you can use to determine if this editor is the best option for you. However, it comes with a Movavi watermark that you can only eliminate with the paid option.
Movavi Video Editor can add transitions, music tracks, chroma-key effects, special effects, and many more exciting features to ensure a top-quality result. Furthermore, its intuitive interface makes it relatively easy for beginners and professionals to use. Therefore, you don’t have to worry about a stiff learning curve. With Movavi, you can also change the output format to switch from MP4 to another commonly supported format.
Pros
- Simple and easy to use
- Supports various input and output formats
- Provides YouTubers with basic and advanced features
- Ideal for beginners and professionals
Cons
- Video rendering is slow for large files
- The trial version comes with a Movavi watermark
Steps to Cut MP4 for YouTube on Mac Using Movavi Video Editor
For cutting your video on Mac using Movavi video editor, you can follow the steps outlined below.
- First, download and install Movavi Video Editor on your Mac.
- After installing Movavi, launch the editor and click the ‘add files’ button to add your MP4 file.
- Once the file shows up in the media bin, drag it to the timeline to start editing your video.
- To cut your MP4 video, move the red marker at the beginning of the video to where you would like to cut. Repeat this process at the end of the video by moving to where you prefer your video to end.
- Next, click the split button to cut this clip from the rest of the video.
- Now, select the fragments you don’t want and hit the delete button to remove them immediately.
- You can also add several filters to your video if you would like to enhance your video.
- You can now save your video by hitting the ‘export’ button. You can choose different formats and video quality for your newly cut video. Select the folder to save to and click the ‘save’ button.
Davinci Resolve
Supported System: Windows and Mac
Davinci Resolve is a favorite for YouTubers who want their videos to look like Hollywood videos. However, this MP4 cutter is aimed at the professional market and supports different input and output formats for your video. Davinci Resolve offers you a variety of professional features and also supports 8k videos. In addition, it provides advanced video cutting features to ensure your video looks excellent even after cutting. You can also combine video clips after cutting without it looking unprofessional.
Although this video cutter software isn’t the best option for beginners, professional editors are sure to be satisfied with the features this editor offers. It also allows you to export directly to various social media platforms, including YouTube, to save space and time.
Pros
- Basic and advanced editing tools
- Fast rendering of videos
- Supports major video formats and video resolutions
- It offers several special effects to make your video more engaging
Cons
- Not the right option for amateurs
Steps to Cut MP4 for YouTube on Mac Using Davinci Resolve
Cutting your MP4 file on Davinci Resolve is relatively easy. The cut tool helps you cut your YouTube video within seconds. Simply follow the steps outlined below.
- First, download and install the Davinci Resolve on your Mac. After installation, launch the MP4 cutter to begin.
- Next, create a new timeline and choose the ‘edit’ mode to begin.
- Import your video by pressing ‘Command+I’ on your keyboard. Alternatively, you can simply drag the video on the timeline.
- Now, select the cut tool and drag the marker from the beginning to where you would like to cut. Repeat this process at the end of the video.
- Afterward, click the blade button to cut your file to your desired size.
- You can now save your file by hitting the ‘export’ button and choosing your preferred file location.
Which Should I Choose, Free or Paid MP4 Cutter?
You need to consider several factors when you’re choosing the right MP4 cutter. First, you have to consider the type of video you would be editing. For YouTube, you need an MP4 cutter that also offers several video editing features you can use to enhance your video. There’s also a need to consider the available formats and quality you can export in and if the MP4 cutter allows you to add visual effects to make your video stand out on YouTube.
Another factor to consider when choosing between a paid or free MP4 cutter for YouTubers on Mac is your experience level. Are you a professional, or you’re looking for some basic app to simply cut your video? Some paid options take you step-by-step through the process of cutting your MP4 file. This type of MP4 cutter helps you advance your skill. This feature is essential because the more you know, the more you’re willing to learn.
Note that most free MP4 cutters offer limited features. Alternatively, some paid MP4 cutters are only suitable for professionals or have a steep subscription to consider. Consider your budget and if any of the editors offer you the tools you need while being affordable. You need to carefully consider if a free tool is what you’re looking for or if you don’t mind paying for more functionality.
FAQs about cutting MP4 video
- What tools should I look for in an MP4 cutter? You should look for basic cutting tools like trimming, slicing and joining. However, you also want an MP4 cutter that offers several editing features to enhance your YouTube video.
- What do most YouTubers use in cutting their videos? From our experience, most YouTubers use the MP4 cutters provided below. You need to note that some are free while some are paid. Simply pick the cutter that fits your needs.
- How can I improve my video cutting and editing skills? You need a lot of practice to learn how to cut and edit videos professionally. It’s also vital to pick software that allows you to develop your editing and cutting skills with time.
- What is the best video cutting and editing software for YouTube novices? If you’re a novice on YouTube, you can start with any basic MP4 cutter on your device. However, we recommend Wondershare Filmora if you want to develop your cutting and editing skills.
Final Thoughts
Cutting MP4 for your YouTube content is a part of becoming a professional YouTuber. When looking for an MP4 cutter that’s reliable and versatile, the goal is to get the job done without any issue. We’ve reviewed the best MP4 cutters for YouTubers on Mac in this guide. You can choose between free or paid software, depending on your needs. However, the best MP4 cutter for YouTubers on Mac is Wondershare Filmore because it is ideal for beginners and professionals. It also offers you a variety of editing features at an affordable cost.
What Is the Best Filmora Slideshow Templates? Experts Choice
47. What is the Best Filmora Slideshow Templates Experts Choice
An easy yet powerful editor
Numerous effects to choose from
Detailed tutorials provided by the official channel
With Filmora software, present information and content through slideshows. Filmora slideshow templates are available on the website free for making effective slideshows.
Part 1 Why Filmora Slideshow Templates Are Popular?
Filmora Slideshow templates are widely used by the users for creating new and impressiveslideshows. The reason for popularity of this software is many such as:
● It is an affordable software/application available free of cost for making slideshows using templates.
● It can run on computers and cell phones also, so there is flexibility in its access.
● It is equipped with various tools and features for both video and audio applications.
● Background effects, picture effects and animation features further make it more popular than the rest of the software.
● It is a good pleasing interface suitable to all content creators whether they are beginners or professionals.
● Video and audio control and video stabilization features make it further popular.
● Advanced text-editing make it possible to add contents in the video slides.
● Templates can be created by adding titles, text, sound, filters, and transitions.
● Theme-based templates are designed and developed looking into the needs f every user for different occasions.
● It has better editing tools like split, merge, rotate, and more.
● Auto-create videos features give the users comfort for using the application by saving their time and energy. Further they can add royalty-free images, videos, and music.
● Aspect ratio for the video creation can be changed.
Part 2 Where to Download Free Filmora Slideshow Templates
To use unlimited and free Filmora slideshow templates, one is required to have the application downloaded from the website. And thereafter one can download the different styles and patterns of templates from section filmora slideshow template free download. Once you create an account in the Filmora platform, you can easily connect with various templates useful for various occasions.
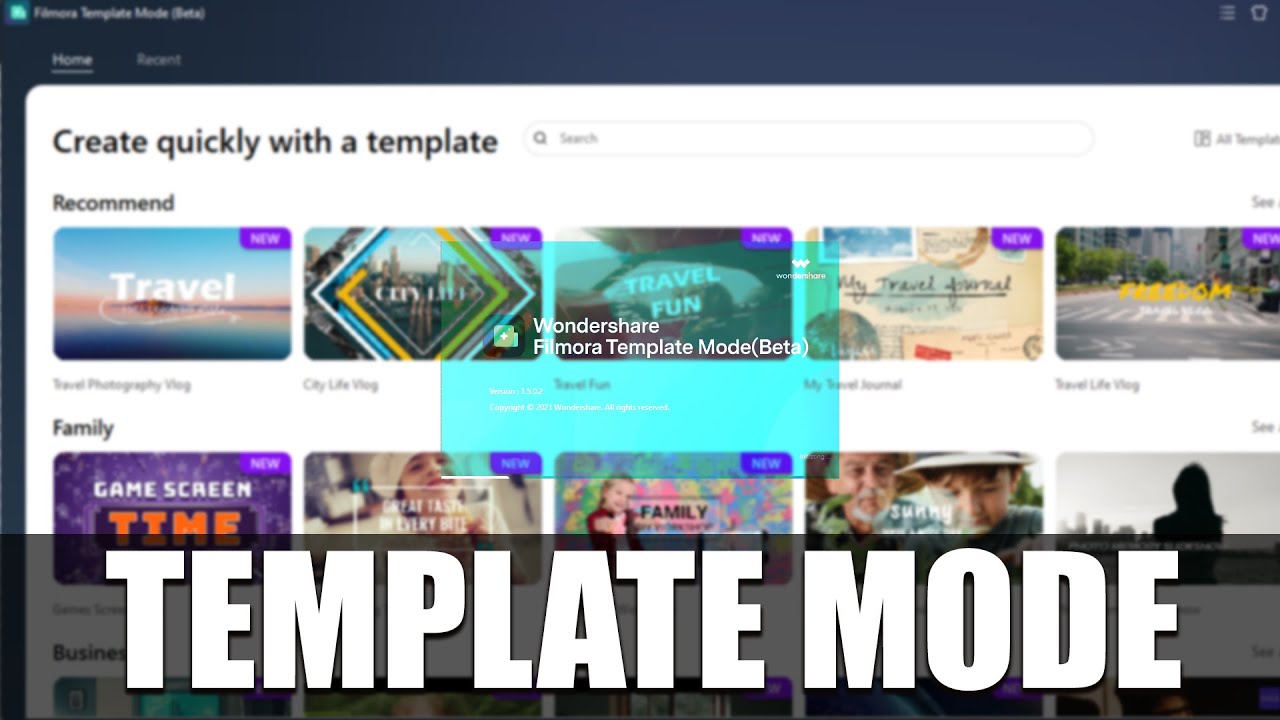
Filmora software or application is the only destination for having a bunch of various templates with many tools to improve the creation of slide shows. One can see the various templates available in the official website of Filmora. One can make slideshow with the help of video maker offered by Filmora. This software is free of cost. The easy-to-use interface feature of this software is good for beginners. It has various in-built customizable templates based in various themes like project, marketing, corporate, celebration, fun, natural, family, and business. It has auto-create mode which saves time and energy of the users as it automatically plays the slides when all media files, pictures or texts are placed over the various slides. For this one is just required to select the different files and click on “Auto-create” option.
Part 3 Best 10 Filmora Slideshow Templates
Filmora has many advanced templates for presentation and slideshow. One can find different kind of templates suitable for creating content and information for various applications. Filmora templates slideshow becomes more attractive when in-built Filmora templates are used. Some of the best 10 Filmora slideshow templates are:

01Business- Proposal Presentation Template
Looking into the business need of business users and marketing professionals, Filmora has developed Business-proposal presentation template with 45 unique custom slides. Business users can create impressive business proposals with various theme and color options. One can insert pictures and text easily in this template and can edit number of times.
02Pitch Deck Template
This template is used to design a pitch deck used by the companies to present at the stage and project about the company. These templates are well designed as they are handled by professionals.
03Company Profile Google Slides Template
It is mostly useful to business professionals to prepare business portfolios. The best thing with these templates is that they are unique, elegant, professional and creative. This template is multipurpose for different business applications.
04Clean Slideshow After Effects Templates
Those who want to make simple but impressive templates, clean slideshow after effect templates are best option. Through this template, one can focus on the main content and can add transitions. Photo slideshows can be easily created through this template.
05Minimal Corporate Presentation
This template is good for the beginners who desire to prepare a simple slideshow. The advantage of this template is that it is easy to use and text can be easily edited. One can insert picture for various corporate and business presentations.
06Corporate Event Promo
A business mostly does promotions and this needs a proper preparation. Corporate event promo presentation template is the best choice for such situations. One can create creative promo slides with such template by adding title and overlays in the template. They can also be edited easily.
07Business Marketing Presentation Layout
Most of the business organizations preferto choose such a template that can present their marketing plan in the best possible way. This Business Marketing Presentation is perfect for every business concern. It comes with nine designing options, through which one can easily replace images and text.
08Event Conference
For creating information and documents over template useful in an event conference, this template of filmora is very useful. The details of event and necessary information can be put in a systematic way through this template. However when played as slideshow, it can reach to maximum number of viewers.
09Mosaic Slideshow
Display of photographs, video albums or glimpse of any events can be impressively done with the help of Mosaic slideshow template. With increasing trends of photo sharing and video making, these templates are gaining popularity.
10Old Fashion Slides
As the name suggests, the templates is good for vintage slideshow. One can use this template for photo and video slideshows. Those who love to be creative, they can use this template.
These are some filmora template slideshow available at the website; however the users can also explore the other category of templates based on occasions at the website of Filmora. Every content creator will surely get desired template to present their information, data and pictures in a unique way.
Part 4 FAQ of Filmora Slideshow Templates
Wondershare Filmora Video Editor is a popular video editing application that also supports making slideshows through the use of various templates. It offers advance editing software for those who love to be creative and present their content in an artistic way. The various features of the software like elegant transitions, beautiful slides, video effects, text, audio and background effects make it more popular among beginners and professionals.
For Win 7 or later (64-bit)
For macOS 10.12 or later
Working with Filmora is easy and time saving. One can easily drag and drop the slides made and do editing on it. Making video through templates is an easy task. Just in few simple steps one can make and export the slides and play it. Photo video slideshows can also be made by using Filmora application. It runs smoothly over various operating systems.
● Whether Filmora has slideshow templates at its site?
Yes, the official website has various online free slideshow templates for the users.
● Whether I need to pay to get sample templates from Filmora?
The trial version of the software is free and you can download the slideshow templates free of cost.
● Whether the slideshow prepared in Flimora site can be edited with other application?
Yes, you can easily do editing on the slides made with Filmora application on other applications.
● What type of slideshare is available at Filmora?
All kind of slideshare and templates are available at Filmora that are useful for business, projects, marketing and personal purposes.
● Ending Thoughts →
● Filmora is a software/application widely used as video editing software and it is getting popular among the users due to its extraordinary features. It has great video editing tools, effects and transitions that give a complete package of video, slideshow and presentation making.
● Filmora has wide range of templates developed at its site for ease of making presentation and slideshows. These are developed looking to needs of every content creator. Some of templates available at the website are clean slideshow after effects templates, Mosaic slideshow, Business- proposal presentation template and many others.
● The filmora photo slideshow template free download and other templates can be searched on the official website of Filmora and can be downloaded from there in simple steps. It can edit and saved at any operating system.
With Filmora software, present information and content through slideshows. Filmora slideshow templates are available on the website free for making effective slideshows.
Part 1 Why Filmora Slideshow Templates Are Popular?
Filmora Slideshow templates are widely used by the users for creating new and impressiveslideshows. The reason for popularity of this software is many such as:
● It is an affordable software/application available free of cost for making slideshows using templates.
● It can run on computers and cell phones also, so there is flexibility in its access.
● It is equipped with various tools and features for both video and audio applications.
● Background effects, picture effects and animation features further make it more popular than the rest of the software.
● It is a good pleasing interface suitable to all content creators whether they are beginners or professionals.
● Video and audio control and video stabilization features make it further popular.
● Advanced text-editing make it possible to add contents in the video slides.
● Templates can be created by adding titles, text, sound, filters, and transitions.
● Theme-based templates are designed and developed looking into the needs f every user for different occasions.
● It has better editing tools like split, merge, rotate, and more.
● Auto-create videos features give the users comfort for using the application by saving their time and energy. Further they can add royalty-free images, videos, and music.
● Aspect ratio for the video creation can be changed.
Part 2 Where to Download Free Filmora Slideshow Templates
To use unlimited and free Filmora slideshow templates, one is required to have the application downloaded from the website. And thereafter one can download the different styles and patterns of templates from section filmora slideshow template free download. Once you create an account in the Filmora platform, you can easily connect with various templates useful for various occasions.
Filmora software or application is the only destination for having a bunch of various templates with many tools to improve the creation of slide shows. One can see the various templates available in the official website of Filmora. One can make slideshow with the help of video maker offered by Filmora. This software is free of cost. The easy-to-use interface feature of this software is good for beginners. It has various in-built customizable templates based in various themes like project, marketing, corporate, celebration, fun, natural, family, and business. It has auto-create mode which saves time and energy of the users as it automatically plays the slides when all media files, pictures or texts are placed over the various slides. For this one is just required to select the different files and click on “Auto-create” option.
Part 3 Best 10 Filmora Slideshow Templates
Filmora has many advanced templates for presentation and slideshow. One can find different kind of templates suitable for creating content and information for various applications. Filmora templates slideshow becomes more attractive when in-built Filmora templates are used. Some of the best 10 Filmora slideshow templates are:
01Business- Proposal Presentation Template
Looking into the business need of business users and marketing professionals, Filmora has developed Business-proposal presentation template with 45 unique custom slides. Business users can create impressive business proposals with various theme and color options. One can insert pictures and text easily in this template and can edit number of times.
02Pitch Deck Template
This template is used to design a pitch deck used by the companies to present at the stage and project about the company. These templates are well designed as they are handled by professionals.
03Company Profile Google Slides Template
It is mostly useful to business professionals to prepare business portfolios. The best thing with these templates is that they are unique, elegant, professional and creative. This template is multipurpose for different business applications.
04Clean Slideshow After Effects Templates
Those who want to make simple but impressive templates, clean slideshow after effect templates are best option. Through this template, one can focus on the main content and can add transitions. Photo slideshows can be easily created through this template.
05Minimal Corporate Presentation
This template is good for the beginners who desire to prepare a simple slideshow. The advantage of this template is that it is easy to use and text can be easily edited. One can insert picture for various corporate and business presentations.
06Corporate Event Promo
A business mostly does promotions and this needs a proper preparation. Corporate event promo presentation template is the best choice for such situations. One can create creative promo slides with such template by adding title and overlays in the template. They can also be edited easily.
07Business Marketing Presentation Layout
Most of the business organizations preferto choose such a template that can present their marketing plan in the best possible way. This Business Marketing Presentation is perfect for every business concern. It comes with nine designing options, through which one can easily replace images and text.
08Event Conference
For creating information and documents over template useful in an event conference, this template of filmora is very useful. The details of event and necessary information can be put in a systematic way through this template. However when played as slideshow, it can reach to maximum number of viewers.
09Mosaic Slideshow
Display of photographs, video albums or glimpse of any events can be impressively done with the help of Mosaic slideshow template. With increasing trends of photo sharing and video making, these templates are gaining popularity.
10Old Fashion Slides
As the name suggests, the templates is good for vintage slideshow. One can use this template for photo and video slideshows. Those who love to be creative, they can use this template.
These are some filmora template slideshow available at the website; however the users can also explore the other category of templates based on occasions at the website of Filmora. Every content creator will surely get desired template to present their information, data and pictures in a unique way.
Part 4 FAQ of Filmora Slideshow Templates
Wondershare Filmora Video Editor is a popular video editing application that also supports making slideshows through the use of various templates. It offers advance editing software for those who love to be creative and present their content in an artistic way. The various features of the software like elegant transitions, beautiful slides, video effects, text, audio and background effects make it more popular among beginners and professionals.
For Win 7 or later (64-bit)
For macOS 10.12 or later
Working with Filmora is easy and time saving. One can easily drag and drop the slides made and do editing on it. Making video through templates is an easy task. Just in few simple steps one can make and export the slides and play it. Photo video slideshows can also be made by using Filmora application. It runs smoothly over various operating systems.
● Whether Filmora has slideshow templates at its site?
Yes, the official website has various online free slideshow templates for the users.
● Whether I need to pay to get sample templates from Filmora?
The trial version of the software is free and you can download the slideshow templates free of cost.
● Whether the slideshow prepared in Flimora site can be edited with other application?
Yes, you can easily do editing on the slides made with Filmora application on other applications.
● What type of slideshare is available at Filmora?
All kind of slideshare and templates are available at Filmora that are useful for business, projects, marketing and personal purposes.
● Ending Thoughts →
● Filmora is a software/application widely used as video editing software and it is getting popular among the users due to its extraordinary features. It has great video editing tools, effects and transitions that give a complete package of video, slideshow and presentation making.
● Filmora has wide range of templates developed at its site for ease of making presentation and slideshows. These are developed looking to needs of every content creator. Some of templates available at the website are clean slideshow after effects templates, Mosaic slideshow, Business- proposal presentation template and many others.
● The filmora photo slideshow template free download and other templates can be searched on the official website of Filmora and can be downloaded from there in simple steps. It can edit and saved at any operating system.
Top Way to Freeze-Frame in Final Cut Pro
Best Way to Freeze Frame in Final Cut Pro
An easy yet powerful editor
Numerous effects to choose from
Detailed tutorials provided by the official channel
The primary purpose of freezing frames is to hold a particular frame in clips in one place, temporarily to stop the action onscreen. You can create the Freeze-Frame clip from any video clip in the browser or the timeline. If a Freeze-Frame clip is created from the browser, it gets affixed to the major storyline at the Playhead location as a connecting clip.

Now, Final Cut Pro is a fantastic video editor available for macOS. It is an entire video editing tool perfect for basic video editing. In addition, it can be valuable to Freeze-Frames in a video. This article will explain why to Freeze-Frame in FCP and its alternatives. We will also introduce how to add a Freeze-Frame Final Cut Pro video editor that can make your videos more appealing.
In this article
01 [Why Do You Need to Freeze-Frame](#Part 1)
02 [How to Freeze-Frames in Final Cut Pro?](#Part 2)
03 [3 Alternative to Freeze-Frames and Why](#Part 3)
Part 1 Why Do You Need to Freeze-Frame
Freeze-Frames is an effective and quick way to begin a drama session when you want to edit a movie. Besides, users of any age, ranging from children to adults, can easily handle it. Participants can use it to create an image using their bodies with no movement, and Freeze-Frames can also be made by individuals, a whole group, or a small group.
Another perfect way to describe a Freeze-Frame is a “still image.” It is a way of pressing the pause button on the remote control and making a statue or taking a photo. The image creation can be quick without discussion, planned, or rehearsed.
Here are some reasons you need a Freeze-Frame app:
● They are beneficial as a quick way of communicating ideas or telling a story.
● In addition, Freeze-Frame can represent objects or people and even abstract concepts like atmosphere or emotions.
● Freeze-Frames can help shyer performers to gain confidence, as there are no lines to learn.

Part 2 How to Freeze-Frames in Final Cut Pro?
FCPX Freeze-Frame clips can temporarily hold a particular frame in place and stop the action onscreen. The Freeze-Frame, as its phrase, freezes or contains the specific frame you want to feature or focus on in a video.
You have to pick or select the frame you want to freeze and follow the steps in the article to freeze the frame of your choice.
In addition, if you do not want to create a separate freeze-frame clip, make a hold segment to stop the action for part of a clip temporarily. This action offers more precise control, especially when a variable speed effect is created.
You can Freeze-Frame on the fly by navigating to a specific frame in a clip or during playback. Thus, A Freeze-Frame clip will preserve any attributes applied to the source clip, such as settings and effects.
Here is how to Freeze-Frame in Final Cut Pro effectively.
Step 1: In the browser or in the timeline in Final Cut Pro, do any one of the following:
● Begin playback of the clip and pause
● Move the Skimmer or Playhead to the portion you wish to freeze.

Step 2: Choose Edit > Add Freeze-Frame (or press Option-F).
Note: How Freeze-Frame gets added to the project depends on whether it got created from the browser or the timeline:
● If the Freeze-Frame was from a browser clip, a new freeze-frame clip gets attached as a connected clip at the Playhead site in the timeline.
● Alternatively, if the freeze-frame was from the timeline, a new freeze-frame clip gets inserted at the Playhead location or the Skimmer in the timeline.

Part 3 Alternative to Freeze-Frames and Why
There are a lot of alternatives to Freeze-Frame in Final-Cut Pro all over the Internet. However, you must be careful while choosing when you want to add customization to your videos.
Additionally, if you are looking for the best editor to add a Freeze-Frame effect to your video, we recommend trying Filmora. Wondershare Filmora Video Editor for Mac and Windows devices comes with tons of Freeze-Frame impacts that you can use to spice-up your video.
For Win 7 or later (64-bit)
For macOS 10.12 or later
Some of the alternatives to adding a Freeze-Frame on Final Cut Pro include:
01AZ Screen Recorder
This is a free android APK alternative to Freeze-Frames in FCP. It is a great application available for anyone who needs to have the ability to record what is happening on their Android device’s screen. One great benefit of using this application is that your Android device does need to be rooted to experience the best the app has to offer.
A blinking red dot will be noticed in the screen’s right bottom corner when users begin to record with this application. This is an indicator that the recording is in progress. In addition, users can pause the recording as per their requirements by just tapping the screen. If you are not comfortable with the location of the blinking red dot, hold and move it to anywhere on the screen that can better suit your needs. Thus, this is an excellent alternative to Final Cut Pro X Freeze-Frame with the exceptional video quality.
Features
● Simple, clean, and easy to use interface
● The application settings options allow users to adjust things like the video output quality and how the clip recording interacts with the screen while the application is running.
● The four icons located in the middle of the application’s home screen clearly outline their options when the application is first open. The four options include adjusting the application’s settings, accessing previously recorded video files, starting recording, and the option to exit.
Pros:
● It has options to increase video quality.
● No watermark
● No time limits
● No frame loss
Cons:
● No option to live stream.

02AndroVid
This Android application allows the creation of new videos by cutting and combining two or more video effects on your phone. Additionally, this application is typically different from the others that let you watch videos or share them with other sites. Bits and pieces can be cut from two or more videos and combined to make a new video. In addition, it is fun to use if you want to create a new music video that features the same song but different steps made when various people are being used.
Users can easily cut and paste with simple instructions, and the application also lets you work with any video stored on your phone.
Features
● Add subtitles to the videos that you create
● Create titles in any color or font that is available with the application
● making the videos from the clips a little more personal and customized before sharing.
Pros
● Allows multiple videos editing
● Allows the addition of a subtitle
● Users can reverse video content
Cons
● You cannot save a lot of work automatically
● It takes time to get the video adjusted

03Action Director
This Android editor also serves as an alternative to Final Cut Pro X Freeze-Frame. This video editing tool allows users to create quality compositions in no time at all. Additionally, you can change the image’s color, cut video clips, add a soundtrack, or insert text with this Video Editor using effortless control. With just a few finger taps on the screen, you can customize any video. This excellent video editing tool lets you create and share your videos quickly and easily.
Features
● Record videos with this Android app.
● Edit video and apply effects from its exclusive list.
● Get more than 12 transitions for your videos
● The useful movie editing guide helps you create videos with action effects and edits.
● Share your videos with your friends.
Pros
● It is fast and easy to use
● It is elementary to control
● Has video sharing option to share videos on another website
Cons
● Requires premium version to export video in high quality
● Ending Thoughts →
● About Final Cut Pro X Freeze-Frame and explained to the user how to use Freeze-Frame in FCP.
● Additionally, the article listed and presented three alternatives to Freeze-Frame and
● Recommended Filmora as the best editing software to use Freeze-Frame effects due to its many editing options.
The primary purpose of freezing frames is to hold a particular frame in clips in one place, temporarily to stop the action onscreen. You can create the Freeze-Frame clip from any video clip in the browser or the timeline. If a Freeze-Frame clip is created from the browser, it gets affixed to the major storyline at the Playhead location as a connecting clip.
Now, Final Cut Pro is a fantastic video editor available for macOS. It is an entire video editing tool perfect for basic video editing. In addition, it can be valuable to Freeze-Frames in a video. This article will explain why to Freeze-Frame in FCP and its alternatives. We will also introduce how to add a Freeze-Frame Final Cut Pro video editor that can make your videos more appealing.
In this article
01 [Why Do You Need to Freeze-Frame](#Part 1)
02 [How to Freeze-Frames in Final Cut Pro?](#Part 2)
03 [3 Alternative to Freeze-Frames and Why](#Part 3)
Part 1 Why Do You Need to Freeze-Frame
Freeze-Frames is an effective and quick way to begin a drama session when you want to edit a movie. Besides, users of any age, ranging from children to adults, can easily handle it. Participants can use it to create an image using their bodies with no movement, and Freeze-Frames can also be made by individuals, a whole group, or a small group.
Another perfect way to describe a Freeze-Frame is a “still image.” It is a way of pressing the pause button on the remote control and making a statue or taking a photo. The image creation can be quick without discussion, planned, or rehearsed.
Here are some reasons you need a Freeze-Frame app:
● They are beneficial as a quick way of communicating ideas or telling a story.
● In addition, Freeze-Frame can represent objects or people and even abstract concepts like atmosphere or emotions.
● Freeze-Frames can help shyer performers to gain confidence, as there are no lines to learn.
Part 2 How to Freeze-Frames in Final Cut Pro?
FCPX Freeze-Frame clips can temporarily hold a particular frame in place and stop the action onscreen. The Freeze-Frame, as its phrase, freezes or contains the specific frame you want to feature or focus on in a video.
You have to pick or select the frame you want to freeze and follow the steps in the article to freeze the frame of your choice.
In addition, if you do not want to create a separate freeze-frame clip, make a hold segment to stop the action for part of a clip temporarily. This action offers more precise control, especially when a variable speed effect is created.
You can Freeze-Frame on the fly by navigating to a specific frame in a clip or during playback. Thus, A Freeze-Frame clip will preserve any attributes applied to the source clip, such as settings and effects.
Here is how to Freeze-Frame in Final Cut Pro effectively.
Step 1: In the browser or in the timeline in Final Cut Pro, do any one of the following:
● Begin playback of the clip and pause
● Move the Skimmer or Playhead to the portion you wish to freeze.
Step 2: Choose Edit > Add Freeze-Frame (or press Option-F).
Note: How Freeze-Frame gets added to the project depends on whether it got created from the browser or the timeline:
● If the Freeze-Frame was from a browser clip, a new freeze-frame clip gets attached as a connected clip at the Playhead site in the timeline.
● Alternatively, if the freeze-frame was from the timeline, a new freeze-frame clip gets inserted at the Playhead location or the Skimmer in the timeline.
Part 3 Alternative to Freeze-Frames and Why
There are a lot of alternatives to Freeze-Frame in Final-Cut Pro all over the Internet. However, you must be careful while choosing when you want to add customization to your videos.
Additionally, if you are looking for the best editor to add a Freeze-Frame effect to your video, we recommend trying Filmora. Wondershare Filmora Video Editor for Mac and Windows devices comes with tons of Freeze-Frame impacts that you can use to spice-up your video.
For Win 7 or later (64-bit)
For macOS 10.12 or later
Some of the alternatives to adding a Freeze-Frame on Final Cut Pro include:
01AZ Screen Recorder
This is a free android APK alternative to Freeze-Frames in FCP. It is a great application available for anyone who needs to have the ability to record what is happening on their Android device’s screen. One great benefit of using this application is that your Android device does need to be rooted to experience the best the app has to offer.
A blinking red dot will be noticed in the screen’s right bottom corner when users begin to record with this application. This is an indicator that the recording is in progress. In addition, users can pause the recording as per their requirements by just tapping the screen. If you are not comfortable with the location of the blinking red dot, hold and move it to anywhere on the screen that can better suit your needs. Thus, this is an excellent alternative to Final Cut Pro X Freeze-Frame with the exceptional video quality.
Features
● Simple, clean, and easy to use interface
● The application settings options allow users to adjust things like the video output quality and how the clip recording interacts with the screen while the application is running.
● The four icons located in the middle of the application’s home screen clearly outline their options when the application is first open. The four options include adjusting the application’s settings, accessing previously recorded video files, starting recording, and the option to exit.
Pros:
● It has options to increase video quality.
● No watermark
● No time limits
● No frame loss
Cons:
● No option to live stream.
02AndroVid
This Android application allows the creation of new videos by cutting and combining two or more video effects on your phone. Additionally, this application is typically different from the others that let you watch videos or share them with other sites. Bits and pieces can be cut from two or more videos and combined to make a new video. In addition, it is fun to use if you want to create a new music video that features the same song but different steps made when various people are being used.
Users can easily cut and paste with simple instructions, and the application also lets you work with any video stored on your phone.
Features
● Add subtitles to the videos that you create
● Create titles in any color or font that is available with the application
● making the videos from the clips a little more personal and customized before sharing.
Pros
● Allows multiple videos editing
● Allows the addition of a subtitle
● Users can reverse video content
Cons
● You cannot save a lot of work automatically
● It takes time to get the video adjusted
03Action Director
This Android editor also serves as an alternative to Final Cut Pro X Freeze-Frame. This video editing tool allows users to create quality compositions in no time at all. Additionally, you can change the image’s color, cut video clips, add a soundtrack, or insert text with this Video Editor using effortless control. With just a few finger taps on the screen, you can customize any video. This excellent video editing tool lets you create and share your videos quickly and easily.
Features
● Record videos with this Android app.
● Edit video and apply effects from its exclusive list.
● Get more than 12 transitions for your videos
● The useful movie editing guide helps you create videos with action effects and edits.
● Share your videos with your friends.
Pros
● It is fast and easy to use
● It is elementary to control
● Has video sharing option to share videos on another website
Cons
● Requires premium version to export video in high quality
● Ending Thoughts →
● About Final Cut Pro X Freeze-Frame and explained to the user how to use Freeze-Frame in FCP.
● Additionally, the article listed and presented three alternatives to Freeze-Frame and
● Recommended Filmora as the best editing software to use Freeze-Frame effects due to its many editing options.
Also read:
- In 2024, The Background in Your Footage Might Be Bland or Unpleasant. This Article Will Discuss Video Background Templates You Can Use to Spice Things up and Make Your Videos Go Viral
- Updated Instagram Doesnt Offer Native Support for GIF Files. So, in This Post, Well Learn How to Convert a GIF to a Video for Instagram Using Multiple Methods.
- Updated Want to Learn How to Make a Fortnite Montage? This Guide Will Give You the Low-Down on Creating Epic Montage Fortnite Videos that You Can Share with Other Players on Social Media Platforms for 2024
- New How-To Tutorials of Kapwing Collage Maker
- 10+ Royalty-Free 5 Second Countdown Footage HD & 4K Clips Included for 2024
- Updated Discover How to Create Professional Foggy Text Reflection Effects in the Filmora Video Editor
- Updated How To Slow Down GIF Building an Understanding
- Best Cinematic LUTs For Premiere Pro You Can Come Across
- New 2024 Approved This Article Aim to Teach You How to Make a Night to Day Effect Video with Filmora. Follow the Steps to Figure It Out
- Updated How to Rotate AVI in Vertical/Portrait Orientation Windows, Mac,Andro
- Looking for the Best Websites for 3D Text PNG? Weve Covered You with Our Top 8 Picks for Your Upcoming Work
- Updated In 2024, Convert Time-Lapse to Normal Video
- New Do You Wish to Learn About some Tools to Slow Down a Video? Discover How to Slow Down Time Lapse on iPhone Throughout This Article for 2024
- Updated 2024 Approved To Help You Perform This Action, in This Article, We List the Steps You Will Need for Cropping Into Video Clips with PowerDirector. As an Added Bonus, We Have Also Included the Method to Perform the Same Actions in WonderShare Filmora
- An Ultimate Guide to Edit a Music Video Aspect Ratio and First Cut
- Updated How to Color Correct in OBS for 2024
- 2024 Approved Discover the Best Video Filter Software . Elevate Your Video Editing with Top Contenders Like Filmora, DaVinci Resolve, HitFilm Express, and More
- In 2024, Mastering Android Device Manager The Ultimate Guide to Unlocking Your Vivo Y100i Device
- In 2024, Ways to trade pokemon go from far away On Tecno Spark 20 Pro+? | Dr.fone
- Lock Your Nubia Red Magic 9 Pro Phone in Style The Top 5 Gesture Lock Screen Apps
- Why is iPogo not working On Realme 12 Pro+ 5G? Fixed | Dr.fone
- How to Downgrade iPhone SE (2020) to the Previous iOS System Version? | Dr.fone
- 3 Ways to Fake GPS Without Root On Xiaomi 14 Pro | Dr.fone
- Hard Resetting an Oppo Reno 8T Device Made Easy | Dr.fone
- Easy steps to recover deleted call history from Motorola
- Why Your WhatsApp Live Location is Not Updating and How to Fix on your Oppo Reno 11 Pro 5G | Dr.fone
- In 2024, Does Life360 Notify When You Log Out On OnePlus Nord CE 3 Lite 5G? | Dr.fone
- In 2024, Why does the pokemon go battle league not available On Samsung Galaxy S23 Tactical Edition | Dr.fone
- In 2024, 6 Ways To Transfer Contacts From Samsung Galaxy A14 5G to iPhone | Dr.fone
- In 2024, How to Mirror Your Samsung Galaxy A34 5G Screen to PC with Chromecast | Dr.fone
- How to Change GPS Location on Asus ROG Phone 8 Pro Easily & Safely | Dr.fone
- Update hardware drivers with Device Manager on Windows 11/10/7
- Title: Updated In 2024, 10 Best Music Video Templates to Make Your Video Popular
- Author: Morgan
- Created at : 2024-05-19 05:12:47
- Updated at : 2024-05-20 05:12:47
- Link: https://ai-video-editing.techidaily.com/updated-in-2024-10-best-music-video-templates-to-make-your-video-popular/
- License: This work is licensed under CC BY-NC-SA 4.0.
