
:max_bytes(150000):strip_icc():format(webp)/GettyImages-849896688-6d69f22bcf0a4ff092f444abe6e1c19f.jpg)
Updated In 2024, Easy Steps to Loop YouTube Videos on iPhone
Easy Steps to Loop YouTube Videos on iPhone
YouTube videos are a great way to get information fast. But there are times when you want to watch a video over and over again without having to go back to the YouTube app. Here is how you can loop YouTube videos on your iPhone. There are 2 ways to loop YouTube videos on iPhone. One is through the YouTube app and using third-party apps.
There are many reasons why you might want to loop a video on your iPhone. Maybe you’re trying to learn a dance routine, or you want to listen to a song on repeat. You’ve probably seen those cool looping videos on Instagram and Facebook and wondered how people make them. YouTube is a great place to find videos on any topic.
The YouTube app on the iPhone is a great way to watch videos, but it doesn’t have a repeat or loop feature. This means that if you are watching a long video, you will have to keep your phone on and continue watching the video. YouTube is the world’s most popular video-sharing platform with approx. 1.9 billion monthly active users.
Part 1: How to loop YouTube videos on iPhone
Step 1: Open the YouTube app on your iPhone
Install YouTube on your iPhone after that open it. Search your desired video on the YouTube search bar.

Step 2: Tap the video you want to repeat
Click on the three dots or click on the save button to create a new playlist for your video. If you want to listen to or see the existing videos you can also add your videos to your old playlist.

Step 3: Create a playlist and start playing it
Click on New Playlist then give any name to your playlist. Give any name to your playlist and select whether you want to make it private or public.

Step 4: Click on the library
After creating a playlist click on the library which is placed at the bottom. After clicking on it you can see your all playlists.

Step 5: Play the playlist on the loop
Click on your desired playlist which you want to play after that you’ll see two options on the screen Play and Shuffle. Select the Play option, your playlist will start.

Step 6: Play your favorite video first and put the playlist on the loop
When you start playing your playlist, you can start it with your favorite video or you can also put your playlist on a loop. So that you can watch your videos on a loop.
Benefits of looping YouTube videos on iPhone
If you are a YouTube addict, then you might be pleased to know that your iPhone has a built-in feature that allows for the video to loop back to the beginning. This feature is an excellent way of saving time and maximizing your viewing pleasure. Looping videos on iPhone is a great way of saving time and maximizing your viewing pleasure.
Looping videos on your phone can be a great way to kill time. Watching the same video over and over again can be tiring, but if you do it on your phone, you don’t have to worry about that. You can change the video at any point in time, so if you find that you are getting bored with it, then just find another one.
Over a billion hours of video are watched every day. The app is available for both iOS and Android devices, which means that you can watch YouTube videos on your phone no matter where you are. This can be useful if you want to listen to music or watch a tutorial while doing something else on your phone, like checking Facebook or browsing the web.
Part 2: How to Edit Time-lapse Video on Computer
Time-lapse videos are becoming more and more popular nowadays. They are a great way to show the passage of time, but editing them on a computer is not an easy task. Editing time-lapse videos on a computer is not an easy task because it requires you to have the right software and know how to use it.
It can be quite time-consuming and tedious work, which is why we need a proper editing program that can help us through this process. It’s just about learning the basics of editing and then adding a few effects to make your video more interesting. Here are some tips on how you can edit time-lapse videos on your computer:
- The first thing you need to do is download and install a video editor for your computer.
- Import the timelapse footage into the video editing program that you have downloaded and installed, such as Adobe Premiere Pro or Sony Vegas Pro, etc.
- Now you need to trim out any unwanted footage at the beginning or end of the clip so that what remains is just what you want to show in your final video.
- The next step is to add transitions between scenes, such as fades, wipes, dissolves, or cuts between shots - this will help transition between scenes smoothly and seamlessly without any abrupt jumps in time or space between them while also adding an extra level of polish.
Time-lapse videos can help you produce stunning results, no matter what your creative goals may be. If you want to create a time-lapse video, there are many things you need to consider. Time-lapse videos are not just a series of photos strung together. And the most important thing you need to consider is the format of the video you’ll need to take.
Choosing the right editing software is also important if you’re using a camera that shoots time-lapse videos. And if you’re using a DSLR camera, there is a chance that your time-lapse videos are in MOV format. If that’s the case, then you’re in luck. Filmora can help you edit your time-lapse video with ease.
Edit Time-lapse video on Filmora software
Filmora is a video editor that lets you easily create and edit time-lapse videos. With Filmora, you can add music, filters, and effects to your videos to give them a unique look and feel. You can also trim and cut your videos, and merge them to create longer videos. Filmora is perfect for creating professional-looking time-lapse videos.
Filmora has an easy-to-use timeline that makes it easy to sequence your videos and create smooth transitions. This makes it easy to create high-quality time-lapse videos that look like they were filmed in a single take. Filmora has a built-in editor that lets you easily add music and sound effects to your videos. This means that you can create videos that look and sound like professional movies.
How to edit a video in Filmora:
Filmora’s time-lapse feature is free, which is a great start. However, you do need to do a few things to make it work. First, you need to make sure that your phone is compatible with Filmora. You’ll also need a connection to the Internet and a working camera on your phone. There are a few things that you’ll need to know to start editing videos on Filmora.
Step 1: Download Filmora and create a new project
Download Filmora on your desktop and click on the “New Project” button. This will open up a new window where you can name your project and choose a video file to start working with.

Free Download For Win 7 or later(64-bit)
Free Download For macOS 10.14 or later
Step 2: Select media and place it on the timeline
Click on the “Media” tab and select your video file. You’ll now see the video timeline on the left side of the window. Use the video timeline to drag and drop video clips into the timeline. You can also use the buttons on the timeline to change the speed, direction, and audio volume of the video clips.

Step 3: Select the speed you want the video to play at and click on the “OK” button.
You set the duration and speed of your video according to your requirements. You can edit the speed of your video individually. If you put your first video on high speed then you can slow down your second video.

Step 4: Click on the “Effects” button and select the “Special Effects” tab
You have undoubtedly seen those videos, full of special effects and transitions. These effects are the result of good video editing software, like Filmora. This software is designed to be used by anyone, from beginners to expert editors. You can add effects to your time-lapse video. Click on the Effects on the top bar of Filmora. You can also add various transitions in your time-lapse video.

Step 5: Export your time-lapse video
As a user of Filmora, you can export a time-lapse video onto your computer. This feature is one of the best features Filmora has to offer. You can export your edited time-lapse video on Filmora. When you are done with your time-lapse editing export the video on your desktop, drive, or anywhere you want

The Bottom Line
Since most people own an iPhone, it’s very useful to know some tricks to be more productive. As you have seen, the utility of looping a video is not something to be scoffed at. If you need to keep watching a video over and over again, on iPhone looping a video is one of the best ways to do so.
We hope the content above has been useful to you, and that you can see how looping YouTube videos on your iPhone could improve your iPhone experience. On the other hand, you can use Filmora software for your video or photo editing. Filmora is user-friendly software and you can easily install it from a browser. You just need a piece of basic knowledge to use Filmora.
Free Download For macOS 10.14 or later
Step 2: Select media and place it on the timeline
Click on the “Media” tab and select your video file. You’ll now see the video timeline on the left side of the window. Use the video timeline to drag and drop video clips into the timeline. You can also use the buttons on the timeline to change the speed, direction, and audio volume of the video clips.
Step 3: Select the speed you want the video to play at and click on the “OK” button.
You set the duration and speed of your video according to your requirements. You can edit the speed of your video individually. If you put your first video on high speed then you can slow down your second video.
Step 4: Click on the “Effects” button and select the “Special Effects” tab
You have undoubtedly seen those videos, full of special effects and transitions. These effects are the result of good video editing software, like Filmora. This software is designed to be used by anyone, from beginners to expert editors. You can add effects to your time-lapse video. Click on the Effects on the top bar of Filmora. You can also add various transitions in your time-lapse video.
Step 5: Export your time-lapse video
As a user of Filmora, you can export a time-lapse video onto your computer. This feature is one of the best features Filmora has to offer. You can export your edited time-lapse video on Filmora. When you are done with your time-lapse editing export the video on your desktop, drive, or anywhere you want
The Bottom Line
Since most people own an iPhone, it’s very useful to know some tricks to be more productive. As you have seen, the utility of looping a video is not something to be scoffed at. If you need to keep watching a video over and over again, on iPhone looping a video is one of the best ways to do so.
We hope the content above has been useful to you, and that you can see how looping YouTube videos on your iPhone could improve your iPhone experience. On the other hand, you can use Filmora software for your video or photo editing. Filmora is user-friendly software and you can easily install it from a browser. You just need a piece of basic knowledge to use Filmora.
Do You Want to Learn How to Film a TikTok with Multiple Clips? Worry No More because You Can Do This by Following the Methods Instructed in This Article
A “day-in-life” short vlog is insanely increasing on TikTok. People love to create small clips throughout the day and then merge it together as a short vlog. With the right tools and methods, you can also create a perfect TikTok with many clips. Moreover, if you don’t know how to film a TikTok with multiple clips, this article is for you.
Here, we will discuss recording multiple clips on TikTok and editing it. If you do not like the editing with TikTok, consider using a third-party video editor. A tool named Wondershare Filmora can help you a lot with this process.

Part 1: How to Make a TikTok Video with Multiple Clips
With more than 1 billion downloads on Play Store and No.1 in the entertainment charts on App Store, TikTok is loved by many users. The community present worldwide has accepted the addition of TikTok to social media. Generally, TikTok is discovered as a source of small videos.
It is widely used for creating and posting entertaining and interactive videos. Making TikTok videos with multiple clips is not as complicated as it sounds. You don’t have to master any videography skills to complete this task.
Moreover, you don’t have to be concerned about private videos as it allows you to make your TikTok account private or public. Managing followers and the following list is also very easy with TikTok. By using the simplified and easy-to-implement methods, you can record multiple TikTok clips with ease:
Method 1: How to Record Multiple Clips on One TikTok Video
The built-in camera recorder of TikTok holds very astonishing metrics. With it, you can switch the flash on and off and swipe the camera from front and back. Moreover, you can also add filters to make videos more complimentary. Enabling beautify feature will help you in looking more beautiful in the videos. By following the steps listed below, you can record multiple TikTok clips:
Step 1: To start the process, locate TikTok on your device and launch it. From the app’s interface, tap the “+” icon from the bottom center of the screen.

Step 2: From the recording interface, select the time limit from the options of “15s”, “60s,” “3m,” and “10m.” Then, hold onto the “Record” button and capture the scenes you want. You can resume and pause the recording to shoot multiple clips. In case you’ve recorded anything unwanted, select “Back Arrow.” Afterward, select the “Tick” icon from the left side of the record button.

Step 3: Following this, you can customize your videos with the options of editing, text, stickers, effects, filters, and more. Once done with editing the video, tap “Next” and add captions and hashtags of your liking. Then hit “Post,” and you upload a TikTok with multiple clips.

Method 2: Uploading Multiple Videos on Create Page
TikTok is a widely used feature-rich application that gives users a full hand to edit videos. You can not only record multiple clips with TikTok but can also add clips in it from the camera roll. Furthermore, TikTok allows you to edit videos by personalizing their speed and length. Adding and deleting clips is also a very smooth process with this app.
You can also use TikTok’s built-in stickers, effects, and filters to give a video a more creative look. They are the perfect elements to enhance the quality of a video. The steps below help you in editing TikTok with more than one clip:
Step 1: To upload several videos on create page, launch TikTok on your device and tap the “Plus” button. Following this, select “Upload” from the bottom right and hit “Select Multiple.” Keep in mind that you cannot select more than 35 clips. After selecting the clips, choose the “Next” button.

Step 2: Once the clips are uploaded as one video, you can enhance them by accessing the TikTok editor. For sound synchronization, select the “Sound Sync” icon from the bottom screen. Edit, text, overlays, and effects can also be customized here.
Once the video is edited, tap on “Save” and select “Next.” Following this add captions of your choice on the next screen and tap “Post.”

Method 3: How to Add Multiple Clips to a TikTok Video Using a Video Editor App
Although TikTok has diversified editing parameters, some users cannot be satisfied with it. That is why they need to take assistance from a third-party video editor. If you are a person who wants to edit TikTok with multiple clips with a third-party tool, the recommendation lies in Wondershare Filmora . Both Android and iPhone users can use this video editor to make prolific TikTok videos.
Filmora has a smooth and sleek interface, making it the best video editing app. It generally provides a variety of editing features to manage videos. Other than this, the processing speed of this tool is ultra-fast, so you can edit TikTok videos in the least time.
download filmora app for ios ](https://app.adjust.com/b0k9hf2%5F4bsu85t ) download filmora app for android ](https://app.adjust.com/b0k9hf2%5F4bsu85t )
Outstanding Key Features of Wondershare Filmora
- Powerful Video Editing Tools: In this app, you can find all the powerful and innovative video editing tools. It can help you with splitting screens, speed ramping, title editing, and more.
- Magnificent Effects: All the video effects in Wondershare Filmora are beyond expectations. It supports all the latest and exclusive video effects. The use of video effects can make your videos eye-catching. AI Portrait and HumanClone are also some special effects in it.
- Edit Videos with Green Screen: Everyone has their own preferences for video editing. If you are working with a green screen and want to change the video’s background, Filmora can help you. It also helps in trimming and adding subtitles and logos in a video.
- Customize Colors: If your video has no illustrative colors, viewers will not like it. That is why Filmora allows you to add a colorful background without complications. You can also blur your background or add an image as your video background.
Steps to Make TikTok Video with Multiple Clips by Using Filmora
To create and enhance the TikTok video with multiple clips in an appealing way, follow the instructions guided below:
Step 1: Launch Filmora and Import Clips
Access Wondershare Filmora on your mobile and launch it. From the main interface, tap “New Project” and select the clips of your choice. Tap the “Import” button and wait a few seconds.

Step 2: Edit the Video with Multiple Clips
Once the clips are imported to Filmora, you will see that they are in the form of one video. From here, you can edit the video by using several editing tools like trim, music, text stickers, and more. You can also tap “Adjust” to customize metrics like exposure and contrast.

Step 3: Export TikTok Video with Multiple Clips
After editing the video to its full extent, tap the “Resolution” dropdown menu from the above panel. From the given options, select the resolution and frames per second for your video. Select the “Export” button to save the edited TikTok video with various clips.

Conclusion
TikTok is an innovative platform for creating and uploading videos. This article has taught you how to film a TikTok with multiple clips with ease. It also offers numerous editing options to its users for creating effective videos. If you don’t like them, you can use a third-party video editor.
A video editor by which you can create and edit TikTok videos with two or more clips is Wondershare Filmora. It never fails to amaze its users with its intuitive and modern tools.
Outstanding Key Features of Wondershare Filmora
- Powerful Video Editing Tools: In this app, you can find all the powerful and innovative video editing tools. It can help you with splitting screens, speed ramping, title editing, and more.
- Magnificent Effects: All the video effects in Wondershare Filmora are beyond expectations. It supports all the latest and exclusive video effects. The use of video effects can make your videos eye-catching. AI Portrait and HumanClone are also some special effects in it.
- Edit Videos with Green Screen: Everyone has their own preferences for video editing. If you are working with a green screen and want to change the video’s background, Filmora can help you. It also helps in trimming and adding subtitles and logos in a video.
- Customize Colors: If your video has no illustrative colors, viewers will not like it. That is why Filmora allows you to add a colorful background without complications. You can also blur your background or add an image as your video background.
Steps to Make TikTok Video with Multiple Clips by Using Filmora
To create and enhance the TikTok video with multiple clips in an appealing way, follow the instructions guided below:
Step 1: Launch Filmora and Import Clips
Access Wondershare Filmora on your mobile and launch it. From the main interface, tap “New Project” and select the clips of your choice. Tap the “Import” button and wait a few seconds.
Step 2: Edit the Video with Multiple Clips
Once the clips are imported to Filmora, you will see that they are in the form of one video. From here, you can edit the video by using several editing tools like trim, music, text stickers, and more. You can also tap “Adjust” to customize metrics like exposure and contrast.
Step 3: Export TikTok Video with Multiple Clips
After editing the video to its full extent, tap the “Resolution” dropdown menu from the above panel. From the given options, select the resolution and frames per second for your video. Select the “Export” button to save the edited TikTok video with various clips.
Conclusion
TikTok is an innovative platform for creating and uploading videos. This article has taught you how to film a TikTok with multiple clips with ease. It also offers numerous editing options to its users for creating effective videos. If you don’t like them, you can use a third-party video editor.
A video editor by which you can create and edit TikTok videos with two or more clips is Wondershare Filmora. It never fails to amaze its users with its intuitive and modern tools.
How to Create a Clideo Slideshow Simply
How to Create a Clideo Slideshow
An easy yet powerful editor
Numerous effects to choose from
Detailed tutorials provided by the official channel
A clideo slideshow is an interesting trend of precise content delivery. Stay here to understand the working essentials of creating Clideo presentations with utmost ease!
In this article
01 [How Do You Make a Slideshow on Clideo?](#Part 1)
02 [Best 5 Tip to Make a Slideshow with Music](#Part 2)
03 [How to Make a Photo Slideshow on Mac?](#Part 3)
Part 1 How Do You Make a Slideshow on Clideo?
Deciding to create slideshow presentations for a graphic design oriented personal or professional concern lands you across a plethora of choices in the IT market in the shape of high end application software program and tools. No doubt, these are leaders in their task; however, the online slideshow makers available across the web are no less.
Paying attention to the same, let us focus our discussion on how does the Clideo slideshow maker tool work to adhere the aforesaid concern. Talking a bit about the credibility of the online program, the tool grants you the flexibility of creating amazing slideshow movies and presentations from images, video clips and recordings, while allowing you to complement the same with the most upbeat and suitable background music.
Additional appeals of the online include the latter’s free availability and extensive device compatibility to work affordably well with all your Windows and MacOS supported desktops, laptops and PCs, along with Android and iOS compatible smartphones and tablets. All you need is an internet connection to launch the tool in your favorite web browser and that’s how you can step into the creation process right away.
Let us now look through the process of creating slideshows in the Clideo tool using a set of still images in the following section:
Step 1: Launch the Tool
Start with navigating to the official Clideo website in any of your preferred web browsers and launch the online slideshow maker tool in your device.

Step 2: Upload Image Files
The tool’s launch screen displays the ‘Choose Files’ tab in blue, which you can click on to upload the desired image files to the Clideo timeline while selecting them from your device gallery. To select and upload images from your Dropbox or Google Drive accounts, click on the ‘Upside Arrow’ in the ‘Choose Files’ tab.

The tool supports a decent variety of image formats to work with, like, JPG, JPEG, PNG, GIF, TIFF, etc., thus letting you escape the notch of sticking to a specific file format. You can also choose to either upload the image files all at once, or add them at a later stage, as per your requirement.
Step 3: Let’s Get Creating!
Once the selected images get uploaded on the editor timeline of the tool, you can preview them in the editor workspace. You can change the sequence of appearance of the images by dragging and dropping their thumbnails at respective places within the editor timeline or delete them by selecting the image and clicking the ‘X’ symbol.
You can additionally, choose to add extra clips by tapping the ‘Add More Videos’ option in the timeline. As an alternative, navigate to the panel at the right and hit the ‘Add More Files’ button at the top.

Step 4: Crop the Media Files
Below the ‘Add More Files’ option in the right panel, you can see the ‘Crop Options’ tab. You can work with the crop tool to adjust the size of the added videos and images so that they fit in the borders of the media frames. You are further allowed to select a suitable aspect ratio and zoom the media files in and out to obtain the affordable screen size. This would come handy when you proceed to share your slideshow across various media platforms, like, Instagram, Facebook, YouTube, etc., each of which has a different screen resolution and size.

Step 5: Time Your Slides
You can decide play duration for your media files by navigating to the same right panel and hitting the ‘Image Duration’ tab and setting the required parameters in the dropdown list that appears next. Here, you can adjust the time settings of the images in your slideshow presentations, however, the video play durations are preset and you are not allowed to change them. If you wish to have a smooth play of the presentation slides, do not forget to tick the ‘Crossfade’ checkbox.

Step 6: Add a Suitable Background Music
The last one in the right panel is the ‘Add Audio’ option which you can use to supplement your presentation with the coolest and the most suitable background music. All you need to do is, hit the aforesaid tab and browse through your device’s media gallery to select an audio file of your choice. To add a music file that’s belongs to your online storage, click on the ‘Upside Arrow’ in the tab and proceed to make a selection or add a link of the desired audio file.

Once you have added the track, you are permitted to trim, adjust volume settings and loop the track if required under the ‘Audio Options’ tab.

Step 7: Duration, Size and Format Adjustments
Navigate to the left side ‘Options Panel’ at the bottom of the editor workspace, where you can set the different parameters of your slideshow size and run time. You can also choose to generate the output presentation in a specific file format if required, using the ‘Format Picker’ tool. When you are satisfied with everything, reach to and hit the ‘Export’ button at the extreme right.

Step 8: Save Your Creation
Completion of Step 7 will take you to the ‘Slideshow Save’ interface of the video editor tool. Here, you can preview your slideshow and save it to your device if everything seems fine. To save your output file, click on the ‘Download’ tab. If however, you need to make any further changes to the presentation, hit the ‘Edit’ tab to get directed back to the editor workspace.

Part 2 Best 5 Tip to Make a Slideshow with Music
While the visual elements count to be the major attractions of a slideshow presentation, subtle background music can work to bind the audience with the rhythm and flow of the presentation. Having learnt about the fundamentals of creating over the top slideshows with Clideo, let us move ahead with working on some of the best tips to complement your already awesome graphic slideshow artwork with the most appealing audio in the following section:
01Select a Royalty Free Music Plan
Adding suitable background music can uplift the appeal of your slideshow presentation to greater extents. While most of the slideshow creator programs available today are equipped with extensive varieties of inbuilt audio for visibly any presentation setting, you can also opt to choose your own music plan in case you don’t get anything specific.
However, you do need to take care of certain factors when deciding on your music plan, most importantly, the pricing concerns. Go for selecting a royalty free, unlimited audio license via an affordable paid subscription from recognized and leading music hubs and online audio websites.
02Browse the Recommended Audio Choices
When looking through the diversity of music options available on any audio website, do not forget to pay attention to the user and website recommended playlists and music categories. These tend to have a collection of the most preferred audio choices and there are high chances of you getting your exact music piece from within these playlists.
You can further, refine your search within these categories by setting filters of genre and style, in case you have a clear idea of what you exactly need, thus rescuing you from the hustle of browsing through a never ending list of audio files.

03Synchronize the Slideshow Music and the Contents
The credibility of your background audio lies in adding additional spark and integrity to the stills and videos of the presentation. When selecting the music elements for your slideshow, make sure that your choices are well in accordance with the content and mood of your creation. The most important aspect here is that the music you choose to add should complement the story being depicted, while captivating the viewer’s attention.
Avoid choosing a random audio just because you have heard a buzz of the same on popular platforms or a peer recommendation, lest the contents and background score of your presentation may take opposite paths and disrupt the information flow, while resulting in a distracted audience. To escape the hustle, you may seek help from the diversity of stock audio websites for a keyword and category oriented music search.
If you are interested in adding depth to your background audio, consider using the stem files of a selected song to obtain the latter’s instrumental note recordings. This will help to add a unique layer to the song, while uplifting its mood to a different level.

04Curate and Test
When you are done with creating the perfect soundtrack for your presentation with the choicest of music, proceed to narrow down your list to a finer selection via curating the elements of the soundtrack. All you need to do is, add each track to the presentation elements, while taking care that every inclusion matches with the content it is supposed to complement.
Take care to restrict your choices in line with the length of the slideshow; else you may end up stuffing the footage with too many music pieces, leading to a miscoordinated arrangement. Check if you need just a single song or a complete soundtrack.

● Sound Proof the Final Selection
When you are happy with your work, move ahead with running a mock slideshow to have an assurance of everything being at its respective place. Take note of the music flow to be in cohesion with the other elements of the presentation, check the audio quality, resolution, etc., properties and make changes where necessary. When all seems well, you are ready to share your Clideo slideshow with friends and family on social media handles and communities.
Part 3 How to Make a Photo Slideshow on Mac?
Creating a slideshow is among the most recent trends of infotainment and content sharing. Talking of the creation tools, while most of them turn to be platform specific, others tend to have limitless device compatibility. The Clideo Slideshow maker online tool is one such utility that allows you to design slideshow presentations on any device of your exclusive preference.
Having said that, let us try hands at understanding the slideshow creation process of the aforesaid tool on a MacOs supported device in the following section:
Step 1: Launch the Clideo Online Tool
In any of your preferred Mac supported device, navigate to the home site of the Clideo slideshow maker tool using your desired web browser and move ahead with launching the same in your system.

Step 2: Upload Your Media
In the aforesaid slideshow maker’s opening interface, click on the ‘Choose Files’ tab to select and add the required media files from your Mac device’s local gallery. You can also opt for a ‘Drag and Drop’ of the desired files from your system to the tool’s editor workspace. However, if you wish to make an upload from your online storage accounts like that of Google Drive or Dropbox, hover to the ‘Upside Arrow within the ‘Choose Files’ tab.

Step 3: Adding Extra Files
If you want to add some more media files to the slideshow, navigate to the ‘Options Panel’ to the right of the editing workspace and click on ‘Add More Files’ at the top. Repeat Step 1 here to upload the image and video files in a similar way. Once finished, you can proceed to change the file sequence, delete any unwanted selection or click on ‘Add More Videos’ in the timeline to directly add more video files to your presentation.

Step 4: Crop Your Selections
The left side ‘Options Panel’ further consists of ‘Crop Options’ from where you can adjust the size of your images and videos to a particular aspect ratio, or fit them to a custom screen size using the ‘Crop and Zoom’ option. To add borders to the sides of your slideshow images, click on the ‘Fit With Border’ option.

Step 5: Play Duration Adjustments
Below the ‘Crop Options’, lies the ‘Image Duration’ tab, which you can click on to set the time frames of at will be applicable to all the media files. Also, click within the ‘Crossfade’ checkbox to ensure a seamless transition between successive slides.

Step 6: Add a Background Audio
Once again, navigate to the left side ‘Options Panel’ and tap the ‘Add Audio’ tab at the bottom to upload the desired audio files from your system to the editor timeline. You can also add music files from your online storage accounts, such as, Dropbox, Google Drive, etc.

To extract a piece of the audio for slideshow inclusion, click on the ‘Trim Audio’ tab under ‘Audio Options’. You can now select the desired audio fragment either by adjusting the yellow markers at the ends of the music clip, or specify the time stamps of the required fragment in the respective fields. The volume adjustments for both audio as well as video tracks can be made using the ‘Volume Bars’ icon.

Step 7: Output Format Selection and Export
Navigate to the format options beneath the editor timeline to select a desired output format for your slideshow. You can choose from MOV, API, MKV, MP4, WMV, and a number of other file formats. When you are happy with your work, navigate to and tap the ‘Export’ button at the extreme right corner of the editor workspace.

Step 8: Preview and Download Your Presentation
When you are done with everything, move ahead to watch a preview of your work to ascertain that all the aspects of the slideshow are just perfect. If you need to add further changes, hit the ‘Edit’ tab to head back to the editing workspace. In an otherwsise case, proceed to tap the ‘Download’ button for saving the slideshow either to your device gallery or an online storage account.

Designing Stunning Slideshow Presentataions in Filmora
When browsing through reliable software alternatiaves ez start your slideshow creation streak, picking any member of the Wondershare Filmora Video Editor franchise would indeed be a smart choice, owing tso the fact that, the aforesaid program promises to adhere to the most specificuser needs and the large scale disverity in creator preferences.
For Win 7 or later (64-bit)
For macOS 10.12 or later
Diving into the feature rich library of the software, you get to access a plethora of preset and custsomizable audio-visual effects, transitions, filters, background themes and templates; and a huge storehouse of additional elements, that are all set to add the jaw dropping spark to your otherwise customary slideshows.
The later versions of the editor program are upgraged to include a divserity of high end editing effects, like the Green Screen and AI based transitions that wosrk towards delivering a high quality professional slideshow output to enure an auadience appraisal that is simply wow!
● Ending Thoughts →
● The Clideo slideshow maker tool is anexcellent choice to design over the top slideshow presentations on an online platform.
●> Using Clideo, you can choose to create slideshows on any of your preferred devices, like, Mac, Windows, etc.
● If you are interested in looking for additional alternatives of slideshow creator software, the Wondershare Filmora franchise is something to count upon.
A clideo slideshow is an interesting trend of precise content delivery. Stay here to understand the working essentials of creating Clideo presentations with utmost ease!
In this article
01 [How Do You Make a Slideshow on Clideo?](#Part 1)
02 [Best 5 Tip to Make a Slideshow with Music](#Part 2)
03 [How to Make a Photo Slideshow on Mac?](#Part 3)
Part 1 How Do You Make a Slideshow on Clideo?
Deciding to create slideshow presentations for a graphic design oriented personal or professional concern lands you across a plethora of choices in the IT market in the shape of high end application software program and tools. No doubt, these are leaders in their task; however, the online slideshow makers available across the web are no less.
Paying attention to the same, let us focus our discussion on how does the Clideo slideshow maker tool work to adhere the aforesaid concern. Talking a bit about the credibility of the online program, the tool grants you the flexibility of creating amazing slideshow movies and presentations from images, video clips and recordings, while allowing you to complement the same with the most upbeat and suitable background music.
Additional appeals of the online include the latter’s free availability and extensive device compatibility to work affordably well with all your Windows and MacOS supported desktops, laptops and PCs, along with Android and iOS compatible smartphones and tablets. All you need is an internet connection to launch the tool in your favorite web browser and that’s how you can step into the creation process right away.
Let us now look through the process of creating slideshows in the Clideo tool using a set of still images in the following section:
Step 1: Launch the Tool
Start with navigating to the official Clideo website in any of your preferred web browsers and launch the online slideshow maker tool in your device.
Step 2: Upload Image Files
The tool’s launch screen displays the ‘Choose Files’ tab in blue, which you can click on to upload the desired image files to the Clideo timeline while selecting them from your device gallery. To select and upload images from your Dropbox or Google Drive accounts, click on the ‘Upside Arrow’ in the ‘Choose Files’ tab.
The tool supports a decent variety of image formats to work with, like, JPG, JPEG, PNG, GIF, TIFF, etc., thus letting you escape the notch of sticking to a specific file format. You can also choose to either upload the image files all at once, or add them at a later stage, as per your requirement.
Step 3: Let’s Get Creating!
Once the selected images get uploaded on the editor timeline of the tool, you can preview them in the editor workspace. You can change the sequence of appearance of the images by dragging and dropping their thumbnails at respective places within the editor timeline or delete them by selecting the image and clicking the ‘X’ symbol.
You can additionally, choose to add extra clips by tapping the ‘Add More Videos’ option in the timeline. As an alternative, navigate to the panel at the right and hit the ‘Add More Files’ button at the top.
Step 4: Crop the Media Files
Below the ‘Add More Files’ option in the right panel, you can see the ‘Crop Options’ tab. You can work with the crop tool to adjust the size of the added videos and images so that they fit in the borders of the media frames. You are further allowed to select a suitable aspect ratio and zoom the media files in and out to obtain the affordable screen size. This would come handy when you proceed to share your slideshow across various media platforms, like, Instagram, Facebook, YouTube, etc., each of which has a different screen resolution and size.
Step 5: Time Your Slides
You can decide play duration for your media files by navigating to the same right panel and hitting the ‘Image Duration’ tab and setting the required parameters in the dropdown list that appears next. Here, you can adjust the time settings of the images in your slideshow presentations, however, the video play durations are preset and you are not allowed to change them. If you wish to have a smooth play of the presentation slides, do not forget to tick the ‘Crossfade’ checkbox.
Step 6: Add a Suitable Background Music
The last one in the right panel is the ‘Add Audio’ option which you can use to supplement your presentation with the coolest and the most suitable background music. All you need to do is, hit the aforesaid tab and browse through your device’s media gallery to select an audio file of your choice. To add a music file that’s belongs to your online storage, click on the ‘Upside Arrow’ in the tab and proceed to make a selection or add a link of the desired audio file.
Once you have added the track, you are permitted to trim, adjust volume settings and loop the track if required under the ‘Audio Options’ tab.
Step 7: Duration, Size and Format Adjustments
Navigate to the left side ‘Options Panel’ at the bottom of the editor workspace, where you can set the different parameters of your slideshow size and run time. You can also choose to generate the output presentation in a specific file format if required, using the ‘Format Picker’ tool. When you are satisfied with everything, reach to and hit the ‘Export’ button at the extreme right.
Step 8: Save Your Creation
Completion of Step 7 will take you to the ‘Slideshow Save’ interface of the video editor tool. Here, you can preview your slideshow and save it to your device if everything seems fine. To save your output file, click on the ‘Download’ tab. If however, you need to make any further changes to the presentation, hit the ‘Edit’ tab to get directed back to the editor workspace.
Part 2 Best 5 Tip to Make a Slideshow with Music
While the visual elements count to be the major attractions of a slideshow presentation, subtle background music can work to bind the audience with the rhythm and flow of the presentation. Having learnt about the fundamentals of creating over the top slideshows with Clideo, let us move ahead with working on some of the best tips to complement your already awesome graphic slideshow artwork with the most appealing audio in the following section:
01Select a Royalty Free Music Plan
Adding suitable background music can uplift the appeal of your slideshow presentation to greater extents. While most of the slideshow creator programs available today are equipped with extensive varieties of inbuilt audio for visibly any presentation setting, you can also opt to choose your own music plan in case you don’t get anything specific.
However, you do need to take care of certain factors when deciding on your music plan, most importantly, the pricing concerns. Go for selecting a royalty free, unlimited audio license via an affordable paid subscription from recognized and leading music hubs and online audio websites.
02Browse the Recommended Audio Choices
When looking through the diversity of music options available on any audio website, do not forget to pay attention to the user and website recommended playlists and music categories. These tend to have a collection of the most preferred audio choices and there are high chances of you getting your exact music piece from within these playlists.
You can further, refine your search within these categories by setting filters of genre and style, in case you have a clear idea of what you exactly need, thus rescuing you from the hustle of browsing through a never ending list of audio files.
03Synchronize the Slideshow Music and the Contents
The credibility of your background audio lies in adding additional spark and integrity to the stills and videos of the presentation. When selecting the music elements for your slideshow, make sure that your choices are well in accordance with the content and mood of your creation. The most important aspect here is that the music you choose to add should complement the story being depicted, while captivating the viewer’s attention.
Avoid choosing a random audio just because you have heard a buzz of the same on popular platforms or a peer recommendation, lest the contents and background score of your presentation may take opposite paths and disrupt the information flow, while resulting in a distracted audience. To escape the hustle, you may seek help from the diversity of stock audio websites for a keyword and category oriented music search.
If you are interested in adding depth to your background audio, consider using the stem files of a selected song to obtain the latter’s instrumental note recordings. This will help to add a unique layer to the song, while uplifting its mood to a different level.
04Curate and Test
When you are done with creating the perfect soundtrack for your presentation with the choicest of music, proceed to narrow down your list to a finer selection via curating the elements of the soundtrack. All you need to do is, add each track to the presentation elements, while taking care that every inclusion matches with the content it is supposed to complement.
Take care to restrict your choices in line with the length of the slideshow; else you may end up stuffing the footage with too many music pieces, leading to a miscoordinated arrangement. Check if you need just a single song or a complete soundtrack.
● Sound Proof the Final Selection
When you are happy with your work, move ahead with running a mock slideshow to have an assurance of everything being at its respective place. Take note of the music flow to be in cohesion with the other elements of the presentation, check the audio quality, resolution, etc., properties and make changes where necessary. When all seems well, you are ready to share your Clideo slideshow with friends and family on social media handles and communities.
Part 3 How to Make a Photo Slideshow on Mac?
Creating a slideshow is among the most recent trends of infotainment and content sharing. Talking of the creation tools, while most of them turn to be platform specific, others tend to have limitless device compatibility. The Clideo Slideshow maker online tool is one such utility that allows you to design slideshow presentations on any device of your exclusive preference.
Having said that, let us try hands at understanding the slideshow creation process of the aforesaid tool on a MacOs supported device in the following section:
Step 1: Launch the Clideo Online Tool
In any of your preferred Mac supported device, navigate to the home site of the Clideo slideshow maker tool using your desired web browser and move ahead with launching the same in your system.
Step 2: Upload Your Media
In the aforesaid slideshow maker’s opening interface, click on the ‘Choose Files’ tab to select and add the required media files from your Mac device’s local gallery. You can also opt for a ‘Drag and Drop’ of the desired files from your system to the tool’s editor workspace. However, if you wish to make an upload from your online storage accounts like that of Google Drive or Dropbox, hover to the ‘Upside Arrow within the ‘Choose Files’ tab.
Step 3: Adding Extra Files
If you want to add some more media files to the slideshow, navigate to the ‘Options Panel’ to the right of the editing workspace and click on ‘Add More Files’ at the top. Repeat Step 1 here to upload the image and video files in a similar way. Once finished, you can proceed to change the file sequence, delete any unwanted selection or click on ‘Add More Videos’ in the timeline to directly add more video files to your presentation.
Step 4: Crop Your Selections
The left side ‘Options Panel’ further consists of ‘Crop Options’ from where you can adjust the size of your images and videos to a particular aspect ratio, or fit them to a custom screen size using the ‘Crop and Zoom’ option. To add borders to the sides of your slideshow images, click on the ‘Fit With Border’ option.
Step 5: Play Duration Adjustments
Below the ‘Crop Options’, lies the ‘Image Duration’ tab, which you can click on to set the time frames of at will be applicable to all the media files. Also, click within the ‘Crossfade’ checkbox to ensure a seamless transition between successive slides.
Step 6: Add a Background Audio
Once again, navigate to the left side ‘Options Panel’ and tap the ‘Add Audio’ tab at the bottom to upload the desired audio files from your system to the editor timeline. You can also add music files from your online storage accounts, such as, Dropbox, Google Drive, etc.
To extract a piece of the audio for slideshow inclusion, click on the ‘Trim Audio’ tab under ‘Audio Options’. You can now select the desired audio fragment either by adjusting the yellow markers at the ends of the music clip, or specify the time stamps of the required fragment in the respective fields. The volume adjustments for both audio as well as video tracks can be made using the ‘Volume Bars’ icon.
Step 7: Output Format Selection and Export
Navigate to the format options beneath the editor timeline to select a desired output format for your slideshow. You can choose from MOV, API, MKV, MP4, WMV, and a number of other file formats. When you are happy with your work, navigate to and tap the ‘Export’ button at the extreme right corner of the editor workspace.
Step 8: Preview and Download Your Presentation
When you are done with everything, move ahead to watch a preview of your work to ascertain that all the aspects of the slideshow are just perfect. If you need to add further changes, hit the ‘Edit’ tab to head back to the editing workspace. In an otherwsise case, proceed to tap the ‘Download’ button for saving the slideshow either to your device gallery or an online storage account.
Designing Stunning Slideshow Presentataions in Filmora
When browsing through reliable software alternatiaves ez start your slideshow creation streak, picking any member of the Wondershare Filmora Video Editor franchise would indeed be a smart choice, owing tso the fact that, the aforesaid program promises to adhere to the most specificuser needs and the large scale disverity in creator preferences.
For Win 7 or later (64-bit)
For macOS 10.12 or later
Diving into the feature rich library of the software, you get to access a plethora of preset and custsomizable audio-visual effects, transitions, filters, background themes and templates; and a huge storehouse of additional elements, that are all set to add the jaw dropping spark to your otherwise customary slideshows.
The later versions of the editor program are upgraged to include a divserity of high end editing effects, like the Green Screen and AI based transitions that wosrk towards delivering a high quality professional slideshow output to enure an auadience appraisal that is simply wow!
● Ending Thoughts →
● The Clideo slideshow maker tool is anexcellent choice to design over the top slideshow presentations on an online platform.
●> Using Clideo, you can choose to create slideshows on any of your preferred devices, like, Mac, Windows, etc.
● If you are interested in looking for additional alternatives of slideshow creator software, the Wondershare Filmora franchise is something to count upon.
Little Known Ways of Adding Emojis to Photos on iPhone & Android [2023
Little Known Ways of Adding Emojis to Photos on iPhone & Android
An easy yet powerful editor
Numerous effects to choose from
Detailed tutorials provided by the official channel
Emojis are catchy graphic elements that can add life to your photos, videos and allied artworks within a wink. Be here to know about the most exciting how-tos!
In this article
01 [Best 6 Tools to Put Emojis on Pictures on iPhone](#Part 1)
02 [Best 6 Tools to Put Emojis on Pictures on Android](#Part 2)
03 [Best 5 Tools to Put Emojis on Pictures on Computer](#Part 3)
Part 1 Best 6 Tools to Put Emojis on Pictures on iPhone
Emojis have managed to secure enough significance in our social and professional lives across social media platforms in the current time. Be it a fun-filled conversation with friends and family on a chat service program, or a high end and professionally sound business strategy, these mini caricature pieces of graphic art can add the much needed highlight to almost every aspect of your digital communication concerns.
Now that you are aware of the utility of working with emojis to make your digital contents, let us take a dive into some of the best ways and means to make your iPhone images come alive in the following section:
01Emoji Picture Editor- Add Emojis to Your Photos
If you like to imbibe the images on your iPhone media gallery with a hoard of funny and cool emojis, this one is a perfect app to address the concern. The tool’s library houses the latest collection of emoji categories to be in line with a diversity of photo styles, themes and backgrounds. You can take your pick from the huge inventory of over 1500 different emojis to level up your photos.
Talking about the app interface and usage controls, you are granted full liberty to add emojis to your emojis, while changing their positions through a finger drag, or scale and rotate them by expanding, pinching and twisting your fingers. The app additionally allows you to send bigger emoji stickers on chats and conversations.
02Insta Emoji Photo Editor
When looking for an interesting and reliable application to set straight the concern of how to put emojis on pictures, the Insta Emoji Photo Editor is an affordable pick. Loaded with an enormous and updated emoji library, the app presents before you over 3200 fascinating emoji options to select from and add to your images.
The inclusion process is intuitively simple, with you just having to upload the desired images to the app’s working interface and choose from your most favorite emoji elements to make the stills come alive with added fun and spark. The app houses an interesting ’Emoji Paint’ feature for the extensively creative ones to let them create catchy drawings with the coolest emojis.
03Emoji My Face
Moving ahead in the list comes the aforesaid app, which you can conveniently rely on to get through the photo edit emoji task in less than a few seconds. What’s unique about the utility is its feature that lets you add emoji stickers on the faces of your image elements. Working with the app, you can transform the skinned appearances of your friends and family into hilarious emoji faces.
While the app permits you to pick any number of preferences from its latest and updated emoji collection, you can additionally, save and share your emoji centered image edits across a diversity of media sharing platforms and chat service programs.
04Emoji Background Photo Maker
While there are hoards of IT alternatives to add emojis to pictures, the following utility caters to the concern in a slightly different style, ahead of just picking and pasting emojis to still captures. Working with the tool, you can experiment with changing the customary and fundamental image backgrounds into funny and appealing emoji centered themes. You are allowed to either work with a desired image from your iPhone’s media gallery, or take a fresh shot from your device’s camera, followed by uploading the same to the app’s editing interface.
Focusing on the tool’s expanse of usage features, you get tom work with a straightforward interface, and select from a wide variety of expressive and thematic emoji backgrounds. You can further, preview and save the edited images in HD quality, and share the same with friends and family across social media handles.
05Funny Photo Editor With Emoji Stickers Camera
This one is an innovative image editing tool that lets you create funny image transformations with classic emoji stickers, while addressing the query of how to add emojis to pictures. If your peer group consists of crazy creators who are selfie freaks, try hands at uplifting your live camera shots with this application by adding the funkiest emojis and sharing them across the regular communication platforms.
The app’s default camera feature lets you capture a straight forward image and convert the same into a hilarious edit with the latest range of free emoji stickers, caricature smileys and lots more. You can additionally beautify the edits with choosing from a decent range of emoji skin tones to suit the image background.
06Instamoji- Emoji Photo Editor
If you have been searching for an affordable solution to walk through the concern of , how to add emoji to photo on your iPhone, try working with the Instamoji application to highlight your customary images with classic emoji stickers and elements within the blink of an eye. The app welcomes you with a clean and intuitive interface to work upon, and is completely free to use.
Talking about the utility’s emoji centered image editing features, you are permitted to select from a decent collection of vibrant, funny and cool emojis, assorted under a diversity of categories to complement your images with, while exporting them across your digital communication accounts with utmost ease. The app promises you of the finest quality edited image output.
Part 2 Best 6 Tools to Put Emojis on Pictures on Android
Emojis are best known to spark up graphic artworks with an element of fun and entertainment. While the introduction of social media and digital communication utilities have brought emojis to the fingertips of modern day smartphone users, the IT market never lags behind at putting the latest transformations regarding emoji usage at your disposal.
Discussing along the line, let us talk about some interesting applications that address the concern of how to add an emoji to a photo using an Android device in what follows next:
01Add Emoji Stickers- Pics Editor and Photo Maker
This one is a smart photo editing tool that you can choose to customize the otherwise ordinary images on the local media gallery of your Android smartphone. The app greets you with an extensive range of updated emoji alternatives to suit your most specific editing requirements for complementing your elementary photos with the perfect feel and emotion.
The emojis work to add the missing fun to your social media posts with image edits funny enough to make your peers roll over with laughter. Not just smiley faces, the app delivers to you a categorized set of emojis that are a perfect fit to any graphic theme. Some of the most preferred ones include Nature, Travel, Food & Drinks, and many more. So why wait? Just get the free utility and begin to edit and share!
02Emoji Face Sticker
If you are creativity freak and love to experiment with your editing skills to put emoji on picture, try hands at working with this free image editor utility to add a fun element to your photos and give a laughter dose to your friends and family on social media. The app caters to transform your uploaded images faces to the cutest emoji look alike ever.
If that’s not enough, you can work with the app to change your smartphone’s regular camera into an emoji camera app that works to create the best caricature emoji montages from your snapped selfies. Navigating through the latte’s editing library, you will get to choose from among the craziest and coolest emoji stickers to create emoji photos out of normal stills. All in all, the app allows you to put forward your emotions in a relatively funnier way.
03Emoji Photo Editor
Are you bored of looking at those customary color backgrounds behind your images? Consider sparking them up with the cutest and most expressive emoji backgrounds. As you pick the app to edit your images, the latter grants you a complete access to its free emoji library that houses a decent collection of over 50 different emoji backgrounds to select from. A few of the most popular ones comprise of the flower and heart crown stickers, dog face camera among others.
Editing images within the app is seamless enough to last for a few seconds. You can use the created emoji background edits in a series of ways, like, preferring a local save or going for an image export to your favorite social media handle. Another cool way to show off your creativity can be making a device screen wallpaper of the emoji background image.
04Auto Face Stamp- Cover Face With Emoji
Looking forward to use an SNS services for media sharing purposes, but bothered about privacy concerns? While it is a common practice to share pictures via SNS and allied public platforms, most of us are often worried about keeping our faces hidden. Under normal circumstances, the face masking task is something you would ideally want to escape; the aforesaid app caters to the same in a funny and enjoyable manner.
Working with the utility, you can mask your image faces with over 100 different types of emoji stickers. The app aids you further in the task through its accurate face recognition ability that takes into consideration the smallest of faces with utmost precision. All you need to do is, select a desired emoji sticker and tap on the face you wish to mask with the same.
You can further, choose to directly export the masked images to media sharing handles right from the app’s editing workspace. The app is available to you absolutely free of cost and greets its users with a responsive working interface.

05Emoji Background Photo Editor
If the ordinary thematic backgrounds of your images do not suit you any longer, try working with this application to transmute the same into vibrant and expressive emoji alternatives. The aforesaid photo editing utility caters to make your images stand out of the crowd with beautiful emoji landscapes that render creative image edits of a matchless class, while maintaining a high-definition output image quality.
Extending the dimension of features to a longer stretch, the app grants you the liberty to adjust the position and transparency of the added emojis, set emoji frames and customize the emoji centered backgrounds with stunning effects and filters. As you finish with the editing process, the app lets you share your creations directly to a preferred social media platform, while also keeping them safe in your device’s local media gallery.

06Face Emoji Photo Effect
Reaching the end of the list, here comes the Face Emoji Photo Effect application that is all set to upgrade the level of your regular images with its classic and beautiful emoji backgrounds and stickers. The app’s editing library houses a diverse range of latest and elusive emojis to highlight your otherwise normal captures. The app additionally facilitates you with an expanded set of image editing features and effects to turn them into a graphic masterpiece.
The app welcomes you with a clean and responsive interface that makes the emoji inclusion process a quick and fun activity. All you need to do is, pick up an image from your locally saved alternatives and upload them to the app’s working interface, followed by browsing the latter’s emoji library to select a cohesive emoji background to complement the same.
You can further, download the premium emoji packs through a minimal payment to enhance the app’s library if the preset options do not match your requirements. The inbuilt emoji choices are however, free to work with.
Part 3 Best 5 Tools to Put Emojis on Pictures on Computer
All of us are familiar to and love using emojis everywhere, right from commenting on regular social media posts and chat service conversations, to creating professionally sound and strategic, business centered company presentations. While the most diverse use of these graphic utilities is reported on mobile devices, you may sometimes land across an instance that demands working with emojis on a computer.
Moving ahead with our discussion to address the aforesaid concern, let us talk about some of the prominent software and online solutions to set aside the issue of how to put emojis on photos while working on a computer in the upcoming section of this article:
01Kapwing
Entering into the domain of online image editing tools, the Kapwing website easily lands among the highly preferred choices. To address the concern of adding emojis to pictures on your PC or desktop systems, this one is an affordable tool to rely on. Talking of the underlying reasons behind the app’s high rated user preference, the latter allows you to access its huge inventory of emoji stickers, distributed across a heap of categories to choose from.
Next in the line is the tool’s spic and span editing process that lets you add and customize emojis on the uploaded images with a series of effects and filters in a matter of counted seconds. You can either pick and import images from your system, or work with the app’s in house emoji templates to edit the photos. As you are done with uploading images and adding emojis, proceed to place them at the desired position within the image.
The app allows you to add multiple emoji layers to the images by facilitating the creation of duplicate copies of your favorite emojis. Once you are done with the editing process, you are free to export your creation across media handles, or save them locally to your system.

02Editor.pho.to
If you are a newbie to the world of graphic editing and want to experiment with your creative skills to sort out the need of how to add an emoji to a picture, prefer landing on this free online website to work on your images. Considering the fact that not everyone around you is a tech savvy, the aforesaid online photo editing tool is designed to house the simplest of interfaces ever. The tool is available to you absolutely free of cost, without any unfair hidden purchases.
Ahead of the basic customization features, the tool grants you the freedom to expand your graphic skills on a wider canvas with presenting before you a plethora of emoji faces, stickers and backgrounds to complement the uploaded images with. Once you have added the emoji, the tool lets you work on the latter’s position and transparency adjustments, create emoji layers and overlays and save the edits to your system in a visibly high output quality.

03Add Emoji to Photo
When looking for dependable solutions to work towards the task of how to put an emoji on a photo, you can conveniently trust the aforementioned online tool to create classic emoji photo edits from the customary still alternatives son your computer. This one is a free to use image editor facility that allows you to decorate your otherwise unnoticed images with an extensive range of preset and custom emojis to make them expressive and speak out your emotions.
The tool caters to render a high definition edited image output within seconds through the simplest of customization processes. You just need to upload a desired image from your system to the tool’s working interface, followed by picking a suitable emoji from the tool’s editing library to add it to the image. If however, the available options don’t seem to address your specific requirements, you can proceed to create custom emojis of your own within the tool.
You can also create multiple emoji layers to add to the uploaded image and make adjustments to their transparency and position within the photo. As you finish the editing process, the tool grants you the liberty to download the customized image to your system in either of the PNG or JPG file formats.
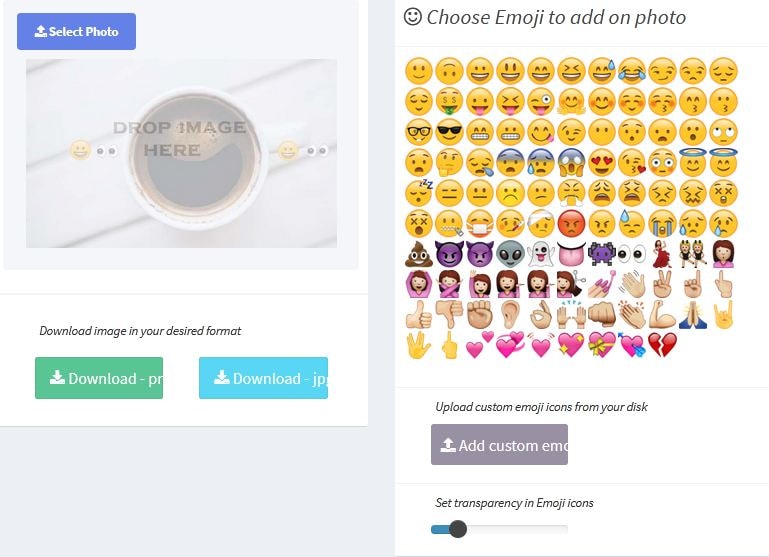
04Image Online
Another entry into the list of solutions to answer the query of how to put emojis on a photo, the Image Online tool promises you of a quality constrained image editing process to complement the basic still captures in the local media gallery of your computer with the latest collection of emoji elements. Welcoming you with a decent interface, the tool caters to sort out your emoji centered picture editing requirements within a blink’s time.
To add emoji to image with this tool, you just need to upload the selected photo to the latter’s workspace, followed by selecting a preferred emoji from the editing library, or create a custom emoji of your own, to put on the image. You can customize the emoji settings in terms of position, size and transparency, and download the edits to your device in JPG and PNG image formats.
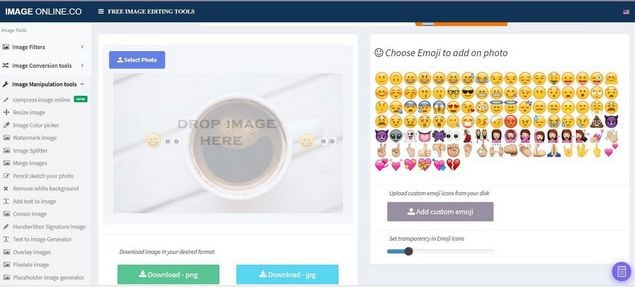
05Canva
Last in the list is the Canva graphic editing tool which you can conveniently work with to add an emoji to a picture. Having a slightly different image editing process in comparison to its online counterparts, the utility requires you to sign up to its working interface to begin editing your photos. To start with, you need to select a preset image template or pick customized dimensions to upload the desired image.
To add emojis to your picture, you will have to download the latter’s application by navigating to and tapping the ‘More’ icon, followed by choosing the ‘Emoji’ option from the drop down menu that appears next. Once the ‘Emoji’ tab shows up in the tool’s main interface, proceed to upload your image and pick a suitable emoji from the list to add to the uploaded image. You can further, add layers of emojis to the picture, while resizing and adjusting the skin tones of the same.

Part 4 Adding Emoji to Photo Q&A
● What is the total number of emoji characters till date?
As of September 2021, a total of 3,633 emojis are known to have been introduced so far. Talking of the latest emoji package, there comes the Emoji 14.0, adding 112 emoji variations to the existing count. The aforesaid is a cumulative figure, including the skin tone, gender and flag sequences.
● What are the different types of emoji categories?
During the current time, the emoji characterization is known to house 8 different categories, namely, Flags, Symbols, Objects, Travel, Activity, Food & Drink, Animals & Nature and Smileys & People.
● What is the difference between Emoji and Emoticons?
Emoticons are specifically, graphic interpretations of the various human emotions that come with a keyboard command combination. Emojis on the other hand, are a standard set of various characters, often having a different artwork, but a universal meaning.
● Is it possible to self-create custom emojis?
As of now, having self-created variants of emojis is not possible. If at all, you become successful in design a character that resembles an emoji, you can use it as an image at the most. In an attempt to share it as an emoji, you will end up sending text combinations.
● What is the best software alternative to add emojis to pictures?
When looking for an affordable software solution for catering to the concern of how to add emojis to a photo, you can go for picking the Wondershare Filmora Video Editor graphic editing program, whose editing library literally houses the largest and the latest collection of emoji categories and varieties for sparking up your images with the best possible customized appearance.
For Win 7 or later (64-bit)
For macOS 10.12 or later
● Ending Thoughts →
● Adding emojis to pictures has landed among the latest and most preferred graphic editing trends of current times.
● When beginning to address the concern of how do you add emojis to pictures, the IT market puts a diversity of software and online solutions before you.
● If you are confused about making the best choice, you can pick the Wondershare Filmora graphic editor program without having to think twice.
Emojis are catchy graphic elements that can add life to your photos, videos and allied artworks within a wink. Be here to know about the most exciting how-tos!
In this article
01 [Best 6 Tools to Put Emojis on Pictures on iPhone](#Part 1)
02 [Best 6 Tools to Put Emojis on Pictures on Android](#Part 2)
03 [Best 5 Tools to Put Emojis on Pictures on Computer](#Part 3)
Part 1 Best 6 Tools to Put Emojis on Pictures on iPhone
Emojis have managed to secure enough significance in our social and professional lives across social media platforms in the current time. Be it a fun-filled conversation with friends and family on a chat service program, or a high end and professionally sound business strategy, these mini caricature pieces of graphic art can add the much needed highlight to almost every aspect of your digital communication concerns.
Now that you are aware of the utility of working with emojis to make your digital contents, let us take a dive into some of the best ways and means to make your iPhone images come alive in the following section:
01Emoji Picture Editor- Add Emojis to Your Photos
If you like to imbibe the images on your iPhone media gallery with a hoard of funny and cool emojis, this one is a perfect app to address the concern. The tool’s library houses the latest collection of emoji categories to be in line with a diversity of photo styles, themes and backgrounds. You can take your pick from the huge inventory of over 1500 different emojis to level up your photos.
Talking about the app interface and usage controls, you are granted full liberty to add emojis to your emojis, while changing their positions through a finger drag, or scale and rotate them by expanding, pinching and twisting your fingers. The app additionally allows you to send bigger emoji stickers on chats and conversations.
02Insta Emoji Photo Editor
When looking for an interesting and reliable application to set straight the concern of how to put emojis on pictures, the Insta Emoji Photo Editor is an affordable pick. Loaded with an enormous and updated emoji library, the app presents before you over 3200 fascinating emoji options to select from and add to your images.
The inclusion process is intuitively simple, with you just having to upload the desired images to the app’s working interface and choose from your most favorite emoji elements to make the stills come alive with added fun and spark. The app houses an interesting ’Emoji Paint’ feature for the extensively creative ones to let them create catchy drawings with the coolest emojis.
03Emoji My Face
Moving ahead in the list comes the aforesaid app, which you can conveniently rely on to get through the photo edit emoji task in less than a few seconds. What’s unique about the utility is its feature that lets you add emoji stickers on the faces of your image elements. Working with the app, you can transform the skinned appearances of your friends and family into hilarious emoji faces.
While the app permits you to pick any number of preferences from its latest and updated emoji collection, you can additionally, save and share your emoji centered image edits across a diversity of media sharing platforms and chat service programs.
04Emoji Background Photo Maker
While there are hoards of IT alternatives to add emojis to pictures, the following utility caters to the concern in a slightly different style, ahead of just picking and pasting emojis to still captures. Working with the tool, you can experiment with changing the customary and fundamental image backgrounds into funny and appealing emoji centered themes. You are allowed to either work with a desired image from your iPhone’s media gallery, or take a fresh shot from your device’s camera, followed by uploading the same to the app’s editing interface.
Focusing on the tool’s expanse of usage features, you get tom work with a straightforward interface, and select from a wide variety of expressive and thematic emoji backgrounds. You can further, preview and save the edited images in HD quality, and share the same with friends and family across social media handles.
05Funny Photo Editor With Emoji Stickers Camera
This one is an innovative image editing tool that lets you create funny image transformations with classic emoji stickers, while addressing the query of how to add emojis to pictures. If your peer group consists of crazy creators who are selfie freaks, try hands at uplifting your live camera shots with this application by adding the funkiest emojis and sharing them across the regular communication platforms.
The app’s default camera feature lets you capture a straight forward image and convert the same into a hilarious edit with the latest range of free emoji stickers, caricature smileys and lots more. You can additionally beautify the edits with choosing from a decent range of emoji skin tones to suit the image background.
06Instamoji- Emoji Photo Editor
If you have been searching for an affordable solution to walk through the concern of , how to add emoji to photo on your iPhone, try working with the Instamoji application to highlight your customary images with classic emoji stickers and elements within the blink of an eye. The app welcomes you with a clean and intuitive interface to work upon, and is completely free to use.
Talking about the utility’s emoji centered image editing features, you are permitted to select from a decent collection of vibrant, funny and cool emojis, assorted under a diversity of categories to complement your images with, while exporting them across your digital communication accounts with utmost ease. The app promises you of the finest quality edited image output.
Part 2 Best 6 Tools to Put Emojis on Pictures on Android
Emojis are best known to spark up graphic artworks with an element of fun and entertainment. While the introduction of social media and digital communication utilities have brought emojis to the fingertips of modern day smartphone users, the IT market never lags behind at putting the latest transformations regarding emoji usage at your disposal.
Discussing along the line, let us talk about some interesting applications that address the concern of how to add an emoji to a photo using an Android device in what follows next:
01Add Emoji Stickers- Pics Editor and Photo Maker
This one is a smart photo editing tool that you can choose to customize the otherwise ordinary images on the local media gallery of your Android smartphone. The app greets you with an extensive range of updated emoji alternatives to suit your most specific editing requirements for complementing your elementary photos with the perfect feel and emotion.
The emojis work to add the missing fun to your social media posts with image edits funny enough to make your peers roll over with laughter. Not just smiley faces, the app delivers to you a categorized set of emojis that are a perfect fit to any graphic theme. Some of the most preferred ones include Nature, Travel, Food & Drinks, and many more. So why wait? Just get the free utility and begin to edit and share!
02Emoji Face Sticker
If you are creativity freak and love to experiment with your editing skills to put emoji on picture, try hands at working with this free image editor utility to add a fun element to your photos and give a laughter dose to your friends and family on social media. The app caters to transform your uploaded images faces to the cutest emoji look alike ever.
If that’s not enough, you can work with the app to change your smartphone’s regular camera into an emoji camera app that works to create the best caricature emoji montages from your snapped selfies. Navigating through the latte’s editing library, you will get to choose from among the craziest and coolest emoji stickers to create emoji photos out of normal stills. All in all, the app allows you to put forward your emotions in a relatively funnier way.
03Emoji Photo Editor
Are you bored of looking at those customary color backgrounds behind your images? Consider sparking them up with the cutest and most expressive emoji backgrounds. As you pick the app to edit your images, the latter grants you a complete access to its free emoji library that houses a decent collection of over 50 different emoji backgrounds to select from. A few of the most popular ones comprise of the flower and heart crown stickers, dog face camera among others.
Editing images within the app is seamless enough to last for a few seconds. You can use the created emoji background edits in a series of ways, like, preferring a local save or going for an image export to your favorite social media handle. Another cool way to show off your creativity can be making a device screen wallpaper of the emoji background image.
04Auto Face Stamp- Cover Face With Emoji
Looking forward to use an SNS services for media sharing purposes, but bothered about privacy concerns? While it is a common practice to share pictures via SNS and allied public platforms, most of us are often worried about keeping our faces hidden. Under normal circumstances, the face masking task is something you would ideally want to escape; the aforesaid app caters to the same in a funny and enjoyable manner.
Working with the utility, you can mask your image faces with over 100 different types of emoji stickers. The app aids you further in the task through its accurate face recognition ability that takes into consideration the smallest of faces with utmost precision. All you need to do is, select a desired emoji sticker and tap on the face you wish to mask with the same.
You can further, choose to directly export the masked images to media sharing handles right from the app’s editing workspace. The app is available to you absolutely free of cost and greets its users with a responsive working interface.
05Emoji Background Photo Editor
If the ordinary thematic backgrounds of your images do not suit you any longer, try working with this application to transmute the same into vibrant and expressive emoji alternatives. The aforesaid photo editing utility caters to make your images stand out of the crowd with beautiful emoji landscapes that render creative image edits of a matchless class, while maintaining a high-definition output image quality.
Extending the dimension of features to a longer stretch, the app grants you the liberty to adjust the position and transparency of the added emojis, set emoji frames and customize the emoji centered backgrounds with stunning effects and filters. As you finish with the editing process, the app lets you share your creations directly to a preferred social media platform, while also keeping them safe in your device’s local media gallery.
06Face Emoji Photo Effect
Reaching the end of the list, here comes the Face Emoji Photo Effect application that is all set to upgrade the level of your regular images with its classic and beautiful emoji backgrounds and stickers. The app’s editing library houses a diverse range of latest and elusive emojis to highlight your otherwise normal captures. The app additionally facilitates you with an expanded set of image editing features and effects to turn them into a graphic masterpiece.
The app welcomes you with a clean and responsive interface that makes the emoji inclusion process a quick and fun activity. All you need to do is, pick up an image from your locally saved alternatives and upload them to the app’s working interface, followed by browsing the latter’s emoji library to select a cohesive emoji background to complement the same.
You can further, download the premium emoji packs through a minimal payment to enhance the app’s library if the preset options do not match your requirements. The inbuilt emoji choices are however, free to work with.
Part 3 Best 5 Tools to Put Emojis on Pictures on Computer
All of us are familiar to and love using emojis everywhere, right from commenting on regular social media posts and chat service conversations, to creating professionally sound and strategic, business centered company presentations. While the most diverse use of these graphic utilities is reported on mobile devices, you may sometimes land across an instance that demands working with emojis on a computer.
Moving ahead with our discussion to address the aforesaid concern, let us talk about some of the prominent software and online solutions to set aside the issue of how to put emojis on photos while working on a computer in the upcoming section of this article:
01Kapwing
Entering into the domain of online image editing tools, the Kapwing website easily lands among the highly preferred choices. To address the concern of adding emojis to pictures on your PC or desktop systems, this one is an affordable tool to rely on. Talking of the underlying reasons behind the app’s high rated user preference, the latter allows you to access its huge inventory of emoji stickers, distributed across a heap of categories to choose from.
Next in the line is the tool’s spic and span editing process that lets you add and customize emojis on the uploaded images with a series of effects and filters in a matter of counted seconds. You can either pick and import images from your system, or work with the app’s in house emoji templates to edit the photos. As you are done with uploading images and adding emojis, proceed to place them at the desired position within the image.
The app allows you to add multiple emoji layers to the images by facilitating the creation of duplicate copies of your favorite emojis. Once you are done with the editing process, you are free to export your creation across media handles, or save them locally to your system.
02Editor.pho.to
If you are a newbie to the world of graphic editing and want to experiment with your creative skills to sort out the need of how to add an emoji to a picture, prefer landing on this free online website to work on your images. Considering the fact that not everyone around you is a tech savvy, the aforesaid online photo editing tool is designed to house the simplest of interfaces ever. The tool is available to you absolutely free of cost, without any unfair hidden purchases.
Ahead of the basic customization features, the tool grants you the freedom to expand your graphic skills on a wider canvas with presenting before you a plethora of emoji faces, stickers and backgrounds to complement the uploaded images with. Once you have added the emoji, the tool lets you work on the latter’s position and transparency adjustments, create emoji layers and overlays and save the edits to your system in a visibly high output quality.
03Add Emoji to Photo
When looking for dependable solutions to work towards the task of how to put an emoji on a photo, you can conveniently trust the aforementioned online tool to create classic emoji photo edits from the customary still alternatives son your computer. This one is a free to use image editor facility that allows you to decorate your otherwise unnoticed images with an extensive range of preset and custom emojis to make them expressive and speak out your emotions.
The tool caters to render a high definition edited image output within seconds through the simplest of customization processes. You just need to upload a desired image from your system to the tool’s working interface, followed by picking a suitable emoji from the tool’s editing library to add it to the image. If however, the available options don’t seem to address your specific requirements, you can proceed to create custom emojis of your own within the tool.
You can also create multiple emoji layers to add to the uploaded image and make adjustments to their transparency and position within the photo. As you finish the editing process, the tool grants you the liberty to download the customized image to your system in either of the PNG or JPG file formats.
04Image Online
Another entry into the list of solutions to answer the query of how to put emojis on a photo, the Image Online tool promises you of a quality constrained image editing process to complement the basic still captures in the local media gallery of your computer with the latest collection of emoji elements. Welcoming you with a decent interface, the tool caters to sort out your emoji centered picture editing requirements within a blink’s time.
To add emoji to image with this tool, you just need to upload the selected photo to the latter’s workspace, followed by selecting a preferred emoji from the editing library, or create a custom emoji of your own, to put on the image. You can customize the emoji settings in terms of position, size and transparency, and download the edits to your device in JPG and PNG image formats.
05Canva
Last in the list is the Canva graphic editing tool which you can conveniently work with to add an emoji to a picture. Having a slightly different image editing process in comparison to its online counterparts, the utility requires you to sign up to its working interface to begin editing your photos. To start with, you need to select a preset image template or pick customized dimensions to upload the desired image.
To add emojis to your picture, you will have to download the latter’s application by navigating to and tapping the ‘More’ icon, followed by choosing the ‘Emoji’ option from the drop down menu that appears next. Once the ‘Emoji’ tab shows up in the tool’s main interface, proceed to upload your image and pick a suitable emoji from the list to add to the uploaded image. You can further, add layers of emojis to the picture, while resizing and adjusting the skin tones of the same.
Part 4 Adding Emoji to Photo Q&A
● What is the total number of emoji characters till date?
As of September 2021, a total of 3,633 emojis are known to have been introduced so far. Talking of the latest emoji package, there comes the Emoji 14.0, adding 112 emoji variations to the existing count. The aforesaid is a cumulative figure, including the skin tone, gender and flag sequences.
● What are the different types of emoji categories?
During the current time, the emoji characterization is known to house 8 different categories, namely, Flags, Symbols, Objects, Travel, Activity, Food & Drink, Animals & Nature and Smileys & People.
● What is the difference between Emoji and Emoticons?
Emoticons are specifically, graphic interpretations of the various human emotions that come with a keyboard command combination. Emojis on the other hand, are a standard set of various characters, often having a different artwork, but a universal meaning.
● Is it possible to self-create custom emojis?
As of now, having self-created variants of emojis is not possible. If at all, you become successful in design a character that resembles an emoji, you can use it as an image at the most. In an attempt to share it as an emoji, you will end up sending text combinations.
● What is the best software alternative to add emojis to pictures?
When looking for an affordable software solution for catering to the concern of how to add emojis to a photo, you can go for picking the Wondershare Filmora Video Editor graphic editing program, whose editing library literally houses the largest and the latest collection of emoji categories and varieties for sparking up your images with the best possible customized appearance.
For Win 7 or later (64-bit)
For macOS 10.12 or later
● Ending Thoughts →
● Adding emojis to pictures has landed among the latest and most preferred graphic editing trends of current times.
● When beginning to address the concern of how do you add emojis to pictures, the IT market puts a diversity of software and online solutions before you.
● If you are confused about making the best choice, you can pick the Wondershare Filmora graphic editor program without having to think twice.
Also read:
- In 2024, | Live Stream on YouTube Using Zoom
- The Actual Discussion Is Regarding the Splitting of the Video by Using the VSDC. Also, Recommendation of Using Wondershare Filmora as the Better Substitute in Place of VSDC for 2024
- Updated The Complete Guide to GIF for Discord Profile for 2024
- Updated Create the Stranger Things Upside Down Effect Video
- New How Can You Import and Adjust the Video Clips on Wondershare Filmora for 2024
- Are You Aware that You Can Create Your Own Lower Thirds for Video? Read This Article for a Tutorial on How to Customize One
- In 2024, How to Make Video Slow Motion? Complete Guide
- New 2024 Approved Progressive Solutions to Adding VHS Effects to Video with Ease
- In 2024, Do You Seek a Guide to Add Motion in Blender? This Article Explains the Blender Motion Blur Effect in Detail and Helps You Master It
- 2024 Approved Modern Silence Detection Tools Are Changing the Face of Video Editing. Use Them to Improve the Quality of Your Video Clips. Learn How These Tools Let You Detect Silence with Pinpoint Accuracy
- New What Is an Eye Zoom Transition Effect? Its a Close-Up Video Effect Allowing Viewers to Transit to the Next Clip From the Eye
- 2024 Approved Best 8 Srt File Creators
- New 2024 Approved Hitfilm Express - A Guide to Download, Install, Key Features
- Do You Want to Create Slow-Motion Videos? This Article Shows Methods to Create Slow-Mo Videos without Changing the Medias Quality
- Why Your Transparent GIF Is Hard to Remove for 2024
- How to Edit A Time Lapse Video on iPhone for 2024
- Updated | Live Stream on YouTube Using Zoom for 2024
- New Want to Make Your Slideshows More Fun and Exciting? Follow the Given Discussion to Know How to Make a Slideshow Gif, Thereby Making Your Slideshow More Enjoyable than Ever for 2024
- New Detailed Tutorial to Crop a Video in KineMaster
- New In 2024, How to Use LUTS to Color Grade on Your iPhone
- How to Track Samsung Galaxy A14 5G by Phone Number | Dr.fone
- 2 Ways to Monitor Motorola Moto G84 5G Activity | Dr.fone
- App Wont Open on Your Samsung Galaxy S23? Here Are All Fixes | Dr.fone
- Ultimate Guide from OnePlus Nord CE 3 Lite 5G FRP Bypass
- In 2024, Preparation to Beat Giovani in Pokemon Go For Poco X5 | Dr.fone
- How to Detect and Stop mSpy from Spying on Your Vivo V27 Pro | Dr.fone
- Still Using Pattern Locks with Infinix Note 30 VIP Racing Edition? Tips, Tricks and Helpful Advice
- How To Reset Your Apple iPhone 15 Pro Without iTunes? | Dr.fone
- The way to get back lost videos from Xiaomi 14
- How to Update Apple iPhone SE (2020) without Losing Anything? | Dr.fone
- Title: Updated In 2024, Easy Steps to Loop YouTube Videos on iPhone
- Author: Morgan
- Created at : 2024-04-24 01:05:04
- Updated at : 2024-04-25 01:05:04
- Link: https://ai-video-editing.techidaily.com/updated-in-2024-easy-steps-to-loop-youtube-videos-on-iphone/
- License: This work is licensed under CC BY-NC-SA 4.0.
