
Updated In 2024, Find Out How to Add Subtitles in the VLC Media Player on Your Windows and Mac System with Quick and Simple Instructions

Find Out How to Add Subtitles in the VLC Media Player on Your Windows and Mac System with Quick and Simple Instructions
VLC is a free, open-source, and easy-to-use cross-platform multimedia player that supports numerous audio and video file formats. You can use the program on different devices, including smartphones, TVs, and PCs.
With the VLC media player, you can not only watch your favorite movie or video clip but can also add subtitles to them. This can be useful to improve your video-watching experience, especially if you are playing a foreign film or one with poor audio quality. Moreover, subtitles can also help people with hearing impairments to follow along.
Want to learn how to add subtitles in the VLC media player? Keep reading to find out!
How To Add Subtitle Files In VLC Media Player?
You can download subtitles for the language you want from a subtitle site and enjoy them while watching the movie or video clip in VLC Media Player. However, this method won’t add the SRT file permanently to your videos.
Here’s how you can add subtitles in the VLC media player on your video clip:
Step1 Visit the subtitles website of your choice and download the file for the video you are watching.
Step2 Save the SRT file along with your video in the same folder.
Step3 Right-click the video, click “Open With,” and choose VLC media player. Alternatively, launch the player, click “Media,” and select “Open file…” to import the video.

Step4 VLC Media Player will automatically detect and add the subtitles file. If not, click the “Subtitles” option in the toolbar, select “Sub Track,” and choose the relevant file within the listing.
Step5 The VLC player will now display the subtitles along with your video. However, if it is still unable to find the subtitles file, click “Subtitles” > “Add Subtitles” and manually add the file you’ve downloaded.

![]()
Note: If the subtitles are not playing correctly along the video, you can adjust the playback delay using the G and H keys on your keyboard. This will toggle between 50ms delays.
How To Add Subtitles To Video In VLC Media Player Permanently?
Since the above method only adds subtitles temporarily, you might be looking for a solution to permanently attach the SRT file to your clip to provide a better viewing experience to your viewers or add extra information for those who have difficulty understanding the audio.
Below we’ve provided step-by-step methods to add subtitles to video in the VLC media player on your Windows and Mac.
On Windows
You can permanently embed the subtitles to your video in the VLC media player on your Windows in the following way:
Step1 Launch the VLC media player on your Windows PC/laptop and click “Media.” Scroll down and click the “Stream” option.

Step2 Now, click “Add” in the pop-up menu and choose the video you want to play. To add a subtitles file, check the “Use a Subtitles File” option and click “Browse.” Now, add the relevant SRT file you’ve downloaded.

Step3 Next, click the “Stream” option and choose “Next.” To set the destination for your video, select “File” and click “Add.” A new window will open, click the “Browse” option and enter your footage/video name.
Make sure to set the format as .mp4 or any other video format. Choose the folder for your video and click “Save.” Click the “Next” option to proceed further.
Step4 Check the box next to “Active Transcoding,” click the Wrench icon, and head to the “Subtitles” tab. Check the boxes next to “Subtitles” and “Overlay Subtitles on the Video.
Finally, click the “Save” option, select “Next,” and click “Stream” in the new window. Wait for the processing to complete, and your video with subtitles will be saved to the folder you’ve selected.

On Mac
Here’s how you can permanently add subtitles to your video clip in the VLC media player on your Mac:
Step1 Launch the VLC media player on your Mac and click the “File” option from the top toolbar. Click “Advanced Open File.”

Step2 Now, click “Browse” on the next page and add the video to which you want to attach the subtitles. Checkmark the “Add Subtitles File” option and click “Choose.” Browse and add the SRT file. Click “OK” to confirm.
Step3 Checkmark the “Stream Outputs” option and click “Settings.” Next, click “Browse” in the next window to configure the output file name and folder. Afterward, click “Save” and set the Encapsulation method as “MPEG 4.”
Under the Transcoding tab, checkmark the boxes next to Video and Audio. Next, click “OK” and select “Open.” You can now turn on the subtitles by navigating to “Subtitles” > “Subtitles Track.”

How To Create Subtitles In VLC Media Player?
It is possible to create subtitles in the VLC media player if you’re unable to find an appropriate SRT file online or want to add some extra details by editing the existing one. For this method to work, you will first need to format your file in the SRT format.
Furthermore, you have to rank the text in order with a number and add timestamps in minutes, seconds, and milliseconds to determine the duration. To avoid plain text, you can also add effects to the subtitles by using HTML.
Step1 Launch a text editoron your PC, import your video to the editor, and save it in .srt format.

Step2 Open the VLC media player and play the video. Now, edit the subtitles while matching them with the timestamps.
Step3 Next, add a new line, timestamp, and subtitle for each caption.
Step4 Repeat the process to create and add all the required subtitles.
Bonus Tips: How To Add And Edit Subtitles In The Best VLC Alternative
If you find the above method difficult to understand, we recommend using Filmora . With this software program, you can not only edit your videos to make them engaging and appealing to watch but can also add and edit subtitles to them using the ten pre-build subtitles templates.
Free Download For Win 7 or later(64-bit)
Free Download For macOS 10.14 or later
Filmora can help you to format the subtitles to match your video and add various font styles, such as WordArt, Basic, Titles, and more. In addition, you can create text with different parameters, including color fills, gradient fills, and 12 shadow effects. You can also make your captions alive with the animation effects.
Here’s how you can add and edit subtitles on your videos using Filmora:
Step1 Launch the Filmora software on your PC and click “Create New Project.” Drag and drop your video or select “Click here to import media” to add your video.

Step2 Add the video to the timeline and play it. Listen to the voiceover and press the “M” key to add a marker.
Now, click the “Titles” option and head to the “Subtitles” tab from the left menu. Double-click a subtitle to download and preview it.

Step3 Drag and drop the subtitle you want to use in the timeline and adjust it along the marker point.
Next, double-click the subtitle box in the timeline and type the text from the voiceover. Add color, text template, and adjust the text space.

Step4 Head to the “Advanced” tab, delete the preset text and adjust the one you’ve just typed. You can also add animation effects from the “Animation” tab and click “OK.”

Repeat the process to add and edit the subtitles on your video till the end. Once you are satisfied, click “Export” and save the file on your PC.
Conclusion
In this article, we’ve explored different methods to show you how to add subtitles in the VLC media player to make your videos more engaging and easy to understand, even for those with hearing impairment.
We’ve also provided step-by-step instructions to use Filmora as an alternative to add and edit the subtitles on your video real quickly.
Hopefully, you’ve enjoyed reading this article and can now enjoy watching a video in any language with ease.
How To Add Subtitles To Video In VLC Media Player Permanently?
Since the above method only adds subtitles temporarily, you might be looking for a solution to permanently attach the SRT file to your clip to provide a better viewing experience to your viewers or add extra information for those who have difficulty understanding the audio.
Below we’ve provided step-by-step methods to add subtitles to video in the VLC media player on your Windows and Mac.
On Windows
You can permanently embed the subtitles to your video in the VLC media player on your Windows in the following way:
Step1 Launch the VLC media player on your Windows PC/laptop and click “Media.” Scroll down and click the “Stream” option.

Step2 Now, click “Add” in the pop-up menu and choose the video you want to play. To add a subtitles file, check the “Use a Subtitles File” option and click “Browse.” Now, add the relevant SRT file you’ve downloaded.

Step3 Next, click the “Stream” option and choose “Next.” To set the destination for your video, select “File” and click “Add.” A new window will open, click the “Browse” option and enter your footage/video name.
Make sure to set the format as .mp4 or any other video format. Choose the folder for your video and click “Save.” Click the “Next” option to proceed further.
Step4 Check the box next to “Active Transcoding,” click the Wrench icon, and head to the “Subtitles” tab. Check the boxes next to “Subtitles” and “Overlay Subtitles on the Video.
Finally, click the “Save” option, select “Next,” and click “Stream” in the new window. Wait for the processing to complete, and your video with subtitles will be saved to the folder you’ve selected.

On Mac
Here’s how you can permanently add subtitles to your video clip in the VLC media player on your Mac:
Step1 Launch the VLC media player on your Mac and click the “File” option from the top toolbar. Click “Advanced Open File.”

Step2 Now, click “Browse” on the next page and add the video to which you want to attach the subtitles. Checkmark the “Add Subtitles File” option and click “Choose.” Browse and add the SRT file. Click “OK” to confirm.
Step3 Checkmark the “Stream Outputs” option and click “Settings.” Next, click “Browse” in the next window to configure the output file name and folder. Afterward, click “Save” and set the Encapsulation method as “MPEG 4.”
Under the Transcoding tab, checkmark the boxes next to Video and Audio. Next, click “OK” and select “Open.” You can now turn on the subtitles by navigating to “Subtitles” > “Subtitles Track.”

How To Create Subtitles In VLC Media Player?
It is possible to create subtitles in the VLC media player if you’re unable to find an appropriate SRT file online or want to add some extra details by editing the existing one. For this method to work, you will first need to format your file in the SRT format.
Furthermore, you have to rank the text in order with a number and add timestamps in minutes, seconds, and milliseconds to determine the duration. To avoid plain text, you can also add effects to the subtitles by using HTML.
Step1 Launch a text editoron your PC, import your video to the editor, and save it in .srt format.

Step2 Open the VLC media player and play the video. Now, edit the subtitles while matching them with the timestamps.
Step3 Next, add a new line, timestamp, and subtitle for each caption.
Step4 Repeat the process to create and add all the required subtitles.
Bonus Tips: How To Add And Edit Subtitles In The Best VLC Alternative
If you find the above method difficult to understand, we recommend using Filmora . With this software program, you can not only edit your videos to make them engaging and appealing to watch but can also add and edit subtitles to them using the ten pre-build subtitles templates.
Free Download For Win 7 or later(64-bit)
Free Download For macOS 10.14 or later
Filmora can help you to format the subtitles to match your video and add various font styles, such as WordArt, Basic, Titles, and more. In addition, you can create text with different parameters, including color fills, gradient fills, and 12 shadow effects. You can also make your captions alive with the animation effects.
Here’s how you can add and edit subtitles on your videos using Filmora:
Step1 Launch the Filmora software on your PC and click “Create New Project.” Drag and drop your video or select “Click here to import media” to add your video.

Step2 Add the video to the timeline and play it. Listen to the voiceover and press the “M” key to add a marker.
Now, click the “Titles” option and head to the “Subtitles” tab from the left menu. Double-click a subtitle to download and preview it.

Step3 Drag and drop the subtitle you want to use in the timeline and adjust it along the marker point.
Next, double-click the subtitle box in the timeline and type the text from the voiceover. Add color, text template, and adjust the text space.

Step4 Head to the “Advanced” tab, delete the preset text and adjust the one you’ve just typed. You can also add animation effects from the “Animation” tab and click “OK.”

Repeat the process to add and edit the subtitles on your video till the end. Once you are satisfied, click “Export” and save the file on your PC.
Conclusion
In this article, we’ve explored different methods to show you how to add subtitles in the VLC media player to make your videos more engaging and easy to understand, even for those with hearing impairment.
We’ve also provided step-by-step instructions to use Filmora as an alternative to add and edit the subtitles on your video real quickly.
Hopefully, you’ve enjoyed reading this article and can now enjoy watching a video in any language with ease.
Have You Ever Used Premiere Pro to Create Slow-Motion Effects? This Article Will Provide a Guide on Producing Slow-Motion Effects by Using Adobe Premiere Pro
Adobe Premiere Pro is a famous video editing program in the media industry. It includes professional-quality features that enable advanced video editing. Due to its impressive performance, many content creators use this tool to add slow-motion effects to the videos. If you are at a beginner stage of video editing, you may not know how to operate Premiere Pro slow-motion effects. Thus, this guide will provide you with basic yet accurate instructions.
To create slow-motion effects in Premiere Pro, the guide will describe the instructions in a simple way. We will also highlight the templates of this tool providing slow-motion effects in Premiere Pro for videos. Hence, keep discovering this guide to learn more details.
Slow Motion Video Maker Slow your video’s speed with better control of your keyframes to create unique cinematic effects

Part 1: How To Perform Slow Motion on Adobe Premiere Pro?
Adobe Premiere Pro offers an advanced user interface to perform complex functions. It contains a wide range of features supporting non-destructive video editing. Its auto-correct feature lets you adjust the color patterns of the video in a smart way. Moreover, it contains a comparison view to analyze the before and after visual effects. You can also add adjustment layers in the timeline to change many clips at once.
On Premiere Pro, you can also connect third-party plugins for more features. It also supports many professional-grade formats to offer flexibility for video editors. Among other features, it can also apply slow-motion effects to the video. To make Premiere Pro slow-motion effects, you can use the following steps:
Step 1: On Premiere Pro, upload the video in which you want to create a slow-motion effect. To proceed, drag it to the timeline with your cursor. At the start of the timeline, right-click on the small icon saying FX on the left side. From there, select “Time Remapping” and then “Speed.”

Step 2: Now, add the keyframe where you want to begin and end the slow-motion effect. To do so, press “CTRL + Click” on the timeline. To add a ramp, click on the added keyframes and drag them a little to the right side.

Step 3: To proceed, move to the central part of the two added keyframes. Afterward, click on the central part and drag it downwards. By doing so, you can see the reduced percentage number on the timeline. To add a more slow-motion effect, pull down the central part of the timeline. For more adjustments in the length within the keyframes, you can go to the effects control. By doing so, you can determine how smoothly you want to create a slow-motion effect.

Part 2:Leading Templates Offering Quick Slow Motion Effect in Premiere Pro
In this section, you can find popular slow-motion effect Premiere Pro templates. After accessing the templates, you can customize them as per your needs. Hence, let’s dig into the details below:
This template is perfect for use in the intros of videos, presentations, slideshows, etc. It contains 9 different scenes of outdoor areas. Moreover, it offers 16 media placeholders and 7 text placeholders to add custom content. You can promote your brand by using its 2 placeholder logos. Hence, it’s a perfect slow-motion video template with HD-quality resolution.

The slow-motion explosion logo opener is an attractive template featuring vibrant colors. It contains a hand-drawn animated logo with suitable backgrounds. Along with the logo reveal, it includes background music that matches the theme of the video. It also offers media and text placeholders to let you introduce your brand.

Do you want to create a modern video on Premiere Pro? Well, this slow-motion template features freeze frames to offer viewers a unique look. The template gives a glimpse of urban life with energetic background music. It’s available in full HD resolution with eye-catching urban locations. Hence, try this template for demos, fashion, and action videos.

Dynamic Sport is one of the famous slow-motion Premiere Pro templates. With a modern outlook, it includes simple text animation. Moreover, it uses many transitioning effects to produce a stunning video. You can insert extra content with its 8 editable text placeholders. Thus, download this template and customize it in Premiere Pro.

This planet-themed template introduces cinematic spinning planets. With 8 text placeholders, you can write content related to your shows, movies, and events. It contains intriguing background music that can grasp the attention of your audience. In full HD resolution, this template can help you produce cinematic slow-motion videos with minimal effort.

Part 3: Tutorial: Perform Slow Motion in Filmora Video Editing
Are you ready to perform slow-motion effects in Premiere Pro in Filmora? Check the directions below to add a slow-motion effect to your video .
Free Download For Win 7 or later(64-bit)
Free Download For macOS 10.14 or later
Step 1Browse and Import the File
After the launch of Filmora, click on the “New Project” button. Click on the “Import Media” section to browse the video file. Once done, drag the video to the timeline to start the editing process.

Step 2Open Speed Ramping Settings
Go to the right panel of the screen to open the settings. From there, go to the “Speed” tab and select “Speed Ramping”. It will display the speed ramping settings below.

Step 3Adjust the Video Speed
The presets are available for speed ramping in the above section. Choose “Customize” and then proceed to the small graph given below. Here, you can move the points to adjust the video’s speed. By pulling down the points, you can reduce the video’s speed. Continue the process until you achieve your desired speed.

Step 4Render the Video
Expand the option of “AI Frame Interpolation” and choose “Optical Flow.” Once done, click on “Render Preview” from the timeline’s toolbar to see the highest-quality results.

Conclusion
Slow-motion effect Premiere Pro can produce high-end results for professionals. Yet, this tool is not ideal for every kind of user. In contrast, Filmora is the most flexible tool due to its friendly user interface. Without extensive manual efforts, you can produce slow-motion videos within a few clicks. Moreover, it features many AI options to let you increase your productivity.
Make A Slow Motion Video Make A Slow Motion Video More Features

Part 1: How To Perform Slow Motion on Adobe Premiere Pro?
Adobe Premiere Pro offers an advanced user interface to perform complex functions. It contains a wide range of features supporting non-destructive video editing. Its auto-correct feature lets you adjust the color patterns of the video in a smart way. Moreover, it contains a comparison view to analyze the before and after visual effects. You can also add adjustment layers in the timeline to change many clips at once.
On Premiere Pro, you can also connect third-party plugins for more features. It also supports many professional-grade formats to offer flexibility for video editors. Among other features, it can also apply slow-motion effects to the video. To make Premiere Pro slow-motion effects, you can use the following steps:
Step 1: On Premiere Pro, upload the video in which you want to create a slow-motion effect. To proceed, drag it to the timeline with your cursor. At the start of the timeline, right-click on the small icon saying FX on the left side. From there, select “Time Remapping” and then “Speed.”

Step 2: Now, add the keyframe where you want to begin and end the slow-motion effect. To do so, press “CTRL + Click” on the timeline. To add a ramp, click on the added keyframes and drag them a little to the right side.

Step 3: To proceed, move to the central part of the two added keyframes. Afterward, click on the central part and drag it downwards. By doing so, you can see the reduced percentage number on the timeline. To add a more slow-motion effect, pull down the central part of the timeline. For more adjustments in the length within the keyframes, you can go to the effects control. By doing so, you can determine how smoothly you want to create a slow-motion effect.

Part 2:Leading Templates Offering Quick Slow Motion Effect in Premiere Pro
In this section, you can find popular slow-motion effect Premiere Pro templates. After accessing the templates, you can customize them as per your needs. Hence, let’s dig into the details below:
This template is perfect for use in the intros of videos, presentations, slideshows, etc. It contains 9 different scenes of outdoor areas. Moreover, it offers 16 media placeholders and 7 text placeholders to add custom content. You can promote your brand by using its 2 placeholder logos. Hence, it’s a perfect slow-motion video template with HD-quality resolution.

The slow-motion explosion logo opener is an attractive template featuring vibrant colors. It contains a hand-drawn animated logo with suitable backgrounds. Along with the logo reveal, it includes background music that matches the theme of the video. It also offers media and text placeholders to let you introduce your brand.

Do you want to create a modern video on Premiere Pro? Well, this slow-motion template features freeze frames to offer viewers a unique look. The template gives a glimpse of urban life with energetic background music. It’s available in full HD resolution with eye-catching urban locations. Hence, try this template for demos, fashion, and action videos.

Dynamic Sport is one of the famous slow-motion Premiere Pro templates. With a modern outlook, it includes simple text animation. Moreover, it uses many transitioning effects to produce a stunning video. You can insert extra content with its 8 editable text placeholders. Thus, download this template and customize it in Premiere Pro.

This planet-themed template introduces cinematic spinning planets. With 8 text placeholders, you can write content related to your shows, movies, and events. It contains intriguing background music that can grasp the attention of your audience. In full HD resolution, this template can help you produce cinematic slow-motion videos with minimal effort.

Part 3: Tutorial: Perform Slow Motion in Filmora Video Editing
Are you ready to perform slow-motion effects in Premiere Pro in Filmora? Check the directions below to add a slow-motion effect to your video .
Free Download For Win 7 or later(64-bit)
Free Download For macOS 10.14 or later
Step 1Browse and Import the File
After the launch of Filmora, click on the “New Project” button. Click on the “Import Media” section to browse the video file. Once done, drag the video to the timeline to start the editing process.

Step 2Open Speed Ramping Settings
Go to the right panel of the screen to open the settings. From there, go to the “Speed” tab and select “Speed Ramping”. It will display the speed ramping settings below.

Step 3Adjust the Video Speed
The presets are available for speed ramping in the above section. Choose “Customize” and then proceed to the small graph given below. Here, you can move the points to adjust the video’s speed. By pulling down the points, you can reduce the video’s speed. Continue the process until you achieve your desired speed.

Step 4Render the Video
Expand the option of “AI Frame Interpolation” and choose “Optical Flow.” Once done, click on “Render Preview” from the timeline’s toolbar to see the highest-quality results.

Conclusion
Slow-motion effect Premiere Pro can produce high-end results for professionals. Yet, this tool is not ideal for every kind of user. In contrast, Filmora is the most flexible tool due to its friendly user interface. Without extensive manual efforts, you can produce slow-motion videos within a few clicks. Moreover, it features many AI options to let you increase your productivity.
How To Make Split Screen Videos in Filmora
To show the interactions and exchanges of things between the characters are widely seen in movies. It seems they are close to each other, but they aren’t.
In this article, we will go with the video editor, Wondershare Filmora, to make split-screen videos instantly. Let’s move forward to check what you need to make these videos!
Part 1. Prerequisites To Make Split Screen Video To Interact
There is no need to make complex videos. Because nowadays, only short videos get viral and are more trending. The interaction videos should be as simple as passing props or playing with someone!
Split-screen videos are widely used in movies and films because it is a visual way to describe any story. The actions will be based on real-time interactions between the characters. The essential things you are required to make these videos are described as follows:
1. Storyboard
First of all, you have to create a story with your friends and family, with whomever you want to create a video. For this, follow the below steps:
- Make a script of a story by coordination, such as writing all dialogues and actions so that there will be no difficulty during a performance on screen.
- Practice those actions again and again to get a professional look.
- The storyboard should be based on the split screen templates available on Wondershare Filmora , or you can create your customized too.

Free Download For Win 7 or later(64-bit)
Free Download For macOS 10.14 or later
2. Characters on the screen
The friends with whom you are interacting should be on the screen and have assets to record a video wherever they are. It will be one person on one split screen or two persons on one. It all depends upon your story and script.
3. Prop to interact
A prop will be any particular thing used to show interaction and should be present in the homes of both characters.
![]()
Note: The prop can be any object like a tissue roll, mobile phone, or anything seen as a passing object from one character to another.

4. A helper at home
There will be one person at home during video shooting to pretend a friend’s or family’s hand reaching to the other character from off-camera.
For example, while performing a high-five action, insert the hand of any member with whom you are living in the scene, showing as the character adjacent to you. After setting up everything in a row, it’s time to record scenes for the video.

5. Record different takes
To give a professional look to the video, you have to record different takes for each person from different angles. After recording, everyone has to send footage to only one person to edit on Filmora.
After getting things and recording, it’s time to edit it on Wondershare Filmora. For this, follow the lines below!
Part 2. Steps To Edit Split Screen Video in Filmora
Split-screen video editing is as simple as throwing a prop toward someone. Wondershare Filmora with a premium domain will get your back!
Filmora is a more creative and instant platform to edit any video or to give birth to new ideas. One of the prominent features is having ready-to-use templates for editing split-screen video. Meanwhile, you can also do a manual setup for editing. Follow the steps mentioned below to edit a video by using split-screen effects.
Split Screen Effect With Templates
Step1Import footage to Filmora
After picking up the best footage of every character, download the Wondershare Filmora (if you have not already). Then to import the clips, perform the following steps:
Free Download For Win 7 or later(64-bit)
Free Download For macOS 10.14 or later
- First, click on the “Click here to Import Media” button, as shown below.

- Then, select the clips you want to edit from your PC, and then they’ll be shown in the media section of Filmora.
Step2Add split screen effect to the timeline
Before adding the clips to the timeline, add the split screen effect to the timeline by following the below-mentioned steps:
- Click on the two-headed arrow at the upper tab.
- Then the drop-down list of two options will pop up, as shown below.

- Click on the Split Screen option, and it will show many split screen effects.

- Select the effect, whatever suits you, and download it then.
- After downloading, drag and drop the effect on the timeline section.

Step3Add clips to the effect
After adding the effect to the timeline, it’s time to implement it on the clips or footage. For this, follow the below-mentioned steps:
- Drag and drop the clips based on your storyboard in the required section.
- Then import the takes wherever and however you want, according to the storyboard.

If you don’t want any templates to be used in your video, then you can manually make a screen split layout. To do this, check the below section.
Manual Split Screen Layout
If the storyboard is organized in such a way that you can’t find out any of the templates suitable, then you can easily create a customized one for your video. In a customized split screen, you can set the duration and adjust the frame rate according to your choice.
Step1Import the clips
First, you must create a timeline to edit your split-screen video. To do this, take a look at the below steps!
- Click on the Import icon in the main preview when you open Wondershare Filmora.
- Then, import all the clips or footage you want to edit.

Step2Add all footages to the timeline
After importing all the clips of interaction videos into Filmora, our next step is to add our videos to the timeline.
- Simply click on the imported clips present in the project media section.
- Then drag it to the timeline below and drop it in the required track of videos.
Do the above-mentioned steps with all the clips present in the project media block.

Doing so will create a working timeline you can view and edit as you go along the editing process.
Step3Adjust the frame rate of all clips
It is all set that your storyboard is customized, for this you have to resize all the clips manually. To arrange clips according to the size, follow the below-mentioned steps:
- First, double-click on the clip you want to edit in the timeline.
- The Basic settings of the video will open in which you have a lot of options to edit.
- Click on the Transform option, and its setting will pop up on the top left side.
- Find out the Scale option from the settings and check out its range.

Adjust the scale rate according to your choice by sliding from its section.

![]()
Note: Repeat this process with all other clips present in the timeline to adjust them in such a way so that the hands moving from frame to frame will line up.

Step4Adjust the timing of clips
After adjusting the frame, you now have to adjust the timing of the clips. To perform this action, follow the below steps:
- Arrange and move around the clips on the timeline so that the timing of the scene lines up between each shot.
- Drag the edge of the clip to the right side if you want to increase the timing and duration.
- While dragging the edge of the clip to the left side, if you want to decrease the timing of the clip.
![]()
Note: The most important part is the first time a hand is supposed to move from one frame to another.
What to do if there is any lag in the preview?
If you’re experiencing lag during the preview, click on the “render” button on the top right of the timeline. It will help to render for a smooth preview.

Step5Splitting the clips
If the timing in your scene starts to fall out of sync, then do the following steps:
- First, try splitting all of the clips.
- Ensure to split before they start to fall out of sync.

![]()
Note: Splitting the clip before one person’s dialogue is preferred.
Step6Full-screen moment
After splitting the clips according to adjustments and storyboard, you can now make one of the characters’ videos in full screen. For this, follow the below steps:
- First, make another cut in the clips before the next hand-crossing action.
- Take one of the characters’ videos from clips in-between moment and make them full screen.

![]()
Note: You can quickly do full screen by double-clicking on the clip and unchecking the “transform“ heading in the top left window.

Final Results
You’re now free to re-adjust your clips in the next part back into sync. If you still want to make any adjustments in duration or cutting or sizing, you can do it easily. Because it’s a customizable effect. Give a pat on your Back! You did a great job and accomplish the results!

Free Download For Win 7 or later(64-bit)
Free Download For macOS 10.14 or later
Conclusion
An instant way to make split screen video and edit it is hidden in Wondershare Filmora . You can unwrap it by following the above-mentioned steps and giving a new life to your interaction videos.
Enjoy new and creative ideas with your family and friends and make your video trendy by Filmora. If you are an influencer, you can interact with other bloggers and influencers and make split-screen videos. It will be a great treat for you and your social media followers
2. Characters on the screen
The friends with whom you are interacting should be on the screen and have assets to record a video wherever they are. It will be one person on one split screen or two persons on one. It all depends upon your story and script.
3. Prop to interact
A prop will be any particular thing used to show interaction and should be present in the homes of both characters.
![]()
Note: The prop can be any object like a tissue roll, mobile phone, or anything seen as a passing object from one character to another.

4. A helper at home
There will be one person at home during video shooting to pretend a friend’s or family’s hand reaching to the other character from off-camera.
For example, while performing a high-five action, insert the hand of any member with whom you are living in the scene, showing as the character adjacent to you. After setting up everything in a row, it’s time to record scenes for the video.

5. Record different takes
To give a professional look to the video, you have to record different takes for each person from different angles. After recording, everyone has to send footage to only one person to edit on Filmora.
After getting things and recording, it’s time to edit it on Wondershare Filmora. For this, follow the lines below!
Part 2. Steps To Edit Split Screen Video in Filmora
Split-screen video editing is as simple as throwing a prop toward someone. Wondershare Filmora with a premium domain will get your back!
Filmora is a more creative and instant platform to edit any video or to give birth to new ideas. One of the prominent features is having ready-to-use templates for editing split-screen video. Meanwhile, you can also do a manual setup for editing. Follow the steps mentioned below to edit a video by using split-screen effects.
Split Screen Effect With Templates
Step1Import footage to Filmora
After picking up the best footage of every character, download the Wondershare Filmora (if you have not already). Then to import the clips, perform the following steps:
Free Download For Win 7 or later(64-bit)
Free Download For macOS 10.14 or later
- First, click on the “Click here to Import Media” button, as shown below.

- Then, select the clips you want to edit from your PC, and then they’ll be shown in the media section of Filmora.
Step2Add split screen effect to the timeline
Before adding the clips to the timeline, add the split screen effect to the timeline by following the below-mentioned steps:
- Click on the two-headed arrow at the upper tab.
- Then the drop-down list of two options will pop up, as shown below.

- Click on the Split Screen option, and it will show many split screen effects.

- Select the effect, whatever suits you, and download it then.
- After downloading, drag and drop the effect on the timeline section.

Step3Add clips to the effect
After adding the effect to the timeline, it’s time to implement it on the clips or footage. For this, follow the below-mentioned steps:
- Drag and drop the clips based on your storyboard in the required section.
- Then import the takes wherever and however you want, according to the storyboard.

If you don’t want any templates to be used in your video, then you can manually make a screen split layout. To do this, check the below section.
Manual Split Screen Layout
If the storyboard is organized in such a way that you can’t find out any of the templates suitable, then you can easily create a customized one for your video. In a customized split screen, you can set the duration and adjust the frame rate according to your choice.
Step1Import the clips
First, you must create a timeline to edit your split-screen video. To do this, take a look at the below steps!
- Click on the Import icon in the main preview when you open Wondershare Filmora.
- Then, import all the clips or footage you want to edit.

Step2Add all footages to the timeline
After importing all the clips of interaction videos into Filmora, our next step is to add our videos to the timeline.
- Simply click on the imported clips present in the project media section.
- Then drag it to the timeline below and drop it in the required track of videos.
Do the above-mentioned steps with all the clips present in the project media block.

Doing so will create a working timeline you can view and edit as you go along the editing process.
Step3Adjust the frame rate of all clips
It is all set that your storyboard is customized, for this you have to resize all the clips manually. To arrange clips according to the size, follow the below-mentioned steps:
- First, double-click on the clip you want to edit in the timeline.
- The Basic settings of the video will open in which you have a lot of options to edit.
- Click on the Transform option, and its setting will pop up on the top left side.
- Find out the Scale option from the settings and check out its range.

Adjust the scale rate according to your choice by sliding from its section.

![]()
Note: Repeat this process with all other clips present in the timeline to adjust them in such a way so that the hands moving from frame to frame will line up.

Step4Adjust the timing of clips
After adjusting the frame, you now have to adjust the timing of the clips. To perform this action, follow the below steps:
- Arrange and move around the clips on the timeline so that the timing of the scene lines up between each shot.
- Drag the edge of the clip to the right side if you want to increase the timing and duration.
- While dragging the edge of the clip to the left side, if you want to decrease the timing of the clip.
![]()
Note: The most important part is the first time a hand is supposed to move from one frame to another.
What to do if there is any lag in the preview?
If you’re experiencing lag during the preview, click on the “render” button on the top right of the timeline. It will help to render for a smooth preview.

Step5Splitting the clips
If the timing in your scene starts to fall out of sync, then do the following steps:
- First, try splitting all of the clips.
- Ensure to split before they start to fall out of sync.

![]()
Note: Splitting the clip before one person’s dialogue is preferred.
Step6Full-screen moment
After splitting the clips according to adjustments and storyboard, you can now make one of the characters’ videos in full screen. For this, follow the below steps:
- First, make another cut in the clips before the next hand-crossing action.
- Take one of the characters’ videos from clips in-between moment and make them full screen.

![]()
Note: You can quickly do full screen by double-clicking on the clip and unchecking the “transform“ heading in the top left window.

Final Results
You’re now free to re-adjust your clips in the next part back into sync. If you still want to make any adjustments in duration or cutting or sizing, you can do it easily. Because it’s a customizable effect. Give a pat on your Back! You did a great job and accomplish the results!

Free Download For Win 7 or later(64-bit)
Free Download For macOS 10.14 or later
Conclusion
An instant way to make split screen video and edit it is hidden in Wondershare Filmora . You can unwrap it by following the above-mentioned steps and giving a new life to your interaction videos.
Enjoy new and creative ideas with your family and friends and make your video trendy by Filmora. If you are an influencer, you can interact with other bloggers and influencers and make split-screen videos. It will be a great treat for you and your social media followers!
This Article Describes Different Ways for Removing Gif Backgrounds, How We Can Use Them, and How This Way Differs From One Another
10 Best Free GIF Background Remover for PC and Online
An easy yet powerful editor
Numerous effects to choose from
Detailed tutorials provided by the official channel
GIF also known as Graphical Interchange Format is a kind of highly compressed image. Gifs are popular these days. Exploring the internet or social media seems impossible without spotting at least one well-done gif. These are great for telling stories and they are fun. Creating gifs from your favorite photos and images is easy but gets complicated when it comes to videos. The right tools can assist and make it a lot more fun. There are several gif background remover tools available on the internet; each has its advantages over the other. Let us dive into some.
In this article
01 [Remove GIF Background Using 5 Online GIF Tools](#Part 1)
02 [Remove Background From a GIF With 5 PC GIF Tools](#Part 2)
03 [Comparing Each Online Tool in Detail](#Part 3)
Part 1 Remove GIF Background Using 5 Online GIF Tools
In most cases, gifs are created using images, and the speed at which the images change is film framerate. Most all the gifs have a transparent background but in case any of the gifs do not have a transparent background, gif background remover might come to the rescue because blending images is the major part of creating a gif. There are several online gif background removers let’s look into the same
01EZGIF
Want to create a new gif? Want to edit it? Want to optimize the gif?
All these questions and many more are answered in EZGIF. It is a complete workshop for all tasks related to gifs. The only restriction is that files exceeding 6 MB cannot be uploaded for manipulation. You can crop the pictures, resize the entire GIF, optimize the frames, reverse the photos, flip or rotate the GIF to a specific angle, alter the speed, split the GIF back to its original images, and add text.
The several pros and cons that comes with ezgif are:
Pros:
● High quality GIFs
● Upload multiple images at once.
● Watermarks are not present.
● Optimization features are available
Cons:
● Tool layout on separate pages.
● Interface isn’t as slick.
● No online save option

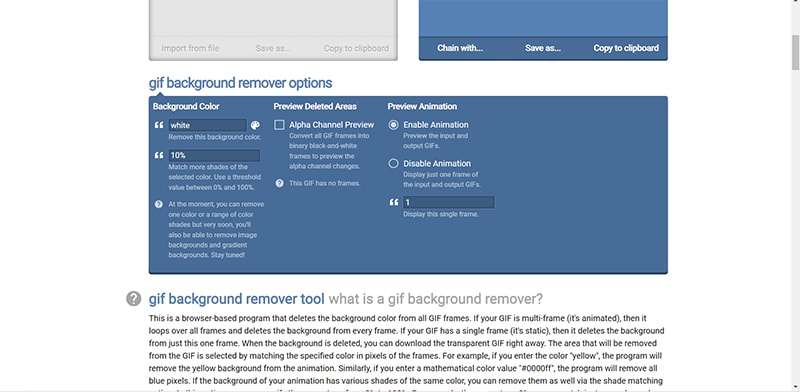
02OnlineGifTools
Claimed to be the world’s best gif online maker, it is a free browser-based program that creates transparent background gifs with only one click, and you can do this by simply mentioning the hex code or color. It does not only remove the gif background but also can make any gif region transparent with the added benefit of controlling the tone, shade and hint.
The pros and cons of using OnlineGifTools are
Pros:
● Free browser based program
● Can make any gif region transparent
Cons:
● Learning curve
03LunaPic
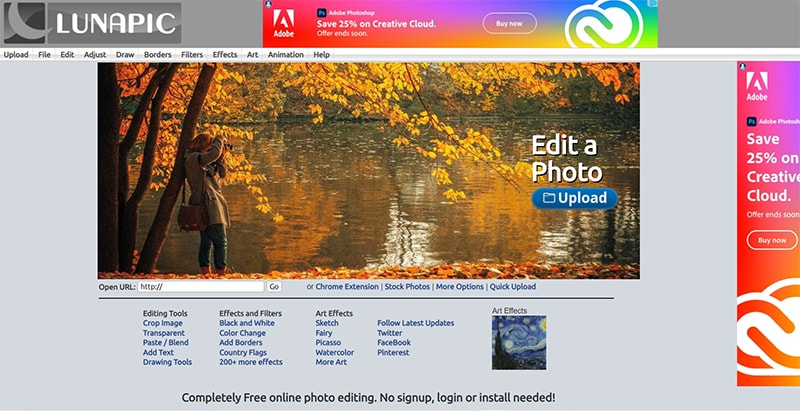
It can be considered the most efficient online tool for editing and optimizing gifs. It looks like an online program with a toolbox containing several tools for editing, adding effects, etc. It has a large number of animations but it looks a bit outdated. Lunapic does not require you to install any plugin, like java, flash etc. to run. Generally, the features found in lunapic cannot be found on any free online platform.
Several pros and cons in lunapic are:
Pros
● Free platform
● Large variety of animations and effects.
● Easy to use
Cons:
● Ads.
● Photo-size limitations.
● Interface not as slick.
04GifMagic
It is solely dedicated to gifs. It allows you to customize the gifs to best cater to your needs. You can add effect, crop, resize and optimize the gif as required after uploading. After the changes are done, the gif can either, be saved or reverted to start out from the beginning. It is best for those that want to make gif with sounds and features a range of wonderful sounds as also allow you to unload your music to make a more personalized gif.
The pros and cons of Gifmagic are:
Pros:
● Free for everyone
● Easy interface
● Supports all video format
Cons:
● Multiple files cannot be uploaded at a time
● Gifs can be made only from gifs

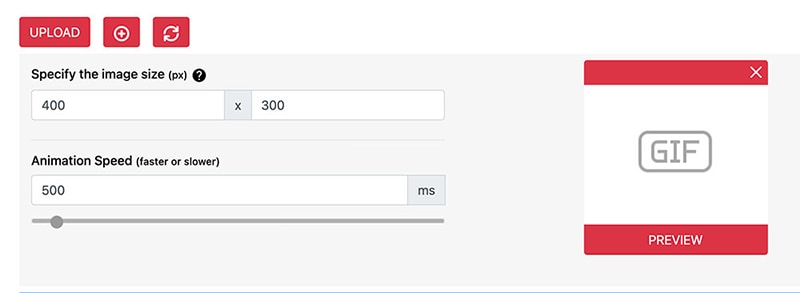
04GifMake
Yet another online tool that allows you to edit an existing gif after you upload it to this platform, but the upload size is set to a maximum of 7 MB. It is a clean interface with a visual board where you will drag and drop anything from links, videos, lists, text, notes, and even hand drawn sketches. Gifmake lets you edit each frame individually. The only drawback is processing time.
The pros and cons are:
Pros:
● Fast and easy
● Free to use
● Multiple customization options
Cons:
● Limited file size
● Processing time
Part 2 Remove Background From a GIF With 5 PC GIF Tools
01Adobe Photoshop
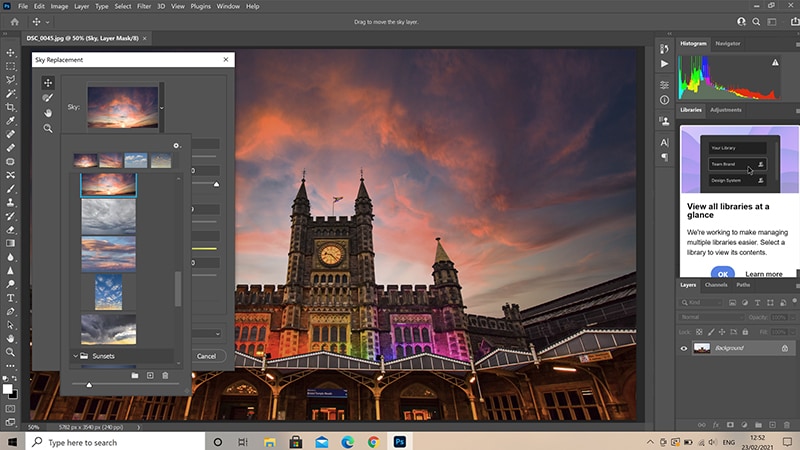
The most famous ways of editing images is Adobe Photoshop. Gifs are a series of images combined we can easily separate them and edit each frame easily using Photoshop. It has smart filters and is built using better technology. It is a useful tool for multishape and path selection. It provides a one-click color correction option. It can be great for removing gif background as it uses latest technology and has variety of designing tools that may assist.
Pros:
● Large Variety of designing tools
● Integrated stock library
● Easy cropping and resizing
Cons:
● Expensive
● Learning Curve
● Takes lot of space
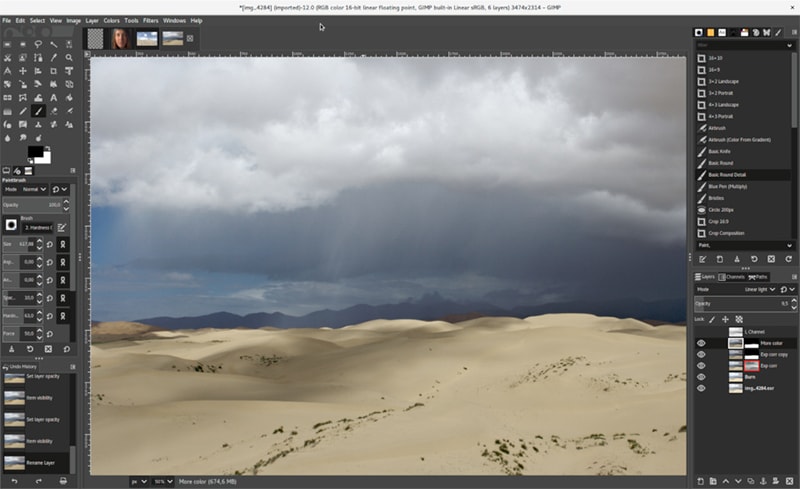
02Gimp
GIMP abbreviation for GNU Image Manipulation Program is a free software raster graphics editor that must be downloaded on your computer to use. It is a cross-platform tool so it can be used on different platforms without any issue. It supports third-party plugin making it a advanced editing tool. It is a very handy tool for various image manipulation tasks. It gives an advanced framework for scripted image manipulation with multiple programming languages.
The several pros and cons are:
Pros:
● Free and powerful open-source image editing platform
● Refine images within editor before adding them to a GIF.
Cons:
● Not as easy like other GIF creator
● Not specialized for GIF
03Filmora
Yet another tool used for removing gif background gives us the capability of utilizing up to 100 layers of media, applying a transition, motion elements, filters, and more. It comes with variety of design tools that helps us layer images and apply effects like blending modes, green screens, background editor, etc. Wondershare Filmora edits gifs very quickly and the edited gif can be previewed in high quality. It also helps us save time consumed during import and export.
The pros and cons are:
Pros:
● Value for money.
● Easy to use.
● Variety of basic and advanced features.
● Easy on the desktop.
Cons:
● Expensive

Wondershare Filmora - Best Video Editor for Mac/Windows
5,481,435 people have downloaded it.
Build unique custom animations without breaking a sweat.
Focus on creating epic stories and leave the details to Filmora’s auto features.
Start a creative adventure with drag & drop effects and endless possibilities.
Filmora simplifies advanced features to save you time and effort.
Filmora cuts out repetition so you can move on to your next creative breakthrough.
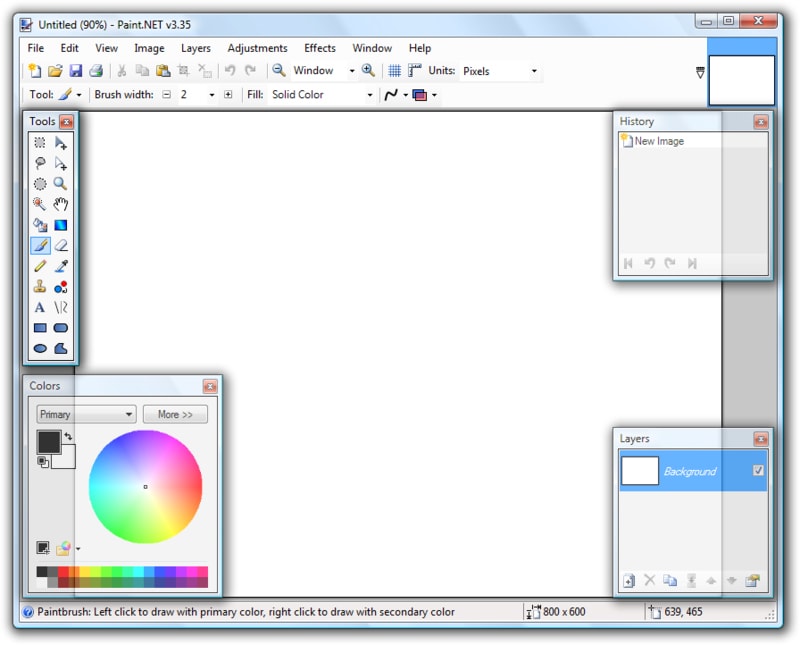
04Paint.net
It is a great free alternative for Photoshop. A simple program does not focus on a variety of complex features but provides the user with a simple interface that makes it easy for users to edit and optimize the images or gifs as per requirement. It offers a configurable interface and editable layers allowing performing multi-level image editing. It not only gives you the opportunities to form creative photo manipulations or deep skin retouching as Photoshop does, but you’ll easily edit photos to form them look great and without visible imperfections.
The pros and cons are:
Pros:
● Easy to use
● Variety of useful functions and effects
● Number of plug-ins
● Clear user interface
Cons:
● Brush work is limited
● No Dodge and burn
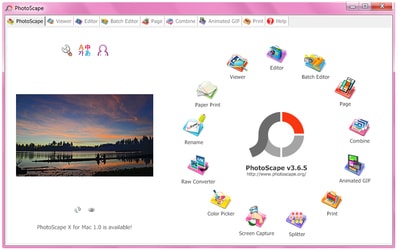
05PhotoScape
Free editing software allows you to enhance and optimize photos. An alternative to Photoshop, PhotoScape provides a wide variety of tools that enables us customize images, add effects etc. It has an accessible and built-in interface, wide functionality. The software allows you to retouch skin, correct colors, manage and view images. It also features a built-in screen capture tool, many filters and effects, and enables you to perform batch photo editing.
The various pros and cons are
Pros:
● Good optimization
● various file formats supported
● Free service
● all photo and video edits can be done
● Batch editing possible
Cons:
● Lags
● while maintaining, quality is lost
● export parameters are weak
Part 3 Comparing Each Online Tool in Detail
| GIF Tool | Can Upload From | Supported Image Formats | Can Make GIFs From | File Upload Type |
|---|---|---|---|---|
| EZGIF | Computer | Almost all major formats | Images & Videos | Single, Bulk |
| OnlineGifTools | Computer | GIF | GIF | Single |
| LunaPic | Computer, URL, Social Media | Almost all major formats | Images | Single, Bulk |
| Gifmake | Computer | Almost all major formats | Images | Single, Bulk |
| GIFmagic | Computer, URL | GIFs | GIF | Single |
● Ending Thoughts →
● Several methods can be used to remove gif background few of them are discussed in the article, the various pros and cons they have. The way we can benefit from using this tools are:
● Using such apps and software help us save time from doing manual work and assisting us in better quality of design only with a few clicks in some cases.
● There are a variety of design tools that can be used for removing the background of gif such app and software delivers our needs.
● Using apps and software not only saves time but also helps in better quality of design.
GIF also known as Graphical Interchange Format is a kind of highly compressed image. Gifs are popular these days. Exploring the internet or social media seems impossible without spotting at least one well-done gif. These are great for telling stories and they are fun. Creating gifs from your favorite photos and images is easy but gets complicated when it comes to videos. The right tools can assist and make it a lot more fun. There are several gif background remover tools available on the internet; each has its advantages over the other. Let us dive into some.
In this article
01 [Remove GIF Background Using 5 Online GIF Tools](#Part 1)
02 [Remove Background From a GIF With 5 PC GIF Tools](#Part 2)
03 [Comparing Each Online Tool in Detail](#Part 3)
Part 1 Remove GIF Background Using 5 Online GIF Tools
In most cases, gifs are created using images, and the speed at which the images change is film framerate. Most all the gifs have a transparent background but in case any of the gifs do not have a transparent background, gif background remover might come to the rescue because blending images is the major part of creating a gif. There are several online gif background removers let’s look into the same
01EZGIF
Want to create a new gif? Want to edit it? Want to optimize the gif?
All these questions and many more are answered in EZGIF. It is a complete workshop for all tasks related to gifs. The only restriction is that files exceeding 6 MB cannot be uploaded for manipulation. You can crop the pictures, resize the entire GIF, optimize the frames, reverse the photos, flip or rotate the GIF to a specific angle, alter the speed, split the GIF back to its original images, and add text.
The several pros and cons that comes with ezgif are:
Pros:
● High quality GIFs
● Upload multiple images at once.
● Watermarks are not present.
● Optimization features are available
Cons:
● Tool layout on separate pages.
● Interface isn’t as slick.
● No online save option

02OnlineGifTools
Claimed to be the world’s best gif online maker, it is a free browser-based program that creates transparent background gifs with only one click, and you can do this by simply mentioning the hex code or color. It does not only remove the gif background but also can make any gif region transparent with the added benefit of controlling the tone, shade and hint.
The pros and cons of using OnlineGifTools are
Pros:
● Free browser based program
● Can make any gif region transparent
Cons:
● Learning curve

03LunaPic
It can be considered the most efficient online tool for editing and optimizing gifs. It looks like an online program with a toolbox containing several tools for editing, adding effects, etc. It has a large number of animations but it looks a bit outdated. Lunapic does not require you to install any plugin, like java, flash etc. to run. Generally, the features found in lunapic cannot be found on any free online platform.
Several pros and cons in lunapic are:
Pros
● Free platform
● Large variety of animations and effects.
● Easy to use
Cons:
● Ads.
● Photo-size limitations.
● Interface not as slick.

04GifMagic
It is solely dedicated to gifs. It allows you to customize the gifs to best cater to your needs. You can add effect, crop, resize and optimize the gif as required after uploading. After the changes are done, the gif can either, be saved or reverted to start out from the beginning. It is best for those that want to make gif with sounds and features a range of wonderful sounds as also allow you to unload your music to make a more personalized gif.
The pros and cons of Gifmagic are:
Pros:
● Free for everyone
● Easy interface
● Supports all video format
Cons:
● Multiple files cannot be uploaded at a time
● Gifs can be made only from gifs

04GifMake
Yet another online tool that allows you to edit an existing gif after you upload it to this platform, but the upload size is set to a maximum of 7 MB. It is a clean interface with a visual board where you will drag and drop anything from links, videos, lists, text, notes, and even hand drawn sketches. Gifmake lets you edit each frame individually. The only drawback is processing time.
The pros and cons are:
Pros:
● Fast and easy
● Free to use
● Multiple customization options
Cons:
● Limited file size
● Processing time

Part 2 Remove Background From a GIF With 5 PC GIF Tools
01Adobe Photoshop
The most famous ways of editing images is Adobe Photoshop. Gifs are a series of images combined we can easily separate them and edit each frame easily using Photoshop. It has smart filters and is built using better technology. It is a useful tool for multishape and path selection. It provides a one-click color correction option. It can be great for removing gif background as it uses latest technology and has variety of designing tools that may assist.
Pros:
● Large Variety of designing tools
● Integrated stock library
● Easy cropping and resizing
Cons:
● Expensive
● Learning Curve
● Takes lot of space

02Gimp
GIMP abbreviation for GNU Image Manipulation Program is a free software raster graphics editor that must be downloaded on your computer to use. It is a cross-platform tool so it can be used on different platforms without any issue. It supports third-party plugin making it a advanced editing tool. It is a very handy tool for various image manipulation tasks. It gives an advanced framework for scripted image manipulation with multiple programming languages.
The several pros and cons are:
Pros:
● Free and powerful open-source image editing platform
● Refine images within editor before adding them to a GIF.
Cons:
● Not as easy like other GIF creator
● Not specialized for GIF

03Filmora
Yet another tool used for removing gif background gives us the capability of utilizing up to 100 layers of media, applying a transition, motion elements, filters, and more. It comes with variety of design tools that helps us layer images and apply effects like blending modes, green screens, background editor, etc. Wondershare Filmora edits gifs very quickly and the edited gif can be previewed in high quality. It also helps us save time consumed during import and export.
The pros and cons are:
Pros:
● Value for money.
● Easy to use.
● Variety of basic and advanced features.
● Easy on the desktop.
Cons:
● Expensive

Wondershare Filmora - Best Video Editor for Mac/Windows
5,481,435 people have downloaded it.
Build unique custom animations without breaking a sweat.
Focus on creating epic stories and leave the details to Filmora’s auto features.
Start a creative adventure with drag & drop effects and endless possibilities.
Filmora simplifies advanced features to save you time and effort.
Filmora cuts out repetition so you can move on to your next creative breakthrough.
04Paint.net
It is a great free alternative for Photoshop. A simple program does not focus on a variety of complex features but provides the user with a simple interface that makes it easy for users to edit and optimize the images or gifs as per requirement. It offers a configurable interface and editable layers allowing performing multi-level image editing. It not only gives you the opportunities to form creative photo manipulations or deep skin retouching as Photoshop does, but you’ll easily edit photos to form them look great and without visible imperfections.
The pros and cons are:
Pros:
● Easy to use
● Variety of useful functions and effects
● Number of plug-ins
● Clear user interface
Cons:
● Brush work is limited
● No Dodge and burn

05PhotoScape
Free editing software allows you to enhance and optimize photos. An alternative to Photoshop, PhotoScape provides a wide variety of tools that enables us customize images, add effects etc. It has an accessible and built-in interface, wide functionality. The software allows you to retouch skin, correct colors, manage and view images. It also features a built-in screen capture tool, many filters and effects, and enables you to perform batch photo editing.
The various pros and cons are
Pros:
● Good optimization
● various file formats supported
● Free service
● all photo and video edits can be done
● Batch editing possible
Cons:
● Lags
● while maintaining, quality is lost
● export parameters are weak

Part 3 Comparing Each Online Tool in Detail
| GIF Tool | Can Upload From | Supported Image Formats | Can Make GIFs From | File Upload Type |
|---|---|---|---|---|
| EZGIF | Computer | Almost all major formats | Images & Videos | Single, Bulk |
| OnlineGifTools | Computer | GIF | GIF | Single |
| LunaPic | Computer, URL, Social Media | Almost all major formats | Images | Single, Bulk |
| Gifmake | Computer | Almost all major formats | Images | Single, Bulk |
| GIFmagic | Computer, URL | GIFs | GIF | Single |
● Ending Thoughts →
● Several methods can be used to remove gif background few of them are discussed in the article, the various pros and cons they have. The way we can benefit from using this tools are:
● Using such apps and software help us save time from doing manual work and assisting us in better quality of design only with a few clicks in some cases.
● There are a variety of design tools that can be used for removing the background of gif such app and software delivers our needs.
● Using apps and software not only saves time but also helps in better quality of design.
GIF also known as Graphical Interchange Format is a kind of highly compressed image. Gifs are popular these days. Exploring the internet or social media seems impossible without spotting at least one well-done gif. These are great for telling stories and they are fun. Creating gifs from your favorite photos and images is easy but gets complicated when it comes to videos. The right tools can assist and make it a lot more fun. There are several gif background remover tools available on the internet; each has its advantages over the other. Let us dive into some.
In this article
01 [Remove GIF Background Using 5 Online GIF Tools](#Part 1)
02 [Remove Background From a GIF With 5 PC GIF Tools](#Part 2)
03 [Comparing Each Online Tool in Detail](#Part 3)
Part 1 Remove GIF Background Using 5 Online GIF Tools
In most cases, gifs are created using images, and the speed at which the images change is film framerate. Most all the gifs have a transparent background but in case any of the gifs do not have a transparent background, gif background remover might come to the rescue because blending images is the major part of creating a gif. There are several online gif background removers let’s look into the same
01EZGIF
Want to create a new gif? Want to edit it? Want to optimize the gif?
All these questions and many more are answered in EZGIF. It is a complete workshop for all tasks related to gifs. The only restriction is that files exceeding 6 MB cannot be uploaded for manipulation. You can crop the pictures, resize the entire GIF, optimize the frames, reverse the photos, flip or rotate the GIF to a specific angle, alter the speed, split the GIF back to its original images, and add text.
The several pros and cons that comes with ezgif are:
Pros:
● High quality GIFs
● Upload multiple images at once.
● Watermarks are not present.
● Optimization features are available
Cons:
● Tool layout on separate pages.
● Interface isn’t as slick.
● No online save option

02OnlineGifTools
Claimed to be the world’s best gif online maker, it is a free browser-based program that creates transparent background gifs with only one click, and you can do this by simply mentioning the hex code or color. It does not only remove the gif background but also can make any gif region transparent with the added benefit of controlling the tone, shade and hint.
The pros and cons of using OnlineGifTools are
Pros:
● Free browser based program
● Can make any gif region transparent
Cons:
● Learning curve

03LunaPic
It can be considered the most efficient online tool for editing and optimizing gifs. It looks like an online program with a toolbox containing several tools for editing, adding effects, etc. It has a large number of animations but it looks a bit outdated. Lunapic does not require you to install any plugin, like java, flash etc. to run. Generally, the features found in lunapic cannot be found on any free online platform.
Several pros and cons in lunapic are:
Pros
● Free platform
● Large variety of animations and effects.
● Easy to use
Cons:
● Ads.
● Photo-size limitations.
● Interface not as slick.

04GifMagic
It is solely dedicated to gifs. It allows you to customize the gifs to best cater to your needs. You can add effect, crop, resize and optimize the gif as required after uploading. After the changes are done, the gif can either, be saved or reverted to start out from the beginning. It is best for those that want to make gif with sounds and features a range of wonderful sounds as also allow you to unload your music to make a more personalized gif.
The pros and cons of Gifmagic are:
Pros:
● Free for everyone
● Easy interface
● Supports all video format
Cons:
● Multiple files cannot be uploaded at a time
● Gifs can be made only from gifs

04GifMake
Yet another online tool that allows you to edit an existing gif after you upload it to this platform, but the upload size is set to a maximum of 7 MB. It is a clean interface with a visual board where you will drag and drop anything from links, videos, lists, text, notes, and even hand drawn sketches. Gifmake lets you edit each frame individually. The only drawback is processing time.
The pros and cons are:
Pros:
● Fast and easy
● Free to use
● Multiple customization options
Cons:
● Limited file size
● Processing time

Part 2 Remove Background From a GIF With 5 PC GIF Tools
01Adobe Photoshop
The most famous ways of editing images is Adobe Photoshop. Gifs are a series of images combined we can easily separate them and edit each frame easily using Photoshop. It has smart filters and is built using better technology. It is a useful tool for multishape and path selection. It provides a one-click color correction option. It can be great for removing gif background as it uses latest technology and has variety of designing tools that may assist.
Pros:
● Large Variety of designing tools
● Integrated stock library
● Easy cropping and resizing
Cons:
● Expensive
● Learning Curve
● Takes lot of space

02Gimp
GIMP abbreviation for GNU Image Manipulation Program is a free software raster graphics editor that must be downloaded on your computer to use. It is a cross-platform tool so it can be used on different platforms without any issue. It supports third-party plugin making it a advanced editing tool. It is a very handy tool for various image manipulation tasks. It gives an advanced framework for scripted image manipulation with multiple programming languages.
The several pros and cons are:
Pros:
● Free and powerful open-source image editing platform
● Refine images within editor before adding them to a GIF.
Cons:
● Not as easy like other GIF creator
● Not specialized for GIF

03Filmora
Yet another tool used for removing gif background gives us the capability of utilizing up to 100 layers of media, applying a transition, motion elements, filters, and more. It comes with variety of design tools that helps us layer images and apply effects like blending modes, green screens, background editor, etc. Wondershare Filmora edits gifs very quickly and the edited gif can be previewed in high quality. It also helps us save time consumed during import and export.
The pros and cons are:
Pros:
● Value for money.
● Easy to use.
● Variety of basic and advanced features.
● Easy on the desktop.
Cons:
● Expensive

Wondershare Filmora - Best Video Editor for Mac/Windows
5,481,435 people have downloaded it.
Build unique custom animations without breaking a sweat.
Focus on creating epic stories and leave the details to Filmora’s auto features.
Start a creative adventure with drag & drop effects and endless possibilities.
Filmora simplifies advanced features to save you time and effort.
Filmora cuts out repetition so you can move on to your next creative breakthrough.
04Paint.net
It is a great free alternative for Photoshop. A simple program does not focus on a variety of complex features but provides the user with a simple interface that makes it easy for users to edit and optimize the images or gifs as per requirement. It offers a configurable interface and editable layers allowing performing multi-level image editing. It not only gives you the opportunities to form creative photo manipulations or deep skin retouching as Photoshop does, but you’ll easily edit photos to form them look great and without visible imperfections.
The pros and cons are:
Pros:
● Easy to use
● Variety of useful functions and effects
● Number of plug-ins
● Clear user interface
Cons:
● Brush work is limited
● No Dodge and burn

05PhotoScape
Free editing software allows you to enhance and optimize photos. An alternative to Photoshop, PhotoScape provides a wide variety of tools that enables us customize images, add effects etc. It has an accessible and built-in interface, wide functionality. The software allows you to retouch skin, correct colors, manage and view images. It also features a built-in screen capture tool, many filters and effects, and enables you to perform batch photo editing.
The various pros and cons are
Pros:
● Good optimization
● various file formats supported
● Free service
● all photo and video edits can be done
● Batch editing possible
Cons:
● Lags
● while maintaining, quality is lost
● export parameters are weak

Part 3 Comparing Each Online Tool in Detail
| GIF Tool | Can Upload From | Supported Image Formats | Can Make GIFs From | File Upload Type |
|---|---|---|---|---|
| EZGIF | Computer | Almost all major formats | Images & Videos | Single, Bulk |
| OnlineGifTools | Computer | GIF | GIF | Single |
| LunaPic | Computer, URL, Social Media | Almost all major formats | Images | Single, Bulk |
| Gifmake | Computer | Almost all major formats | Images | Single, Bulk |
| GIFmagic | Computer, URL | GIFs | GIF | Single |
● Ending Thoughts →
● Several methods can be used to remove gif background few of them are discussed in the article, the various pros and cons they have. The way we can benefit from using this tools are:
● Using such apps and software help us save time from doing manual work and assisting us in better quality of design only with a few clicks in some cases.
● There are a variety of design tools that can be used for removing the background of gif such app and software delivers our needs.
● Using apps and software not only saves time but also helps in better quality of design.
GIF also known as Graphical Interchange Format is a kind of highly compressed image. Gifs are popular these days. Exploring the internet or social media seems impossible without spotting at least one well-done gif. These are great for telling stories and they are fun. Creating gifs from your favorite photos and images is easy but gets complicated when it comes to videos. The right tools can assist and make it a lot more fun. There are several gif background remover tools available on the internet; each has its advantages over the other. Let us dive into some.
In this article
01 [Remove GIF Background Using 5 Online GIF Tools](#Part 1)
02 [Remove Background From a GIF With 5 PC GIF Tools](#Part 2)
03 [Comparing Each Online Tool in Detail](#Part 3)
Part 1 Remove GIF Background Using 5 Online GIF Tools
In most cases, gifs are created using images, and the speed at which the images change is film framerate. Most all the gifs have a transparent background but in case any of the gifs do not have a transparent background, gif background remover might come to the rescue because blending images is the major part of creating a gif. There are several online gif background removers let’s look into the same
01EZGIF
Want to create a new gif? Want to edit it? Want to optimize the gif?
All these questions and many more are answered in EZGIF. It is a complete workshop for all tasks related to gifs. The only restriction is that files exceeding 6 MB cannot be uploaded for manipulation. You can crop the pictures, resize the entire GIF, optimize the frames, reverse the photos, flip or rotate the GIF to a specific angle, alter the speed, split the GIF back to its original images, and add text.
The several pros and cons that comes with ezgif are:
Pros:
● High quality GIFs
● Upload multiple images at once.
● Watermarks are not present.
● Optimization features are available
Cons:
● Tool layout on separate pages.
● Interface isn’t as slick.
● No online save option

02OnlineGifTools
Claimed to be the world’s best gif online maker, it is a free browser-based program that creates transparent background gifs with only one click, and you can do this by simply mentioning the hex code or color. It does not only remove the gif background but also can make any gif region transparent with the added benefit of controlling the tone, shade and hint.
The pros and cons of using OnlineGifTools are
Pros:
● Free browser based program
● Can make any gif region transparent
Cons:
● Learning curve

03LunaPic
It can be considered the most efficient online tool for editing and optimizing gifs. It looks like an online program with a toolbox containing several tools for editing, adding effects, etc. It has a large number of animations but it looks a bit outdated. Lunapic does not require you to install any plugin, like java, flash etc. to run. Generally, the features found in lunapic cannot be found on any free online platform.
Several pros and cons in lunapic are:
Pros
● Free platform
● Large variety of animations and effects.
● Easy to use
Cons:
● Ads.
● Photo-size limitations.
● Interface not as slick.

04GifMagic
It is solely dedicated to gifs. It allows you to customize the gifs to best cater to your needs. You can add effect, crop, resize and optimize the gif as required after uploading. After the changes are done, the gif can either, be saved or reverted to start out from the beginning. It is best for those that want to make gif with sounds and features a range of wonderful sounds as also allow you to unload your music to make a more personalized gif.
The pros and cons of Gifmagic are:
Pros:
● Free for everyone
● Easy interface
● Supports all video format
Cons:
● Multiple files cannot be uploaded at a time
● Gifs can be made only from gifs

04GifMake
Yet another online tool that allows you to edit an existing gif after you upload it to this platform, but the upload size is set to a maximum of 7 MB. It is a clean interface with a visual board where you will drag and drop anything from links, videos, lists, text, notes, and even hand drawn sketches. Gifmake lets you edit each frame individually. The only drawback is processing time.
The pros and cons are:
Pros:
● Fast and easy
● Free to use
● Multiple customization options
Cons:
● Limited file size
● Processing time

Part 2 Remove Background From a GIF With 5 PC GIF Tools
01Adobe Photoshop
The most famous ways of editing images is Adobe Photoshop. Gifs are a series of images combined we can easily separate them and edit each frame easily using Photoshop. It has smart filters and is built using better technology. It is a useful tool for multishape and path selection. It provides a one-click color correction option. It can be great for removing gif background as it uses latest technology and has variety of designing tools that may assist.
Pros:
● Large Variety of designing tools
● Integrated stock library
● Easy cropping and resizing
Cons:
● Expensive
● Learning Curve
● Takes lot of space

02Gimp
GIMP abbreviation for GNU Image Manipulation Program is a free software raster graphics editor that must be downloaded on your computer to use. It is a cross-platform tool so it can be used on different platforms without any issue. It supports third-party plugin making it a advanced editing tool. It is a very handy tool for various image manipulation tasks. It gives an advanced framework for scripted image manipulation with multiple programming languages.
The several pros and cons are:
Pros:
● Free and powerful open-source image editing platform
● Refine images within editor before adding them to a GIF.
Cons:
● Not as easy like other GIF creator
● Not specialized for GIF

03Filmora
Yet another tool used for removing gif background gives us the capability of utilizing up to 100 layers of media, applying a transition, motion elements, filters, and more. It comes with variety of design tools that helps us layer images and apply effects like blending modes, green screens, background editor, etc. Wondershare Filmora edits gifs very quickly and the edited gif can be previewed in high quality. It also helps us save time consumed during import and export.
The pros and cons are:
Pros:
● Value for money.
● Easy to use.
● Variety of basic and advanced features.
● Easy on the desktop.
Cons:
● Expensive

Wondershare Filmora - Best Video Editor for Mac/Windows
5,481,435 people have downloaded it.
Build unique custom animations without breaking a sweat.
Focus on creating epic stories and leave the details to Filmora’s auto features.
Start a creative adventure with drag & drop effects and endless possibilities.
Filmora simplifies advanced features to save you time and effort.
Filmora cuts out repetition so you can move on to your next creative breakthrough.
04Paint.net
It is a great free alternative for Photoshop. A simple program does not focus on a variety of complex features but provides the user with a simple interface that makes it easy for users to edit and optimize the images or gifs as per requirement. It offers a configurable interface and editable layers allowing performing multi-level image editing. It not only gives you the opportunities to form creative photo manipulations or deep skin retouching as Photoshop does, but you’ll easily edit photos to form them look great and without visible imperfections.
The pros and cons are:
Pros:
● Easy to use
● Variety of useful functions and effects
● Number of plug-ins
● Clear user interface
Cons:
● Brush work is limited
● No Dodge and burn

05PhotoScape
Free editing software allows you to enhance and optimize photos. An alternative to Photoshop, PhotoScape provides a wide variety of tools that enables us customize images, add effects etc. It has an accessible and built-in interface, wide functionality. The software allows you to retouch skin, correct colors, manage and view images. It also features a built-in screen capture tool, many filters and effects, and enables you to perform batch photo editing.
The various pros and cons are
Pros:
● Good optimization
● various file formats supported
● Free service
● all photo and video edits can be done
● Batch editing possible
Cons:
● Lags
● while maintaining, quality is lost
● export parameters are weak

Part 3 Comparing Each Online Tool in Detail
| GIF Tool | Can Upload From | Supported Image Formats | Can Make GIFs From | File Upload Type |
|---|---|---|---|---|
| EZGIF | Computer | Almost all major formats | Images & Videos | Single, Bulk |
| OnlineGifTools | Computer | GIF | GIF | Single |
| LunaPic | Computer, URL, Social Media | Almost all major formats | Images | Single, Bulk |
| Gifmake | Computer | Almost all major formats | Images | Single, Bulk |
| GIFmagic | Computer, URL | GIFs | GIF | Single |
● Ending Thoughts →
● Several methods can be used to remove gif background few of them are discussed in the article, the various pros and cons they have. The way we can benefit from using this tools are:
● Using such apps and software help us save time from doing manual work and assisting us in better quality of design only with a few clicks in some cases.
● There are a variety of design tools that can be used for removing the background of gif such app and software delivers our needs.
● Using apps and software not only saves time but also helps in better quality of design.
Also read:
- New How to Add Motion Titles
- 2024 Approved Hey! Are You Looking for Video Reverse Effects in Your Videos? Then, You Are at the Right Place. This Article Will Guide You in Creating a Video Reverse Effect
- New 2024 Approved Video Inspiration for Birthday Slideshow
- 2024 Approved Quick Answer Why Did Filmora AI Portrait Attract People?
- New In 2024, Overview of FPS for YouTube Videos
- Looking for a Free and Open Source Video Editor with Cross-Platform Support? Kdenlive Video Editor Is Great but Is It the Best? Find Out From Our Complete Kdenlive Review for 2024
- 2024 Approved How Does the YouTube AI Algorithm Work - AI EXPLAINED
- Updated 2024 Approved Top 10 Old Film Overlays to Make Your Videos Look Vintage
- New 2024 Approved If You Want to Know What to Prepare and How to Make the Wedding Video Perfect for Videographers, Check Out This Menu Here
- Updated How to Create Intro Video with Filmora
- New Top 10 Best Free Video Compressors for 2024
- Updated 2024 Approved How to Make Stunning Glitch Effect in Photoshop? Ultimate Guide
- New 10 Best Voice Over Generators Windows, Mac, Android, iPhone, and Online for 2024
- Updated 2024 Approved Looking for a Way to Learn How to Merge Videos in HandBrake? Theres a Better Solution Waiting for You Inside
- Updated 2024 Approved Are You a Vlogger Looking for Good Color Correction and Video Grading Presets? Here Youll Find Different Vlog LUTs that You Can Use for Your Videos
- New How to Become a Youtuber, In 2024
- New In This Article Ill Share to You some of the Skin Care Vlog Ideas for You to Start Doing a Skin Care Review on Your YouTube Channel. But Before that Ill Share with You How Important Is Skin Care?
- Updated 2024 Approved Learn About some of the Best Apps for Photo Collage for PC
- WebM to GIF Converters (Online and Offline Solutions)
- New How To Synchronize Your Audio And Videos Properly?
- Top 10 Free WhatsApp Video Converter
- Updated In 2024, The Complete Guide to GIF for Discord Profile
- Updated In 2024, Looking for Exciting Methods to Create Alluring GIFs Worthy of Making a Mass Appeal? Heres All About GIF Design You Will Ever Want to Know and Learn
- Updated Learn How to Use Face Tracking in After Effects to Quickly Mask Out Faces, Animate Objects on Faces, and More
- 2024 Approved How to Easily Add VHS Green Screen to Your Video
- Updated 2024 Approved What Are the Top 15 Slideshow Presentation Examples Your Audience Will
- Updated 2024 Approved Do You Want to Explore some Available Opportunities to Create Slow Motion? Discover the Best Slow-Motion Video Editors for Desktop, Android, and iPhone Here
- Updated Learn How to Blur a Still or Moving Part of Video for 2024
- Updated LUTs Can Make Ordinary-Looking Footage Look More Attractive. Read This Guide to Learn How You Can Easily Create Your Own LUTs Using Filmora
- New How to Make OBS Slideshow for 2024
- In 2024, Are You Looking for the Best Premiere Pro Slideshow Template Online for Free? If Yes, You Can Find a Few Exciting Slideshow Templates Here. They Are Worth Using
- Want Make a Slide Show Video? Heres How for 2024
- New Best GIF to AVI Converters (Online + Software Solutions) for 2024
- Your Powerpoint Slides Are Not Always Perfect and Sometimes Need a Little Editing Before Being Sent to the Client. Here Are some Ways You Can Make Sure Your Powerpoint Is Not Wrong
- New In 2024, How to Make Censor Effects with Filmora
- Best Anti Tracker Software For Tecno Camon 20 | Dr.fone
- In 2024, How to Unlock Realme GT 5 Pro Phone without Any Data Loss
- In 2024, Top 15 Augmented Reality Games Like Pokémon GO To Play On OnePlus Nord N30 5G | Dr.fone
- How to Factory Reset Sony Xperia 1 V without Losing Data | Dr.fone
- In 2024, Unlocking Made Easy The Best 10 Apps for Unlocking Your Itel S23 Device
- In 2024, How to Change Your Realme 11 5G Location on life360 Without Anyone Knowing? | Dr.fone
- In 2024, Easiest Guide How to Clone Honor Play 7T Phone? | Dr.fone
- 3 Ways to Track Infinix Note 30i without Them Knowing | Dr.fone
- How To Check if Your Asus ROG Phone 8 Is Unlocked
- In 2024, 4 Most-Known Ways to Find Someone on Tinder For Realme 12 Pro 5G by Name | Dr.fone
- In 2024, Process of Screen Sharing Vivo S18 Pro to PC- Detailed Steps | Dr.fone
- Prevent Cross-Site Tracking on Vivo S18 and Browser | Dr.fone
- Unlocking the Power of Smart Lock A Beginners Guide for Realme Narzo N53 Users
- In 2024, The 10 Best Tools to Bypass iCloud Activation Lock From iPhone 11 Pro Max You Should Try Out
- 2 Ways to Monitor Xiaomi Redmi 12 Activity | Dr.fone
- In 2024, The Ultimate Guide to Unlocking Apple Watch Or Apple iPhone 15 Plus from iCloud
- 2024 Approved What Is AI Generated Text?
- Top IMEI Unlokers for Your Vivo V30 Lite 5G Phone
- Trouble with iPhone 13 Swipe-Up? Try These 11 Solutions
- In 2024, 8 Safe and Effective Methods to Unlock Your iPhone SE (2022) Without a Passcode
- How To Restore a Bricked Poco M6 5G Back to Operation | Dr.fone
- Title: Updated In 2024, Find Out How to Add Subtitles in the VLC Media Player on Your Windows and Mac System with Quick and Simple Instructions
- Author: Morgan
- Created at : 2024-06-24 01:30:28
- Updated at : 2024-06-25 01:30:28
- Link: https://ai-video-editing.techidaily.com/updated-in-2024-find-out-how-to-add-subtitles-in-the-vlc-media-player-on-your-windows-and-mac-system-with-quick-and-simple-instructions/
- License: This work is licensed under CC BY-NC-SA 4.0.

