

Updated In 2024, Have You Been Looking for Online YouTube Video Trimmer? You Will Be Introduced to Different Ways to Trim YouTube Videos as Introduced by YouTube Itself and some Online and Desktop Software to Help You Learn Video Trimming in This Article
Have You Been Looking for Online YouTube Video Trimmer? You Will Be Introduced to Different Ways to Trim YouTube Videos as Introduced by YouTube Itself and some Online and Desktop Software to Help You Learn Video Trimming in This Article
Since the shift in interest from on-site jobs to content creators and exploring opportunities to take advantage of better and improved career growth opportunities, YouTube is one of the most popular social media platforms to get started.
But how do people face difficulties in finding an affordable and quick online YouTube video trimmer? Are you also facing issues with trimming your video before uploading it to get more views?
This is an ultimate guide on online YouTube video trimmer software and how you can trim your YouTube videos in no time.
Part 1. What is a YouTube trimmer?
Before diving into any details, it is important to introduce you to what is a YouTube trimmer and why it is important to trim your video. A YouTube trimmer is an easy and fast video editing tool that allows you to trim, crop, and share your favorite video parts online. You can also create custom links to YouTube Crops to embed on your website.
There are two popular online YouTube trimmers available; one only allows you to edit the YouTube link, which means you can only view the edited video online, while the other allows you to do related operations on the video file and download and save it as an mp4 or other file type for offline viewing.
Part 2. How to online trim YouTube videos?
1. Online YouTube trimmer (no edit and download)
Using these two websites, you can easily find the YouTube video clip you want to keep, but there is no way to download the video or add more editing to the clip. However, it works well for sharing links online or adding them to your website and using them to describe the part that best fits the topic.
The straightforward interface has just one function. Enter the start and end times in the box after entering the right YouTube link, then click “Crop!” to create a string of links.

The video’s beginning and ending times are selected in the same way as on the previous website. However, this website offers some basic code that you may copy and paste into your web pages to suit your demands in order to add YouTube videos.

Once you are done trimming your videos, you can download or export your videos in different formats, depending on your preference. It can be in mp4, mp3, or any other supported format.
2. Online YouTube trimmer (edit and download)
The websites that are listed after that combine an online YouTube downloader with a video editor, allowing you to make a variety of further edits to the selected video clip before downloading it locally.
- Veed.io :
Anyone can make powerful videos and expand their audiences thanks to the online video editing application Veed. It has some useful capabilities, such as the capacity to cut videos and filter them using different aesthetics. Users can crop, add text, make drawings, and even add photos to the movies. In addition, Veed serves as a tool for producing social media films that may be customized for each channel where they will be shared.
Additionally, they are free to play with various tools like rotate, trim, add photos, stickers, emojis, and more. Through the program, users may even create video memes online by uploading a target movie, modifying it using a variety of features, and downloading the altered video after a brief rendering.
Step1Launch veed.io on your web browser. Click on ‘Upload Your Video‘ to upload the video file you want to edit.
Step2You will notice a button to upload your media file once you are taken to the editing page.

Step3You can trim your video section by dragging the mark after you’ve uploaded the media file.

Step4Now, delete the unwanted video segment and click on ‘Export’ to save the trimmed video.
- Kapwing :
An effective, non-linear editing workflow is supported by the online video editor Kapwing. Upload your audio, video, and image files, then edit everything in one location. Since Kapwing is entirely online, content creators may access and edit their work from any computer or mobile device.
Step1Launch Kapwing.com on your web browser. If you are not directed to the trim video section, then go to the ‘Tools‘ menu and select ‘Trim Video‘. Now, click on ‘Choose a Video.’
Step2From the main page, click ‘Click to upload’ to upload the media file.

Step3After uploading the media file, Click on ‘Trim’ from the editing section on the right side of the screen.

Step4A pop-up screen will appear on your screen labeled as Trim Video. Trim the parts of the video as per your requirement and Click ‘Trim’ to finish.

Step5Once you have completed editing, click on ‘Export’ to save the video to your device.
Part 3. How to trim YouTube videos on a desktop?
Using an online video trimmer has been one of the last options that anyone would consider, but due to the expensive software, they have turned out to be a friendly and easy approach to editing videos. But the online video trimmers still rank at the bottom of the list because they’re unstable, and you can’t save the project at any time. If the online program breaks down, all your effort will be wasted. But desktop programs such as Filmora will never make you encounter such problems unless you experience a technical glitch.
With the help of a variety of strong editing tools and Wondershare Filmora , users may quickly and easily make outstanding videos. With Wondershare Filmora, anyone can learn how to be an excellent video editor, thanks to its wonderfully simple design.
You can follow these easy steps to trim your video:
Step1Click “Import” on the main windows and then select the desired video files from your computer to add video files to the Timeline for cutting. Movies can also be dropped directly into the Media Library.

Step2By moving the playhead over the unwanted section and choosing the trash can icon, you can delete it.

Step3When you’re through trimming, click “Export”, then select a location to store the edited video.
Conclusion
Depending on the comparison of how different software work, it is justifiable to conclude that Filmora is the best video editing software by all means. It offers a wide range of editing tools and ensures that progress has not been lost. If you are looking forward to trimming a video, download Filmora on your device to get started.
Free Download For Win 7 or later(64-bit)
Free Download For macOS 10.14 or later
Free Download For macOS 10.14 or later
How to Add Motion Titles
Do you want to make your videos eye-catching instantly? Looking for some cool title animations to make your texts stand out? You should definitely opt for motion title templates that are widely available in popular video editors. Motion title templates come preloaded with animated texts, engaging graphic elements, and even background effects.
You can add them directly to your video and customize them as per you requirements so that your video looks exactly the way you desire. Different video editors have different motion titles, and therefore, you should check them out one by one to find out the templates you are looking for. We will illustrate title motion graphics in all the leading video editors.
Part 1. Add Motion Title with Filmora
The easiest way to add motion title to your video on your computer is through Wondershare Filmora . Filmora is a professional video editor that is available for Windows and Mac users. Filmora has the best collection of motion title templates, and the user interface is super intuitive and anyone can use without any prior experience. Here are the steps to add motion title with Filmora.
Step1Install and launch Wondershare Filmora on your computer. Click on New Project option on the welcome screen or go to File menu and click on New Project option.

Step2Go to File menu and Import Media option to import your video file. Otherwise, you can simply drop the video file into Project Media folder.
Step3Drag the video file from Project Media folder and drop it into the Timeline.

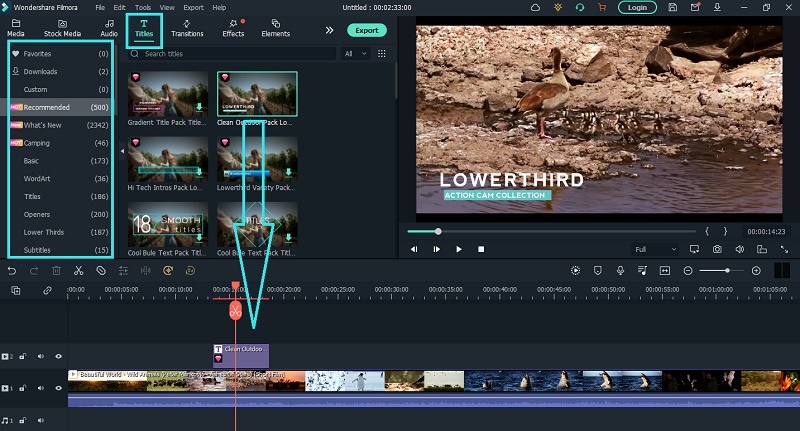
Step4Go to Titles at the top and go to the left panel. You can different categories of motion title templates. Select any desired text effect and drop into the Timeline above the video layer wherever you want.
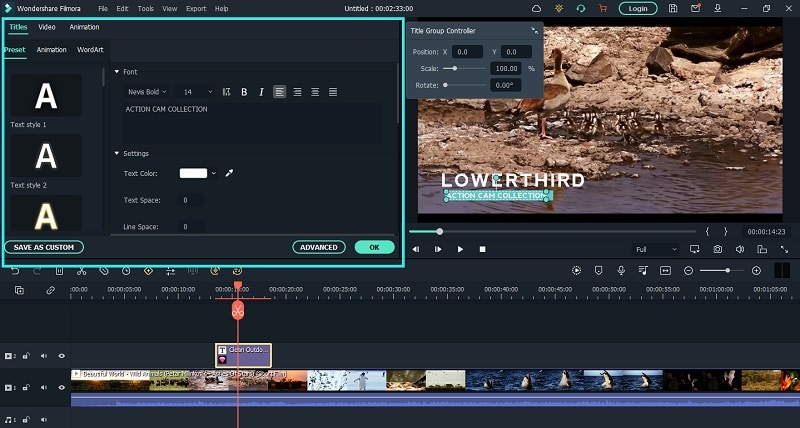
Step5Double clicking on the text layer on Timeline to edit the text and change the styles. Under Preset tab, you can change font, size, and color. Finally, click on OK button to save the edits done.
Part 2. Add Motion Title with Premiere Pro
Adobe Premiere Pro is a renowned video editor that is mostly used by professionals to edit videos and add effects and animations. Even though Premiere Pro has a steep learning curve, you can create motion title in simple steps. You can write any text on the video and select from different effects and animations to create motion title graphics. Here are the steps to add title motion graphics Premiere Pro free.
Step1Launch Premiere Pro and go to New> Project option. Import the video file and drop it into Timeline.
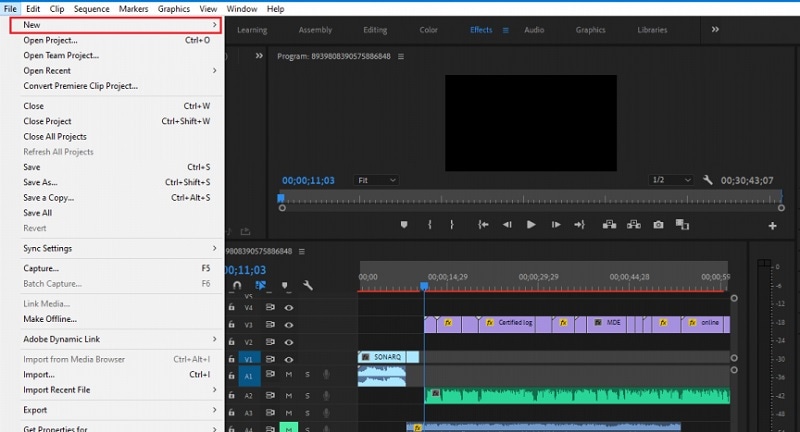
Step2Go to Title> New Title> Default Still option and follow the on-screen instructions.

Step3You will see different types of title styles and designs to choose from as you feel.

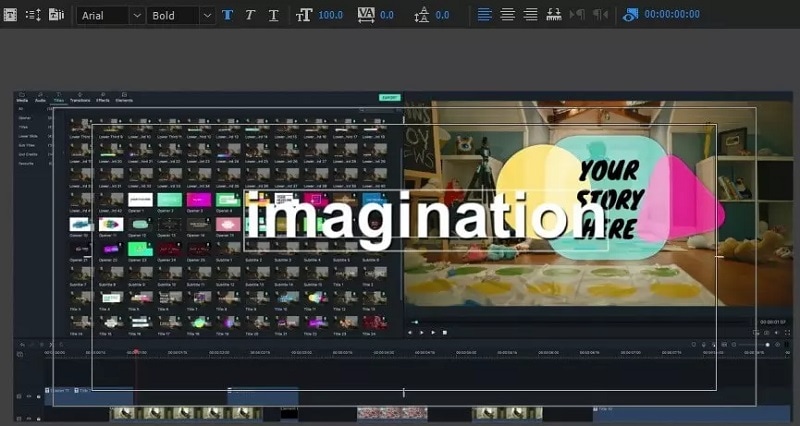
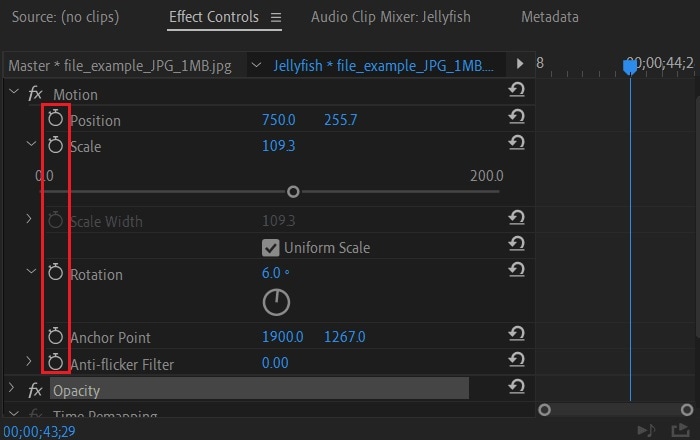
Step4Click on Type Tool option and click on the area on the video where you want the text to appear. You can customize them from the right panel from Title Styles, Title Properties, Tools and Title Actions.
Step5To add motion to the title, click on Effects Control window. Click on any desired animation and turn to Stopwatch icon to apply the effect to the text. There is a dedicated Motion option available.
Part 3. Make motion title with Studio
Studio is a popular video editing software where you can not only apply motion title presets but also create motion title presets from scratch. The reason why video editors choose Studio is because it allows users to customize everything and create different templates and animations for personalization. Here are the steps to create title motion graphics in Studio as per your requirements.
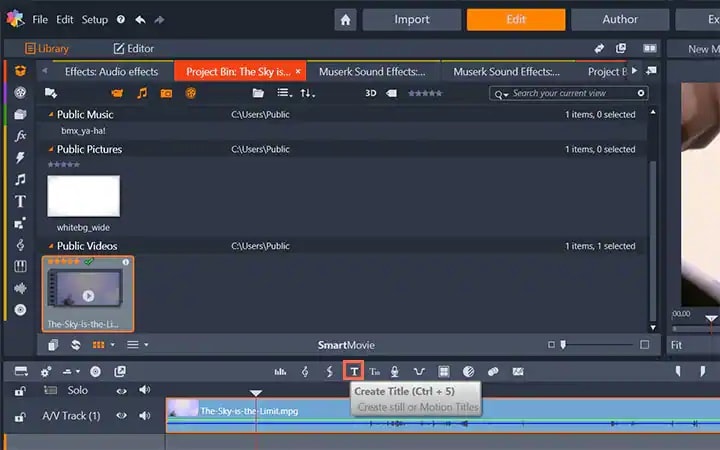
Step1Launch Studio. Import your video file, and you can import single frames such as images from a live video for stop motion titles. Once you have imported, go to the header bar above the Timeline. Click on Create Title option to open Title Editor to create title motion.
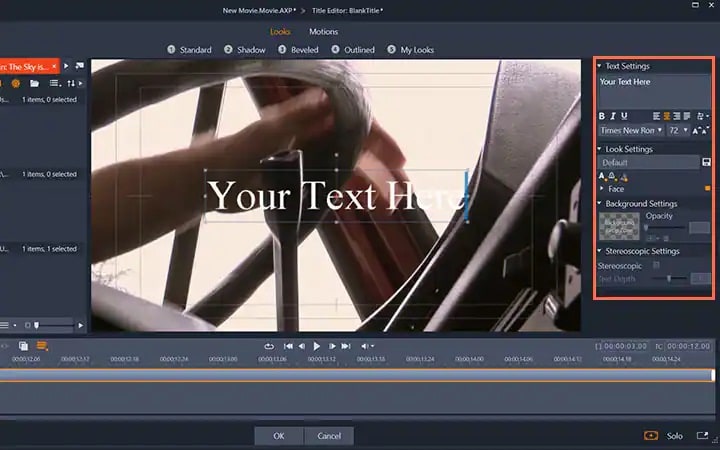
Step2Add your preferred text under Title Editor and adjust font, size, and style as you feel. Go to the right side to make changes to Look, Background, and Stereoscopic Settings to get the perfect text style from the wide range of choices available.
Step3Click on Motion option at the top to add motion to the text. Choose from the different motion title templates as per your preference.
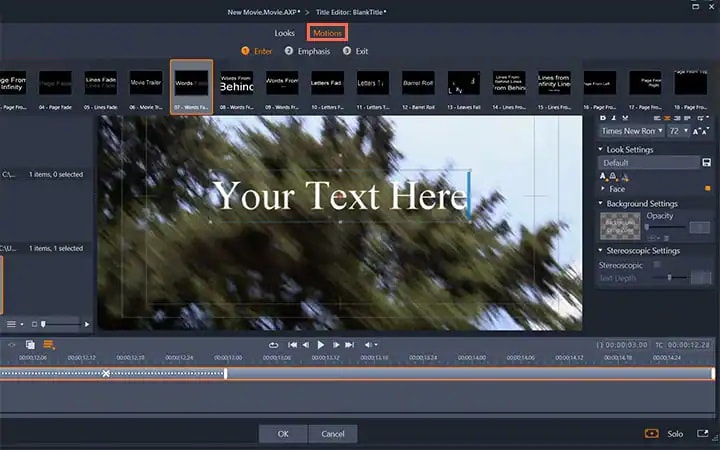
Step4You can adjust the duration of the motion effect from the right panel and click on Ok button.

Part 4. Add Motion Title with WeVideo
WeVideo is a popular online video editor that you can use to add title motion graphics Premiere Pro free. You can find many motion titles on WeVideo for free like you get in Premiere Pro and there are many exclusive motion text templates available. You need to create a free account with WeVideo to get started. You can create your video from scratch by selecting from the available video templates. You can even import your recorded video and add motion texts and animations as per your preference. Here are the steps to add motion title with WeVideo.
Step1Open your web browser and visit “wevideo.com”. Click on Try For Free button. Sign up for free and go to WeVideo video editor.
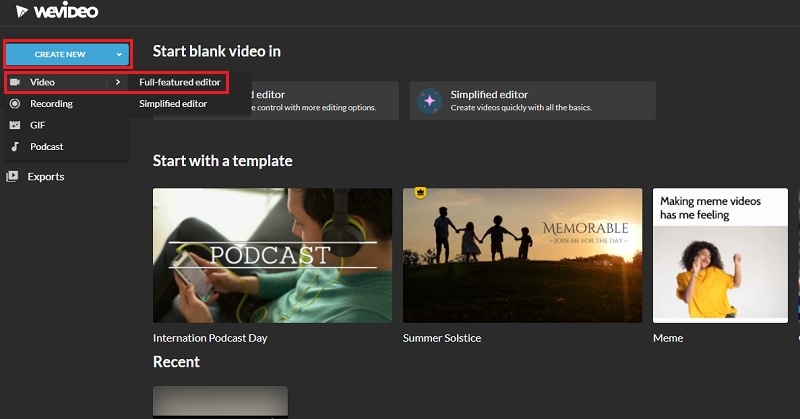
Step2Click on Create New button and select Video option. Click on Full-featured editor option.
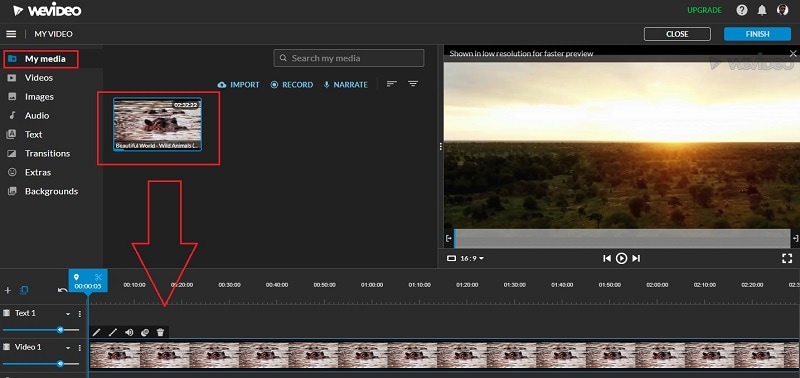
Step3Drag and drop your video file into My Media folder and bring it to Timeline.
Step4Go to Text tab and you will see all the motion animated titles under Titles section. Click on them to check out their previews in Viewer. If you have selected anyone, drag and drop it into Timeline.
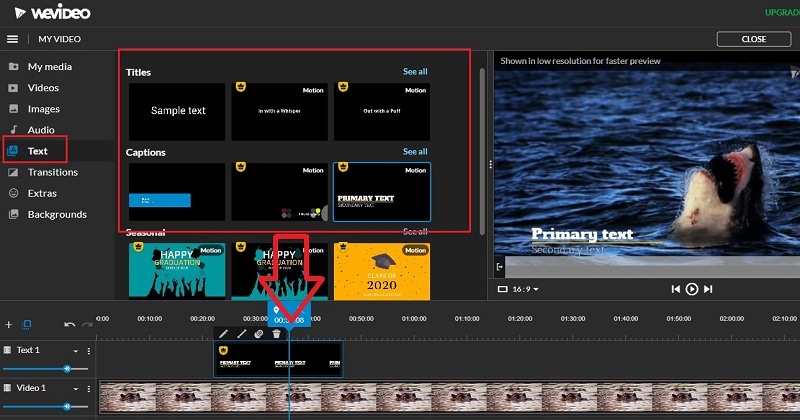
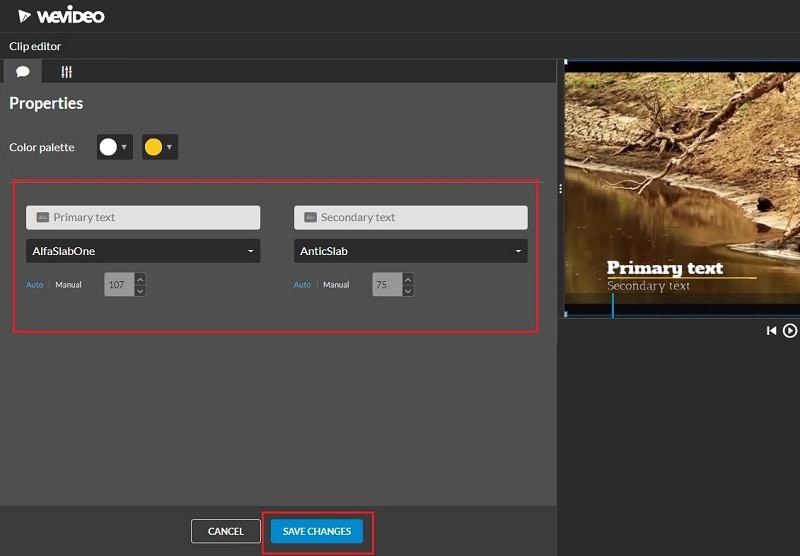
Step5Adjust the position where you want the title to appear on the video and stretch the duration as required. Double-click on the title to edit and customize it as per your preference. Finally, click on Save Changes button.
The Bottom Line
Motion titles are extremely important for any video because they bring in a variety to your video. They make the video eye-catching and help in getting the message across by grabbing the attention of the viewers. We have illustrated how to add motion titles Premiere Pro and Studio. You can also use WeVideo online video editor. We recommend Wondershare Filmora for its extensive collection of motion title templates to choose from and apply to your text.
Free Download For Win 7 or later(64-bit)
Free Download For macOS 10.14 or later
Art of Time Manipulation: A Guide to After Effects Slow Motion Mastery
The discovery of manipulating various aspects of video is advancing in every era. One such advancement is manipulating time duration to create slow-mo. Slowing down a video has advantages in many industries and multiple contexts. For instance, it focuses the audience’s attention on a video shot or during a sports match. They also help in comprehending scientific processes during research.
If you also want to experiment with this video aspect, then you’re at the right place. This article will provide you with a detailed guide on how to slow down video in After Effects. Along with slow down footage After Effects, you can learn about an alternative. Both video editors are professional when it comes to making a slow-mo. Keep reading the article to learn more about the slow-down clip After Effects.
Slow Motion Video Maker Slow your video’s speed with better control of your keyframes to create unique cinematic effects!
Make A Slow Motion Video Make A Slow Motion Video More Features

Part 1: A Complete Overview of Adobe After Effects
Before learning how to slow mo in After Effects, we want to introduce you to the software. Adobe After Effects is a professional software designed to assist in post-production. Those unrealistic scenes you see in a sci-fi movie are its creation. Users can work with multiple effects categories to create animated scenes and titles.
The software has undergone multiple updates since its creation. With each version more advanced than the previous, users can perform multiple tasks with it. They can add and customize visual effects, 2D vectors, and 3D animations. Following are some of the functions to find along with slow-down footage After Effects:
- Text Animations: Adding text and titles is important for emphasizing a video’s key parts. In After Effects, you can personalize titles and introduce animations. You can also create animated logos in this editor for personal branding.
- VFX/Visual Effects: You can add multiple visual effects and presets from its asset’s library. The tool also allows users to customize and add an effect to preset. This helps with increasing productivity during video editing tasks.
- Motion Tracking: Do you want to blur out or remove a person or scene throughout a video? With this feature, doing that is a piece of cake. Select the object-to-motion track and play the video from start to end. The tracker will detect the object’s motion and add a specific effect throughout.
- Masking: Many video editors offer masking options, but a few offer precision. Precision is very important during masking, and After Effects is a master of that. Along with different masking options, it offers custom settings to bring accuracy.
- Timeline Editing: To see how professional software is, see if it has a timeline panel. Timeline editing is one of the functions that bring accuracy and professionalism. You can cut, align, apply effects, transitions, and much more on it.
Part 2: A Guide to Slow Down Video in Adobe After Effects During Editing
Upon learning about After Effects and its functionalities, let’s move forward. This section highlights the step-by-step procedure of creating a video slow mo. This is a quick and simple method to slow down a video using After Effects. Keep reading the below section for a seamless slow-down clip After Effects:
Step 1: After importing a video, navigate towards the timeline video layer and right-click on it. From the dropdown menu, select “Time” and then select the “Time Stretch” option.

Step 2: In the Time Stretch window, increase the default value of “Stretch Factor.” Then click “OK,” and this will slow down your clip.

Step 3: To bring precision to your slow-mo, you need to adjust the frame rate of the video. For this, right-click on the timeline and go to “Frame Blending > Pixel Motion” option. Afterward, play your video from start to end and observe the changes.

Part 3: Alternative: Slowing Down Video in Wondershare Filmora with Clarity
Even though slow-down footage After Effects retains video quality, there are certain drawbacks. It is a professional video editing platform used by filmmakers. This means the software must have some technicalities and costs a fortune. Hence, we provide you with a simpler yet professional alternative called Wondershare Filmora . It is a video editing software that offers multiple editing functions and effects.
Wondershare Filmora is an AI-driven software that makes task achievement accessible. Along with multiple features, there are different methods for slowing down a video in it. You can use its Super Slow-Motion feature, Speed Ramping, or a Preset for it. In this guide, we will discuss all these methods with their step-by-step guides.
Free Download For Win 7 or later(64-bit)
Free Download For macOS 10.14 or later
Methods to Slow Down Video in Filmora
In this section, we will discuss alternative methods of slowing video in After Effects. All the mentioned methods are carried out in Wondershare Filmora. Here is the step-by-step guide to creating a slow-motion video using Filmora:
- Method 1. Step-by-Step Guide to Slow Down a Video Manually
- Method 2. Step-by-Step Guide to Slow a Video Using Optical Flow Option
Method 1. Step-by-Step Guide to Slow Down a Video Manually
Users can employ the manual speed adjustment option along with the automated slow-motion option. The method of accessing this option is straightforward, and here is its guide:
Step 1Initiate Filmora and Import Media
Once you have downloaded Filmora, start it and click the “New Project” tab. After accessing the editing interface, click the “Import” button to download media. From the Project Media panel, drag and drop media to the timeline.

Step 2Access Uniform Speed Option
Once the media is in the timeline, select it and right-click on it. From the options panel, locate and click the “Uniform Speed” option. From

Step 3Adjust the Speed and Preview
A settings panel will appear on the right side of the screen; navigate towards it. Under the “Uniform Speed” tab, adjust the “Speed” slider to slow down your video. If its value decreases, your video will become slow motion. Further, hit the play button to preview and export your slow-mo video.

Method 2. Step-by-Step Guide to Slow a Video Using Optical Flow Option
If you prefer the automated creation of slow-mo, then Filmora offers an AI Frame Interpolation feature. Find the detailed instruction manual for accessing this feature below:
Step 1Look For Speed Ramping Option
After importing media and bringing it to the timeline panel, select it. Then, navigate towards the top toolbar and select the “Tools” tab. From the expansion menu, click on the “Speed Ramping” option.

Step 2Access the AI Frame Interpolation
Continue to select a specific preset for speed ramping. As you select one, locate and expand the “AI Frame Interpolation” section. From the appearing option, select the “Optical Flow” option.

Step 3Render Preview for Results
Once you have enabled this option, navigate towards the timeline toolbar. Search and select the “Render Preview” option from the given icons. Play the video to see the results, adjust, and click the “Export” button to download.

Edit Beyond Basic with AI Video Editing Features of Filmora
This part of the article will highlight some of the prominent video editing features of Filmora. The uniqueness of these features lies in their AI-backed algorithms. You can give directions according to your video, and AI will operate accordingly. Here are some of its video editing features that you’ll come across upon entering:
1. Remove Background
With this feature of Filmora, you can remove the background of your videos and images. The AI-integrated technology preserves the object while removing the background. In addition, you can add a solid color, gradient, or custom background for it.
2. Auto Reframe
Creating reels for Instagram or crafting YouTube shorts has some requirements. To preserve the integrity and visuals of content, it is important to fit a video. With this AI, you can set the required frame resolution. Along with that, it preserves the pixel quality of the video while resizing the frame.
3. AI Smart Masking
Filmora offers multiple mask options to infuse effects and filters to specific parts. However, the V13 upgrade introduced an AI masking feature for improved results. By enabling this feature, you can choose to mask objects or backgrounds.
4. AI Thumbnail Creator
Thumbnails increase video views by evoking the audience’s interest in seeing a video. In Filmora, you can employ the AI Thumbnail creator to auto-create thumbnails. It analyzes the best frame out of your video and chooses it as a thumbnail. You can further apply many templates to this thumbnail according to context.
Conclusion
This article has expanded your knowledge and expertise about two powerful video editors. With how to slow down video in After Effects, we introduced you to the software. There is no limitation of features in either software as both bring out the best in videos.
However, we recommend Wondershare Filmora as it is a more accessible alternative. Creating a slow-mo in this software is easier and requires no effort. In addition, you can also access its built-in effects and presets for task productivity.
Make A Slow Motion Video Make A Slow Motion Video More Features
Part 1: A Complete Overview of Adobe After Effects
Before learning how to slow mo in After Effects, we want to introduce you to the software. Adobe After Effects is a professional software designed to assist in post-production. Those unrealistic scenes you see in a sci-fi movie are its creation. Users can work with multiple effects categories to create animated scenes and titles.
The software has undergone multiple updates since its creation. With each version more advanced than the previous, users can perform multiple tasks with it. They can add and customize visual effects, 2D vectors, and 3D animations. Following are some of the functions to find along with slow-down footage After Effects:
- Text Animations: Adding text and titles is important for emphasizing a video’s key parts. In After Effects, you can personalize titles and introduce animations. You can also create animated logos in this editor for personal branding.
- VFX/Visual Effects: You can add multiple visual effects and presets from its asset’s library. The tool also allows users to customize and add an effect to preset. This helps with increasing productivity during video editing tasks.
- Motion Tracking: Do you want to blur out or remove a person or scene throughout a video? With this feature, doing that is a piece of cake. Select the object-to-motion track and play the video from start to end. The tracker will detect the object’s motion and add a specific effect throughout.
- Masking: Many video editors offer masking options, but a few offer precision. Precision is very important during masking, and After Effects is a master of that. Along with different masking options, it offers custom settings to bring accuracy.
- Timeline Editing: To see how professional software is, see if it has a timeline panel. Timeline editing is one of the functions that bring accuracy and professionalism. You can cut, align, apply effects, transitions, and much more on it.
Part 2: A Guide to Slow Down Video in Adobe After Effects During Editing
Upon learning about After Effects and its functionalities, let’s move forward. This section highlights the step-by-step procedure of creating a video slow mo. This is a quick and simple method to slow down a video using After Effects. Keep reading the below section for a seamless slow-down clip After Effects:
Step 1: After importing a video, navigate towards the timeline video layer and right-click on it. From the dropdown menu, select “Time” and then select the “Time Stretch” option.
Step 2: In the Time Stretch window, increase the default value of “Stretch Factor.” Then click “OK,” and this will slow down your clip.
Step 3: To bring precision to your slow-mo, you need to adjust the frame rate of the video. For this, right-click on the timeline and go to “Frame Blending > Pixel Motion” option. Afterward, play your video from start to end and observe the changes.
Part 3: Alternative: Slowing Down Video in Wondershare Filmora with Clarity
Even though slow-down footage After Effects retains video quality, there are certain drawbacks. It is a professional video editing platform used by filmmakers. This means the software must have some technicalities and costs a fortune. Hence, we provide you with a simpler yet professional alternative called Wondershare Filmora . It is a video editing software that offers multiple editing functions and effects.
Wondershare Filmora is an AI-driven software that makes task achievement accessible. Along with multiple features, there are different methods for slowing down a video in it. You can use its Super Slow-Motion feature, Speed Ramping, or a Preset for it. In this guide, we will discuss all these methods with their step-by-step guides.
Free Download For Win 7 or later(64-bit)
Free Download For macOS 10.14 or later
Methods to Slow Down Video in Filmora
In this section, we will discuss alternative methods of slowing video in After Effects. All the mentioned methods are carried out in Wondershare Filmora. Here is the step-by-step guide to creating a slow-motion video using Filmora:
- Method 1. Step-by-Step Guide to Slow Down a Video Manually
- Method 2. Step-by-Step Guide to Slow a Video Using Optical Flow Option
Method 1. Step-by-Step Guide to Slow Down a Video Manually
Users can employ the manual speed adjustment option along with the automated slow-motion option. The method of accessing this option is straightforward, and here is its guide:
Step 1Initiate Filmora and Import Media
Once you have downloaded Filmora, start it and click the “New Project” tab. After accessing the editing interface, click the “Import” button to download media. From the Project Media panel, drag and drop media to the timeline.
Step 2Access Uniform Speed Option
Once the media is in the timeline, select it and right-click on it. From the options panel, locate and click the “Uniform Speed” option. From
Step 3Adjust the Speed and Preview
A settings panel will appear on the right side of the screen; navigate towards it. Under the “Uniform Speed” tab, adjust the “Speed” slider to slow down your video. If its value decreases, your video will become slow motion. Further, hit the play button to preview and export your slow-mo video.
Method 2. Step-by-Step Guide to Slow a Video Using Optical Flow Option
If you prefer the automated creation of slow-mo, then Filmora offers an AI Frame Interpolation feature. Find the detailed instruction manual for accessing this feature below:
Step 1Look For Speed Ramping Option
After importing media and bringing it to the timeline panel, select it. Then, navigate towards the top toolbar and select the “Tools” tab. From the expansion menu, click on the “Speed Ramping” option.
Step 2Access the AI Frame Interpolation
Continue to select a specific preset for speed ramping. As you select one, locate and expand the “AI Frame Interpolation” section. From the appearing option, select the “Optical Flow” option.
Step 3Render Preview for Results
Once you have enabled this option, navigate towards the timeline toolbar. Search and select the “Render Preview” option from the given icons. Play the video to see the results, adjust, and click the “Export” button to download.
Edit Beyond Basic with AI Video Editing Features of Filmora
This part of the article will highlight some of the prominent video editing features of Filmora. The uniqueness of these features lies in their AI-backed algorithms. You can give directions according to your video, and AI will operate accordingly. Here are some of its video editing features that you’ll come across upon entering:
1. Remove Background
With this feature of Filmora, you can remove the background of your videos and images. The AI-integrated technology preserves the object while removing the background. In addition, you can add a solid color, gradient, or custom background for it.
2. Auto Reframe
Creating reels for Instagram or crafting YouTube shorts has some requirements. To preserve the integrity and visuals of content, it is important to fit a video. With this AI, you can set the required frame resolution. Along with that, it preserves the pixel quality of the video while resizing the frame.
3. AI Smart Masking
Filmora offers multiple mask options to infuse effects and filters to specific parts. However, the V13 upgrade introduced an AI masking feature for improved results. By enabling this feature, you can choose to mask objects or backgrounds.
4. AI Thumbnail Creator
Thumbnails increase video views by evoking the audience’s interest in seeing a video. In Filmora, you can employ the AI Thumbnail creator to auto-create thumbnails. It analyzes the best frame out of your video and chooses it as a thumbnail. You can further apply many templates to this thumbnail according to context.
Conclusion
This article has expanded your knowledge and expertise about two powerful video editors. With how to slow down video in After Effects, we introduced you to the software. There is no limitation of features in either software as both bring out the best in videos.
However, we recommend Wondershare Filmora as it is a more accessible alternative. Creating a slow-mo in this software is easier and requires no effort. In addition, you can also access its built-in effects and presets for task productivity.
This Article Has a Detailed Description of How You Can Split the Videos in Lightworks Including the the Discussion of Splitting the Wondershare Filmora as an Alternative. It Is Also a Suitable Choice
Lightworks is among the best programs for editing the videos available for the Windows and Mac operating systems with no watermark. Through the accessible version of Lightworks, it is easy to export the videos into the MP4 format along with the resolution of 720p. There are different tools available in Lightworks so you can make videos for your YouTube channels, Vimeo, film making projects and different social media platforms.
Lightworks has become famous because it has been used for editing the popular movies of Hollywood. Along with the videos, it is straightforward to enhance the images by blending the colours. This article has a detailed description of how you can split the videos in Lightworks including the the discussion of splitting the Wondershare Filmora as an alternative. It is also a suitable choice.
How can you split the video clips in Lightworks?
Lightworks is software based on the cloud that consists of particular functionalities. It only includes editing and trimming, cutting, and splitting your video clips according to your requirements. Following are the easy-to-follow steps for splitting the clips in Lightworks:
Part1 - Splitting of one clip:
Step 1: The first step is importing the video into the timeline. It is simply through dragging the file on which you have to work.

Step 2: When the uploading is complete, you can cut and split the clips depending on your needs. Now, keep moving the play head in the specific direction from where you have to cut the clips—Press “C” on your keyboard.

Step 3: After getting the split clip, you can delete the remaining part that is not in use. For this, selecting the particular part is necessary and selecting the option of “Delete”. Even, you can press the “delete” key on your keyboard.

Step 4: When your video is ready, simply export the video by clicking right on the option of “All”. On the left lower side of the timeline, it is now clicked on “Export”.


Part 2- trimming of the clips in Lightworks
To trim the video clips in Lightworks, you require to hover the mouse towards the last of the video clip. Keep moving until and unless that part of the clip gets highlighted. After this step, start dragging till the previous where you want it.


An easier way to split the video clip
Even though Lightworks is a wonderful software for editing videos and images, its interface is easy to handle. But it is not supportive of different formats and 4K videos. For a few features, you might need the paid version of Lightworks. The most acquired solution to resolve this issue is Filmora Video Editor . It is freely available, and use all the tools according to your needs. That’s why it is gaining popularity, and users are increasing day by day. The latest versions of the Wondershare Filmora are available to enhance user experiences. You can export the outcome with ease from the tools.
For Win 7 or later (64-bit)
For macOS 10.14 or later
Features:
- Availability of drag and drag feature
- Can preview the functionalities you apply
- Easy to customize the images and videos
- Involvement of the animation
- Huge library available for the effects of visual and audio
- Splitting and merging the clips
Wondershare Filmora always offers to split the clips from the creative techniques. This tool is extremely useful, particularly when creating commentaries, tutorials, or interviews. The exact footage has to be on the timeline. All the options are on the main panel. Add anything you like, such as animation, text, images, or other media, to make an outstanding outcome. These are very easy to understand, so go through the following steps for splitting the video clips. Two ways are trimming and splitting the clips in Wondershare Filmora.
First method: splitting on the timeline
Step 1. Selection of the clip in the timeline that you want to split. Your play head should be precisely at this particular place from where you need the splitting.

Step 2. When your play head is on the correct point of the timeline, right-click on the clip for opening the menu. Select the option of “Split” or click on the scissor icon in red colour.

There is also a possibility of hiding the red icon of the scissor present. You can do it by tapping on the options of Wondershare Filmora. Then go to Preferencesàediting. Now uncheck the button of Split.

Second method: detection of the scene
If there are different shots in your clips or separation in the scenes, you can use the tool of “scene detection” in the Wondershare Filmora.
Step 1. Select your video clip from the media library that you want to split. After right-clicking on it, select the option of “Scene detection” from the menu.

Step 2. The new window of the scene detection appears and then click on “Detect”. Depending on the transitions of the video clips, it is divided into different parts.

There are hundreds of editing software present in the marketplace, but Wondershare Filmora’s success rate is the highest. It is just because of its simplicity and advanced tools that fulfil the users’ needs. The whole interface is hassle-free and clean no matter which operating system you use. It is also helpful in saving your time in terms of applying the settings of colour correction on more than one clip at all at once.
Exploration of the transition effects with the filters allows motion elements in your images and videos. Even you can split the screens to present your videos in a different style. Must discover the Wondershare Filmora whether you are using it casually or professionally. Keep going with the flow and go through the available guidelines. You will definitely consider Wondershare Filmora the best software for your managing and editing tasks.
Step 2: When the uploading is complete, you can cut and split the clips depending on your needs. Now, keep moving the play head in the specific direction from where you have to cut the clips—Press “C” on your keyboard.
Step 3: After getting the split clip, you can delete the remaining part that is not in use. For this, selecting the particular part is necessary and selecting the option of “Delete”. Even, you can press the “delete” key on your keyboard.
Step 4: When your video is ready, simply export the video by clicking right on the option of “All”. On the left lower side of the timeline, it is now clicked on “Export”.
Part 2- trimming of the clips in Lightworks
To trim the video clips in Lightworks, you require to hover the mouse towards the last of the video clip. Keep moving until and unless that part of the clip gets highlighted. After this step, start dragging till the previous where you want it.
An easier way to split the video clip
Even though Lightworks is a wonderful software for editing videos and images, its interface is easy to handle. But it is not supportive of different formats and 4K videos. For a few features, you might need the paid version of Lightworks. The most acquired solution to resolve this issue is Filmora Video Editor . It is freely available, and use all the tools according to your needs. That’s why it is gaining popularity, and users are increasing day by day. The latest versions of the Wondershare Filmora are available to enhance user experiences. You can export the outcome with ease from the tools.
For Win 7 or later (64-bit)
For macOS 10.14 or later
Features:
- Availability of drag and drag feature
- Can preview the functionalities you apply
- Easy to customize the images and videos
- Involvement of the animation
- Huge library available for the effects of visual and audio
- Splitting and merging the clips
Wondershare Filmora always offers to split the clips from the creative techniques. This tool is extremely useful, particularly when creating commentaries, tutorials, or interviews. The exact footage has to be on the timeline. All the options are on the main panel. Add anything you like, such as animation, text, images, or other media, to make an outstanding outcome. These are very easy to understand, so go through the following steps for splitting the video clips. Two ways are trimming and splitting the clips in Wondershare Filmora.
First method: splitting on the timeline
Step 1. Selection of the clip in the timeline that you want to split. Your play head should be precisely at this particular place from where you need the splitting.
Step 2. When your play head is on the correct point of the timeline, right-click on the clip for opening the menu. Select the option of “Split” or click on the scissor icon in red colour.
There is also a possibility of hiding the red icon of the scissor present. You can do it by tapping on the options of Wondershare Filmora. Then go to Preferencesàediting. Now uncheck the button of Split.
Second method: detection of the scene
If there are different shots in your clips or separation in the scenes, you can use the tool of “scene detection” in the Wondershare Filmora.
Step 1. Select your video clip from the media library that you want to split. After right-clicking on it, select the option of “Scene detection” from the menu.
Step 2. The new window of the scene detection appears and then click on “Detect”. Depending on the transitions of the video clips, it is divided into different parts.
There are hundreds of editing software present in the marketplace, but Wondershare Filmora’s success rate is the highest. It is just because of its simplicity and advanced tools that fulfil the users’ needs. The whole interface is hassle-free and clean no matter which operating system you use. It is also helpful in saving your time in terms of applying the settings of colour correction on more than one clip at all at once.
Exploration of the transition effects with the filters allows motion elements in your images and videos. Even you can split the screens to present your videos in a different style. Must discover the Wondershare Filmora whether you are using it casually or professionally. Keep going with the flow and go through the available guidelines. You will definitely consider Wondershare Filmora the best software for your managing and editing tasks.
Also read:
- In 2024, How to Export iMovie?
- New How to Start a Vlog for 2024
- New 3 Best Motion Blur Plugins for Adobe After Effects
- Discover the Top 10 Video Editing Apps with Templates for Professional-Grade Results. Edit Like a Pro with These Tools for 2024
- New Detailed Steps to Rotate Videos in Davinci Resolve
- 2024 Approved What Is Color Finale
- Updated Fascinated About Exploring Your Graphic Creativity by Experimenting with Designing Slideshow Presentations on a Variety of Software Programs? Stay Here to Get the Know-How of Using Clideo for 2024
- New In 2024, Best iOS Slow Motion Apps To Work With
- Learning How to Slow Down a Video on iPhone Properly
- Best 10 Video Quiz Makers 2024 Add Quiz To Videos Easily
- New Track Mattes The Ultimate Guide For After Effects
- 2024 Approved This Article Will Help You Understand How to Create Flying Objects Using Editing Tools Such as Wondershare Filmora
- Updated M31 LUT (Teal and Orange LUT) Free Download for 2024
- New Heres All About GIF Keyboard Youll Ever Want to Know
- How to Zoom In and Out on Mac for 2024
- 2024 Approved Color Match Game Top Tips for You
- Updated 2024 Approved Converting Files Is Easy with the Right Tools, and Likewise, GIF to JPG Conversion Is. Choose the Best Tool and Get the Expected Results Within the Blink of an Eye
- Updated How to Create a Slideshow with Icecream Slideshow Maker
- New Stop Worrying if Your Adobe Premiere Playback Slows Down. This Guide Will Show You the Best Solutions to Resolve This Issue and a Perfect Alternative
- 8 Apps to Custom GIF Stickers
- Updated Transforming a Slow-Motion Video to Normal Mastering the Skill for 2024
- New In 2024, Are You Looking for Ways to Add Background to Green Screen Video Online? Worry Not, as in This Article; We Shall Discuss Using a Green Screen Background Adder in Filmora
- Updated In 2024, Have You Ever Watched YouTube Live Streams? In Fact, You Can Also Start a Live Streaming on YouTube if You Want. Here Well Share some Tips to Live Stream on YouTube
- If You Are a Beginner and Want to Familiarise Yourself with Steps and Terms Used in Video Editing, in This Article, We Will Go Through the Steps You Will Need to Cut Your Video File in Adobe Premiere Pro and Wondershare Filmora for 2024
- A Roster of 8 Top Color Match Generators
- New Do You Know Adding Subtitles Can Benefit Video Content? Meanwhile, for Adding Subtitles to a Video, Wondershare Filmora Can Help You for 2024
- Basic Introduction of LumaFusion Color Grading for 2024
- New Keyframes Interval Everything You Need To Know | Filmora
- New Several Tips Can Facilitate How You Edit Videos Faster and Easier. All You Need to Do Is to Read This Article to Find Out What They Are for 2024
- New 2024 Approved Recording Slow-Motion Videos Is Not More Difficult Using a Smartphone. Learn Everything From How to Record Slow-Motion Video and Edit a Video to Slow Down It
- Updated Making Slow Motion Videos in Final Cut Pro The Best Methods for 2024
- 2024 Approved Find Out The Best Dark Moody LUTs During Editing
- Updated Methods on How to Speed Up Video on Splice for 2024
- Updated In 2024, Looking for Exciting Methods to Create Alluring GIFs Worthy of Making a Mass Appeal? Heres All About GIF Design You Will Ever Want to Know and Learn
- In 2024, How to use iSpoofer on Honor Magic 5 Pro? | Dr.fone
- In 2024, Troubleshooting Error Connecting to the Apple ID Server On Apple iPhone 6s
- How to Unlock Apple iPhone 13 with a Mask On
- How to get back lost photos from Asus ROG Phone 8.
- In 2024, A Step-by-Step Guide on Using ADB and Fastboot to Remove FRP Lock from your Xiaomi 14 Ultra
- Updated Guide to Generating Speech in Different Languages With the Best Tools for 2024
- How To Track IMEI Number Of Nubia Z50 Ultra Through Google Earth?
- Top 10 AirPlay Apps in Realme 12 Pro+ 5G for Streaming | Dr.fone
- In 2024, How Can We Unlock Our Samsung Galaxy S23+ Phone Screen?
- In 2024, How to Change your Infinix Note 30 5G Location on Twitter | Dr.fone
- In 2024, The Updated Method to Bypass Samsung Galaxy XCover 6 Pro Tactical Edition FRP
- 6 Fixes to Unfortunately WhatsApp has stopped Error Popups On Xiaomi Redmi K70 Pro | Dr.fone
- How to Change Location On Facebook Dating for your Oppo A38 | Dr.fone
- Best 15 Greatest Claymation Movies of All Time for 2024
- In 2024, How to Change Location On Facebook Dating for your OnePlus Nord 3 5G | Dr.fone
- In 2024, How to Fake Snapchat Location on Nokia C32 | Dr.fone
- The way to get back lost data from Samsung Galaxy A05s
- Title: Updated In 2024, Have You Been Looking for Online YouTube Video Trimmer? You Will Be Introduced to Different Ways to Trim YouTube Videos as Introduced by YouTube Itself and some Online and Desktop Software to Help You Learn Video Trimming in This Article
- Author: Morgan
- Created at : 2024-07-01 13:02:12
- Updated at : 2024-07-02 13:02:12
- Link: https://ai-video-editing.techidaily.com/updated-in-2024-have-you-been-looking-for-online-youtube-video-trimmer-you-will-be-introduced-to-different-ways-to-trim-youtube-videos-as-introduced-by-yout/
- License: This work is licensed under CC BY-NC-SA 4.0.
