:max_bytes(150000):strip_icc():format(webp)/Verified-badge-on-phone-658ecad4f9104dae97a969bfa2f74eb3.jpg)
Updated In 2024, How to Blur a Still or Moving Part of Video

Learn How to Blur a Still or Moving Part of Video
Create High-Quality Video - Wondershare Filmora
An easy and powerful YouTube video editor
Numerous video and audio effects to choose from
Detailed tutorials provided by the official channel
Adding a blur effect to your video is vital, especially if you have added unwanted things that could ruin its quality. It often looks awkward when there’s something wrong in the background of your video. Various video editing programs allow you to blur a moving or still part of your video if you don’t want viewers to see it. With that in mind, we’ll look at how to blur part of a video using Filmora.
In this article
01 How to Blur a Part of a Video Using Filmora
02 How to Blur a Moving Part of a Video Using Filmora
03 How to Blur Part of a Video Using OpenShot
There are several ways you can blur part of a video. Filmora allows you to blur a still and moving part of a video. The software is user-friendly and comes with an aesthetically pleasing interface. You don’t have to be tech-savvy to learn how to blur out part of a video with Filmora. You can also use OpenShot to blur part of a video.
How to Blur a Part of a Video Using Filmora
Both Mac and PC owners can use this video editing software to blur part of a video. Here is how to blur a part of video using Filmora.
- Download and install Wondershare Filmora on your device. If you had already installed Filmora on your computer, double-click the program to launch it.
- Next, you need to drag and drop the video file you wish to blur into the Media Library. Alternatively, you could also navigate to the File tab and click it, then choose Import Media and select the Import Media Files option. Find the video you want to edit and select it. You can now hit the Open button to import the video file to Media Library
- After your video file is on Filmora’s Media Library, drag and drop it into the Timeline; this is where the program allows you to assemble effects and media files for your video project.

- Click on the Effects tab; this will allow you to browse through Filmora’s collection of visual effects. Select Utility on the drop-down menu located on the left side of your screen.

- The program will display a range of effects; select the Mosaic option. You can also type in Mosaic in the search bar to find the effect swiftly.
- Drag the Mosaic effect to above the video clip on your Timeline. Dragging the border of your Mosaic clip allows you to adjust its length.
- A small blurred area will appear in the preview window.

- Lock the main tracks.
- Now, click the Mosaic layer to modify the Mosaic size and area. Move it to the part of the video that you would like to blur.
- Double-clicking on the Mosaic clip will allow you to change the mosaic type and adjust the opacity and blur amount. You can choose from six different Mosaic types. Adjusting the opacity allows you to set the degree to which you can see through the blurred area. The blur amount lets you control the intensity of the blur.

- You can now save your blurred video. Click on the File tab and select ‘Save Project.’ Doing this will save your project to the default file. Choose ‘Save Project As’ to save your video to another destination of your choice.
How to Blur a Moving Part of a Video Using Filmora
You can also blur a moving part of your video with Filmora; this program allows you to add the motion-tracking mosaic to any moving object in your video that you do not want your viewers to see. You can use stickers, mosaic, or anything you download on the internet to hide any unwanted moving object.
With that in mind, here is how to blur a moving part of a video using Filmora:
- Run Filmora on your device.
- Import your video into Filmora’s Media Library.
- Drag your video to the Timeline.

- Now, double-click the video in the Timeline. Doing this will open the editing menu.
- Check the box that’s right next to Motion Tracking; this tool allows you to track movement in a video and then have objects like text, images, videos, or elements follow this movement.

- A tracker box will appear on your preview window; move it over the moving object you would like to track. You can increase or reduce the size of the tracker box. Hit the Start Tracking button to render the effect.

- Wait until the tracking process is complete. The duration of this process will depend on the length of your video. You’ll have to do some trimming if other objects block the moving part you’re tracking from time to time.

- WNow, select the Add Mosaic option.
- Choose the Mosaic type you prefer and adjust the opacity and blur amount to ensure the object is unrecognizable.
- Now, select the moving part of the video you want to blur and click OK.
- The object is now blurred, and the mosaic layer will follow its movement everywhere it goes.
- Playback your video to check the result. Filmora allows you to fine-tune the position and size of the object that’s following the track in your Preview Window without restarting tracking. Additionally, you can switch the follower anytime you want.
- When you have finished blurring the moving part on your video, click File > Save Project or Save Project As to save your video.
For Win 7 or later (64-bit)
For macOS 10.12 or later
How to Blur Part of a Video Using OpenShot
Designed for Windows, Mac, and Linux, OpenShot is a free, open-source, and cross-platform video editor. While there’s no predefined function or filter in this tool to help you blur part of a video, OpenShot has another way of blurring static parts of your video: it uses an image.
OpenShot blur part of video is free, and you’ll use its open-source programs as a base program for the edition of the video and GIMP Image Manipulation software to edit photos. Follow the guide below to learn how to blur out something in a video using OpenShot.
Step 1: Download OpenShot and install it on your device.

Step 2: Take a screenshot from your video, where the part you want to blur is easily visible. You can do this by going to a relevant frame and utilizing Save Current Frame with a camera icon, located on the right side of the video preview window in a standard program configuration.

Step 3: Be sure to save your video screenshot on your computer.
Step 4: Since you have exported a relevant frame from your video as a screenshot, you need to open it in a photo editor that can handle PNG pics and transparency, like the GIMP Image Manipulation program. Use any selection tool to select the area of the picture you want to blur on the video. Depending on your preferences, you can choose the free select tool, the ellipse select tool, or the rectangle select tool.

Step 5: In the blur filters submenu, open the Pixelize tool and adjust the options that suit your preferences. You can use CTRL-Z to cancel the operation, and repeat it until you find the best combination of blurring settings.
Step 6: When you are satisfied with blurring, right-click on the blurred area and select Invert in the Select submenu; this will allow you to select the entire part of the frame that has not been blurred, which is the part you would like to get rid of because you will only have to use the blurred part of your video overlay where necessary.
Step 7: Now, cut the section of the picture you do not want to keep. You can do this by using CTRL-X. The blurred filter for your video is now ready.

Step 8: If after cutting you notice a plain color rather than a checkerboard canvas representing transparency, use CTRL-Z to cancel the cut. Then, use CTRL-I to invert the selection again to get control of the blurred selection again, and copy or cut it using CTRL-X or CTRL-C.
Step 9: Create another image using CTRL-N, and ensure you have navigated to the advanced options and selected transparency as the fill-in color, and paste your selection there.
Step 10: You now have a perfect photo with full transparency, which is represented by a checkerboard canvas, except for the section of the video frames you would like to blur that should be pixelized.
Step 11: Use the Export option under the File menu to export the photo to your PC as a . PNG file. To save a picture with a transparency channel, you need to use the . PNG extension.
Step 12: Now return to OpenShot video editor and import the generated picture with a pixelized portion in the OpenShot video project. Next, add the picture as an overlay track. Make sure it’s above the video track.
Step 13: If the program asks you to import the photo as an image sequence, select the NO option because you need to import a still photo, and not a video sequence.
Step 14: The picture will be displayed before the video, blurring only the portion of the video where you modified the frame. The other parts of the video won’t be touched. You can make adjustments to ensure the picture track is only displayed at required moments. And that’s how to blur part of a video using OpenShot.
Conclusion
● Now that you know how to blur out part of a video, you can have fun and censor anything you want in your clips. Use Filmora to blur moving and still parts on your video.
Adding a blur effect to your video is vital, especially if you have added unwanted things that could ruin its quality. It often looks awkward when there’s something wrong in the background of your video. Various video editing programs allow you to blur a moving or still part of your video if you don’t want viewers to see it. With that in mind, we’ll look at how to blur part of a video using Filmora.
In this article
01 How to Blur a Part of a Video Using Filmora
02 How to Blur a Moving Part of a Video Using Filmora
03 How to Blur Part of a Video Using OpenShot
There are several ways you can blur part of a video. Filmora allows you to blur a still and moving part of a video. The software is user-friendly and comes with an aesthetically pleasing interface. You don’t have to be tech-savvy to learn how to blur out part of a video with Filmora. You can also use OpenShot to blur part of a video.
How to Blur a Part of a Video Using Filmora
Both Mac and PC owners can use this video editing software to blur part of a video. Here is how to blur a part of video using Filmora.
- Download and install Wondershare Filmora on your device. If you had already installed Filmora on your computer, double-click the program to launch it.
- Next, you need to drag and drop the video file you wish to blur into the Media Library. Alternatively, you could also navigate to the File tab and click it, then choose Import Media and select the Import Media Files option. Find the video you want to edit and select it. You can now hit the Open button to import the video file to Media Library
- After your video file is on Filmora’s Media Library, drag and drop it into the Timeline; this is where the program allows you to assemble effects and media files for your video project.

- Click on the Effects tab; this will allow you to browse through Filmora’s collection of visual effects. Select Utility on the drop-down menu located on the left side of your screen.

- The program will display a range of effects; select the Mosaic option. You can also type in Mosaic in the search bar to find the effect swiftly.
- Drag the Mosaic effect to above the video clip on your Timeline. Dragging the border of your Mosaic clip allows you to adjust its length.
- A small blurred area will appear in the preview window.

- Lock the main tracks.
- Now, click the Mosaic layer to modify the Mosaic size and area. Move it to the part of the video that you would like to blur.
- Double-clicking on the Mosaic clip will allow you to change the mosaic type and adjust the opacity and blur amount. You can choose from six different Mosaic types. Adjusting the opacity allows you to set the degree to which you can see through the blurred area. The blur amount lets you control the intensity of the blur.

- You can now save your blurred video. Click on the File tab and select ‘Save Project.’ Doing this will save your project to the default file. Choose ‘Save Project As’ to save your video to another destination of your choice.
How to Blur a Moving Part of a Video Using Filmora
You can also blur a moving part of your video with Filmora; this program allows you to add the motion-tracking mosaic to any moving object in your video that you do not want your viewers to see. You can use stickers, mosaic, or anything you download on the internet to hide any unwanted moving object.
With that in mind, here is how to blur a moving part of a video using Filmora:
- Run Filmora on your device.
- Import your video into Filmora’s Media Library.
- Drag your video to the Timeline.

- Now, double-click the video in the Timeline. Doing this will open the editing menu.
- Check the box that’s right next to Motion Tracking; this tool allows you to track movement in a video and then have objects like text, images, videos, or elements follow this movement.

- A tracker box will appear on your preview window; move it over the moving object you would like to track. You can increase or reduce the size of the tracker box. Hit the Start Tracking button to render the effect.

- Wait until the tracking process is complete. The duration of this process will depend on the length of your video. You’ll have to do some trimming if other objects block the moving part you’re tracking from time to time.

- WNow, select the Add Mosaic option.
- Choose the Mosaic type you prefer and adjust the opacity and blur amount to ensure the object is unrecognizable.
- Now, select the moving part of the video you want to blur and click OK.
- The object is now blurred, and the mosaic layer will follow its movement everywhere it goes.
- Playback your video to check the result. Filmora allows you to fine-tune the position and size of the object that’s following the track in your Preview Window without restarting tracking. Additionally, you can switch the follower anytime you want.
- When you have finished blurring the moving part on your video, click File > Save Project or Save Project As to save your video.
For Win 7 or later (64-bit)
For macOS 10.12 or later
How to Blur Part of a Video Using OpenShot
Designed for Windows, Mac, and Linux, OpenShot is a free, open-source, and cross-platform video editor. While there’s no predefined function or filter in this tool to help you blur part of a video, OpenShot has another way of blurring static parts of your video: it uses an image.
OpenShot blur part of video is free, and you’ll use its open-source programs as a base program for the edition of the video and GIMP Image Manipulation software to edit photos. Follow the guide below to learn how to blur out something in a video using OpenShot.
Step 1: Download OpenShot and install it on your device.

Step 2: Take a screenshot from your video, where the part you want to blur is easily visible. You can do this by going to a relevant frame and utilizing Save Current Frame with a camera icon, located on the right side of the video preview window in a standard program configuration.

Step 3: Be sure to save your video screenshot on your computer.
Step 4: Since you have exported a relevant frame from your video as a screenshot, you need to open it in a photo editor that can handle PNG pics and transparency, like the GIMP Image Manipulation program. Use any selection tool to select the area of the picture you want to blur on the video. Depending on your preferences, you can choose the free select tool, the ellipse select tool, or the rectangle select tool.

Step 5: In the blur filters submenu, open the Pixelize tool and adjust the options that suit your preferences. You can use CTRL-Z to cancel the operation, and repeat it until you find the best combination of blurring settings.
Step 6: When you are satisfied with blurring, right-click on the blurred area and select Invert in the Select submenu; this will allow you to select the entire part of the frame that has not been blurred, which is the part you would like to get rid of because you will only have to use the blurred part of your video overlay where necessary.
Step 7: Now, cut the section of the picture you do not want to keep. You can do this by using CTRL-X. The blurred filter for your video is now ready.

Step 8: If after cutting you notice a plain color rather than a checkerboard canvas representing transparency, use CTRL-Z to cancel the cut. Then, use CTRL-I to invert the selection again to get control of the blurred selection again, and copy or cut it using CTRL-X or CTRL-C.
Step 9: Create another image using CTRL-N, and ensure you have navigated to the advanced options and selected transparency as the fill-in color, and paste your selection there.
Step 10: You now have a perfect photo with full transparency, which is represented by a checkerboard canvas, except for the section of the video frames you would like to blur that should be pixelized.
Step 11: Use the Export option under the File menu to export the photo to your PC as a . PNG file. To save a picture with a transparency channel, you need to use the . PNG extension.
Step 12: Now return to OpenShot video editor and import the generated picture with a pixelized portion in the OpenShot video project. Next, add the picture as an overlay track. Make sure it’s above the video track.
Step 13: If the program asks you to import the photo as an image sequence, select the NO option because you need to import a still photo, and not a video sequence.
Step 14: The picture will be displayed before the video, blurring only the portion of the video where you modified the frame. The other parts of the video won’t be touched. You can make adjustments to ensure the picture track is only displayed at required moments. And that’s how to blur part of a video using OpenShot.
Conclusion
● Now that you know how to blur out part of a video, you can have fun and censor anything you want in your clips. Use Filmora to blur moving and still parts on your video.
Adding a blur effect to your video is vital, especially if you have added unwanted things that could ruin its quality. It often looks awkward when there’s something wrong in the background of your video. Various video editing programs allow you to blur a moving or still part of your video if you don’t want viewers to see it. With that in mind, we’ll look at how to blur part of a video using Filmora.
In this article
01 How to Blur a Part of a Video Using Filmora
02 How to Blur a Moving Part of a Video Using Filmora
03 How to Blur Part of a Video Using OpenShot
There are several ways you can blur part of a video. Filmora allows you to blur a still and moving part of a video. The software is user-friendly and comes with an aesthetically pleasing interface. You don’t have to be tech-savvy to learn how to blur out part of a video with Filmora. You can also use OpenShot to blur part of a video.
How to Blur a Part of a Video Using Filmora
Both Mac and PC owners can use this video editing software to blur part of a video. Here is how to blur a part of video using Filmora.
- Download and install Wondershare Filmora on your device. If you had already installed Filmora on your computer, double-click the program to launch it.
- Next, you need to drag and drop the video file you wish to blur into the Media Library. Alternatively, you could also navigate to the File tab and click it, then choose Import Media and select the Import Media Files option. Find the video you want to edit and select it. You can now hit the Open button to import the video file to Media Library
- After your video file is on Filmora’s Media Library, drag and drop it into the Timeline; this is where the program allows you to assemble effects and media files for your video project.

- Click on the Effects tab; this will allow you to browse through Filmora’s collection of visual effects. Select Utility on the drop-down menu located on the left side of your screen.

- The program will display a range of effects; select the Mosaic option. You can also type in Mosaic in the search bar to find the effect swiftly.
- Drag the Mosaic effect to above the video clip on your Timeline. Dragging the border of your Mosaic clip allows you to adjust its length.
- A small blurred area will appear in the preview window.

- Lock the main tracks.
- Now, click the Mosaic layer to modify the Mosaic size and area. Move it to the part of the video that you would like to blur.
- Double-clicking on the Mosaic clip will allow you to change the mosaic type and adjust the opacity and blur amount. You can choose from six different Mosaic types. Adjusting the opacity allows you to set the degree to which you can see through the blurred area. The blur amount lets you control the intensity of the blur.

- You can now save your blurred video. Click on the File tab and select ‘Save Project.’ Doing this will save your project to the default file. Choose ‘Save Project As’ to save your video to another destination of your choice.
How to Blur a Moving Part of a Video Using Filmora
You can also blur a moving part of your video with Filmora; this program allows you to add the motion-tracking mosaic to any moving object in your video that you do not want your viewers to see. You can use stickers, mosaic, or anything you download on the internet to hide any unwanted moving object.
With that in mind, here is how to blur a moving part of a video using Filmora:
- Run Filmora on your device.
- Import your video into Filmora’s Media Library.
- Drag your video to the Timeline.

- Now, double-click the video in the Timeline. Doing this will open the editing menu.
- Check the box that’s right next to Motion Tracking; this tool allows you to track movement in a video and then have objects like text, images, videos, or elements follow this movement.

- A tracker box will appear on your preview window; move it over the moving object you would like to track. You can increase or reduce the size of the tracker box. Hit the Start Tracking button to render the effect.

- Wait until the tracking process is complete. The duration of this process will depend on the length of your video. You’ll have to do some trimming if other objects block the moving part you’re tracking from time to time.

- WNow, select the Add Mosaic option.
- Choose the Mosaic type you prefer and adjust the opacity and blur amount to ensure the object is unrecognizable.
- Now, select the moving part of the video you want to blur and click OK.
- The object is now blurred, and the mosaic layer will follow its movement everywhere it goes.
- Playback your video to check the result. Filmora allows you to fine-tune the position and size of the object that’s following the track in your Preview Window without restarting tracking. Additionally, you can switch the follower anytime you want.
- When you have finished blurring the moving part on your video, click File > Save Project or Save Project As to save your video.
For Win 7 or later (64-bit)
For macOS 10.12 or later
How to Blur Part of a Video Using OpenShot
Designed for Windows, Mac, and Linux, OpenShot is a free, open-source, and cross-platform video editor. While there’s no predefined function or filter in this tool to help you blur part of a video, OpenShot has another way of blurring static parts of your video: it uses an image.
OpenShot blur part of video is free, and you’ll use its open-source programs as a base program for the edition of the video and GIMP Image Manipulation software to edit photos. Follow the guide below to learn how to blur out something in a video using OpenShot.
Step 1: Download OpenShot and install it on your device.

Step 2: Take a screenshot from your video, where the part you want to blur is easily visible. You can do this by going to a relevant frame and utilizing Save Current Frame with a camera icon, located on the right side of the video preview window in a standard program configuration.

Step 3: Be sure to save your video screenshot on your computer.
Step 4: Since you have exported a relevant frame from your video as a screenshot, you need to open it in a photo editor that can handle PNG pics and transparency, like the GIMP Image Manipulation program. Use any selection tool to select the area of the picture you want to blur on the video. Depending on your preferences, you can choose the free select tool, the ellipse select tool, or the rectangle select tool.

Step 5: In the blur filters submenu, open the Pixelize tool and adjust the options that suit your preferences. You can use CTRL-Z to cancel the operation, and repeat it until you find the best combination of blurring settings.
Step 6: When you are satisfied with blurring, right-click on the blurred area and select Invert in the Select submenu; this will allow you to select the entire part of the frame that has not been blurred, which is the part you would like to get rid of because you will only have to use the blurred part of your video overlay where necessary.
Step 7: Now, cut the section of the picture you do not want to keep. You can do this by using CTRL-X. The blurred filter for your video is now ready.

Step 8: If after cutting you notice a plain color rather than a checkerboard canvas representing transparency, use CTRL-Z to cancel the cut. Then, use CTRL-I to invert the selection again to get control of the blurred selection again, and copy or cut it using CTRL-X or CTRL-C.
Step 9: Create another image using CTRL-N, and ensure you have navigated to the advanced options and selected transparency as the fill-in color, and paste your selection there.
Step 10: You now have a perfect photo with full transparency, which is represented by a checkerboard canvas, except for the section of the video frames you would like to blur that should be pixelized.
Step 11: Use the Export option under the File menu to export the photo to your PC as a . PNG file. To save a picture with a transparency channel, you need to use the . PNG extension.
Step 12: Now return to OpenShot video editor and import the generated picture with a pixelized portion in the OpenShot video project. Next, add the picture as an overlay track. Make sure it’s above the video track.
Step 13: If the program asks you to import the photo as an image sequence, select the NO option because you need to import a still photo, and not a video sequence.
Step 14: The picture will be displayed before the video, blurring only the portion of the video where you modified the frame. The other parts of the video won’t be touched. You can make adjustments to ensure the picture track is only displayed at required moments. And that’s how to blur part of a video using OpenShot.
Conclusion
● Now that you know how to blur out part of a video, you can have fun and censor anything you want in your clips. Use Filmora to blur moving and still parts on your video.
Adding a blur effect to your video is vital, especially if you have added unwanted things that could ruin its quality. It often looks awkward when there’s something wrong in the background of your video. Various video editing programs allow you to blur a moving or still part of your video if you don’t want viewers to see it. With that in mind, we’ll look at how to blur part of a video using Filmora.
In this article
01 How to Blur a Part of a Video Using Filmora
02 How to Blur a Moving Part of a Video Using Filmora
03 How to Blur Part of a Video Using OpenShot
There are several ways you can blur part of a video. Filmora allows you to blur a still and moving part of a video. The software is user-friendly and comes with an aesthetically pleasing interface. You don’t have to be tech-savvy to learn how to blur out part of a video with Filmora. You can also use OpenShot to blur part of a video.
How to Blur a Part of a Video Using Filmora
Both Mac and PC owners can use this video editing software to blur part of a video. Here is how to blur a part of video using Filmora.
- Download and install Wondershare Filmora on your device. If you had already installed Filmora on your computer, double-click the program to launch it.
- Next, you need to drag and drop the video file you wish to blur into the Media Library. Alternatively, you could also navigate to the File tab and click it, then choose Import Media and select the Import Media Files option. Find the video you want to edit and select it. You can now hit the Open button to import the video file to Media Library
- After your video file is on Filmora’s Media Library, drag and drop it into the Timeline; this is where the program allows you to assemble effects and media files for your video project.

- Click on the Effects tab; this will allow you to browse through Filmora’s collection of visual effects. Select Utility on the drop-down menu located on the left side of your screen.

- The program will display a range of effects; select the Mosaic option. You can also type in Mosaic in the search bar to find the effect swiftly.
- Drag the Mosaic effect to above the video clip on your Timeline. Dragging the border of your Mosaic clip allows you to adjust its length.
- A small blurred area will appear in the preview window.

- Lock the main tracks.
- Now, click the Mosaic layer to modify the Mosaic size and area. Move it to the part of the video that you would like to blur.
- Double-clicking on the Mosaic clip will allow you to change the mosaic type and adjust the opacity and blur amount. You can choose from six different Mosaic types. Adjusting the opacity allows you to set the degree to which you can see through the blurred area. The blur amount lets you control the intensity of the blur.

- You can now save your blurred video. Click on the File tab and select ‘Save Project.’ Doing this will save your project to the default file. Choose ‘Save Project As’ to save your video to another destination of your choice.
How to Blur a Moving Part of a Video Using Filmora
You can also blur a moving part of your video with Filmora; this program allows you to add the motion-tracking mosaic to any moving object in your video that you do not want your viewers to see. You can use stickers, mosaic, or anything you download on the internet to hide any unwanted moving object.
With that in mind, here is how to blur a moving part of a video using Filmora:
- Run Filmora on your device.
- Import your video into Filmora’s Media Library.
- Drag your video to the Timeline.

- Now, double-click the video in the Timeline. Doing this will open the editing menu.
- Check the box that’s right next to Motion Tracking; this tool allows you to track movement in a video and then have objects like text, images, videos, or elements follow this movement.

- A tracker box will appear on your preview window; move it over the moving object you would like to track. You can increase or reduce the size of the tracker box. Hit the Start Tracking button to render the effect.

- Wait until the tracking process is complete. The duration of this process will depend on the length of your video. You’ll have to do some trimming if other objects block the moving part you’re tracking from time to time.

- WNow, select the Add Mosaic option.
- Choose the Mosaic type you prefer and adjust the opacity and blur amount to ensure the object is unrecognizable.
- Now, select the moving part of the video you want to blur and click OK.
- The object is now blurred, and the mosaic layer will follow its movement everywhere it goes.
- Playback your video to check the result. Filmora allows you to fine-tune the position and size of the object that’s following the track in your Preview Window without restarting tracking. Additionally, you can switch the follower anytime you want.
- When you have finished blurring the moving part on your video, click File > Save Project or Save Project As to save your video.
For Win 7 or later (64-bit)
For macOS 10.12 or later
How to Blur Part of a Video Using OpenShot
Designed for Windows, Mac, and Linux, OpenShot is a free, open-source, and cross-platform video editor. While there’s no predefined function or filter in this tool to help you blur part of a video, OpenShot has another way of blurring static parts of your video: it uses an image.
OpenShot blur part of video is free, and you’ll use its open-source programs as a base program for the edition of the video and GIMP Image Manipulation software to edit photos. Follow the guide below to learn how to blur out something in a video using OpenShot.
Step 1: Download OpenShot and install it on your device.

Step 2: Take a screenshot from your video, where the part you want to blur is easily visible. You can do this by going to a relevant frame and utilizing Save Current Frame with a camera icon, located on the right side of the video preview window in a standard program configuration.

Step 3: Be sure to save your video screenshot on your computer.
Step 4: Since you have exported a relevant frame from your video as a screenshot, you need to open it in a photo editor that can handle PNG pics and transparency, like the GIMP Image Manipulation program. Use any selection tool to select the area of the picture you want to blur on the video. Depending on your preferences, you can choose the free select tool, the ellipse select tool, or the rectangle select tool.

Step 5: In the blur filters submenu, open the Pixelize tool and adjust the options that suit your preferences. You can use CTRL-Z to cancel the operation, and repeat it until you find the best combination of blurring settings.
Step 6: When you are satisfied with blurring, right-click on the blurred area and select Invert in the Select submenu; this will allow you to select the entire part of the frame that has not been blurred, which is the part you would like to get rid of because you will only have to use the blurred part of your video overlay where necessary.
Step 7: Now, cut the section of the picture you do not want to keep. You can do this by using CTRL-X. The blurred filter for your video is now ready.

Step 8: If after cutting you notice a plain color rather than a checkerboard canvas representing transparency, use CTRL-Z to cancel the cut. Then, use CTRL-I to invert the selection again to get control of the blurred selection again, and copy or cut it using CTRL-X or CTRL-C.
Step 9: Create another image using CTRL-N, and ensure you have navigated to the advanced options and selected transparency as the fill-in color, and paste your selection there.
Step 10: You now have a perfect photo with full transparency, which is represented by a checkerboard canvas, except for the section of the video frames you would like to blur that should be pixelized.
Step 11: Use the Export option under the File menu to export the photo to your PC as a . PNG file. To save a picture with a transparency channel, you need to use the . PNG extension.
Step 12: Now return to OpenShot video editor and import the generated picture with a pixelized portion in the OpenShot video project. Next, add the picture as an overlay track. Make sure it’s above the video track.
Step 13: If the program asks you to import the photo as an image sequence, select the NO option because you need to import a still photo, and not a video sequence.
Step 14: The picture will be displayed before the video, blurring only the portion of the video where you modified the frame. The other parts of the video won’t be touched. You can make adjustments to ensure the picture track is only displayed at required moments. And that’s how to blur part of a video using OpenShot.
Conclusion
● Now that you know how to blur out part of a video, you can have fun and censor anything you want in your clips. Use Filmora to blur moving and still parts on your video.
Are You the One Who Is Confused About What to Opt Between Camtasia vs Captivate? No More Confusion! Here We Are Going to Reveal the Answer to Camtasia vs Captivate Which Is Better? Learn More
Being a video editor, it’s critical to keep ahead of the curve in our fast-changing global world. From small enterprises to major corporations, eLearning applications have shown to be a significant tool for cutting expenses and increasing profits. Software like Camtasia and Captivate are in high demand as e-learning becomes a more vital aspect of our life. When it comes to creating a course or video instruction, these two applications are quite quick and useful. Whether you should choose a Camtasia or a Captivate relies entirely on your industry and what you want to accomplish with this application.
Often times between Camtasia vs Captivate, the question arises: “Which software is superior?” As a result, we’ve compared Camtasia and Captivate based on the software packages themselves, as well as some important features, similarities, and differences. Software stimulation, production, demonstration screencasts, and translation of PowerPoint presentations into various formats are all possible using TechSmith Camtasia and Adobe Captivate. Camtasia offers fewer online learning alternatives, but it boasts incredible screen and video capture, as well as video editing facilities. This application allows you to alter the sound and visual characteristics manually. Video artists may improve video quality by using auxiliary microphones and cameras. The editing of the video is Camtasia’s most impressive function. It allows you to cut and paste films, add transitions and subtitles to them, as well as do color grading and color correction.
Part 1. Overall Comparison
Each piece of software may be used to create eLearning and lesson material. Despite the fact that Adobe Captivate offers amazing transitional features and visual effect tools, it does not include video editing, which is, in my view, the backbone of developing eLearning material that adheres to the learning management system. As a result, Adobe Captivate needs the use of Adobe Premiere to edit and correct any problems in your films. Adobe Captivate, on the other hand, is the greatest alternative for developing quality eLearning and lesson software material. It’s an excellent tool for developing online courses and tutorials. However, as previously said, Adobe Captivate is not simple to use and is not recommended for novices. Camtasia, on the other hand, seems to be the most economical and practical alternative for you based on your abilities if you are an entry-level editor and want to master the fundamentals of video editing and lesson production on your own.
Attributes360-degree Learning Experience
| | Camtasia | Adobe Captivate | |
| ——————- | ———————————————————————- | ———————————————————————- |
| Ease of Use | Easy and simple User Interface | User-friendly and simple gestures for adding and creating |
| Requirement | Camtasia supports a dual-core processor with a clock speed of 2.0GHz. | A 1.0GHz CPU can run Captivate. |
| Special Feature | Annotations for Multi-Track Timelines Learning in all directions | |
| Support system | Camtasia is only compatible with 64-bit operating systems. | Captivate is compatible with both 32-bit and 64-bit operating systems. |
| Price | Camtasia costs $249 | Captivate comes for $34/month. |
| Best for | Best for professional video editing and production | It’s great for transferring and watching videos. |
| Value For Money | Value for Money is a bit high | It provides both monthly and one-time subscription options. |
| Recording | Camtasia features a function that allows you to record screens. | Captivate has a clever function that enables you to capture videos. |
| Overall Rating | Less than Adobe Captivate in terms of overall rating and user reviews. | Higher Rating and user feedbacks. |
Part 2. Camtasia Software Review
Camtasia by TechSmith is a straightforward video editing and screen recording application. Camtasia was created with novices in mind, allowing designers to quickly and easily make excellent instructional films. Both Windows and MacOS are supported. Camtasia is one of the most popular video editing applications on the market. Camtasia is available for both Windows and iOS. Camtasia is simple to use and supports a wide range of media formats. This software package has several features and controls. On the same platform, you can capture screens and edit movies with Camtasia. The benefits don’t stop there; you can also share your work with others through YouTube and Google Drive.

Pros:
- Camtasia is designed for video-editing novices, with a simple setup and user interface.
- The screen capture capability is fantastic. Not only is the resolution excellent, but it is also simple to operate.
- Camtasia’s built-in effects are, on the whole, minimal. Their cursor effects, on the other hand, are spectacular.
- You may use Camtasia to add interactive quizzes to your videos.
- Camtasia provides many of the fundamentals you’ll need if you’re short on time and need to search assets straight immediately.
- TechSmith is a free app for iOS and Android that allows you to make screen recordings from your smartphone or tablet.
- TechSmith offers an excellent customer service department.
Cons:
- Crashing and bugs very often
- Many instructions are missing, despite the fact that they have restricted keyboard controls.
- Camtasia is designed for novices; therefore, it does not allow for much modification.
- Camtasia makes it tough to move and animate things.
- Camtasia video encoding and exporting difficulties have been reported by certain users.
Part 3. Adobe Captivate Review
Captivate is an Adobe tool designed to make online learning more engaging and interactive. Students save time since they can take their classes with them. Captivate has no built-in video editing tools. To do so, you’ll need to use additional Adobe applications. Captivate allows students to study at any time and from any location. However, if you’re the one creating the course, Adobe Captivate could be a little frightening since it requires Adobe experience to utilize.

Pros:
- It’s quite simple to use! Each frame may be easily shortened or lengthened.
- It’s simple to record motions onscreen, and it comes with a range of choices for recording various things (the application smooths down mouse movements).
- When the user is through shooting, the video is divided into multiple frames to make editing easy.
- A built-in editor enables users to manipulate audio by cutting, pasting, altering levels, and adding silences.
- Captivate can capture what’s occurring onscreen and provide step-by-step subtitles for popular menu actions automatically.
- Captivate has some fantastic interactive elements. Tutorials may be created so that users can follow along with pre-recorded comments on the screen.
- Adding audio or importing from another source is simple.
Cons:
- The sound’s bit rate was automatically reduced, making it seem more robotic and muffled.
- It might take a long time to preview and save works-in-progress.
- The finished flash flicks are fairly big.
Part 4. Alternative Way to Edit Videos [The Best Method]
Wondershare Filmora is a robust screen capture tool that allows you to manually alter all video and audio parameters, as well as edit your recordings in the software’s video editor. By tweaking a few basic parameters and exporting your eLearning material in MP4, MOV, or GIF file formats, you may make PIP movies. Filmora is a less expensive alternative to Camtasia 9 or Adobe Captivate for creating high-quality screen recordings. Filmora has the resources to make it possible. It’s both sound and video editing software that comes with a lot of instructions and activities to help you handle the fundamentals and create excellent recordings.
For Win 7 or later (64-bit)
For macOS 10.12 or later
This video editorial manager for PC and Mac comes with a natural point of connection that makes it simple to use for both new and experienced users. Because it is a freemium instrument, the free version will allow you to examine all of the components, albeit the final video will include a watermark. Change over, chop, change the examining rate, add effects, and that’s only the beginning of what you can do with your digital recording on the app’s schedule. Wondershare Filmora is simple to use and maintains the best sound and video toolkit. It’s best suited for novice and intermediate users since it allows you to create professional recordings in seconds and supports all of the popular designs.
Steps to Edit Video using Filmora
Step 1: Download and install Filmora Toolkit.
To begin using Filmora for editing, go to the official website and download the most current version of Wondershare Filmora. Launch the software when the download is complete and click the New Project button to see the product’s underlying window interface.

Step 2: Remove Any Unnecessary Background Sounds
Filmora Audio Editor, in addition to the video editor, allowing you to enhance the sound of your video. If your voice-over has any background noise, you may simply eliminate it from the whole clip or a segment of the video where the sound is inappropriate. In Filmora, you may also add your favourite ones to the videos by importing the files and adding them to the timeline. You may also isolate the audio from your video clips and chop or sync it with the video using the timeline of this video editor.

Step 3: Perform Professional Video Editing
Right-click the video and choose edit from the menu. Then, by hitting the proper effects buttons, you may rotate the movie. You may also swivel 90 degrees anticlockwise/clockwise, flip level, or go vertical, depending on your requirements. Then, in that instance. You can also add a variety of video effects, and the greatest part is that you can use others from the standard library as well, allowing you to put it with greater adjustment. The Editor in Filmora allows you to add Animated Titles, amazing effects, Audio Enhancements, and more to your recorded video.

Step 4: Enhance Audio Quality
The Wondershare Filmora Audio Editor allows you to change the volume, add fade-in and fade-out effects, and silence audio in certain parts of the video. All of the options are easily accessible on the right side of the software interface when you click on the audio component of the movie in Wondershare Filmora’s timeline. You may check the audio sound within the application to see whether it’s in sync with your recorded video clip once you’ve made any necessary edits to your audio.

Step 5: Download/Share the video
Click “Export” in the Toolbar to export the video to the specified format and also, you may share it on-spot. Finally, when you’ve done the video editing, you may completely utilize the Filmora editor as above. And, to publish your work of art immediately to YouTube or another well-known site, select the Export option and pick the platform where you want to share your video clip. You may even alter the movie before sharing it if you desire.

Conclusion
Camtasia’s technique of making a presentation using an individual movie works well for developers who are knowledgeable with video applications. Developers inexperienced with the method may have significant trouble with the editing operation in Camtasia since screen grabs occur in real time. Editing material using slides in Captivate 2 is often less onerous than the video format utilized in Camtasia. The biggest issue is that long presentations might result in a large number of slides that can be time consuming to look through and result in a greater file size for the Flash file that user’s access. Hence, we like to advocate Filmora as a reasonable method between these two.
Part 2. Camtasia Software Review
Camtasia by TechSmith is a straightforward video editing and screen recording application. Camtasia was created with novices in mind, allowing designers to quickly and easily make excellent instructional films. Both Windows and MacOS are supported. Camtasia is one of the most popular video editing applications on the market. Camtasia is available for both Windows and iOS. Camtasia is simple to use and supports a wide range of media formats. This software package has several features and controls. On the same platform, you can capture screens and edit movies with Camtasia. The benefits don’t stop there; you can also share your work with others through YouTube and Google Drive.

Pros:
- Camtasia is designed for video-editing novices, with a simple setup and user interface.
- The screen capture capability is fantastic. Not only is the resolution excellent, but it is also simple to operate.
- Camtasia’s built-in effects are, on the whole, minimal. Their cursor effects, on the other hand, are spectacular.
- You may use Camtasia to add interactive quizzes to your videos.
- Camtasia provides many of the fundamentals you’ll need if you’re short on time and need to search assets straight immediately.
- TechSmith is a free app for iOS and Android that allows you to make screen recordings from your smartphone or tablet.
- TechSmith offers an excellent customer service department.
Cons:
- Crashing and bugs very often
- Many instructions are missing, despite the fact that they have restricted keyboard controls.
- Camtasia is designed for novices; therefore, it does not allow for much modification.
- Camtasia makes it tough to move and animate things.
- Camtasia video encoding and exporting difficulties have been reported by certain users.
Part 3. Adobe Captivate Review
Captivate is an Adobe tool designed to make online learning more engaging and interactive. Students save time since they can take their classes with them. Captivate has no built-in video editing tools. To do so, you’ll need to use additional Adobe applications. Captivate allows students to study at any time and from any location. However, if you’re the one creating the course, Adobe Captivate could be a little frightening since it requires Adobe experience to utilize.

Pros:
- It’s quite simple to use! Each frame may be easily shortened or lengthened.
- It’s simple to record motions onscreen, and it comes with a range of choices for recording various things (the application smooths down mouse movements).
- When the user is through shooting, the video is divided into multiple frames to make editing easy.
- A built-in editor enables users to manipulate audio by cutting, pasting, altering levels, and adding silences.
- Captivate can capture what’s occurring onscreen and provide step-by-step subtitles for popular menu actions automatically.
- Captivate has some fantastic interactive elements. Tutorials may be created so that users can follow along with pre-recorded comments on the screen.
- Adding audio or importing from another source is simple.
Cons:
- The sound’s bit rate was automatically reduced, making it seem more robotic and muffled.
- It might take a long time to preview and save works-in-progress.
- The finished flash flicks are fairly big.
Part 4. Alternative Way to Edit Videos [The Best Method]
Wondershare Filmora is a robust screen capture tool that allows you to manually alter all video and audio parameters, as well as edit your recordings in the software’s video editor. By tweaking a few basic parameters and exporting your eLearning material in MP4, MOV, or GIF file formats, you may make PIP movies. Filmora is a less expensive alternative to Camtasia 9 or Adobe Captivate for creating high-quality screen recordings. Filmora has the resources to make it possible. It’s both sound and video editing software that comes with a lot of instructions and activities to help you handle the fundamentals and create excellent recordings.
For Win 7 or later (64-bit)
For macOS 10.12 or later
This video editorial manager for PC and Mac comes with a natural point of connection that makes it simple to use for both new and experienced users. Because it is a freemium instrument, the free version will allow you to examine all of the components, albeit the final video will include a watermark. Change over, chop, change the examining rate, add effects, and that’s only the beginning of what you can do with your digital recording on the app’s schedule. Wondershare Filmora is simple to use and maintains the best sound and video toolkit. It’s best suited for novice and intermediate users since it allows you to create professional recordings in seconds and supports all of the popular designs.
Steps to Edit Video using Filmora
Step 1: Download and install Filmora Toolkit.
To begin using Filmora for editing, go to the official website and download the most current version of Wondershare Filmora. Launch the software when the download is complete and click the New Project button to see the product’s underlying window interface.

Step 2: Remove Any Unnecessary Background Sounds
Filmora Audio Editor, in addition to the video editor, allowing you to enhance the sound of your video. If your voice-over has any background noise, you may simply eliminate it from the whole clip or a segment of the video where the sound is inappropriate. In Filmora, you may also add your favourite ones to the videos by importing the files and adding them to the timeline. You may also isolate the audio from your video clips and chop or sync it with the video using the timeline of this video editor.

Step 3: Perform Professional Video Editing
Right-click the video and choose edit from the menu. Then, by hitting the proper effects buttons, you may rotate the movie. You may also swivel 90 degrees anticlockwise/clockwise, flip level, or go vertical, depending on your requirements. Then, in that instance. You can also add a variety of video effects, and the greatest part is that you can use others from the standard library as well, allowing you to put it with greater adjustment. The Editor in Filmora allows you to add Animated Titles, amazing effects, Audio Enhancements, and more to your recorded video.

Step 4: Enhance Audio Quality
The Wondershare Filmora Audio Editor allows you to change the volume, add fade-in and fade-out effects, and silence audio in certain parts of the video. All of the options are easily accessible on the right side of the software interface when you click on the audio component of the movie in Wondershare Filmora’s timeline. You may check the audio sound within the application to see whether it’s in sync with your recorded video clip once you’ve made any necessary edits to your audio.

Step 5: Download/Share the video
Click “Export” in the Toolbar to export the video to the specified format and also, you may share it on-spot. Finally, when you’ve done the video editing, you may completely utilize the Filmora editor as above. And, to publish your work of art immediately to YouTube or another well-known site, select the Export option and pick the platform where you want to share your video clip. You may even alter the movie before sharing it if you desire.

Conclusion
Camtasia’s technique of making a presentation using an individual movie works well for developers who are knowledgeable with video applications. Developers inexperienced with the method may have significant trouble with the editing operation in Camtasia since screen grabs occur in real time. Editing material using slides in Captivate 2 is often less onerous than the video format utilized in Camtasia. The biggest issue is that long presentations might result in a large number of slides that can be time consuming to look through and result in a greater file size for the Flash file that user’s access. Hence, we like to advocate Filmora as a reasonable method between these two.
Part 2. Camtasia Software Review
Camtasia by TechSmith is a straightforward video editing and screen recording application. Camtasia was created with novices in mind, allowing designers to quickly and easily make excellent instructional films. Both Windows and MacOS are supported. Camtasia is one of the most popular video editing applications on the market. Camtasia is available for both Windows and iOS. Camtasia is simple to use and supports a wide range of media formats. This software package has several features and controls. On the same platform, you can capture screens and edit movies with Camtasia. The benefits don’t stop there; you can also share your work with others through YouTube and Google Drive.

Pros:
- Camtasia is designed for video-editing novices, with a simple setup and user interface.
- The screen capture capability is fantastic. Not only is the resolution excellent, but it is also simple to operate.
- Camtasia’s built-in effects are, on the whole, minimal. Their cursor effects, on the other hand, are spectacular.
- You may use Camtasia to add interactive quizzes to your videos.
- Camtasia provides many of the fundamentals you’ll need if you’re short on time and need to search assets straight immediately.
- TechSmith is a free app for iOS and Android that allows you to make screen recordings from your smartphone or tablet.
- TechSmith offers an excellent customer service department.
Cons:
- Crashing and bugs very often
- Many instructions are missing, despite the fact that they have restricted keyboard controls.
- Camtasia is designed for novices; therefore, it does not allow for much modification.
- Camtasia makes it tough to move and animate things.
- Camtasia video encoding and exporting difficulties have been reported by certain users.
Part 3. Adobe Captivate Review
Captivate is an Adobe tool designed to make online learning more engaging and interactive. Students save time since they can take their classes with them. Captivate has no built-in video editing tools. To do so, you’ll need to use additional Adobe applications. Captivate allows students to study at any time and from any location. However, if you’re the one creating the course, Adobe Captivate could be a little frightening since it requires Adobe experience to utilize.

Pros:
- It’s quite simple to use! Each frame may be easily shortened or lengthened.
- It’s simple to record motions onscreen, and it comes with a range of choices for recording various things (the application smooths down mouse movements).
- When the user is through shooting, the video is divided into multiple frames to make editing easy.
- A built-in editor enables users to manipulate audio by cutting, pasting, altering levels, and adding silences.
- Captivate can capture what’s occurring onscreen and provide step-by-step subtitles for popular menu actions automatically.
- Captivate has some fantastic interactive elements. Tutorials may be created so that users can follow along with pre-recorded comments on the screen.
- Adding audio or importing from another source is simple.
Cons:
- The sound’s bit rate was automatically reduced, making it seem more robotic and muffled.
- It might take a long time to preview and save works-in-progress.
- The finished flash flicks are fairly big.
Part 4. Alternative Way to Edit Videos [The Best Method]
Wondershare Filmora is a robust screen capture tool that allows you to manually alter all video and audio parameters, as well as edit your recordings in the software’s video editor. By tweaking a few basic parameters and exporting your eLearning material in MP4, MOV, or GIF file formats, you may make PIP movies. Filmora is a less expensive alternative to Camtasia 9 or Adobe Captivate for creating high-quality screen recordings. Filmora has the resources to make it possible. It’s both sound and video editing software that comes with a lot of instructions and activities to help you handle the fundamentals and create excellent recordings.
For Win 7 or later (64-bit)
For macOS 10.12 or later
This video editorial manager for PC and Mac comes with a natural point of connection that makes it simple to use for both new and experienced users. Because it is a freemium instrument, the free version will allow you to examine all of the components, albeit the final video will include a watermark. Change over, chop, change the examining rate, add effects, and that’s only the beginning of what you can do with your digital recording on the app’s schedule. Wondershare Filmora is simple to use and maintains the best sound and video toolkit. It’s best suited for novice and intermediate users since it allows you to create professional recordings in seconds and supports all of the popular designs.
Steps to Edit Video using Filmora
Step 1: Download and install Filmora Toolkit.
To begin using Filmora for editing, go to the official website and download the most current version of Wondershare Filmora. Launch the software when the download is complete and click the New Project button to see the product’s underlying window interface.

Step 2: Remove Any Unnecessary Background Sounds
Filmora Audio Editor, in addition to the video editor, allowing you to enhance the sound of your video. If your voice-over has any background noise, you may simply eliminate it from the whole clip or a segment of the video where the sound is inappropriate. In Filmora, you may also add your favourite ones to the videos by importing the files and adding them to the timeline. You may also isolate the audio from your video clips and chop or sync it with the video using the timeline of this video editor.

Step 3: Perform Professional Video Editing
Right-click the video and choose edit from the menu. Then, by hitting the proper effects buttons, you may rotate the movie. You may also swivel 90 degrees anticlockwise/clockwise, flip level, or go vertical, depending on your requirements. Then, in that instance. You can also add a variety of video effects, and the greatest part is that you can use others from the standard library as well, allowing you to put it with greater adjustment. The Editor in Filmora allows you to add Animated Titles, amazing effects, Audio Enhancements, and more to your recorded video.

Step 4: Enhance Audio Quality
The Wondershare Filmora Audio Editor allows you to change the volume, add fade-in and fade-out effects, and silence audio in certain parts of the video. All of the options are easily accessible on the right side of the software interface when you click on the audio component of the movie in Wondershare Filmora’s timeline. You may check the audio sound within the application to see whether it’s in sync with your recorded video clip once you’ve made any necessary edits to your audio.

Step 5: Download/Share the video
Click “Export” in the Toolbar to export the video to the specified format and also, you may share it on-spot. Finally, when you’ve done the video editing, you may completely utilize the Filmora editor as above. And, to publish your work of art immediately to YouTube or another well-known site, select the Export option and pick the platform where you want to share your video clip. You may even alter the movie before sharing it if you desire.

Conclusion
Camtasia’s technique of making a presentation using an individual movie works well for developers who are knowledgeable with video applications. Developers inexperienced with the method may have significant trouble with the editing operation in Camtasia since screen grabs occur in real time. Editing material using slides in Captivate 2 is often less onerous than the video format utilized in Camtasia. The biggest issue is that long presentations might result in a large number of slides that can be time consuming to look through and result in a greater file size for the Flash file that user’s access. Hence, we like to advocate Filmora as a reasonable method between these two.
Part 2. Camtasia Software Review
Camtasia by TechSmith is a straightforward video editing and screen recording application. Camtasia was created with novices in mind, allowing designers to quickly and easily make excellent instructional films. Both Windows and MacOS are supported. Camtasia is one of the most popular video editing applications on the market. Camtasia is available for both Windows and iOS. Camtasia is simple to use and supports a wide range of media formats. This software package has several features and controls. On the same platform, you can capture screens and edit movies with Camtasia. The benefits don’t stop there; you can also share your work with others through YouTube and Google Drive.

Pros:
- Camtasia is designed for video-editing novices, with a simple setup and user interface.
- The screen capture capability is fantastic. Not only is the resolution excellent, but it is also simple to operate.
- Camtasia’s built-in effects are, on the whole, minimal. Their cursor effects, on the other hand, are spectacular.
- You may use Camtasia to add interactive quizzes to your videos.
- Camtasia provides many of the fundamentals you’ll need if you’re short on time and need to search assets straight immediately.
- TechSmith is a free app for iOS and Android that allows you to make screen recordings from your smartphone or tablet.
- TechSmith offers an excellent customer service department.
Cons:
- Crashing and bugs very often
- Many instructions are missing, despite the fact that they have restricted keyboard controls.
- Camtasia is designed for novices; therefore, it does not allow for much modification.
- Camtasia makes it tough to move and animate things.
- Camtasia video encoding and exporting difficulties have been reported by certain users.
Part 3. Adobe Captivate Review
Captivate is an Adobe tool designed to make online learning more engaging and interactive. Students save time since they can take their classes with them. Captivate has no built-in video editing tools. To do so, you’ll need to use additional Adobe applications. Captivate allows students to study at any time and from any location. However, if you’re the one creating the course, Adobe Captivate could be a little frightening since it requires Adobe experience to utilize.

Pros:
- It’s quite simple to use! Each frame may be easily shortened or lengthened.
- It’s simple to record motions onscreen, and it comes with a range of choices for recording various things (the application smooths down mouse movements).
- When the user is through shooting, the video is divided into multiple frames to make editing easy.
- A built-in editor enables users to manipulate audio by cutting, pasting, altering levels, and adding silences.
- Captivate can capture what’s occurring onscreen and provide step-by-step subtitles for popular menu actions automatically.
- Captivate has some fantastic interactive elements. Tutorials may be created so that users can follow along with pre-recorded comments on the screen.
- Adding audio or importing from another source is simple.
Cons:
- The sound’s bit rate was automatically reduced, making it seem more robotic and muffled.
- It might take a long time to preview and save works-in-progress.
- The finished flash flicks are fairly big.
Part 4. Alternative Way to Edit Videos [The Best Method]
Wondershare Filmora is a robust screen capture tool that allows you to manually alter all video and audio parameters, as well as edit your recordings in the software’s video editor. By tweaking a few basic parameters and exporting your eLearning material in MP4, MOV, or GIF file formats, you may make PIP movies. Filmora is a less expensive alternative to Camtasia 9 or Adobe Captivate for creating high-quality screen recordings. Filmora has the resources to make it possible. It’s both sound and video editing software that comes with a lot of instructions and activities to help you handle the fundamentals and create excellent recordings.
For Win 7 or later (64-bit)
For macOS 10.12 or later
This video editorial manager for PC and Mac comes with a natural point of connection that makes it simple to use for both new and experienced users. Because it is a freemium instrument, the free version will allow you to examine all of the components, albeit the final video will include a watermark. Change over, chop, change the examining rate, add effects, and that’s only the beginning of what you can do with your digital recording on the app’s schedule. Wondershare Filmora is simple to use and maintains the best sound and video toolkit. It’s best suited for novice and intermediate users since it allows you to create professional recordings in seconds and supports all of the popular designs.
Steps to Edit Video using Filmora
Step 1: Download and install Filmora Toolkit.
To begin using Filmora for editing, go to the official website and download the most current version of Wondershare Filmora. Launch the software when the download is complete and click the New Project button to see the product’s underlying window interface.

Step 2: Remove Any Unnecessary Background Sounds
Filmora Audio Editor, in addition to the video editor, allowing you to enhance the sound of your video. If your voice-over has any background noise, you may simply eliminate it from the whole clip or a segment of the video where the sound is inappropriate. In Filmora, you may also add your favourite ones to the videos by importing the files and adding them to the timeline. You may also isolate the audio from your video clips and chop or sync it with the video using the timeline of this video editor.

Step 3: Perform Professional Video Editing
Right-click the video and choose edit from the menu. Then, by hitting the proper effects buttons, you may rotate the movie. You may also swivel 90 degrees anticlockwise/clockwise, flip level, or go vertical, depending on your requirements. Then, in that instance. You can also add a variety of video effects, and the greatest part is that you can use others from the standard library as well, allowing you to put it with greater adjustment. The Editor in Filmora allows you to add Animated Titles, amazing effects, Audio Enhancements, and more to your recorded video.

Step 4: Enhance Audio Quality
The Wondershare Filmora Audio Editor allows you to change the volume, add fade-in and fade-out effects, and silence audio in certain parts of the video. All of the options are easily accessible on the right side of the software interface when you click on the audio component of the movie in Wondershare Filmora’s timeline. You may check the audio sound within the application to see whether it’s in sync with your recorded video clip once you’ve made any necessary edits to your audio.

Step 5: Download/Share the video
Click “Export” in the Toolbar to export the video to the specified format and also, you may share it on-spot. Finally, when you’ve done the video editing, you may completely utilize the Filmora editor as above. And, to publish your work of art immediately to YouTube or another well-known site, select the Export option and pick the platform where you want to share your video clip. You may even alter the movie before sharing it if you desire.

Conclusion
Camtasia’s technique of making a presentation using an individual movie works well for developers who are knowledgeable with video applications. Developers inexperienced with the method may have significant trouble with the editing operation in Camtasia since screen grabs occur in real time. Editing material using slides in Captivate 2 is often less onerous than the video format utilized in Camtasia. The biggest issue is that long presentations might result in a large number of slides that can be time consuming to look through and result in a greater file size for the Flash file that user’s access. Hence, we like to advocate Filmora as a reasonable method between these two.
Best 8 Educational Video Websites for Teachers
The examples below are the only few that are possible to find on the internet and offer a thousand free educational videos usable in the classroom or online classroom. It’s up to you if you can use or follow all the websites I provide. Of course, the internet offers unlimited help for teachers to tap into, but it has dangers around quality, inappropriate content, advertisement, and copyrights. Double-check everything before you use in your classes and show it to your students.
Khan Academy (https://www.khanacademy.org/ )
Provides a free personalized learning resource for all ages. Khan Academy also offers different exercises and instructional videos that empower the students to study at their own pace inside the classroom or outside. For the students who want to learn something, these are the following subjects they tackle: Science, Mathematics, History, Economics, Reading & Language, Life Skills, and more.

They are working hard to ensure that Khan Academy gives teachers of all stripes the tools they need to understand better the students’ activities and how to assist them effectively. The Khan Academy teacher dashboard offers an overview of the overall performance of the class as well as comprehensive student profiles. Khan Academy is free, and anyone can learn anything. They are nonprofit because, according to Khan Academy, they believe in free, world-class education anywhere.
Is Khan Academy suitable for learning?
An excellent and convenient resource for academic study is Khan Academy. Anyone who desires to study may benefit from Khan, even though it is specially designed for kids in grade school through the college level stage. The website has several fantastic features, like the ability to enable subtitles for each video and the availability of the whole Khan Academy course in at least 18 other languages.
However, it would be convenient if the text-only material could use the built-in text-to-speech feature. Students may now access all courses using the Khan Academy app, which also enables downloading for offline learning. It’s doubtful that many students will open Khan Academy and be eager to start using it because its organization and interface are both rather formal, and its activities are simple.
SchoolTube (https://www.schooltube.com/ )
- is a secure platform for sharing videos without distraction-causing side video suggestions and advertising. Teachers and students can upload a YouTube video to their SchoolTube playlist. Still, all ancillary material, including advertising that would typically be included on the YouTube website, has been stripped off.
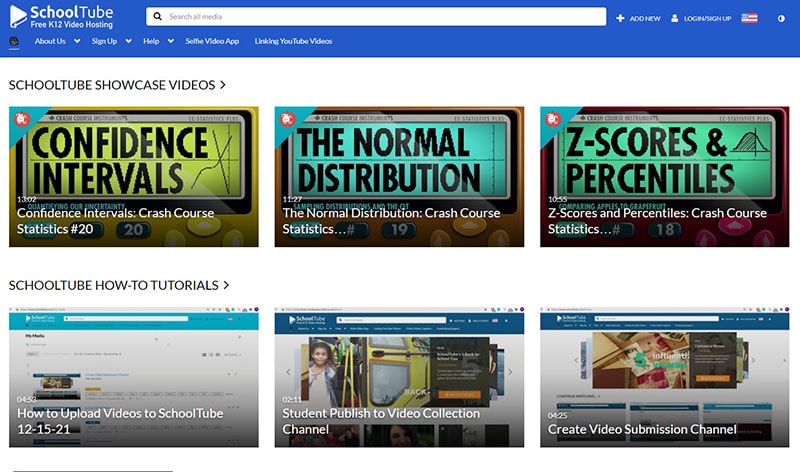
Many choices are available on the SchoolTube website, including the ability to submit movies, screenshot a device’s display, record video inside the application, add attachments to films, and add a video quiz. Further exploration of the application reveals more possibilities for the editor. SchoolTube is suitable for teachers and students since it lets them contribute or make their movies with brand-new features that encourage more interactive learning in a secure digital setting.
Is SchoolTube suitable for learning?
This product is an excellent place to submit student-made movies or to obtain videos related to your classroom topics. The subject or topic they are discussing can be used to filter channels for students and teachers. I think it is a fantastic alternative to using YouTube, a more restricted site in the classroom. When you require students to watch films related to the ideas you are discussing, SchoolTube is a terrific resource to use. It is a safer or more closely supervised website than YouTube.
TeacherTube (https://www.teachertube.com/ )
- is an online community for sharing instructional videos. They seek to offer a safe venue or site for teachers, schools, and students to access educationally focused videos. Currently, they provide an incredible 60 topics or subjects for all ages from Science, Math, History, Social Studies, Language & Arts, and more. They also have educational songs for kids and programming languages for the higher level. TeacherTube also provides anytime, anywhere professional development for teachers. And the site where teachers can post educational videos on their own designed for students to view to learn a concept or skill.
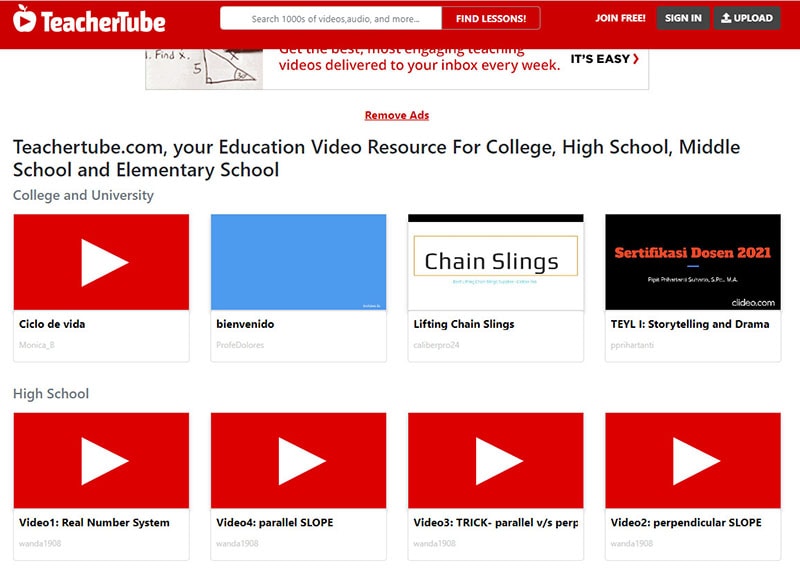
Is TeacherTube suitable for learning?
Despite being helpful in situations with no access to YouTube, this has a restricted search function. For each topic searched, there are just a few relevant search results. Results might range widely in terms of quality. If required, this would be a helpful resource, but it might be even better if it were more thorough.
TED-Ed (https://www.ed.ted.com/ )
- the videos and courses on TED-Ed may be used to supplement practically any topic by adding video learning, knowledge tests, and conversation prompts. Students are likely to get immediately engaged with the content because it is outstanding and comes from some of the top brains in the world. Videos are excellent for group viewing or use in flipped classrooms.

You can use TED-Ed’s videos and lessons to supplement almost any subject with video learning, basic knowledge checks, and discussion questions. Browse by topic or subtopic or search by keyword. You can filter by target age, content type, subtitles, etc. The content is remarkable and comes from some of the world’s best minds, and the students will likely engage with it immediately. Videos can be great to watch as a class or to include as part of a flipped classroom.
Is Ted-Ed suitable for learning?
TED-Ed is a fantastic tool for students and instructors searching for inspiration, knowledge, and perhaps even some fun, thanks to the high-quality videos and the vast library of lesson ideas. The cartoons and films are just as well-made and engaging as some of the most remarkable television programming. The website presents a complicated subject intelligently, while a few students may feel bored or annoyed with videos on more advanced topics.
Crash Course (https://thecrashcourse.com/ )
Can provide a free high-quality educational video on various subjects. Crash Course also alters the traditional textbook model by presenting information in a fast-paced format to enhance students’ learning experience. With the help of the Crash Course team, they created different kinds of videos on 21 subjects for high school and college learners.

Primary and Intermediate or grade school students can also use this site. According to Crash Course, they also have hundreds of millions of views on their YouTube channel. While the show is a beneficial tool for teachers and students, it also has an extensive viewership of casual learners seeking online educational content independently.
Is Crash Course suitable for learning?
The sarcastic tone and rapid speed of Crash Course will undoubtedly keep students intrigued, but the material is often dubious, and the videos offer primarily passive learning. Each Crash Course video’s host is enthusiastic about the subject. The majority of the Crash Course videos are pretty accurate. However, in an attempt to simplify topics, several Crash Course Kids videos fall short.
National Geographic Kids (https://kids.nationalgeographic.com/ )
It offers educational videos, games, and other activities, especially on animals and the natural world. The students will enjoy playing games with simple instructions and a range of difficulties and frequently practice memory, logic, and other skills. They can contribute to the site by leaving some comments, taking quizzes, viewing user photos, and sharing their own.

Is National Geographic Kids suitable for learning?
The National Geographic Kids website is easy to navigate and contains exciting materials for students, while some content isn’t properly structured and may be challenging to find. Clicking on a menu choice at the top of the screen leads you to a related page, but lingering over that same option brings up extra alternatives that you wouldn’t see if you clicked. Keyword searches and links supplied by the teacher will be helpful here. For example, the site has tools such as a Homework Help section that teaches kids how to be an expert fact-checker, write an animal report, and more. Still, it’s not precisely apparent how to get there unless you search for it.
NeoK12 (https://www.neok12.com/ )
Uses educational videos and animations for the students. It is a great way to learn, allowing the students to build a visual model in their minds by watching their videos. The graphical representation of the ideas aids their comprehension, piques their interest, and promotes self-directed learning in each learner. Educational videos in NeoK12 and games are possibly one of the most effective learning tools. Even the higher levels of students will find the platform enriching and entertaining. NeoK12’s website also features tools not only for learners but also for teachers.

Is NeoK12 suitable for learning?
This platform is a rather extensive library of interesting educational tools, and the films and brain games are both free and well worth a look. Kids may augment the movie with other resources, such as interactive diagrams, flowcharts, fun, and puzzles, for a relatively inexpensive monthly charge. The films are simple teaching tools that usually contain supplementary resources that help youngsters to put what they’ve learned into practice. There are various “Universe” films, for example, under the Earth and Space area. Children who watch these films may also access relevant games, diagrams, activities, and photographs to prepare presentations.
Discovery Education (https://www.discoveryeducation.com/ )
Has made a name for itself as the top supplier of digital content, curriculum resources, and professional development for grades K–12. Discovery Education is used by almost 5.6 million students in Canada, all 50 states, and other countries. Why not give it a shot in the Philippines or somewhere else in Asia?

Teachers can use the free resources on Discovery Education to enhance their existing curriculum from the Grade School Level up to High School Level. An example of a tool with this platform is the Puzzlemaker, whose vocabulary makes crosswords and other types of puzzles. They can also be assigned specific videos or interactive activities to introduce new ideas at home.
Is Discovery Education suitable for learning?
Discovery Education is an excellent free resource. The commercial edition has considerably more resources, and after using it, I sincerely wished they would make it accessible for free or at a lower cost. The items aimed at students are straightforward and uninspiring; the website is intended for teachers. I would love to see them unlock more of the stuff that is locked behind the barrier, maybe in a cyclical manner where some films or resources are made available for free for a month at a time.
Free Download For Win 7 or later(64-bit)
Free Download For macOS 10.14 or later
Free Download For macOS 10.14 or later
Top 9 Sparkle Effects Photo and Video Editors You Should Know
Versatile Video Editor - Wondershare Filmora
An easy yet powerful editor
Numerous effects to choose from
Detailed tutorials provided by the official channel
Has your project been looking sparkly lately?
With New Year’s Eve and other holiday celebrations just behind us, you may have noticed some excessive glitter everywhere. You might have found yourself wondering if everyone had spent the holidays mastering some clever techniques of photography with fancy new equipment they got for holiday celebrations. Well, they might have, but the chances are they have just improved their projects with some admirable effects, and we are about to show you how you can do the same.
There are loads of free (or very cheap) apps or video editors you can use to easily beautify the creativity and mood of your images - using just the smartphone camera in your pocket! Sparkling decorations, twinkling lights, and dramatic lens flares can all compile into your photo during or after you shoot your project.
So, let’s move on to considering the best and effective ways of using sparkle video effects as follows.
In this article
01 What are the Advantages of Sparkle Effects?
02 Top 8 Sparkle Effects Apps/Editors in 2021
Part 1: What are the Advantages of Sparkle Effects?
By now, you’re all familiar with the basics of sparkle video effects editing: You push a button and push your button. But if you plan to preserve those prosperous memories, then you’ll want your snaps to look their best.
Glitter filters or sparkle video effects are beauty-enhancing effects that any photo or video editing users enjoy applying to their projects. Even Twitter and Instagram are pretty considerable that incredible amounts of sparkle or glitter effects are available within.
There are tons of filters and similar effects to choose from among them, and they all add specks of silver glitter that glisten as you shoot your video. At the same time, they also often smooth the skin of the subject. So, you must also note them as their advantages.
However, others aren’t too keen on the glitters filters, claiming they transform appearance too much and are usually pretty annoying and fake.
Depending on the purpose of your image, you may want to add filters, text, and frames. For instance, you can include your signature to avoid copying your image without receiving credit if shared online.
Part 2: Top 8 Sparkle Effects Apps/Editors in 2021
Find the right photo enhancement tools to edit your pictures.
3 Best Sparkle Effect Apps
1. kirakira+

With this app, you can apply a cross filter to combine with the camera lens. The reflective objects and light-emitting materials will shine even more. It has sparkle video effects of jewelry, glass, illumination, etc. Its primary function is that you can shoot the photo and video with an impressive Glitter effect.
Price: $0.99 || Devices: Android, iPhone, iPad ||
2. Sparkle Effects - Glitter FX
Let’s have fun adding beautiful glitter and sparkle video effects to your photos and videos. Here, you can upload pictures and videos directly from your gallery. Just hover the camera at anything shiny and let the app take over. These effects can be helpful on jewelry, cars, landscape, motorcycles, or anything else you’d like!
Price: Free || Devices: Android, iPhone, iPad ||
3. PicsArt iOS | Android
Use the Lens Flare tool to apply a dynamic effect directly to your videos and images. Alternatively, you Search for lens flare or sunray stickers and similar sparkle video effects and then apply them to your photo using the different blend modes. You can adjust using a layer mask or customize the opacity to suit.
2 Excellent Sparkle Video Effects Editor
1. Wondershare Filmora
Wondershare Filmora
Get started easily with Filmora’s powerful performance, intuitive interface, and countless effects!
Try It Free Try It Free Try It Free Learn More >

Video effects, also known as visual effects or filters, create crazy graphics with clicks. It’s simple, and the results are great when you use dedicated software such as Wondershare Filmora. This is why people love sparkle video effects.
This platform is quite different from other video editing software in the market with minimal video effects. Wondershare Filmora offers 300+ free effects: Picture in Pageant, Transitional effects, Intro/Credits, Sound, Jump Cut, Titles, Mosaic, and more.
Or, you can download the Sparkle effects pack from Filmstock .
2. After Effects
It’s an excellent background for Christmas plays, holiday pageants, or any other video you wish to add a little twinkle! You can add a twinkling star quite easily in Adobe After Effects.
Are you looking for the perfect sparkle video effect for your next After Effects project? Here are some great picks!
After Effects has Particle Presets Kit, Glitter Particles Logo, Elegant Particle Logo, Glitter Fantasy, Particle Glitter, Magic Graphics, Golden, and more in Sparkle effects filters.

Top 3 Online Sparkle Effects Editor
1. Videezy
Footage from Videezy is royalty-free for personal and commercial use, but users need to credit ‘Videezy.com’ in their projects.
The freest stock videos are in HD resolution, but there’s also a good collection of 4K clips – mostly abstract clips and landscape scenes rendered using Adobe After Effects.
The quality is mixed but generally high. All videos are in MP4 format, and you can see the resolution below the preview on the download page.
2. Pngtree
Pngtree is a PNG stock images market, but also you can look for a lot of unique backgrounds and templates. Their staff or customer care are also lovely and reply in time. Furthermore, its graphics are good enough, and you can find almost anything you are looking for.
3. Glitterboo
It is a much more complete tool that also allows video editing. Before you edit your images, we advise you to test this site yourself to get satisfactory results. Essentially, the procedure to apply the glitter effect is very similar to those described above, so in this case, it is not strictly necessary to show you all the steps, as it is all quite intuitive.

Part 3: FAQs about Sparkle Effects
1 – What is the sparkle effect on Instagram?
Glitter filters are a type of beauty-enhancing filter that Instagram users enjoy applying to their selfies and videos. There is plenty of different ones to choose from on Instagram, and they all add specks of silver glitter that glisten as you film your video.
2 – What is the sparkle effect on TikTok?
To get the sparkly ‘bling’ effect, you further need to consider a few straightforward steps. All you are required to do beforehand is to check that your TikTok app is up to date!
3 – How can I improve my photos?
You can use filters and effects to improve photos to a great extent. For this purpose, you can go with using the sparkle effects as aforementioned.
Conclusion
The perfect sparkle video effect can add majesty, magic, and wonder to your next project. Furthermore, you can add a slight shimmer and shine and take the viewing experience to a whole new stage with one of these tremendous effects.
More thanks we should add to the video editing software present in the market, every kins of user can easily apply effects to our videos. Don’t like the complicated software like Final Cut Pro or Adobe Premiere or any other tools listed above? Wondershare Filmora video editor now makes it easy to apply all the special effects, including sparkle video effects mentioned above. This simple video editing tool provides the most comprehensive and practical editing elements and workflow around.
And, if you’re not satisfied with Filmora’s inbuilt effects, Filmstock is a one-stop shop for royalty-free video effects, music and sound effects, stock video footage, and more stock media.
Has your project been looking sparkly lately?
With New Year’s Eve and other holiday celebrations just behind us, you may have noticed some excessive glitter everywhere. You might have found yourself wondering if everyone had spent the holidays mastering some clever techniques of photography with fancy new equipment they got for holiday celebrations. Well, they might have, but the chances are they have just improved their projects with some admirable effects, and we are about to show you how you can do the same.
There are loads of free (or very cheap) apps or video editors you can use to easily beautify the creativity and mood of your images - using just the smartphone camera in your pocket! Sparkling decorations, twinkling lights, and dramatic lens flares can all compile into your photo during or after you shoot your project.
So, let’s move on to considering the best and effective ways of using sparkle video effects as follows.
In this article
01 What are the Advantages of Sparkle Effects?
02 Top 8 Sparkle Effects Apps/Editors in 2021
Part 1: What are the Advantages of Sparkle Effects?
By now, you’re all familiar with the basics of sparkle video effects editing: You push a button and push your button. But if you plan to preserve those prosperous memories, then you’ll want your snaps to look their best.
Glitter filters or sparkle video effects are beauty-enhancing effects that any photo or video editing users enjoy applying to their projects. Even Twitter and Instagram are pretty considerable that incredible amounts of sparkle or glitter effects are available within.
There are tons of filters and similar effects to choose from among them, and they all add specks of silver glitter that glisten as you shoot your video. At the same time, they also often smooth the skin of the subject. So, you must also note them as their advantages.
However, others aren’t too keen on the glitters filters, claiming they transform appearance too much and are usually pretty annoying and fake.
Depending on the purpose of your image, you may want to add filters, text, and frames. For instance, you can include your signature to avoid copying your image without receiving credit if shared online.
Part 2: Top 8 Sparkle Effects Apps/Editors in 2021
Find the right photo enhancement tools to edit your pictures.
3 Best Sparkle Effect Apps
1. kirakira+

With this app, you can apply a cross filter to combine with the camera lens. The reflective objects and light-emitting materials will shine even more. It has sparkle video effects of jewelry, glass, illumination, etc. Its primary function is that you can shoot the photo and video with an impressive Glitter effect.
Price: $0.99 || Devices: Android, iPhone, iPad ||
2. Sparkle Effects - Glitter FX

Let’s have fun adding beautiful glitter and sparkle video effects to your photos and videos. Here, you can upload pictures and videos directly from your gallery. Just hover the camera at anything shiny and let the app take over. These effects can be helpful on jewelry, cars, landscape, motorcycles, or anything else you’d like!
Price: Free || Devices: Android, iPhone, iPad ||
3. PicsArt iOS | Android

Use the Lens Flare tool to apply a dynamic effect directly to your videos and images. Alternatively, you Search for lens flare or sunray stickers and similar sparkle video effects and then apply them to your photo using the different blend modes. You can adjust using a layer mask or customize the opacity to suit.
2 Excellent Sparkle Video Effects Editor
1. Wondershare Filmora
Wondershare Filmora
Get started easily with Filmora’s powerful performance, intuitive interface, and countless effects!
Try It Free Try It Free Try It Free Learn More >

Video effects, also known as visual effects or filters, create crazy graphics with clicks. It’s simple, and the results are great when you use dedicated software such as Wondershare Filmora. This is why people love sparkle video effects.
This platform is quite different from other video editing software in the market with minimal video effects. Wondershare Filmora offers 300+ free effects: Picture in Pageant, Transitional effects, Intro/Credits, Sound, Jump Cut, Titles, Mosaic, and more.

Or, you can download the Sparkle effects pack from Filmstock .

2. After Effects
It’s an excellent background for Christmas plays, holiday pageants, or any other video you wish to add a little twinkle! You can add a twinkling star quite easily in Adobe After Effects.
Are you looking for the perfect sparkle video effect for your next After Effects project? Here are some great picks!
After Effects has Particle Presets Kit, Glitter Particles Logo, Elegant Particle Logo, Glitter Fantasy, Particle Glitter, Magic Graphics, Golden, and more in Sparkle effects filters.

Top 3 Online Sparkle Effects Editor
1. Videezy
Footage from Videezy is royalty-free for personal and commercial use, but users need to credit ‘Videezy.com’ in their projects.
The freest stock videos are in HD resolution, but there’s also a good collection of 4K clips – mostly abstract clips and landscape scenes rendered using Adobe After Effects.
The quality is mixed but generally high. All videos are in MP4 format, and you can see the resolution below the preview on the download page.

2. Pngtree
Pngtree is a PNG stock images market, but also you can look for a lot of unique backgrounds and templates. Their staff or customer care are also lovely and reply in time. Furthermore, its graphics are good enough, and you can find almost anything you are looking for.

3. Glitterboo
It is a much more complete tool that also allows video editing. Before you edit your images, we advise you to test this site yourself to get satisfactory results. Essentially, the procedure to apply the glitter effect is very similar to those described above, so in this case, it is not strictly necessary to show you all the steps, as it is all quite intuitive.

Part 3: FAQs about Sparkle Effects
1 – What is the sparkle effect on Instagram?
Glitter filters are a type of beauty-enhancing filter that Instagram users enjoy applying to their selfies and videos. There is plenty of different ones to choose from on Instagram, and they all add specks of silver glitter that glisten as you film your video.
2 – What is the sparkle effect on TikTok?
To get the sparkly ‘bling’ effect, you further need to consider a few straightforward steps. All you are required to do beforehand is to check that your TikTok app is up to date!
3 – How can I improve my photos?
You can use filters and effects to improve photos to a great extent. For this purpose, you can go with using the sparkle effects as aforementioned.
Conclusion
The perfect sparkle video effect can add majesty, magic, and wonder to your next project. Furthermore, you can add a slight shimmer and shine and take the viewing experience to a whole new stage with one of these tremendous effects.
More thanks we should add to the video editing software present in the market, every kins of user can easily apply effects to our videos. Don’t like the complicated software like Final Cut Pro or Adobe Premiere or any other tools listed above? Wondershare Filmora video editor now makes it easy to apply all the special effects, including sparkle video effects mentioned above. This simple video editing tool provides the most comprehensive and practical editing elements and workflow around.
And, if you’re not satisfied with Filmora’s inbuilt effects, Filmstock is a one-stop shop for royalty-free video effects, music and sound effects, stock video footage, and more stock media.
Has your project been looking sparkly lately?
With New Year’s Eve and other holiday celebrations just behind us, you may have noticed some excessive glitter everywhere. You might have found yourself wondering if everyone had spent the holidays mastering some clever techniques of photography with fancy new equipment they got for holiday celebrations. Well, they might have, but the chances are they have just improved their projects with some admirable effects, and we are about to show you how you can do the same.
There are loads of free (or very cheap) apps or video editors you can use to easily beautify the creativity and mood of your images - using just the smartphone camera in your pocket! Sparkling decorations, twinkling lights, and dramatic lens flares can all compile into your photo during or after you shoot your project.
So, let’s move on to considering the best and effective ways of using sparkle video effects as follows.
In this article
01 What are the Advantages of Sparkle Effects?
02 Top 8 Sparkle Effects Apps/Editors in 2021
Part 1: What are the Advantages of Sparkle Effects?
By now, you’re all familiar with the basics of sparkle video effects editing: You push a button and push your button. But if you plan to preserve those prosperous memories, then you’ll want your snaps to look their best.
Glitter filters or sparkle video effects are beauty-enhancing effects that any photo or video editing users enjoy applying to their projects. Even Twitter and Instagram are pretty considerable that incredible amounts of sparkle or glitter effects are available within.
There are tons of filters and similar effects to choose from among them, and they all add specks of silver glitter that glisten as you shoot your video. At the same time, they also often smooth the skin of the subject. So, you must also note them as their advantages.
However, others aren’t too keen on the glitters filters, claiming they transform appearance too much and are usually pretty annoying and fake.
Depending on the purpose of your image, you may want to add filters, text, and frames. For instance, you can include your signature to avoid copying your image without receiving credit if shared online.
Part 2: Top 8 Sparkle Effects Apps/Editors in 2021
Find the right photo enhancement tools to edit your pictures.
3 Best Sparkle Effect Apps
1. kirakira+

With this app, you can apply a cross filter to combine with the camera lens. The reflective objects and light-emitting materials will shine even more. It has sparkle video effects of jewelry, glass, illumination, etc. Its primary function is that you can shoot the photo and video with an impressive Glitter effect.
Price: $0.99 || Devices: Android, iPhone, iPad ||
2. Sparkle Effects - Glitter FX

Let’s have fun adding beautiful glitter and sparkle video effects to your photos and videos. Here, you can upload pictures and videos directly from your gallery. Just hover the camera at anything shiny and let the app take over. These effects can be helpful on jewelry, cars, landscape, motorcycles, or anything else you’d like!
Price: Free || Devices: Android, iPhone, iPad ||
3. PicsArt iOS | Android

Use the Lens Flare tool to apply a dynamic effect directly to your videos and images. Alternatively, you Search for lens flare or sunray stickers and similar sparkle video effects and then apply them to your photo using the different blend modes. You can adjust using a layer mask or customize the opacity to suit.
2 Excellent Sparkle Video Effects Editor
1. Wondershare Filmora
Wondershare Filmora
Get started easily with Filmora’s powerful performance, intuitive interface, and countless effects!
Try It Free Try It Free Try It Free Learn More >

Video effects, also known as visual effects or filters, create crazy graphics with clicks. It’s simple, and the results are great when you use dedicated software such as Wondershare Filmora. This is why people love sparkle video effects.
This platform is quite different from other video editing software in the market with minimal video effects. Wondershare Filmora offers 300+ free effects: Picture in Pageant, Transitional effects, Intro/Credits, Sound, Jump Cut, Titles, Mosaic, and more.

Or, you can download the Sparkle effects pack from Filmstock .

2. After Effects
It’s an excellent background for Christmas plays, holiday pageants, or any other video you wish to add a little twinkle! You can add a twinkling star quite easily in Adobe After Effects.
Are you looking for the perfect sparkle video effect for your next After Effects project? Here are some great picks!
After Effects has Particle Presets Kit, Glitter Particles Logo, Elegant Particle Logo, Glitter Fantasy, Particle Glitter, Magic Graphics, Golden, and more in Sparkle effects filters.

Top 3 Online Sparkle Effects Editor
1. Videezy
Footage from Videezy is royalty-free for personal and commercial use, but users need to credit ‘Videezy.com’ in their projects.
The freest stock videos are in HD resolution, but there’s also a good collection of 4K clips – mostly abstract clips and landscape scenes rendered using Adobe After Effects.
The quality is mixed but generally high. All videos are in MP4 format, and you can see the resolution below the preview on the download page.

2. Pngtree
Pngtree is a PNG stock images market, but also you can look for a lot of unique backgrounds and templates. Their staff or customer care are also lovely and reply in time. Furthermore, its graphics are good enough, and you can find almost anything you are looking for.

3. Glitterboo
It is a much more complete tool that also allows video editing. Before you edit your images, we advise you to test this site yourself to get satisfactory results. Essentially, the procedure to apply the glitter effect is very similar to those described above, so in this case, it is not strictly necessary to show you all the steps, as it is all quite intuitive.

Part 3: FAQs about Sparkle Effects
1 – What is the sparkle effect on Instagram?
Glitter filters are a type of beauty-enhancing filter that Instagram users enjoy applying to their selfies and videos. There is plenty of different ones to choose from on Instagram, and they all add specks of silver glitter that glisten as you film your video.
2 – What is the sparkle effect on TikTok?
To get the sparkly ‘bling’ effect, you further need to consider a few straightforward steps. All you are required to do beforehand is to check that your TikTok app is up to date!
3 – How can I improve my photos?
You can use filters and effects to improve photos to a great extent. For this purpose, you can go with using the sparkle effects as aforementioned.
Conclusion
The perfect sparkle video effect can add majesty, magic, and wonder to your next project. Furthermore, you can add a slight shimmer and shine and take the viewing experience to a whole new stage with one of these tremendous effects.
More thanks we should add to the video editing software present in the market, every kins of user can easily apply effects to our videos. Don’t like the complicated software like Final Cut Pro or Adobe Premiere or any other tools listed above? Wondershare Filmora video editor now makes it easy to apply all the special effects, including sparkle video effects mentioned above. This simple video editing tool provides the most comprehensive and practical editing elements and workflow around.
And, if you’re not satisfied with Filmora’s inbuilt effects, Filmstock is a one-stop shop for royalty-free video effects, music and sound effects, stock video footage, and more stock media.
Has your project been looking sparkly lately?
With New Year’s Eve and other holiday celebrations just behind us, you may have noticed some excessive glitter everywhere. You might have found yourself wondering if everyone had spent the holidays mastering some clever techniques of photography with fancy new equipment they got for holiday celebrations. Well, they might have, but the chances are they have just improved their projects with some admirable effects, and we are about to show you how you can do the same.
There are loads of free (or very cheap) apps or video editors you can use to easily beautify the creativity and mood of your images - using just the smartphone camera in your pocket! Sparkling decorations, twinkling lights, and dramatic lens flares can all compile into your photo during or after you shoot your project.
So, let’s move on to considering the best and effective ways of using sparkle video effects as follows.
In this article
01 What are the Advantages of Sparkle Effects?
02 Top 8 Sparkle Effects Apps/Editors in 2021
Part 1: What are the Advantages of Sparkle Effects?
By now, you’re all familiar with the basics of sparkle video effects editing: You push a button and push your button. But if you plan to preserve those prosperous memories, then you’ll want your snaps to look their best.
Glitter filters or sparkle video effects are beauty-enhancing effects that any photo or video editing users enjoy applying to their projects. Even Twitter and Instagram are pretty considerable that incredible amounts of sparkle or glitter effects are available within.
There are tons of filters and similar effects to choose from among them, and they all add specks of silver glitter that glisten as you shoot your video. At the same time, they also often smooth the skin of the subject. So, you must also note them as their advantages.
However, others aren’t too keen on the glitters filters, claiming they transform appearance too much and are usually pretty annoying and fake.
Depending on the purpose of your image, you may want to add filters, text, and frames. For instance, you can include your signature to avoid copying your image without receiving credit if shared online.
Part 2: Top 8 Sparkle Effects Apps/Editors in 2021
Find the right photo enhancement tools to edit your pictures.
3 Best Sparkle Effect Apps
1. kirakira+

With this app, you can apply a cross filter to combine with the camera lens. The reflective objects and light-emitting materials will shine even more. It has sparkle video effects of jewelry, glass, illumination, etc. Its primary function is that you can shoot the photo and video with an impressive Glitter effect.
Price: $0.99 || Devices: Android, iPhone, iPad ||
2. Sparkle Effects - Glitter FX

Let’s have fun adding beautiful glitter and sparkle video effects to your photos and videos. Here, you can upload pictures and videos directly from your gallery. Just hover the camera at anything shiny and let the app take over. These effects can be helpful on jewelry, cars, landscape, motorcycles, or anything else you’d like!
Price: Free || Devices: Android, iPhone, iPad ||
3. PicsArt iOS | Android

Use the Lens Flare tool to apply a dynamic effect directly to your videos and images. Alternatively, you Search for lens flare or sunray stickers and similar sparkle video effects and then apply them to your photo using the different blend modes. You can adjust using a layer mask or customize the opacity to suit.
2 Excellent Sparkle Video Effects Editor
1. Wondershare Filmora
Wondershare Filmora
Get started easily with Filmora’s powerful performance, intuitive interface, and countless effects!
Try It Free Try It Free Try It Free Learn More >

Video effects, also known as visual effects or filters, create crazy graphics with clicks. It’s simple, and the results are great when you use dedicated software such as Wondershare Filmora. This is why people love sparkle video effects.
This platform is quite different from other video editing software in the market with minimal video effects. Wondershare Filmora offers 300+ free effects: Picture in Pageant, Transitional effects, Intro/Credits, Sound, Jump Cut, Titles, Mosaic, and more.

Or, you can download the Sparkle effects pack from Filmstock .

2. After Effects
It’s an excellent background for Christmas plays, holiday pageants, or any other video you wish to add a little twinkle! You can add a twinkling star quite easily in Adobe After Effects.
Are you looking for the perfect sparkle video effect for your next After Effects project? Here are some great picks!
After Effects has Particle Presets Kit, Glitter Particles Logo, Elegant Particle Logo, Glitter Fantasy, Particle Glitter, Magic Graphics, Golden, and more in Sparkle effects filters.

Top 3 Online Sparkle Effects Editor
1. Videezy
Footage from Videezy is royalty-free for personal and commercial use, but users need to credit ‘Videezy.com’ in their projects.
The freest stock videos are in HD resolution, but there’s also a good collection of 4K clips – mostly abstract clips and landscape scenes rendered using Adobe After Effects.
The quality is mixed but generally high. All videos are in MP4 format, and you can see the resolution below the preview on the download page.

2. Pngtree
Pngtree is a PNG stock images market, but also you can look for a lot of unique backgrounds and templates. Their staff or customer care are also lovely and reply in time. Furthermore, its graphics are good enough, and you can find almost anything you are looking for.

3. Glitterboo
It is a much more complete tool that also allows video editing. Before you edit your images, we advise you to test this site yourself to get satisfactory results. Essentially, the procedure to apply the glitter effect is very similar to those described above, so in this case, it is not strictly necessary to show you all the steps, as it is all quite intuitive.

Part 3: FAQs about Sparkle Effects
1 – What is the sparkle effect on Instagram?
Glitter filters are a type of beauty-enhancing filter that Instagram users enjoy applying to their selfies and videos. There is plenty of different ones to choose from on Instagram, and they all add specks of silver glitter that glisten as you film your video.
2 – What is the sparkle effect on TikTok?
To get the sparkly ‘bling’ effect, you further need to consider a few straightforward steps. All you are required to do beforehand is to check that your TikTok app is up to date!
3 – How can I improve my photos?
You can use filters and effects to improve photos to a great extent. For this purpose, you can go with using the sparkle effects as aforementioned.
Conclusion
The perfect sparkle video effect can add majesty, magic, and wonder to your next project. Furthermore, you can add a slight shimmer and shine and take the viewing experience to a whole new stage with one of these tremendous effects.
More thanks we should add to the video editing software present in the market, every kins of user can easily apply effects to our videos. Don’t like the complicated software like Final Cut Pro or Adobe Premiere or any other tools listed above? Wondershare Filmora video editor now makes it easy to apply all the special effects, including sparkle video effects mentioned above. This simple video editing tool provides the most comprehensive and practical editing elements and workflow around.
And, if you’re not satisfied with Filmora’s inbuilt effects, Filmstock is a one-stop shop for royalty-free video effects, music and sound effects, stock video footage, and more stock media.
Also read:
- Updated The Top 10 Effective SRT Editors Online
- New 2024 Approved IMovie Review – Is It The Best Video Editor for Mac Users
- New Splitting Audio From Video in Sony Vegas Step by Step for 2024
- New 2024 Approved Learn More About the Video Editing Interface of Wondershare Filmora
- Updated Stop Worrying if Your Adobe Premiere Playback Slows Down. This Guide Will Show You the Best Solutions to Resolve This Issue and a Perfect Alternative
- | How to Share YouTube Video on Zoom for 2024
- Updated In 2024, Hey! Are You Looking for Video Reverse Effects in Your Videos? Then, You Are at the Right Place. This Article Will Guide You in Creating a Video Reverse Effect
- Updated The Power of Music in Videos (+Filmora Editing Tricks)
- Updated How to Create Discord Logo GIF for 2024
- Updated 2024 Approved 15 Best Travel Vloggers That You Should Follow
- New The Ultimate Guide to GIF for Discord Profile for 2024
- New 2024 Approved 8 Apps to Custom Your GIF Stickers
- In 2024, Best MOV to GIF Converters
- New General Knowledge About MP4 Format and Best MP4 Video Editor
- New How to Use Filmora Slideshow Maker for Making Slideshow, In 2024 What Is Slideshow Filmora? Know the Steps to Make Filmora Slideshow. What Are Steps to Make Filmora Slideshow Template?
- Are You Looking for the Best Way to Add Subtitles to Your Video? The Top SRT File Creators Can Help You Do That
- How to Create Discord Logo GIF for 2024
- 2024 Approved This Article Will Explore in Detail How You Can Use the Features Available in Wondershare Filmora to Export the Video by Changing the Resolution of the Footage
- 2024 Approved Brighten a Video in Windows 10 Easily When Video Clips You Recorded on Your Windows 10 Computer or Those Downloaded From YouTube Are Too Dark or Too Bright, You Can Easily Adjust the Color Levels in a Few Clicks
- How To Repair iPhone 6s System? | Dr.fone
- iSpoofer is not working On Meizu 21 Pro? Fixed | Dr.fone
- In 2024, A Working Guide For Pachirisu Pokemon Go Map On Oppo A58 4G | Dr.fone
- Troubleshooting Error Connecting to the Apple ID Server On iPhone 6 Plus
- How to Unlock Infinix Phone without PIN
- How To Fix Apple iPhone XR Could Not Be Activated/Reached Issue
- How to Unlock Oppo Find X7 Phone with Broken Screen
- Tutorial to Change Samsung Galaxy F15 5G IMEI without Root A Comprehensive Guide
- How To Activate and Use Life360 Ghost Mode On OnePlus 11 5G | Dr.fone
- How to Send and Fake Live Location on Facebook Messenger Of your Nokia G22 | Dr.fone
- Best Android Data Recovery - Retrieve Lost Pictures from Nokia G42 5G.
- 3 Effective Ways to Bypass Activation Lock from iPhone XS Max
- In 2024, A Perfect Guide To Remove or Disable Google Smart Lock On Vivo S18 Pro
- Title: Updated In 2024, How to Blur a Still or Moving Part of Video
- Author: Morgan
- Created at : 2024-04-24 01:02:14
- Updated at : 2024-04-25 01:02:14
- Link: https://ai-video-editing.techidaily.com/updated-in-2024-how-to-blur-a-still-or-moving-part-of-video/
- License: This work is licensed under CC BY-NC-SA 4.0.

