
:max_bytes(150000):strip_icc():format(webp)/d-link-default-password-list-2619152-d6281a924f45426f879c8707220ce92d.png)
Updated In 2024, Lets Learn How to Convert a Normal Video Into a Film Shot in the 1920S with Wondershare Filmora
Let’s Learn How to Convert a Normal Video Into a Film Shot in the 1920S with Wondershare Filmora
Do you want to roll back the hands of time and shoot a film like you were in WWI or Charlie Chaplin’s era? That’s what a vintage film effect is all about. In other words, this video effect will give your videos an old-film look and feel. So, without wasting time, let’s learn how to convert a normal video into a film shot in the 1920s with Wondershare Filmora.
Preparation

In this tutorial, you don’t need a lot of creativity to create a vintage film, as Wondershare Filmora will be doing the heavy lifting. Just shoot an action video like chasing each other around, chatting with friends, running away from something, or doing anything else. Let’s learn how to do that below!
Free Download For Win 7 or later(64-bit)
Free Download For macOS 10.14 or later
Step1 Add a video you want to edit

Upload your video on Filmora, then move it to the editing timeline by dragging it. This should take a second or two.
Step2 Add a crop effect

After successfully adding your video to the timeline, tap the Effect tab on top of the screen and click Utility. Then, choose the Crop effect and add a few tracks above the video clip.

Next, double-tap the Crop effect on the editing timeline to open the effect editing tools. Now change the crop amount to 15 to add a vintage feel to your video. Just enter 15 on the Left and Right boxes.
Step3 Add the Dirty Film and Silent Film effects

Tap the Effect tab, then open the Overlay drop-down menu. Then, choose the Old Film category before adding a Dirty Film effect above the clip. To apply a more vintage feel to your video, add a Silent Film effect to the track above the Dirty Film effect.
Step4 Add a black & white effect to your video

Up to this point, your film should now start having a more vintage feel. But to make it look even older, double-click the video clip and tap the Color tab. After that, open the 3D LUT arrow and choose the B&W Film option. Now play the video and enjoy.
Summary
See, you don’t need to break a sweat to add a vintage feel to your funny video. With Filmora, you’ll access multiple tools and effects to create an old-looking film with just a single click. And don’t forget to play around with other Filmora overlays and effects to bring out the inner video editor in you. Thanks for reading!
Free Download For macOS 10.14 or later
Step1 Add a video you want to edit
Upload your video on Filmora, then move it to the editing timeline by dragging it. This should take a second or two.
Step2 Add a crop effect
After successfully adding your video to the timeline, tap the Effect tab on top of the screen and click Utility. Then, choose the Crop effect and add a few tracks above the video clip.
Next, double-tap the Crop effect on the editing timeline to open the effect editing tools. Now change the crop amount to 15 to add a vintage feel to your video. Just enter 15 on the Left and Right boxes.
Step3 Add the Dirty Film and Silent Film effects
Tap the Effect tab, then open the Overlay drop-down menu. Then, choose the Old Film category before adding a Dirty Film effect above the clip. To apply a more vintage feel to your video, add a Silent Film effect to the track above the Dirty Film effect.
Step4 Add a black & white effect to your video
Up to this point, your film should now start having a more vintage feel. But to make it look even older, double-click the video clip and tap the Color tab. After that, open the 3D LUT arrow and choose the B&W Film option. Now play the video and enjoy.
Summary
See, you don’t need to break a sweat to add a vintage feel to your funny video. With Filmora, you’ll access multiple tools and effects to create an old-looking film with just a single click. And don’t forget to play around with other Filmora overlays and effects to bring out the inner video editor in you. Thanks for reading!
How to Windows Online Movie Maker [Complete Guide]
The likelihood is that video will soon play a significant role in your content marketing approach, if it hasn’t already – and for that using windows online movie maker is inevitable. You are an emerging brand, a sole proprietor, or even a podcaster. Knowing the importance of video marketing to content producers and agencies is second nature if you’re an astute digital marketer It may be costly and challenging to utilize video editing software. Fortunately, there are free online video editors available.
Before very recently, video editing needed highly specialized skills and was done manually using different tools. Windows Movie Maker used to be a standard component of every Windows user’s toolbox and was a highly recommended video editing product for novices. With the windows movie maker online, the application was well-liked for its ease of use and entertaining special effects, but most significantly - it was free. It came pre-installed on all Windows machines. You may do that with the help of our handy list of the top three online video creators.
Part 1. How to Make a Video Online [Use Movie Maker Windows Online]
Using the help of Movie Maker, you may create videos online with your browser. It enables you to create professional-caliber videos without having to purchase video editing tools at professional-caliber costs. For every genre and need, this web program includes stock video, animated text, audio tracks, and on-screen effects. Your own video clips are uploaded. Then, use the simple drag-and-drop online video editor in Movie Maker to edit footage and add special effects and music to make your movie shine.
Making fantastic compilation films from your already-existing photographs and videos doesn’t need you to be a skilled editor. Even for amateur video makers, the platform’s UI is simple to use and straightforward to navigate. The customizing choices in Movie Maker are many. You have the option of uploading your own fonts and logos. You may also watermark your films and alter the text’s color. Additionally, there are a ton of very unique components like stickers, vector shapes, and masks that may enhance the visual appeal of your video productions and widen your creative boundaries.
Steps to Make Video with Movie Maker Online
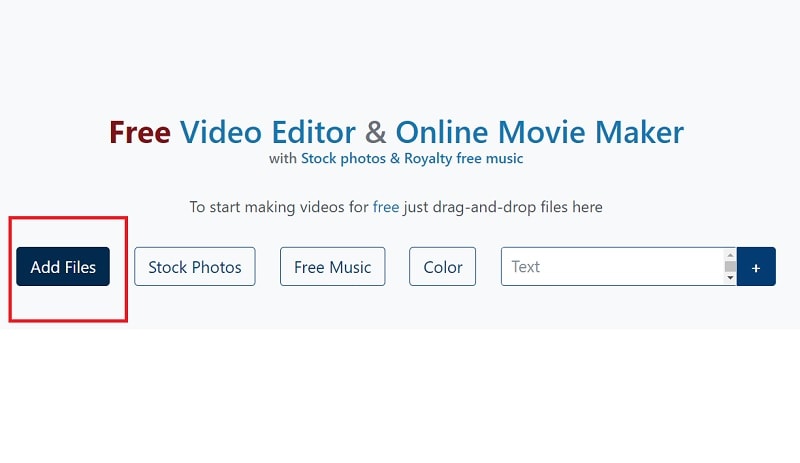
Step1 Go to Movie Maker Online
Using Movie Maker Online, you can quickly and easily make incredibly interesting compilation films using your already-posted photographs and videos. You’ll immediately be sent to the editor, where you can begin organizing your films. Here’s the official link to the toolkit:
Step2 Upload Files to Web
Your photographs, videos, and text may all be uploaded. If you like the default music, you may skip the step to change it; otherwise, you can choose another song from our library or upload your own MP3 file. Files from a variety of sources and devices may be added. Click the Import Media button to start importing your own media. Click Open after locating the video you wish to modify.
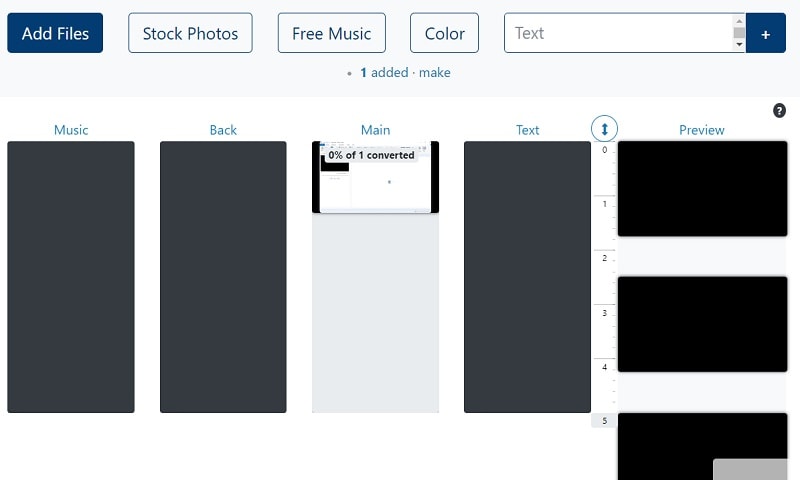
Step3 Create an online video
Add your music to your video compilation after all of your clips have been placed on the timeline. To accomplish that, choose a song depending on the genre or mood you want by clicking on the Music option on the left menu panel. To listen to the music track, click the little icon to the left of it. Text, colors, pictures, and video may all be customized to your heart’s delight. Add effects, drag, cut, etc. Press the Make Video button.
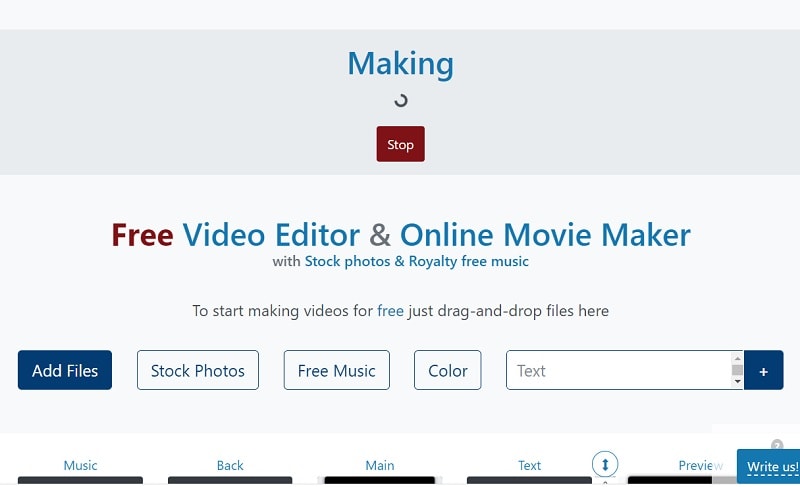
Step4 Save and Share with Others
Sharing your films on Facebook, Instagram, YouTube, and other platforms is made effortless. You may also send your loved ones the URLs to your videos. When you are happy with the changes, click the Save & Share option in the upper right corner, choose the quality you want to download your movie in, and then click the Export button. Download the updated video, then post it.
Part 2. Other Windows Online Movie Makers to Use [Top 3]
1. Kizoa
Link: Kizoa
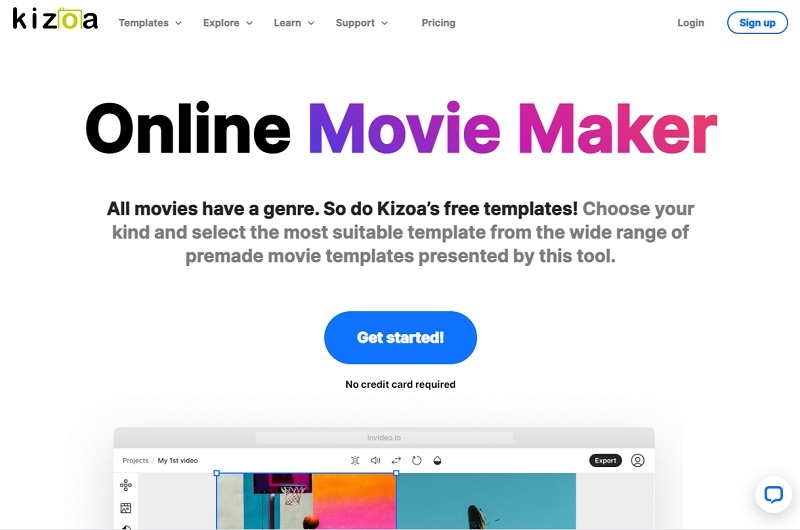
Customizing the appearance of your film is one of the finest ways to make it seem like it is your own. With the Kizoa tool, you may trim, apply a crossfade effect, choose the required resolution, and format for an output video in addition to merging files. Utilize Kizoa’s online video creator to produce eye-catching videos that will hold your audience’s attention. Create any kind of video, from personal family video slideshows to expert films to advertise your company. With the drag-and-drop movie production tool from Kizoa, you can create your very own video in a matter of minutes.
Use a video template as your starting point if you need inspiration. Key framing, animated overlays, noise reduction, transitions, and titles are just a few of the features it provides to help you produce excellent footage. For rapid video editing, there is a video production wizard. Windows Movie Maker’s auto movie themes pale in comparison to those provided by this program. Its extensive collection of stock footage and audio tracks helps you to concentrate on the crucial elements without having to drastically decrease the length of your film or the number of scenes.
2. FlexClip
Link: FlexClip
With the aid of the online video effects tool FlexClip, you may quickly and easily make entertaining short films. It has a ton of video editing features that you may use without logging in or creating an account, like merging, compressing, compiling, adding text, creating memes, etc. For those that are muted, you may use FlexClip to add animated text that blends in with the style of your film. Additionally, you may add your logo so that everyone is aware of who created the masterpiece they just saw.
An online video editor called FlexClip is mainly focused on producing high-quality marketing, advertising, and promotional films for companies. Recording a single video that will function on all social networking and video-sharing websites is almost impossible. Instagram, YouTube, and Facebook Marketing are among the partners of FlexClip that have received expert approval. It is used by marketers and enthusiasts to quickly create looping movies and stop motion animation. But as it only provides very basic functionality, it may not be the greatest choice for more intricate, demanding editing.
3. Veed.Io
Link: Veed.Io
With only a few mouse clicks, users of the browser-based video editing program VEED may create professional-caliber movies. The greatest movie-making tools, including filters, effects, and stickers, are available on VEED. There are no intricate timelines, layers, or intricacy since it is a simple program that runs in your web browser. Simple drag-and-drop functionality is all you need to convey your tales. You may modify your video using its features. Using the video track below, you may combine, divide, or cut your files. Visit our website to see all of our filters, stickers, add-ons, and other tools.
Any device, whether an iPhone or Android phone, a MacBook, a Windows or Linux computer, may use VEED’s online video editor. You have access to all the resources you need to make amazing videos using VEED’s online video editor. Our user-friendly interface is very simple to use and is contemporary and intuitive. The native video sizes on each of the publishing sites, including Facebook, YouTube, and Vimeo, may all be altered using Veed. Finally, click “Export” in the editor’s upper-right corner, and your video will render quickly. Share some!
Conclusion
Use this editing list to produce more compelling video mashups for YouTube and other social media platforms in order to expand your audience, cultivate real connections with them, and eventually increase conversion rates. Because they combine the complex capabilities of the expensive, professional video suites with the user-friendliness and cost that appeal to novices, these online makers are a popular among editors of all skill levels. Make an investment in one of these video editing tools and own it.
Free Download For Win 7 or later(64-bit)
Free Download For macOS 10.14 or later
Part 1. How to Make a Video Online [Use Movie Maker Windows Online]
Using the help of Movie Maker, you may create videos online with your browser. It enables you to create professional-caliber videos without having to purchase video editing tools at professional-caliber costs. For every genre and need, this web program includes stock video, animated text, audio tracks, and on-screen effects. Your own video clips are uploaded. Then, use the simple drag-and-drop online video editor in Movie Maker to edit footage and add special effects and music to make your movie shine.
Making fantastic compilation films from your already-existing photographs and videos doesn’t need you to be a skilled editor. Even for amateur video makers, the platform’s UI is simple to use and straightforward to navigate. The customizing choices in Movie Maker are many. You have the option of uploading your own fonts and logos. You may also watermark your films and alter the text’s color. Additionally, there are a ton of very unique components like stickers, vector shapes, and masks that may enhance the visual appeal of your video productions and widen your creative boundaries.
Steps to Make Video with Movie Maker Online
Step1 Go to Movie Maker Online
Using Movie Maker Online, you can quickly and easily make incredibly interesting compilation films using your already-posted photographs and videos. You’ll immediately be sent to the editor, where you can begin organizing your films. Here’s the official link to the toolkit:
Step2 Upload Files to Web
Your photographs, videos, and text may all be uploaded. If you like the default music, you may skip the step to change it; otherwise, you can choose another song from our library or upload your own MP3 file. Files from a variety of sources and devices may be added. Click the Import Media button to start importing your own media. Click Open after locating the video you wish to modify.
Step3 Create an online video
Add your music to your video compilation after all of your clips have been placed on the timeline. To accomplish that, choose a song depending on the genre or mood you want by clicking on the Music option on the left menu panel. To listen to the music track, click the little icon to the left of it. Text, colors, pictures, and video may all be customized to your heart’s delight. Add effects, drag, cut, etc. Press the Make Video button.
Step4 Save and Share with Others
Sharing your films on Facebook, Instagram, YouTube, and other platforms is made effortless. You may also send your loved ones the URLs to your videos. When you are happy with the changes, click the Save & Share option in the upper right corner, choose the quality you want to download your movie in, and then click the Export button. Download the updated video, then post it.
Part 2. Other Windows Online Movie Makers to Use [Top 3]
1. Kizoa
Link: Kizoa
Customizing the appearance of your film is one of the finest ways to make it seem like it is your own. With the Kizoa tool, you may trim, apply a crossfade effect, choose the required resolution, and format for an output video in addition to merging files. Utilize Kizoa’s online video creator to produce eye-catching videos that will hold your audience’s attention. Create any kind of video, from personal family video slideshows to expert films to advertise your company. With the drag-and-drop movie production tool from Kizoa, you can create your very own video in a matter of minutes.
Use a video template as your starting point if you need inspiration. Key framing, animated overlays, noise reduction, transitions, and titles are just a few of the features it provides to help you produce excellent footage. For rapid video editing, there is a video production wizard. Windows Movie Maker’s auto movie themes pale in comparison to those provided by this program. Its extensive collection of stock footage and audio tracks helps you to concentrate on the crucial elements without having to drastically decrease the length of your film or the number of scenes.
2. FlexClip
Link: FlexClip
With the aid of the online video effects tool FlexClip, you may quickly and easily make entertaining short films. It has a ton of video editing features that you may use without logging in or creating an account, like merging, compressing, compiling, adding text, creating memes, etc. For those that are muted, you may use FlexClip to add animated text that blends in with the style of your film. Additionally, you may add your logo so that everyone is aware of who created the masterpiece they just saw.
An online video editor called FlexClip is mainly focused on producing high-quality marketing, advertising, and promotional films for companies. Recording a single video that will function on all social networking and video-sharing websites is almost impossible. Instagram, YouTube, and Facebook Marketing are among the partners of FlexClip that have received expert approval. It is used by marketers and enthusiasts to quickly create looping movies and stop motion animation. But as it only provides very basic functionality, it may not be the greatest choice for more intricate, demanding editing.
3. Veed.Io
Link: Veed.Io
With only a few mouse clicks, users of the browser-based video editing program VEED may create professional-caliber movies. The greatest movie-making tools, including filters, effects, and stickers, are available on VEED. There are no intricate timelines, layers, or intricacy since it is a simple program that runs in your web browser. Simple drag-and-drop functionality is all you need to convey your tales. You may modify your video using its features. Using the video track below, you may combine, divide, or cut your files. Visit our website to see all of our filters, stickers, add-ons, and other tools.
Any device, whether an iPhone or Android phone, a MacBook, a Windows or Linux computer, may use VEED’s online video editor. You have access to all the resources you need to make amazing videos using VEED’s online video editor. Our user-friendly interface is very simple to use and is contemporary and intuitive. The native video sizes on each of the publishing sites, including Facebook, YouTube, and Vimeo, may all be altered using Veed. Finally, click “Export” in the editor’s upper-right corner, and your video will render quickly. Share some!
Conclusion
Use this editing list to produce more compelling video mashups for YouTube and other social media platforms in order to expand your audience, cultivate real connections with them, and eventually increase conversion rates. Because they combine the complex capabilities of the expensive, professional video suites with the user-friendliness and cost that appeal to novices, these online makers are a popular among editors of all skill levels. Make an investment in one of these video editing tools and own it.
Free Download For Win 7 or later(64-bit)
Free Download For macOS 10.14 or later
Best Cinematic LUTs For Premiere Pro You Can Come Across
LUTs stand for Look-Up Tables and are compatible with a wide array of editing software. This element in video editing can be used during production or before and after production. Using the LUTs, you can color grade your media content to make it more visually appealing. The LUTs can create consistency in your videos and photos and also leads to accurate results.
This article is designed to provide all the information about cinematic LUTs for Premiere Pro. You will not only find the best LUTs present for Premiere Pro, but we will also discuss the compatibility of LUTs with other editing software. Above all, the bonus tip will also provide a great alternative to Premiere Pro for cinematic LUTs.
Part 1: Which File Formats Are LUTs Available In?
You must be wondering if there are any specific file formats for cinematic LUTs Premiere Pro. Yes, some formats define the availability of LUTs. Some of them are:
- 3DL: 3DL is the 3D lattice of RGB output colors. You can find this in DaVinci Resolve, Adobe After Effects, and Photoshop.
- CUBE: It is one of the most popular file formats for video editing. If you want to work with CUBE, you can access it on Final Cut Pro, Adobe Premiere Pro, and other editing software.
- DAT: If you are an animation maker or work with 3D modeling, this file format is for you. In case you want to use it, go to Autodesk Maya.
- CSP: This stands for Clip Studio Paint. As the name suggests, you can use it for making high-class digital art.
- ICC: The International Color Consortium is a file format specifically used for color calibrations along with color management.
- MGA: Are you irritated by low-quality graphics? No worries because MGA can help you in improving the graphics in versatile gaming software.
- Look: With this file format; you can work with Sony Camera’s postproduction work. It leads to high-quality results, so you can use it without issues.
Empower your videos with a new mood using different LUTs. Filmora now offers 100+ top-quality 3D LUTs cover a broad range of scenarios. Transform your videos with Filmora’s powerful 3D LUTs.
Apply LUT on Videos Apply LUT on Videos Learn More


Part 2: Are LUTs Compatible With All Media Editing Software?
Predominantly, LUTs are compatible with a considerable number of media editing software. Yet, the specificity of the compatibility is somehow dependent on the file formats for the LUTs you want to use. Moreover, some software does not have the ability to import or apply the LUTs to a satisfactory quality. Many video editing software supports 3DL and CUBE as they are the most commonly used software.
In addition, popular platforms such as Final Cut Pro, Adobe Acrobat, DaVinci Resolve, and many other software can provide you with LUTs. However, you need to make sure that you are using their latest version because versions of software can affect the compatibility of LUTs. In case you want to use the less commonly used LUTs formats, you need to find a reliable source to import or apply it.
Part 3: What Are The Best Cinematic LUTs For Premiere Pro?
Now that you know considerable information about LUTs, you must be wondering where to find them. In this section, you will discover the cinematic LUTs for Premiere Pro, one of the most known platforms for providing LUTs. Thus, look below to find the LUTs of Premiere Pro:
1. Fast Film LUTs
With this cinematic LUTs Premiere Pro, you can add aesthetic emulation to your film project. It can even add a filmy touch to simple photographs. This can also save the low light issues in the footage to show clear scenes to your audience. Above all, it also reduces the noise and helps improve your film’s outlook.

2. Emulation LUTs
Using this LUT preset, you can optimize your film’s dynamic range and emulation metrics. It can escalate every little detail of your footage and help engage more viewers. In addition to this, you can apply these LUTs to multiple shots to add consistency to your video. These Premiere Pro cinematic LUTs can also

3. Pro Color Grading LUTs
A video or photo without colors can never attract the target audience. Yet, you can cater to these issues using the intuitive LUT named Pro Color Grading LUTs. It can not only fix the color grading problems of your media but can also add aesthetics to it. Moreover, you can also customize it as per your need.

4. Filmy Tone LUTs
If you wish to evoke a sense of nostalgia in your viewers, there is no better way than the Filmy Tone LUTs. It enhances the visibility of videos and photos and aims to show different periods. This can be the perfect choice for those who want to create films and photos dedicated to the past.

5. City Skyline LUTs
For creating and adding the city-lighted environment to media, you can take assistance from this LUT. It is widely used in travel and commercial videos. Moreover, you can also emphasize the features of the cityscape by using it. This also helps to add vibrant colors and styling, just as in city shots.

6. LUTs Summer Film
Creating summer videos with precise summer lights can be a tricky procedure. However, the LUTs Summer Film can help you with this as it can add summer vibes to any videos and photos. You can even use it to give summer looks to the videos shot in the winter season.

7. Exhale LUTs
To add the soft highlight along with a moody environment, you can use the Exhale LUTs. These cinematic filters Premiere Pro are widely used in music and fashion videos. You can also use it in art videos to create a sense of immersion and connection for the viewers.

8. DELUTS
The Digital Film Emulation Look-Up Tables are useful for creating a classic filmy look for simple videos and photos. It can enhance the texture and depth of everything in the video, making it more studio friendly. You can use this LUT for weddings or corporate videos.

9. Free Reign Sample LUTs
With the help of this LUT, you can experience full control over the color metrics of videos and photos. Even if the video’s color gets compromised during shooting, you can fix them with this. This type of LUTs can be used for experiments, independent or travel videos.

10. Vintage LUTs for Premiere Pro
As the name suggests, you can use these LUTs to add a more vintage look to the photos and videos. This can improve the warmth and clarify the theme of the video. You can make your videos and photos stand out in a crowd with the help of this type of LUTs.

11. Airy Bright LUTs
Many users love to make their videos airier and fuller in brightness. This LUT is perfect for users of these types of liking. You can access these LUTs to add soothing brightness and airer effects in videos and photos. It is widely used for fixing the photos of bad videos captured at night.

12. Canon Cinestyle to Rec.709 LUT
This LUT can help the videographers to add a more cinematic look to the videos captured by Cannon DSLR. You can also create a color space of Rec.709 in your videos with this LUT. No matter if you want to work on wedding shots or short films, this LUT can help you with all.

13. Urban Fashion Premiere Pro LUTs
By applying this LUT, you can convert simple fashion videos into professional ones. It can create VOUGE-standard videos for you; thus, you can also use this for startup brands. Moreover, if you are an Instagram or TikTok model, you should get familiar with it because it can make any footage premiere level in a few taps.

14. Osiris Cinematic LUTs
For making travel or advertisement videos more high quality, you can use this Premiere Pro cinematic presets. It can make all types of videos more visually appealing and can add cinematic looks to it. Moreover, this LUT allows you to upscale all the visuals and characters in the video.

15. Finishing LUTs
To add eye-catching finishing effects to the videos, you can use the Finishing LUTs. This can enhance the end-of-color grading procedure for you. It can also add a more contrast and color-friendly look to the ends. You can use it for TV series, films, music, and other videos.

Bonus Part: Wondershare Filmora – A Great Alternative To Discover Cinematic LUTs
Undoubtedly, you can use the cinematic LUTs for Premiere Pro, yet sometimes it can be a tricky platform. Thus, you need to know the best alternative to Premiere Pro so you can apply LUTs to your videos in an optimized manner. The best tool that can help you with this is Wondershare Filmora . You can experience professional-level video editing with this.
Add LUTs on Video For Win 7 or later(64-bit)
Add LUTs on Video For macOS 10.14 or later
Moreover, you can apply LUTs to the videos and can also adjust their intensity as per your need. Above all, it can help you to apply LUTs to several types of videos, such as landscapers or short videos. It also supports the LUTs hover, which lets you preview the LUTs effects .

Prominent Features of Wondershare Filmora
- With its Color Wheel, you can adjust every color metric of video. It can include mid-tones, shadows, hue, and more.
- Along with color customization, you can also sharpen the blur videos to improve the quality of your video.
- You can also control the speed ramping of your video with Filmora. It can also do motion tracking for you.
- By using the batch edit feature, you can edit multiple videos at once without compromising the quality.
Conclusion
Considering everything, you can use the cinematic LUTs for Premiere Pro to upgrade the functionality of your video. The LUTs are available in several file formats, which are mentioned above. Moreover, several editing software can help you to import and apply LUTs on photos and videos. One of the popular ones is Premiere Pro.
Other than this, the best Premiere Pro cinematic LUTs are also discussed above for your ease. Yet, if you find the Premiere Pro difficult, you can use its best alternative named Wondershare Filmora. To find out more about Filmora, go to the previous part.
Add LUTs on Video For Win 7 or later(64-bit)
Add LUTs on Video For macOS 10.14 or later
Apply LUT on Videos Apply LUT on Videos Learn More
Part 2: Are LUTs Compatible With All Media Editing Software?
Predominantly, LUTs are compatible with a considerable number of media editing software. Yet, the specificity of the compatibility is somehow dependent on the file formats for the LUTs you want to use. Moreover, some software does not have the ability to import or apply the LUTs to a satisfactory quality. Many video editing software supports 3DL and CUBE as they are the most commonly used software.
In addition, popular platforms such as Final Cut Pro, Adobe Acrobat, DaVinci Resolve, and many other software can provide you with LUTs. However, you need to make sure that you are using their latest version because versions of software can affect the compatibility of LUTs. In case you want to use the less commonly used LUTs formats, you need to find a reliable source to import or apply it.
Part 3: What Are The Best Cinematic LUTs For Premiere Pro?
Now that you know considerable information about LUTs, you must be wondering where to find them. In this section, you will discover the cinematic LUTs for Premiere Pro, one of the most known platforms for providing LUTs. Thus, look below to find the LUTs of Premiere Pro:
1. Fast Film LUTs
With this cinematic LUTs Premiere Pro, you can add aesthetic emulation to your film project. It can even add a filmy touch to simple photographs. This can also save the low light issues in the footage to show clear scenes to your audience. Above all, it also reduces the noise and helps improve your film’s outlook.
2. Emulation LUTs
Using this LUT preset, you can optimize your film’s dynamic range and emulation metrics. It can escalate every little detail of your footage and help engage more viewers. In addition to this, you can apply these LUTs to multiple shots to add consistency to your video. These Premiere Pro cinematic LUTs can also
3. Pro Color Grading LUTs
A video or photo without colors can never attract the target audience. Yet, you can cater to these issues using the intuitive LUT named Pro Color Grading LUTs. It can not only fix the color grading problems of your media but can also add aesthetics to it. Moreover, you can also customize it as per your need.
4. Filmy Tone LUTs
If you wish to evoke a sense of nostalgia in your viewers, there is no better way than the Filmy Tone LUTs. It enhances the visibility of videos and photos and aims to show different periods. This can be the perfect choice for those who want to create films and photos dedicated to the past.
5. City Skyline LUTs
For creating and adding the city-lighted environment to media, you can take assistance from this LUT. It is widely used in travel and commercial videos. Moreover, you can also emphasize the features of the cityscape by using it. This also helps to add vibrant colors and styling, just as in city shots.
6. LUTs Summer Film
Creating summer videos with precise summer lights can be a tricky procedure. However, the LUTs Summer Film can help you with this as it can add summer vibes to any videos and photos. You can even use it to give summer looks to the videos shot in the winter season.
7. Exhale LUTs
To add the soft highlight along with a moody environment, you can use the Exhale LUTs. These cinematic filters Premiere Pro are widely used in music and fashion videos. You can also use it in art videos to create a sense of immersion and connection for the viewers.
8. DELUTS
The Digital Film Emulation Look-Up Tables are useful for creating a classic filmy look for simple videos and photos. It can enhance the texture and depth of everything in the video, making it more studio friendly. You can use this LUT for weddings or corporate videos.
9. Free Reign Sample LUTs
With the help of this LUT, you can experience full control over the color metrics of videos and photos. Even if the video’s color gets compromised during shooting, you can fix them with this. This type of LUTs can be used for experiments, independent or travel videos.
10. Vintage LUTs for Premiere Pro
As the name suggests, you can use these LUTs to add a more vintage look to the photos and videos. This can improve the warmth and clarify the theme of the video. You can make your videos and photos stand out in a crowd with the help of this type of LUTs.
11. Airy Bright LUTs
Many users love to make their videos airier and fuller in brightness. This LUT is perfect for users of these types of liking. You can access these LUTs to add soothing brightness and airer effects in videos and photos. It is widely used for fixing the photos of bad videos captured at night.
12. Canon Cinestyle to Rec.709 LUT
This LUT can help the videographers to add a more cinematic look to the videos captured by Cannon DSLR. You can also create a color space of Rec.709 in your videos with this LUT. No matter if you want to work on wedding shots or short films, this LUT can help you with all.
13. Urban Fashion Premiere Pro LUTs
By applying this LUT, you can convert simple fashion videos into professional ones. It can create VOUGE-standard videos for you; thus, you can also use this for startup brands. Moreover, if you are an Instagram or TikTok model, you should get familiar with it because it can make any footage premiere level in a few taps.
14. Osiris Cinematic LUTs
For making travel or advertisement videos more high quality, you can use this Premiere Pro cinematic presets. It can make all types of videos more visually appealing and can add cinematic looks to it. Moreover, this LUT allows you to upscale all the visuals and characters in the video.
15. Finishing LUTs
To add eye-catching finishing effects to the videos, you can use the Finishing LUTs. This can enhance the end-of-color grading procedure for you. It can also add a more contrast and color-friendly look to the ends. You can use it for TV series, films, music, and other videos.
Bonus Part: Wondershare Filmora – A Great Alternative To Discover Cinematic LUTs
Undoubtedly, you can use the cinematic LUTs for Premiere Pro, yet sometimes it can be a tricky platform. Thus, you need to know the best alternative to Premiere Pro so you can apply LUTs to your videos in an optimized manner. The best tool that can help you with this is Wondershare Filmora . You can experience professional-level video editing with this.
Add LUTs on Video For Win 7 or later(64-bit)
Add LUTs on Video For macOS 10.14 or later
Moreover, you can apply LUTs to the videos and can also adjust their intensity as per your need. Above all, it can help you to apply LUTs to several types of videos, such as landscapers or short videos. It also supports the LUTs hover, which lets you preview the LUTs effects .
Prominent Features of Wondershare Filmora
- With its Color Wheel, you can adjust every color metric of video. It can include mid-tones, shadows, hue, and more.
- Along with color customization, you can also sharpen the blur videos to improve the quality of your video.
- You can also control the speed ramping of your video with Filmora. It can also do motion tracking for you.
- By using the batch edit feature, you can edit multiple videos at once without compromising the quality.
Conclusion
Considering everything, you can use the cinematic LUTs for Premiere Pro to upgrade the functionality of your video. The LUTs are available in several file formats, which are mentioned above. Moreover, several editing software can help you to import and apply LUTs on photos and videos. One of the popular ones is Premiere Pro.
Other than this, the best Premiere Pro cinematic LUTs are also discussed above for your ease. Yet, if you find the Premiere Pro difficult, you can use its best alternative named Wondershare Filmora. To find out more about Filmora, go to the previous part.
Add LUTs on Video For Win 7 or later(64-bit)
Add LUTs on Video For macOS 10.14 or later
M31 LUT (Teal and Orange LUT) Free Download
Today’s article will be fascinating for all those who want to shoot their films at home and become a filmmaker. As upon M31, LUT (teal and orange) is one of the most used LUTs in various films. It was first introduced in Hollywood, and there are many movies that use this style for color correction, such as the well-known Transformers, Star Trek, Mad Max, and Wonder Woman. The spectator can rapidly comprehend the information in the image and quickly tell the topic from the backdrop thanks to the two contrasting hues of teal and orange, which are more common in nature. These colors can also merge more smoothly with the rest of the image. In this article, we will discuss how to use it and other amazing LUTs in your videos. So let’s begin!
Part 1. What is M31 LUT (Teal & Orange LUT)?
M31 LUT (Teal & Orange Lut) is one of the most used LUTs in Hollywood and other cinematic industries. This LUT help to get your video the cinematic colors of teal and orange. The contrast between the two colors teal and orange is clear, but there are also other colors present in nature. For example, human skin is mostly composed of the colors yellow, red, and brown. Because blue is the complement of these colors, teal is their contrast color.

Other quality features are Color Remapping, Skin Toning, Saturation, etc. In other words, it helps your videos look like popular Hollywood films as they also use this same LUT in their movies. Its popularity in Hollywood films may be due to a number of factors, but one of the most crucial ones is that it gives the scene a cohesive mood by allowing disparate aspects to mirror one another and emphasize the overall qualities of the scene.

Why is it necessary to discuss the Teal & Orange LUT separately since they are now so popular? The fact that you may utilize this approach for a very long time to enhance the color quality of your own work and your own use of color is what matters most.
The following sections discuss downloading and using these LUTs in your videos.
Part 2. M31 LUT (Teal & Orange LUT) free download
1. Orange and Teal Lightroom Presets by SparkleStock (Lite)
SparkleStock is well-known for its variety of LUTs with its featured appearance on many brands. This Sparkle stock pack contains the M31 Teal and Orange LUT with seven other LUTs.
The download link of the LUT is here .
2. Orange-and-Teal-LUTs-Pack-by-Navpreet-Singh-ShareAE.com
Navpreet Singh is a growing designer. However, he offers some good packs of LUTs. One of which is the Orange and Teal LUTs pack. There are eight variations of M31 LUT available in the pack.
The download link of the LUT is here .
3. Orange and Teal - Kevin Aryal Tutorial
This pack also has nearly six various M31 Orange and Teal LUT. Kevin Aryal Tutorial, a source of many effects and LUTs, offers this pack.
The download link of the LUT is here .
4. DaVinci Resolve 18
DaVinci Resolve 18 also has a good name in providing LUTs and effects. They also offer the M31 Orange and Teal LUT with a variety of many more effects.
The download link of the LUT is here .
5. FG-Free-Cine-LUTs-Pack-v2
Filtergrade is another trusted source to get different LUT packs. This pack by Filtergrade has various cinematic effects, including the M31 Teal and Orange LUT.
The download link of the LUT is here .
Part 3. How to use LUTs in Filmora Video Editor?
In addition to M31 LUTs, Filmora offers more than 100 LUT packages to pick from when color grading your videos. Select the LUT that best suits your video, then use Filmora to add it. To add a sophisticated effect to your clips, follow these steps:
- Once your video clips have been imported, select LUT from the Effects tab. Here, you may view more than 100 different LUT styles to match various themes and moods.

- Or you can just click on the “Tools > Color > Color correction”. You may improve the picture quality by adjusting the color details, contrast, light, and shadows here.


- If you want to use other preset LUTs, click on the drop-down menu and select the Load LUT option. Then, choose the downloaded LUT and click OK button.

Conclusion
Therefore, to help those who want to add amazing LUTs like M31 (teal and orange) in their videos to give them a cinematic look, we hope this article will be helpful. You can use the traditional LUTs that we suggest, and if you’re still having some difficulty with color grading, you’re welcome to try Filmora’s color grading tool to help you out.
Free Download For Win 7 or later(64-bit)
Free Download For macOS 10.14 or later
Free Download For macOS 10.14 or later
Also read:
- Updated Twitch Green Screen Guide
- Updated Discord Is the Future of Networking. After All, It Is Here to Stay. Have You Heard of the Discord Animated Avatar? If Yes, You Understand Its Power and if Not, Ensure You Study This Article for More Information
- Updated 2024 Approved In This Article, You Will Learn About Splitting the Video Into the Frames in FFmpeg and Mentioning the Easy Option for Doing the Same Task in a Few Seconds by Wondershare Filmora
- In 2024, Do You Want to Know How to Convert YouTube SBV Subtitles to SRT Format? Here Is an Ultimate Guide About It
- 2024 Approved Want to Speed up Your Video to Create Short-Duration Instagram Reels? Here Is How You Can Change the Speed of Pre-Recorded and Live Videos on Instagram Reels
- In 2024, Efficient Ways to Manage Your Timeline
- Updated What You Should Know About Speech-to-Text Technology
- 2024 Approved The Best 10 AI Video Analytics Companies at a Glance
- New 2024 Approved Do You Want to Know About the DaVinci Resolve Adjustment Layer? Read This Article to Learn How to Use an Adjustment Layer (Clip) in DaVinci Resolve to Edit Videos
- Updated Best 8 AR Apps for Android and iOS | Help You See the World of AR for 2024
- In This Article We Will Be Covering the Most Important Topics You Have to Remember when Becoming a Successful YouTube-Star
- Updated 15 Camera Shake Preset for Adobe Premiere Pro for 2024
- New In 2024, Do You Still Waste Time Making Transparent Background in Paint
- Updated Tactics to Create Transparent Image in Minimal Steps for 2024
- How to Time-Lapse a Video on iMovie
- Updated Green Screen YouTube Videos
- In 2024, Looking for Simple Steps to Customize the Speed of Your Video in DaVinci Resolve? Find Out How You Can Do that and Discover an Easier Alternative to DaVinci Resolve
- New Blender Green Screen Effects for 2024
- Its Always a Cool Thing to Use a 3D Intro Maker to Create Intro Videos for Your Clips. This Post Will Introduce You 4 of the Best Intro Video Makers to Help You Improve Your Video for 2024
- New Are You Aware that You Can Create Your Own Lower Thirds for Video? Read This Article for a Tutorial on How to Customize One for 2024
- Updated 2024 Approved Quick Solved How to Add Subtitles to a Video on iPhones
- New This Article Discusses What Is Blender Video Editor, How to Download, Install and Use It, and Its Key Features. It Further Discusses Its Alternative for Editing Your Videos and More. Check Out Now for 2024
- Repeated Text Animation Tutorial
- New In 2024, 10 Best Innovative AR Video Effects to Check Out
- Updated 2024 Approved Do You Want to Slow Down Your TikTok Video and Zoom on a Specific Part? This Is No Longer a Difficult Task as This Video Comes up with the Right Set of Methods that Can Be Used to Implement the Slow Zoom Effect TikTok
- New In 2024, Create Slide Masking Effect Intro【Filmora】
- New In 2024, Learn How to Perform Velocity Edits on Your PC
- Updated 2024 Approved 15 Camera Shake Preset for Adobe Premiere Pro
- New In 2024, Best Shortcut Towards Timeline Template
- In 2024, Discover the Various Techniques of Video Framing, Which Involve Capturing the Essence of a Subject While Eliminating Distractions in the Background, Andlearn How to Apply Them Skillfully to Achieve Desired Results
- Updated Use The Best LUTs for Lightroom
- In the Realm of Creating Graphic Presentation, People Also Ask About Designing Professionally Sound Slideshow Word Presentations. Heres How You Can Go About the Process
- Updated 4 Ways to Loop a Video on Vimeo for 2024
- Updated Beginners Guide to Green Screen Keying for 2024
- Updated Top 8 Augmented Reality Video Games
- Updated In 2024, How to Fade in Text in Adobe Premiere Pro
- Discover the Top Slow Motion Camera App to Use
- Updated 2024 Approved Do You Want to Know How to Add a VHS Effect Premiere Look? You Can Easily Apply the VHS Effect to Your Videos Using Adobe Premiere Pro
- New What Is MKV Format and How To Play MKV Video for 2024
- In 2024, How to Create a Slideshow GIF?
- New In 2024, Time Bending Brilliance The Ultimate Slow Motion Video Makers
- New What Is the Best MP4 Cutters for YouTubers on Mac?
- Home Button Not Working on Xiaomi Redmi K70E? Here Are Real Fixes | Dr.fone
- In 2024, The Ultimate Guide to Xiaomi Redmi Note 13 Pro 5G Pattern Lock Screen Everything You Need to Know
- How to remove Google FRP Lock on Oppo A79 5G
- In 2024, About ZTE FRP Bypass
- How To Fake GPS On HTC U23 For Mobile Legends? | Dr.fone
- In 2024, Reset iTunes Backup Password Of Apple iPhone 7 Plus Prevention & Solution
- Reliable User Guide to Fix Tecno Spark 10 4G Running Slow and Freezing | Dr.fone
- In 2024, How to Bypass iPhone 7 Passcode Easily Video Inside | Dr.fone
- Pokemon Go No GPS Signal? Heres Every Possible Solution On Vivo Y78+ | Dr.fone
- In 2024, A Perfect Guide To Remove or Disable Google Smart Lock On Xiaomi Redmi Note 13 Pro+ 5G
- Updated Create Video With PPT for 2024
- Three Ways to Sim Unlock Vivo Y27s
- New In 2024, How To Generate Speech From Text | The Top Text-to-Speech Converters
- In 2024, Forgot Pattern Lock? Heres How You Can Unlock Xiaomi Redmi A2 Pattern Lock Screen
- In 2024, Is Fake GPS Location Spoofer a Good Choice On Asus ROG Phone 7? | Dr.fone
- 4 Methods to Turn off Life 360 On Nokia C22 without Anyone Knowing | Dr.fone
- How to Factory Reset Motorola Razr 40 without Losing Data | Dr.fone
- How to Reset Gmail Password on Realme C51 Devices
- In 2024, What is the best Pokemon for pokemon pvp ranking On Oppo Find N3 Flip? | Dr.fone
- Title: Updated In 2024, Lets Learn How to Convert a Normal Video Into a Film Shot in the 1920S with Wondershare Filmora
- Author: Morgan
- Created at : 2024-04-24 01:10:39
- Updated at : 2024-04-25 01:10:39
- Link: https://ai-video-editing.techidaily.com/updated-in-2024-lets-learn-how-to-convert-a-normal-video-into-a-film-shot-in-the-1920s-with-wondershare-filmora/
- License: This work is licensed under CC BY-NC-SA 4.0.
