

Updated In 2024, When Struggling to Find a Suitable Game Recorder for Your PC, You Might Come Across Many Options. Explore the Best Game Recorders for Sharing Game Highlights
When Struggling to Find a Suitable Game Recorder for Your PC, You Might Come Across Many Options. Explore the Best Game Recorders for Sharing Game Highlights
You’re likely familiar with recording gameplays if you’re involved in the gaming community. The desire to share our gameplay adventures has never been more widely spread. YouTube and Twitch serve as popular hubs for gamers to showcase their skills and build communities.
However, with various game recorders, finding the perfect fit for your next gameplay recording can be challenging. We’ve tested many options to ease your search and made a list to enhance your gaming experience.
In this article
- Part 1. Discussing the Advancements in Game Recording in the Digital Realm
- Part 2. Top Best Game Recorders To Consider for Efficient Recording
- Part 3. Make Screen Recording Simple and Easy: Wondershare Filmora
- Conclusion
Part 1: Discussing the Advancements in Game Recording in the Digital Realm
Game recording has evolved from basic methods to sophisticated tools. In the past, gamers used VHS recorders connected to consoles. Moreover, screen capture software like Fraps became popular in the early 2000s. Afterward, built-in recording features within PlayStation 4 and Xbox One simplified the process.
Platforms like Twitch emerged for live streaming in the late 2010s. Cloud gaming services have revolutionized recording by allowing gameplay on remote servers. Finally, modern game recorders emerged to provide instant replay and webcam integration.
Chronological Understanding of the Advancements in Game Recordings
- Users can now capture gameplay in stunning 4K resolution for top-notch visual quality.
- Frame rate settings ensure smooth playback of recorded videos.
- Bitrate settings let you control recording quality and file size.
- Players can use GPU power for faster and more efficient video encoding.
- Multi-channel audio recording lets you record gameplay audio, microphone input, and other sources. Also, it separates tracks for easy editing and control.
- An infusion of overlays in the webcam adds a personalized touch to gameplay videos, building competition in quality offering.
- Network switching within software is possible without any cross-platform shift, from recording to live streaming.
Example
PewDiePie is one of the leading stars in YouTube stardom. His game screen recording is proof of how online entertainment has changed. He earned his initial fame by playing horror games with funny commentary. People loved his infectious personality and unique style. Furthermore, he expanded his content to include games, vlogs, and entertaining stuff. Now, he has a fan base of 111M, positioning him as the most influential figure in online gaming.
Part 2: Top Best Game Recorders To Consider for Efficient Recording
Most of us play games for fun while wanting to share the gameplay with friends. The game screen recorder helps you share the screen with others to enjoy with them. Let’s go through the options of tools that can record gameplay screens efficiently:
Best Game Recorders for PC
1.Movavi
2.OBS
3.Bandicam
4.XSplit
5.Aqua Demo
6.GoPlay
7.Action! Game Recorder
8.Wondershare DemoCreator
1. Movavi
Movavi lets you do full-screen or custom area recording with various functionalities. Using this tool, you can annotate the screen while recording for real-time experience. For improving viewer’s attention, you can also illuminate mouse cursor and keystrokes within the recording screen. It also features a noise reduction feature to get rid of intrusive voices. Movavi can take scrolling screenshots to capture content that doesn’t fit on one screen.

Pros
- This game screen recording tool has a user-friendly interface and is easy to use without the need for training.
- The tool allows you to capture audio and video simultaneously and separately.
Con
- It offers limited features when it comes to video manipulation while recording games.
2. OBS Studio
Open Broadcaster Software is the best screen recorder for games when it comes to finding open-source recorders. This recorder enables you to record multiple scenes at a time. It offers seamless transitions to switch between the scenes. Users can use the audio mixer feature of the tool for noise suppression and gain. The tool also provides the configuration option to add new sources and replace existing ones.

Pros
- You can capture multiple windows simultaneously with the help of this tool, giving diversified opportunities.
- This screen recorder allows you to preview sources and scenes before live streaming.
Con
- OBS is challenging for beginners due to its steep learning curve.
3. Bandicam
Gamers can record high-resolution gameplay in 4K UHD and 480FPS with Bandicam. Upon utilizing this tool, they record gameplay and voice to share with friends on YouTube. This Lolio game recorder uses a webcam and mic to record gameplay with the player’s live face and voice. Plus, you can also save the audio track of the gameplay record in separate WAV files.

Pros
- This game recorder compresses high-quality video to save space.
- Bandicam supports the latest hardware acceleration from AMD, Intel, and NVIDIA.
Con
- It only works on Windows and does not support Mac, Android, or Linux.
4. XSplit
Content creators and game players can use this all-in-one streaming and recording tool. This video game recorder allows you to switch from a solo camera to a podcast easily. You can start streaming to any broadcast platform with the native plugin of the tool. XSplit Broadcaster enables you to add multiple animation and broadcast effects to your scenes.

Pros
- Users can record multiple scenes at the same time with this screen recorder. This helps you in covering more content in similar timeframes.
- You can do custom transitions of various scenes with the help of this tool.
Con
- Installing XSplit Broadcaster in your system slows down the running of the PC dramatically.
5. Aqua Demo
Aqua Demo is the best way to record gameplay on a PC to produce high-quality video. You can easily record gameplay as the interface of the tool is intuitive and easy to use. It supports various video formats, including AVI, MP4, and MOV, to save the recordings. Users can do editing while recording to make it engaging and interactive.

Image Name: best-game-recorder-for-pc-2024-5.jpg
Image Alt:
Pros
- This tool allows you to record video using the sound of a PC, microphone, or both.
- You can easily schedule when video recording should take place with this tool.
Con
- AceThinker Aqua Demo offers a limited trial version to its users for screen recording.
6. GoPlay
GoPlay is the best software to record gameplay as it allows you to record yourself while gaming. With the help of this software, users can do basic editing of the video before live streaming. Plus, it allows you to record fast-paced games up to 60fps for smooth results. The software offers the feature to remove unwanted noise in the video.

Pros
- This screen recorder offers you the option to dub your own voice within the video recording.
- It helps to adjust the audio of each track on the timeline.
Con
- Unlike other screen recorders, it has a small number of transitions and effects.
7. Action! – Game Recorder
Action! stands out as one of the best screen recorder for games, as it uses low CPU space. Gamers can record smooth HD video of gameplay up to 120fps. You can make 20 times smaller video recordings with the help of this tool. Also, users are able to apply different editing effects to the recorder clips. This tool even enables you to control video recording with a smartphone.

Image Name: best-game-recorder-for-pc-2024-7.jpg
Image Alt:
Pros
- Action supports the webcam and microphone commentary during recording.
- It displays current and average FPS while playing games and saves benchmark results.
Con
- People face usability issues like problems with frame rate drops while recording.
8. Wondershare DemoCreator
Users can use DemoCreator on Windows and Mac to record the screen of gameplay. No doubt, it is a cool game recording software available to users. It also offers lag-free recording for uninterrupted gameplay records. You can plan and automate recording sessions with the help of this software. This game recorder provides a dynamic cursor effect for a visual guide of your audience.

Pros
- Wondershare DemoCreator offers dual monitor recording for an expanded view.
- User can create their own virtual avatars for presenting the content through video.
Con
- The tool has limited functionality in the free version, so you have to buy its premium subscription.
10+ Screen Recorder without Watermark
https://www.youtube.com/watch?v=CVmVxhxfnlU
Part 3: Make Screen Recording Simple and Easy: Wondershare Filmora
Gaming has made a significant impact on people as the associated industry keep producing new games with the latest technology. Moreover, the popularity of streaming games online has also increased. In this case, gamers need an effective game recorder software. Wondershare Filmora is the most efficient solution to effective screen recording. This video game recorder tool can capture any area of your selection.
Filmora also has various built-in editing tools and recording effects. You can also customize the ratio and size of your recording screen by changing the height and width. This tool records the screen and captures the audio from your microphone at the same time. Gamers can schedule their recording with the Record Timer feature. Moreover, you can customize your keystrokes and make hotkey combinations.
Other Features of Wondershare Filmora
- Split Screen: The Split Screen feature has up to 250+ pre-made templates that help you create animated video collages. You can have up to 6 screens for gameplaying or live chat channels on your screen. There are thousands of effects and filters you add to each of the screens.

- AI Thumbnail Creator: Filmora provides a Thumbnail feature that can generate exclusive thumbnails for your videos. It supports advanced text and image editing tools with 58+ templates. You can get stunning thumbnails for your gameplay in seconds with the help of AI.

- AI Vocal Remover: If you are having trouble with unnecessary background noise, remove it with the AI vocal remover feature. Streamers can separate the vocals from their microphone and gameplay. Also, you can dub videos freely without losing audio quality.

Steps-by-Step Guide to Screen Record With Wondershare Filmora
Wondershare Filmora provides the best way to record gameplay on your PC, as it gives you the necessary features. So, let’s discuss the steps on how to record a professional gameplay recording. The following are the steps to record gameplay with Filmora:
Step 1 Launch and Create a New Project on Filmora
After downloading Filmora on your PC and launching the software, go to the “Create Project” tab on the left-side panel. Here, you can click the “New Project” option to open the main editing interface.

Step 2 Record Gameplay on Your PC
On the main interface, click the “Record” option above the media panel. From the drop-down panel, select the “Record PC Screen” option. After that, a small panel screen with the name “Wondershare Screen Recorder” will appear on your PC.

Step 3 Adjust Recording Settings for Gaming
Now, adjust the screen recording settings according to your preference. You can change the screen’s dimensions from full screen to target window. Also, choose to turn on the microphone, audio, and camera by clicking on their icons. Now, hit the dropdown menu of “Settings,” and change the frame rate and other video options. Once you are satisfied with the settings, hit the “Start Recording” button to start.

Conclusion
Gamers need to find the best tool to share their gaming moments in 2024. Filmora is a standout choice among the game recording software for PCs. The software is reliable and enriched with features that are easy to use. You can record, edit, and share your exciting gameplay adventures with the audience. If you’re on the lookout for the best game recorder for your PC, Filmora is a solid recommendation.
- Part 2. Top Best Game Recorders To Consider for Efficient Recording
- Part 3. Make Screen Recording Simple and Easy: Wondershare Filmora
- Conclusion
Part 1: Discussing the Advancements in Game Recording in the Digital Realm
Game recording has evolved from basic methods to sophisticated tools. In the past, gamers used VHS recorders connected to consoles. Moreover, screen capture software like Fraps became popular in the early 2000s. Afterward, built-in recording features within PlayStation 4 and Xbox One simplified the process.
Platforms like Twitch emerged for live streaming in the late 2010s. Cloud gaming services have revolutionized recording by allowing gameplay on remote servers. Finally, modern game recorders emerged to provide instant replay and webcam integration.
Chronological Understanding of the Advancements in Game Recordings
- Users can now capture gameplay in stunning 4K resolution for top-notch visual quality.
- Frame rate settings ensure smooth playback of recorded videos.
- Bitrate settings let you control recording quality and file size.
- Players can use GPU power for faster and more efficient video encoding.
- Multi-channel audio recording lets you record gameplay audio, microphone input, and other sources. Also, it separates tracks for easy editing and control.
- An infusion of overlays in the webcam adds a personalized touch to gameplay videos, building competition in quality offering.
- Network switching within software is possible without any cross-platform shift, from recording to live streaming.
Example
PewDiePie is one of the leading stars in YouTube stardom. His game screen recording is proof of how online entertainment has changed. He earned his initial fame by playing horror games with funny commentary. People loved his infectious personality and unique style. Furthermore, he expanded his content to include games, vlogs, and entertaining stuff. Now, he has a fan base of 111M, positioning him as the most influential figure in online gaming.
Part 2: Top Best Game Recorders To Consider for Efficient Recording
Most of us play games for fun while wanting to share the gameplay with friends. The game screen recorder helps you share the screen with others to enjoy with them. Let’s go through the options of tools that can record gameplay screens efficiently:
Best Game Recorders for PC
1.Movavi
2.OBS
3.Bandicam
4.XSplit
5.Aqua Demo
6.GoPlay
7.Action! Game Recorder
8.Wondershare DemoCreator
1. Movavi
Movavi lets you do full-screen or custom area recording with various functionalities. Using this tool, you can annotate the screen while recording for real-time experience. For improving viewer’s attention, you can also illuminate mouse cursor and keystrokes within the recording screen. It also features a noise reduction feature to get rid of intrusive voices. Movavi can take scrolling screenshots to capture content that doesn’t fit on one screen.
Pros
- This game screen recording tool has a user-friendly interface and is easy to use without the need for training.
- The tool allows you to capture audio and video simultaneously and separately.
Con
- It offers limited features when it comes to video manipulation while recording games.
2. OBS Studio
Open Broadcaster Software is the best screen recorder for games when it comes to finding open-source recorders. This recorder enables you to record multiple scenes at a time. It offers seamless transitions to switch between the scenes. Users can use the audio mixer feature of the tool for noise suppression and gain. The tool also provides the configuration option to add new sources and replace existing ones.
Pros
- You can capture multiple windows simultaneously with the help of this tool, giving diversified opportunities.
- This screen recorder allows you to preview sources and scenes before live streaming.
Con
- OBS is challenging for beginners due to its steep learning curve.
3. Bandicam
Gamers can record high-resolution gameplay in 4K UHD and 480FPS with Bandicam. Upon utilizing this tool, they record gameplay and voice to share with friends on YouTube. This Lolio game recorder uses a webcam and mic to record gameplay with the player’s live face and voice. Plus, you can also save the audio track of the gameplay record in separate WAV files.
Pros
- This game recorder compresses high-quality video to save space.
- Bandicam supports the latest hardware acceleration from AMD, Intel, and NVIDIA.
Con
- It only works on Windows and does not support Mac, Android, or Linux.
4. XSplit
Content creators and game players can use this all-in-one streaming and recording tool. This video game recorder allows you to switch from a solo camera to a podcast easily. You can start streaming to any broadcast platform with the native plugin of the tool. XSplit Broadcaster enables you to add multiple animation and broadcast effects to your scenes.
Pros
- Users can record multiple scenes at the same time with this screen recorder. This helps you in covering more content in similar timeframes.
- You can do custom transitions of various scenes with the help of this tool.
Con
- Installing XSplit Broadcaster in your system slows down the running of the PC dramatically.
5. Aqua Demo
Aqua Demo is the best way to record gameplay on a PC to produce high-quality video. You can easily record gameplay as the interface of the tool is intuitive and easy to use. It supports various video formats, including AVI, MP4, and MOV, to save the recordings. Users can do editing while recording to make it engaging and interactive.
Image Name: best-game-recorder-for-pc-2024-5.jpg
Image Alt:
Pros
- This tool allows you to record video using the sound of a PC, microphone, or both.
- You can easily schedule when video recording should take place with this tool.
Con
- AceThinker Aqua Demo offers a limited trial version to its users for screen recording.
6. GoPlay
GoPlay is the best software to record gameplay as it allows you to record yourself while gaming. With the help of this software, users can do basic editing of the video before live streaming. Plus, it allows you to record fast-paced games up to 60fps for smooth results. The software offers the feature to remove unwanted noise in the video.
Pros
- This screen recorder offers you the option to dub your own voice within the video recording.
- It helps to adjust the audio of each track on the timeline.
Con
- Unlike other screen recorders, it has a small number of transitions and effects.
7. Action! – Game Recorder
Action! stands out as one of the best screen recorder for games, as it uses low CPU space. Gamers can record smooth HD video of gameplay up to 120fps. You can make 20 times smaller video recordings with the help of this tool. Also, users are able to apply different editing effects to the recorder clips. This tool even enables you to control video recording with a smartphone.
Image Name: best-game-recorder-for-pc-2024-7.jpg
Image Alt:
Pros
- Action supports the webcam and microphone commentary during recording.
- It displays current and average FPS while playing games and saves benchmark results.
Con
- People face usability issues like problems with frame rate drops while recording.
8. Wondershare DemoCreator
Users can use DemoCreator on Windows and Mac to record the screen of gameplay. No doubt, it is a cool game recording software available to users. It also offers lag-free recording for uninterrupted gameplay records. You can plan and automate recording sessions with the help of this software. This game recorder provides a dynamic cursor effect for a visual guide of your audience.
Pros
- Wondershare DemoCreator offers dual monitor recording for an expanded view.
- User can create their own virtual avatars for presenting the content through video.
Con
- The tool has limited functionality in the free version, so you have to buy its premium subscription.
10+ Screen Recorder without Watermark
https://www.youtube.com/watch?v=CVmVxhxfnlU
Part 3: Make Screen Recording Simple and Easy: Wondershare Filmora
Gaming has made a significant impact on people as the associated industry keep producing new games with the latest technology. Moreover, the popularity of streaming games online has also increased. In this case, gamers need an effective game recorder software. Wondershare Filmora is the most efficient solution to effective screen recording. This video game recorder tool can capture any area of your selection.
Filmora also has various built-in editing tools and recording effects. You can also customize the ratio and size of your recording screen by changing the height and width. This tool records the screen and captures the audio from your microphone at the same time. Gamers can schedule their recording with the Record Timer feature. Moreover, you can customize your keystrokes and make hotkey combinations.
Other Features of Wondershare Filmora
- Split Screen: The Split Screen feature has up to 250+ pre-made templates that help you create animated video collages. You can have up to 6 screens for gameplaying or live chat channels on your screen. There are thousands of effects and filters you add to each of the screens.
- AI Thumbnail Creator: Filmora provides a Thumbnail feature that can generate exclusive thumbnails for your videos. It supports advanced text and image editing tools with 58+ templates. You can get stunning thumbnails for your gameplay in seconds with the help of AI.
- AI Vocal Remover: If you are having trouble with unnecessary background noise, remove it with the AI vocal remover feature. Streamers can separate the vocals from their microphone and gameplay. Also, you can dub videos freely without losing audio quality.
Steps-by-Step Guide to Screen Record With Wondershare Filmora
Wondershare Filmora provides the best way to record gameplay on your PC, as it gives you the necessary features. So, let’s discuss the steps on how to record a professional gameplay recording. The following are the steps to record gameplay with Filmora:
Step 1 Launch and Create a New Project on Filmora
After downloading Filmora on your PC and launching the software, go to the “Create Project” tab on the left-side panel. Here, you can click the “New Project” option to open the main editing interface.
Step 2 Record Gameplay on Your PC
On the main interface, click the “Record” option above the media panel. From the drop-down panel, select the “Record PC Screen” option. After that, a small panel screen with the name “Wondershare Screen Recorder” will appear on your PC.
Step 3 Adjust Recording Settings for Gaming
Now, adjust the screen recording settings according to your preference. You can change the screen’s dimensions from full screen to target window. Also, choose to turn on the microphone, audio, and camera by clicking on their icons. Now, hit the dropdown menu of “Settings,” and change the frame rate and other video options. Once you are satisfied with the settings, hit the “Start Recording” button to start.
Conclusion
Gamers need to find the best tool to share their gaming moments in 2024. Filmora is a standout choice among the game recording software for PCs. The software is reliable and enriched with features that are easy to use. You can record, edit, and share your exciting gameplay adventures with the audience. If you’re on the lookout for the best game recorder for your PC, Filmora is a solid recommendation.
Best 22 Video Editing Tips to Know
Whether your video is short or long, you may want to make it better and appealing. Video editing involves the manipulation of your videos through which the desired transformation is achieved and you can flaunt every move of your video in a more preferable way. Video editing involves cutting the video short, changing the speed, organizing the video in a seamless flow. In short, the better the cuts of your videos, the better your message/story is conveyed.
Part 1: Things to Learn Before Editing First Draft
You have shot your video and now you’re stuck on the post-processing of that video. Don’t worry! We got you covered through this article which will guide you through the different things which you must learn before editing the first draft of your video.
Start a video project
Your smartphone and digital camera can let you record multiple videos but what now? You head out to edit your first draft by choosing a suitable platform or software and then you can surely lay back and see the software doing wonders to your raw videos. By starting off with editing, you choose your video editing preferences and then you just let the video editing tools do the magic.
Get to know the video editing software workspace
Video editing software offer customizable workspaces for different editing tasks. The software workspace streamlines routine actions you take with clips, like editing clips, making DVD and Blu-ray menus, and sharing movies. By placing panels in the layout that best matches your working style, you can personalize your workspace. The additional panels adjust automatically to fit the window as you rearrange them. For various jobs, such as one for editing and one for preview, you can build and store multiple workspaces.
Understand the timeline
The timeline of your video is the backbone of your digital video editing process. It’s called a timeline because the various pieces of video will be lined up horizontally. In a video editing software, the timeline is where you arrange your video clips and plan out all the modifications you want to do. As you work, you will see every single one of your video and audio clips, effects, and transitions sorted chronologically from beginning to end. All the fundamentals of video editing, including reordering, trimming, and enhancing your footage, are available. To preview how your adjustments will turn out, you can also play your project at any point in the timeline.
Add clips to timeline
When you have grasped the idea behind a timeline, the next step you need to follow is to add clips into your timeline. Before adding clips to your timeline, it is suggested that you label each clip. Although it does seem like a lot of work, it will be easier to locate all of the clips later on if you’re working on a large project. after the footages are gathered and named, add important clips in the beginning of the timeline to begin establishing the video’s overall structure and order.
Editing tools
Besides basic cutting, trimming and cropping, video editing software offer multiple professional editing tools which enhance the outlook your videos and make them 10x better. For example, instead of cutting up a clip into a bunch of small clips and unwanted gaps, use the Ripple Edit tool keep your timeline clean. This means when a clip is trimmed, it causes a ripple effect throughout the rest of your timeline, shifting all other clips into a new timeline position.
Similarly, when working with lengthy timelines, the Razor tool is also really helpful because you can select the clip you wish to cut by dragging your razor over it. So, the Razor cut is the tool to use if you need to make a lot of cuts in your videos quickly.
Syncing audio and video
You already know how annoying it can be if audio and video don’t sync while you’re listening to a podcast or viewing a YouTube vlog. The video editing software offer helpful manual and auto sync tools. It can be though a bit of hard work for beginners, but the ‘Lights, Camera, Action’ approach works best in syncing your audio with your video. To sync audio, you need to record audio first and then through matching the wavelengths displayed on your timeline, you can sync the audio with your video.
Edit download talking head/interview footage
Now with professional video editing tools, you can make ‘talking head videos’ if you want to share your expertise as a YouTube vlogger or if you want to do employee training. Talking head films are a fantastic way to stimulate the mind and the heart while increasing learner retention in this digital age.
Additionally, with other video editing tools, you can edit your interview footages and for that, you don’t have to mess with timestamps, cutting or splicing videos, or creating transitions between clips, you just edit the transcript of the video and the video edits itself to match.
Video properties: Scale, position, opacity
Any screen recording, camera-based video, imported video clips, and text picture clips can have their visuals altered using video properties. In video editing software, multiple video properties are offered which include scaling, positioning, rotating, changing the opacity, changing level of reflection and shadow. Additionally, Video properties also include editing the video as a whole or just altering a clip from the video.
Types of cuts: Straight, J-Cut, L-Cut etc
The different types of cuts used in the video editing process is an effective way to make the transitions in your video pop. Basically, these cuts join two or more clips together via audio. Professional editors call these cuts as ‘split edits. The most common cuts are called J-Cut and L-Cut. They help to mix the content’s flow and keep the on-screen narrative in motion. In essence, these edits are necessary to make your scenes feel warm and more authentic.
Part 2: Practical Video Editing Tips
Choose right software
The push start of video editing for beginners is based on one common step: know your software or workspace. Selecting the appropriate software for editing your video is the first step in streamlining your video editing process. Although all software often includes the tools that you need to make ordinary video edits, you could favor one over the others based on its usefulness, digital interface, and features. Instead of just using the latest and trending video editing software available, the key is to choose what functions for you and your editing style.
Use a fast computer
Slow rendering hinders video editing process and other commands given to a computer. From a practical point of view, it is recommended that irrespective of the model of the computer or version of your software; your computer must be efficient to help you to access your files and software easily and to speed up your export time. With a slow computer, you will definitely feel stuck and the video editing complications will haunt you in your dreams.
Watch video editing tutorials
None of us is a pro until we’ve practiced something enough to know everything about it. Video editing requires both; technical knowledge as well as your creativity, so it is better not to do try things on your own. A little guidance can surely help you get through the basics of the video editing process. There are tons of helpful tutorials for making excellent videos on YouTube, vlogs, and educational websites. The majority of tutorials you’ll discover online are free, making the readily available at the tip of your fingers.
Get the project files
Most of the beginner video editors prefer to use the same project files as the tutorial instructors when they are following along. Your work will exactly resemble the demo’s sample, which will aid in your understanding of the steps. For precisely this reason, many tutorials let you download the project files. You can repeat a process with your own video files once you’ve mastered this technique.
Edit for a story
Remembering your creative objective to create a wonderful story or message through your edited video is one of the most crucial lessons you should learn from this article. It is critically important that you make your film visually appealing and dramatically engaging to effectively evoke the right emotions and to communicate your desired message. Instead of merely adding a huge amount of effects to wow your audience, use your practical and technical skills to do this.
Maintain an efficient workflow
You’ll need to be systematic and organized in addition to having an editing software if you want to become a more competent editor. Putting your projects and files in folders that you may use repeatedly is one method to streamline your process. Besides this, organizing your projects and files into an external hard drive or USB is recommended in case of losing access to your intricately designed projects.
Utilize keyboard shortcuts
Keyboard shortcuts speed up the process of video editing and save you ample time. Different keyboard shortcuts are compatible with different video editing software; leaving a few which are mutual in every software. Don’t attempt to put all of these shortcuts into action at once. Pick a small number to begin with, and as they become instinctive, add more. You’ll progress more quickly if you use less mouse while editing your video.
Learn important terms
As a beginner, you may not want to feel a lump in the throat caused by the complicated dictionary of video editing software. There are some broad video editing terms that refer to videography as a whole as well as video editing terms specific to the process of editing footage. You must first learn what these terms means for example you may want to know what the terms like ‘aspect ratio, B-roll, bit rate, close up, compression, crop and compositing’ mean.
Color correct your clips
Do you own a rather boring video? Perhaps it’s a little too dull or the colors don’t stand out as much as they should? A crucial step is to modify the video’s color. This will assist in reducing the saturation and revive your video. Yet, there are some color correcting presets which can be easily accessed in different video editing apps.
Select good music
You ever saw an ad on YouTube or other social media platforms without an audio background. You may just want to skip it because the video, which may apparently be appealing, fails to strike you. Coordinating and complimenting your video with a music in the background is like cherry on top. It’s a huge plus to attract viewers’ attention. Though it is necessary that the music you choose must be relevant to your video file and should target the majority. So, choose good music to adorn your videos and trigger emotions in your target audience.
Add text and graphics
Some people are attracted more towards textual descriptions rather visual representation of content. It is crucial that considering the preferences of majority, you add significant details to your video which can target your audience in a multidimension. You might need to include more text in addition to the title, opening/closing billboards (for broadcasting), and film credits, depending on the type of film you’re making. However, you can make dazzling visuals using your editing program if you feel the urge to do so.
Export web versions
When your film is finished and is ready to be exported, you would have a natural urge to export it at the highest video resolution possible. If it’s going to be shown in theatres and on ultra-HD screens, this is unquestionably the best course of action. However, you should also export smaller, higher-quality versions for simpler viewing in the modern day where video projects are typically promoted online and on social media.
The objective of creating a file for the web is to keep its high quality while not making it too large for upload and online viewing. Don’t worry if you’re unsure of the export settings to utilize. Websites like Facebook, YouTube, and Vimeo all provide suggested export settings to assist you in correctly resizing your content.
Part 3: 10 Advanced Editing Tips for Professionals
We all definitely have experimented with video editing tools to some extent. But now, it is definitely time to become a pro. Don’t worry, the process isn’t as scary as we imagine it to be. This article is your best stop to grab some fine guidelines about how to become a video editor, in fact, a Pro video editor.
- Make titles stand out
You’re skilled in video editing, but do your titles seem a little…unfinished? Do those lower thirds strike you as being monotonous and boring? Is your typography competing for attention against your pictures? It appears that you would benefit from some basic title design advice, and lucky for you, we have some. Your title must be readable by majority and always choose your safe way in selecting texts for example, a sans-serif typeface is usually going to be a safe choice for video. You can also animate text to highlight it so that it is more captivating.
- Put video inside text or logos effects
Videos resonate with your brand and content if you add a specific logo or text effects to it. Almost all the video editors allow this featuring so that the identification of your work is maintained and copyright claim can be imposed if you see your content being copied or manipulated.
- Add light leaks, film burns and lens flares
Incorporating unique transitions into your monotonous videos can get you your viewer’s attention in a go. Lens flares, light leaks, and film burns can result in a unique look, but are not always easy to add naturally in-camera. Some of the best video editing software which allow access to adding lens flares, light leaks and film burns include: Free 4K Light Leaks – RocketStock, Motion Array Free Light Leaks, WZZLY Free Light Leaks, LIGHT LEAK FILM OVERLAY and many more.
- Add the vintage old film look
The quick Instagram-category of filters are common today but what makes your videos more natural and appealing is the addition of some presets which almost every video editor offers. These presets add a classic vintage old film look to your videos by manipulating color correction effects, framerate settings, overlays, and aspect ratio hacks. Some popular vintage old film effects are found in software namely VSDC, VEED, Adobe Premium Pro and many others in list.
- Add type-on effect
A type-on effect added to your videos comprehend your content more firmly. Simply by tabbing on ‘Add text effect’ in any video editor, you can add type-on effect to your videos and to add ravishing component to the overall structure of your video.
- Zoom in or out effect
The zoom-in or out feature (if available) in your video editing software can allow you to magnify any part of your video quickly and easily. Some of the best video editors featuring this specification include: Wondershare DemoCreator Zoom in Video Effect, DaVinci Resolve, Wondershare Filmora , Windows Movie Maker and Apowersoft Screen Recorder.
- Custom wipe on/off reveal effect
The wipe on/off reveal transition or effect is one of the earliest ways of transitioning from one scene to another. An object (usually a line) moves across the screen, revealing the next scene, while simultaneously removing (or wiping) the previous scene and when used properly, they can create a very powerful effect. It involves creative fading in and out transitions to give a more dramatic look.
- 4k, 8k, HD resolution
The latest video editing software offer the export your edited video in multiple formats, out of which 4k, 8k and HD resolution formats are preferable for majority of the professional video editors. It is necessary that even after the video is uploaded to a platform, the pixels do not decrease and the quality of the video is maintained. Although attractive to the viewers, the higher the resolution, the more the data with which you must deal. It is suggested that a standard or default resolution is chosen to play and replay the video in different computers.
- B-roll
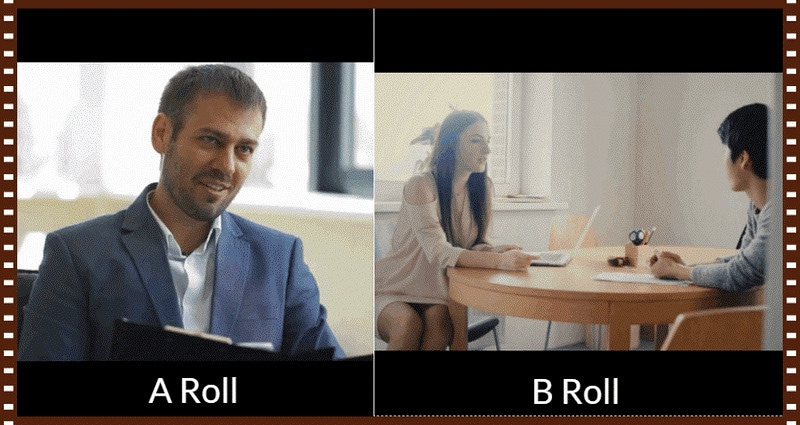
B-roll is secondary video that is frequently used as cutaway video to add context and visual interest to your story. The term is originated from the early days of Hollywood when there used to be an A-roll which was the primary video and B-roll which served as a secondary video footage. This can help you visualize your video from different dimensions, giving it a more realistic look for captivating viewers.
- Compression rate, bit depth, bit
The amount of data the camera records each second is referred to as bit rate. Every single second of a video is subject to significant data processing by cameras. The higher the quality of the video, the more is the bit rate. Bit depth refers to the number of colors your camera can read per pixel. Common bit depths are 8-bit and 10-bit, which enable a camera to read 256 million or 1.07 billion colors respectively. To upload your edited video, a compression is usually required to convert your resolution to internet quality so that the upload can be made simpler, without distorting the video resolution.
Whether your video is short or long, you may want to make it better and appealing. Video editing involves the manipulation of your videos through which the desired transformation is achieved and you can flaunt every move of your video in a more preferable way. Video editing involves cutting the video short, changing the speed, organizing the video in a seamless flow. In short, the better the cuts of your videos, the better your message/story is conveyed.
Part 1: Things to Learn Before Editing First Draft
You have shot your video and now you’re stuck on the post-processing of that video. Don’t worry! We got you covered through this article which will guide you through the different things which you must learn before editing the first draft of your video.
Start a video project
Your smartphone and digital camera can let you record multiple videos but what now? You head out to edit your first draft by choosing a suitable platform or software and then you can surely lay back and see the software doing wonders to your raw videos. By starting off with editing, you choose your video editing preferences and then you just let the video editing tools do the magic.
Get to know the video editing software workspace
Video editing software offer customizable workspaces for different editing tasks. The software workspace streamlines routine actions you take with clips, like editing clips, making DVD and Blu-ray menus, and sharing movies. By placing panels in the layout that best matches your working style, you can personalize your workspace. The additional panels adjust automatically to fit the window as you rearrange them. For various jobs, such as one for editing and one for preview, you can build and store multiple workspaces.
Understand the timeline
The timeline of your video is the backbone of your digital video editing process. It’s called a timeline because the various pieces of video will be lined up horizontally. In a video editing software, the timeline is where you arrange your video clips and plan out all the modifications you want to do. As you work, you will see every single one of your video and audio clips, effects, and transitions sorted chronologically from beginning to end. All the fundamentals of video editing, including reordering, trimming, and enhancing your footage, are available. To preview how your adjustments will turn out, you can also play your project at any point in the timeline.
Add clips to timeline
When you have grasped the idea behind a timeline, the next step you need to follow is to add clips into your timeline. Before adding clips to your timeline, it is suggested that you label each clip. Although it does seem like a lot of work, it will be easier to locate all of the clips later on if you’re working on a large project. after the footages are gathered and named, add important clips in the beginning of the timeline to begin establishing the video’s overall structure and order.
Editing tools
Besides basic cutting, trimming and cropping, video editing software offer multiple professional editing tools which enhance the outlook your videos and make them 10x better. For example, instead of cutting up a clip into a bunch of small clips and unwanted gaps, use the Ripple Edit tool keep your timeline clean. This means when a clip is trimmed, it causes a ripple effect throughout the rest of your timeline, shifting all other clips into a new timeline position.
Similarly, when working with lengthy timelines, the Razor tool is also really helpful because you can select the clip you wish to cut by dragging your razor over it. So, the Razor cut is the tool to use if you need to make a lot of cuts in your videos quickly.
Syncing audio and video
You already know how annoying it can be if audio and video don’t sync while you’re listening to a podcast or viewing a YouTube vlog. The video editing software offer helpful manual and auto sync tools. It can be though a bit of hard work for beginners, but the ‘Lights, Camera, Action’ approach works best in syncing your audio with your video. To sync audio, you need to record audio first and then through matching the wavelengths displayed on your timeline, you can sync the audio with your video.
Edit download talking head/interview footage
Now with professional video editing tools, you can make ‘talking head videos’ if you want to share your expertise as a YouTube vlogger or if you want to do employee training. Talking head films are a fantastic way to stimulate the mind and the heart while increasing learner retention in this digital age.
Additionally, with other video editing tools, you can edit your interview footages and for that, you don’t have to mess with timestamps, cutting or splicing videos, or creating transitions between clips, you just edit the transcript of the video and the video edits itself to match.
Video properties: Scale, position, opacity
Any screen recording, camera-based video, imported video clips, and text picture clips can have their visuals altered using video properties. In video editing software, multiple video properties are offered which include scaling, positioning, rotating, changing the opacity, changing level of reflection and shadow. Additionally, Video properties also include editing the video as a whole or just altering a clip from the video.
Types of cuts: Straight, J-Cut, L-Cut etc
The different types of cuts used in the video editing process is an effective way to make the transitions in your video pop. Basically, these cuts join two or more clips together via audio. Professional editors call these cuts as ‘split edits. The most common cuts are called J-Cut and L-Cut. They help to mix the content’s flow and keep the on-screen narrative in motion. In essence, these edits are necessary to make your scenes feel warm and more authentic.
Part 2: Practical Video Editing Tips
Choose right software
The push start of video editing for beginners is based on one common step: know your software or workspace. Selecting the appropriate software for editing your video is the first step in streamlining your video editing process. Although all software often includes the tools that you need to make ordinary video edits, you could favor one over the others based on its usefulness, digital interface, and features. Instead of just using the latest and trending video editing software available, the key is to choose what functions for you and your editing style.
Use a fast computer
Slow rendering hinders video editing process and other commands given to a computer. From a practical point of view, it is recommended that irrespective of the model of the computer or version of your software; your computer must be efficient to help you to access your files and software easily and to speed up your export time. With a slow computer, you will definitely feel stuck and the video editing complications will haunt you in your dreams.
Watch video editing tutorials
None of us is a pro until we’ve practiced something enough to know everything about it. Video editing requires both; technical knowledge as well as your creativity, so it is better not to do try things on your own. A little guidance can surely help you get through the basics of the video editing process. There are tons of helpful tutorials for making excellent videos on YouTube, vlogs, and educational websites. The majority of tutorials you’ll discover online are free, making the readily available at the tip of your fingers.
Get the project files
Most of the beginner video editors prefer to use the same project files as the tutorial instructors when they are following along. Your work will exactly resemble the demo’s sample, which will aid in your understanding of the steps. For precisely this reason, many tutorials let you download the project files. You can repeat a process with your own video files once you’ve mastered this technique.
Edit for a story
Remembering your creative objective to create a wonderful story or message through your edited video is one of the most crucial lessons you should learn from this article. It is critically important that you make your film visually appealing and dramatically engaging to effectively evoke the right emotions and to communicate your desired message. Instead of merely adding a huge amount of effects to wow your audience, use your practical and technical skills to do this.
Maintain an efficient workflow
You’ll need to be systematic and organized in addition to having an editing software if you want to become a more competent editor. Putting your projects and files in folders that you may use repeatedly is one method to streamline your process. Besides this, organizing your projects and files into an external hard drive or USB is recommended in case of losing access to your intricately designed projects.
Utilize keyboard shortcuts
Keyboard shortcuts speed up the process of video editing and save you ample time. Different keyboard shortcuts are compatible with different video editing software; leaving a few which are mutual in every software. Don’t attempt to put all of these shortcuts into action at once. Pick a small number to begin with, and as they become instinctive, add more. You’ll progress more quickly if you use less mouse while editing your video.
Learn important terms
As a beginner, you may not want to feel a lump in the throat caused by the complicated dictionary of video editing software. There are some broad video editing terms that refer to videography as a whole as well as video editing terms specific to the process of editing footage. You must first learn what these terms means for example you may want to know what the terms like ‘aspect ratio, B-roll, bit rate, close up, compression, crop and compositing’ mean.
Color correct your clips
Do you own a rather boring video? Perhaps it’s a little too dull or the colors don’t stand out as much as they should? A crucial step is to modify the video’s color. This will assist in reducing the saturation and revive your video. Yet, there are some color correcting presets which can be easily accessed in different video editing apps.
Select good music
You ever saw an ad on YouTube or other social media platforms without an audio background. You may just want to skip it because the video, which may apparently be appealing, fails to strike you. Coordinating and complimenting your video with a music in the background is like cherry on top. It’s a huge plus to attract viewers’ attention. Though it is necessary that the music you choose must be relevant to your video file and should target the majority. So, choose good music to adorn your videos and trigger emotions in your target audience.
Add text and graphics
Some people are attracted more towards textual descriptions rather visual representation of content. It is crucial that considering the preferences of majority, you add significant details to your video which can target your audience in a multidimension. You might need to include more text in addition to the title, opening/closing billboards (for broadcasting), and film credits, depending on the type of film you’re making. However, you can make dazzling visuals using your editing program if you feel the urge to do so.
Export web versions
When your film is finished and is ready to be exported, you would have a natural urge to export it at the highest video resolution possible. If it’s going to be shown in theatres and on ultra-HD screens, this is unquestionably the best course of action. However, you should also export smaller, higher-quality versions for simpler viewing in the modern day where video projects are typically promoted online and on social media.
The objective of creating a file for the web is to keep its high quality while not making it too large for upload and online viewing. Don’t worry if you’re unsure of the export settings to utilize. Websites like Facebook, YouTube, and Vimeo all provide suggested export settings to assist you in correctly resizing your content.
Part 3: 10 Advanced Editing Tips for Professionals
We all definitely have experimented with video editing tools to some extent. But now, it is definitely time to become a pro. Don’t worry, the process isn’t as scary as we imagine it to be. This article is your best stop to grab some fine guidelines about how to become a video editor, in fact, a Pro video editor.
- Make titles stand out
You’re skilled in video editing, but do your titles seem a little…unfinished? Do those lower thirds strike you as being monotonous and boring? Is your typography competing for attention against your pictures? It appears that you would benefit from some basic title design advice, and lucky for you, we have some. Your title must be readable by majority and always choose your safe way in selecting texts for example, a sans-serif typeface is usually going to be a safe choice for video. You can also animate text to highlight it so that it is more captivating.
- Put video inside text or logos effects
Videos resonate with your brand and content if you add a specific logo or text effects to it. Almost all the video editors allow this featuring so that the identification of your work is maintained and copyright claim can be imposed if you see your content being copied or manipulated.
- Add light leaks, film burns and lens flares
Incorporating unique transitions into your monotonous videos can get you your viewer’s attention in a go. Lens flares, light leaks, and film burns can result in a unique look, but are not always easy to add naturally in-camera. Some of the best video editing software which allow access to adding lens flares, light leaks and film burns include: Free 4K Light Leaks – RocketStock, Motion Array Free Light Leaks, WZZLY Free Light Leaks, LIGHT LEAK FILM OVERLAY and many more.
- Add the vintage old film look
The quick Instagram-category of filters are common today but what makes your videos more natural and appealing is the addition of some presets which almost every video editor offers. These presets add a classic vintage old film look to your videos by manipulating color correction effects, framerate settings, overlays, and aspect ratio hacks. Some popular vintage old film effects are found in software namely VSDC, VEED, Adobe Premium Pro and many others in list.
- Add type-on effect
A type-on effect added to your videos comprehend your content more firmly. Simply by tabbing on ‘Add text effect’ in any video editor, you can add type-on effect to your videos and to add ravishing component to the overall structure of your video.
- Zoom in or out effect
The zoom-in or out feature (if available) in your video editing software can allow you to magnify any part of your video quickly and easily. Some of the best video editors featuring this specification include: Wondershare DemoCreator Zoom in Video Effect, DaVinci Resolve, Wondershare Filmora , Windows Movie Maker and Apowersoft Screen Recorder.
- Custom wipe on/off reveal effect
The wipe on/off reveal transition or effect is one of the earliest ways of transitioning from one scene to another. An object (usually a line) moves across the screen, revealing the next scene, while simultaneously removing (or wiping) the previous scene and when used properly, they can create a very powerful effect. It involves creative fading in and out transitions to give a more dramatic look.
- 4k, 8k, HD resolution
The latest video editing software offer the export your edited video in multiple formats, out of which 4k, 8k and HD resolution formats are preferable for majority of the professional video editors. It is necessary that even after the video is uploaded to a platform, the pixels do not decrease and the quality of the video is maintained. Although attractive to the viewers, the higher the resolution, the more the data with which you must deal. It is suggested that a standard or default resolution is chosen to play and replay the video in different computers.
- B-roll
B-roll is secondary video that is frequently used as cutaway video to add context and visual interest to your story. The term is originated from the early days of Hollywood when there used to be an A-roll which was the primary video and B-roll which served as a secondary video footage. This can help you visualize your video from different dimensions, giving it a more realistic look for captivating viewers.
- Compression rate, bit depth, bit
The amount of data the camera records each second is referred to as bit rate. Every single second of a video is subject to significant data processing by cameras. The higher the quality of the video, the more is the bit rate. Bit depth refers to the number of colors your camera can read per pixel. Common bit depths are 8-bit and 10-bit, which enable a camera to read 256 million or 1.07 billion colors respectively. To upload your edited video, a compression is usually required to convert your resolution to internet quality so that the upload can be made simpler, without distorting the video resolution.
How to Add Text Animation Online
Before you can publish your recorded video to your viewers, you need to polish the video so that you can get everyone’s appreciation. This is where the magic of video editing comes into the scene. Editing your video is not just about trimming unnecessary parts and adding transitions and effects. The titles and texts you display on your video play a major role in your video content. In fact, you can create a video based on texts and titles only.
Instead of showing static texts, you should create animated texts and place them in the video wherever appropriate. You do not need to download a video editor on your computer or smartphone to add animated text to your video. You can make text animation online using an online text animation maker. We will illustrate the steps to create animated text with three different online editors.
Part 1. Use Biteable Animated Text
Biteable is a popular online platform where you can create amazing animated text video using Biteable text video maker. You can add animated text to your videos as well as photos. The user interface of Biteable is extremely easy for all users. You have to first create an account for free to get started. There are various templates available to create your animated text video from scratch. Here are the steps to use Biteable online text animation maker to create a video based on animated texts.
Step1Open your web browser and visit “biteable.com/animated/text”. Click on “Make a video with animated text” button.
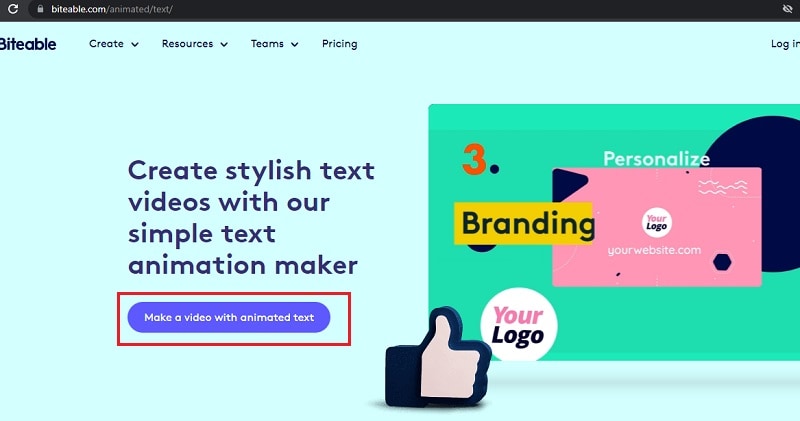
Step2Create an account by following the on-screen instructions. Click on New Video button and select “Create a video from scratch”.
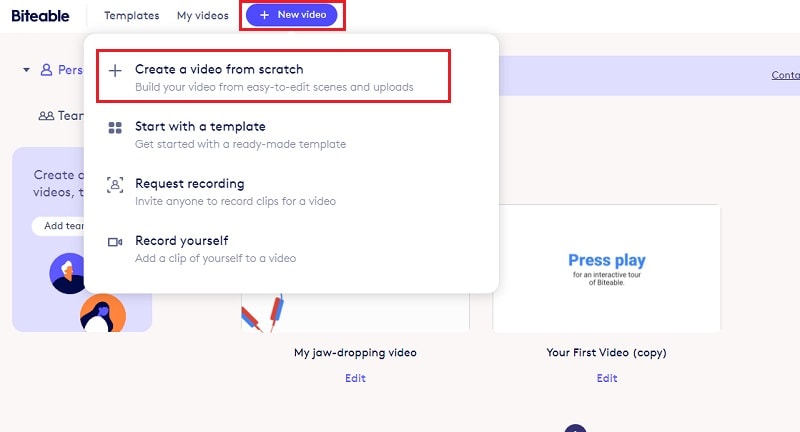
Step3Enter a name for the video and select a video shape as per your preference. Click on Continue button.
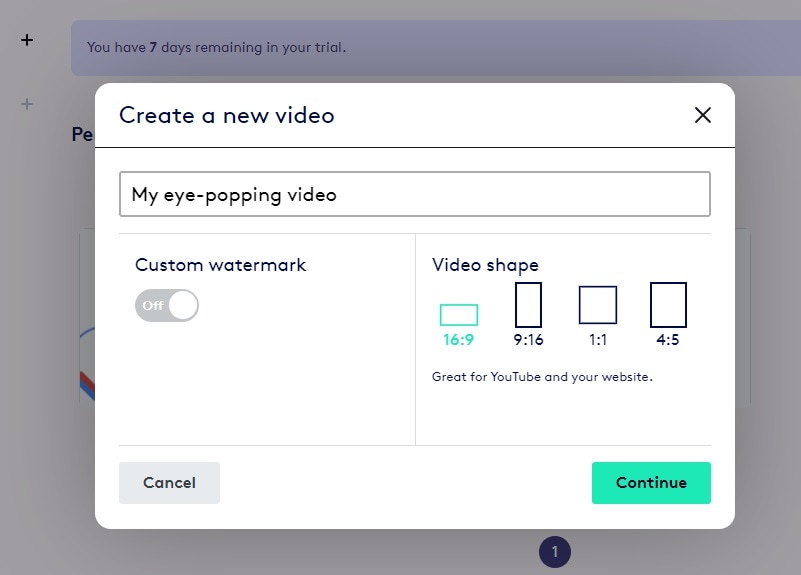
Step4Under Titles, select any template and it will be added to the Timeline. Similarly, you can add multiple titles templates, text templates, number templates and likewise. You will see them in the Timeline placed side by side. You can stretch their durations as per your requirements.
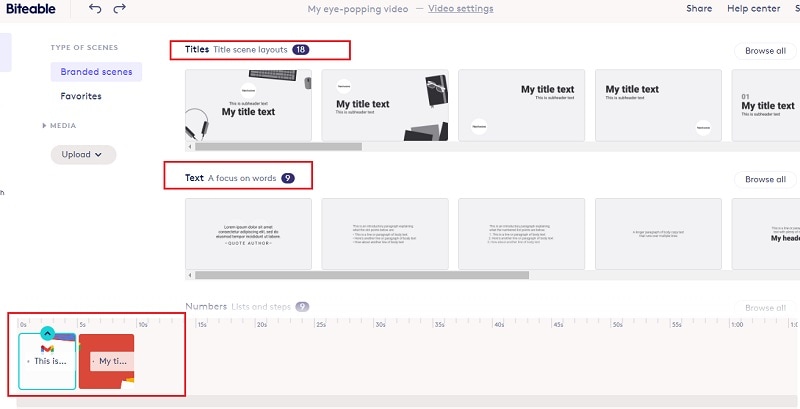
Step5Double-click on each template to edit the text in them and select the text animations as per your preference. Play the video and if you are satisfied, click on Publish button to save the video.
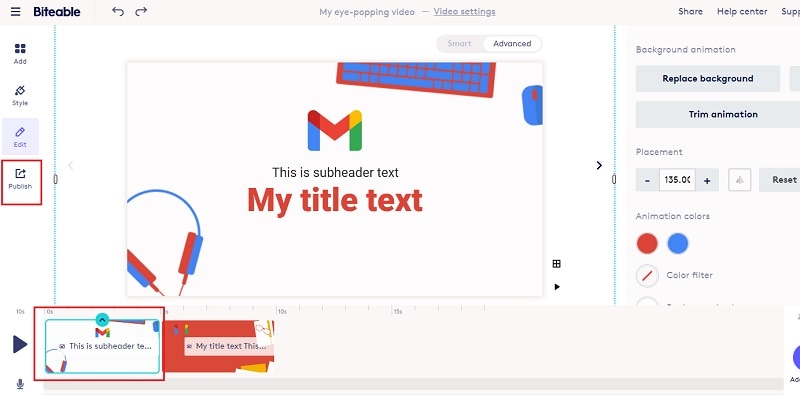
Part 2. Use Motionden Video Maker
Motionden is yet another powerful text animation maker where you can create free text animations instantly. There are over 1500 templates available to choose from in order to create text videos from scratch. You can choose video templates from any category as per the video theme you want. Besides, you can upload your video or photo and add texts and music as per your preference. Here are the steps to create animated text online using Motionden Video Maker.
Step1Open your web browser and visit “motionden.com/video-maker/text-animation”. Click on “Make a video for free” button.
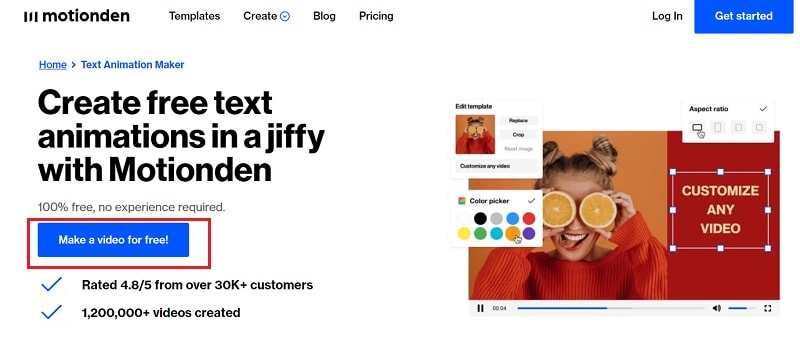
Step2Go to Create menu option and select any category of video templates. You can also check out the popular video templates and select anyone as per your preference.
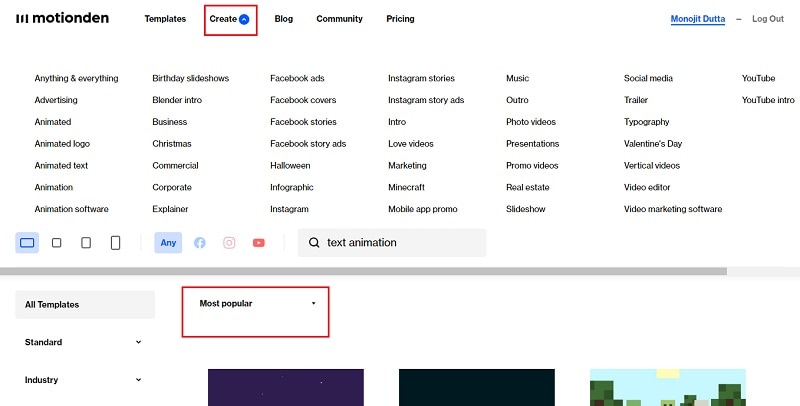
Step3For the selected category, you need to select the desired video template. Click on Edit Video and you can make changes to the template on the video editor as per your requirements. You need to sign up for free in order to continue and edit the template.
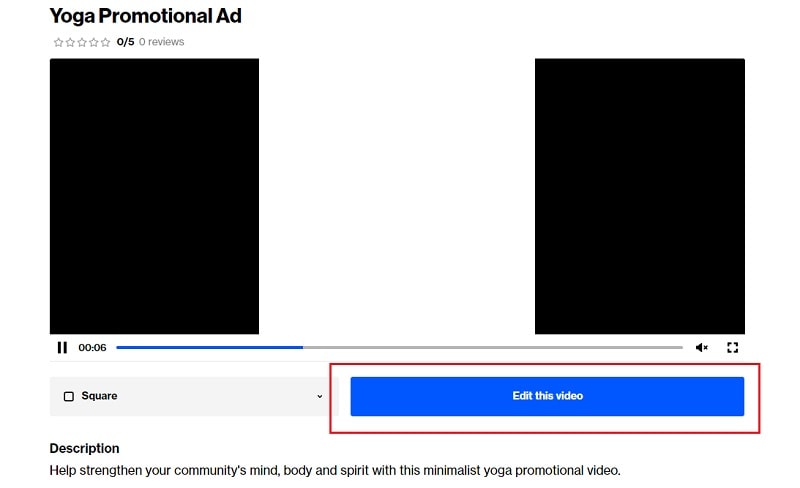
Step4Click on individual scenes and click on texts to customize them. Once the editing is done for each scene, click on Make Video button to build and save the text video.

Part 3. Use Flexclip Text Animation Tool
You can use Flexclip Text Animation Tool to create text video from scratch as well as add text to your recorded video. You should use Biteable and Motionden to create video with text effects only directly using video template while you should use Flexclip to edit your video and add text. You can add text effects to photos and videos and here are the steps to follow.
Step1Open web browser and visit “flexclip.com/features/text-animation.html”. Click on Make Animated Video button.
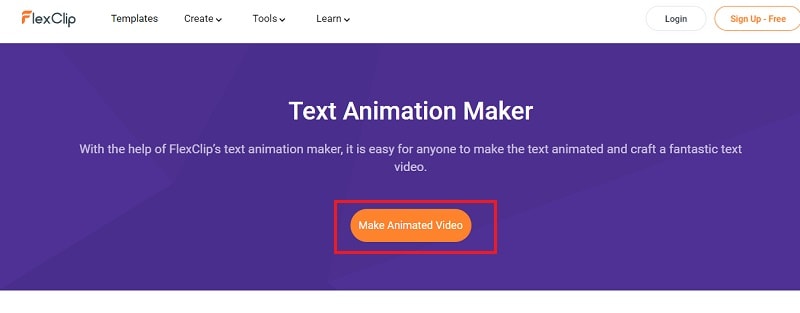
Step2You can choose from the available templates to create video with text from scratch. If you want to add text to your recorded video, go to Media tab. Click on Local Files button and upload your recorded video.

Step3Drag and drop the uploaded video into the Timeline. Thereafter, go to Text tab.
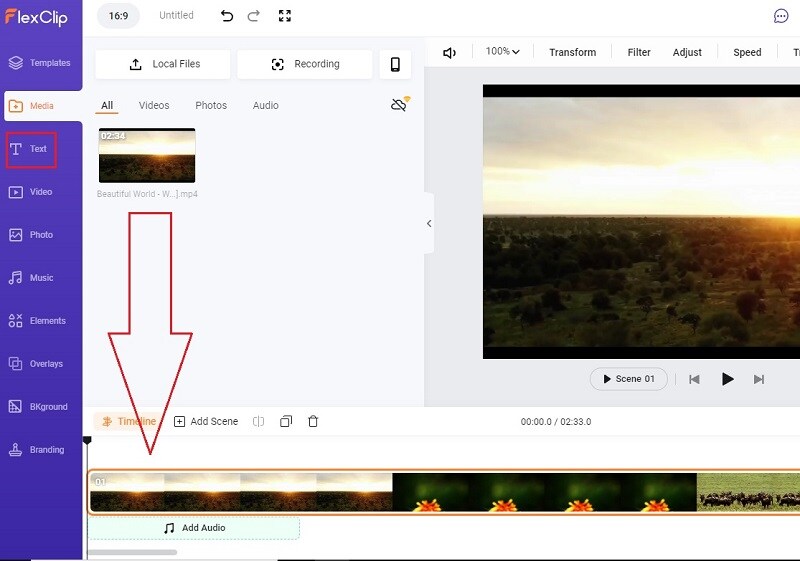
Step4You will see all the different text effects and animations. Place your mouse pointer to preview the animation. Drag and drop the select text template to the video on the Viewer. You can check the Timeline and stretch or compress the text layer as per your requirements.
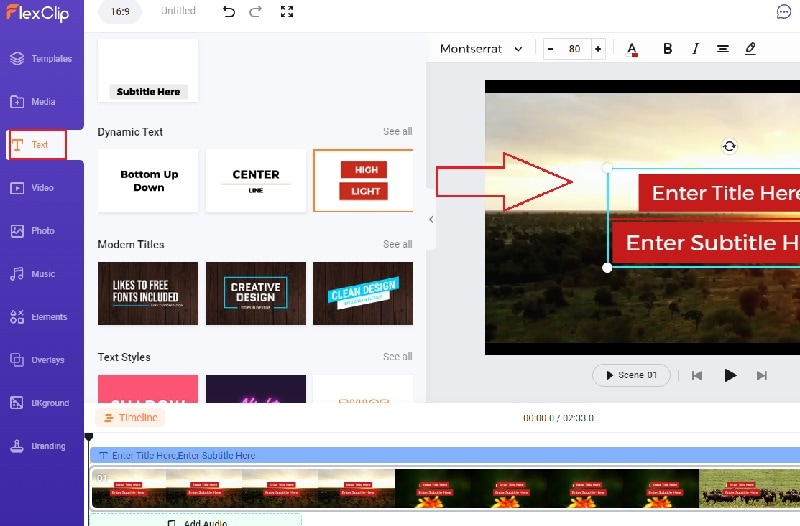
Step5Double-click on the text on Viewer window and customize the text as per your preference. Finally, click on Export button to save the edited video.
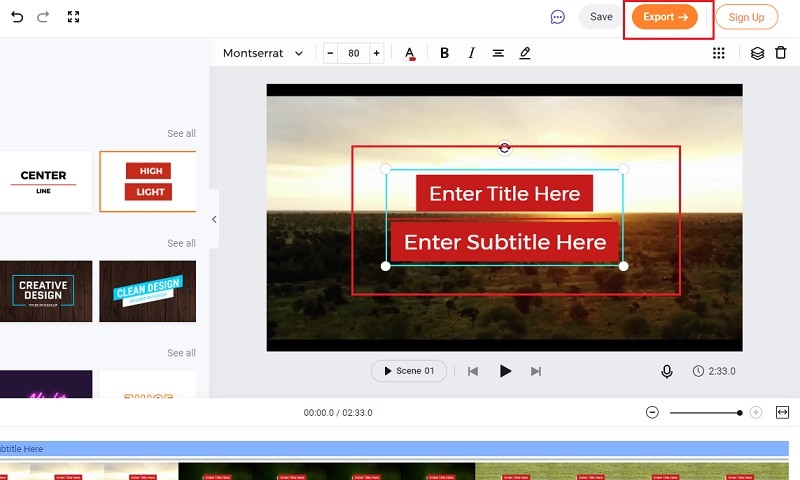
Conclusion
You can make video with animated text to make your presentation video eye-catching and attention-grabbing. We have mentioned three different online text animation makers that you can use to create animated text video from scratch by choosing different video templates. You can also edit your recorded video and add animated text wherever you want using Flexclip Text Animation Tool.
Free Download For Win 7 or later(64-bit)
Free Download For macOS 10.14 or later
Top 12 Best Freeze Frame Video Editing Examples
Top 12 Best Freeze Frame Video Editing Examples
An easy yet powerful editor
Numerous effects to choose from
Detailed tutorials provided by the official channel
Freeze frame effect in video editing is a skill that requires more practice to master. It adds drama and impact to movies. If you want to see more energy and acting in the videos you watch, then you should see more freeze-frame examples.
Sometimes we notice that a particular action stays on longer than necessary in a movie or video. The filmmakers use this skill to emphasize some intense moments further to sustain or pique your interest.
The freeze-frame video editing feature is a valuable skill that helps filmmakers make excellent movies. We have a list of the top 12 examples of freeze-frame effects in movies for you.
In this article
01 [What is freeze-frame video editing?](#Part 1)
02 [Ways to use freeze-frame video editing](#Part 2)
03 [What are the best freeze-frame video editing examples?](#Part 3)
Part 1 What Is Freeze Frame Video Editing?
Freeze frame video editing is a video editing technique that halts movement in a video for a given period. It converts moving pictures into still photography for some time. These video editor effects help filmmakers gear attention to the video editing or filmmaking process. In other words, they are self-reflexive.
Part 2 Ways to Use Freeze Frame in Video editing
Freeze frames can be helpful in 3 significant ways in video editing;
● At the beginning of a movie/video: Freeze-frame at the beginning helps you pique the audience’s interest and give them a sneak peek of what to expect in the movie. This freeze-frame technique was used in the film ‘Good Fellas’ to pique the audience’s interests.
● At the end: Using a freeze-frame allows the audience to choose or decide how the movie ends, whether it is obvious. The ‘breakfast club’ filmmakers use a freeze-frame at the end to emphasize the young boy.
● In the middle, subtly capturing intense moments like in the movie ‘The Departed.’
Part 3 What are the Best Freeze-Frame Video Editing Examples?
It takes a great deal of skill to employ freeze frame with the best results correctly. It might bore the audience or give another impression other than the intended when not done effectively.
But several movie directors have effectively used the freeze-frame video editing technique that wowed the audience.
Here is a list of the best freeze frame examples you would love;
01The Departed

In this 2006 movie, an undercover cop and a mole try to identify each other. Scorsese shows his editing prowess once again as he uses freeze-frame more subtly.
He changes the frame speed instead of stopping on one frame for a considerably longer time. This emphasizes some memorable moments that you may overlook on a first watch.
02Rocky III

The freeze-frame came in during the final match between Apollo and Balboa in this movie.
During the first 3 Rocky movies, Apollo and Balboa had an intriguing rivalry. At the end of Rocky III, the duo decides to engage in a friendly battle to determine who was the Lord in boxing.
The movie ends in a freeze-frame with Rocky swinging a right hook after Apollo imitates the bell, saying, “Ding Dong.”
The freeze-frame allows the audience to guess who the winner will be, thus a longer time to think of the movie after watching.
03400 Blows

In 400 Blows, the main character Antoine, a young Parisian, was hardly out of trouble.
In an attempt to end his troubles, he arrives at the beach after running away from a soccer match.
He is faced with either jumping right in or going back. The movie ends in a freeze-frame as no one finds out. The decision was left to the audience.
04Thelma and Louise

Thelma and Louise is about two (2) friends, Thelma Dickinson and Louise Sawyer. They both rise to defend themselves in a male-dominated world. In the film, Thelma and Louise are both running from the authorities. Louise killed a man who almost raped her friend, Thelma, thus the run. Things get out of control as they try to escape to Mexico, away from the authorities.
While on the run, they get ambushed by the police towards the grand canyon. The audience, at this point, is in suspense as to whether the ladies will survive or not.
Instead of surrendering, they drive right into the grand canyon, and the movie ends in a freeze-frame as they get caught hanging in the air while plunging into the canyon.
Regular movies might decide to give us all the details of the car plunging and exploding.
05The Wolf of Wall Street

Scorsese uses freeze-frame at the beginning of this movie, just as he did in Good Fellas. The freeze-frame effect here helps introduce the character and shows us the plot of the movie hence piquing the audience’s interests immediately.
06Out of Sight

This movie is another excellent example of freeze-frame video editing. What other way to pique the audience’s interest significantly and emphasize them than capture them in a freeze-frame.
07Death Proof

In this movie, the freeze-frame stays till the very end. It captures three women as they raise their hands-on celebration after successfully beating to death a psychopath who has been killing young women.
08Butch Cassidy and the Sundance Kid

This movie follows two train robbers, Butch Cassidy and Harry Longabaugh, known as the ‘Sundance Kid.’ After conducting several robberies, they go on the run as the authorities pursue them. After a gun battle with the authorities, they take cover inside a building, but they get surrounded with no other escape route.
Thus they decide to engage in the last fight instead of surrendering, and you see them in a gun battle with the authorities. The movie ends with them caught in a freeze-frame brandishing their guns at the officers instead of actual bloodshed. Though we all know they will get killed.
09Good Fellas

Initially, we mentioned that a freeze-frame could be of use at the beginning of a movie. Scorsese used this effectively in ‘Good Fellas’ to emphasize the movie plot.
In the opening scene, the characters Henry, Jimmy, and Tonny, played by Ray Liotta, Robert De Niro, and Joe Pesci, respectively, stop their car in the middle of the road.
They open their truck and see a man badly wounded and beaten, Tonny stabs him, and Jimmy shoots him. Henry then closes the truck and looks on in a freeze-frame before uttering the lines, “As far back as I can remember, I have always wanted to be a gangster.”
This lets us know right away what will happen in the movie. That person will get killed, and this is the mob territory.
10Harry Potter and the Prisoner of Azkaban

During a bad and weird year at Hogwarts, Harry potter experiences an extremely joyous moment when he goes anti-gravity on his new Firebolt broom.
He becomes overjoyed and his expression gets captured in a freeze-frame.
11The Breakfast Club

The Breakfast Club is an 80s movie showing teenagers trying to find their identity in life and overcoming the challenges of these years.
This is another freeze frame example where the filmmakers showed great expertise. The character John Bender is caught in a freeze-frame, punching the air to celebrate his victory.
He has just shared a kiss with the class sweetheart Claire. He and his classmates have also just won over the authoritative principal, Mr. Vernon.
12Pulp Fiction: Pumpkin and Honey Bunny.

Pulp Fiction is another movie such as ‘Good Fellas’ with its freeze-frame edition done at the movie’s beginning.
Pumpkin and Honey Bunny are shown at the movie’s beginning, sitting together in a diner. They argue whether it will be safer to rub a bank or a restaurant. In the end, they settle for a diner — the same one they are sitting in.
They kiss and pull out their guns, and the images freeze before the credits roll out.
The freeze-frame gives us a sneak peek of the violence to experience in the movie, and indeed, we were not disappointed.
For Win 7 or later (64-bit)
For macOS 10.12 or later
With Wondershare Filmora Video Editor ‘s speed ramping feature, you can adjust your video speed while controlling the keyframes to create fascinating cinematic videos.
Filmora is a video editing tool developed by wondershare and has exciting features. Filmora makes video editing easy and seamless yet produces professional results.
Filmora’s freeze-frame feature helps bring dynamism and energy to your videos using its keyframe feature.
● Ending Thoughts →
● It is an inexplicable feeling that we get every time we remember a movie we watched a long time ago, the ones whereas kept debating with our friends as to what would have happened.
● That is the purpose of adding freeze-frame effects at the end of videos. So you keep thinking about them.
● Now that you know this effect, you can figure out which freeze-frame video examples you still find very interesting. Also, do not hesitate to try out the new features of Filmora. It would bring out the best of your video to the audience.
Freeze frame effect in video editing is a skill that requires more practice to master. It adds drama and impact to movies. If you want to see more energy and acting in the videos you watch, then you should see more freeze-frame examples.
Sometimes we notice that a particular action stays on longer than necessary in a movie or video. The filmmakers use this skill to emphasize some intense moments further to sustain or pique your interest.
The freeze-frame video editing feature is a valuable skill that helps filmmakers make excellent movies. We have a list of the top 12 examples of freeze-frame effects in movies for you.
In this article
01 [What is freeze-frame video editing?](#Part 1)
02 [Ways to use freeze-frame video editing](#Part 2)
03 [What are the best freeze-frame video editing examples?](#Part 3)
Part 1 What Is Freeze Frame Video Editing?
Freeze frame video editing is a video editing technique that halts movement in a video for a given period. It converts moving pictures into still photography for some time. These video editor effects help filmmakers gear attention to the video editing or filmmaking process. In other words, they are self-reflexive.
Part 2 Ways to Use Freeze Frame in Video editing
Freeze frames can be helpful in 3 significant ways in video editing;
● At the beginning of a movie/video: Freeze-frame at the beginning helps you pique the audience’s interest and give them a sneak peek of what to expect in the movie. This freeze-frame technique was used in the film ‘Good Fellas’ to pique the audience’s interests.
● At the end: Using a freeze-frame allows the audience to choose or decide how the movie ends, whether it is obvious. The ‘breakfast club’ filmmakers use a freeze-frame at the end to emphasize the young boy.
● In the middle, subtly capturing intense moments like in the movie ‘The Departed.’
Part 3 What are the Best Freeze-Frame Video Editing Examples?
It takes a great deal of skill to employ freeze frame with the best results correctly. It might bore the audience or give another impression other than the intended when not done effectively.
But several movie directors have effectively used the freeze-frame video editing technique that wowed the audience.
Here is a list of the best freeze frame examples you would love;
01The Departed
In this 2006 movie, an undercover cop and a mole try to identify each other. Scorsese shows his editing prowess once again as he uses freeze-frame more subtly.
He changes the frame speed instead of stopping on one frame for a considerably longer time. This emphasizes some memorable moments that you may overlook on a first watch.
02Rocky III
The freeze-frame came in during the final match between Apollo and Balboa in this movie.
During the first 3 Rocky movies, Apollo and Balboa had an intriguing rivalry. At the end of Rocky III, the duo decides to engage in a friendly battle to determine who was the Lord in boxing.
The movie ends in a freeze-frame with Rocky swinging a right hook after Apollo imitates the bell, saying, “Ding Dong.”
The freeze-frame allows the audience to guess who the winner will be, thus a longer time to think of the movie after watching.
03400 Blows
In 400 Blows, the main character Antoine, a young Parisian, was hardly out of trouble.
In an attempt to end his troubles, he arrives at the beach after running away from a soccer match.
He is faced with either jumping right in or going back. The movie ends in a freeze-frame as no one finds out. The decision was left to the audience.
04Thelma and Louise
Thelma and Louise is about two (2) friends, Thelma Dickinson and Louise Sawyer. They both rise to defend themselves in a male-dominated world. In the film, Thelma and Louise are both running from the authorities. Louise killed a man who almost raped her friend, Thelma, thus the run. Things get out of control as they try to escape to Mexico, away from the authorities.
While on the run, they get ambushed by the police towards the grand canyon. The audience, at this point, is in suspense as to whether the ladies will survive or not.
Instead of surrendering, they drive right into the grand canyon, and the movie ends in a freeze-frame as they get caught hanging in the air while plunging into the canyon.
Regular movies might decide to give us all the details of the car plunging and exploding.
05The Wolf of Wall Street
Scorsese uses freeze-frame at the beginning of this movie, just as he did in Good Fellas. The freeze-frame effect here helps introduce the character and shows us the plot of the movie hence piquing the audience’s interests immediately.
06Out of Sight
This movie is another excellent example of freeze-frame video editing. What other way to pique the audience’s interest significantly and emphasize them than capture them in a freeze-frame.
07Death Proof
In this movie, the freeze-frame stays till the very end. It captures three women as they raise their hands-on celebration after successfully beating to death a psychopath who has been killing young women.
08Butch Cassidy and the Sundance Kid
This movie follows two train robbers, Butch Cassidy and Harry Longabaugh, known as the ‘Sundance Kid.’ After conducting several robberies, they go on the run as the authorities pursue them. After a gun battle with the authorities, they take cover inside a building, but they get surrounded with no other escape route.
Thus they decide to engage in the last fight instead of surrendering, and you see them in a gun battle with the authorities. The movie ends with them caught in a freeze-frame brandishing their guns at the officers instead of actual bloodshed. Though we all know they will get killed.
09Good Fellas
Initially, we mentioned that a freeze-frame could be of use at the beginning of a movie. Scorsese used this effectively in ‘Good Fellas’ to emphasize the movie plot.
In the opening scene, the characters Henry, Jimmy, and Tonny, played by Ray Liotta, Robert De Niro, and Joe Pesci, respectively, stop their car in the middle of the road.
They open their truck and see a man badly wounded and beaten, Tonny stabs him, and Jimmy shoots him. Henry then closes the truck and looks on in a freeze-frame before uttering the lines, “As far back as I can remember, I have always wanted to be a gangster.”
This lets us know right away what will happen in the movie. That person will get killed, and this is the mob territory.
10Harry Potter and the Prisoner of Azkaban
During a bad and weird year at Hogwarts, Harry potter experiences an extremely joyous moment when he goes anti-gravity on his new Firebolt broom.
He becomes overjoyed and his expression gets captured in a freeze-frame.
11The Breakfast Club
The Breakfast Club is an 80s movie showing teenagers trying to find their identity in life and overcoming the challenges of these years.
This is another freeze frame example where the filmmakers showed great expertise. The character John Bender is caught in a freeze-frame, punching the air to celebrate his victory.
He has just shared a kiss with the class sweetheart Claire. He and his classmates have also just won over the authoritative principal, Mr. Vernon.
12Pulp Fiction: Pumpkin and Honey Bunny.
Pulp Fiction is another movie such as ‘Good Fellas’ with its freeze-frame edition done at the movie’s beginning.
Pumpkin and Honey Bunny are shown at the movie’s beginning, sitting together in a diner. They argue whether it will be safer to rub a bank or a restaurant. In the end, they settle for a diner — the same one they are sitting in.
They kiss and pull out their guns, and the images freeze before the credits roll out.
The freeze-frame gives us a sneak peek of the violence to experience in the movie, and indeed, we were not disappointed.
For Win 7 or later (64-bit)
For macOS 10.12 or later
With Wondershare Filmora Video Editor ‘s speed ramping feature, you can adjust your video speed while controlling the keyframes to create fascinating cinematic videos.
Filmora is a video editing tool developed by wondershare and has exciting features. Filmora makes video editing easy and seamless yet produces professional results.
Filmora’s freeze-frame feature helps bring dynamism and energy to your videos using its keyframe feature.
● Ending Thoughts →
● It is an inexplicable feeling that we get every time we remember a movie we watched a long time ago, the ones whereas kept debating with our friends as to what would have happened.
● That is the purpose of adding freeze-frame effects at the end of videos. So you keep thinking about them.
● Now that you know this effect, you can figure out which freeze-frame video examples you still find very interesting. Also, do not hesitate to try out the new features of Filmora. It would bring out the best of your video to the audience.
Also read:
- This Article Presents the Guide to Using Magic Effects for Creating Competent Films with Step-by-Step Instructions and Filmoras Grow and Win Program Contest for 2024
- New 2024 Approved Using VN Editor To Add Luts for Video Editing
- In 2024, | Live Stream on YouTube Using Zoom
- How to Add Adjustment Layer in Premiere Pro
- Elevate Your TikTok Game with Catchy Captions! Explore the Trendiest 2024 TikTok Captions for Every Occasion and Style. Up Your TikTok Content with Style
- Updated This Article Talks in Detail About How to Export iMovie Video From iPhone, Mac, Etc. It Also Covers the Process of Using iMovie Alternative to Edit Videos on Mac. Check Out Now for 2024
- Updated How to Create Your Own LUTs for Your Video for 2024
- New In 2024, Learn to Splice Videos Together on iPhone
- In 2024, Adding Shake Effects to Your Video With Alight Motion
- Updated Level Up Videos By Applying Keyframe Like A Pro for 2024
- Slow-Motion Edits Are Pretty Mesmerizing, and Weve All Imagined Ourselves in One of Those Visually Appealing, Slowed-Down Movies. Well Teach You How to Make a Smooth Slo-Mo Video Using Twixtor in This Article. Stay Tuned Until the End
- Updated In 2024, Adobe After Effects Review
- 2024 Approved Finding Best GIF Websites Is Easy as Pie — Heres What You Should Know
- Updated 2024 Approved How To Add Fade In Windows Video Editor
- New 2024 Approved Creating a Slideshow Is Necessity of the Modern Time. Whether You Plan a Business Meeting or You Are Going to Do some Family Event with Slideshow Presentation, a Good Slideshow Maker Will Help You in This Direction
- Updated 5 Ways to Denoise a Video for 2024
- 2024 Approved What Is the Best Filmora Slideshow Templates? Experts Choice
- New 2024 Approved 10+ Royalty-Free 5 Second Countdown Footage HD & 4K Clips Included
- How to Make Dynamic Video Collages, In 2024
- Updated 2 Solutions to Crop a Video Using After Effects for 2024
- Updated In 2024, Do You Wish to Learn About some Tools to Slow Down a Video? Discover How to Slow Down Time Lapse on iPhone Throughout This Article
- Updated How to Upload Videos to Twitch? Heres a Guide for Beginner for 2024
- New Learn How to Use and Download KineMaster Templates Like a Pro. Discover Alternative Video Templates to Elevate Your Video Creation
- New In 2024, Complete Tutorial on After Effects Countdown Timer Adding
- This Article Aims to Show You How to Export Videos in Filmora for 2024
- Updated Easy Steps to Add Miniature Effect to Videos
- In 2024, Split a Clip in DaVinci Resolve Step by Step
- New Leading Applications to Create Fast Motion in iPhone for 2024
- Updated Top 20 Best Text To Speech Software Windows, Mac, Android, iPhone & Online
- New As an Online Marketer, It Is Important to Know the Algorithm of YouTube Platform. Ill Share You the History of Algorithm of YouTube and the New Changes in This Year for 2024
- New Easy Way to Combine Several Xvid Files Into One Windows, Mac,Android
- In 2024, 3 Actionable Ways to Create Countdown Animation for Videos
- How to Make Stunning Glitch Effect in Photoshop? Ultimate Guide
- New Motion Tracking Is the Process of Tracking the Movements of a Project in a Video. This Article Will Show You How to Apply Motion Tracking Effect Into Videos
- Updated Are You Searching the Internet for Top Wedding LUTs Premiere Pro? This Article Provides Suggestions on the Best LUT Color Presets for 2024
- New Wondering if You Can Make DIY Green Screen Video for Streaming? Learn the Easy Steps to Setup DIY Green Screen, Shoot the Video and Edit It Out to Add Green Screen Effects for 2024
- New In 2024, How to Turn Text Into a Podcast
- New Achieving GoPro Slow Motion with Quality An In-Depth Overview for 2024
- Updated How to Make a Time-Lapse Video Online for 2024
- New How To Zoom In On TikTok Videos?
- Updated 100 Workable How to Mask Track with Adobe Premiere Pro for 2024
- New You Can Make Stylish Chroma Key Text Effects After Reading This Article. Wondershare Filmora Will Fill the Crazy Colors in Your Handwritten Note or Words for 2024
- Updated Make Videos with Pictures and Music-10 Apps
- In 2024, Two Ways to Track My Boyfriends Lava Yuva 2 Pro without Him Knowing | Dr.fone
- Trouble with iPhone XR Swipe-Up? Try These 11 Solutions | Dr.fone
- In 2024, 2 Ways to Transfer Text Messages from Gionee F3 Pro to iPhone 15/14/13/12/11/X/8/ | Dr.fone
- Latest Guide on iPad 2/3 and iPhone 6 Plus iCloud Activation Lock Bypass
- Updated In 2024, Top 10 Banned Anime Around the World and Why
- What are Location Permissions Life360 On Xiaomi 13 Ultra? | Dr.fone
- Home Button Not Working on Samsung Galaxy S23 FE? Here Are Real Fixes | Dr.fone
- Online electronic signature for PDF v2.0 document
- For People Wanting to Mock GPS on Realme C67 4G Devices | Dr.fone
- Unlocking Made Easy The Best 10 Apps for Unlocking Your Samsung Galaxy A23 5G Device
- In 2024, How to Show Wi-Fi Password on Xiaomi Redmi Note 13 5G
- What To Do if Your Xiaomi Redmi Note 12 Pro 5G Auto Does Not Work | Dr.fone
- Complete Review & Guide to Techeligible FRP Bypass and More For Xiaomi Redmi Note 12 5G
- A Detailed VPNa Fake GPS Location Free Review On Nokia C210 | Dr.fone
- Title: Updated In 2024, When Struggling to Find a Suitable Game Recorder for Your PC, You Might Come Across Many Options. Explore the Best Game Recorders for Sharing Game Highlights
- Author: Morgan
- Created at : 2024-06-24 01:30:17
- Updated at : 2024-06-25 01:30:17
- Link: https://ai-video-editing.techidaily.com/updated-in-2024-when-struggling-to-find-a-suitable-game-recorder-for-your-pc-you-might-come-across-many-options-explore-the-best-game-recorders-for-sharing-/
- License: This work is licensed under CC BY-NC-SA 4.0.
