:max_bytes(150000):strip_icc():format(webp)/GettyImages-527847020-5b9edc17c9e77c0050ff9045.jpg)
Updated Learn How to Create a Unique Repeated Text Animation in the Filmora Video Editor. Follow the Simple Step-by-Step Instructions

Learn How to Create a Unique Repeated Text Animation in the Filmora Video Editor. Follow the Simple Step-by-Step Instructions
Preparation
What you need to prepare:
- A computer (Windows or macOS)
- Your video materials.
- Filmora video editor
Step 1
Download Filmora . Let it install and wait for it to run. Then, click on “New Project”. Now, you’re ready to edit!
Step 2
First, go to Titles and drag the Default Title to the Timeline.

Step 3
Now, double-click on the Default Title clip. Here, change its font to any bold font. Increase the text size to 120. Type in your text in the box. Scroll a bit down and change the Text Spacing to 8. Click OK.

Step 4
Take a Snapshot of this Default Title.

Step 5
Double-click on the Default Title clip once again. This time, click on its Advanced settings. Here, turn OFF Text Fill → turn ON Outline → change the Outline color to White → reduce Thickness to 1. Click OK. Now, take another Snapshot.

Step 6
Delete the Default Title clip from the Timeline. Now, drag the Outline snapshot that we just created to the Timeline. Open the Crop tool → change the Ratio to Custom → replace “1080” with “540”. Lastly, move the highlighted crop section to the top. Click OK.

Step 7
Double-click on the Snapshot to open its settings panel. Go to the Animation tab. Here, change the value of the Y-axis to “275”**.** Click OK. Now, take a Snapshot.

Step 8
Next, click on the Crop tool again and simply move the highlighted crop section to the bottom part of the screen. Click OK. Then, double-click on the snapshot clip in the Timeline and change the value of the Y-axis from “275” to “-275”**.** Click OK. Take a Snapshot again.
Step 9
Import a background image to My Media. Drag the background image to the Timeline. Double-click on it and drag the Scale bar until the background image covers the whole screen. Click OK. You should cut the background clip to make it 3 seconds long as well.

Step 10
Lock this track in the Timeline by pressing the highlighted button on the left. Then, go to “Track Manager” and add 6 new Tracks to the Timeline. Click OK.

Step 11
Drag the first Snapshot we made before to Track 6. Cut it so it’s 3 seconds long. Then, Lock the Track.

Step 12
Set the Playhead at the 15th frame on the Timeline. Then, drag the Upward Outline snapshot to this point. Double-click on it and change the Y-axis value to “**-4%**”. Then, reduce the Opacity to 0%. Now, move the Playhead 5 frames further. Next, increase the Opacity to 100% and increase the Y-axis value to around “105”. Don’t click OK yet.
Step 13
Move the Playhead to 1 minute and 5 seconds on the Timeline. Add a keyframe by clicking on the “+Add” button. Then, move the Playhead 5 frames forward. Here, change the Zoom Level to 25%.

Step 14
Double-click on the clip in Track 5. Drag the text like in the image below. Then, delete the part of the clip on the right side after 1 minute and 15 seconds.

Step 15
Hide the clips on Track 6 and Track 1 by clicking the “eye” icons next to them. Then, take a Snapshot. Now, drag this Snapshot right next to the clip on Track 5.

Step 16
Move the Playhead 3 frames forward from the starting point of the clip you just added. Unhide Track 6. Double-click on the clip on the right side of Track 5 and click on “+Add”. Move the Playhead 5 seconds forward and adjust the Upward Outline to fit the text.

Step 17
Move the Playhead 5 frames forward again. Drag the Y-axis value to the left until the outline clip overlaps the main text. Then, reduce the Opacity to 0%. Move the Playhead to 2 minutes and 10 seconds. Cut the Track and delete the clip on the right side. Lastly, Lock Track 5.

Step 18
Drag the Downward Outline snapshot to Track 4. Then, repeat the same process as in Step 16 and Step 17.
Step 19
Drag the Upward Outline snapshot to Track 3 at the 17th frame. Double-click on it and change the Opacity to 0%.

Step 20
Now, move 5 frames forward and increase the Opacity back to 100%. Then, drag the Y-axis value to the right until the screen looks like this.

Step 21
Move the Playhead to 1 minute and 5 seconds. Click on “+Add” to add a keyframe. Then, move the Playhead 5 frames forward. Double-click on the clip and stretch it from side to side to match something like this.

Step 22
Move the Playhead to 1 minute and 16 seconds. Split the clip and delete the part on the right side. Hide Track 4, 5, and 6. Then, take a Snapshot. Drag this Snapshot next to the clip on Track 3. Place the Playhead on 1 minute and 18 seconds. Then, unhide Track 4, 5, and 6.
Step 23
Double-click on the clip on the right side of Track 3. Add a keyframe by pressing “+Add”. Move the Playhead to 1 minute and 23 seconds. Now, resize the clip back to its original size by moving the rectangle left and right. Right now, it should look like this.

Step 24
Move the Playhead 5 frames forward. Drag the Y-axis value to the left until the screen looks like this.

Step 25
Move the Playhead 5 frames forward again. Drag the value of the Y-axis to the left until the screen looks like this. Then, change the Opacity to 0%. Finally, split the clip at 2 minutes and 10 seconds. Delete the part on the right side. Lock Track 3.

Step 26
Next, drag the Downward Snapshot on Track 2 and follow the same process as in Steps 19 through 25.
Step 27
Unhide the Background clip at the bottom of the Timeline. Then, Unlock Track 6. Split the clip on Track 6 at the 15th frame.

Step 28
Move the Playhead at the beginning of the Timeline. Click on the first part of the clip on Track 6. Add a keyframe. Drag the X-axis value to the right until the word disappears out of the screen. Like this. 👇Then, move the Playhead to the 6th frame and Reset the X-axis value to 0.0.

Step 29
Take the Playhead to 2 minutes and 10 seconds. Split it. Now, move the Playhead to 2 minutes and 19 seconds and add a keyframe. Lastly, take the Playhead to the very end of the clip and drag the text to the right side until it’s out of the screen once again.

Step 30
Go to the Effects tab. Select Glitch from the panel on the left. Then, apply “Glitch Dispersion” and “Glitch Stripe 2” to the clips at the start and at the end.

Step 31
Finally, Render the video to watch the final preview. And, you’re done! Congratulations on creating a repeated text animation in Filmora.

Summary
What you’ve learned:
- How to create text animations in Filmora
- Applying animation effects
- Make advanced edits on Titles in Filmora
- Hide and lock Tracks and Clips in Filmora
What you need to prepare:
- A computer (Windows or macOS)
- Your video materials.
- Filmora video editor
Step 1
Download Filmora . Let it install and wait for it to run. Then, click on “New Project”. Now, you’re ready to edit!
Step 2
First, go to Titles and drag the Default Title to the Timeline.

Step 3
Now, double-click on the Default Title clip. Here, change its font to any bold font. Increase the text size to 120. Type in your text in the box. Scroll a bit down and change the Text Spacing to 8. Click OK.

Step 4
Take a Snapshot of this Default Title.

Step 5
Double-click on the Default Title clip once again. This time, click on its Advanced settings. Here, turn OFF Text Fill → turn ON Outline → change the Outline color to White → reduce Thickness to 1. Click OK. Now, take another Snapshot.

Step 6
Delete the Default Title clip from the Timeline. Now, drag the Outline snapshot that we just created to the Timeline. Open the Crop tool → change the Ratio to Custom → replace “1080” with “540”. Lastly, move the highlighted crop section to the top. Click OK.

Step 7
Double-click on the Snapshot to open its settings panel. Go to the Animation tab. Here, change the value of the Y-axis to “275”**.** Click OK. Now, take a Snapshot.

Step 8
Next, click on the Crop tool again and simply move the highlighted crop section to the bottom part of the screen. Click OK. Then, double-click on the snapshot clip in the Timeline and change the value of the Y-axis from “275” to “-275”**.** Click OK. Take a Snapshot again.
Step 9
Import a background image to My Media. Drag the background image to the Timeline. Double-click on it and drag the Scale bar until the background image covers the whole screen. Click OK. You should cut the background clip to make it 3 seconds long as well.

Step 10
Lock this track in the Timeline by pressing the highlighted button on the left. Then, go to “Track Manager” and add 6 new Tracks to the Timeline. Click OK.

Step 11
Drag the first Snapshot we made before to Track 6. Cut it so it’s 3 seconds long. Then, Lock the Track.

Step 12
Set the Playhead at the 15th frame on the Timeline. Then, drag the Upward Outline snapshot to this point. Double-click on it and change the Y-axis value to “**-4%**”. Then, reduce the Opacity to 0%. Now, move the Playhead 5 frames further. Next, increase the Opacity to 100% and increase the Y-axis value to around “105”. Don’t click OK yet.
Step 13
Move the Playhead to 1 minute and 5 seconds on the Timeline. Add a keyframe by clicking on the “+Add” button. Then, move the Playhead 5 frames forward. Here, change the Zoom Level to 25%.

Step 14
Double-click on the clip in Track 5. Drag the text like in the image below. Then, delete the part of the clip on the right side after 1 minute and 15 seconds.

Step 15
Hide the clips on Track 6 and Track 1 by clicking the “eye” icons next to them. Then, take a Snapshot. Now, drag this Snapshot right next to the clip on Track 5.

Step 16
Move the Playhead 3 frames forward from the starting point of the clip you just added. Unhide Track 6. Double-click on the clip on the right side of Track 5 and click on “+Add”. Move the Playhead 5 seconds forward and adjust the Upward Outline to fit the text.

Step 17
Move the Playhead 5 frames forward again. Drag the Y-axis value to the left until the outline clip overlaps the main text. Then, reduce the Opacity to 0%. Move the Playhead to 2 minutes and 10 seconds. Cut the Track and delete the clip on the right side. Lastly, Lock Track 5.

Step 18
Drag the Downward Outline snapshot to Track 4. Then, repeat the same process as in Step 16 and Step 17.
Step 19
Drag the Upward Outline snapshot to Track 3 at the 17th frame. Double-click on it and change the Opacity to 0%.

Step 20
Now, move 5 frames forward and increase the Opacity back to 100%. Then, drag the Y-axis value to the right until the screen looks like this.

Step 21
Move the Playhead to 1 minute and 5 seconds. Click on “+Add” to add a keyframe. Then, move the Playhead 5 frames forward. Double-click on the clip and stretch it from side to side to match something like this.

Step 22
Move the Playhead to 1 minute and 16 seconds. Split the clip and delete the part on the right side. Hide Track 4, 5, and 6. Then, take a Snapshot. Drag this Snapshot next to the clip on Track 3. Place the Playhead on 1 minute and 18 seconds. Then, unhide Track 4, 5, and 6.
Step 23
Double-click on the clip on the right side of Track 3. Add a keyframe by pressing “+Add”. Move the Playhead to 1 minute and 23 seconds. Now, resize the clip back to its original size by moving the rectangle left and right. Right now, it should look like this.

Step 24
Move the Playhead 5 frames forward. Drag the Y-axis value to the left until the screen looks like this.

Step 25
Move the Playhead 5 frames forward again. Drag the value of the Y-axis to the left until the screen looks like this. Then, change the Opacity to 0%. Finally, split the clip at 2 minutes and 10 seconds. Delete the part on the right side. Lock Track 3.

Step 26
Next, drag the Downward Snapshot on Track 2 and follow the same process as in Steps 19 through 25.
Step 27
Unhide the Background clip at the bottom of the Timeline. Then, Unlock Track 6. Split the clip on Track 6 at the 15th frame.

Step 28
Move the Playhead at the beginning of the Timeline. Click on the first part of the clip on Track 6. Add a keyframe. Drag the X-axis value to the right until the word disappears out of the screen. Like this. 👇Then, move the Playhead to the 6th frame and Reset the X-axis value to 0.0.

Step 29
Take the Playhead to 2 minutes and 10 seconds. Split it. Now, move the Playhead to 2 minutes and 19 seconds and add a keyframe. Lastly, take the Playhead to the very end of the clip and drag the text to the right side until it’s out of the screen once again.

Step 30
Go to the Effects tab. Select Glitch from the panel on the left. Then, apply “Glitch Dispersion” and “Glitch Stripe 2” to the clips at the start and at the end.

Step 31
Finally, Render the video to watch the final preview. And, you’re done! Congratulations on creating a repeated text animation in Filmora.

Summary
What you’ve learned:
- How to create text animations in Filmora
- Applying animation effects
- Make advanced edits on Titles in Filmora
- Hide and lock Tracks and Clips in Filmora
What you need to prepare:
- A computer (Windows or macOS)
- Your video materials.
- Filmora video editor
Step 1
Download Filmora . Let it install and wait for it to run. Then, click on “New Project”. Now, you’re ready to edit!
Step 2
First, go to Titles and drag the Default Title to the Timeline.

Step 3
Now, double-click on the Default Title clip. Here, change its font to any bold font. Increase the text size to 120. Type in your text in the box. Scroll a bit down and change the Text Spacing to 8. Click OK.

Step 4
Take a Snapshot of this Default Title.

Step 5
Double-click on the Default Title clip once again. This time, click on its Advanced settings. Here, turn OFF Text Fill → turn ON Outline → change the Outline color to White → reduce Thickness to 1. Click OK. Now, take another Snapshot.

Step 6
Delete the Default Title clip from the Timeline. Now, drag the Outline snapshot that we just created to the Timeline. Open the Crop tool → change the Ratio to Custom → replace “1080” with “540”. Lastly, move the highlighted crop section to the top. Click OK.

Step 7
Double-click on the Snapshot to open its settings panel. Go to the Animation tab. Here, change the value of the Y-axis to “275”**.** Click OK. Now, take a Snapshot.

Step 8
Next, click on the Crop tool again and simply move the highlighted crop section to the bottom part of the screen. Click OK. Then, double-click on the snapshot clip in the Timeline and change the value of the Y-axis from “275” to “-275”**.** Click OK. Take a Snapshot again.
Step 9
Import a background image to My Media. Drag the background image to the Timeline. Double-click on it and drag the Scale bar until the background image covers the whole screen. Click OK. You should cut the background clip to make it 3 seconds long as well.

Step 10
Lock this track in the Timeline by pressing the highlighted button on the left. Then, go to “Track Manager” and add 6 new Tracks to the Timeline. Click OK.

Step 11
Drag the first Snapshot we made before to Track 6. Cut it so it’s 3 seconds long. Then, Lock the Track.

Step 12
Set the Playhead at the 15th frame on the Timeline. Then, drag the Upward Outline snapshot to this point. Double-click on it and change the Y-axis value to “**-4%**”. Then, reduce the Opacity to 0%. Now, move the Playhead 5 frames further. Next, increase the Opacity to 100% and increase the Y-axis value to around “105”. Don’t click OK yet.
Step 13
Move the Playhead to 1 minute and 5 seconds on the Timeline. Add a keyframe by clicking on the “+Add” button. Then, move the Playhead 5 frames forward. Here, change the Zoom Level to 25%.

Step 14
Double-click on the clip in Track 5. Drag the text like in the image below. Then, delete the part of the clip on the right side after 1 minute and 15 seconds.

Step 15
Hide the clips on Track 6 and Track 1 by clicking the “eye” icons next to them. Then, take a Snapshot. Now, drag this Snapshot right next to the clip on Track 5.

Step 16
Move the Playhead 3 frames forward from the starting point of the clip you just added. Unhide Track 6. Double-click on the clip on the right side of Track 5 and click on “+Add”. Move the Playhead 5 seconds forward and adjust the Upward Outline to fit the text.

Step 17
Move the Playhead 5 frames forward again. Drag the Y-axis value to the left until the outline clip overlaps the main text. Then, reduce the Opacity to 0%. Move the Playhead to 2 minutes and 10 seconds. Cut the Track and delete the clip on the right side. Lastly, Lock Track 5.

Step 18
Drag the Downward Outline snapshot to Track 4. Then, repeat the same process as in Step 16 and Step 17.
Step 19
Drag the Upward Outline snapshot to Track 3 at the 17th frame. Double-click on it and change the Opacity to 0%.

Step 20
Now, move 5 frames forward and increase the Opacity back to 100%. Then, drag the Y-axis value to the right until the screen looks like this.

Step 21
Move the Playhead to 1 minute and 5 seconds. Click on “+Add” to add a keyframe. Then, move the Playhead 5 frames forward. Double-click on the clip and stretch it from side to side to match something like this.

Step 22
Move the Playhead to 1 minute and 16 seconds. Split the clip and delete the part on the right side. Hide Track 4, 5, and 6. Then, take a Snapshot. Drag this Snapshot next to the clip on Track 3. Place the Playhead on 1 minute and 18 seconds. Then, unhide Track 4, 5, and 6.
Step 23
Double-click on the clip on the right side of Track 3. Add a keyframe by pressing “+Add”. Move the Playhead to 1 minute and 23 seconds. Now, resize the clip back to its original size by moving the rectangle left and right. Right now, it should look like this.

Step 24
Move the Playhead 5 frames forward. Drag the Y-axis value to the left until the screen looks like this.

Step 25
Move the Playhead 5 frames forward again. Drag the value of the Y-axis to the left until the screen looks like this. Then, change the Opacity to 0%. Finally, split the clip at 2 minutes and 10 seconds. Delete the part on the right side. Lock Track 3.

Step 26
Next, drag the Downward Snapshot on Track 2 and follow the same process as in Steps 19 through 25.
Step 27
Unhide the Background clip at the bottom of the Timeline. Then, Unlock Track 6. Split the clip on Track 6 at the 15th frame.

Step 28
Move the Playhead at the beginning of the Timeline. Click on the first part of the clip on Track 6. Add a keyframe. Drag the X-axis value to the right until the word disappears out of the screen. Like this. 👇Then, move the Playhead to the 6th frame and Reset the X-axis value to 0.0.

Step 29
Take the Playhead to 2 minutes and 10 seconds. Split it. Now, move the Playhead to 2 minutes and 19 seconds and add a keyframe. Lastly, take the Playhead to the very end of the clip and drag the text to the right side until it’s out of the screen once again.

Step 30
Go to the Effects tab. Select Glitch from the panel on the left. Then, apply “Glitch Dispersion” and “Glitch Stripe 2” to the clips at the start and at the end.

Step 31
Finally, Render the video to watch the final preview. And, you’re done! Congratulations on creating a repeated text animation in Filmora.

Summary
What you’ve learned:
- How to create text animations in Filmora
- Applying animation effects
- Make advanced edits on Titles in Filmora
- Hide and lock Tracks and Clips in Filmora
What you need to prepare:
- A computer (Windows or macOS)
- Your video materials.
- Filmora video editor
Step 1
Download Filmora . Let it install and wait for it to run. Then, click on “New Project”. Now, you’re ready to edit!
Step 2
First, go to Titles and drag the Default Title to the Timeline.

Step 3
Now, double-click on the Default Title clip. Here, change its font to any bold font. Increase the text size to 120. Type in your text in the box. Scroll a bit down and change the Text Spacing to 8. Click OK.

Step 4
Take a Snapshot of this Default Title.

Step 5
Double-click on the Default Title clip once again. This time, click on its Advanced settings. Here, turn OFF Text Fill → turn ON Outline → change the Outline color to White → reduce Thickness to 1. Click OK. Now, take another Snapshot.

Step 6
Delete the Default Title clip from the Timeline. Now, drag the Outline snapshot that we just created to the Timeline. Open the Crop tool → change the Ratio to Custom → replace “1080” with “540”. Lastly, move the highlighted crop section to the top. Click OK.

Step 7
Double-click on the Snapshot to open its settings panel. Go to the Animation tab. Here, change the value of the Y-axis to “275”**.** Click OK. Now, take a Snapshot.

Step 8
Next, click on the Crop tool again and simply move the highlighted crop section to the bottom part of the screen. Click OK. Then, double-click on the snapshot clip in the Timeline and change the value of the Y-axis from “275” to “-275”**.** Click OK. Take a Snapshot again.
Step 9
Import a background image to My Media. Drag the background image to the Timeline. Double-click on it and drag the Scale bar until the background image covers the whole screen. Click OK. You should cut the background clip to make it 3 seconds long as well.

Step 10
Lock this track in the Timeline by pressing the highlighted button on the left. Then, go to “Track Manager” and add 6 new Tracks to the Timeline. Click OK.

Step 11
Drag the first Snapshot we made before to Track 6. Cut it so it’s 3 seconds long. Then, Lock the Track.

Step 12
Set the Playhead at the 15th frame on the Timeline. Then, drag the Upward Outline snapshot to this point. Double-click on it and change the Y-axis value to “**-4%**”. Then, reduce the Opacity to 0%. Now, move the Playhead 5 frames further. Next, increase the Opacity to 100% and increase the Y-axis value to around “105”. Don’t click OK yet.
Step 13
Move the Playhead to 1 minute and 5 seconds on the Timeline. Add a keyframe by clicking on the “+Add” button. Then, move the Playhead 5 frames forward. Here, change the Zoom Level to 25%.

Step 14
Double-click on the clip in Track 5. Drag the text like in the image below. Then, delete the part of the clip on the right side after 1 minute and 15 seconds.

Step 15
Hide the clips on Track 6 and Track 1 by clicking the “eye” icons next to them. Then, take a Snapshot. Now, drag this Snapshot right next to the clip on Track 5.

Step 16
Move the Playhead 3 frames forward from the starting point of the clip you just added. Unhide Track 6. Double-click on the clip on the right side of Track 5 and click on “+Add”. Move the Playhead 5 seconds forward and adjust the Upward Outline to fit the text.

Step 17
Move the Playhead 5 frames forward again. Drag the Y-axis value to the left until the outline clip overlaps the main text. Then, reduce the Opacity to 0%. Move the Playhead to 2 minutes and 10 seconds. Cut the Track and delete the clip on the right side. Lastly, Lock Track 5.

Step 18
Drag the Downward Outline snapshot to Track 4. Then, repeat the same process as in Step 16 and Step 17.
Step 19
Drag the Upward Outline snapshot to Track 3 at the 17th frame. Double-click on it and change the Opacity to 0%.

Step 20
Now, move 5 frames forward and increase the Opacity back to 100%. Then, drag the Y-axis value to the right until the screen looks like this.

Step 21
Move the Playhead to 1 minute and 5 seconds. Click on “+Add” to add a keyframe. Then, move the Playhead 5 frames forward. Double-click on the clip and stretch it from side to side to match something like this.

Step 22
Move the Playhead to 1 minute and 16 seconds. Split the clip and delete the part on the right side. Hide Track 4, 5, and 6. Then, take a Snapshot. Drag this Snapshot next to the clip on Track 3. Place the Playhead on 1 minute and 18 seconds. Then, unhide Track 4, 5, and 6.
Step 23
Double-click on the clip on the right side of Track 3. Add a keyframe by pressing “+Add”. Move the Playhead to 1 minute and 23 seconds. Now, resize the clip back to its original size by moving the rectangle left and right. Right now, it should look like this.

Step 24
Move the Playhead 5 frames forward. Drag the Y-axis value to the left until the screen looks like this.

Step 25
Move the Playhead 5 frames forward again. Drag the value of the Y-axis to the left until the screen looks like this. Then, change the Opacity to 0%. Finally, split the clip at 2 minutes and 10 seconds. Delete the part on the right side. Lock Track 3.

Step 26
Next, drag the Downward Snapshot on Track 2 and follow the same process as in Steps 19 through 25.
Step 27
Unhide the Background clip at the bottom of the Timeline. Then, Unlock Track 6. Split the clip on Track 6 at the 15th frame.

Step 28
Move the Playhead at the beginning of the Timeline. Click on the first part of the clip on Track 6. Add a keyframe. Drag the X-axis value to the right until the word disappears out of the screen. Like this. 👇Then, move the Playhead to the 6th frame and Reset the X-axis value to 0.0.

Step 29
Take the Playhead to 2 minutes and 10 seconds. Split it. Now, move the Playhead to 2 minutes and 19 seconds and add a keyframe. Lastly, take the Playhead to the very end of the clip and drag the text to the right side until it’s out of the screen once again.

Step 30
Go to the Effects tab. Select Glitch from the panel on the left. Then, apply “Glitch Dispersion” and “Glitch Stripe 2” to the clips at the start and at the end.

Step 31
Finally, Render the video to watch the final preview. And, you’re done! Congratulations on creating a repeated text animation in Filmora.

Summary
What you’ve learned:
- How to create text animations in Filmora
- Applying animation effects
- Make advanced edits on Titles in Filmora
- Hide and lock Tracks and Clips in Filmora
Best Filmic Pro LUTs For Video Editing
Video editing involves rearranging and upscaling video content for improved quality. Meanwhile, video editing can consume a lot of time and resources. For video editing, you need to have expertise in using the software. The ideal solution is using Filmic Tone LUTs for free download. These LUTs can extend the quality of your videos in a hassle-free environment. This article will discuss important Filmic Pro LUTs.
- Part 2: Discussing Some Practical Uses of LUTs in Video Editing
- Part 3: Best Filmic Pro LUTs To Use
- Part 4: Getting To Know Wondershare Filmora and Its Use in LUTs
Part 1: How Can LUTs Benefit Video Editors?
Video editors are professionals that are tasked to edit and customize videos. Their main objective is to enhance video quality with necessary manual upscaling. Making things more accessible, find how LUTs can benefit these professionals:
- Increased Efficiency: With LUTs, video editors can optimize their workflows with ready-made filters. So they don’t need to spend hours on video editing. By applying filters, video colors are upgraded.
- Consistent Grading: During manual editing, multiple frames are left out during color correction. With LUTs, the colors are applied in a consistent way in all frames. This way, you will experience effective color enhancement.
- Professional Quality: The quality of applied LUTs is amazing. After all, LUTs provide dedicated filter presets to optimize color saturation and brightness. With professional color grading, experience a top-quality video.
- Creative Colors: LUTs are ideal for adding premium yet stylish color schemas into videos. The color gradients are creative as well as sleek and luxurious. You will not regret using creative color presets in LUTs.
Part 2: Discussing Some Practical Uses of LUTs in Video Editing
LUTs, also known as look-up tables, are unique video editing tools. They use mathematical instructions to map input color values into output color values. This way, consistent color gradings are applied across video content. In video editing, LUTs can be used for a variety of practical uses:
1. Special Effects
By using LUTs, you can add special effects to your videos. This includes different effects, including dreamy, moody, or surreal. The videos will look more professional and enchanting with attractive looks. So you don’t need to pursue video editing in a deep way.
2. HDR Display
With LUTs, users can add a dynamic touch of HDR display to the videos. After all, they can convert SDR footage to HDR footage using special filter presets. This allows for different color contrasts within the video.
3. Color Enhancement
Enhancing color schemas is easier and more convenient using LUTs. These editing tools can adjust color contrast, balance, and saturation. Hence, your video is upscaled with an improved color display for vintage or cinematic looks.
4. Match Footages
Different cameras produce videos with diverse quality, which is unsatisfying. Through LUTs, you can match the color of your footage with a consistent appearance. The color schemes and tone contrasts are optimized in a collective way.
Part 3: Best Filmic Pro LUTs To Use
Using LUTs in video editing can save a lot of time. For video editors, LUTs can be revolutionizing because of less effort with amazing output. In general, using Filmic Pro LUTs is in great demand. Let’s discover some of them:
1. Filmic LUT Support
Bring Filmic looks to your videos using this Filmic Pro LUTs download pack. There are up to 7 different LUT preset filters that you can import. With Filmic touch, you can add unique cinematic looks to your visual content. LUT Quick Action Modal (QAM) is also introduced to switch into preview mode or apply LUT to the video.

2. Richard Lackey FREE Filmic Pro LOGv2 LUT for FilmConvert
Add a cinematic touch to your videos with this Filmic Tone LUTs free download pack. This special LUTs pack lets you add attractive film interaction to your video. The provided color schemes are exceptional because they offer unique color presentations. Meanwhile, the LUT equips solutions to correct imbalances and noise.

3. Free LUT Filmic
Make your photo or video more special with this Free LUT Filmic pack. Meanwhile, there are special effects for transforming color schemas within visual content. So, if you have film or photography, the provided LUT filters are amazing. This way, you can spark creativity like a professional editor. The video content will become more appealing.

4. Film Slog3 And Standard LUTs
Enhance your visual creativity by blending premium looks into your videos. After all, this Filmic Pro LUT download pack has fantastic color upscaling solutions. It contains a collection of 20 Film REC 709 LUTs and 20 Film Slog3 LUTs to adapt. This way, you can improve the color gradients of your social media videos and presentations.
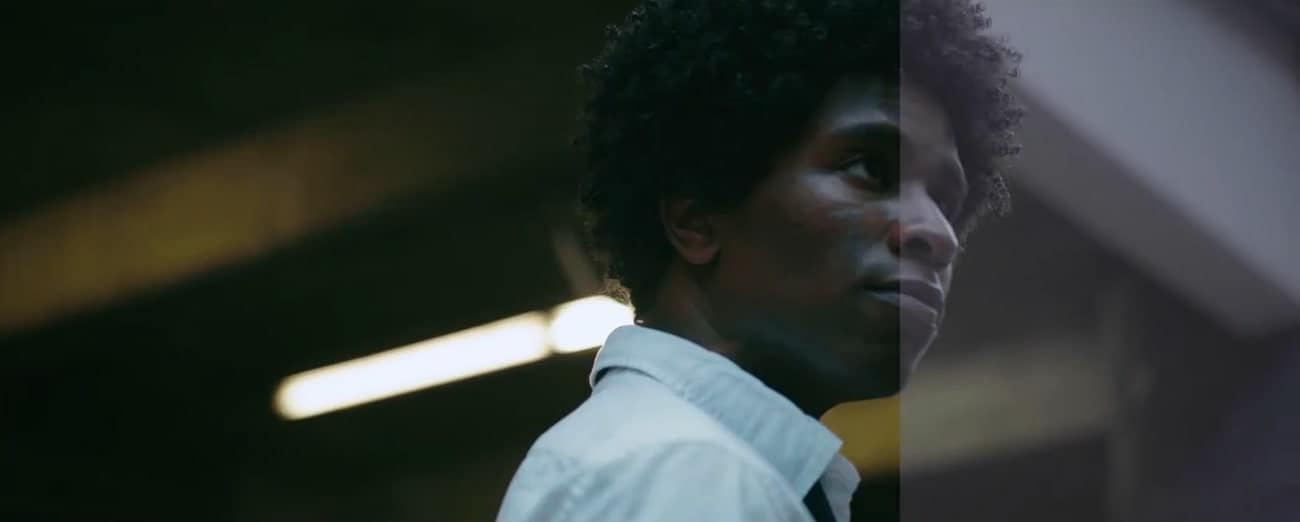
5.FILMIC PRO SUPER-BUNDLE LUTS PACK
Enhancing video quality is now easier with this color-grading Filmic Pro pack. This is a specialized LUTs bundle that incorporates 50 cinematic filter presets. The available LUTs can generally optimize color gradients with the right contrasts. So if you have flat or log footage, using this LUT can be ideal. Meanwhile, the LUT is designed explicitly for mobile-captured videos.

6.Filmic Tone LUTs
Upgrade your preset library with this amazing Filmic Tone LUTs pack. While featuring 10 preset filters, this LUTs pack provides an aesthetic dark, moody tone. LUTs are easily applied to your videos with the right color upscaling. You will also receive a VLOG - Rec709 LUT and Sony SLOG2/3 - Rec709 LUT. The supported file format is .cube.

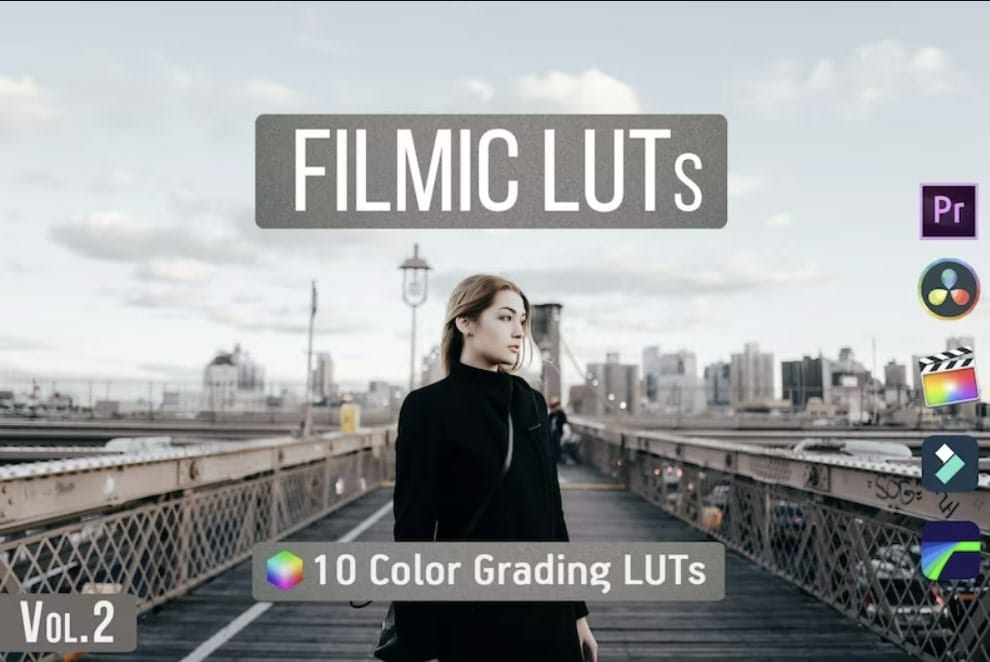
7. 7. Filmic LUTs Vol.2
Working with LUTs has never been this easy. So when you use Filmic LUTs Vol.2, you will get 10 creative LUT preset filters. Integrate these LUTs into your visual content to upscale their quality. Meanwhile, the LUTs can be used on different editing platforms. In most instances, you will get upscaling results within seconds. There is also an option to adjust intensity, contrast, and more.
8. 50 Cinematic Retro Film LUTs Pack
Add a retro touch to your videos with this Filmic Pro LUT download pack. After all, there are 50 retro-styled Filmic LUT presets. When you apply these LUTs to your video, special color grading is applied. Every specific LUT has a unique color schema with a styled theme. In this LUTs pack, you will also receive a PDF guide with step-by-step instructions.

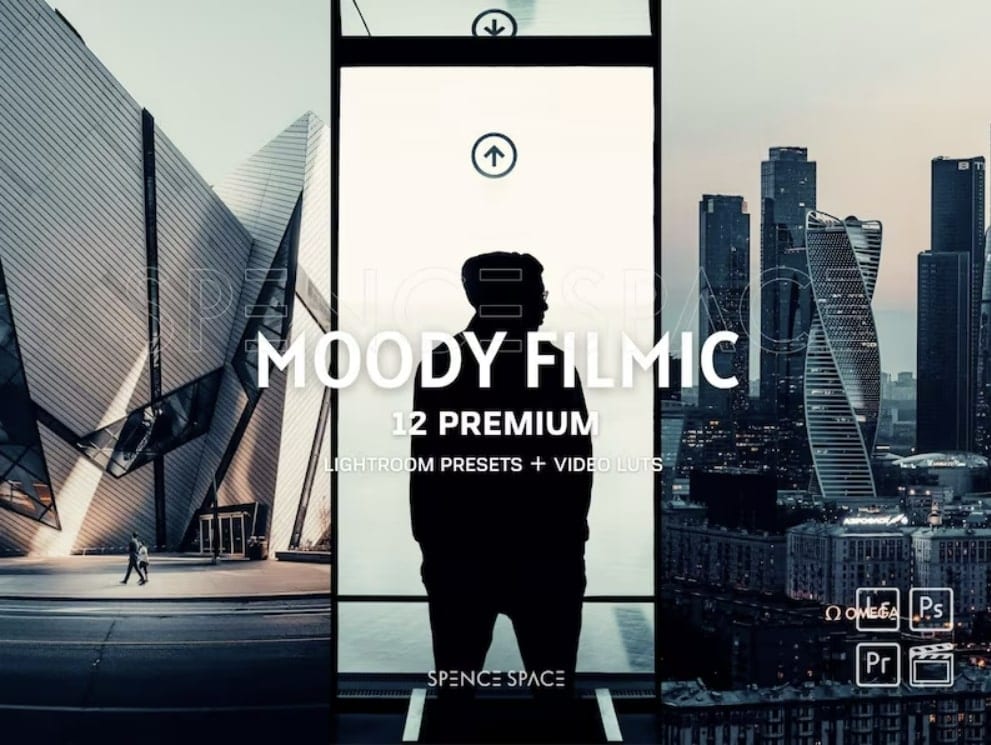
9. Moody Filmic Cityscape LR Presets
Moody Filmic retouches are always special and exciting. When adding them to visual content, you can extend quality in an optimal way. After all, this Filmic Tone LUTs free download pack has 12 filter presets. This way, you can enhance color grading with the right correction standards. You can use these filter presets on both mobile and the web.
10. Movie Cinematic Film LUTs
Transform color grading within your visual content with this cinematic film LUTs pack. To sum up, there are 50 different cinematic LUTs in this pack. So, while using these LUTs, color saturation and brightness will upgrade your visual content. The good thing is the LUTs are compatible with both video and image formats.

Part 4: Getting To Know Wondershare Filmora and Its Use in LUTs
Wondershare Filmora is an industrial-standard video editing software. Meanwhile, this software is ideal for all video editors because it offers various video enhancements. There are 200+ LUTs in this editing tool which includes color grading Filmic Pro. Thus, you can upscale video colors in an optimized way in different styles.
![]()
Note: Filmora has AI tools like AI Smart Cutout, AI Audio Denoise, and Auto Reframe. Moreover, you can also enjoy the perks of AI copywriting for ready-made video scripts. With motion tracking, speed ramping, and keyframing, video editing becomes simpler. In addition, there are several options for effects, transitions, and stickers. This makes it a complete and comprehensive video editing solution for the masses.

Empower your videos with a new mood using different LUTs. Filmora now offers 100+ top-quality 3D LUTs cover a broad range of scenarios. Transform your videos with Filmora’s powerful 3D LUTs.
Apply LUT on Videos Apply LUT on Videos Learn More

Conclusion
LUTs are pre-defined color gradients that work in an instant way. Meanwhile, they make video editing simpler and smarter. This article illustrated 10 top Filmic Pro LUTs free download. By using these LUTs, you can upscale your important videos with improved color schemas. In addition, you discovered a vital editing tool, Wondershare Filmora. Within this software, you can upscale videos with multiple functionalities.
Part 1: How Can LUTs Benefit Video Editors?
Video editors are professionals that are tasked to edit and customize videos. Their main objective is to enhance video quality with necessary manual upscaling. Making things more accessible, find how LUTs can benefit these professionals:
- Increased Efficiency: With LUTs, video editors can optimize their workflows with ready-made filters. So they don’t need to spend hours on video editing. By applying filters, video colors are upgraded.
- Consistent Grading: During manual editing, multiple frames are left out during color correction. With LUTs, the colors are applied in a consistent way in all frames. This way, you will experience effective color enhancement.
- Professional Quality: The quality of applied LUTs is amazing. After all, LUTs provide dedicated filter presets to optimize color saturation and brightness. With professional color grading, experience a top-quality video.
- Creative Colors: LUTs are ideal for adding premium yet stylish color schemas into videos. The color gradients are creative as well as sleek and luxurious. You will not regret using creative color presets in LUTs.
Part 2: Discussing Some Practical Uses of LUTs in Video Editing
LUTs, also known as look-up tables, are unique video editing tools. They use mathematical instructions to map input color values into output color values. This way, consistent color gradings are applied across video content. In video editing, LUTs can be used for a variety of practical uses:
1. Special Effects
By using LUTs, you can add special effects to your videos. This includes different effects, including dreamy, moody, or surreal. The videos will look more professional and enchanting with attractive looks. So you don’t need to pursue video editing in a deep way.
2. HDR Display
With LUTs, users can add a dynamic touch of HDR display to the videos. After all, they can convert SDR footage to HDR footage using special filter presets. This allows for different color contrasts within the video.
3. Color Enhancement
Enhancing color schemas is easier and more convenient using LUTs. These editing tools can adjust color contrast, balance, and saturation. Hence, your video is upscaled with an improved color display for vintage or cinematic looks.
4. Match Footages
Different cameras produce videos with diverse quality, which is unsatisfying. Through LUTs, you can match the color of your footage with a consistent appearance. The color schemes and tone contrasts are optimized in a collective way.
Part 3: Best Filmic Pro LUTs To Use
Using LUTs in video editing can save a lot of time. For video editors, LUTs can be revolutionizing because of less effort with amazing output. In general, using Filmic Pro LUTs is in great demand. Let’s discover some of them:
1. Filmic LUT Support
Bring Filmic looks to your videos using this Filmic Pro LUTs download pack. There are up to 7 different LUT preset filters that you can import. With Filmic touch, you can add unique cinematic looks to your visual content. LUT Quick Action Modal (QAM) is also introduced to switch into preview mode or apply LUT to the video.

2. Richard Lackey FREE Filmic Pro LOGv2 LUT for FilmConvert
Add a cinematic touch to your videos with this Filmic Tone LUTs free download pack. This special LUTs pack lets you add attractive film interaction to your video. The provided color schemes are exceptional because they offer unique color presentations. Meanwhile, the LUT equips solutions to correct imbalances and noise.

3. Free LUT Filmic
Make your photo or video more special with this Free LUT Filmic pack. Meanwhile, there are special effects for transforming color schemas within visual content. So, if you have film or photography, the provided LUT filters are amazing. This way, you can spark creativity like a professional editor. The video content will become more appealing.

4. Film Slog3 And Standard LUTs
Enhance your visual creativity by blending premium looks into your videos. After all, this Filmic Pro LUT download pack has fantastic color upscaling solutions. It contains a collection of 20 Film REC 709 LUTs and 20 Film Slog3 LUTs to adapt. This way, you can improve the color gradients of your social media videos and presentations.

5.FILMIC PRO SUPER-BUNDLE LUTS PACK
Enhancing video quality is now easier with this color-grading Filmic Pro pack. This is a specialized LUTs bundle that incorporates 50 cinematic filter presets. The available LUTs can generally optimize color gradients with the right contrasts. So if you have flat or log footage, using this LUT can be ideal. Meanwhile, the LUT is designed explicitly for mobile-captured videos.

6.Filmic Tone LUTs
Upgrade your preset library with this amazing Filmic Tone LUTs pack. While featuring 10 preset filters, this LUTs pack provides an aesthetic dark, moody tone. LUTs are easily applied to your videos with the right color upscaling. You will also receive a VLOG - Rec709 LUT and Sony SLOG2/3 - Rec709 LUT. The supported file format is .cube.

7. 7. Filmic LUTs Vol.2
Working with LUTs has never been this easy. So when you use Filmic LUTs Vol.2, you will get 10 creative LUT preset filters. Integrate these LUTs into your visual content to upscale their quality. Meanwhile, the LUTs can be used on different editing platforms. In most instances, you will get upscaling results within seconds. There is also an option to adjust intensity, contrast, and more.

8. 50 Cinematic Retro Film LUTs Pack
Add a retro touch to your videos with this Filmic Pro LUT download pack. After all, there are 50 retro-styled Filmic LUT presets. When you apply these LUTs to your video, special color grading is applied. Every specific LUT has a unique color schema with a styled theme. In this LUTs pack, you will also receive a PDF guide with step-by-step instructions.

9. Moody Filmic Cityscape LR Presets
Moody Filmic retouches are always special and exciting. When adding them to visual content, you can extend quality in an optimal way. After all, this Filmic Tone LUTs free download pack has 12 filter presets. This way, you can enhance color grading with the right correction standards. You can use these filter presets on both mobile and the web.

10. Movie Cinematic Film LUTs
Transform color grading within your visual content with this cinematic film LUTs pack. To sum up, there are 50 different cinematic LUTs in this pack. So, while using these LUTs, color saturation and brightness will upgrade your visual content. The good thing is the LUTs are compatible with both video and image formats.

Part 4: Getting To Know Wondershare Filmora and Its Use in LUTs
Wondershare Filmora is an industrial-standard video editing software. Meanwhile, this software is ideal for all video editors because it offers various video enhancements. There are 200+ LUTs in this editing tool which includes color grading Filmic Pro. Thus, you can upscale video colors in an optimized way in different styles.
![]()
Note: Filmora has AI tools like AI Smart Cutout, AI Audio Denoise, and Auto Reframe. Moreover, you can also enjoy the perks of AI copywriting for ready-made video scripts. With motion tracking, speed ramping, and keyframing, video editing becomes simpler. In addition, there are several options for effects, transitions, and stickers. This makes it a complete and comprehensive video editing solution for the masses.

Empower your videos with a new mood using different LUTs. Filmora now offers 100+ top-quality 3D LUTs cover a broad range of scenarios. Transform your videos with Filmora’s powerful 3D LUTs.
Apply LUT on Videos Apply LUT on Videos Learn More

Conclusion
LUTs are pre-defined color gradients that work in an instant way. Meanwhile, they make video editing simpler and smarter. This article illustrated 10 top Filmic Pro LUTs free download. By using these LUTs, you can upscale your important videos with improved color schemas. In addition, you discovered a vital editing tool, Wondershare Filmora. Within this software, you can upscale videos with multiple functionalities.
Do You Want to Record Videos with a Phantom High-Speed Camera? In This Guide, You Can Get a Detailed Note on the Phantom Camera
In the media industry, you can find many professional and high-end cameras. Such cameras use advanced mechanisms to create slow-motion videos. Moreover, they capture natural colors and shades in the video with precision. Phantom slow-mo cameras are one of the prominent examples of the industry’s leading camera brand. To learn more about this camera brand, this article will consist of all the details.
With a Phantom slow-motion camera, you can get high-resolution results. Through this guide, you can discover a detailed analysis of the Phantom slo-mo camera. Also, we will suggest an affordable alternative that can make slow-motion videos efficiently.
Slow Motion Video Maker Slow your video’s speed with better control of your keyframes to create unique cinematic effects!
Make A Slow Motion Video Make A Slow Motion Video More Features

Part 1: What Do You Know About Phantom Camera Company?
Vision Research manufactures a Phantom camera that can be used in many professional fields. This company first came into being in 1950 by the name of “Photographic Analysis Company .”During the initial years, the company produced many cameras that could tackle the need for high-speed photography. However, in 1992, the company decided to create a separate entity to create high-speed cameras that wouldn’t depend on photographic film for imaging.
The US Patent Office acknowledged the use of innovative technology in the Phantom high-speed cameras. The main aim of this company is to produce robust cameras that can capture faster frame rates in high-speed photography. Many industries like defense, academia, and science research use Phantom slow-motion cameras. They are used in microfluidics, transparent flows, imaging, etc.
Part 2: Best Phantom Slow Motion Camera To Try
Phantom offers many slow-motion cameras with different features. This section will list down some of the best Phantom slow-motion cameras with pricing:
- TMX 7510
- T – Series T4040
- Machine Vision S200
- VEO 710
- Micro C and N C321
- 4K and Media Production Flex4K
1. TMX 7510
The TMX 7510 is built to produce high-end videos with different speed combinations. It uses a side-illuminated camera sensor to capture high-definition images. It can deliver 75,000 FPS with 1280 x 800 resolution. It offers up to 512GB RAM to help in making high-speed images. You can use its built-in Binning Mode with flexible options. It also supports many file formats like Cine RAW, TIFF, JPEG, etc.

2. T – Series T4040
The T-Series of Phantom includes many features to capture images with precision. The T4040 camera supports 9,350 fps with 2560 x 1664 resolution. It offers a peak Quantum Efficiency rating of 90% that can produce images in low-light conditions. Moreover, this Phantom slow-motion camera uses flow visualization techniques to capture minute details with high precision. It also offers EDR that balances exposure in the saturated areas of the image.

3. Machine Vision S200
This machine vision camera applies CXP technology to capture long-duration high-speed photos. It includes GPIO for events and ready signals. It’s economical and available in a compact size. Users can also use the time stamp on the frame to check the time code. Moreover, it can reach up to 6,950 fps with full resolution. You can trigger the recording with the given software or the GPIO trigger signal.
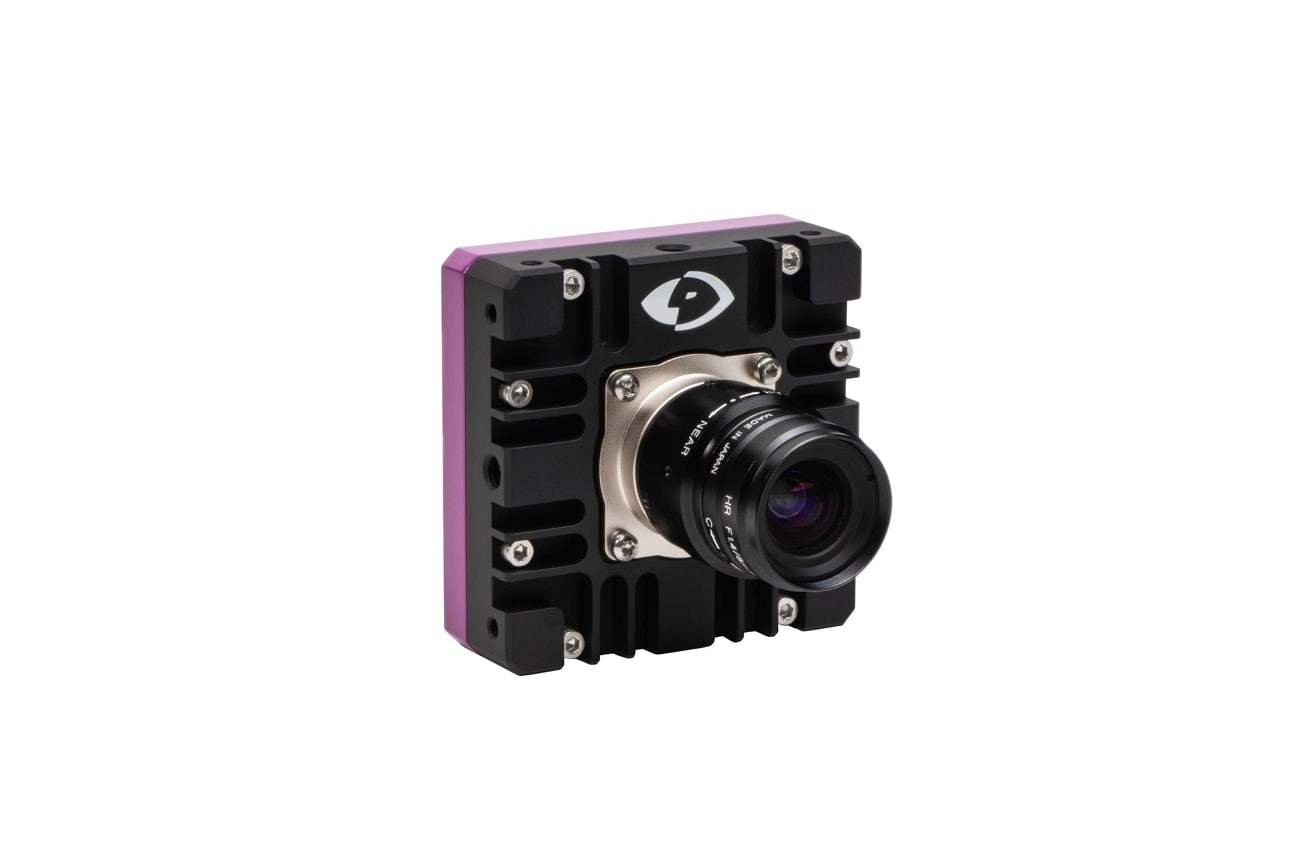
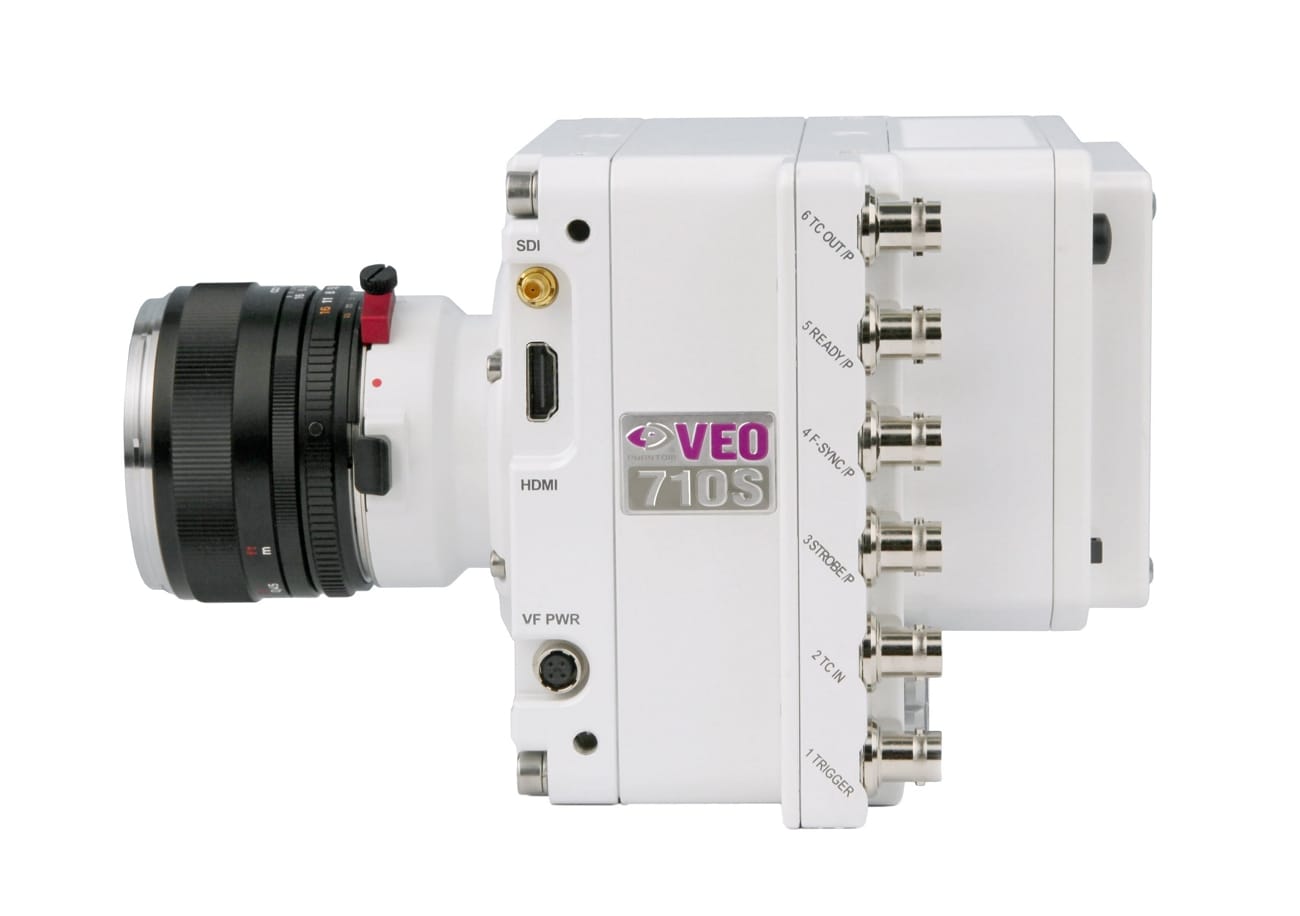
4. VEO 710
VEO series are specifically designed for film production and science laboratories. It has 7,400fps with a 1-Mpx 35mm sensor. The sensor format used in this camera is ideal for high-quality camera lenses. There are two options for the VEO body: S (full) and L (light). By purchasing the S model, you can experience many on-camera controls. Moreover, the body of this camera is made with aluminum to increase its reliability in tougher situations.
5. Micro C and N C321
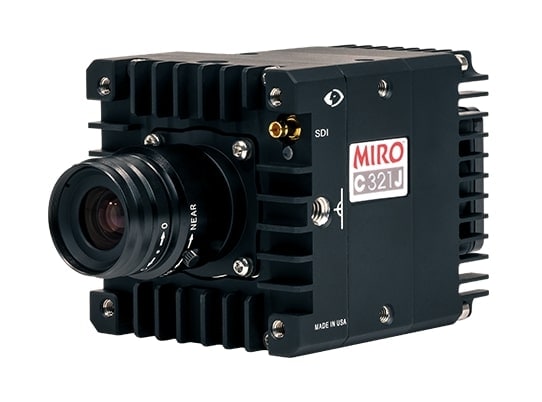
The Micro C and N series are built to meet the challenges of using a standard camera. The lightweight body and on-board protection make this camera ideal. It supports a maximum fps of 1480 with full resolution. With high sensitivity, it can capture low-noise images with vibrant colors. The advanced features of this camera can provide high-end images while preserving the natural colors.
6. 4K and Media Production Flex4K
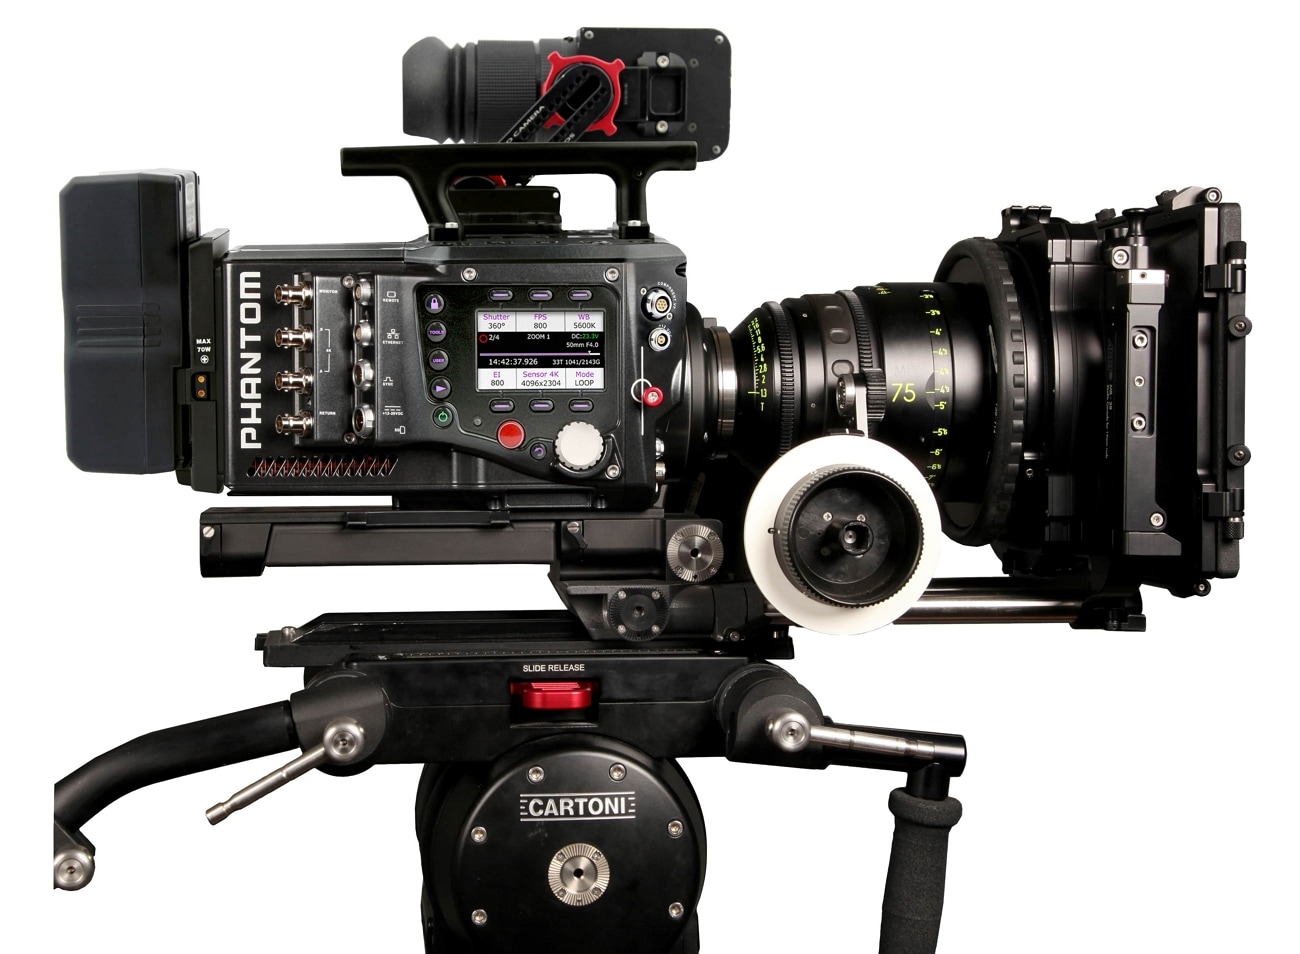
For professional cinema, Phantom has developed the Flex4k camera. This Phantom slo-mo camera supports 4K imaging with up to 1,000 fps. It provides three battery mounts with an on-camera menu system. The produced images are compatible with many color grading and video editing tools. Furthermore, it offers many remote-control options to ease your workflow. All the images that are produced will be delivered in the Cine RAW file format.
Part 3: No Phantom Camera? Still, Create a Slow Motion Video
Are you unable to buy a Phantom slow-mo camera? No worries, as Filmora can help you generate slow-motion videos with a normal camera. After recording a video from any standard device, you can add slow-motion effects with this tool. It provides a speed ramping feature that allows you to manage the speed of your video. It contains 6 speed ramping templates that you can try for professional purposes. Moreover, it provides a drag-and-drop interface to provide you with robust controls.
Filmora can make any ordinary video look cinematic. You can incorporate special backgrounds in your video without using a green screen. Furthermore, it can remove all the production flaws from your video within a few taps.
Free Download For Win 7 or later(64-bit)
Free Download For macOS 10.14 or later
Instructions to Produce Slow Motion Video With Speed Ramping
This part of the guide will include all the basic steps to make slow-motion videos . Thus, follow the steps mentioned below:
Step 1Import the Video File
Start by launching Filmora on your desktop. Select “New Project” to open its interface. Once done, press “Ctrl + I” to import the preferred video file.

Step 2Select Speed Ramping
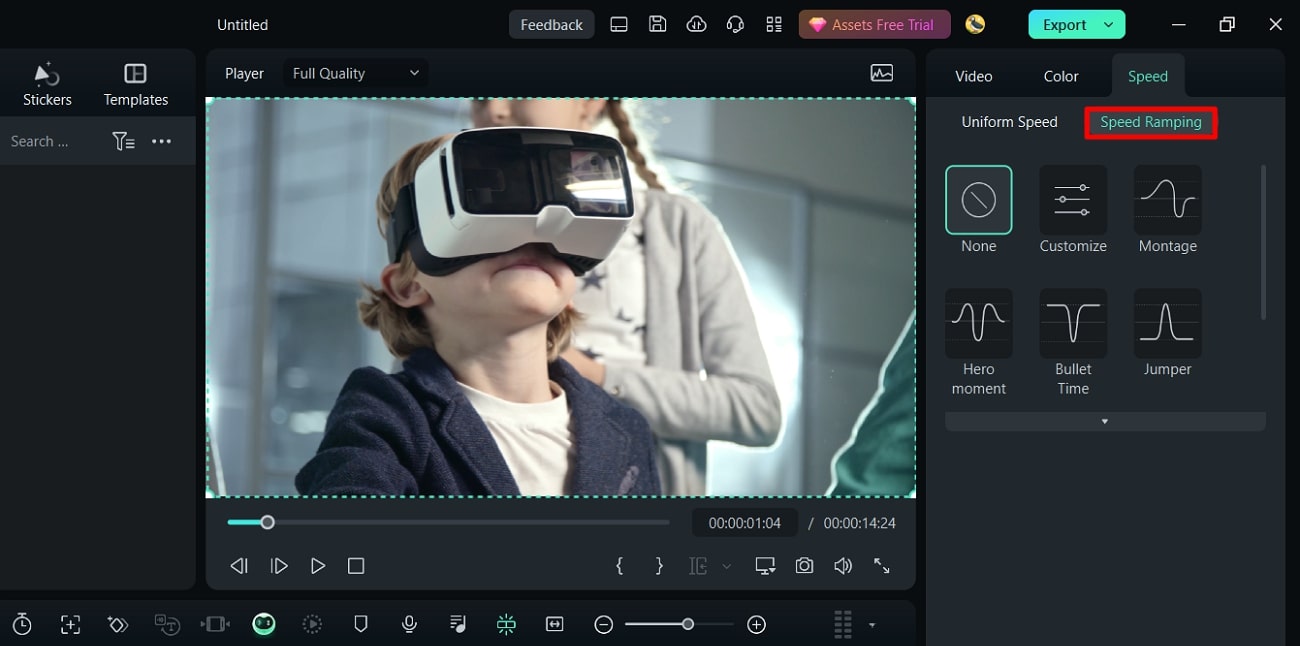
Once done by dragging it to the timeline, right-click on it to open a pop-up menu. Select “Speed” and then choose “Speed Ramping”. From the right panel, you can manage the speed ramping settings.
Step 3Adjust the Speed Settings
Select “Customize” for the preset and scroll a little bit. Here, you can adjust the pointers by using the cursor for speed modification. By dragging the point downwards, you will decrease the speed. In contrast, moving the points upwards will increase the speed.

Step 4Generate Final Results
Navigate into the “AI Frame Interpolation” section to smoothen the effect. From there, select “Optical Flow” to create a slow-motion effect of the best quality. To see the results, choose the “Render Preview” option given on the toolbar of the timeline. After modifying the video, save and export the results.

Key Features of Wondershare Filmora
Auto Reframe: This feature adjusts the aspect ratio of a video in an automated manner. You can make your video vertical for TikTok and YouTube Shorts. In a similar way, it can make videos horizontal to fit to Instagram.
AI Audio Denoise: The AI audio denoise feature is designed to remove specific voices from your video. You can try its AI voice enhancement option to make the vocals prominent. Moreover, it can remove reverb and hiss sounds from the audio in a natural way.
AI Smart Cutout: To remove unnecessary objects from the video, try its AI Smart Cutout feature. After selecting the area, it offers four preview modes. By using these modes, you can make adjustments according to the background.
Color Correction: Filmora provides more than 40 presets for color schemes. You can access the color correction settings to make manual changes. Moreover, you can apply advanced color tuning to adjust the colors of the video deeply.
Conclusion
Phantom slow-motion cameras offer great high-speed image details. The cameras of this brand produce high-definition results with advanced features. However, it cannot be affordable or accessible for many users. Therefore, Filmora is the best choice for students and beginners. With this software, you can make slow-motion videos in a cost-effective manner.
Make A Slow Motion Video Make A Slow Motion Video More Features

Part 1: What Do You Know About Phantom Camera Company?
Vision Research manufactures a Phantom camera that can be used in many professional fields. This company first came into being in 1950 by the name of “Photographic Analysis Company .”During the initial years, the company produced many cameras that could tackle the need for high-speed photography. However, in 1992, the company decided to create a separate entity to create high-speed cameras that wouldn’t depend on photographic film for imaging.
The US Patent Office acknowledged the use of innovative technology in the Phantom high-speed cameras. The main aim of this company is to produce robust cameras that can capture faster frame rates in high-speed photography. Many industries like defense, academia, and science research use Phantom slow-motion cameras. They are used in microfluidics, transparent flows, imaging, etc.
Part 2: Best Phantom Slow Motion Camera To Try
Phantom offers many slow-motion cameras with different features. This section will list down some of the best Phantom slow-motion cameras with pricing:
- TMX 7510
- T – Series T4040
- Machine Vision S200
- VEO 710
- Micro C and N C321
- 4K and Media Production Flex4K
1. TMX 7510
The TMX 7510 is built to produce high-end videos with different speed combinations. It uses a side-illuminated camera sensor to capture high-definition images. It can deliver 75,000 FPS with 1280 x 800 resolution. It offers up to 512GB RAM to help in making high-speed images. You can use its built-in Binning Mode with flexible options. It also supports many file formats like Cine RAW, TIFF, JPEG, etc.

2. T – Series T4040
The T-Series of Phantom includes many features to capture images with precision. The T4040 camera supports 9,350 fps with 2560 x 1664 resolution. It offers a peak Quantum Efficiency rating of 90% that can produce images in low-light conditions. Moreover, this Phantom slow-motion camera uses flow visualization techniques to capture minute details with high precision. It also offers EDR that balances exposure in the saturated areas of the image.

3. Machine Vision S200
This machine vision camera applies CXP technology to capture long-duration high-speed photos. It includes GPIO for events and ready signals. It’s economical and available in a compact size. Users can also use the time stamp on the frame to check the time code. Moreover, it can reach up to 6,950 fps with full resolution. You can trigger the recording with the given software or the GPIO trigger signal.

4. VEO 710
VEO series are specifically designed for film production and science laboratories. It has 7,400fps with a 1-Mpx 35mm sensor. The sensor format used in this camera is ideal for high-quality camera lenses. There are two options for the VEO body: S (full) and L (light). By purchasing the S model, you can experience many on-camera controls. Moreover, the body of this camera is made with aluminum to increase its reliability in tougher situations.

5. Micro C and N C321
The Micro C and N series are built to meet the challenges of using a standard camera. The lightweight body and on-board protection make this camera ideal. It supports a maximum fps of 1480 with full resolution. With high sensitivity, it can capture low-noise images with vibrant colors. The advanced features of this camera can provide high-end images while preserving the natural colors.

6. 4K and Media Production Flex4K
For professional cinema, Phantom has developed the Flex4k camera. This Phantom slo-mo camera supports 4K imaging with up to 1,000 fps. It provides three battery mounts with an on-camera menu system. The produced images are compatible with many color grading and video editing tools. Furthermore, it offers many remote-control options to ease your workflow. All the images that are produced will be delivered in the Cine RAW file format.

Part 3: No Phantom Camera? Still, Create a Slow Motion Video
Are you unable to buy a Phantom slow-mo camera? No worries, as Filmora can help you generate slow-motion videos with a normal camera. After recording a video from any standard device, you can add slow-motion effects with this tool. It provides a speed ramping feature that allows you to manage the speed of your video. It contains 6 speed ramping templates that you can try for professional purposes. Moreover, it provides a drag-and-drop interface to provide you with robust controls.
Filmora can make any ordinary video look cinematic. You can incorporate special backgrounds in your video without using a green screen. Furthermore, it can remove all the production flaws from your video within a few taps.
Free Download For Win 7 or later(64-bit)
Free Download For macOS 10.14 or later
Instructions to Produce Slow Motion Video With Speed Ramping
This part of the guide will include all the basic steps to make slow-motion videos . Thus, follow the steps mentioned below:
Step 1Import the Video File
Start by launching Filmora on your desktop. Select “New Project” to open its interface. Once done, press “Ctrl + I” to import the preferred video file.

Step 2Select Speed Ramping
Once done by dragging it to the timeline, right-click on it to open a pop-up menu. Select “Speed” and then choose “Speed Ramping”. From the right panel, you can manage the speed ramping settings.

Step 3Adjust the Speed Settings
Select “Customize” for the preset and scroll a little bit. Here, you can adjust the pointers by using the cursor for speed modification. By dragging the point downwards, you will decrease the speed. In contrast, moving the points upwards will increase the speed.

Step 4Generate Final Results
Navigate into the “AI Frame Interpolation” section to smoothen the effect. From there, select “Optical Flow” to create a slow-motion effect of the best quality. To see the results, choose the “Render Preview” option given on the toolbar of the timeline. After modifying the video, save and export the results.

Key Features of Wondershare Filmora
Auto Reframe: This feature adjusts the aspect ratio of a video in an automated manner. You can make your video vertical for TikTok and YouTube Shorts. In a similar way, it can make videos horizontal to fit to Instagram.
AI Audio Denoise: The AI audio denoise feature is designed to remove specific voices from your video. You can try its AI voice enhancement option to make the vocals prominent. Moreover, it can remove reverb and hiss sounds from the audio in a natural way.
AI Smart Cutout: To remove unnecessary objects from the video, try its AI Smart Cutout feature. After selecting the area, it offers four preview modes. By using these modes, you can make adjustments according to the background.
Color Correction: Filmora provides more than 40 presets for color schemes. You can access the color correction settings to make manual changes. Moreover, you can apply advanced color tuning to adjust the colors of the video deeply.
Conclusion
Phantom slow-motion cameras offer great high-speed image details. The cameras of this brand produce high-definition results with advanced features. However, it cannot be affordable or accessible for many users. Therefore, Filmora is the best choice for students and beginners. With this software, you can make slow-motion videos in a cost-effective manner.
Best 6 WMV to GIF Converters
Powerful Video Editor - Wondershare Filmora
Provide abundant video effects - A creative video editor
Powerful color correction and grading
Detailed tutorials are provided by the official channel
GIFs function as a series of images that seem like an audio-less video and are widely used across numerous platforms. People send GIFs to their friends while chatting and also add them to their photos and videos. Moreover, this image format does not lose its quality during compression. Due to their high popularity, GIF converters are much needed.
If you have a WMV file and want to use it as a GIF, you can easily execute the conversion through GIF converters. You can find tons of GIF converters, but not every tool is reliable. For WMV to GIF conversion, we will provide the best GIF converters that you can utilize confidently.
In this article
Part 1: Best 3 WMV to GIF Converter Software
Part 2: 3 Online WMV to GIF Converters
Part 3: How to Convert WMV to GIF Using Wondershare Filmora?
Part 1: Best 3 WMV to GIF Converter Software
In this following part, we will discuss the best 3 offline GIF converters through which you can easily convert your files from WMV to GIF comfortably.
1. Wondershare Filmora
| Compatibility | Pricing |
|---|---|
| Windows/Mac | $28.98/Monthly $68.98/Annual $98.98/Perpetual |
Wondershare Filmora is a top-notch video editing tool comprising every basic and advanced feature that you would require. It offers smart templates that help beginners in designing their videos along with exceptional effects. Furthermore, people can utilize their royalty-free images and videos to add them to their videos for more dimensions.
Along with its extraordinary video editing features, people can also convert their videos files to numerous formats such as GIFs and other formats. Although the user interface of Filmora is extremely easy to handle, if you still find some difficulties, you can watch the tutorials from their platform to execute the editing process easier. By using this excellent platform, you can not only get rid of the flaws in your videos but can also convert them to GIF format conveniently.

Pros
The “Instant Mode” of Filmora enables the users to design and create their videos with great proficiency without spending too much time.
It comprises animated effects that can add an artistic element to your videos.
It has an excellent function of a “Screen Recorder” that can effortlessly capture the on-screen activities of your computer.
You can easily synchronize the audio and soundtracks with the videos through its “Auto Synchronization” feature.
Cons
The free version of this platform comprises a watermark that can ruin the actual impression of the video.
2. Adobe Premiere Pro
| Compatibility | Pricing |
|---|---|
| Windows/Mac | $20.99/Monthly |
This tool is an ultimate professional video editor that comprises the ability to transform videos into a high-end project. You can add various transitions to the videos and can portray interesting storytelling through them. You can easily upload the recorded video from either your smartphone or professional camera and can edit the footage in up to 8K high quality.
Furthermore, when people try to export their videos, this tool displays multiple options to convert the current video file into another. Thus, you can easily convert your video file WMV into GIF quickly with a single click. Other amazing features of this tool include Adobe Stock, through which you can import various audio files and can professionally embed them in your video.

Pros
The “Auto-Reframe” feature allows the users to intelligently reframe their videos in 4K resolution flawlessly.
You can add subtitles to your videos through “Auto Transcriptions” quickly and can edit them further.
You can color fix the videos through its excellent filters, which can give an aesthetic impression.
The export settings of this tool can be customized, and you can easily share your videos to online platforms.
Cons
The user interface of Adobe Premiere Pro is a bit complicated, and non-professionals can find it difficult to use for the first time.
3. Cyberlink PowerDirector
| Compatibility | Pricing |
|---|---|
| Windows/Mac | $19.99/Monthly $69.99/Monthly |
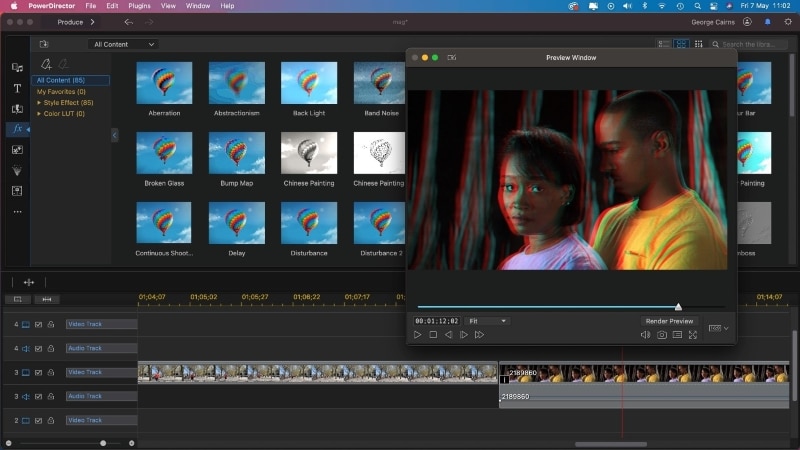
This trustworthy tool is widely used for converting video files to GIF format along with various intuitive features. It also functions as a video editor as it includes advanced options to edit multiple video file formats effortlessly. You can use their enhanced “Mask and Blend” option to combine numerous video clips smoothly and professionally. Also, you can replace dull and boring skies from your videos through its “Sky Replacement” feature.
Along with its powerful conversion feature, you can also remove unwanted objects or people from the videos flawlessly with a single click. For a high-quality audio experience, you can use its audio tools to remove unnecessary background noise to make the vocals sound refined. Hence, it works as a trustworthy tool that not only makes the videos appealing but also provides ease to its users.
Pros
This platform offers motion tracking through which you can precisely synchronize the elements in your video.
It has included various effects and filters ranging in diverse categories that can be used to change the perspective of the videos.
The user interface is well-defined and easy to use for beginners.
It offers fast rendering so that you can export the edited video in high quality.
Cons
This tool contains ads and has an expensive subscription plan.
Part 2: 3 Online WMV to GIF Converters
If you want to conduct online conversion of files from WMV to GIF instantly, use any of the following mentioned tools.
1. Adobe Creative Cloud Express
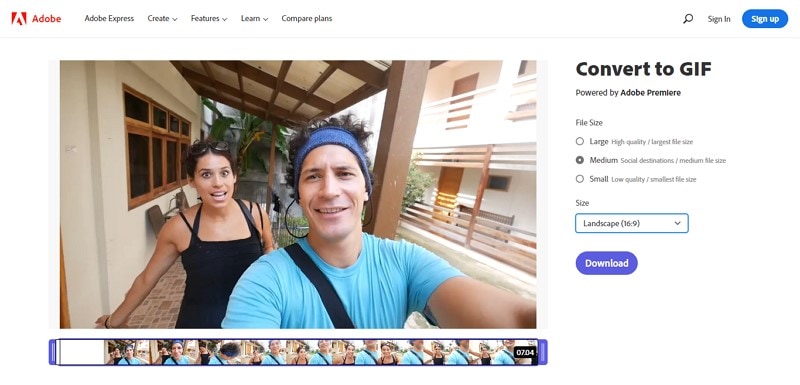
This online tool provides an easy way to convert WMV to GIF in a well-protected environment. You can import your WMV file to this tool easily either from your device or can utilize the drag and drop option. Afterward, you can select the quality type and file size from the displayed options. The conversion process does not take long, and you can easily share the newly converted GIF across online platforms.
Pros
This tool is free to use and offers basic editing options to create unlimited GIFs.<
You can select the file size of the GIF file so that you can easily save it on your device without worrying about space usage.<
You can adjust the aspect ratio of your manually before the conversion process.<
Through its trim option, you can eradicate unwanted parts easily.<
Cons
It only offers premium features such as refine, cutout, and resize in the premium plan.<
2. CloudConvert
CloudConvert is an online platform that will assist you in converting video files such as WMV into GIFs conveniently. This tool supports and shows compatibility with more than 200 file formats which depict that you can convert from and to GIFs in the best environment. You just need to upload the video file to this platform, and with a single click, you can get a GIF of the best possible quality.

Pros
You can simultaneously convert the videos files into GIFs through its batch processing option.
Apart from being an online tool, the software rendering integrated into this tool allows the users to get high-quality results after the conversion.
The data security in this tool is exceptional as this tool has a strict privacy policy for the users.
Apart from video and image files, you can also convert documents and audio files through this tool efficiently.
Cons
This online tool takes plenty amount of time to convert large-sized files.
3. Convertio
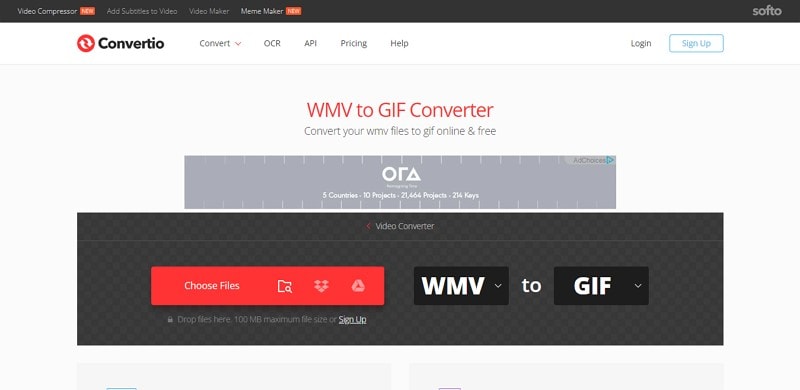
Convertio is another good example of an online GIF converter that supports tons of file formats. It has one of the easiest user interfaces among other online converters, as each function is well-displayed on its main interface. After uploading the video file on this online tool, you can easily select the output format, such as GIF, and within no time, you will get the desired result. This free tool also supports batch processing to offer an enhanced ecosystem to the users.
Pros
Beginners can rely on this online platform as it offers security along with tons of supported formats.
For instant conversion of the files, this tool is ideal as it does not demand the users to create accounts for sign-ups.
It does not disturb the users with constant ads and functions as a stable tool.
You can access this online tool from any browser, and it can easily work for converting videos, documents, and images.
Cons
For converting large-sized videos, you need to buy its subscription plan.
Part 3: How to Convert WMV to GIF Using Wondershare Filmora?
There are plenty of GIF converters, but to enjoy the best user experience, explore Wondershare Filmora. As we mentioned earlier, this tool includes every basic to advanced feature for both video editing and conversion process. To convert WMV to GIF through Filmora, use the below steps:
Step 1: Import WMV File
Launch Wondershare Filmora on your desktop and click to use its interface. Tap on the “New Project” option that will display a new window on your screen. At the media tab, click on the arrow and import the WMV file from browsing through your computer.

Step 2: Select GIF Format
Now drag the imported video to the timeline of this tool and tap on the “Export” button displayed on top. From the newly displayed window, select the “GIF” format from the left section.

Step 3: Click to Export
Along with changing file format, you can also name the file and can set its file location. For more settings, you can adjust its resolution, bit rate, and frame rate displayed on the right side of the screen. Once done, click on the “Export” option.

Conclusion
Create your GIFs by converting from the WMV files through powerful GIF converters. To convert WMV to GIF, we have recommended different tools along with their distinct features for your ease. However, to generate instant and best outputs, Wondershare Filmora comes on top as a powerful GIF converter. Through its advanced features, you can edit and create multiple GIFs within a well-defined platform.
GIFs function as a series of images that seem like an audio-less video and are widely used across numerous platforms. People send GIFs to their friends while chatting and also add them to their photos and videos. Moreover, this image format does not lose its quality during compression. Due to their high popularity, GIF converters are much needed.
If you have a WMV file and want to use it as a GIF, you can easily execute the conversion through GIF converters. You can find tons of GIF converters, but not every tool is reliable. For WMV to GIF conversion, we will provide the best GIF converters that you can utilize confidently.
In this article
Part 1: Best 3 WMV to GIF Converter Software
Part 2: 3 Online WMV to GIF Converters
Part 3: How to Convert WMV to GIF Using Wondershare Filmora?
Part 1: Best 3 WMV to GIF Converter Software
In this following part, we will discuss the best 3 offline GIF converters through which you can easily convert your files from WMV to GIF comfortably.
1. Wondershare Filmora
| Compatibility | Pricing |
|---|---|
| Windows/Mac | $28.98/Monthly $68.98/Annual $98.98/Perpetual |
Wondershare Filmora is a top-notch video editing tool comprising every basic and advanced feature that you would require. It offers smart templates that help beginners in designing their videos along with exceptional effects. Furthermore, people can utilize their royalty-free images and videos to add them to their videos for more dimensions.
Along with its extraordinary video editing features, people can also convert their videos files to numerous formats such as GIFs and other formats. Although the user interface of Filmora is extremely easy to handle, if you still find some difficulties, you can watch the tutorials from their platform to execute the editing process easier. By using this excellent platform, you can not only get rid of the flaws in your videos but can also convert them to GIF format conveniently.

Pros
The “Instant Mode” of Filmora enables the users to design and create their videos with great proficiency without spending too much time.
It comprises animated effects that can add an artistic element to your videos.
It has an excellent function of a “Screen Recorder” that can effortlessly capture the on-screen activities of your computer.
You can easily synchronize the audio and soundtracks with the videos through its “Auto Synchronization” feature.
Cons
The free version of this platform comprises a watermark that can ruin the actual impression of the video.
2. Adobe Premiere Pro
| Compatibility | Pricing |
|---|---|
| Windows/Mac | $20.99/Monthly |
This tool is an ultimate professional video editor that comprises the ability to transform videos into a high-end project. You can add various transitions to the videos and can portray interesting storytelling through them. You can easily upload the recorded video from either your smartphone or professional camera and can edit the footage in up to 8K high quality.
Furthermore, when people try to export their videos, this tool displays multiple options to convert the current video file into another. Thus, you can easily convert your video file WMV into GIF quickly with a single click. Other amazing features of this tool include Adobe Stock, through which you can import various audio files and can professionally embed them in your video.

Pros
The “Auto-Reframe” feature allows the users to intelligently reframe their videos in 4K resolution flawlessly.
You can add subtitles to your videos through “Auto Transcriptions” quickly and can edit them further.
You can color fix the videos through its excellent filters, which can give an aesthetic impression.
The export settings of this tool can be customized, and you can easily share your videos to online platforms.
Cons
The user interface of Adobe Premiere Pro is a bit complicated, and non-professionals can find it difficult to use for the first time.
3. Cyberlink PowerDirector
| Compatibility | Pricing |
|---|---|
| Windows/Mac | $19.99/Monthly $69.99/Monthly |
This trustworthy tool is widely used for converting video files to GIF format along with various intuitive features. It also functions as a video editor as it includes advanced options to edit multiple video file formats effortlessly. You can use their enhanced “Mask and Blend” option to combine numerous video clips smoothly and professionally. Also, you can replace dull and boring skies from your videos through its “Sky Replacement” feature.
Along with its powerful conversion feature, you can also remove unwanted objects or people from the videos flawlessly with a single click. For a high-quality audio experience, you can use its audio tools to remove unnecessary background noise to make the vocals sound refined. Hence, it works as a trustworthy tool that not only makes the videos appealing but also provides ease to its users.

Pros
This platform offers motion tracking through which you can precisely synchronize the elements in your video.
It has included various effects and filters ranging in diverse categories that can be used to change the perspective of the videos.
The user interface is well-defined and easy to use for beginners.
It offers fast rendering so that you can export the edited video in high quality.
Cons
This tool contains ads and has an expensive subscription plan.
Part 2: 3 Online WMV to GIF Converters
If you want to conduct online conversion of files from WMV to GIF instantly, use any of the following mentioned tools.
1. Adobe Creative Cloud Express
This online tool provides an easy way to convert WMV to GIF in a well-protected environment. You can import your WMV file to this tool easily either from your device or can utilize the drag and drop option. Afterward, you can select the quality type and file size from the displayed options. The conversion process does not take long, and you can easily share the newly converted GIF across online platforms.

Pros
This tool is free to use and offers basic editing options to create unlimited GIFs.<
You can select the file size of the GIF file so that you can easily save it on your device without worrying about space usage.<
You can adjust the aspect ratio of your manually before the conversion process.<
Through its trim option, you can eradicate unwanted parts easily.<
Cons
It only offers premium features such as refine, cutout, and resize in the premium plan.<
2. CloudConvert
CloudConvert is an online platform that will assist you in converting video files such as WMV into GIFs conveniently. This tool supports and shows compatibility with more than 200 file formats which depict that you can convert from and to GIFs in the best environment. You just need to upload the video file to this platform, and with a single click, you can get a GIF of the best possible quality.

Pros
You can simultaneously convert the videos files into GIFs through its batch processing option.
Apart from being an online tool, the software rendering integrated into this tool allows the users to get high-quality results after the conversion.
The data security in this tool is exceptional as this tool has a strict privacy policy for the users.
Apart from video and image files, you can also convert documents and audio files through this tool efficiently.
Cons
This online tool takes plenty amount of time to convert large-sized files.
3. Convertio
Convertio is another good example of an online GIF converter that supports tons of file formats. It has one of the easiest user interfaces among other online converters, as each function is well-displayed on its main interface. After uploading the video file on this online tool, you can easily select the output format, such as GIF, and within no time, you will get the desired result. This free tool also supports batch processing to offer an enhanced ecosystem to the users.

Pros
Beginners can rely on this online platform as it offers security along with tons of supported formats.
For instant conversion of the files, this tool is ideal as it does not demand the users to create accounts for sign-ups.
It does not disturb the users with constant ads and functions as a stable tool.
You can access this online tool from any browser, and it can easily work for converting videos, documents, and images.
Cons
For converting large-sized videos, you need to buy its subscription plan.
Part 3: How to Convert WMV to GIF Using Wondershare Filmora?
There are plenty of GIF converters, but to enjoy the best user experience, explore Wondershare Filmora. As we mentioned earlier, this tool includes every basic to advanced feature for both video editing and conversion process. To convert WMV to GIF through Filmora, use the below steps:
Step 1: Import WMV File
Launch Wondershare Filmora on your desktop and click to use its interface. Tap on the “New Project” option that will display a new window on your screen. At the media tab, click on the arrow and import the WMV file from browsing through your computer.

Step 2: Select GIF Format
Now drag the imported video to the timeline of this tool and tap on the “Export” button displayed on top. From the newly displayed window, select the “GIF” format from the left section.

Step 3: Click to Export
Along with changing file format, you can also name the file and can set its file location. For more settings, you can adjust its resolution, bit rate, and frame rate displayed on the right side of the screen. Once done, click on the “Export” option.

Conclusion
Create your GIFs by converting from the WMV files through powerful GIF converters. To convert WMV to GIF, we have recommended different tools along with their distinct features for your ease. However, to generate instant and best outputs, Wondershare Filmora comes on top as a powerful GIF converter. Through its advanced features, you can edit and create multiple GIFs within a well-defined platform.
GIFs function as a series of images that seem like an audio-less video and are widely used across numerous platforms. People send GIFs to their friends while chatting and also add them to their photos and videos. Moreover, this image format does not lose its quality during compression. Due to their high popularity, GIF converters are much needed.
If you have a WMV file and want to use it as a GIF, you can easily execute the conversion through GIF converters. You can find tons of GIF converters, but not every tool is reliable. For WMV to GIF conversion, we will provide the best GIF converters that you can utilize confidently.
In this article
Part 1: Best 3 WMV to GIF Converter Software
Part 2: 3 Online WMV to GIF Converters
Part 3: How to Convert WMV to GIF Using Wondershare Filmora?
Part 1: Best 3 WMV to GIF Converter Software
In this following part, we will discuss the best 3 offline GIF converters through which you can easily convert your files from WMV to GIF comfortably.
1. Wondershare Filmora
| Compatibility | Pricing |
|---|---|
| Windows/Mac | $28.98/Monthly $68.98/Annual $98.98/Perpetual |
Wondershare Filmora is a top-notch video editing tool comprising every basic and advanced feature that you would require. It offers smart templates that help beginners in designing their videos along with exceptional effects. Furthermore, people can utilize their royalty-free images and videos to add them to their videos for more dimensions.
Along with its extraordinary video editing features, people can also convert their videos files to numerous formats such as GIFs and other formats. Although the user interface of Filmora is extremely easy to handle, if you still find some difficulties, you can watch the tutorials from their platform to execute the editing process easier. By using this excellent platform, you can not only get rid of the flaws in your videos but can also convert them to GIF format conveniently.

Pros
The “Instant Mode” of Filmora enables the users to design and create their videos with great proficiency without spending too much time.
It comprises animated effects that can add an artistic element to your videos.
It has an excellent function of a “Screen Recorder” that can effortlessly capture the on-screen activities of your computer.
You can easily synchronize the audio and soundtracks with the videos through its “Auto Synchronization” feature.
Cons
The free version of this platform comprises a watermark that can ruin the actual impression of the video.
2. Adobe Premiere Pro
| Compatibility | Pricing |
|---|---|
| Windows/Mac | $20.99/Monthly |
This tool is an ultimate professional video editor that comprises the ability to transform videos into a high-end project. You can add various transitions to the videos and can portray interesting storytelling through them. You can easily upload the recorded video from either your smartphone or professional camera and can edit the footage in up to 8K high quality.
Furthermore, when people try to export their videos, this tool displays multiple options to convert the current video file into another. Thus, you can easily convert your video file WMV into GIF quickly with a single click. Other amazing features of this tool include Adobe Stock, through which you can import various audio files and can professionally embed them in your video.

Pros
The “Auto-Reframe” feature allows the users to intelligently reframe their videos in 4K resolution flawlessly.
You can add subtitles to your videos through “Auto Transcriptions” quickly and can edit them further.
You can color fix the videos through its excellent filters, which can give an aesthetic impression.
The export settings of this tool can be customized, and you can easily share your videos to online platforms.
Cons
The user interface of Adobe Premiere Pro is a bit complicated, and non-professionals can find it difficult to use for the first time.
3. Cyberlink PowerDirector
| Compatibility | Pricing |
|---|---|
| Windows/Mac | $19.99/Monthly $69.99/Monthly |
This trustworthy tool is widely used for converting video files to GIF format along with various intuitive features. It also functions as a video editor as it includes advanced options to edit multiple video file formats effortlessly. You can use their enhanced “Mask and Blend” option to combine numerous video clips smoothly and professionally. Also, you can replace dull and boring skies from your videos through its “Sky Replacement” feature.
Along with its powerful conversion feature, you can also remove unwanted objects or people from the videos flawlessly with a single click. For a high-quality audio experience, you can use its audio tools to remove unnecessary background noise to make the vocals sound refined. Hence, it works as a trustworthy tool that not only makes the videos appealing but also provides ease to its users.

Pros
This platform offers motion tracking through which you can precisely synchronize the elements in your video.
It has included various effects and filters ranging in diverse categories that can be used to change the perspective of the videos.
The user interface is well-defined and easy to use for beginners.
It offers fast rendering so that you can export the edited video in high quality.
Cons
This tool contains ads and has an expensive subscription plan.
Part 2: 3 Online WMV to GIF Converters
If you want to conduct online conversion of files from WMV to GIF instantly, use any of the following mentioned tools.
1. Adobe Creative Cloud Express
This online tool provides an easy way to convert WMV to GIF in a well-protected environment. You can import your WMV file to this tool easily either from your device or can utilize the drag and drop option. Afterward, you can select the quality type and file size from the displayed options. The conversion process does not take long, and you can easily share the newly converted GIF across online platforms.

Pros
This tool is free to use and offers basic editing options to create unlimited GIFs.<
You can select the file size of the GIF file so that you can easily save it on your device without worrying about space usage.<
You can adjust the aspect ratio of your manually before the conversion process.<
Through its trim option, you can eradicate unwanted parts easily.<
Cons
It only offers premium features such as refine, cutout, and resize in the premium plan.<
2. CloudConvert
CloudConvert is an online platform that will assist you in converting video files such as WMV into GIFs conveniently. This tool supports and shows compatibility with more than 200 file formats which depict that you can convert from and to GIFs in the best environment. You just need to upload the video file to this platform, and with a single click, you can get a GIF of the best possible quality.

Pros
You can simultaneously convert the videos files into GIFs through its batch processing option.
Apart from being an online tool, the software rendering integrated into this tool allows the users to get high-quality results after the conversion.
The data security in this tool is exceptional as this tool has a strict privacy policy for the users.
Apart from video and image files, you can also convert documents and audio files through this tool efficiently.
Cons
This online tool takes plenty amount of time to convert large-sized files.
3. Convertio
Convertio is another good example of an online GIF converter that supports tons of file formats. It has one of the easiest user interfaces among other online converters, as each function is well-displayed on its main interface. After uploading the video file on this online tool, you can easily select the output format, such as GIF, and within no time, you will get the desired result. This free tool also supports batch processing to offer an enhanced ecosystem to the users.

Pros
Beginners can rely on this online platform as it offers security along with tons of supported formats.
For instant conversion of the files, this tool is ideal as it does not demand the users to create accounts for sign-ups.
It does not disturb the users with constant ads and functions as a stable tool.
You can access this online tool from any browser, and it can easily work for converting videos, documents, and images.
Cons
For converting large-sized videos, you need to buy its subscription plan.
Part 3: How to Convert WMV to GIF Using Wondershare Filmora?
There are plenty of GIF converters, but to enjoy the best user experience, explore Wondershare Filmora. As we mentioned earlier, this tool includes every basic to advanced feature for both video editing and conversion process. To convert WMV to GIF through Filmora, use the below steps:
Step 1: Import WMV File
Launch Wondershare Filmora on your desktop and click to use its interface. Tap on the “New Project” option that will display a new window on your screen. At the media tab, click on the arrow and import the WMV file from browsing through your computer.

Step 2: Select GIF Format
Now drag the imported video to the timeline of this tool and tap on the “Export” button displayed on top. From the newly displayed window, select the “GIF” format from the left section.

Step 3: Click to Export
Along with changing file format, you can also name the file and can set its file location. For more settings, you can adjust its resolution, bit rate, and frame rate displayed on the right side of the screen. Once done, click on the “Export” option.

Conclusion
Create your GIFs by converting from the WMV files through powerful GIF converters. To convert WMV to GIF, we have recommended different tools along with their distinct features for your ease. However, to generate instant and best outputs, Wondershare Filmora comes on top as a powerful GIF converter. Through its advanced features, you can edit and create multiple GIFs within a well-defined platform.
GIFs function as a series of images that seem like an audio-less video and are widely used across numerous platforms. People send GIFs to their friends while chatting and also add them to their photos and videos. Moreover, this image format does not lose its quality during compression. Due to their high popularity, GIF converters are much needed.
If you have a WMV file and want to use it as a GIF, you can easily execute the conversion through GIF converters. You can find tons of GIF converters, but not every tool is reliable. For WMV to GIF conversion, we will provide the best GIF converters that you can utilize confidently.
In this article
Part 1: Best 3 WMV to GIF Converter Software
Part 2: 3 Online WMV to GIF Converters
Part 3: How to Convert WMV to GIF Using Wondershare Filmora?
Part 1: Best 3 WMV to GIF Converter Software
In this following part, we will discuss the best 3 offline GIF converters through which you can easily convert your files from WMV to GIF comfortably.
1. Wondershare Filmora
| Compatibility | Pricing |
|---|---|
| Windows/Mac | $28.98/Monthly $68.98/Annual $98.98/Perpetual |
Wondershare Filmora is a top-notch video editing tool comprising every basic and advanced feature that you would require. It offers smart templates that help beginners in designing their videos along with exceptional effects. Furthermore, people can utilize their royalty-free images and videos to add them to their videos for more dimensions.
Along with its extraordinary video editing features, people can also convert their videos files to numerous formats such as GIFs and other formats. Although the user interface of Filmora is extremely easy to handle, if you still find some difficulties, you can watch the tutorials from their platform to execute the editing process easier. By using this excellent platform, you can not only get rid of the flaws in your videos but can also convert them to GIF format conveniently.

Pros
The “Instant Mode” of Filmora enables the users to design and create their videos with great proficiency without spending too much time.
It comprises animated effects that can add an artistic element to your videos.
It has an excellent function of a “Screen Recorder” that can effortlessly capture the on-screen activities of your computer.
You can easily synchronize the audio and soundtracks with the videos through its “Auto Synchronization” feature.
Cons
The free version of this platform comprises a watermark that can ruin the actual impression of the video.
2. Adobe Premiere Pro
| Compatibility | Pricing |
|---|---|
| Windows/Mac | $20.99/Monthly |
This tool is an ultimate professional video editor that comprises the ability to transform videos into a high-end project. You can add various transitions to the videos and can portray interesting storytelling through them. You can easily upload the recorded video from either your smartphone or professional camera and can edit the footage in up to 8K high quality.
Furthermore, when people try to export their videos, this tool displays multiple options to convert the current video file into another. Thus, you can easily convert your video file WMV into GIF quickly with a single click. Other amazing features of this tool include Adobe Stock, through which you can import various audio files and can professionally embed them in your video.

Pros
The “Auto-Reframe” feature allows the users to intelligently reframe their videos in 4K resolution flawlessly.
You can add subtitles to your videos through “Auto Transcriptions” quickly and can edit them further.
You can color fix the videos through its excellent filters, which can give an aesthetic impression.
The export settings of this tool can be customized, and you can easily share your videos to online platforms.
Cons
The user interface of Adobe Premiere Pro is a bit complicated, and non-professionals can find it difficult to use for the first time.
3. Cyberlink PowerDirector
| Compatibility | Pricing |
|---|---|
| Windows/Mac | $19.99/Monthly $69.99/Monthly |
This trustworthy tool is widely used for converting video files to GIF format along with various intuitive features. It also functions as a video editor as it includes advanced options to edit multiple video file formats effortlessly. You can use their enhanced “Mask and Blend” option to combine numerous video clips smoothly and professionally. Also, you can replace dull and boring skies from your videos through its “Sky Replacement” feature.
Along with its powerful conversion feature, you can also remove unwanted objects or people from the videos flawlessly with a single click. For a high-quality audio experience, you can use its audio tools to remove unnecessary background noise to make the vocals sound refined. Hence, it works as a trustworthy tool that not only makes the videos appealing but also provides ease to its users.

Pros
This platform offers motion tracking through which you can precisely synchronize the elements in your video.
It has included various effects and filters ranging in diverse categories that can be used to change the perspective of the videos.
The user interface is well-defined and easy to use for beginners.
It offers fast rendering so that you can export the edited video in high quality.
Cons
This tool contains ads and has an expensive subscription plan.
Part 2: 3 Online WMV to GIF Converters
If you want to conduct online conversion of files from WMV to GIF instantly, use any of the following mentioned tools.
1. Adobe Creative Cloud Express
This online tool provides an easy way to convert WMV to GIF in a well-protected environment. You can import your WMV file to this tool easily either from your device or can utilize the drag and drop option. Afterward, you can select the quality type and file size from the displayed options. The conversion process does not take long, and you can easily share the newly converted GIF across online platforms.

Pros
This tool is free to use and offers basic editing options to create unlimited GIFs.<
You can select the file size of the GIF file so that you can easily save it on your device without worrying about space usage.<
You can adjust the aspect ratio of your manually before the conversion process.<
Through its trim option, you can eradicate unwanted parts easily.<
Cons
It only offers premium features such as refine, cutout, and resize in the premium plan.<
2. CloudConvert
CloudConvert is an online platform that will assist you in converting video files such as WMV into GIFs conveniently. This tool supports and shows compatibility with more than 200 file formats which depict that you can convert from and to GIFs in the best environment. You just need to upload the video file to this platform, and with a single click, you can get a GIF of the best possible quality.

Pros
You can simultaneously convert the videos files into GIFs through its batch processing option.
Apart from being an online tool, the software rendering integrated into this tool allows the users to get high-quality results after the conversion.
The data security in this tool is exceptional as this tool has a strict privacy policy for the users.
Apart from video and image files, you can also convert documents and audio files through this tool efficiently.
Cons
This online tool takes plenty amount of time to convert large-sized files.
3. Convertio
Convertio is another good example of an online GIF converter that supports tons of file formats. It has one of the easiest user interfaces among other online converters, as each function is well-displayed on its main interface. After uploading the video file on this online tool, you can easily select the output format, such as GIF, and within no time, you will get the desired result. This free tool also supports batch processing to offer an enhanced ecosystem to the users.

Pros
Beginners can rely on this online platform as it offers security along with tons of supported formats.
For instant conversion of the files, this tool is ideal as it does not demand the users to create accounts for sign-ups.
It does not disturb the users with constant ads and functions as a stable tool.
You can access this online tool from any browser, and it can easily work for converting videos, documents, and images.
Cons
For converting large-sized videos, you need to buy its subscription plan.
Part 3: How to Convert WMV to GIF Using Wondershare Filmora?
There are plenty of GIF converters, but to enjoy the best user experience, explore Wondershare Filmora. As we mentioned earlier, this tool includes every basic to advanced feature for both video editing and conversion process. To convert WMV to GIF through Filmora, use the below steps:
Step 1: Import WMV File
Launch Wondershare Filmora on your desktop and click to use its interface. Tap on the “New Project” option that will display a new window on your screen. At the media tab, click on the arrow and import the WMV file from browsing through your computer.

Step 2: Select GIF Format
Now drag the imported video to the timeline of this tool and tap on the “Export” button displayed on top. From the newly displayed window, select the “GIF” format from the left section.

Step 3: Click to Export
Along with changing file format, you can also name the file and can set its file location. For more settings, you can adjust its resolution, bit rate, and frame rate displayed on the right side of the screen. Once done, click on the “Export” option.

Conclusion
Create your GIFs by converting from the WMV files through powerful GIF converters. To convert WMV to GIF, we have recommended different tools along with their distinct features for your ease. However, to generate instant and best outputs, Wondershare Filmora comes on top as a powerful GIF converter. Through its advanced features, you can edit and create multiple GIFs within a well-defined platform.
Also read:
- Step by Step to Cut Videos in Adobe Premiere Pro
- 2024 Approved Using VN Editor To Add Luts for Video Editing
- New In 2024, How to Create Your Own LUTs for Your Video with Filmora
- In 2024, Top 10 Voice Over Generators Windows, Mac, Android, iPhone, and Onli
- New In 2024, Are You Tired of Long Video Edits? Do You Speed up the Video in Canva without a Hassle? Well, Stick with Us as We Guide You Through the Process Step by Step
- New How to Convert Time-Lapse to Normal Video
- New 2024 Approved Want to Explore the Exciting World of GIFs? Here Is Everything You Will Ever Want to Know and Learn About the Most Appealing GIF Libraries, All at Once Place
- In 2024, How To Blur Background in Adobe Premiere Pro Detailed Guide
- New Easy Way to Inset Text in Video
- Updated 2024 Approved Slow Down the GIF to Emphasize Details Better. To Do so, Read This Guide and Learn to Use the Best Platforms for Slow-Motion GIFs
- The Glitch Filter Is Similar to an Error or a Distorted Effect in the Video. The Article Enables the Users to Get the VHS Filter in One of Their Travel Videos and Instagram Accounts for 2024
- Updated Discover 8 Top-Rated Video and Photo Merger Tools for Desktop, Mobile, and Online Use. Elevate Your Media Game and Create Stunning Visuals with Ease
- Updated 2024 Approved OpenCV Object Tracking The Complete Guide
- New If You Want to Record Video Streams on Windows or Mac Using FFmpeg, Read Our Guide and Learn How to Do This with Easy Step-by-Step Instructions for 2024
- New The Craziest 10 AI Editors Youve Ever Seen for 2024
- New In 2024, FLV Editor for Windows 11/10/8.1/8/7 Easily Edit FLV Videos on PC
- 2024 Approved Create Kinetice Typography Text Effect in Filmora
- New Best AR Video Apps
- Updated How to Change Video Resolution in Filmora
- In 2024, 3 Methods to Combine 2 or 3 Videos Into 1
- 2024 Approved Wondershare Filmora Tutorial | Using The AI Auto Reframe Feature
- New In This Article, We Shall Take a Look at the Various Steps of Making a Photo Collage in Microsoft Word, and Also at Other Details of the Process, Which Might Be Relevant for 2024
- Updated Advancements in Game Recording Software A Comprehensive Overview for 2024
- 2024 Approved Zoom In and Zoom Out on YouTube
- Updated Looking For a Cheap Camera to Make Slow Motion Video? Get It Now for 2024
- New How To Change Sky Background With Adobe Photoshop Best Ways
- Updated How to Create Freeze Frame Clone Effect for 2024
- Updated In 2024, How to Change Video Thumbnail in Google Drive
- Adobe Premiere Pro Guide to Slow-Down Video for 2024
- Updated How to Create a Custom Slide Show in PowerPoint
- New The Best Jump Cut Editing Tricks Make Your Videos Snappy!
- 2024 Approved How Can Filmora Create an Audio Visualizer Project for a Song? All Steps, From Launching the App to Editing the Text, Are Detailed Here
- Updated How to Add Effects on TikTok
- Updated Bandicut Video Editor Review for 2024
- Updated Top Fixes to Resolve Issues with Premiere Pro Slow Playback
- Updated In 2024, 10 Best Innovative AR Video Effects to Check Out
- Updated Explore a Variety of Inexpensive Camera Models Suitable for Making Slow-Motion Footage without Compromising Quality for 2024
- New In 2024, Best Photo Video Maker Apps with Song PC, Mobile, Online
- New In This Article, We Introduce You Our Top 5 Picks of Video to Ppt Converter
- Updated When Struggling to Find a Suitable Game Recorder for Your PC, You Might Come Across Many Options. Explore the Best Game Recorders for Sharing Game Highlights
- Easy Guide How To Bypass OnePlus Nord N30 SE FRP Android 10/11/12/13
- In 2024, How to Fix Pokemon Go Route Not Working On Honor X50 GT? | Dr.fone
- 5 Quick Methods to Bypass Realme C55 FRP
- Top 10 Fixes for Phone Keep Disconnecting from Wi-Fi On Honor Magic Vs 2 | Dr.fone
- Two Ways to Track My Boyfriends Samsung Galaxy A15 4G without Him Knowing | Dr.fone
- How to Unlock iPhone 12 With an Apple Watch & What to Do if It Doesnt Work
- Home Button Not Working on Nokia C210? Here Are Real Fixes | Dr.fone
- In 2024, Latest way to get Shiny Meltan Box in Pokémon Go Mystery Box On Oppo Reno 11F 5G | Dr.fone
- In 2024, Fake the Location to Get Around the MLB Blackouts on Samsung Galaxy M54 5G | Dr.fone
- A Step-by-Step Guide on Using ADB and Fastboot to Remove FRP Lock on your Samsung Galaxy XCover 6 Pro Tactical Edition
- In 2024, Android to Apple How To Transfer Photos From Oppo F23 5G to iPad Easily | Dr.fone
- How to fix iCloud lock on your Apple iPhone 14 Pro and iPad
- In 2024, Can Life360 Track You When Your Xiaomi Redmi Note 13 Pro+ 5G is off? | Dr.fone
- In 2024, How to Transfer Data from Realme 11 5G to Other Android Devices? | Dr.fone
- In 2024, How to Transfer Data from Nokia 105 Classic to Other Android Devices? | Dr.fone
- How to Fix the Apple iPhone 6 Plus GPS not Working Issue | Dr.fone
- Full Guide to Fix iToolab AnyGO Not Working On Honor Magic Vs 2 | Dr.fone
- How can I get more stardust in pokemon go On Lava Storm 5G? | Dr.fone
- In 2024, 2 Ways to Transfer Text Messages from Honor V Purse to iPhone 15/14/13/12/11/X/8/ | Dr.fone
- Does Life360 Notify When You Log Out On Infinix Hot 30i? | Dr.fone
- Easily Unlock Your Realme Narzo 60 Pro 5G Device SIM
- In 2024, Complete Tutorial to Use VPNa to Fake GPS Location On Tecno Camon 30 Pro 5G | Dr.fone
- In 2024, How To Bypass Tecno Pova 5 Pro FRP In 3 Different Ways
- In 2024, How to Intercept Text Messages on Samsung Galaxy A54 5G | Dr.fone
- In 2024, How Do You Remove Restricted Mode on iPhone 11 Pro | Dr.fone
- In 2024, How to Watch Hulu Outside US On Vivo S18e | Dr.fone
- In 2024, How to Fix Pokemon Go Route Not Working On Tecno Spark 10 5G? | Dr.fone
- A Comprehensive Guide to iCloud Unlock From Apple iPhone 13 Pro Max Online
- In 2024, Hacks to do pokemon go trainer battles For Realme Narzo 60 Pro 5G | Dr.fone
- Fixes for Apps Keep Crashing on Sony Xperia 1 V | Dr.fone
- Undelete lost messages from Galaxy S24
- Reasons for Samsung Galaxy F14 5G Stuck on Startup Screen and Ways To Fix Them | Dr.fone
- In 2024, How to Change your Lava Yuva 2 Location on Twitter | Dr.fone
- Detailed guide of ispoofer for pogo installation On Vivo V30 Lite 5G | Dr.fone
- New The Ultimate List of Live Chat Apps for Shopify
- In 2024, How Many Attempts To Unlock iPhone 15 Plus
- Title: Updated Learn How to Create a Unique Repeated Text Animation in the Filmora Video Editor. Follow the Simple Step-by-Step Instructions
- Author: Morgan
- Created at : 2024-05-19 05:12:39
- Updated at : 2024-05-20 05:12:39
- Link: https://ai-video-editing.techidaily.com/updated-learn-how-to-create-a-unique-repeated-text-animation-in-the-filmora-video-editor-follow-the-simple-step-by-step-instructions/
- License: This work is licensed under CC BY-NC-SA 4.0.


