:max_bytes(150000):strip_icc():format(webp)/AnneParkShedloskytvOS-2d4178dd6b7d46a08c34ab8b750fe23e.jpg)
Updated MAGIX Vegas Pro Review A Professional Video Editing Software for 2024

MAGIX Vegas Pro Review: A Professional Video Editing Software
MAGIX Vegas Pro is a powerful and flexible solution for editing, creating, and adding a finishing touch to your videos. The software combines cutting-edge technology with a highly intuitive user interface, making it easy to use for newbies in the world of video production.
In this MAGIX Vegas Pro review, we’ll take a look at the software and tell you why it’s a great video editor. We’ll also provide a Sony Vegas vs. Adobe Premiere comparison to see how they stand against each other.
Part 1. What Is MAGIX Vegas Pro
Firstly, let’s have a deeper understanding of MAGIX Vegas Pro before we have a review in Part 2.
MAGIX is a computer software company that produces a variety of audio, video, and graphic design digital products. MAGIX has been in business for over 25 years, and its products are used by millions worldwide.
Vegas software was first released in 1999 by Sonic Foundry. Sony Creator Software purchased the program in 2003 and released its several versions till 2014. The company later sold it to MAGIX.
Sony Vegas History Series
Some of the Vegas software series released by Sony Creative Software are listed below:
- Vegas 4.0e: Released in November 2003, the first version by Sony.
- Vegas 5.0: Released in April 2004.
- Vegas 6.0: Released in April 2005.
- Vegas 7.0: Released in September 2006.
- Vegas Pro 8.0: Released in September 2007.
- Vegas Pro 8.1: First Sony Vegas version to support 64-bit.
- Vegas Pro 9.0: Released in 2009 with greater support for digital cinema.
- Vegas Pro 10: Released in 2010.
- Vegas Pro 11: Released on 17 October 2011.
- Vegas Pro 12: Released in November 2012.
- Vegas Pro 13: Released in April 2014 with new collaboration tools, the last version by Sony.
MAGIX Vegas Pro 20
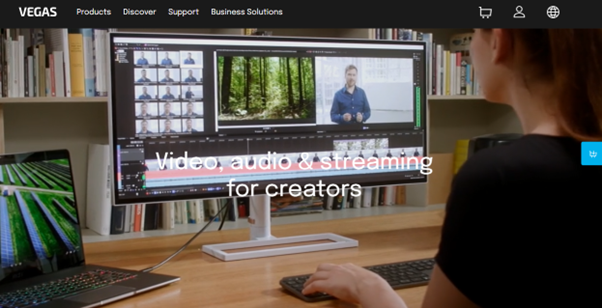
MAGIX Vegas Pro 20 is an industry-leading video editing software program owned by MAGIX. The software can help you manipulate, combine, and edit your video clips with various tools in an easy-to-use interface. Vegas Pro is well known among professionals who need to create high-quality videos.
Some basic functions of the Vegas Pro 20 include Speech to Text functionality, Audio production with VST3, Eight Preset Window Layouts, Track effect, Color grading, Optical Flow mode, Fade In/Out features, Honeycomb, and Color Plane presets for GL transitions, and Add and Arrange Media.
Part 2. MAGIX Vegas Pro Review
The Vegas Pro 20 is a tailor-made software for content creators with an optimized interface, fast rendering speed, and many features to help them create video projects that stand out.
The Score On G2
MAGIX Vegas Pro - a top-of-the-line video editing software that has received several positive reviews from critics and developers on the G2, a famous software review platform.
- Ease of Use: 8.6 stars out of 10.
- Ease of Setup: 9.2 stars.
- Quality of Support: 7.2 stars.
- Overall: 4.2 stars out of 5.
Price
VEGAS editing software has three tiers that are each designed to fit your specific workflow requirements and budget:
- VEGAS Edit: Includes a basic package that costs $12.99/ month or $249 for a perpetual license.
- VEGAS Pro: Advanced package with SOUND FORGE Audio Studio and advanced video editing tools. The package is priced at $19.99/ month or $399 for a perpetual license.
- VEGAS Post: Ultimate bundle with Vegas effects for high-end compositing and RAW image support. The package will cost you $29.99/ month or $599 for a perpetual license.

![]()
Note: MAGIX Vegas Pro also offers a 30-day free trial that is only limited to basic features.
Functions Review
We’ll now review some of the most important features of MAGIX Vegas Pro 20 and see how they can be used to improve your video editing workflow.
- Color Touches: The interface has now got a new look that is a bit darker, sleeker, and more professional that lets the icons pop up and become more visible than before.
- Color Grading: The color grading panel has also received some improvements and is redesigned into a range-limited color wheel, providing more functionalities.

- Track Effects: The Vegas Pro 20 offers adjustment tracks that help apply effects to the entire track. You can also alter the intensity of these effects and use keyframes from the timeline.
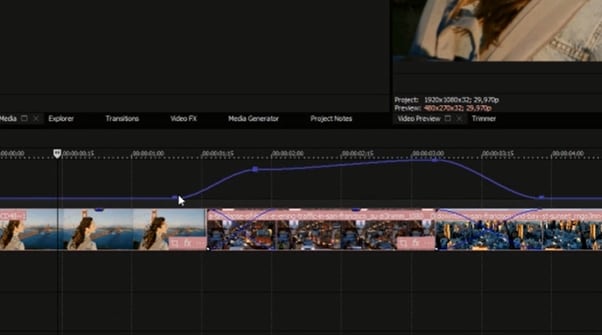
- Scene Detection: The new “Automatic Scene Detection” feature saves you the hassle of cutting your video clips manually before adding them to the timeline. The software does this in three ways: Analyse, Detect, and Split the scenes to add them to the timeline in a sequence.
- Supported Formats: VEGAS Pro is compatible with Blackmagic RAW, MP4, Apple ProRes, MPEG-2, MPEG-1, AVI,AVC, Panasonic P2, and RED RAW video formats. The software also supports images and audio formats.
And we have prepared a video for you below, so that you can establish an overview of MAGIX Vegas Pro 20 better.
Video - Full Walkthrough of Vegas Pro 20
Part 3. MAGIX Vegas Pro Pros and Cons
Like any other software, MAGIX Vegas Pro also has pros and cons that you must be aware of before making any purchase.
Pros
- Comes with improved and user-friendly color grading tools.
- Offers free stock clips for the premium version.
- Improved rendering performance.
- Traditional nested timeline.
- Offers social export options such as YouTube and Facebook.
- Save your project automatically.
- Supports chroma key and AI AIDs.
- Has an advanced HDR color correction tool.
Cons
- Expensive for some users.
- Only supports Windows 10/11.
- Lacks convenience found in similar software.
- Unstable Multicam.
- The startup does not offer a Welcome panel.
- Lacks tutorials to help.
- Some programs lack stability.
- Do not support timely after-sale services.
Part 4. Sony Vegas VS Adobe Premiere, Which One is Better?
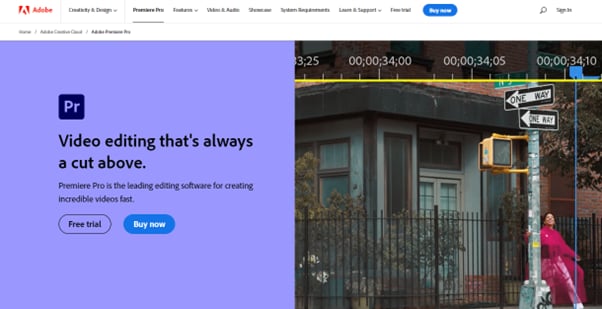
Both Sony Vegas and Adobe Premiere are powerful video editing software programs with their own unique strengths and weaknesses. As with any software decision, it ultimately comes down to the specific needs of the user to decide which one is better.
Here is our complete guide to the two software programs to help you decide which is best for your needs: Sony Vegas VS Adobe Premiere. Which One is Better ?
Conclusion
Vegas Pro 19 is an excellent video editor that offers robust features and a streamlined user experience. In addition, the software’s intuitive interface allows anyone to edit videos quickly and easily without having to know any complicated techniques.
In this article, we’ve provided the MAGIX Vegas Pro review to help you understand the features, pros, and cons and what the software has to offer for content creators. We’ve also explored the series of versions developed and released by Sony Vegas.
Hopefully, you find our Magix Vegas Pro 20 review helpful and can now make a better buying decision.
Free Download For Win 7 or later(64-bit)
Free Download For macOS 10.14 or later
Functions Review
We’ll now review some of the most important features of MAGIX Vegas Pro 20 and see how they can be used to improve your video editing workflow.
- Color Touches: The interface has now got a new look that is a bit darker, sleeker, and more professional that lets the icons pop up and become more visible than before.
- Color Grading: The color grading panel has also received some improvements and is redesigned into a range-limited color wheel, providing more functionalities.

- Track Effects: The Vegas Pro 20 offers adjustment tracks that help apply effects to the entire track. You can also alter the intensity of these effects and use keyframes from the timeline.

- Scene Detection: The new “Automatic Scene Detection” feature saves you the hassle of cutting your video clips manually before adding them to the timeline. The software does this in three ways: Analyse, Detect, and Split the scenes to add them to the timeline in a sequence.
- Supported Formats: VEGAS Pro is compatible with Blackmagic RAW, MP4, Apple ProRes, MPEG-2, MPEG-1, AVI,AVC, Panasonic P2, and RED RAW video formats. The software also supports images and audio formats.
And we have prepared a video for you below, so that you can establish an overview of MAGIX Vegas Pro 20 better.
Video - Full Walkthrough of Vegas Pro 20
Part 3. MAGIX Vegas Pro Pros and Cons
Like any other software, MAGIX Vegas Pro also has pros and cons that you must be aware of before making any purchase.
Pros
- Comes with improved and user-friendly color grading tools.
- Offers free stock clips for the premium version.
- Improved rendering performance.
- Traditional nested timeline.
- Offers social export options such as YouTube and Facebook.
- Save your project automatically.
- Supports chroma key and AI AIDs.
- Has an advanced HDR color correction tool.
Cons
- Expensive for some users.
- Only supports Windows 10/11.
- Lacks convenience found in similar software.
- Unstable Multicam.
- The startup does not offer a Welcome panel.
- Lacks tutorials to help.
- Some programs lack stability.
- Do not support timely after-sale services.
Part 4. Sony Vegas VS Adobe Premiere, Which One is Better?
Both Sony Vegas and Adobe Premiere are powerful video editing software programs with their own unique strengths and weaknesses. As with any software decision, it ultimately comes down to the specific needs of the user to decide which one is better.
Here is our complete guide to the two software programs to help you decide which is best for your needs: Sony Vegas VS Adobe Premiere. Which One is Better ?

Conclusion
Vegas Pro 19 is an excellent video editor that offers robust features and a streamlined user experience. In addition, the software’s intuitive interface allows anyone to edit videos quickly and easily without having to know any complicated techniques.
In this article, we’ve provided the MAGIX Vegas Pro review to help you understand the features, pros, and cons and what the software has to offer for content creators. We’ve also explored the series of versions developed and released by Sony Vegas.
Hopefully, you find our Magix Vegas Pro 20 review helpful and can now make a better buying decision.
Free Download For Win 7 or later(64-bit)
Free Download For macOS 10.14 or later
Do You Want Your Video Footage to Resemble Kodak Films? You Can Get the Old Kodak Film Look by Searching for Kodak 2383 LUT Free Download on the Internet
If you’re from the 20th century, you might have used Kodak cameras. Those cameras had a distinct look and feel, creating a nostalgic look. However, as technology has advanced, we now have access to more advanced cameras. Moreover, these new cameras can capture high-quality images with accurate details. However, you can still achieve that classic Kodak look with the help of LUTs.
To add up, these LUTs can mimic the characteristics of specific films or looks, including Kodak films. There are various LUTs available to download, offering different film looks and styles. In contrast, you can get the classic Kodak film look with your modern cameras. There are different options for Kodak 2383 LUTs free download on the internet. You can download these LUTs to apply on your digital media.
Part 1: An Overview of Some Famous Kodak LUTs and Powergrade Print Films
There are many different presets available that give you Kodak films-like color grading. Here are some of the Kodak film presets that you can use.
Kodak 2383
Kodak 2383 is a color film known for its unique qualities. When used, it enhances the richness of black shades, adding depth and intensity to your images. Additionally, it brings out neutral highlights, creating a distinctive Kodak film look. Moreover, this color film is suitable for both traditional camera films and digital prints. Additionally, you can expect your images to have a timeless quality and a distinct character.
Moreover, you can give your photos a dramatic touch with black shades and neutral highlights. These color films are a unique way to give your content a classic Kodak film look. You can experience the richness and clarity it brings to your images using this film. You can get the Kodak 2383 LUT download link online.
Kodak 2393
Kodak 2393 is a Powergrade film preset that you can use. This editable LUT can improve your media files by adding richer colors, especially in the shadows. When you apply this LUT, it brings out the natural beauty of your video with the right amount of saturation. Furthermore, you can make your videos a more natural and lifelike appearance with this Powergrade.
Moreover, it works particularly well in adding depth and richness to darker areas of your footage. Similarly, it ensures that every detail is visible in a natural way. Furthermore, this LUT can achieve a more natural and realistic look. Additionally, it is a great choice if you’re looking to add vibrance and naturalness to your media files.
Kodak 2302
Kodak 2302 is a high-resolution black-and-white color print film. Furthermore, this film is specifically designed for blue-sensitive printing. It allows for the precise reproduction of details and tones in black-and-white imagery. Moreover, this Kodak 2302 film offers exceptional image quality. Additionally, it uses electron beam recorders to create positive and negative titles.
In addition to this, it also creates RGB separations using beam recorders. Similarly, this technology creates accurate color reproduction and improves the final print’s quality. Kodak 2302 is coated with an ESTAR base to enhance its performance further. This special coating improves the film’s physical properties, making it more durable and resistant.
Empower your videos with a new mood using different LUTs. Filmora now offers 100+ top-quality 3D LUTs cover a broad range of scenarios. Transform your videos with Filmora’s powerful 3D LUTs.
Apply LUT on Videos Apply LUT on Videos Learn More

Part 2: The Best Kodak LUTs Free Available in the Market
You might find many Kodak 2393 LUT free download links, but some of them are not authentic. Here is a list of authentic Kodak-inspired LUTs that you can download and use.
1. Kinetic
Kinetic LUT is a great preset inspired by the iconic Kodak 2383 and 2393 films. With Kinetic, you can bring a vibrant and dynamic color palette to your digital media. This LUT enhances shades such as deep blues and rich reds, adding depth and intensity to your visuals. Moreover, it creates dynamic shadows to bring a sense of richness and dimension to your content. It is a pack of 5 Kodak-inspired LUTs.

2. Kodak Film 2383 - Vlog
The Kodak Film 2383 - Vlog LUT is a perfect choice for adding a Kodak-inspired look to your vlogs. This LUT brings an authentic touch to your content. Moreover, this LUT enhances the color grading of your content with yellowish and bluish tones. Furthermore, it aims to recreate the look and feel of shooting with Kodak film stock. Experiment, explore, and find the perfect balance that brings out the best in your vlogs.

3. Kodak 2383 Print Film LUT
The Kodak 2383 Print Film LUT allows you to create a modern cinematic look. You can use digital videos and transform them into old-style Kodak films look. Moreover, this LUT replicates the color grading of the Kodak 2383 print film. Additionally, it captures the essence of the original film stock, providing an authentic feel. It is a great LUT to make your video content look more natural.

4. Free LUTs Kodak Color
It is a collection of LUTs inspired by the iconic Kodak film look. LUTs Kodak Color is created to enhance your media with vibrant colors and a cinematic look. It is a Kodak LUT free pack that you can download from the internet. Moreover, it adds vibrancy to your media, making the colors pop and come to life. Additionally, these LUTs decrease the white balance, giving your media a warmer tone.

5. KODAK Film Emulation LUT
The KODAK Film Emulation LUT is a collection of 16 cinematic LUTs. These LUTs are inspired by the iconic Kodak 2383 film. Furthermore, these LUTs allow you to achieve the timeless and distinctive look of Kodak film. Moreover, to increase the authenticity of Kodak films, this LUT highlights rich red and blue tones. This LUT replicates Kodak film stock to improve the character of your digital media files.

6. Kodak Film LUTs and Presets
The Kodak Film LUTs and Presets pack features 17 LUTs inspired by the iconic Kodak film look. These LUTs are created to give your digital files a timeless aesthetic. Moreover, it fades certain colors and adds vibrant tones to your media files. Furthermore, replicating Kodak films adds richness and depth to your content with color grading. Additionally, it maintains a perfect balance between classic and modern looks.

7. CL-Kodak
CL-Kodak is a collection of 28 Kodak-style LUTs. Each LUT is designed to elevate your color grading game. Furthermore, you can color grade your media with the iconic reddish tones of Kodak films. Additionally, these LUTs add a grainy texture to your media. These LUTs support Kodak cameras up to 8K resolution. Using these LUTs, you can give your digital files the authentic nostalgic feel of Kodak films.

Part 3: Wondershare Filmora: Reviewing LUTs in Video Editor
There are many great video editing software that exist in the market. Wondershare Filmora , being among the best, offers features to enhance your videos, including color grading and adjustment capabilities. With Filmora, you can modify the colors and tones of your videos to get the desired look and feel. Furthermore, you can apply LUTs using Wondershare Filmora. You can import different LUTs in the tool and apply them directly to your files.
Add LUTs on Video For Win 7 or later(64-bit)
Add LUTs on Video For macOS 10.14 or later
In its newest update, Filmora has introduced over 200+ LUTs you can download and use. Filmora has expanded your creative color grading and adjustment options with this feature. These LUTs cover many styles, from bold and modern to retro and vintage looks. With such a vast selection, you can easily find the perfect LUT to match the mood and tone of your video project.

Key Features of Wondershare Filmora
- Filmora offers complete video editing features to help you edit your videos. You can trim and merge clips and apply transitions. Moreover, you can add text and titles, import music and sound effects, and much more.
- Furthermore, Wondershare Filmora provides advanced tools for precise control over your videos. You can adjust the brightness and contrast. Furthermore, you can control saturation and other parameters.
- You can create dynamic animations and apply effects at any frame with keyframing. Moreover, using this feature, you can add effects to specific sections of your video.
Conclusion
To conclude, using LUTs is a simple and effective way to transform your media files. Moreover, you can also add a nostalgic or cinematic feel to your videos. You can experiment with different film looks by exploring different LUTs. Furthermore, you can even get Kodak 2393 Powergrade free download options online. These Kodak-film-inspired LUTs can take you back to the 20th century.
Apply LUT on Videos Apply LUT on Videos Learn More

Part 2: The Best Kodak LUTs Free Available in the Market
You might find many Kodak 2393 LUT free download links, but some of them are not authentic. Here is a list of authentic Kodak-inspired LUTs that you can download and use.
1. Kinetic
Kinetic LUT is a great preset inspired by the iconic Kodak 2383 and 2393 films. With Kinetic, you can bring a vibrant and dynamic color palette to your digital media. This LUT enhances shades such as deep blues and rich reds, adding depth and intensity to your visuals. Moreover, it creates dynamic shadows to bring a sense of richness and dimension to your content. It is a pack of 5 Kodak-inspired LUTs.

2. Kodak Film 2383 - Vlog
The Kodak Film 2383 - Vlog LUT is a perfect choice for adding a Kodak-inspired look to your vlogs. This LUT brings an authentic touch to your content. Moreover, this LUT enhances the color grading of your content with yellowish and bluish tones. Furthermore, it aims to recreate the look and feel of shooting with Kodak film stock. Experiment, explore, and find the perfect balance that brings out the best in your vlogs.

3. Kodak 2383 Print Film LUT
The Kodak 2383 Print Film LUT allows you to create a modern cinematic look. You can use digital videos and transform them into old-style Kodak films look. Moreover, this LUT replicates the color grading of the Kodak 2383 print film. Additionally, it captures the essence of the original film stock, providing an authentic feel. It is a great LUT to make your video content look more natural.

4. Free LUTs Kodak Color
It is a collection of LUTs inspired by the iconic Kodak film look. LUTs Kodak Color is created to enhance your media with vibrant colors and a cinematic look. It is a Kodak LUT free pack that you can download from the internet. Moreover, it adds vibrancy to your media, making the colors pop and come to life. Additionally, these LUTs decrease the white balance, giving your media a warmer tone.

5. KODAK Film Emulation LUT
The KODAK Film Emulation LUT is a collection of 16 cinematic LUTs. These LUTs are inspired by the iconic Kodak 2383 film. Furthermore, these LUTs allow you to achieve the timeless and distinctive look of Kodak film. Moreover, to increase the authenticity of Kodak films, this LUT highlights rich red and blue tones. This LUT replicates Kodak film stock to improve the character of your digital media files.

6. Kodak Film LUTs and Presets
The Kodak Film LUTs and Presets pack features 17 LUTs inspired by the iconic Kodak film look. These LUTs are created to give your digital files a timeless aesthetic. Moreover, it fades certain colors and adds vibrant tones to your media files. Furthermore, replicating Kodak films adds richness and depth to your content with color grading. Additionally, it maintains a perfect balance between classic and modern looks.

7. CL-Kodak
CL-Kodak is a collection of 28 Kodak-style LUTs. Each LUT is designed to elevate your color grading game. Furthermore, you can color grade your media with the iconic reddish tones of Kodak films. Additionally, these LUTs add a grainy texture to your media. These LUTs support Kodak cameras up to 8K resolution. Using these LUTs, you can give your digital files the authentic nostalgic feel of Kodak films.

Part 3: Wondershare Filmora: Reviewing LUTs in Video Editor
There are many great video editing software that exist in the market. Wondershare Filmora , being among the best, offers features to enhance your videos, including color grading and adjustment capabilities. With Filmora, you can modify the colors and tones of your videos to get the desired look and feel. Furthermore, you can apply LUTs using Wondershare Filmora. You can import different LUTs in the tool and apply them directly to your files.
Add LUTs on Video For Win 7 or later(64-bit)
Add LUTs on Video For macOS 10.14 or later
In its newest update, Filmora has introduced over 200+ LUTs you can download and use. Filmora has expanded your creative color grading and adjustment options with this feature. These LUTs cover many styles, from bold and modern to retro and vintage looks. With such a vast selection, you can easily find the perfect LUT to match the mood and tone of your video project.

Key Features of Wondershare Filmora
- Filmora offers complete video editing features to help you edit your videos. You can trim and merge clips and apply transitions. Moreover, you can add text and titles, import music and sound effects, and much more.
- Furthermore, Wondershare Filmora provides advanced tools for precise control over your videos. You can adjust the brightness and contrast. Furthermore, you can control saturation and other parameters.
- You can create dynamic animations and apply effects at any frame with keyframing. Moreover, using this feature, you can add effects to specific sections of your video.
Conclusion
To conclude, using LUTs is a simple and effective way to transform your media files. Moreover, you can also add a nostalgic or cinematic feel to your videos. You can experiment with different film looks by exploring different LUTs. Furthermore, you can even get Kodak 2393 Powergrade free download options online. These Kodak-film-inspired LUTs can take you back to the 20th century.
Fast and Easy Method to Match Color in Photoshop
Fast and Easy Method to Match Color in Photoshop
An easy yet powerful editor
Numerous effects to choose from
Detailed tutorials provided by the official channel
Photoshop is one such editing tool where we can easily edit our photos and videos. And Photoshop matches can colour in the same image, which is one of the most incredible features of this tool. And in the following discussion, we will be talking about how you can color match photos online with the help of Photoshop.
And lastly, we will be introducing you to another proficient tool that has the perfect feature to help you edit and colour match photos. So, let us get started with our discussion without any further delay.
In this article
01 [What Scene is Photoshop’s Color Matching Generally Used For?](#Part 1)
02 [How to perfectly match colors in Photoshop when combining photos?](#Part 2)
03 [Is There Any Other Ways to Use Color Matching?](#Part 3)
Part 1 What Scene is Photoshop’s Color Matching Generally Used For?
You can match color in Photoshop in just a few simple steps. And as far as the question of what scene can be used for it, you can use any and every photo you want to match the colour for. And the following steps will be noting how you can adjust the color of an image in Photoshop.
Step Open both the images, the one you want to alter and the one you want to change it with. And if it is just one image, open and select that one image.
Step Choose the “Image” and then select the “Adjustment” option. And after you choose the “Adjustment” option, go to the “Match Colour” option. You will be noticing the target photo that you have opted for.
Step You will find the “Image Statistics” portion in the dialogue portion. Opt for the “Source” list and select the image name consisting of the shades and hues you would want your image to be altered. You will notice a thumbnail appearing in the dialogue as you do so. And you will automatically see the colours of the photo have changed.
Step Now use the “Preview” feature to see the photoshop match colour tone, and then you will be done with adjusting the colour!
Part 2 How to perfectly match colors in Photoshop when combining photos
Now, we will be discussing the different steps that will help you match color from photo in Photoshop, with absolute precision and effortlessness. Here is the list of steps that you would need to follow to match skin tone in Photoshop most perfectly.
Step 1 Duplicate the background of the original photo
The first and the most essential step to match lighting photoshop or the colour or any other editing task is to duplicate the background of the original image. The reason for this is that without this step, we might lose out on the original background information, which is essential for the image.
And to duplicate the background of an image in Photoshop, you need to use a few shortcuts of your keyboard. If you are using a Windows device, then the shortcut for this will be “Ctrl+J”, and if you are using Mac, then the shortcut will be “ Command+J”.

Step 2 Select the Image whose colour you want to change.
Photoshop has several selection tools. Choose one of the many selection tools. You might choose the “Pen Tool” or the “Lasso Tool” or anything else. Select the image with the tool by drawing along the image with the tool. And when you are done with tracing the image with the selection tool of your choice, you will see a border marching around the image.

Step 3 Select the area of the second image
You will need the selection tool again. The second image is the one that consists of the colour you would want the original image to match with. So, use the selection tool again to trace out an area in the second picture with the colour you want.
Ensure that you trace out a substantial area with the colour you need. You need not be highly precise with selecting the area. Instead, focus on covering a large area so that you can cover up the different shades and hues of the colour.

Step 4 Move back to the original picture
We will proceed with the “Colour Match” feature in Photoshop, but before that, you must make sure that you have the original image selected. The technical term to use here is “Focus”. So, ensure that the original image is in focus.
You can bring the original image into “focus” by clicking anywhere inside the document’s window where the original image is present. And that will automatically bring back the focus to the original image.
Step 5 Bring the “Colour Match” command into function
After selecting the original image, reach out to the “Image” option and click on the “Adjustments” option. You will find the “Match Colour” option; click on it.
There are two sections of the “Color Match” option. One is the “Image Statistics” portion, and the other is the “Destination Image”. The “destination Image” portion consists of the name of the original image and a few image settings as well. The options include “luminescence”, “color intensity”, “fade”, and “neutralize”.
Step 6 Head to the “Image Statistics” portion
The “Image Statistics” portion consists of the “Source” option. It is present in the bottom down part of the “Image Statistics” box. It is a drop-down box, and you will have to click on it. Tap on the small downward arrow beside the “Source” option and then choose the second image where you traced out the area of the colour you would want your original image to have.

Your image might have more than one layer, and if so, you will have to opt for the correct layer from the “Layer” option of Photoshop.
Step 7 Select the correct options in the “Image Statistics” area
In the “Image Statistics” portion, you will find some options, such as “Use Selection in Source to Calculate Colours” and “Use Selection In Target To Calculate Adjustment”. You will have to click on this option and agree to them. It will instruct Photoshop to follow these instructions and colour match photos accordingly.

Click on “OK” after doing the changes mentioned above and exit the dialogue box to proceed with the next step.
Step 8 Add “Adjustment Layer”
Go to the “Layers” option and then opt for the “Layers Palette” present at the bottom. Then select “New Adjustment Layer” and click on the “Levels” option.

Step 9 Adjust the Pointers
You will find two pointers, one black and the other white. You will have to bring both the pointers to the centre of the line.
Then click on “OK” and exit the box to proceed with the next step.

Step 10 Select “Luminosity”
You will find the “Blend Mode” in the “Layers palette”. Select the “Blend Mode” from there. You will find it reflecting “Normal”, which is the default setting. You need to click on the small drop-down arrow and change the option from “Normal” to “Luminosity”.

Step 11 Deselect
Now, use the keyboard shortcut “Ctrl+D” if you are using windows and “Command+D” working on a Mac device. And this completes the entire process of colour matching in photoshop.
Part 3 Is There Any Other Ways to Use Color Matching?
You will find numerous other tools that give you the opportunity of editing images and videos. But there are only a few that will offer you the quality of precise and proficient features. And if you ask us whether there are any other ways of using colour matching, we would like to introduce to you one of the best photo editing tools- Filmora 11!
It has an incredible feature of “Colour Matching” that will offer you the ease of altering colours of your pictures in the most effortless way, with the quality of original intact and even sometimes enhanced. And now, we will be discussing the “Colour Matching” feature of Filmora 11.
If you want to change the color of a clipping, then Filmora 11’s “Color Matching” allows you to extract the clip and then match colors in just a few steps.
You can use the filters of this tool, and it allows you to match color from to 10as well. So, the efficiency and quality are incomparable.
It has an adaptive scene change, and no matter in which device you use Filmora to edit our images, it will work with equal proficiency.
● Key Takeaways from This Episode →
● In this discussion, we have enveloped the following topics.
● We discussed the scene in which you can match colors in Photoshop.
● Then we proceeded with the steps to help you use the “Color Match” feature of Photoshop.
● And lastly, we introduced o you to Filmora 1the best photo and video editing tool, and its incredible feature of “Color Matching”.
Photoshop is one such editing tool where we can easily edit our photos and videos. And Photoshop matches can colour in the same image, which is one of the most incredible features of this tool. And in the following discussion, we will be talking about how you can color match photos online with the help of Photoshop.
And lastly, we will be introducing you to another proficient tool that has the perfect feature to help you edit and colour match photos. So, let us get started with our discussion without any further delay.
In this article
01 [What Scene is Photoshop’s Color Matching Generally Used For?](#Part 1)
02 [How to perfectly match colors in Photoshop when combining photos?](#Part 2)
03 [Is There Any Other Ways to Use Color Matching?](#Part 3)
Part 1 What Scene is Photoshop’s Color Matching Generally Used For?
You can match color in Photoshop in just a few simple steps. And as far as the question of what scene can be used for it, you can use any and every photo you want to match the colour for. And the following steps will be noting how you can adjust the color of an image in Photoshop.
Step Open both the images, the one you want to alter and the one you want to change it with. And if it is just one image, open and select that one image.
Step Choose the “Image” and then select the “Adjustment” option. And after you choose the “Adjustment” option, go to the “Match Colour” option. You will be noticing the target photo that you have opted for.
Step You will find the “Image Statistics” portion in the dialogue portion. Opt for the “Source” list and select the image name consisting of the shades and hues you would want your image to be altered. You will notice a thumbnail appearing in the dialogue as you do so. And you will automatically see the colours of the photo have changed.
Step Now use the “Preview” feature to see the photoshop match colour tone, and then you will be done with adjusting the colour!
Part 2 How to perfectly match colors in Photoshop when combining photos
Now, we will be discussing the different steps that will help you match color from photo in Photoshop, with absolute precision and effortlessness. Here is the list of steps that you would need to follow to match skin tone in Photoshop most perfectly.
Step 1 Duplicate the background of the original photo
The first and the most essential step to match lighting photoshop or the colour or any other editing task is to duplicate the background of the original image. The reason for this is that without this step, we might lose out on the original background information, which is essential for the image.
And to duplicate the background of an image in Photoshop, you need to use a few shortcuts of your keyboard. If you are using a Windows device, then the shortcut for this will be “Ctrl+J”, and if you are using Mac, then the shortcut will be “ Command+J”.

Step 2 Select the Image whose colour you want to change.
Photoshop has several selection tools. Choose one of the many selection tools. You might choose the “Pen Tool” or the “Lasso Tool” or anything else. Select the image with the tool by drawing along the image with the tool. And when you are done with tracing the image with the selection tool of your choice, you will see a border marching around the image.

Step 3 Select the area of the second image
You will need the selection tool again. The second image is the one that consists of the colour you would want the original image to match with. So, use the selection tool again to trace out an area in the second picture with the colour you want.
Ensure that you trace out a substantial area with the colour you need. You need not be highly precise with selecting the area. Instead, focus on covering a large area so that you can cover up the different shades and hues of the colour.

Step 4 Move back to the original picture
We will proceed with the “Colour Match” feature in Photoshop, but before that, you must make sure that you have the original image selected. The technical term to use here is “Focus”. So, ensure that the original image is in focus.
You can bring the original image into “focus” by clicking anywhere inside the document’s window where the original image is present. And that will automatically bring back the focus to the original image.
Step 5 Bring the “Colour Match” command into function
After selecting the original image, reach out to the “Image” option and click on the “Adjustments” option. You will find the “Match Colour” option; click on it.
There are two sections of the “Color Match” option. One is the “Image Statistics” portion, and the other is the “Destination Image”. The “destination Image” portion consists of the name of the original image and a few image settings as well. The options include “luminescence”, “color intensity”, “fade”, and “neutralize”.
Step 6 Head to the “Image Statistics” portion
The “Image Statistics” portion consists of the “Source” option. It is present in the bottom down part of the “Image Statistics” box. It is a drop-down box, and you will have to click on it. Tap on the small downward arrow beside the “Source” option and then choose the second image where you traced out the area of the colour you would want your original image to have.

Your image might have more than one layer, and if so, you will have to opt for the correct layer from the “Layer” option of Photoshop.
Step 7 Select the correct options in the “Image Statistics” area
In the “Image Statistics” portion, you will find some options, such as “Use Selection in Source to Calculate Colours” and “Use Selection In Target To Calculate Adjustment”. You will have to click on this option and agree to them. It will instruct Photoshop to follow these instructions and colour match photos accordingly.

Click on “OK” after doing the changes mentioned above and exit the dialogue box to proceed with the next step.
Step 8 Add “Adjustment Layer”
Go to the “Layers” option and then opt for the “Layers Palette” present at the bottom. Then select “New Adjustment Layer” and click on the “Levels” option.

Step 9 Adjust the Pointers
You will find two pointers, one black and the other white. You will have to bring both the pointers to the centre of the line.
Then click on “OK” and exit the box to proceed with the next step.

Step 10 Select “Luminosity”
You will find the “Blend Mode” in the “Layers palette”. Select the “Blend Mode” from there. You will find it reflecting “Normal”, which is the default setting. You need to click on the small drop-down arrow and change the option from “Normal” to “Luminosity”.

Step 11 Deselect
Now, use the keyboard shortcut “Ctrl+D” if you are using windows and “Command+D” working on a Mac device. And this completes the entire process of colour matching in photoshop.
Part 3 Is There Any Other Ways to Use Color Matching?
You will find numerous other tools that give you the opportunity of editing images and videos. But there are only a few that will offer you the quality of precise and proficient features. And if you ask us whether there are any other ways of using colour matching, we would like to introduce to you one of the best photo editing tools- Filmora 11!
It has an incredible feature of “Colour Matching” that will offer you the ease of altering colours of your pictures in the most effortless way, with the quality of original intact and even sometimes enhanced. And now, we will be discussing the “Colour Matching” feature of Filmora 11.
If you want to change the color of a clipping, then Filmora 11’s “Color Matching” allows you to extract the clip and then match colors in just a few steps.
You can use the filters of this tool, and it allows you to match color from to 10as well. So, the efficiency and quality are incomparable.
It has an adaptive scene change, and no matter in which device you use Filmora to edit our images, it will work with equal proficiency.
● Key Takeaways from This Episode →
● In this discussion, we have enveloped the following topics.
● We discussed the scene in which you can match colors in Photoshop.
● Then we proceeded with the steps to help you use the “Color Match” feature of Photoshop.
● And lastly, we introduced o you to Filmora 1the best photo and video editing tool, and its incredible feature of “Color Matching”.
Photoshop is one such editing tool where we can easily edit our photos and videos. And Photoshop matches can colour in the same image, which is one of the most incredible features of this tool. And in the following discussion, we will be talking about how you can color match photos online with the help of Photoshop.
And lastly, we will be introducing you to another proficient tool that has the perfect feature to help you edit and colour match photos. So, let us get started with our discussion without any further delay.
In this article
01 [What Scene is Photoshop’s Color Matching Generally Used For?](#Part 1)
02 [How to perfectly match colors in Photoshop when combining photos?](#Part 2)
03 [Is There Any Other Ways to Use Color Matching?](#Part 3)
Part 1 What Scene is Photoshop’s Color Matching Generally Used For?
You can match color in Photoshop in just a few simple steps. And as far as the question of what scene can be used for it, you can use any and every photo you want to match the colour for. And the following steps will be noting how you can adjust the color of an image in Photoshop.
Step Open both the images, the one you want to alter and the one you want to change it with. And if it is just one image, open and select that one image.
Step Choose the “Image” and then select the “Adjustment” option. And after you choose the “Adjustment” option, go to the “Match Colour” option. You will be noticing the target photo that you have opted for.
Step You will find the “Image Statistics” portion in the dialogue portion. Opt for the “Source” list and select the image name consisting of the shades and hues you would want your image to be altered. You will notice a thumbnail appearing in the dialogue as you do so. And you will automatically see the colours of the photo have changed.
Step Now use the “Preview” feature to see the photoshop match colour tone, and then you will be done with adjusting the colour!
Part 2 How to perfectly match colors in Photoshop when combining photos
Now, we will be discussing the different steps that will help you match color from photo in Photoshop, with absolute precision and effortlessness. Here is the list of steps that you would need to follow to match skin tone in Photoshop most perfectly.
Step 1 Duplicate the background of the original photo
The first and the most essential step to match lighting photoshop or the colour or any other editing task is to duplicate the background of the original image. The reason for this is that without this step, we might lose out on the original background information, which is essential for the image.
And to duplicate the background of an image in Photoshop, you need to use a few shortcuts of your keyboard. If you are using a Windows device, then the shortcut for this will be “Ctrl+J”, and if you are using Mac, then the shortcut will be “ Command+J”.

Step 2 Select the Image whose colour you want to change.
Photoshop has several selection tools. Choose one of the many selection tools. You might choose the “Pen Tool” or the “Lasso Tool” or anything else. Select the image with the tool by drawing along the image with the tool. And when you are done with tracing the image with the selection tool of your choice, you will see a border marching around the image.

Step 3 Select the area of the second image
You will need the selection tool again. The second image is the one that consists of the colour you would want the original image to match with. So, use the selection tool again to trace out an area in the second picture with the colour you want.
Ensure that you trace out a substantial area with the colour you need. You need not be highly precise with selecting the area. Instead, focus on covering a large area so that you can cover up the different shades and hues of the colour.

Step 4 Move back to the original picture
We will proceed with the “Colour Match” feature in Photoshop, but before that, you must make sure that you have the original image selected. The technical term to use here is “Focus”. So, ensure that the original image is in focus.
You can bring the original image into “focus” by clicking anywhere inside the document’s window where the original image is present. And that will automatically bring back the focus to the original image.
Step 5 Bring the “Colour Match” command into function
After selecting the original image, reach out to the “Image” option and click on the “Adjustments” option. You will find the “Match Colour” option; click on it.
There are two sections of the “Color Match” option. One is the “Image Statistics” portion, and the other is the “Destination Image”. The “destination Image” portion consists of the name of the original image and a few image settings as well. The options include “luminescence”, “color intensity”, “fade”, and “neutralize”.
Step 6 Head to the “Image Statistics” portion
The “Image Statistics” portion consists of the “Source” option. It is present in the bottom down part of the “Image Statistics” box. It is a drop-down box, and you will have to click on it. Tap on the small downward arrow beside the “Source” option and then choose the second image where you traced out the area of the colour you would want your original image to have.

Your image might have more than one layer, and if so, you will have to opt for the correct layer from the “Layer” option of Photoshop.
Step 7 Select the correct options in the “Image Statistics” area
In the “Image Statistics” portion, you will find some options, such as “Use Selection in Source to Calculate Colours” and “Use Selection In Target To Calculate Adjustment”. You will have to click on this option and agree to them. It will instruct Photoshop to follow these instructions and colour match photos accordingly.

Click on “OK” after doing the changes mentioned above and exit the dialogue box to proceed with the next step.
Step 8 Add “Adjustment Layer”
Go to the “Layers” option and then opt for the “Layers Palette” present at the bottom. Then select “New Adjustment Layer” and click on the “Levels” option.

Step 9 Adjust the Pointers
You will find two pointers, one black and the other white. You will have to bring both the pointers to the centre of the line.
Then click on “OK” and exit the box to proceed with the next step.

Step 10 Select “Luminosity”
You will find the “Blend Mode” in the “Layers palette”. Select the “Blend Mode” from there. You will find it reflecting “Normal”, which is the default setting. You need to click on the small drop-down arrow and change the option from “Normal” to “Luminosity”.

Step 11 Deselect
Now, use the keyboard shortcut “Ctrl+D” if you are using windows and “Command+D” working on a Mac device. And this completes the entire process of colour matching in photoshop.
Part 3 Is There Any Other Ways to Use Color Matching?
You will find numerous other tools that give you the opportunity of editing images and videos. But there are only a few that will offer you the quality of precise and proficient features. And if you ask us whether there are any other ways of using colour matching, we would like to introduce to you one of the best photo editing tools- Filmora 11!
It has an incredible feature of “Colour Matching” that will offer you the ease of altering colours of your pictures in the most effortless way, with the quality of original intact and even sometimes enhanced. And now, we will be discussing the “Colour Matching” feature of Filmora 11.
If you want to change the color of a clipping, then Filmora 11’s “Color Matching” allows you to extract the clip and then match colors in just a few steps.
You can use the filters of this tool, and it allows you to match color from to 10as well. So, the efficiency and quality are incomparable.
It has an adaptive scene change, and no matter in which device you use Filmora to edit our images, it will work with equal proficiency.
● Key Takeaways from This Episode →
● In this discussion, we have enveloped the following topics.
● We discussed the scene in which you can match colors in Photoshop.
● Then we proceeded with the steps to help you use the “Color Match” feature of Photoshop.
● And lastly, we introduced o you to Filmora 1the best photo and video editing tool, and its incredible feature of “Color Matching”.
Photoshop is one such editing tool where we can easily edit our photos and videos. And Photoshop matches can colour in the same image, which is one of the most incredible features of this tool. And in the following discussion, we will be talking about how you can color match photos online with the help of Photoshop.
And lastly, we will be introducing you to another proficient tool that has the perfect feature to help you edit and colour match photos. So, let us get started with our discussion without any further delay.
In this article
01 [What Scene is Photoshop’s Color Matching Generally Used For?](#Part 1)
02 [How to perfectly match colors in Photoshop when combining photos?](#Part 2)
03 [Is There Any Other Ways to Use Color Matching?](#Part 3)
Part 1 What Scene is Photoshop’s Color Matching Generally Used For?
You can match color in Photoshop in just a few simple steps. And as far as the question of what scene can be used for it, you can use any and every photo you want to match the colour for. And the following steps will be noting how you can adjust the color of an image in Photoshop.
Step Open both the images, the one you want to alter and the one you want to change it with. And if it is just one image, open and select that one image.
Step Choose the “Image” and then select the “Adjustment” option. And after you choose the “Adjustment” option, go to the “Match Colour” option. You will be noticing the target photo that you have opted for.
Step You will find the “Image Statistics” portion in the dialogue portion. Opt for the “Source” list and select the image name consisting of the shades and hues you would want your image to be altered. You will notice a thumbnail appearing in the dialogue as you do so. And you will automatically see the colours of the photo have changed.
Step Now use the “Preview” feature to see the photoshop match colour tone, and then you will be done with adjusting the colour!
Part 2 How to perfectly match colors in Photoshop when combining photos
Now, we will be discussing the different steps that will help you match color from photo in Photoshop, with absolute precision and effortlessness. Here is the list of steps that you would need to follow to match skin tone in Photoshop most perfectly.
Step 1 Duplicate the background of the original photo
The first and the most essential step to match lighting photoshop or the colour or any other editing task is to duplicate the background of the original image. The reason for this is that without this step, we might lose out on the original background information, which is essential for the image.
And to duplicate the background of an image in Photoshop, you need to use a few shortcuts of your keyboard. If you are using a Windows device, then the shortcut for this will be “Ctrl+J”, and if you are using Mac, then the shortcut will be “ Command+J”.

Step 2 Select the Image whose colour you want to change.
Photoshop has several selection tools. Choose one of the many selection tools. You might choose the “Pen Tool” or the “Lasso Tool” or anything else. Select the image with the tool by drawing along the image with the tool. And when you are done with tracing the image with the selection tool of your choice, you will see a border marching around the image.

Step 3 Select the area of the second image
You will need the selection tool again. The second image is the one that consists of the colour you would want the original image to match with. So, use the selection tool again to trace out an area in the second picture with the colour you want.
Ensure that you trace out a substantial area with the colour you need. You need not be highly precise with selecting the area. Instead, focus on covering a large area so that you can cover up the different shades and hues of the colour.

Step 4 Move back to the original picture
We will proceed with the “Colour Match” feature in Photoshop, but before that, you must make sure that you have the original image selected. The technical term to use here is “Focus”. So, ensure that the original image is in focus.
You can bring the original image into “focus” by clicking anywhere inside the document’s window where the original image is present. And that will automatically bring back the focus to the original image.
Step 5 Bring the “Colour Match” command into function
After selecting the original image, reach out to the “Image” option and click on the “Adjustments” option. You will find the “Match Colour” option; click on it.
There are two sections of the “Color Match” option. One is the “Image Statistics” portion, and the other is the “Destination Image”. The “destination Image” portion consists of the name of the original image and a few image settings as well. The options include “luminescence”, “color intensity”, “fade”, and “neutralize”.
Step 6 Head to the “Image Statistics” portion
The “Image Statistics” portion consists of the “Source” option. It is present in the bottom down part of the “Image Statistics” box. It is a drop-down box, and you will have to click on it. Tap on the small downward arrow beside the “Source” option and then choose the second image where you traced out the area of the colour you would want your original image to have.

Your image might have more than one layer, and if so, you will have to opt for the correct layer from the “Layer” option of Photoshop.
Step 7 Select the correct options in the “Image Statistics” area
In the “Image Statistics” portion, you will find some options, such as “Use Selection in Source to Calculate Colours” and “Use Selection In Target To Calculate Adjustment”. You will have to click on this option and agree to them. It will instruct Photoshop to follow these instructions and colour match photos accordingly.

Click on “OK” after doing the changes mentioned above and exit the dialogue box to proceed with the next step.
Step 8 Add “Adjustment Layer”
Go to the “Layers” option and then opt for the “Layers Palette” present at the bottom. Then select “New Adjustment Layer” and click on the “Levels” option.

Step 9 Adjust the Pointers
You will find two pointers, one black and the other white. You will have to bring both the pointers to the centre of the line.
Then click on “OK” and exit the box to proceed with the next step.

Step 10 Select “Luminosity”
You will find the “Blend Mode” in the “Layers palette”. Select the “Blend Mode” from there. You will find it reflecting “Normal”, which is the default setting. You need to click on the small drop-down arrow and change the option from “Normal” to “Luminosity”.

Step 11 Deselect
Now, use the keyboard shortcut “Ctrl+D” if you are using windows and “Command+D” working on a Mac device. And this completes the entire process of colour matching in photoshop.
Part 3 Is There Any Other Ways to Use Color Matching?
You will find numerous other tools that give you the opportunity of editing images and videos. But there are only a few that will offer you the quality of precise and proficient features. And if you ask us whether there are any other ways of using colour matching, we would like to introduce to you one of the best photo editing tools- Filmora 11!
It has an incredible feature of “Colour Matching” that will offer you the ease of altering colours of your pictures in the most effortless way, with the quality of original intact and even sometimes enhanced. And now, we will be discussing the “Colour Matching” feature of Filmora 11.
If you want to change the color of a clipping, then Filmora 11’s “Color Matching” allows you to extract the clip and then match colors in just a few steps.
You can use the filters of this tool, and it allows you to match color from to 10as well. So, the efficiency and quality are incomparable.
It has an adaptive scene change, and no matter in which device you use Filmora to edit our images, it will work with equal proficiency.
● Key Takeaways from This Episode →
● In this discussion, we have enveloped the following topics.
● We discussed the scene in which you can match colors in Photoshop.
● Then we proceeded with the steps to help you use the “Color Match” feature of Photoshop.
● And lastly, we introduced o you to Filmora 1the best photo and video editing tool, and its incredible feature of “Color Matching”.
How to Create an Aesthetic Slideshow Presentation
How to Make an Aesthetic Slideshow Presentation
An easy yet powerful editor
Numerous effects to choose from
Detailed tutorials provided by the official channel
The slideshow must be engaging and attractive. And the recent trend is all about making things around your aesthetic, that is, visually pleasant. You might want to know how you, too, can make such aesthetic slideshows? Well, in the following discussion, we will discuss all of it, along with the best tool for making the best aesthetic slideshows.
In this article
01 The Best 8 Premium Aesthetic Slideshow Template Designs
02 [How to Make an Aesthetic Slideshow Presentation](#Part 2)
03 [FAQ of Making Aesthetic Slideshow](#Part 3)
Part 1 The Best 8 Premium Aesthetic Slideshow Template Designs
One of the best ways of making marvellous aesthetic slideshows is by using an aesthetic slideshow template. The templates have readymade elements that emit aesthetic and minimalistic vibes to your slideshow.
You will find numerous templates that have an aesthetic and minimalistic theme. You can choose any among the countless for your slideshows. There are many designs of templates available for making aesthetic slideshows.
We will discuss eight premium aesthetic slideshow template designs that you can readily use in your slideshows to make your work a lot easier. These template designs will be some of the best ones and can serve and suit every possible purpose for creating a slideshow.
So, here are the best and the most useful eight aesthetic slideshow template designs that you can use for making fantastic aesthetic slideshows.
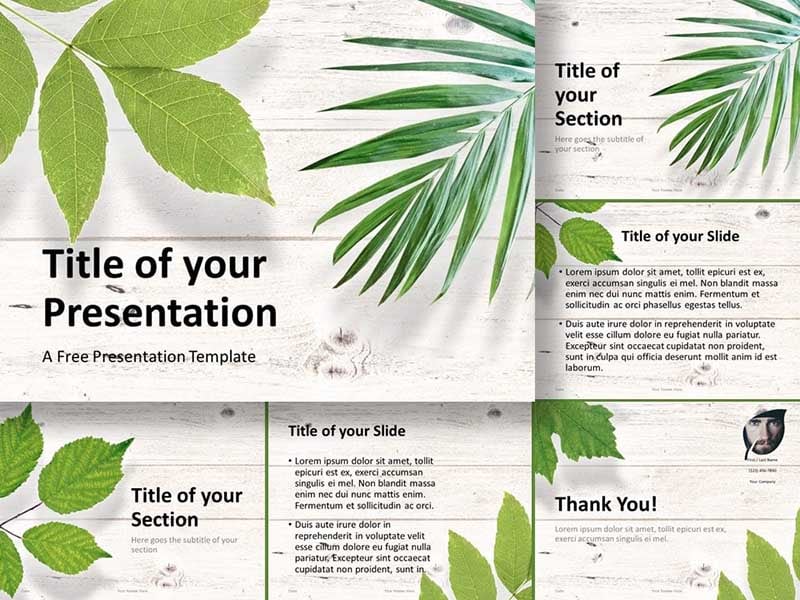
01Leafy Template Design
The Leafy template design is best suitable for making the best aesthetic slideshows with a classy presentation theme. It is available in Google Slides, and it consists of as many as 120 unique designed slides and two variations of colours.
You can readily make changes and edits and customize the tinplated design according to your imagination, reference and skills. It is best for making classy presentations because the designs are simple, yet they reflect the quality of elegance that helps you create the best aesthetic sideshows.
02Cinematic Reel Template
The Cinematic Reel template is a premiere pro template design by Videomaker. It consists of 22 media layers and 12 editable tact layers, and it has a very stylish design and includes simple yet impactful text animations.

Any trailers, demos, reel videos, short movie trails and the like can be ideally and perfectly created with this template design. Using this template design is absolutely effortless, and you can make any content-related slideshows effortlessly and ideally with this slideshow template design by Videomaker.
03B-Clinique
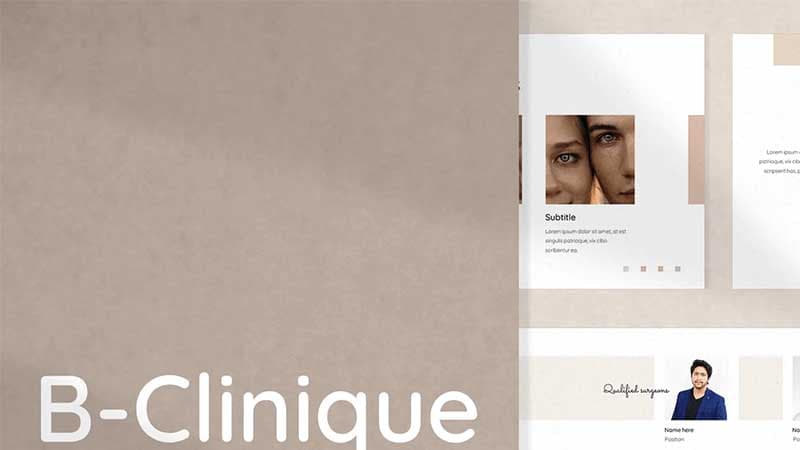
B-Clinique is the template design for making a minimalist aesthetic slideshow avowable on Google Slides. This template design is best suited for creating trendy aesthetic slideshows. It includes designs of line arts, subtle pleasant shares and all the other components that solely and perfectly reflect an aesthetic aura.
It was primarily designed for making slides for cosmetology purposes. It has 30 different slide designs and is ideal for creating slides for the industry by integrating a few edits. It ideally reflects a calming aura as it uses the earthy brown tone and shade for the design of the template.
04YouTube Pack Template
We all know that various social media platforms have become the most influential factor in our lives. And YouTube is the most renowned among all the other social media platforms, and now, it has even become a mode of earning a livelihood.
And for making slideshows that are to be put up on one or more social media platforms, especially on YouTube, they need to be presented in a particular manner. And you can readily make aesthetic slideshows ideal for social media platforms, especially YouTube, with the YouTube Pack Templated designs, which is Mirs.
This template includes all the necessary elements, such as the “Subscribe” panel, other buttons, side frames, and the like. One can readily use it to make incredible aesthetic slides for their social media channels.

05Sunlike Template
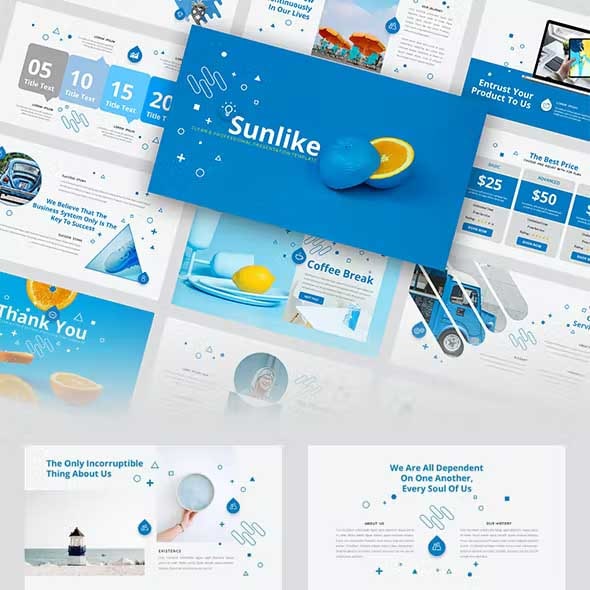
The Sunlike Templates by the Google Slides. It is a beautiful and professional aesthetic slideshow template with design slides that can create a clean and highly professional. It is a modern-creative type of template that consists of 39 distinctive design slides. You can readily edit and thus, customise the slides according to your overreference, needs and skills.
It helps you create a lively and aesthetic presentation at the same time. It includes a lot of vibrant colours that make your presentation look exuberant and engaging.
06Fast Glitch Transitions Template
The Fast Glitch Transitions template is by Red Feathers. Transitions have been the recent trend, and in every other video, we see different and unique transitions. And when you integrate transitions in your slideshows, they become more eye-catching.
And the glitch transitions can create a unique yet pleasing effect for your slideshows when you use the many among the uncountable options available.

07Solv Template
The Solv template is by Google Slides. It is best suitable for creating your start-up business slideshow presentation when you are a big fan of aesthetic presentations. 36 slides are present with attractive pop colours, which, although they look vibrant, are gladly aesthetic too.

08Text Messages Template
The Text Messages template by Blinque can be the trendiest and the most aesthetic template design one can find. It helps you create slideshow videos in the form of text messages. So, if you want to narrate anything and do it uniquely, this template can be the best fit for you.

Part 2 How to Make an Aesthetic Slideshow Presentation
Making a slideshow presentation is quite simple and an aspect that is well-known to many. But, how can you make your slideshows look aesthetic? If you include them in your slideshows, there are a few factors that can readily turn them aesthetic.
So, let us look into the different aspects that can help you turn your slides aesthetic when you integrate them into it.
● Minimalistic Text Designs
Minimalism and aesthetic aura go simultaneously. So, the more your efforts to keep your texts and writings in your slide minimalistic, the more aesthetic your slide would look. Several such finds or text designs are available, and you can readily choose among them and integrate them into your slides.
● Use soft and pastel colours for your theme of the template
Every aesthetic object’s most common and signature feature is its subtle, pastel shade. So, stick to using a soft pastel shade for the theme of your template. The colours, such as lavender, sift purple, millennial pink, powder blue or tones of silver, can ideally fit under the collection of aesthetic shades for the youth template of the slideshows.
● Minimalistic Pictures
The images you use in your slideshow will play a considerable role in deeming how aesthetic your slides look. So, choose them after enough analysis. See whether the photos have an aesthetic or minimalistic feature. By that, we are referring to the copper tone of the picture, its content and its size. It is best to include small images to reflect the slide’s minimalistic character.
Part 3 FAQ of Making Aesthetic Slideshow
Here are some of the FAQs about making aesthetic slideshows.
01How can I make an aesthetic slideshow in PowerPoint?
One can effortlessly do so with the templates available. Also, it is best to use small images, subtle pastel shades for the theme and minimalistic text designs or fonts in the slides.
02Which is the best tool for creating aesthetic slideshows?
Filmore is one of the most effective and ideal tools for making the most aesthetically pleasing slideshows. It has over 700 filters, innumerable templates and uncountable beneficial features to make your slides look minimalistic and aesthetic.
03How can I use Filmora for making aesthetic slideshows?
Filmora has several templates that reflect minimalistic designs. You can readily use them for your slideshow video. You can also use several filters to give a subtle pastel tone to your slideshow. Lastly, the different motion control features and fonts available can help you make the most aesthetically pleasing slideshows with Filmora.
04Is Filmora suitable for slideshows?
Wondershare Filmora Video Editor is one of the best and renowned tools for video editing. And for making slideshow videos, it Is equally competent and helps make the best and the most aesthetic slideshows with its incredible features.
For Win 7 or later (64-bit)
For macOS 10.12 or later
Filmora is the best video editing tool that one can come across. It has the best and the most advanced features for editing and is ideal for professionals. But, the beginners, too, can use it to enhance their editing skills, as Filmora is not difficult to use.
Also, it is ideal for creating aesthetic slideshow videos. It is because-
● There are more than 800 templates, and among them, there are numerous aesthetic design templates that you can use
● The filters can help add an aesthetic and minimalistic tone to your slideshow video
● You can integrate different aesthetic fonts from the many available.
● Ending Thoughts →
● Now that you know all about creating the best minimalist aesthetic slideshow, bring out all your creative skills and make the most wholesome and engaging slideshow!
● Choose the best templates, and for the ideal results, pick from the templates mentioned above.
● Follow the above steps to create the most aesthetic slideshows that would perfectly mirror your imagination.
● Lastly, use the best video editing tool, Filmora, that will help you make such aesthetic slideshows that will definitely be incomparable and inimitable!
The slideshow must be engaging and attractive. And the recent trend is all about making things around your aesthetic, that is, visually pleasant. You might want to know how you, too, can make such aesthetic slideshows? Well, in the following discussion, we will discuss all of it, along with the best tool for making the best aesthetic slideshows.
In this article
01 The Best 8 Premium Aesthetic Slideshow Template Designs
02 [How to Make an Aesthetic Slideshow Presentation](#Part 2)
03 [FAQ of Making Aesthetic Slideshow](#Part 3)
Part 1 The Best 8 Premium Aesthetic Slideshow Template Designs
One of the best ways of making marvellous aesthetic slideshows is by using an aesthetic slideshow template. The templates have readymade elements that emit aesthetic and minimalistic vibes to your slideshow.
You will find numerous templates that have an aesthetic and minimalistic theme. You can choose any among the countless for your slideshows. There are many designs of templates available for making aesthetic slideshows.
We will discuss eight premium aesthetic slideshow template designs that you can readily use in your slideshows to make your work a lot easier. These template designs will be some of the best ones and can serve and suit every possible purpose for creating a slideshow.
So, here are the best and the most useful eight aesthetic slideshow template designs that you can use for making fantastic aesthetic slideshows.
01Leafy Template Design
The Leafy template design is best suitable for making the best aesthetic slideshows with a classy presentation theme. It is available in Google Slides, and it consists of as many as 120 unique designed slides and two variations of colours.
You can readily make changes and edits and customize the tinplated design according to your imagination, reference and skills. It is best for making classy presentations because the designs are simple, yet they reflect the quality of elegance that helps you create the best aesthetic sideshows.

02Cinematic Reel Template
The Cinematic Reel template is a premiere pro template design by Videomaker. It consists of 22 media layers and 12 editable tact layers, and it has a very stylish design and includes simple yet impactful text animations.

Any trailers, demos, reel videos, short movie trails and the like can be ideally and perfectly created with this template design. Using this template design is absolutely effortless, and you can make any content-related slideshows effortlessly and ideally with this slideshow template design by Videomaker.
03B-Clinique
B-Clinique is the template design for making a minimalist aesthetic slideshow avowable on Google Slides. This template design is best suited for creating trendy aesthetic slideshows. It includes designs of line arts, subtle pleasant shares and all the other components that solely and perfectly reflect an aesthetic aura.
It was primarily designed for making slides for cosmetology purposes. It has 30 different slide designs and is ideal for creating slides for the industry by integrating a few edits. It ideally reflects a calming aura as it uses the earthy brown tone and shade for the design of the template.

04YouTube Pack Template
We all know that various social media platforms have become the most influential factor in our lives. And YouTube is the most renowned among all the other social media platforms, and now, it has even become a mode of earning a livelihood.
And for making slideshows that are to be put up on one or more social media platforms, especially on YouTube, they need to be presented in a particular manner. And you can readily make aesthetic slideshows ideal for social media platforms, especially YouTube, with the YouTube Pack Templated designs, which is Mirs.
This template includes all the necessary elements, such as the “Subscribe” panel, other buttons, side frames, and the like. One can readily use it to make incredible aesthetic slides for their social media channels.

05Sunlike Template
The Sunlike Templates by the Google Slides. It is a beautiful and professional aesthetic slideshow template with design slides that can create a clean and highly professional. It is a modern-creative type of template that consists of 39 distinctive design slides. You can readily edit and thus, customise the slides according to your overreference, needs and skills.
It helps you create a lively and aesthetic presentation at the same time. It includes a lot of vibrant colours that make your presentation look exuberant and engaging.

06Fast Glitch Transitions Template
The Fast Glitch Transitions template is by Red Feathers. Transitions have been the recent trend, and in every other video, we see different and unique transitions. And when you integrate transitions in your slideshows, they become more eye-catching.
And the glitch transitions can create a unique yet pleasing effect for your slideshows when you use the many among the uncountable options available.

07Solv Template
The Solv template is by Google Slides. It is best suitable for creating your start-up business slideshow presentation when you are a big fan of aesthetic presentations. 36 slides are present with attractive pop colours, which, although they look vibrant, are gladly aesthetic too.

08Text Messages Template
The Text Messages template by Blinque can be the trendiest and the most aesthetic template design one can find. It helps you create slideshow videos in the form of text messages. So, if you want to narrate anything and do it uniquely, this template can be the best fit for you.

Part 2 How to Make an Aesthetic Slideshow Presentation
Making a slideshow presentation is quite simple and an aspect that is well-known to many. But, how can you make your slideshows look aesthetic? If you include them in your slideshows, there are a few factors that can readily turn them aesthetic.
So, let us look into the different aspects that can help you turn your slides aesthetic when you integrate them into it.
● Minimalistic Text Designs
Minimalism and aesthetic aura go simultaneously. So, the more your efforts to keep your texts and writings in your slide minimalistic, the more aesthetic your slide would look. Several such finds or text designs are available, and you can readily choose among them and integrate them into your slides.
● Use soft and pastel colours for your theme of the template
Every aesthetic object’s most common and signature feature is its subtle, pastel shade. So, stick to using a soft pastel shade for the theme of your template. The colours, such as lavender, sift purple, millennial pink, powder blue or tones of silver, can ideally fit under the collection of aesthetic shades for the youth template of the slideshows.
● Minimalistic Pictures
The images you use in your slideshow will play a considerable role in deeming how aesthetic your slides look. So, choose them after enough analysis. See whether the photos have an aesthetic or minimalistic feature. By that, we are referring to the copper tone of the picture, its content and its size. It is best to include small images to reflect the slide’s minimalistic character.
Part 3 FAQ of Making Aesthetic Slideshow
Here are some of the FAQs about making aesthetic slideshows.
01How can I make an aesthetic slideshow in PowerPoint?
One can effortlessly do so with the templates available. Also, it is best to use small images, subtle pastel shades for the theme and minimalistic text designs or fonts in the slides.
02Which is the best tool for creating aesthetic slideshows?
Filmore is one of the most effective and ideal tools for making the most aesthetically pleasing slideshows. It has over 700 filters, innumerable templates and uncountable beneficial features to make your slides look minimalistic and aesthetic.
03How can I use Filmora for making aesthetic slideshows?
Filmora has several templates that reflect minimalistic designs. You can readily use them for your slideshow video. You can also use several filters to give a subtle pastel tone to your slideshow. Lastly, the different motion control features and fonts available can help you make the most aesthetically pleasing slideshows with Filmora.
04Is Filmora suitable for slideshows?
Wondershare Filmora Video Editor is one of the best and renowned tools for video editing. And for making slideshow videos, it Is equally competent and helps make the best and the most aesthetic slideshows with its incredible features.
For Win 7 or later (64-bit)
For macOS 10.12 or later
Filmora is the best video editing tool that one can come across. It has the best and the most advanced features for editing and is ideal for professionals. But, the beginners, too, can use it to enhance their editing skills, as Filmora is not difficult to use.
Also, it is ideal for creating aesthetic slideshow videos. It is because-
● There are more than 800 templates, and among them, there are numerous aesthetic design templates that you can use
● The filters can help add an aesthetic and minimalistic tone to your slideshow video
● You can integrate different aesthetic fonts from the many available.
● Ending Thoughts →
● Now that you know all about creating the best minimalist aesthetic slideshow, bring out all your creative skills and make the most wholesome and engaging slideshow!
● Choose the best templates, and for the ideal results, pick from the templates mentioned above.
● Follow the above steps to create the most aesthetic slideshows that would perfectly mirror your imagination.
● Lastly, use the best video editing tool, Filmora, that will help you make such aesthetic slideshows that will definitely be incomparable and inimitable!
The slideshow must be engaging and attractive. And the recent trend is all about making things around your aesthetic, that is, visually pleasant. You might want to know how you, too, can make such aesthetic slideshows? Well, in the following discussion, we will discuss all of it, along with the best tool for making the best aesthetic slideshows.
In this article
01 The Best 8 Premium Aesthetic Slideshow Template Designs
02 [How to Make an Aesthetic Slideshow Presentation](#Part 2)
03 [FAQ of Making Aesthetic Slideshow](#Part 3)
Part 1 The Best 8 Premium Aesthetic Slideshow Template Designs
One of the best ways of making marvellous aesthetic slideshows is by using an aesthetic slideshow template. The templates have readymade elements that emit aesthetic and minimalistic vibes to your slideshow.
You will find numerous templates that have an aesthetic and minimalistic theme. You can choose any among the countless for your slideshows. There are many designs of templates available for making aesthetic slideshows.
We will discuss eight premium aesthetic slideshow template designs that you can readily use in your slideshows to make your work a lot easier. These template designs will be some of the best ones and can serve and suit every possible purpose for creating a slideshow.
So, here are the best and the most useful eight aesthetic slideshow template designs that you can use for making fantastic aesthetic slideshows.
01Leafy Template Design
The Leafy template design is best suitable for making the best aesthetic slideshows with a classy presentation theme. It is available in Google Slides, and it consists of as many as 120 unique designed slides and two variations of colours.
You can readily make changes and edits and customize the tinplated design according to your imagination, reference and skills. It is best for making classy presentations because the designs are simple, yet they reflect the quality of elegance that helps you create the best aesthetic sideshows.

02Cinematic Reel Template
The Cinematic Reel template is a premiere pro template design by Videomaker. It consists of 22 media layers and 12 editable tact layers, and it has a very stylish design and includes simple yet impactful text animations.

Any trailers, demos, reel videos, short movie trails and the like can be ideally and perfectly created with this template design. Using this template design is absolutely effortless, and you can make any content-related slideshows effortlessly and ideally with this slideshow template design by Videomaker.
03B-Clinique
B-Clinique is the template design for making a minimalist aesthetic slideshow avowable on Google Slides. This template design is best suited for creating trendy aesthetic slideshows. It includes designs of line arts, subtle pleasant shares and all the other components that solely and perfectly reflect an aesthetic aura.
It was primarily designed for making slides for cosmetology purposes. It has 30 different slide designs and is ideal for creating slides for the industry by integrating a few edits. It ideally reflects a calming aura as it uses the earthy brown tone and shade for the design of the template.

04YouTube Pack Template
We all know that various social media platforms have become the most influential factor in our lives. And YouTube is the most renowned among all the other social media platforms, and now, it has even become a mode of earning a livelihood.
And for making slideshows that are to be put up on one or more social media platforms, especially on YouTube, they need to be presented in a particular manner. And you can readily make aesthetic slideshows ideal for social media platforms, especially YouTube, with the YouTube Pack Templated designs, which is Mirs.
This template includes all the necessary elements, such as the “Subscribe” panel, other buttons, side frames, and the like. One can readily use it to make incredible aesthetic slides for their social media channels.

05Sunlike Template
The Sunlike Templates by the Google Slides. It is a beautiful and professional aesthetic slideshow template with design slides that can create a clean and highly professional. It is a modern-creative type of template that consists of 39 distinctive design slides. You can readily edit and thus, customise the slides according to your overreference, needs and skills.
It helps you create a lively and aesthetic presentation at the same time. It includes a lot of vibrant colours that make your presentation look exuberant and engaging.

06Fast Glitch Transitions Template
The Fast Glitch Transitions template is by Red Feathers. Transitions have been the recent trend, and in every other video, we see different and unique transitions. And when you integrate transitions in your slideshows, they become more eye-catching.
And the glitch transitions can create a unique yet pleasing effect for your slideshows when you use the many among the uncountable options available.

07Solv Template
The Solv template is by Google Slides. It is best suitable for creating your start-up business slideshow presentation when you are a big fan of aesthetic presentations. 36 slides are present with attractive pop colours, which, although they look vibrant, are gladly aesthetic too.

08Text Messages Template
The Text Messages template by Blinque can be the trendiest and the most aesthetic template design one can find. It helps you create slideshow videos in the form of text messages. So, if you want to narrate anything and do it uniquely, this template can be the best fit for you.

Part 2 How to Make an Aesthetic Slideshow Presentation
Making a slideshow presentation is quite simple and an aspect that is well-known to many. But, how can you make your slideshows look aesthetic? If you include them in your slideshows, there are a few factors that can readily turn them aesthetic.
So, let us look into the different aspects that can help you turn your slides aesthetic when you integrate them into it.
● Minimalistic Text Designs
Minimalism and aesthetic aura go simultaneously. So, the more your efforts to keep your texts and writings in your slide minimalistic, the more aesthetic your slide would look. Several such finds or text designs are available, and you can readily choose among them and integrate them into your slides.
● Use soft and pastel colours for your theme of the template
Every aesthetic object’s most common and signature feature is its subtle, pastel shade. So, stick to using a soft pastel shade for the theme of your template. The colours, such as lavender, sift purple, millennial pink, powder blue or tones of silver, can ideally fit under the collection of aesthetic shades for the youth template of the slideshows.
● Minimalistic Pictures
The images you use in your slideshow will play a considerable role in deeming how aesthetic your slides look. So, choose them after enough analysis. See whether the photos have an aesthetic or minimalistic feature. By that, we are referring to the copper tone of the picture, its content and its size. It is best to include small images to reflect the slide’s minimalistic character.
Part 3 FAQ of Making Aesthetic Slideshow
Here are some of the FAQs about making aesthetic slideshows.
01How can I make an aesthetic slideshow in PowerPoint?
One can effortlessly do so with the templates available. Also, it is best to use small images, subtle pastel shades for the theme and minimalistic text designs or fonts in the slides.
02Which is the best tool for creating aesthetic slideshows?
Filmore is one of the most effective and ideal tools for making the most aesthetically pleasing slideshows. It has over 700 filters, innumerable templates and uncountable beneficial features to make your slides look minimalistic and aesthetic.
03How can I use Filmora for making aesthetic slideshows?
Filmora has several templates that reflect minimalistic designs. You can readily use them for your slideshow video. You can also use several filters to give a subtle pastel tone to your slideshow. Lastly, the different motion control features and fonts available can help you make the most aesthetically pleasing slideshows with Filmora.
04Is Filmora suitable for slideshows?
Wondershare Filmora Video Editor is one of the best and renowned tools for video editing. And for making slideshow videos, it Is equally competent and helps make the best and the most aesthetic slideshows with its incredible features.
For Win 7 or later (64-bit)
For macOS 10.12 or later
Filmora is the best video editing tool that one can come across. It has the best and the most advanced features for editing and is ideal for professionals. But, the beginners, too, can use it to enhance their editing skills, as Filmora is not difficult to use.
Also, it is ideal for creating aesthetic slideshow videos. It is because-
● There are more than 800 templates, and among them, there are numerous aesthetic design templates that you can use
● The filters can help add an aesthetic and minimalistic tone to your slideshow video
● You can integrate different aesthetic fonts from the many available.
● Ending Thoughts →
● Now that you know all about creating the best minimalist aesthetic slideshow, bring out all your creative skills and make the most wholesome and engaging slideshow!
● Choose the best templates, and for the ideal results, pick from the templates mentioned above.
● Follow the above steps to create the most aesthetic slideshows that would perfectly mirror your imagination.
● Lastly, use the best video editing tool, Filmora, that will help you make such aesthetic slideshows that will definitely be incomparable and inimitable!
The slideshow must be engaging and attractive. And the recent trend is all about making things around your aesthetic, that is, visually pleasant. You might want to know how you, too, can make such aesthetic slideshows? Well, in the following discussion, we will discuss all of it, along with the best tool for making the best aesthetic slideshows.
In this article
01 The Best 8 Premium Aesthetic Slideshow Template Designs
02 [How to Make an Aesthetic Slideshow Presentation](#Part 2)
03 [FAQ of Making Aesthetic Slideshow](#Part 3)
Part 1 The Best 8 Premium Aesthetic Slideshow Template Designs
One of the best ways of making marvellous aesthetic slideshows is by using an aesthetic slideshow template. The templates have readymade elements that emit aesthetic and minimalistic vibes to your slideshow.
You will find numerous templates that have an aesthetic and minimalistic theme. You can choose any among the countless for your slideshows. There are many designs of templates available for making aesthetic slideshows.
We will discuss eight premium aesthetic slideshow template designs that you can readily use in your slideshows to make your work a lot easier. These template designs will be some of the best ones and can serve and suit every possible purpose for creating a slideshow.
So, here are the best and the most useful eight aesthetic slideshow template designs that you can use for making fantastic aesthetic slideshows.
01Leafy Template Design
The Leafy template design is best suitable for making the best aesthetic slideshows with a classy presentation theme. It is available in Google Slides, and it consists of as many as 120 unique designed slides and two variations of colours.
You can readily make changes and edits and customize the tinplated design according to your imagination, reference and skills. It is best for making classy presentations because the designs are simple, yet they reflect the quality of elegance that helps you create the best aesthetic sideshows.

02Cinematic Reel Template
The Cinematic Reel template is a premiere pro template design by Videomaker. It consists of 22 media layers and 12 editable tact layers, and it has a very stylish design and includes simple yet impactful text animations.

Any trailers, demos, reel videos, short movie trails and the like can be ideally and perfectly created with this template design. Using this template design is absolutely effortless, and you can make any content-related slideshows effortlessly and ideally with this slideshow template design by Videomaker.
03B-Clinique
B-Clinique is the template design for making a minimalist aesthetic slideshow avowable on Google Slides. This template design is best suited for creating trendy aesthetic slideshows. It includes designs of line arts, subtle pleasant shares and all the other components that solely and perfectly reflect an aesthetic aura.
It was primarily designed for making slides for cosmetology purposes. It has 30 different slide designs and is ideal for creating slides for the industry by integrating a few edits. It ideally reflects a calming aura as it uses the earthy brown tone and shade for the design of the template.

04YouTube Pack Template
We all know that various social media platforms have become the most influential factor in our lives. And YouTube is the most renowned among all the other social media platforms, and now, it has even become a mode of earning a livelihood.
And for making slideshows that are to be put up on one or more social media platforms, especially on YouTube, they need to be presented in a particular manner. And you can readily make aesthetic slideshows ideal for social media platforms, especially YouTube, with the YouTube Pack Templated designs, which is Mirs.
This template includes all the necessary elements, such as the “Subscribe” panel, other buttons, side frames, and the like. One can readily use it to make incredible aesthetic slides for their social media channels.

05Sunlike Template
The Sunlike Templates by the Google Slides. It is a beautiful and professional aesthetic slideshow template with design slides that can create a clean and highly professional. It is a modern-creative type of template that consists of 39 distinctive design slides. You can readily edit and thus, customise the slides according to your overreference, needs and skills.
It helps you create a lively and aesthetic presentation at the same time. It includes a lot of vibrant colours that make your presentation look exuberant and engaging.

06Fast Glitch Transitions Template
The Fast Glitch Transitions template is by Red Feathers. Transitions have been the recent trend, and in every other video, we see different and unique transitions. And when you integrate transitions in your slideshows, they become more eye-catching.
And the glitch transitions can create a unique yet pleasing effect for your slideshows when you use the many among the uncountable options available.

07Solv Template
The Solv template is by Google Slides. It is best suitable for creating your start-up business slideshow presentation when you are a big fan of aesthetic presentations. 36 slides are present with attractive pop colours, which, although they look vibrant, are gladly aesthetic too.

08Text Messages Template
The Text Messages template by Blinque can be the trendiest and the most aesthetic template design one can find. It helps you create slideshow videos in the form of text messages. So, if you want to narrate anything and do it uniquely, this template can be the best fit for you.

Part 2 How to Make an Aesthetic Slideshow Presentation
Making a slideshow presentation is quite simple and an aspect that is well-known to many. But, how can you make your slideshows look aesthetic? If you include them in your slideshows, there are a few factors that can readily turn them aesthetic.
So, let us look into the different aspects that can help you turn your slides aesthetic when you integrate them into it.
● Minimalistic Text Designs
Minimalism and aesthetic aura go simultaneously. So, the more your efforts to keep your texts and writings in your slide minimalistic, the more aesthetic your slide would look. Several such finds or text designs are available, and you can readily choose among them and integrate them into your slides.
● Use soft and pastel colours for your theme of the template
Every aesthetic object’s most common and signature feature is its subtle, pastel shade. So, stick to using a soft pastel shade for the theme of your template. The colours, such as lavender, sift purple, millennial pink, powder blue or tones of silver, can ideally fit under the collection of aesthetic shades for the youth template of the slideshows.
● Minimalistic Pictures
The images you use in your slideshow will play a considerable role in deeming how aesthetic your slides look. So, choose them after enough analysis. See whether the photos have an aesthetic or minimalistic feature. By that, we are referring to the copper tone of the picture, its content and its size. It is best to include small images to reflect the slide’s minimalistic character.
Part 3 FAQ of Making Aesthetic Slideshow
Here are some of the FAQs about making aesthetic slideshows.
01How can I make an aesthetic slideshow in PowerPoint?
One can effortlessly do so with the templates available. Also, it is best to use small images, subtle pastel shades for the theme and minimalistic text designs or fonts in the slides.
02Which is the best tool for creating aesthetic slideshows?
Filmore is one of the most effective and ideal tools for making the most aesthetically pleasing slideshows. It has over 700 filters, innumerable templates and uncountable beneficial features to make your slides look minimalistic and aesthetic.
03How can I use Filmora for making aesthetic slideshows?
Filmora has several templates that reflect minimalistic designs. You can readily use them for your slideshow video. You can also use several filters to give a subtle pastel tone to your slideshow. Lastly, the different motion control features and fonts available can help you make the most aesthetically pleasing slideshows with Filmora.
04Is Filmora suitable for slideshows?
Wondershare Filmora Video Editor is one of the best and renowned tools for video editing. And for making slideshow videos, it Is equally competent and helps make the best and the most aesthetic slideshows with its incredible features.
For Win 7 or later (64-bit)
For macOS 10.12 or later
Filmora is the best video editing tool that one can come across. It has the best and the most advanced features for editing and is ideal for professionals. But, the beginners, too, can use it to enhance their editing skills, as Filmora is not difficult to use.
Also, it is ideal for creating aesthetic slideshow videos. It is because-
● There are more than 800 templates, and among them, there are numerous aesthetic design templates that you can use
● The filters can help add an aesthetic and minimalistic tone to your slideshow video
● You can integrate different aesthetic fonts from the many available.
● Ending Thoughts →
● Now that you know all about creating the best minimalist aesthetic slideshow, bring out all your creative skills and make the most wholesome and engaging slideshow!
● Choose the best templates, and for the ideal results, pick from the templates mentioned above.
● Follow the above steps to create the most aesthetic slideshows that would perfectly mirror your imagination.
● Lastly, use the best video editing tool, Filmora, that will help you make such aesthetic slideshows that will definitely be incomparable and inimitable!
Also read:
- In 2024, Step by Step to Crop Videos with CyberLink PowerDirector
- In 2024, Split a Clip in DaVinci Resolve Step by Step
- New How to Create Simple Slideshow Word
- Updated In 2024, Video Editors Use the Loading Text Effect to Create Impressive and Descriptive Videos. Let Us Understand the Detailed Steps to Customize the Loading Text Effect in Wondershare Filmora
- New A Guide to Understanding Efectum App and Some Top Alternatives for 2024
- New How to Make a Video Slideshow in iMovie
- New 2024 Approved The Craziest 10 AI Editors Youve Ever Seen
- New 10 Best Free GIF Background Remover for PC and Online
- Makeup Video Is One of the Video Types that Many Vloggers Are Creating. If You Are Also the One Who Wants to Share Makeup Experiences in Videos, Then You Can Follow the Guide Below to Make a Makeup Video with Simple Steps for 2024
- Looking for a Great Way to Make Your Own Anime Music Video? The Following Are the Top AMV Makers to Choose From
- New In 2024, If You Want to Know How to Live Stream Pre-Recorded Video, You Are in the Right Place. We Will Give You a Complete Guide on 8 Ways You Can Live Stream Pre-Recorded Videos Successfully
- MAGIX Vegas Pro Review A Professional Video Editing Software
- In 2024, Useful Tips for Tiktok Video Aspect Ratio Included
- Updated In 2024, Do You Waste Time Making Transparent Background in Paint
- Everything You Need to Know About Color Grading in Photography
- The Way to Quick and Efficient Editing | Keyboard Shortcuts in Filmora
- Updated How to Add Green Screen Effects In Phhotoshop
- In This Article, You Will Learn About the Top 5 Editors for Windows, Top 5 Editors for iPhone/Android, and Top 5 Editors for Animated GIF Editing
- 2024 Approved Easy Way to Combine Several Xvid Files Into One Windows, Mac,Android
- New In 2024, 2 Methods to Cut Video in VLC on Windows
- Are You a Vlogger Looking for Good Color Correction and Video Grading Presets? Here Youll Find Different Vlog LUTs that You Can Use for Your Videos
- New In 2024, How to Make a Video with My Phone
- Updated Guide To Scaling and Setting Videos in Filmora | Tutorial
- In 2024, How to Brighten Video in Premiere Pro
- Updated What You Should Know About Speech-to-Text Technology for 2024
- New In 2024, A Vacation Slideshow Is a Great Way to Relive the Vacation Memories and Also Share Them with Your Loved Ones. If You Are Looking for Ways to Create a Slideshow in Just a Few Minutes, We Will Help You with the Best Tool
- How to Create Motion Text Effects for Your Video?
- Updated In 2024, How to Denoise in After Effects – Audio & Video Noise Removal
- New In 2024, Do You Want to Know How to Add LUTs to Premiere Pro? In This Guide, You Will Find Details and Easy Steps to Proceed with Using LUTs in Premiere Pro
- Updated In 2024, How to Trim Video in QuickTime Player on Your Mac
- Updated 2024 Approved Adjust Background to Black for Your Product Review Video
- Updated In 2024, Top 5 Online Video Converter for Instagram
- New List of Supported Whatsapp Video Format You May Want to Know for 2024
- Updated There Are Many Vlogging Cameras You Can Find in the Market. However, to Get a Good Start in Vlogging, some Sony Vlogging Cameras and Canon Vlog Cameras Are to Consider. This Article Introduces You to the Respective List
- 2024 Approved 3 Actionable Ways to Create Countdown Animation for Videos
- In 2024, Step by Step to Cut Videos in Lightworks
- New 2024 Approved Are You Stuck with How to Use Discord GIF Ideally? Check that Out in This Article, as We Will Guide You on All You Need to Know About GIFs for Discord
- Updated Is Augmented Reality Conferencing the Future of Workplace Collaboration, In 2024
- New In 2024, Easy Way to Add Transitions to Videos
- Updated 2024 Approved Several Tips Can Facilitate How You Edit Videos Faster and Easier. All You Need to Do Is to Read This Article to Find Out What They Are
- Updated In 2024, Movavi Video Editor Plus Review
- Updated Are You Searching for the Best Cinematic LUTs for Premiere Pro? You Are in the Right Place because This Article Is Dedicated to LUTs for 2024
- In 2024, How to Use GIMP GREEN SCREEN
- Updated Free Drone LUTs For Perfect Drone Footage for 2024
- Updated 2024 Approved How to Convert Images Into Video - Kapwing Tutorial
- How to Rotate a Video in Windows 10 for 2024
- What Is the Best MP4 Cutters for YouTubers on Mac, In 2024
- In 2024, About Sony Xperia 1 V FRP Bypass
- How can I get more stardust in pokemon go On Vivo X90S? | Dr.fone
- In 2024, Learn How To Lock Stolen Your Apple iPhone 15 Pro Properly
- How Screen Mirroring Apple iPhone 15 Pro to TV or PC? | Dr.fone
- Is Your Apple iPhone 11 in Security Lockout? Proper Ways To Unlock | Dr.fone
- In 2024, How Can I Use a Fake GPS Without Mock Location On Xiaomi 14 Pro? | Dr.fone
- In 2024, Troubleshooting Error Connecting to the Apple ID Server On iPhone 12
- How to Reset your Vivo X100 Lock Screen Password
- In 2024, How to fix iCloud lock on your iPhone 13 mini and iPad
- In 2024, Bypass iCloud Activation Lock with IMEI Code From iPhone 12 Pro
- Solutions to restore deleted files from Poco X5
- In 2024, Complete Tutorial to Use GPS Joystick to Fake GPS Location On Oppo Find X6 Pro | Dr.fone
- 9 Best Free Android Monitoring Apps to Monitor Phone Remotely For your Realme Narzo 60 Pro 5G | Dr.fone
- In 2024, Best 3 Xiaomi Redmi Note 12T Pro Emulator for Mac to Run Your Wanted Android Apps | Dr.fone
- Updated In 2024, The Most Efficient Tools to Convert Text to MP3 With the Best Natural Voices
- Pokemon Go No GPS Signal? Heres Every Possible Solution On Samsung Galaxy Z Fold 5 | Dr.fone
- Resolve Your iPhone 6s Keeps Asking for Outlook Password
- Three Ways to Sim Unlock Gionee F3 Pro
- How and Where to Find a Shiny Stone Pokémon For Vivo Y27 5G? | Dr.fone
- Best 10 Mock Location Apps Worth Trying On Poco F5 Pro 5G | Dr.fone
- In 2024, PassFab iPhone 15 Pro Max Backup Unlocker Top 4 Alternatives
- In 2024, How To Use Allshare Cast To Turn On Screen Mirroring On Lava Blaze Pro 5G | Dr.fone
- Honor Bypass Tools to Bypass Lock Screen(Honor Magic 6 Pro)
- Unlock Xiaomi Civi 3 Phone Password Without Factory Reset Full Guide Here
- How to Transfer Videos from Sony Xperia 1 V to iPad | Dr.fone
- The way to get back lost data from Magic 6 Lite
- Forgot Pattern Lock? Heres How You Can Unlock Xiaomi Redmi A2 Pattern Lock Screen
- Can Life360 Track Or See Text Messages? What Can You Do with Life360 On Nokia C22? | Dr.fone
- Full Guide How To Fix Connection Is Not Private on Google Pixel 8 | Dr.fone
- In 2024, How to Fix when Apple Account Locked From Apple iPhone SE (2020)?
- The way to recover deleted pictures on Vivo S18 Pro without backup.
- How does the stardust trade cost In pokemon go On Apple iPhone 6s? | Dr.fone
- How to Copy Contacts from Apple iPhone 8 Plus to SIM? | Dr.fone
- In 2024, A Guide Samsung Galaxy S23 Tactical Edition Wireless and Wired Screen Mirroring | Dr.fone
- In 2024, Top 10 Password Cracking Tools For Samsung Galaxy F54 5G
- Complete Guide on Unlocking Apple iPhone SE (2020) with a Broken Screen?
- Easy Guide to Sony FRP Bypass With Best Methods
- Title: Updated MAGIX Vegas Pro Review A Professional Video Editing Software for 2024
- Author: Morgan
- Created at : 2024-04-24 01:06:57
- Updated at : 2024-04-25 01:06:57
- Link: https://ai-video-editing.techidaily.com/updated-magix-vegas-pro-review-a-professional-video-editing-software-for-2024/
- License: This work is licensed under CC BY-NC-SA 4.0.


