
:max_bytes(150000):strip_icc():format(webp)/youtube-s-free-streaming-movies-and-tv-shows-1357439-ddbc3cf482e24a539c67009c07310ae1.png)
Updated Read This Review to Learn Everything You Need to Know About Leeming LUT Pro and How to Apply Pro LUTs Using Different Video Editors for 2024
Read This Review to Learn Everything You Need to Know About Leeming LUT Pro and How to Apply Pro LUTs Using Different Video Editors
Create High-Quality Video - Wondershare Filmora
An easy and powerful YouTube video editor
Numerous video and audio effects to choose from
Detailed tutorials are provided by the official channel
Color grading can be a tedious process, especially if you don’t have the technical skills required to achieve the desired result. That’s where a LUT can come in handy. So, what is a LUT?
LUT stands for “look up table.” Simply put, a LUT is a color preset that you can apply to your video footage to speed up the color grading process. While LUTs are commonly used to speed up the color grading process, they can also be used for other tasks, such as color transfer between software, monitor calibration, and more.
In this article, we’ll explore a particular LUT – Leeming LUT Pro™ and how you can use it in various video editors.

In this article
02 Supported Cameras of Leeming LUT Pro™
03 How to Import and Use Leeming LUT Pro™ in Different Video Editors
What is Leeming LUT Pro™?
Leeming LUT Pro™ is the world’s first unified, corrective Look Up Table (LUT) system for supported cameras. It’s designed to maximize dynamic range, fix skin tones, remove unwanted color casts and provide an accurate Rec709 starting point for further creative color grading.
The Pro LUTs are designed for perfect Rec709 colorimetry and have a linear luma curve, with an average measured dE(2000) of less than 1. As a result, they are visually indistinguishable from reality to the human eye.
Athena LUTs are a brighter version of Pro. They are designed around how the eye sees while retaining the same perfect colorimetry as Pro.
Supported Cameras of Leeming LUT Pro™
- Panasonic G Series: All G series cameras with Cine-D, V-LogL, and HLG for Rec709
- Panasonic S Series: All S series cameras with V-Log, V-Log BRAW, V-Log ProRes RAW, Cine-D, Cine-D2, and HLG for Rec709
- Fujifilm X Series: All X Series cameras with F-Log, Eterna Cinema, Pro Neg Std, and HLG for Rec709
- Canon R Series: All R series cameras with the Faithful Picture Style, C-Log, C-Log3, and CanonRAW
- Canon C Series: All C series cameras with BT.709, C-Log2, C-Log3, HDR-PQ for Rec709, and HLG for Rec709
- Blackmagic Pocket 4K/6K/6K Pro: All cameras with Gen 4 or Gen5 Film
- Blackmagic Pocket/Micro: Older cameras with Gen1 Film
- Nikon Z Series: All cameras with N-Log, Flat
- Sony A Series: All cameras with Picture profile menus, like the A7, with Cine2, S-Log2, S-Log3, HLG/3 for Rec709, and S-Cinetone
- JVC: GY-LS300 with J-Log1
- RunCam: 5 Orange Normal, Flat
- GoPro: 6,7 8, 9 & 10 ProTune, 4 & 5 ProTune, Session ProTune
- DJI: Mavic3, Phantom 4 Pro, Air 2S, Mavic 2 Pro, Mavic Air 2, Mini Series, Mavic Air, Mavic Pro, Pocket 2, Osmo Pocket, Osmo Action, X5 Series
How to Import and Use Leeming LUT Pro™ in Different Video Editors
Leeming LUT Pro™ is supported by various video editors, coloring software, and motion graphics programs, such as:
- Final Cut Pro X
- Avid Media Composer
- DaVinci Resolve
- Adobe Premiere Pro
- Adobe After Effects
- Magix Vegas
- Grass Valley Edius
- Lightworks
- Cyberlink PowerDirector
- LumaFusion
Next, we’ll explore how you can use Leeming LUT in some popular video editors.
1. How to Use Leeming LUT in FCPX
Follow these steps to use Leeming LUT in Final Cut Pro:
Step 1. Import Footage
Launch Final Cut Pro and import your footage. To import your footage, navigate to the top left corner and click on the import icon (the arrow pointing downwards).
In the window that opens, your camera or device name should appear in the left column under devices.
Click on your camera or device to display the media you want to import. Then select the media you want to import and click on the import selected button in the bottom right corner to import your footage.

Step 2. Highlight the Footage
Highlight all the footage by clicking and dragging your pointer over the footage or press Command + A to select all the footage.

Step 3. Open the Inspector
After highlighting all the footage, open the Inspector menu and click the little i icon. Then go down to the bottom of the Inspector and switch from Basic to General.
Step 4. Select the Camera LUT Option
Select Camera LUT from the options under General and click on the Add Custom Camera LUT option.
Step 5. Import Leeming LUTs into FCPX
Find the folder where your Leeming LUTs are stored and import them into Final Cut Pro by clicking on Open.
Step 6. Select the LUT
Once imported, go back to the Camera LUT option under General and click on it. Then scroll down the available options and select your Leeming LUT under the Custom Camera options.
Finally, click the profile you used to apply it to your footage.
2. How to Use Leeming LUT in PowerDirector
Follow these steps to use a LUT in PowerDirector:
Step 1. Launch PowerDirector
Open PowerDirector and select Full Mode.
Step 2. Import Media
Click the import button and then select Import Media Folder to import the video footage you want to apply the Leeming LUT to.
Step 3. Add Footage to Timeline
Drag and drop the imported video footage into your project’s timeline.
Step 4. Select the Fix/Enhance Option
Click on the video clip on the timeline and choose the Fix/Enhance option.
Step 5. Select the Color Presets & CLUTs Option
In the top left window that opens above the timeline, select the Color Presets & CLUTs option under Enhance.
Step 6. Apply the Leeming LUT to the Footage
Click on the import button in the panel to import the Leeming LUT file. Once imported, apply it to give your video a more vibrant look.
Part 5: Bonus! Use Filmora – Easy to Use Video Editor for Color LUTs
Besides Final Cut Pro and PowerDirector, Filmora is another excellent video editing software that you can use to apply LUTs to your video.
Designed for beginners and intermediate users, Filmora is an intuitive yet powerful video editing software.
For instance, you can apply 3D LUTs to your video using Filmora. Unlike 1D LUTs, which can only control one value setting, 3D LUTs can allow you to control various value settings. As a result, 3D LUTs can give you more control over specific color values in your video.
Here’s how you can apply LUTs using Filmora:
Step 1. Import the Footage
Launch Filmora and choose New Project. In the New Project window that opens, import the video you want to apply the LUT to by clicking on Import and selecting one of the drop-down options.
Step 2. Add the Video to the Timeline
Drag and drop the video into your project’s timeline.
Step 3. Open the Color Tab
Double click the video on the timeline to select it. Once it’s selected, go to the top left panel and click on the color tab.

Step 4. Apply a LUT to the Video
Under the color tab, navigate to the 3D LUT option and select one of the available options in the 3D LUT drop-down menu to apply a LUT.
Many LUTs are named after popular TV shows and series whose visual styles they mimic, such as Batman, House of Cards, Game of Thrones, Mission Impossible, Harry Potter, Star Wars, and more.
Once you apply a LUT, you can see your changes in the Preview Window. Besides using the preset LUTs, Filmora also allows you to use custom LUTs. Instead of choosing one of the presets, click on the Load New LUT option to import your custom LUT into Filmora.
Step 5. Make Fine Adjustments
Once you apply a LUT, Filmora can allow you to make further modifications to the video. Click on the Advanced button at the bottom of the color tab to view advanced color correction options.
In the new window that opens, you can adjust several things, such as color, light, HSL, and more. You can also choose from a variety of other available presets.

Step 6. Save the Changes
Once you’re satisfied with the changes you’ve applied, click on the OK button in the lower right corner to save the changes.
For Win 7 or later (64-bit)
For macOS 10.12 or later
Conclusion
LUTs are a fast way to color grade your footage after color correction. However, to ensure your LUTs work effectively, here are some important guidelines you should observe when using LUTs:
- Ensure your footage matches from shot to shot, especially if you’re applying LUTs to multiple clips.
- Ensure your exposure is correct before using LUTs. You can use a histogram to help you set the exposure.
- Ensure you apply LUTs to a video that’s been properly color corrected.
- Make small adjustments to things, such as brightness, saturation, contrast, exposure, color temperature, and tint for best results.
- Test out various LUTs before settling for one because shooting conditions can drastically affect how different LUTs look.
Ultimately, LUTs are an excellent way to make your video more cinematic. If you don’t have advanced video editing skills or prior experience working with LUTs, don’t worry. Filmora is a user-friendly video editing software that allows you to quickly apply LUTs with no video editing experience. Just download Filmora for free to get started.
Color grading can be a tedious process, especially if you don’t have the technical skills required to achieve the desired result. That’s where a LUT can come in handy. So, what is a LUT?
LUT stands for “look up table.” Simply put, a LUT is a color preset that you can apply to your video footage to speed up the color grading process. While LUTs are commonly used to speed up the color grading process, they can also be used for other tasks, such as color transfer between software, monitor calibration, and more.
In this article, we’ll explore a particular LUT – Leeming LUT Pro™ and how you can use it in various video editors.
In this article
02 Supported Cameras of Leeming LUT Pro™
03 How to Import and Use Leeming LUT Pro™ in Different Video Editors
What is Leeming LUT Pro™?
Leeming LUT Pro™ is the world’s first unified, corrective Look Up Table (LUT) system for supported cameras. It’s designed to maximize dynamic range, fix skin tones, remove unwanted color casts and provide an accurate Rec709 starting point for further creative color grading.
The Pro LUTs are designed for perfect Rec709 colorimetry and have a linear luma curve, with an average measured dE(2000) of less than 1. As a result, they are visually indistinguishable from reality to the human eye.
Athena LUTs are a brighter version of Pro. They are designed around how the eye sees while retaining the same perfect colorimetry as Pro.
Supported Cameras of Leeming LUT Pro™
- Panasonic G Series: All G series cameras with Cine-D, V-LogL, and HLG for Rec709
- Panasonic S Series: All S series cameras with V-Log, V-Log BRAW, V-Log ProRes RAW, Cine-D, Cine-D2, and HLG for Rec709
- Fujifilm X Series: All X Series cameras with F-Log, Eterna Cinema, Pro Neg Std, and HLG for Rec709
- Canon R Series: All R series cameras with the Faithful Picture Style, C-Log, C-Log3, and CanonRAW
- Canon C Series: All C series cameras with BT.709, C-Log2, C-Log3, HDR-PQ for Rec709, and HLG for Rec709
- Blackmagic Pocket 4K/6K/6K Pro: All cameras with Gen 4 or Gen5 Film
- Blackmagic Pocket/Micro: Older cameras with Gen1 Film
- Nikon Z Series: All cameras with N-Log, Flat
- Sony A Series: All cameras with Picture profile menus, like the A7, with Cine2, S-Log2, S-Log3, HLG/3 for Rec709, and S-Cinetone
- JVC: GY-LS300 with J-Log1
- RunCam: 5 Orange Normal, Flat
- GoPro: 6,7 8, 9 & 10 ProTune, 4 & 5 ProTune, Session ProTune
- DJI: Mavic3, Phantom 4 Pro, Air 2S, Mavic 2 Pro, Mavic Air 2, Mini Series, Mavic Air, Mavic Pro, Pocket 2, Osmo Pocket, Osmo Action, X5 Series
How to Import and Use Leeming LUT Pro™ in Different Video Editors
Leeming LUT Pro™ is supported by various video editors, coloring software, and motion graphics programs, such as:
- Final Cut Pro X
- Avid Media Composer
- DaVinci Resolve
- Adobe Premiere Pro
- Adobe After Effects
- Magix Vegas
- Grass Valley Edius
- Lightworks
- Cyberlink PowerDirector
- LumaFusion
Next, we’ll explore how you can use Leeming LUT in some popular video editors.
1. How to Use Leeming LUT in FCPX
Follow these steps to use Leeming LUT in Final Cut Pro:
Step 1. Import Footage
Launch Final Cut Pro and import your footage. To import your footage, navigate to the top left corner and click on the import icon (the arrow pointing downwards).
In the window that opens, your camera or device name should appear in the left column under devices.
Click on your camera or device to display the media you want to import. Then select the media you want to import and click on the import selected button in the bottom right corner to import your footage.
Step 2. Highlight the Footage
Highlight all the footage by clicking and dragging your pointer over the footage or press Command + A to select all the footage.
Step 3. Open the Inspector
After highlighting all the footage, open the Inspector menu and click the little i icon. Then go down to the bottom of the Inspector and switch from Basic to General.
Step 4. Select the Camera LUT Option
Select Camera LUT from the options under General and click on the Add Custom Camera LUT option.
Step 5. Import Leeming LUTs into FCPX
Find the folder where your Leeming LUTs are stored and import them into Final Cut Pro by clicking on Open.
Step 6. Select the LUT
Once imported, go back to the Camera LUT option under General and click on it. Then scroll down the available options and select your Leeming LUT under the Custom Camera options.
Finally, click the profile you used to apply it to your footage.
2. How to Use Leeming LUT in PowerDirector
Follow these steps to use a LUT in PowerDirector:
Step 1. Launch PowerDirector
Open PowerDirector and select Full Mode.
Step 2. Import Media
Click the import button and then select Import Media Folder to import the video footage you want to apply the Leeming LUT to.
Step 3. Add Footage to Timeline
Drag and drop the imported video footage into your project’s timeline.
Step 4. Select the Fix/Enhance Option
Click on the video clip on the timeline and choose the Fix/Enhance option.
Step 5. Select the Color Presets & CLUTs Option
In the top left window that opens above the timeline, select the Color Presets & CLUTs option under Enhance.
Step 6. Apply the Leeming LUT to the Footage
Click on the import button in the panel to import the Leeming LUT file. Once imported, apply it to give your video a more vibrant look.
Part 5: Bonus! Use Filmora – Easy to Use Video Editor for Color LUTs
Besides Final Cut Pro and PowerDirector, Filmora is another excellent video editing software that you can use to apply LUTs to your video.
Designed for beginners and intermediate users, Filmora is an intuitive yet powerful video editing software.
For instance, you can apply 3D LUTs to your video using Filmora. Unlike 1D LUTs, which can only control one value setting, 3D LUTs can allow you to control various value settings. As a result, 3D LUTs can give you more control over specific color values in your video.
Here’s how you can apply LUTs using Filmora:
Step 1. Import the Footage
Launch Filmora and choose New Project. In the New Project window that opens, import the video you want to apply the LUT to by clicking on Import and selecting one of the drop-down options.
Step 2. Add the Video to the Timeline
Drag and drop the video into your project’s timeline.
Step 3. Open the Color Tab
Double click the video on the timeline to select it. Once it’s selected, go to the top left panel and click on the color tab.
Step 4. Apply a LUT to the Video
Under the color tab, navigate to the 3D LUT option and select one of the available options in the 3D LUT drop-down menu to apply a LUT.
Many LUTs are named after popular TV shows and series whose visual styles they mimic, such as Batman, House of Cards, Game of Thrones, Mission Impossible, Harry Potter, Star Wars, and more.
Once you apply a LUT, you can see your changes in the Preview Window. Besides using the preset LUTs, Filmora also allows you to use custom LUTs. Instead of choosing one of the presets, click on the Load New LUT option to import your custom LUT into Filmora.
Step 5. Make Fine Adjustments
Once you apply a LUT, Filmora can allow you to make further modifications to the video. Click on the Advanced button at the bottom of the color tab to view advanced color correction options.
In the new window that opens, you can adjust several things, such as color, light, HSL, and more. You can also choose from a variety of other available presets.
Step 6. Save the Changes
Once you’re satisfied with the changes you’ve applied, click on the OK button in the lower right corner to save the changes.
For Win 7 or later (64-bit)
For macOS 10.12 or later
Conclusion
LUTs are a fast way to color grade your footage after color correction. However, to ensure your LUTs work effectively, here are some important guidelines you should observe when using LUTs:
- Ensure your footage matches from shot to shot, especially if you’re applying LUTs to multiple clips.
- Ensure your exposure is correct before using LUTs. You can use a histogram to help you set the exposure.
- Ensure you apply LUTs to a video that’s been properly color corrected.
- Make small adjustments to things, such as brightness, saturation, contrast, exposure, color temperature, and tint for best results.
- Test out various LUTs before settling for one because shooting conditions can drastically affect how different LUTs look.
Ultimately, LUTs are an excellent way to make your video more cinematic. If you don’t have advanced video editing skills or prior experience working with LUTs, don’t worry. Filmora is a user-friendly video editing software that allows you to quickly apply LUTs with no video editing experience. Just download Filmora for free to get started.
Vintage Film Effect 1920S - How to Make
Do you want to roll back the hands of time and shoot a film like you were in WWI or Charlie Chaplin’s era? That’s what a vintage film effect is all about. In other words, this video effect will give your videos an old-film look and feel. So, without wasting time, let’s learn how to convert a normal video into a film shot in the 1920s with Wondershare Filmora.
Preparation

In this tutorial, you don’t need a lot of creativity to create a vintage film, as Wondershare Filmora will be doing the heavy lifting. Just shoot an action video like chasing each other around, chatting with friends, running away from something, or doing anything else. Let’s learn how to do that below!
Free Download For Win 7 or later(64-bit)
Free Download For macOS 10.14 or later
Step1 Add a video you want to edit

Upload your video on Filmora, then move it to the editing timeline by dragging it. This should take a second or two.
Step2 Add a crop effect

After successfully adding your video to the timeline, tap the Effect tab on top of the screen and click Utility. Then, choose the Crop effect and add a few tracks above the video clip.

Next, double-tap the Crop effect on the editing timeline to open the effect editing tools. Now change the crop amount to 15 to add a vintage feel to your video. Just enter 15 on the Left and Right boxes.
Step3 Add the Dirty Film and Silent Film effects

Tap the Effect tab, then open the Overlay drop-down menu. Then, choose the Old Film category before adding a Dirty Film effect above the clip. To apply a more vintage feel to your video, add a Silent Film effect to the track above the Dirty Film effect.
Step4 Add a black & white effect to your video

Up to this point, your film should now start having a more vintage feel. But to make it look even older, double-click the video clip and tap the Color tab. After that, open the 3D LUT arrow and choose the B&W Film option. Now play the video and enjoy.
Summary
See, you don’t need to break a sweat to add a vintage feel to your funny video. With Filmora, you’ll access multiple tools and effects to create an old-looking film with just a single click. And don’t forget to play around with other Filmora overlays and effects to bring out the inner video editor in you. Thanks for reading!
Free Download For macOS 10.14 or later
Step1 Add a video you want to edit
Upload your video on Filmora, then move it to the editing timeline by dragging it. This should take a second or two.
Step2 Add a crop effect
After successfully adding your video to the timeline, tap the Effect tab on top of the screen and click Utility. Then, choose the Crop effect and add a few tracks above the video clip.
Next, double-tap the Crop effect on the editing timeline to open the effect editing tools. Now change the crop amount to 15 to add a vintage feel to your video. Just enter 15 on the Left and Right boxes.
Step3 Add the Dirty Film and Silent Film effects
Tap the Effect tab, then open the Overlay drop-down menu. Then, choose the Old Film category before adding a Dirty Film effect above the clip. To apply a more vintage feel to your video, add a Silent Film effect to the track above the Dirty Film effect.
Step4 Add a black & white effect to your video
Up to this point, your film should now start having a more vintage feel. But to make it look even older, double-click the video clip and tap the Color tab. After that, open the 3D LUT arrow and choose the B&W Film option. Now play the video and enjoy.
Summary
See, you don’t need to break a sweat to add a vintage feel to your funny video. With Filmora, you’ll access multiple tools and effects to create an old-looking film with just a single click. And don’t forget to play around with other Filmora overlays and effects to bring out the inner video editor in you. Thanks for reading!
How D AI Video Games Act More Human Than Human?
How Did AI Video Games Act More Human Than Human?
An easy yet powerful editor
Numerous effects to choose from
Detailed tutorials provided by the official channel
The gaming world is ever-changing, with developers looking to create innovative ways to immerse players into their digital worlds. One such technology that has begun to sweep is AI in the game industry.
AI is a powerful tool in many ways to improve the gaming experience. It can make artificial intelligence in computer games more believable and add replayability and immersion to games, and we can expect to see even more impressive applications in the future.
In this article
01 [What Is AI in Gaming?](#Part 1)
02 [Why Does AI in Gaming Matter?](#Part 2)
03 [How AI Will Completely Change Video Games](#Part 3)
04 [8 Games with Incredible Artificial Intelligence](#Part 4)
05 [What AI Video Games Assets Do Filmora Have?](#Part 5)
Part 1 What Is AI in Gaming?
In simple terms, AI is a set of algorithms that allow a computer to learn and improve from experience. Although you can apply it in many ways, artificial intelligence in video games is usually helpful to create more intelligent and more believable non-player characters (NPCs).
For example, an AI system might be helpful to determine how an NPC reacts to the player’s actions. If the player tries to steal from an NPC, the AI might make the NPC angry and more likely to attack the player. Alternatively, if the player is friendly to an NPC, the AI game playing might make the NPC more likely to help the player in future interactions.
Part 2 Why Does AI in Gaming Matter?
One of the most vital aspects of AI in video games is that it can make games more believable and immersive for players. When games can convincingly simulate human-like behavior, it can be a much more enjoyable experience for gamers. AI can make NPCs seem more lifelike and make the game world feel more believable.
AI is also becoming increasingly important for creating procedural content. This is where the game generates content on its own, rather than relying on pre-made assets. For example, a game might use procedural generation to create random dungeons or quests that the player can explore. This can add a lot of replayability to a game, as the player never knows what they will encounter next.
Part 3 How AI Will Completely Change Video Games
It is not a secret that AI is changing the world as we know it. With its ability to enable computers to learn and improve from experience, AI is paving the way for a future where machines can handle more complex tasks. And nowhere is this more apparent than in the world of video gaming.
In the past, developers brought in AI primarily for simple things like making certain NPCs (non-player characters) move and act realistically. But now, artificial intelligence in video games is being used for much more complex tasks like generating procedural content and creating believable human-like behavior. This results in a new generation of AI game playing that are more immersive and playable.
Part 4 Games with Incredible Artificial Intelligence
Now, we will look into eight video games that signify why we need the best ai in video games.
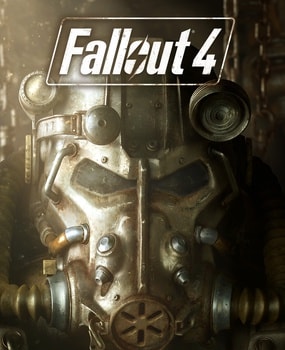
01Fallout 4
One of the most attractive examples of AI in video gaming is Fallout 4. This post-apocalyptic RPG features some of the most believable NPCs ever seen in a game. Each character is fully voiced, and they all have their unique personalities and backstories. The AI generates procedural content, meaning that the game world is always different each time you play.
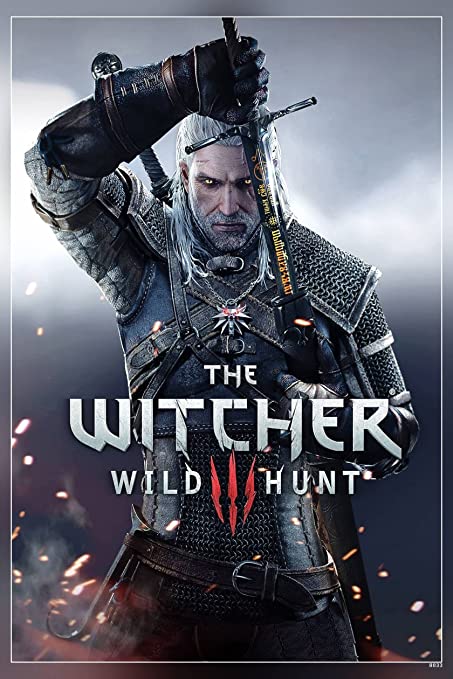
02The Witcher 3: Wild Hunt
The Witcher 3: Wild Hunt is one more great example of an AI video game. This open-world RPG features a vast array of believable NPCs, each with unique personality traits and motivations. The AI is also used to generate procedural content, resulting in a different game world every time you play.
03Grand Theft Auto V
Grand Theft Auto V is yet another example of AI being used to create believable human-like behavior. The NPCs in this play are some of the most lifelike and realistic ever seen. They react to the player’s actions in believable ways, and the AI is used to generate procedural content, resulting in a game world that is always different.

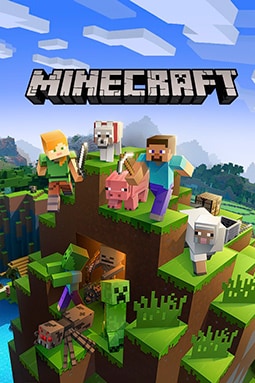
04Minecraft
Minecraft is a game that heavily uses procedural generation to create its content. The terrain and structures in the game are all generated on the fly by the AI, resulting in a different game world every time you play. What’s more, AI is also used to generate the behaviors of mobs (hostile creatures), making them more believable and lifelike.
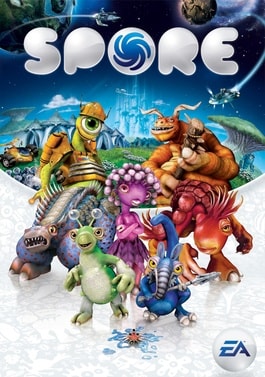
05Spore
Spore is an AI game play that is all about procedural generation. Every creature in the game is generated by AI, meaning that there are many possible creature designs. What’s more, AI is used to create creatures’ behaviors, making them more believable and lifelike.
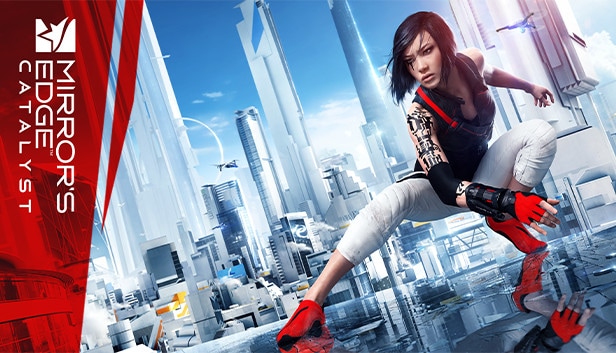
06Mirror’s Edge Catalyst
Mirror’s Edge Catalyst is a game that heavily uses AI to create its content. The levels in the game are all procedurally generated, meaning that they are different every time you play. This is made possible by the game’s AI, which produces the level layouts and obstacles on the fly.
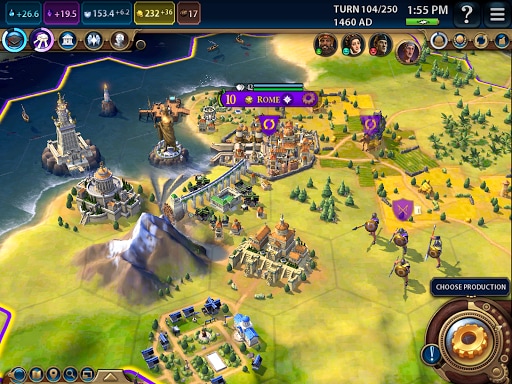
07Civilization VI
One of the most incredible examples of AI in video gaming is Civilization VI. This turn-based strategy game features some of the most believable NPCs ever seen in a game. Each character has its voice fully, and they all have unique personalities and backstories.
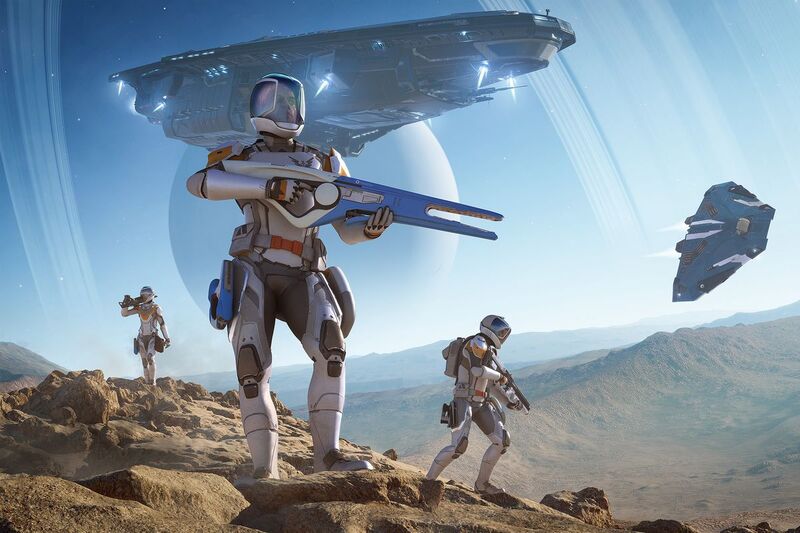
08Elite Dangerous
Elite Dangerous is a space simulation game that uses advanced AI to create believable and realistic human-like behavior. The NPCs in the game are some of the most lifelike and realistic ever seen. They react to the player’s actions in believable ways, and the AI is used to generate procedural content, resulting in a game world that is always different.
Part 5 What AI Video Games Assets Do Wondershare Filmora Video Editor Have?
With the increased use of AI in video games, most gamers have found gaming more enjoyable. However, an outstanding video editor has some assets that can significantly make AI video games better and more human. This video editor is one of the most sorted for and is called Filmora. Filmora is a great video editing software for creating stunning videos. It’s effortless to use and has various features to create professional-looking videos. It’s perfect for making videos for social media, YouTube, and other online platforms.
Its many features have a touch of artificial intelligence, making this program stand out from the other video editors and valuable for editing during ai video games creation.
Screen Recording
The Filmora screen recorder allows the user to concurrently record the screen and camera and the system and microphone audio. You can quickly record games, tutorials, YouTube videos, and other videos and then export them to YouTube, Vimeo, and other devices.
AI Portrait
The AI portrait function in Filmora video editor allows you to locate the human in your movie effortlessly and erase the background with a simple drag and click. There are also several portrait effects and AR stickers to add to your video editing enjoyment.
For Win 7 or later (64-bit)
For macOS 10.12 or later
Video Effects
Filmora customers can choose from various effects to utilize in their video editing software. It’s simple to create whatever effect you want with over 900 free effects, including drag-and-drop transitions, titles, filters, and motion components.
Do visit Wondershare Filmora exclusive website to know more about its latest upgrade and new features launch.
● Ending Thoughts →
● Thus, that was about what an ai video game is and why the characters act more like humans.
● So, as a video game lover, you can now explore the best of ai playing video games to have a personal experience of this new video gaming trend. Also, do try the Filmora software to see how you can change the looks and feel of your video game creation.
The gaming world is ever-changing, with developers looking to create innovative ways to immerse players into their digital worlds. One such technology that has begun to sweep is AI in the game industry.
AI is a powerful tool in many ways to improve the gaming experience. It can make artificial intelligence in computer games more believable and add replayability and immersion to games, and we can expect to see even more impressive applications in the future.
In this article
01 [What Is AI in Gaming?](#Part 1)
02 [Why Does AI in Gaming Matter?](#Part 2)
03 [How AI Will Completely Change Video Games](#Part 3)
04 [8 Games with Incredible Artificial Intelligence](#Part 4)
05 [What AI Video Games Assets Do Filmora Have?](#Part 5)
Part 1 What Is AI in Gaming?
In simple terms, AI is a set of algorithms that allow a computer to learn and improve from experience. Although you can apply it in many ways, artificial intelligence in video games is usually helpful to create more intelligent and more believable non-player characters (NPCs).
For example, an AI system might be helpful to determine how an NPC reacts to the player’s actions. If the player tries to steal from an NPC, the AI might make the NPC angry and more likely to attack the player. Alternatively, if the player is friendly to an NPC, the AI game playing might make the NPC more likely to help the player in future interactions.
Part 2 Why Does AI in Gaming Matter?
One of the most vital aspects of AI in video games is that it can make games more believable and immersive for players. When games can convincingly simulate human-like behavior, it can be a much more enjoyable experience for gamers. AI can make NPCs seem more lifelike and make the game world feel more believable.
AI is also becoming increasingly important for creating procedural content. This is where the game generates content on its own, rather than relying on pre-made assets. For example, a game might use procedural generation to create random dungeons or quests that the player can explore. This can add a lot of replayability to a game, as the player never knows what they will encounter next.
Part 3 How AI Will Completely Change Video Games
It is not a secret that AI is changing the world as we know it. With its ability to enable computers to learn and improve from experience, AI is paving the way for a future where machines can handle more complex tasks. And nowhere is this more apparent than in the world of video gaming.
In the past, developers brought in AI primarily for simple things like making certain NPCs (non-player characters) move and act realistically. But now, artificial intelligence in video games is being used for much more complex tasks like generating procedural content and creating believable human-like behavior. This results in a new generation of AI game playing that are more immersive and playable.
Part 4 Games with Incredible Artificial Intelligence
Now, we will look into eight video games that signify why we need the best ai in video games.
01Fallout 4
One of the most attractive examples of AI in video gaming is Fallout 4. This post-apocalyptic RPG features some of the most believable NPCs ever seen in a game. Each character is fully voiced, and they all have their unique personalities and backstories. The AI generates procedural content, meaning that the game world is always different each time you play.
02The Witcher 3: Wild Hunt
The Witcher 3: Wild Hunt is one more great example of an AI video game. This open-world RPG features a vast array of believable NPCs, each with unique personality traits and motivations. The AI is also used to generate procedural content, resulting in a different game world every time you play.
03Grand Theft Auto V
Grand Theft Auto V is yet another example of AI being used to create believable human-like behavior. The NPCs in this play are some of the most lifelike and realistic ever seen. They react to the player’s actions in believable ways, and the AI is used to generate procedural content, resulting in a game world that is always different.
04Minecraft
Minecraft is a game that heavily uses procedural generation to create its content. The terrain and structures in the game are all generated on the fly by the AI, resulting in a different game world every time you play. What’s more, AI is also used to generate the behaviors of mobs (hostile creatures), making them more believable and lifelike.
05Spore
Spore is an AI game play that is all about procedural generation. Every creature in the game is generated by AI, meaning that there are many possible creature designs. What’s more, AI is used to create creatures’ behaviors, making them more believable and lifelike.
06Mirror’s Edge Catalyst
Mirror’s Edge Catalyst is a game that heavily uses AI to create its content. The levels in the game are all procedurally generated, meaning that they are different every time you play. This is made possible by the game’s AI, which produces the level layouts and obstacles on the fly.
07Civilization VI
One of the most incredible examples of AI in video gaming is Civilization VI. This turn-based strategy game features some of the most believable NPCs ever seen in a game. Each character has its voice fully, and they all have unique personalities and backstories.
08Elite Dangerous
Elite Dangerous is a space simulation game that uses advanced AI to create believable and realistic human-like behavior. The NPCs in the game are some of the most lifelike and realistic ever seen. They react to the player’s actions in believable ways, and the AI is used to generate procedural content, resulting in a game world that is always different.
Part 5 What AI Video Games Assets Do Wondershare Filmora Video Editor Have?
With the increased use of AI in video games, most gamers have found gaming more enjoyable. However, an outstanding video editor has some assets that can significantly make AI video games better and more human. This video editor is one of the most sorted for and is called Filmora. Filmora is a great video editing software for creating stunning videos. It’s effortless to use and has various features to create professional-looking videos. It’s perfect for making videos for social media, YouTube, and other online platforms.
Its many features have a touch of artificial intelligence, making this program stand out from the other video editors and valuable for editing during ai video games creation.
Screen Recording
The Filmora screen recorder allows the user to concurrently record the screen and camera and the system and microphone audio. You can quickly record games, tutorials, YouTube videos, and other videos and then export them to YouTube, Vimeo, and other devices.
AI Portrait
The AI portrait function in Filmora video editor allows you to locate the human in your movie effortlessly and erase the background with a simple drag and click. There are also several portrait effects and AR stickers to add to your video editing enjoyment.
For Win 7 or later (64-bit)
For macOS 10.12 or later
Video Effects
Filmora customers can choose from various effects to utilize in their video editing software. It’s simple to create whatever effect you want with over 900 free effects, including drag-and-drop transitions, titles, filters, and motion components.
Do visit Wondershare Filmora exclusive website to know more about its latest upgrade and new features launch.
● Ending Thoughts →
● Thus, that was about what an ai video game is and why the characters act more like humans.
● So, as a video game lover, you can now explore the best of ai playing video games to have a personal experience of this new video gaming trend. Also, do try the Filmora software to see how you can change the looks and feel of your video game creation.
Best GIF to AVI Converters
Great Video Converter - Wondershare Filmora
Provide abundant video effects - A creative video editor
Powerful color correction and grading
Detailed tutorials provided by the official channel
Introduction
It will be much fun if you get to assort most of your GIF files and turn them into full-length streaming videos. However, many conversion websites and software on the internet offer you the facility to convert GIF to AVI file format with ease of use. With these online tools, you also get the opportunity to upload the converted file on various social media channels. Unlike real video, these files have less memory and are easy to save on your device or hard disk.
Although both AVI and GIF are two commonly used file formats, they are different. First of all, GIF stands for Graphical Interchange Format, and it is an image format that can store several consequent or dis-consequent pictures into an animated file. In contrast, AVI is a lossless video file format. This guide focuses on turning GIF animated images into AVI videos and gives a list of the best GIF to AVI converters you can choose from.
In this article
Part 1: Best 4 Online GIFs to AVI Converters
Part 2: Best 4 GIFs to AVI Software
Part 3: How to Convert GIF to AVI?

Part 1: Best 4 Online GIFs to AVI Converters
· Cloudconvert
One prominent feature of this tool is the interface of this GIF to AVI converter is straightforward to follow. However, you don’t have to download any plug-ins or software during the file conversion process with this online tool. This online website is SSL protected; thus, you will not need to deal with worms or viruses when downloading your converted file. In addition, you can also choose from more than 200 different file formats. Moreso, you get a chance to contact webmasters through email channels.
Main Features:
- There is an API function that you can use the site on several of your laptops, mobile devices, etc.
- It offers users various platforms to upload files for conversion through URL, PC, DropBox, Google Drive, etc.

· Video.online-convert
Using this GIF to AVI online converter, you do not have to deal with many advertisements; furthermore, the conversion speed is very high. Thus, with this converter, you can work on lengthy projects efficiently. In addition, the website also offers a lot of options that you can choose from while converting a file. This software also allows you to crop, change the bitrate of the video, change the rate of the frame, etc. The uploaded files will be secure and safe as the website follows strict confidentiality norms.
Main Features:
- This converter website offers a drag-drop feature that allows users to upload a file quickly.
- The facility to solve your queries is available through various frequently asked questions.

· Convertio
Using Convertio will have to follow a few initial steps to change GIF to AVI file extension. However, to convert GIF files to AVI online, you are not required to download any external software, saving your computer memory and time. It is effortless to download converted files on your system, as the website also provides API services. The website also gives an effective option to store and save data over cloud services through DropBox, Google Drive, etc.
Main Features:
- The site provides excellent options for video cutting, rotating, clipping, filtering, etc.
- Choose from different languages; thus, converting a file would be more comfortable and practical.

· File-conversion
The website has excellent UI and UX features. Allows users to convert GIF to AVI file format within a short time. Once you can convert GIF to AVI with this software, you will be able to download the file straight into your PC. The website also grants the opportunity to delete the data once it gets converted, and you can then download the file.
Main Features:
- This converter web portal gives you the chance to make several changes to the file you plan to convert.
- There are no unnecessary advertisements, which speeds up the conversion process.

Part 2: Best 4 GIFs to AVI Software
· Filmora.
Wondershare Filmora is editing and creating software specially designed for Windows and Mac PCs that is also an excellent GIF to AVI converter. In addition, it is highly compatible with a variety of media formats and gives you access to a variety of editing options. It also provides you with high-quality output files and uses various effects, transitions, overlays, graphics, and titles to create videos.
This software also supports numerous formats: MPEG, MP4, AVI, WebM, etc. It extracts the audio or converts them into MP3 format. In addition, it outputs high-quality videos, which include ones in 4K resolution.
Pros
It is compatible with various media formats
It comes with a built-in video editing tool
Receive high-quality output files
Grant users with access to multiple video editing options
Cons
Sometimes it takes extra time to generate the output files
Some of the sample files require a download

· ACDSee
This GIF to AVI converter software can share, manage, and edit photographs. In addition, its interface is, however, similar to those of other similar products, so if you have previous experience in using any editing software, this is no different. This software is also highly improbable. Thus, you will not have any difficulty using ACDSee. Its working area is usually divided into three sections:
- a left panel where you can browse folders
- a right panel with the properties
- the prominent viewing area in the middle.
Pros
It is elementary to use
It has a very lovely user-interface
An extensive collection of tools
Quick browsing through photos is allowed
Uploading photographs to the cloud through photos is supported
Cons
There are not as many features as other video editing tools
Its corrections are not always effective

· Free Video Editor
If you need a GIF to AVI converter that works free of charge, you need to try this software. This software program allows you to slice your video files and convert them into popular video formats. It also enables users to perform some basic edits and supports AVI, GIF, MKV, and MP4 for the output. It also gives users the possibility of extracting the audio stream of your video files and saving it as an MP3 file. In addition, users can load any MPG, MKV, AVI, WEBM, MP$, or WMV files split easily into as many clips as possible.
Pros
Has an accurate cutting point
It has useful features that can help to maximize the cutting process
Capabilities for rotation
Tag editor
Allows the conversion to some of the most well-known video formats
Cons
Some complex editing features are lacking
Unable to customize output profiles

· Easy GIF Animator
The main intention of this software is to create animations for your web pages. In addition, this software has a modern interface, in the style of Microsoft Office’s latest versions. However, some wizards can help to guide users of this software.
Pros
Helpful in creating graphical banners for advertising
Perfect for animation frame by frame
Convert video to GIF animations
Ideal for converting GIF to AVI
Add effects to your animations
Cons
Key-framing animation unsupported
Layers are not supported

Part 3: How to Convert GIF to AVI?
Convert GIF to AVI Using Online Converters
Convertio is an online file format converting tool compatible with a wide range of input and output formats, including GIF to AVI.
Here is a step-by-step guide of this GIF to AVI converter:

Step 1: Visit Convertio in your browser and select and upload a GIF file from your channel, like URL, computer, Dropbox, and Google Drive.
Step 2: Select AVI from the dropdown format option and click the Convert button to begin converting GIF to AVI.
Step 3: When completed, download the AVI files to your computer or send them to the cloud service
Save GIF as AVI through GIF to AVI Software
One of the primary reasons we recommend Wondershare Filmora is that online GIF converters can be unreliable. This implies that there must be a stable internet connection and power supply. In addition, Filmora software is safe and secure, which is a common concern with online tools.
Follow the steps below to turn GIF into AVI:
Step 1: Install Filmora on Mac or Windows
Download and Install Filmora software on your PC. Double click the .dmg file and follow all the instructions to install this software.
Step 2: Begin New Project
Click on the Filmora icon to start a new project and when it is open, click “New Project,” and make sure you select the “Project Settings” from the dropdown options (desired video aspect ratio, resolution and frame rate based on the sharing platform)

Step 3: Import Files to Convert
Start a new project by importing the GIF you want to convert to the timeline. A prompt project setting will pop up if the media aspect ratio and resolution do not match. Make sure you click on “DON’T CHANGE” to maintain your earlier setting

Step 4: Finish the Process and Export
Click on export to convert the video and select the AVI file format to save your file

Finally, save your GIF to AVI video on your preferred location
Conclusion
Thus, we learned:
- The process of converting GIF files to AVI using online tools
- How to use downloaded software to turn GIF to AVI
- It also provided a list of the top best software and online tool you can choose from to convert your GIF to AVIvery quickly.
- Lastly, it recommended Filmora as the top-most GIF to AVI converterdue to its reliability and safety commitment.
Introduction
It will be much fun if you get to assort most of your GIF files and turn them into full-length streaming videos. However, many conversion websites and software on the internet offer you the facility to convert GIF to AVI file format with ease of use. With these online tools, you also get the opportunity to upload the converted file on various social media channels. Unlike real video, these files have less memory and are easy to save on your device or hard disk.
Although both AVI and GIF are two commonly used file formats, they are different. First of all, GIF stands for Graphical Interchange Format, and it is an image format that can store several consequent or dis-consequent pictures into an animated file. In contrast, AVI is a lossless video file format. This guide focuses on turning GIF animated images into AVI videos and gives a list of the best GIF to AVI converters you can choose from.
In this article
Part 1: Best 4 Online GIFs to AVI Converters
Part 2: Best 4 GIFs to AVI Software
Part 3: How to Convert GIF to AVI?
Part 1: Best 4 Online GIFs to AVI Converters
· Cloudconvert
One prominent feature of this tool is the interface of this GIF to AVI converter is straightforward to follow. However, you don’t have to download any plug-ins or software during the file conversion process with this online tool. This online website is SSL protected; thus, you will not need to deal with worms or viruses when downloading your converted file. In addition, you can also choose from more than 200 different file formats. Moreso, you get a chance to contact webmasters through email channels.
Main Features:
- There is an API function that you can use the site on several of your laptops, mobile devices, etc.
- It offers users various platforms to upload files for conversion through URL, PC, DropBox, Google Drive, etc.
· Video.online-convert
Using this GIF to AVI online converter, you do not have to deal with many advertisements; furthermore, the conversion speed is very high. Thus, with this converter, you can work on lengthy projects efficiently. In addition, the website also offers a lot of options that you can choose from while converting a file. This software also allows you to crop, change the bitrate of the video, change the rate of the frame, etc. The uploaded files will be secure and safe as the website follows strict confidentiality norms.
Main Features:
- This converter website offers a drag-drop feature that allows users to upload a file quickly.
- The facility to solve your queries is available through various frequently asked questions.
· Convertio
Using Convertio will have to follow a few initial steps to change GIF to AVI file extension. However, to convert GIF files to AVI online, you are not required to download any external software, saving your computer memory and time. It is effortless to download converted files on your system, as the website also provides API services. The website also gives an effective option to store and save data over cloud services through DropBox, Google Drive, etc.
Main Features:
- The site provides excellent options for video cutting, rotating, clipping, filtering, etc.
- Choose from different languages; thus, converting a file would be more comfortable and practical.
· File-conversion
The website has excellent UI and UX features. Allows users to convert GIF to AVI file format within a short time. Once you can convert GIF to AVI with this software, you will be able to download the file straight into your PC. The website also grants the opportunity to delete the data once it gets converted, and you can then download the file.
Main Features:
- This converter web portal gives you the chance to make several changes to the file you plan to convert.
- There are no unnecessary advertisements, which speeds up the conversion process.
Part 2: Best 4 GIFs to AVI Software
· Filmora.
Wondershare Filmora is editing and creating software specially designed for Windows and Mac PCs that is also an excellent GIF to AVI converter. In addition, it is highly compatible with a variety of media formats and gives you access to a variety of editing options. It also provides you with high-quality output files and uses various effects, transitions, overlays, graphics, and titles to create videos.
This software also supports numerous formats: MPEG, MP4, AVI, WebM, etc. It extracts the audio or converts them into MP3 format. In addition, it outputs high-quality videos, which include ones in 4K resolution.
Pros
It is compatible with various media formats
It comes with a built-in video editing tool
Receive high-quality output files
Grant users with access to multiple video editing options
Cons
Sometimes it takes extra time to generate the output files
Some of the sample files require a download
· ACDSee
This GIF to AVI converter software can share, manage, and edit photographs. In addition, its interface is, however, similar to those of other similar products, so if you have previous experience in using any editing software, this is no different. This software is also highly improbable. Thus, you will not have any difficulty using ACDSee. Its working area is usually divided into three sections:
- a left panel where you can browse folders
- a right panel with the properties
- the prominent viewing area in the middle.
Pros
It is elementary to use
It has a very lovely user-interface
An extensive collection of tools
Quick browsing through photos is allowed
Uploading photographs to the cloud through photos is supported
Cons
There are not as many features as other video editing tools
Its corrections are not always effective
· Free Video Editor
If you need a GIF to AVI converter that works free of charge, you need to try this software. This software program allows you to slice your video files and convert them into popular video formats. It also enables users to perform some basic edits and supports AVI, GIF, MKV, and MP4 for the output. It also gives users the possibility of extracting the audio stream of your video files and saving it as an MP3 file. In addition, users can load any MPG, MKV, AVI, WEBM, MP$, or WMV files split easily into as many clips as possible.
Pros
Has an accurate cutting point
It has useful features that can help to maximize the cutting process
Capabilities for rotation
Tag editor
Allows the conversion to some of the most well-known video formats
Cons
Some complex editing features are lacking
Unable to customize output profiles
· Easy GIF Animator
The main intention of this software is to create animations for your web pages. In addition, this software has a modern interface, in the style of Microsoft Office’s latest versions. However, some wizards can help to guide users of this software.
Pros
Helpful in creating graphical banners for advertising
Perfect for animation frame by frame
Convert video to GIF animations
Ideal for converting GIF to AVI
Add effects to your animations
Cons
Key-framing animation unsupported
Layers are not supported
Part 3: How to Convert GIF to AVI?
Convert GIF to AVI Using Online Converters
Convertio is an online file format converting tool compatible with a wide range of input and output formats, including GIF to AVI.
Here is a step-by-step guide of this GIF to AVI converter:
Step 1: Visit Convertio in your browser and select and upload a GIF file from your channel, like URL, computer, Dropbox, and Google Drive.
Step 2: Select AVI from the dropdown format option and click the Convert button to begin converting GIF to AVI.
Step 3: When completed, download the AVI files to your computer or send them to the cloud service
Save GIF as AVI through GIF to AVI Software
One of the primary reasons we recommend Wondershare Filmora is that online GIF converters can be unreliable. This implies that there must be a stable internet connection and power supply. In addition, Filmora software is safe and secure, which is a common concern with online tools.
Follow the steps below to turn GIF into AVI:
Step 1: Install Filmora on Mac or Windows
Download and Install Filmora software on your PC. Double click the .dmg file and follow all the instructions to install this software.
Step 2: Begin New Project
Click on the Filmora icon to start a new project and when it is open, click “New Project,” and make sure you select the “Project Settings” from the dropdown options (desired video aspect ratio, resolution and frame rate based on the sharing platform)
Step 3: Import Files to Convert
Start a new project by importing the GIF you want to convert to the timeline. A prompt project setting will pop up if the media aspect ratio and resolution do not match. Make sure you click on “DON’T CHANGE” to maintain your earlier setting
Step 4: Finish the Process and Export
Click on export to convert the video and select the AVI file format to save your file
Finally, save your GIF to AVI video on your preferred location
Conclusion
Thus, we learned:
- The process of converting GIF files to AVI using online tools
- How to use downloaded software to turn GIF to AVI
- It also provided a list of the top best software and online tool you can choose from to convert your GIF to AVIvery quickly.
- Lastly, it recommended Filmora as the top-most GIF to AVI converterdue to its reliability and safety commitment.
Also read:
- New How to Make Falling Text Effect in Filmora, In 2024
- New 15 Camera Shake Preset for Premiere Pro for 2024
- Want to Speed up or Slow Down a Video to Make It Look Different? Here Are the Simple Steps to Change Video Speed in Lightworks Video Editor for 2024
- New 12 Impressive AI Video Ideas for Making Engaging Video Content
- Updated Detailed Guide to Merge Videos in VLC Media Player for 2024
- New Are You Looking for Top AI Video Recognition Software to Choose From? Please Stay on This Article as We Look at the Current Top AI-Based Video Tools for 2024
- Updated Are You Wondering How to Slow Down Videos or Speed Them up, Here Are Three Ways to Do It. Speed up or Slow Down Your Videos on PC, Online, and Phone for 2024
- 2024 Approved Create Motion Effect with Path Blur In Photoshop
- In 2024, Perfecting the Art of Slowing Down Video on Instagram
- 10 Best Vlogging Cameras for Beginners
- Want to Add Freeze Frame Effect to Your Video on Your Device? Here Are the Steps to Add Freeze Frame on PC, Mac, Smartphone as Well as Online From Any Device
- New In 2024, Learning How to Slow Down a Video on iPhone Properly
- New In 2024, How to Livestream Zoom on Facebook?
- New In 2024, How to Create Discord Logo GIF
- In This Article, We Are Going to Learn the Simplest Procedure on How to Cut And/Or Trim Videos Using VLC Media Player. Each Step Is Carefully Explained, with Screenshots Attached
- New In This Article We Will Be Covering the Most Important Topics You Have to Remember when Becoming a Successful YouTube-Star for 2024
- In 2024, How to Make Vintage Film Effect 1980S
- New How to Make Vintage Film Effect 1950S for 2024
- Updated In 2024, In This Article, We Introduce You Our Top 5 Picks of Video to Ppt Converter
- Are You Eager to Discover the Method of Video Scaling in Filmora? You Are in the Right Place because This Discussion Will Cover the Content on This Matter
- Updated Step by Step to Rotate Videos Using OBS for 2024
- In 2024, The Availability of the Slow-Motion Feature on the iPhone Is Often Debated. This Article Will Guide You on How to Slow Down a Video on iPhone
- Updated In 2024, In This Article, We Will Be Discussing How to Crop a Video on Android, but Since Most Android Devices Dont Have This Option, You Will Need to Do It Externally, by Downloading and Using Different Apps
- Updated How To Record Video in Slow Motion Comprehending Important Points
- Updated How to Make Tutorial Video with Filmora for 2024
- Want to Uninstall Google Play Service from Honor 90 Pro? Here is How | Dr.fone
- Delete Gmail Account With/Without Password On Oppo Reno 10 Pro 5G
- How to Rescue Lost Music from Samsung Galaxy M14 5G
- Quick Fixes for Why Is My Vivo Y27 5G Black and White | Dr.fone
- Top 10 AirPlay Apps in Huawei Nova Y71 for Streaming | Dr.fone
- How To Bypass Oppo A2 FRP In 3 Different Ways
- In 2024, 4 Ways to Transfer Music from Realme Narzo N55 to iPhone | Dr.fone
- 9 Mind-Blowing Tricks to Hatch Eggs in Pokemon Go Without Walking On Motorola Moto E13 | Dr.fone
- In 2024, A Guide Xiaomi Redmi Note 12T Pro Wireless and Wired Screen Mirroring | Dr.fone
- In 2024, Mastering Lock Screen Settings How to Enable and Disable on Samsung Galaxy A14 5G
- In 2024, How to use iSpoofer on Oppo F23 5G? | Dr.fone
- A Detailed VPNa Fake GPS Location Free Review On Oppo Reno 10 5G | Dr.fone
- In 2024, Full Guide to Fix iToolab AnyGO Not Working On Samsung Galaxy A15 5G | Dr.fone
- 7 Top Ways To Resolve Apple ID Not Active Issue For Apple iPhone 6 Plus
- In 2024, 2 Ways to Monitor Vivo Y56 5G Activity | Dr.fone
- How To Transfer WhatsApp From iPhone XS to other iPhone 11 Pro devices? | Dr.fone
- In 2024, Is GSM Flasher ADB Legit? Full Review To Bypass Your Oppo Find X7 Ultra Phone FRP Lock
- Title: Updated Read This Review to Learn Everything You Need to Know About Leeming LUT Pro and How to Apply Pro LUTs Using Different Video Editors for 2024
- Author: Morgan
- Created at : 2024-04-24 01:11:00
- Updated at : 2024-04-25 01:11:00
- Link: https://ai-video-editing.techidaily.com/updated-read-this-review-to-learn-everything-you-need-to-know-about-leeming-lut-pro-and-how-to-apply-pro-luts-using-different-video-editors-for-2024/
- License: This work is licensed under CC BY-NC-SA 4.0.
