:max_bytes(150000):strip_icc():format(webp)/GettyImages-534572567-56facec43df78c784197b92d.jpg)
Updated Shotcut Video Editor Review

Shotcut Video Editor Review
If you are looking for a free video editor, you should definitely opt for an open-source video editor. They come free of cost without locking any feature and they are compatible with all desktop operating systems. The user interface of Shotcut looks powerful still easy to operate. There are dockable panels and flexible layouts to customize the interface.
Coming to the features, there are plenty of video effects and filters to enhance video content. You can do all the standard video editing works comfortably. There are certain advanced features available such as keyframe, audio mixing and much more. However, can we consider Shotcut video editor the best for editing professional-quality videos? Find out the complete Shotcut reviews.
Part 1. How to Download and Install Shotcut
Shotcut is completely compatible with Windows, Mac and Linux. The company has discontinued Shotcut 32 bit version and the current version only supports 64 bit computer. Shotcut is safe to download and the installer is free of spyware and malware. Here are the steps to download and install Shotcut.

Step 1: From your web browser, visit “shotcut.org/download”. It automatically detects your operating system and provides you the installer to download Shotcut that could be compatible with your system.
Step 2: You can download the installer from Site 1(FossHub) or Site 2(GitHub). Besides, you can download the .exe file from Windows installer link or .zip file from Windows portable zip file.
Step 3: After downloading the installer file, install Shotcut from it by following the on-screen instructions.
Step 4: After installation, launch Shotcut and import all video and audio clips from Open File option. Bring them down to Timeline for basic editing.
Part 2. Key Features of Shotcut
Shotcut has all the standard features for basic video editing. Before downloading Shotcut, you should be aware of the features so that you can decide whether the video editor is suitable for your video editing purpose. Here are all the key features of Shotcut that stand out.
Video Capture – You can capture your screen as well as webcam video. Shotcut supports audio capture from the system as well as from the external mic. In fact, the software supports 4K resolution which is great being an open-source video editor.
Standard Editing – You can trim video clips and perform cut-copy-paste on clips. You can also append clips, insert clips in between, and extract audio from the videos. There are keyframes for video filters, presents, and markers. You can drag and drop files and keep notes. Besides, Shotcut uses proxy editing for handling high-resolution video files.
Audio Features – Shotcut comes with several audio filters that you can apply on your audio clips to enhance them. There are options for volume control, audio mixing, tone generator, and pitch adjustment. The popular fade in and fade out effects are also available along with audio scopes.
Video Effects – There is no dearth of effects and filters on Shotcut. In fact, you can compare Shotcut with premium video editors when it comes to video filters. Besides, there are blending modes and track compositing. Moreover, there are several transitions and deinterlacing. You can opt for 360-degree filters and reverse video clips as well as use video scopes.
Wide Support – Shotcut supports almost all the different video and audio formats. In fact, you get to select different photo file formats. The multi-format timeline supports mixing video and audio of different parameters perfectly. The software also supports network streaming and alpha channel videos.
Part 3. How to Edit Videos with Shotcut
Shotcut is good as a free video editor for standard editing options. You can add texts and titles, crop and trim video clips, as well as split and join clips. Besides, you can control the speed of the video clips as well as add transitions. Thereafter, you can export the video and publish online. Here are the steps about Shotcut editing videos.
Step 1: Launch Shotcut and go to File> New. Select Projects Folder and Video Mode and enter Project Name. Finally, click on Start button to get started.
Step 2: Go to View> Layout> Timeline Project for the best editing layer.
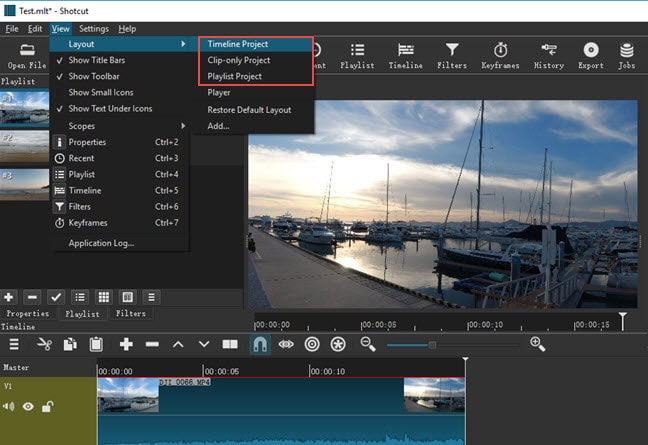
Step 3: To import media files, go to File> Open File> and select media files.
Step 4: To add texts, go to Filters> “+” icon> Video tab> select “Text:Simple”. Thereafter, type anything and choose a font and select any color.

Step 5: To crop any video, go to Filters> Video> and Crop option. You can select various geometry shapes as you think appropriate.
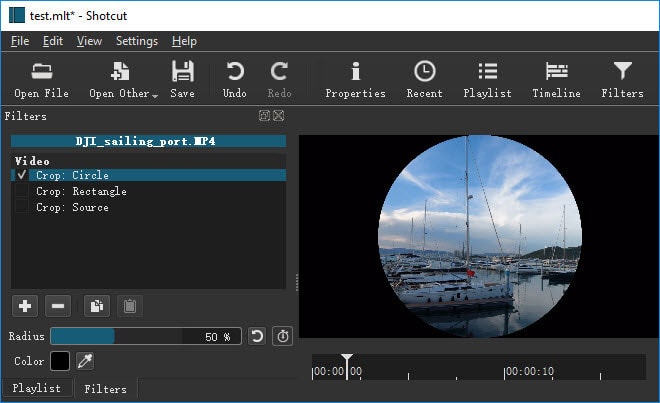
Step 6: To add transitions, keep two clips on the same track and get them overlapped. Choose a transition from Properties and apply to your video.
Step 7: Finally, go to File> Export Video option. You can choose from different option and select frame rate, video resolution, and others from Advanced option.

Part 4. Shotcut Alternative to Edit Videos
There are many reasons why you could be looking for a better alternative to Shotcut. First of all, there is a big lack of advanced video editing features. That is why editing professional-quality videos with Shotcut is not highly feasible. The user interface is not as robust as the standard user interface of video. The editing cannot be as fluent as any premium and professional video editor. That is why we recommend Wondershare Filmora as the best alternative to Shotcut.
Wondershare Filmora is a premium video editor where there is a perfect balance of standard and advanced features. You can also capture screen and webcam video. There are tons of transitions, effects, filters, elements, and much more. There is also a stock media library available. Filmora has wider support for different file formats. Here are the steps on how to edit videos with Filmora.
For Win 7 or later (64-bit)
For macOS 10.12 or later
Step 1: Download and install Filmora as per your operating system. Launch Filmora and click on New Project option on the welcome screen. Drag and drop media files into Project Media folder.
Step 2: Drag and drop video clips and audio clips on the timeline in proper sequence. Thereafter, you can do basic editing such as trimming, cropping, splitting, and much more.

Step 3: Go to Transitions option and add your desired transitions in between clips. You can also opt for Titles for texts, Effects for animations, and Elements for objects.

Step 4: Once you are satisfied with the editing, click on Export button to save your video to your hard drive.

Part 5. FAQs about Shotcut
**Is Shotcut totally free?
Yes, Shotcut is a completely free video editor as it belongs to the open-source software category. It is available for free for Windows, Mac, and Linux users. All the features are completely unlocked, and there is no premium version available.
**Is Openshot better than Shotcut?
Openshot is equally good as Shotcut in terms of features. But in terms of user experience and editing 4K videos, Shotcut scores better than Openshot. Shotcut is a more lightweight video editor, and hence, the chances of crashes are relatively low.
**Is Shotcut good for YouTube?
Shotcut is particularly good for YouTube if you need only basic editing on your videos. You can export the edited video file from Shotcut to YouTube after basic editing. You can get eh frame rate, video resolution, and aspect ratio as per your requirements.
For macOS 10.12 or later
Step 1: Download and install Filmora as per your operating system. Launch Filmora and click on New Project option on the welcome screen. Drag and drop media files into Project Media folder.
Step 2: Drag and drop video clips and audio clips on the timeline in proper sequence. Thereafter, you can do basic editing such as trimming, cropping, splitting, and much more.

Step 3: Go to Transitions option and add your desired transitions in between clips. You can also opt for Titles for texts, Effects for animations, and Elements for objects.

Step 4: Once you are satisfied with the editing, click on Export button to save your video to your hard drive.

Part 5. FAQs about Shotcut
**Is Shotcut totally free?
Yes, Shotcut is a completely free video editor as it belongs to the open-source software category. It is available for free for Windows, Mac, and Linux users. All the features are completely unlocked, and there is no premium version available.
**Is Openshot better than Shotcut?
Openshot is equally good as Shotcut in terms of features. But in terms of user experience and editing 4K videos, Shotcut scores better than Openshot. Shotcut is a more lightweight video editor, and hence, the chances of crashes are relatively low.
**Is Shotcut good for YouTube?
Shotcut is particularly good for YouTube if you need only basic editing on your videos. You can export the edited video file from Shotcut to YouTube after basic editing. You can get eh frame rate, video resolution, and aspect ratio as per your requirements.
For macOS 10.12 or later
Step 1: Download and install Filmora as per your operating system. Launch Filmora and click on New Project option on the welcome screen. Drag and drop media files into Project Media folder.
Step 2: Drag and drop video clips and audio clips on the timeline in proper sequence. Thereafter, you can do basic editing such as trimming, cropping, splitting, and much more.

Step 3: Go to Transitions option and add your desired transitions in between clips. You can also opt for Titles for texts, Effects for animations, and Elements for objects.

Step 4: Once you are satisfied with the editing, click on Export button to save your video to your hard drive.

Part 5. FAQs about Shotcut
**Is Shotcut totally free?
Yes, Shotcut is a completely free video editor as it belongs to the open-source software category. It is available for free for Windows, Mac, and Linux users. All the features are completely unlocked, and there is no premium version available.
**Is Openshot better than Shotcut?
Openshot is equally good as Shotcut in terms of features. But in terms of user experience and editing 4K videos, Shotcut scores better than Openshot. Shotcut is a more lightweight video editor, and hence, the chances of crashes are relatively low.
**Is Shotcut good for YouTube?
Shotcut is particularly good for YouTube if you need only basic editing on your videos. You can export the edited video file from Shotcut to YouTube after basic editing. You can get eh frame rate, video resolution, and aspect ratio as per your requirements.
For macOS 10.12 or later
Step 1: Download and install Filmora as per your operating system. Launch Filmora and click on New Project option on the welcome screen. Drag and drop media files into Project Media folder.
Step 2: Drag and drop video clips and audio clips on the timeline in proper sequence. Thereafter, you can do basic editing such as trimming, cropping, splitting, and much more.

Step 3: Go to Transitions option and add your desired transitions in between clips. You can also opt for Titles for texts, Effects for animations, and Elements for objects.

Step 4: Once you are satisfied with the editing, click on Export button to save your video to your hard drive.

Part 5. FAQs about Shotcut
**Is Shotcut totally free?
Yes, Shotcut is a completely free video editor as it belongs to the open-source software category. It is available for free for Windows, Mac, and Linux users. All the features are completely unlocked, and there is no premium version available.
**Is Openshot better than Shotcut?
Openshot is equally good as Shotcut in terms of features. But in terms of user experience and editing 4K videos, Shotcut scores better than Openshot. Shotcut is a more lightweight video editor, and hence, the chances of crashes are relatively low.
**Is Shotcut good for YouTube?
Shotcut is particularly good for YouTube if you need only basic editing on your videos. You can export the edited video file from Shotcut to YouTube after basic editing. You can get eh frame rate, video resolution, and aspect ratio as per your requirements.
HOW to Add Fade to Black on Premiere Pro
The most fundamental and typical sort of Fading is a simple cut, which is often used by editors to go from one shot to another. Applying effects between clips, at the start of a clip, or at its finish may sometimes help you smooth out or stylize your edit. Fade to black transition premiere pro can be used to get this outcome. To help users create current and trendy styles, Premiere Pro features a vast range of effects and tools including fade to black in premiere pro.
Going back to the days of black and white may sometimes be a welcome change of pace in the era of vivid digital and flashy film. Being a professional editor, you’ll understand that editing should be undetectable. If an editor has done their job well, no one will notice their efforts. You’ve failed as soon as the audience realizes the cut has occurred. But fading out to black (or white) seems out of the ordinary. Use this how to fade to black premiere pro guide to learn the steps in Adobe PR.
Part 1. What is Fade to Black
You will become a better filmmaker if you expand your vocabulary in video editing by learning about transitions. The dissolve-to-black, or fade-to-black (a fade to black in premiere pro), works well in part because it has a certain theatrical feel to it. A fade-out/fade-down, often known as a fade-to-black in theater, occurs in total darkness. One of the key components of video editing is using transitions in Adobe Premiere Pro.
The fundamental elements of many other transitions are fades. Effective use of Fades is a crucial skill in your video editing repertoire since it is subtle to the point of practically being undetectable. A video transition called a “fade to black” causes a scene or clip to gradually conclude with a black backdrop. It dates back to the time when the stage curtains were drawn and the lights were dimmed during a theatrical performance. The stage therefore went completely black while the team behind hurriedly changed into new clothing and stage items for the following action.
Those that seem to take place close together chronologically are edited together, while scenes that occur at separate periods or locales are faded out. These are recognizable features of the film. They alert us to the fact that the tale is moving to a later time or place, either thematically, chronologically, or geographically. In a practical sense, this is the time when the cast and crew switch out the set and clothes. But the fade-to-black marks the end of the scene in a symbolic and narrative sense.
Part 2. How to Fade to Black in Premiere Pro
One of the most widely used video editing programs is Adobe Premiere Pro. In Premiere Pro, a number of transitions are available. One of the first, most important responsibilities for a film editor to do is the utilization of numerous transitions. In fact, many aspiring film editors start off by learning how to fade to black in Premiere. Fortunately, creating a fade to black transition in Premiere isn’t that difficult to do step by step. Everything from straightforward dissolves to wipes, slides, and zooms may be found here.
Steps to Fade to Black in Premiere Pro:
Step1Launch the Program and Refer to the Effects
After launching Adobe Premier Pro CC, simply drag the Dip to Black effect from the Effects tab to the very start or very finish of the clip you want to use. The effect may then be moved around to change its duration as needed. Add two clips to the Premiere Pro timeline.

Step2 Add the fade to black transition
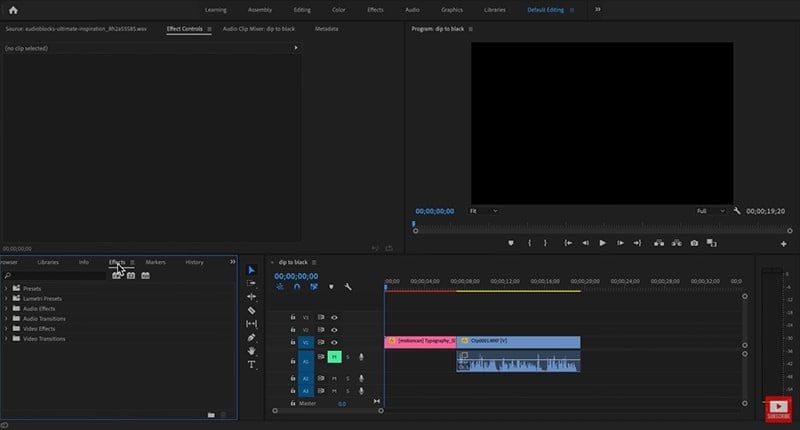
Drag and drop the Dip to Black effect between two clips on the timeline after selecting the Effects tab and typing “dip to black” into the search field. The right half of the clip will display the dip to black effect.
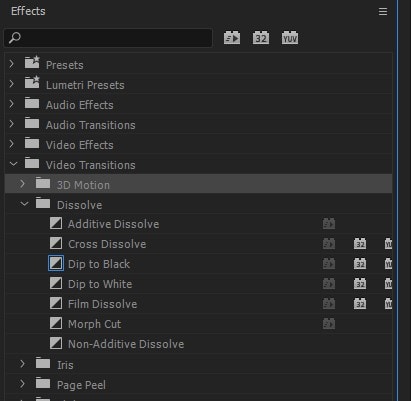
Step3 Customize the fade to black effect
Go to Effect Controls and, while the dip to black effect is chosen, alter the alignment to Center at Cut. Before video B starts, video A will now fade to black.
Step4 Optionally change the fade-to-black effect’s duration
just extend the timeline’s fade to black effect at the very end. The slower and smoother the fade to black effect will be, and vice versa, as you move the effect outward.
Part 3. Premiere Pro Alternative to Fade to Black
Although Premiere Pro is a powerful tool to fade to black, but what if your audience wishes to evoke a certain atmosphere, swap between tales, adopt a different point of view, spice up the narrative, or advance or recede in time? Here, more creative transitions would be beneficial. For that, Filmora is a fantastic substitute for Premiere Pro if you need to quickly apply a fade to black transition to your video.
The tool is packed with built-in features that are powerful enough to polish your videos in addition to fade to black effect. For creating scroll-stopping video content, you can also discover a ton of completely adjustable video templates for YouTube, TikTok, Instagram, Facebook, and other platforms as well as a ton of attractive overlay transitions and royalty-free music and sound effects.
Free Download For Win 7 or later(64-bit)
Free Download For macOS 10.14 or later
Steps to Fade to Black Using Filmora
Step1 Install Filmora on your laptop
You must first download this software application to your computer from one of the following sources in order to start:
You must install it on your computer once you’ve done downloading it before you can use it with your laptop.

Step2 Customize the Video
After the Import, you may edit your audio recordings using tools that are completely customizable. Use the editor in Filmora to edit your recorded audio files, using simple to advanced editing techniques. Your recorded video may be improved using Filmora’s Editor by adding animated titles, spectacular effects, audio enhancements, and more.

Step3 Fade to Black Videos
Spice up the Fade effect into your videos and add the effect into the timeline. You will be able to make it black at the ends by customizing the effect inside the Fade window.

Step4 Add VFX to Your Video
The software is embedded with Effects primarily to give your videos a polished appearance. You may utilize a variety of its eye-catching and adjustable effects to make your video productions stand out from the competition. In this area, we’ve covered some of the best effects for bringing life to your dull, unprofessional videos as shown below:

Step5 Save or Share the Videos
Finally, you may use the complete Filmora editor as previously mentioned when you’ve done editing the recorded video. When you want to submit your creative work right away to YouTube or another well-known website, click the Export option and choose the platform where you want to distribute your video clip. If you like, you may even make changes to the video before uploading it.
Part 4. Related FAQs
How do you fade a clip to black?
Utilizing the dip to black transition in your video sequence is the key to learning how to fade to black in Premiere. To produce the Fade to Black reaction you’re trying to accomplish, you must Dip to Black. Simply drag the feature to the conclusion of your sequence to complete the task. Where you want the fading to start and terminate. The length of the fade or dip may be altered using the effects control panel.
How do I fade to white in Premier Pro?
Contrarily, as this montage demonstrates, fading to white may be utilized to convey uncertainty or a feeling of optimism. One of the most traditional transition effects that is often utilized in movies and videos is the fade to white. Your film gains a cinematic feel from it, and the change from one scene to the next is more seamless.
How do you keyframe colors in Premiere?
You can find other color problems in Premiere Pro that you need to fix. Therefore, it makes sense to adjust your highlight, mid, and black points first and have them dialed in before addressing saturation and color temperature. Open the Color panel on the right side of the screen while your adjustment layer is highlighted in the sequence. Make your color adjustments while keeping in mind that the effect will be applied to every clip below it in the timeline.
We only stop feeling immersed when we notice abrupt cuts. It makes sense to know when to color correct your footage throughout the video editing process. If you color correct your film too early, you can be wasting your time by color grading footage that you might eventually cut out or never use. We hope that this article will assist you in streamlining your editing process if you’re just starting started using Premiere Pro’s adjustments layers. Try experimenting with Filmora if you often utilize them to improve your edits.
Free Download For macOS 10.14 or later
Steps to Fade to Black Using Filmora
Step1 Install Filmora on your laptop
You must first download this software application to your computer from one of the following sources in order to start:
You must install it on your computer once you’ve done downloading it before you can use it with your laptop.

Step2 Customize the Video
After the Import, you may edit your audio recordings using tools that are completely customizable. Use the editor in Filmora to edit your recorded audio files, using simple to advanced editing techniques. Your recorded video may be improved using Filmora’s Editor by adding animated titles, spectacular effects, audio enhancements, and more.

Step3 Fade to Black Videos
Spice up the Fade effect into your videos and add the effect into the timeline. You will be able to make it black at the ends by customizing the effect inside the Fade window.

Step4 Add VFX to Your Video
The software is embedded with Effects primarily to give your videos a polished appearance. You may utilize a variety of its eye-catching and adjustable effects to make your video productions stand out from the competition. In this area, we’ve covered some of the best effects for bringing life to your dull, unprofessional videos as shown below:

Step5 Save or Share the Videos
Finally, you may use the complete Filmora editor as previously mentioned when you’ve done editing the recorded video. When you want to submit your creative work right away to YouTube or another well-known website, click the Export option and choose the platform where you want to distribute your video clip. If you like, you may even make changes to the video before uploading it.
Part 4. Related FAQs
How do you fade a clip to black?
Utilizing the dip to black transition in your video sequence is the key to learning how to fade to black in Premiere. To produce the Fade to Black reaction you’re trying to accomplish, you must Dip to Black. Simply drag the feature to the conclusion of your sequence to complete the task. Where you want the fading to start and terminate. The length of the fade or dip may be altered using the effects control panel.
How do I fade to white in Premier Pro?
Contrarily, as this montage demonstrates, fading to white may be utilized to convey uncertainty or a feeling of optimism. One of the most traditional transition effects that is often utilized in movies and videos is the fade to white. Your film gains a cinematic feel from it, and the change from one scene to the next is more seamless.
How do you keyframe colors in Premiere?
You can find other color problems in Premiere Pro that you need to fix. Therefore, it makes sense to adjust your highlight, mid, and black points first and have them dialed in before addressing saturation and color temperature. Open the Color panel on the right side of the screen while your adjustment layer is highlighted in the sequence. Make your color adjustments while keeping in mind that the effect will be applied to every clip below it in the timeline.
We only stop feeling immersed when we notice abrupt cuts. It makes sense to know when to color correct your footage throughout the video editing process. If you color correct your film too early, you can be wasting your time by color grading footage that you might eventually cut out or never use. We hope that this article will assist you in streamlining your editing process if you’re just starting started using Premiere Pro’s adjustments layers. Try experimenting with Filmora if you often utilize them to improve your edits.
Facts About GIF Background You Didn’t Know
Some Facts About GIF Background You Didn’t Know
An easy yet powerful editor
Numerous effects to choose from
Detailed tutorials provided by the official channel
Once you start using GIFs in your everyday conversations, there’s no going back. GIFs make the conversation more immersive and enjoyable and add a sense of emotion that is not possible with ordinary text. You probably loved some gifs more than others, or there were moments when you wanted to turn them into gifs and wished you could use them as a gif background on your device or presentation but couldn’t figure out how to do it. But, now you don’t have to bury your wish any longer. During this article, you will learn everything there is to know about all the different ways you can use gifs as your background and many more. In addition, you will learn how to use them as your background and how to create them.
In this article
01 [How to Use a GIF as Your Desktop Background on Windows](#Part 1)
02 [How to Make GIF Background on Windows/Mac/Android/iPhone](#Part 2)
03 [How to Make GIF Powerpoint Background](#Part 3)
04 [How to Make GIF Without Background - Free & Efficiently?](#Part 4)
Part 1 How to Use a GIF as Your Desktop Background on Windows?
Although Windows doesn’t have native support to keep animated gif backgrounds, you can use third-party services to keep gifs as background images.
Using Plastuer or BioniX wallpaper changer as a 3rd party software is the best way to use animated gifs for your desktop.
As a starting point, we’ll cover plastuer, which uses WebGL and chromium-browser to make gifs as your background.
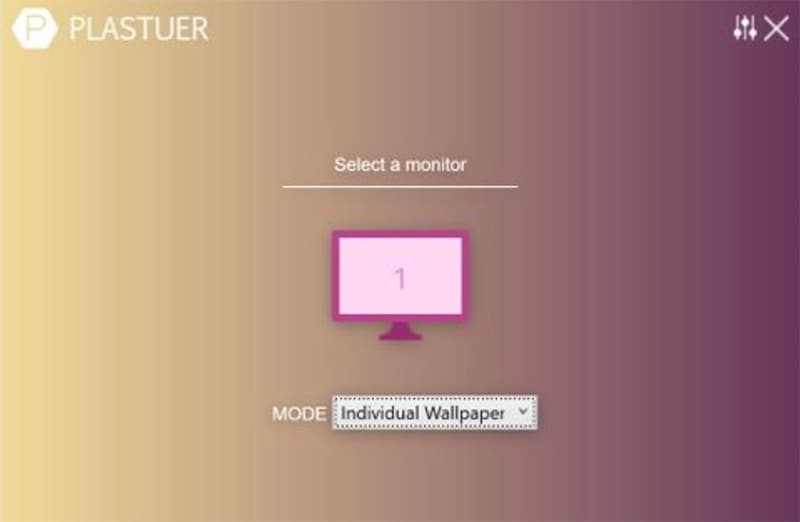
The software includes selecting different screens where you want the wallpaper to appear, making it possible to apply it to different screens at once.
To select the gif you want:
● You can paste the URL of the gif you want to use.
● You can also use the “create playlist” field to add multiple gifs as your background.
● You can select a file from your device using the “select file” option.
● Or you can choose from hundreds of gifs present in the plastuer library.
● You can disable the wallpaper whenever you wish by clicking on the “disable wallpaper” option.
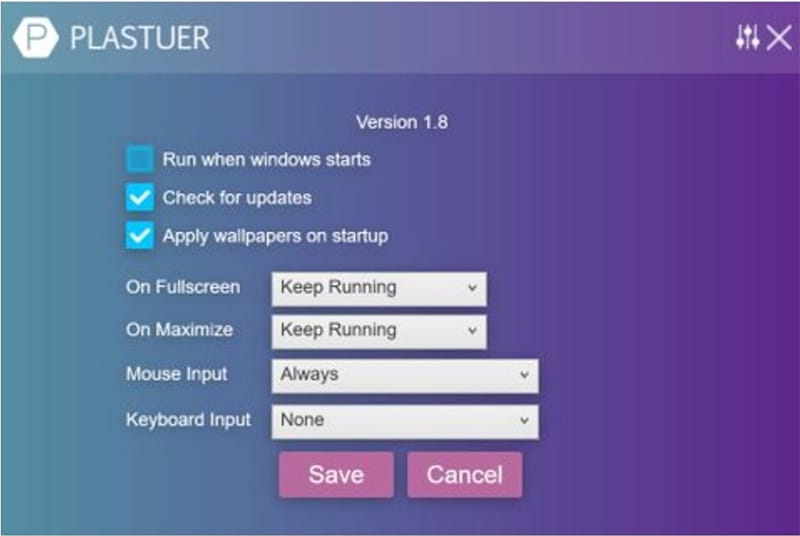
How to use the bioniX wallpaper changer?
BioniX comes with several options that one may need to apply to their Windows device’s background, and animated gif backgrounds are one of them.
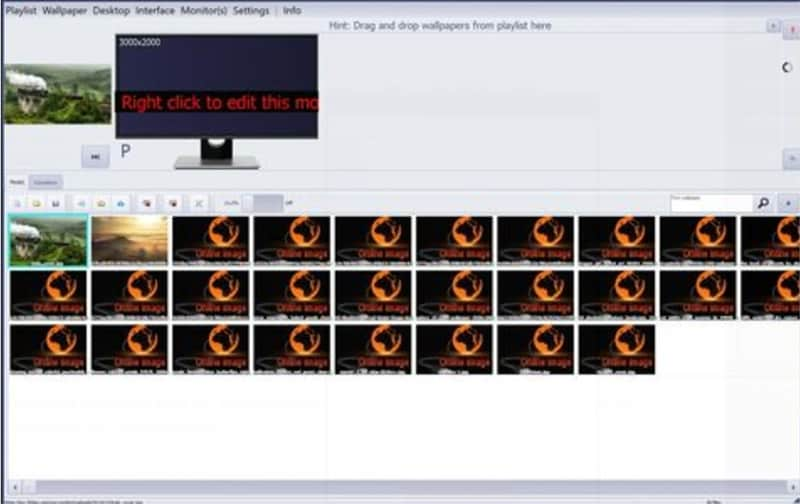
You will need to download the software and once it is installed, launch it on your PC to apply cool gif backgrounds. To choose files from the device itself, you will have to use the shortcut command “CTRL+F”, or you can also choose to insert the URL of the gif you want to use as your background.
Once your image gets uploaded into the software, double click on it to set it as your windows wallpaper. You can also choose a launch of gifs, create a playlist, and select the timer to change wallpaper regularly.
Part 2 How to Make GIF Background on Windows/Mac/Android/iPhone?
So, how can you create moving background gifs on your different devices like Windows/Mac/Android/iPhone?
In case you thought that was hard, you were entirely mistaken. Now, you can easily create or customize cool background gifs for your computer, tablet, phone, or other devices that you own. The best part is that you don’t need any technical skills to use different tools.
You can create gifs with the help of many tools such as Giphy and share them with your family, friends, and coworkers.
01Giphy
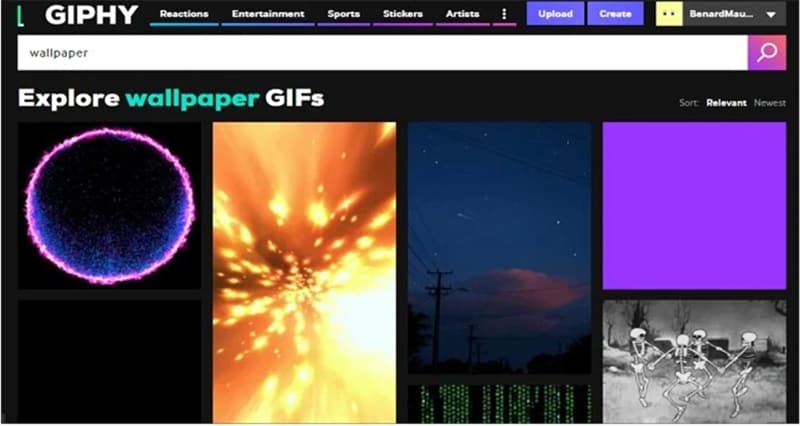
Giphy is a one-stop destination for all of your gifs needs. You can create or choose from thousands of gifs present in their library. Furthermore, one can make personalized gifs with all the tools they provide and add custom stickers, texts or different filters. There is also a live wallpaper section present in giphy, from where you can download hundreds of cool gif backgrounds and make your old machine look fabulous again.
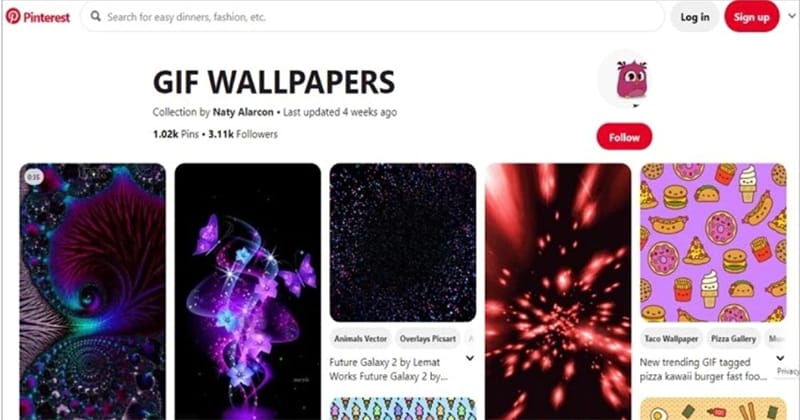
02Pinterest
It’s no secret that Pinterest has a lot of great images, but did you know you can also find gif backgrounds here in various genres that you like and then download them?
It’s straightforward to use, and you can also find anime gif backgrounds on Pinterest if you are an anime fan.
03Tenor
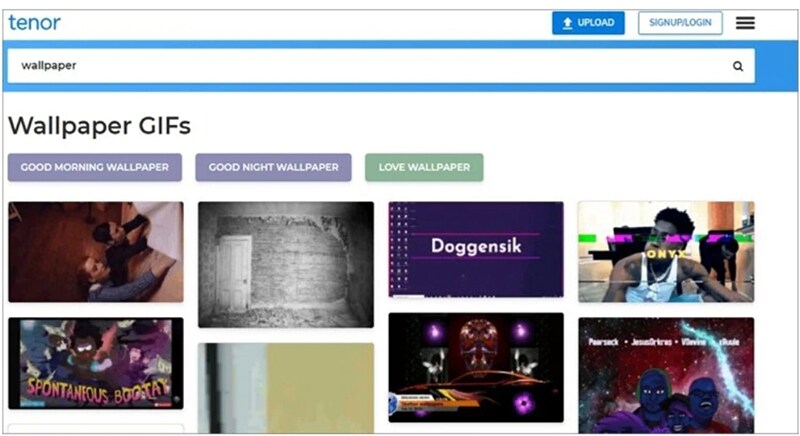
This site offers online gif backgrounds. One may choose from a wide selection of wallpapers and backgrounds available on this site. Online Library is filled up with all sorts of aesthetic gif backgrounds and other types of background that people like.
A few more tools fit the need, but most of them are not reliable, and the tools mentioned above are currently the best ones available for you to use.
Part 3 How to Make a GIF Powerpoint Background?
If you make PowerPoint presentations, you can use various tools to modify your presentation. But did you know that you can also include an aesthetic gif background as part of your presentation?
The steps to creating a gif PowerPoint background are very simple, and below you will find all the steps you need to follow:
● You’ll need to choose the PPTx file that you want to use the GIF background on to get started. Then you can choose the specific slide.
● Navigate to the “design” tab, then to the “background” section. You will see a “background styles” option where you will have to select “format background” to complete the process.
● Select “fill” in the left-hand side panel of the appeared window. Now, select “picture or texture fill” and choose the “file” button, which will lead to another window.
● In the “look in” menu, find the folder or file where the required gif is present. Go on to select the “ok” option. You can either select “close” to apply the gif to a particular slide or “apply to all” to use the gif background in the whole presentation.
Part 4 How to Make GIF Without Background - Free & Efficiently?
One may also look for transparent gif maker websites that will help them make gifs without background and use them on different devices they own.
Here are a few websites that are best for this job; they won’t only help you make transparent gifs but also edit various features like delay time, animation speed etc.
01Using EzGif
Using EzGif is probably one of the best options available in the market at the moment. You can go to their website and create a transparent gif background of high resolution.
Doing that is easy; you need to upload PNG type images that don’t have a background or combine transparent background to form a gif. You can choose up to 2000 images with a maximum file size of 100 MB for all images combined.
To create a gif, go on their site, then to the “gif maker” section to upload the images, and click on “make a gif” to make a transparent gif from the selected images. Once the gif is created, you can use it as a moving gif background and share it with friends or family.
02Use animizer.net to create a gif without background
It is effortless to use software to create transparent gifs by uploading multiple transparent PNG images and combining them to form a gif.
You can use unlimited images for your gif and animated gif background. It also lets you adjust various settings for your transparent gifs like loops, animation speed and much more.
03Use filmora for making gifs without background easily
Wondershare Filmora Video Editor is an all in one tool that will help you create all sorts of gifs, including transparent gifs. You can take advantage of their easy to use tools that are fir for people who have no technical skills at all.
You can easily upload the images and remove their background in the software itself and later use it in the gif you are willing to create.

Wondershare Filmora - Best Video Editor for Mac/Windows
5,481,435 people have downloaded it.
Build unique custom animations without breaking a sweat.
Focus on creating epic stories and leave the details to Filmora’s auto features.
Start a creative adventure with drag & drop effects and endless possibilities.
Filmora simplifies advanced features to save you time and effort.
Filmora cuts out repetition so you can move on to your next creative breakthrough.
This is probably one of the best options if you are looking for an all in one tool for all your needs.
● Ending Thoughts →
● The techniques that we have talked about in this guide may help you discover things about gif backgrounds you have not known before.
● They are incredible and can help you utilize gifs in ways you hadn’t even considered.
● Create a moving gif background and apply it to any device easily.
● Of course, a simple background won’t provide the same type of effect as a moving gif. With this guide, you’ll learn about every tool that you may use and how to apply or create a cool gif background on your own.
Once you start using GIFs in your everyday conversations, there’s no going back. GIFs make the conversation more immersive and enjoyable and add a sense of emotion that is not possible with ordinary text. You probably loved some gifs more than others, or there were moments when you wanted to turn them into gifs and wished you could use them as a gif background on your device or presentation but couldn’t figure out how to do it. But, now you don’t have to bury your wish any longer. During this article, you will learn everything there is to know about all the different ways you can use gifs as your background and many more. In addition, you will learn how to use them as your background and how to create them.
In this article
01 [How to Use a GIF as Your Desktop Background on Windows](#Part 1)
02 [How to Make GIF Background on Windows/Mac/Android/iPhone](#Part 2)
03 [How to Make GIF Powerpoint Background](#Part 3)
04 [How to Make GIF Without Background - Free & Efficiently?](#Part 4)
Part 1 How to Use a GIF as Your Desktop Background on Windows?
Although Windows doesn’t have native support to keep animated gif backgrounds, you can use third-party services to keep gifs as background images.
Using Plastuer or BioniX wallpaper changer as a 3rd party software is the best way to use animated gifs for your desktop.
As a starting point, we’ll cover plastuer, which uses WebGL and chromium-browser to make gifs as your background.

The software includes selecting different screens where you want the wallpaper to appear, making it possible to apply it to different screens at once.
To select the gif you want:
● You can paste the URL of the gif you want to use.
● You can also use the “create playlist” field to add multiple gifs as your background.
● You can select a file from your device using the “select file” option.
● Or you can choose from hundreds of gifs present in the plastuer library.
● You can disable the wallpaper whenever you wish by clicking on the “disable wallpaper” option.

How to use the bioniX wallpaper changer?
BioniX comes with several options that one may need to apply to their Windows device’s background, and animated gif backgrounds are one of them.

You will need to download the software and once it is installed, launch it on your PC to apply cool gif backgrounds. To choose files from the device itself, you will have to use the shortcut command “CTRL+F”, or you can also choose to insert the URL of the gif you want to use as your background.
Once your image gets uploaded into the software, double click on it to set it as your windows wallpaper. You can also choose a launch of gifs, create a playlist, and select the timer to change wallpaper regularly.
Part 2 How to Make GIF Background on Windows/Mac/Android/iPhone?
So, how can you create moving background gifs on your different devices like Windows/Mac/Android/iPhone?
In case you thought that was hard, you were entirely mistaken. Now, you can easily create or customize cool background gifs for your computer, tablet, phone, or other devices that you own. The best part is that you don’t need any technical skills to use different tools.
You can create gifs with the help of many tools such as Giphy and share them with your family, friends, and coworkers.
01Giphy
Giphy is a one-stop destination for all of your gifs needs. You can create or choose from thousands of gifs present in their library. Furthermore, one can make personalized gifs with all the tools they provide and add custom stickers, texts or different filters. There is also a live wallpaper section present in giphy, from where you can download hundreds of cool gif backgrounds and make your old machine look fabulous again.

02Pinterest
It’s no secret that Pinterest has a lot of great images, but did you know you can also find gif backgrounds here in various genres that you like and then download them?
It’s straightforward to use, and you can also find anime gif backgrounds on Pinterest if you are an anime fan.

03Tenor
This site offers online gif backgrounds. One may choose from a wide selection of wallpapers and backgrounds available on this site. Online Library is filled up with all sorts of aesthetic gif backgrounds and other types of background that people like.
A few more tools fit the need, but most of them are not reliable, and the tools mentioned above are currently the best ones available for you to use.

Part 3 How to Make a GIF Powerpoint Background?
If you make PowerPoint presentations, you can use various tools to modify your presentation. But did you know that you can also include an aesthetic gif background as part of your presentation?
The steps to creating a gif PowerPoint background are very simple, and below you will find all the steps you need to follow:
● You’ll need to choose the PPTx file that you want to use the GIF background on to get started. Then you can choose the specific slide.
● Navigate to the “design” tab, then to the “background” section. You will see a “background styles” option where you will have to select “format background” to complete the process.
● Select “fill” in the left-hand side panel of the appeared window. Now, select “picture or texture fill” and choose the “file” button, which will lead to another window.
● In the “look in” menu, find the folder or file where the required gif is present. Go on to select the “ok” option. You can either select “close” to apply the gif to a particular slide or “apply to all” to use the gif background in the whole presentation.
Part 4 How to Make GIF Without Background - Free & Efficiently?
One may also look for transparent gif maker websites that will help them make gifs without background and use them on different devices they own.
Here are a few websites that are best for this job; they won’t only help you make transparent gifs but also edit various features like delay time, animation speed etc.
01Using EzGif
Using EzGif is probably one of the best options available in the market at the moment. You can go to their website and create a transparent gif background of high resolution.
Doing that is easy; you need to upload PNG type images that don’t have a background or combine transparent background to form a gif. You can choose up to 2000 images with a maximum file size of 100 MB for all images combined.
To create a gif, go on their site, then to the “gif maker” section to upload the images, and click on “make a gif” to make a transparent gif from the selected images. Once the gif is created, you can use it as a moving gif background and share it with friends or family.
02Use animizer.net to create a gif without background
It is effortless to use software to create transparent gifs by uploading multiple transparent PNG images and combining them to form a gif.
You can use unlimited images for your gif and animated gif background. It also lets you adjust various settings for your transparent gifs like loops, animation speed and much more.
03Use filmora for making gifs without background easily
Wondershare Filmora Video Editor is an all in one tool that will help you create all sorts of gifs, including transparent gifs. You can take advantage of their easy to use tools that are fir for people who have no technical skills at all.
You can easily upload the images and remove their background in the software itself and later use it in the gif you are willing to create.

Wondershare Filmora - Best Video Editor for Mac/Windows
5,481,435 people have downloaded it.
Build unique custom animations without breaking a sweat.
Focus on creating epic stories and leave the details to Filmora’s auto features.
Start a creative adventure with drag & drop effects and endless possibilities.
Filmora simplifies advanced features to save you time and effort.
Filmora cuts out repetition so you can move on to your next creative breakthrough.
This is probably one of the best options if you are looking for an all in one tool for all your needs.
● Ending Thoughts →
● The techniques that we have talked about in this guide may help you discover things about gif backgrounds you have not known before.
● They are incredible and can help you utilize gifs in ways you hadn’t even considered.
● Create a moving gif background and apply it to any device easily.
● Of course, a simple background won’t provide the same type of effect as a moving gif. With this guide, you’ll learn about every tool that you may use and how to apply or create a cool gif background on your own.
Once you start using GIFs in your everyday conversations, there’s no going back. GIFs make the conversation more immersive and enjoyable and add a sense of emotion that is not possible with ordinary text. You probably loved some gifs more than others, or there were moments when you wanted to turn them into gifs and wished you could use them as a gif background on your device or presentation but couldn’t figure out how to do it. But, now you don’t have to bury your wish any longer. During this article, you will learn everything there is to know about all the different ways you can use gifs as your background and many more. In addition, you will learn how to use them as your background and how to create them.
In this article
01 [How to Use a GIF as Your Desktop Background on Windows](#Part 1)
02 [How to Make GIF Background on Windows/Mac/Android/iPhone](#Part 2)
03 [How to Make GIF Powerpoint Background](#Part 3)
04 [How to Make GIF Without Background - Free & Efficiently?](#Part 4)
Part 1 How to Use a GIF as Your Desktop Background on Windows?
Although Windows doesn’t have native support to keep animated gif backgrounds, you can use third-party services to keep gifs as background images.
Using Plastuer or BioniX wallpaper changer as a 3rd party software is the best way to use animated gifs for your desktop.
As a starting point, we’ll cover plastuer, which uses WebGL and chromium-browser to make gifs as your background.

The software includes selecting different screens where you want the wallpaper to appear, making it possible to apply it to different screens at once.
To select the gif you want:
● You can paste the URL of the gif you want to use.
● You can also use the “create playlist” field to add multiple gifs as your background.
● You can select a file from your device using the “select file” option.
● Or you can choose from hundreds of gifs present in the plastuer library.
● You can disable the wallpaper whenever you wish by clicking on the “disable wallpaper” option.

How to use the bioniX wallpaper changer?
BioniX comes with several options that one may need to apply to their Windows device’s background, and animated gif backgrounds are one of them.

You will need to download the software and once it is installed, launch it on your PC to apply cool gif backgrounds. To choose files from the device itself, you will have to use the shortcut command “CTRL+F”, or you can also choose to insert the URL of the gif you want to use as your background.
Once your image gets uploaded into the software, double click on it to set it as your windows wallpaper. You can also choose a launch of gifs, create a playlist, and select the timer to change wallpaper regularly.
Part 2 How to Make GIF Background on Windows/Mac/Android/iPhone?
So, how can you create moving background gifs on your different devices like Windows/Mac/Android/iPhone?
In case you thought that was hard, you were entirely mistaken. Now, you can easily create or customize cool background gifs for your computer, tablet, phone, or other devices that you own. The best part is that you don’t need any technical skills to use different tools.
You can create gifs with the help of many tools such as Giphy and share them with your family, friends, and coworkers.
01Giphy
Giphy is a one-stop destination for all of your gifs needs. You can create or choose from thousands of gifs present in their library. Furthermore, one can make personalized gifs with all the tools they provide and add custom stickers, texts or different filters. There is also a live wallpaper section present in giphy, from where you can download hundreds of cool gif backgrounds and make your old machine look fabulous again.

02Pinterest
It’s no secret that Pinterest has a lot of great images, but did you know you can also find gif backgrounds here in various genres that you like and then download them?
It’s straightforward to use, and you can also find anime gif backgrounds on Pinterest if you are an anime fan.

03Tenor
This site offers online gif backgrounds. One may choose from a wide selection of wallpapers and backgrounds available on this site. Online Library is filled up with all sorts of aesthetic gif backgrounds and other types of background that people like.
A few more tools fit the need, but most of them are not reliable, and the tools mentioned above are currently the best ones available for you to use.

Part 3 How to Make a GIF Powerpoint Background?
If you make PowerPoint presentations, you can use various tools to modify your presentation. But did you know that you can also include an aesthetic gif background as part of your presentation?
The steps to creating a gif PowerPoint background are very simple, and below you will find all the steps you need to follow:
● You’ll need to choose the PPTx file that you want to use the GIF background on to get started. Then you can choose the specific slide.
● Navigate to the “design” tab, then to the “background” section. You will see a “background styles” option where you will have to select “format background” to complete the process.
● Select “fill” in the left-hand side panel of the appeared window. Now, select “picture or texture fill” and choose the “file” button, which will lead to another window.
● In the “look in” menu, find the folder or file where the required gif is present. Go on to select the “ok” option. You can either select “close” to apply the gif to a particular slide or “apply to all” to use the gif background in the whole presentation.
Part 4 How to Make GIF Without Background - Free & Efficiently?
One may also look for transparent gif maker websites that will help them make gifs without background and use them on different devices they own.
Here are a few websites that are best for this job; they won’t only help you make transparent gifs but also edit various features like delay time, animation speed etc.
01Using EzGif
Using EzGif is probably one of the best options available in the market at the moment. You can go to their website and create a transparent gif background of high resolution.
Doing that is easy; you need to upload PNG type images that don’t have a background or combine transparent background to form a gif. You can choose up to 2000 images with a maximum file size of 100 MB for all images combined.
To create a gif, go on their site, then to the “gif maker” section to upload the images, and click on “make a gif” to make a transparent gif from the selected images. Once the gif is created, you can use it as a moving gif background and share it with friends or family.
02Use animizer.net to create a gif without background
It is effortless to use software to create transparent gifs by uploading multiple transparent PNG images and combining them to form a gif.
You can use unlimited images for your gif and animated gif background. It also lets you adjust various settings for your transparent gifs like loops, animation speed and much more.
03Use filmora for making gifs without background easily
Wondershare Filmora Video Editor is an all in one tool that will help you create all sorts of gifs, including transparent gifs. You can take advantage of their easy to use tools that are fir for people who have no technical skills at all.
You can easily upload the images and remove their background in the software itself and later use it in the gif you are willing to create.

Wondershare Filmora - Best Video Editor for Mac/Windows
5,481,435 people have downloaded it.
Build unique custom animations without breaking a sweat.
Focus on creating epic stories and leave the details to Filmora’s auto features.
Start a creative adventure with drag & drop effects and endless possibilities.
Filmora simplifies advanced features to save you time and effort.
Filmora cuts out repetition so you can move on to your next creative breakthrough.
This is probably one of the best options if you are looking for an all in one tool for all your needs.
● Ending Thoughts →
● The techniques that we have talked about in this guide may help you discover things about gif backgrounds you have not known before.
● They are incredible and can help you utilize gifs in ways you hadn’t even considered.
● Create a moving gif background and apply it to any device easily.
● Of course, a simple background won’t provide the same type of effect as a moving gif. With this guide, you’ll learn about every tool that you may use and how to apply or create a cool gif background on your own.
Once you start using GIFs in your everyday conversations, there’s no going back. GIFs make the conversation more immersive and enjoyable and add a sense of emotion that is not possible with ordinary text. You probably loved some gifs more than others, or there were moments when you wanted to turn them into gifs and wished you could use them as a gif background on your device or presentation but couldn’t figure out how to do it. But, now you don’t have to bury your wish any longer. During this article, you will learn everything there is to know about all the different ways you can use gifs as your background and many more. In addition, you will learn how to use them as your background and how to create them.
In this article
01 [How to Use a GIF as Your Desktop Background on Windows](#Part 1)
02 [How to Make GIF Background on Windows/Mac/Android/iPhone](#Part 2)
03 [How to Make GIF Powerpoint Background](#Part 3)
04 [How to Make GIF Without Background - Free & Efficiently?](#Part 4)
Part 1 How to Use a GIF as Your Desktop Background on Windows?
Although Windows doesn’t have native support to keep animated gif backgrounds, you can use third-party services to keep gifs as background images.
Using Plastuer or BioniX wallpaper changer as a 3rd party software is the best way to use animated gifs for your desktop.
As a starting point, we’ll cover plastuer, which uses WebGL and chromium-browser to make gifs as your background.

The software includes selecting different screens where you want the wallpaper to appear, making it possible to apply it to different screens at once.
To select the gif you want:
● You can paste the URL of the gif you want to use.
● You can also use the “create playlist” field to add multiple gifs as your background.
● You can select a file from your device using the “select file” option.
● Or you can choose from hundreds of gifs present in the plastuer library.
● You can disable the wallpaper whenever you wish by clicking on the “disable wallpaper” option.

How to use the bioniX wallpaper changer?
BioniX comes with several options that one may need to apply to their Windows device’s background, and animated gif backgrounds are one of them.

You will need to download the software and once it is installed, launch it on your PC to apply cool gif backgrounds. To choose files from the device itself, you will have to use the shortcut command “CTRL+F”, or you can also choose to insert the URL of the gif you want to use as your background.
Once your image gets uploaded into the software, double click on it to set it as your windows wallpaper. You can also choose a launch of gifs, create a playlist, and select the timer to change wallpaper regularly.
Part 2 How to Make GIF Background on Windows/Mac/Android/iPhone?
So, how can you create moving background gifs on your different devices like Windows/Mac/Android/iPhone?
In case you thought that was hard, you were entirely mistaken. Now, you can easily create or customize cool background gifs for your computer, tablet, phone, or other devices that you own. The best part is that you don’t need any technical skills to use different tools.
You can create gifs with the help of many tools such as Giphy and share them with your family, friends, and coworkers.
01Giphy
Giphy is a one-stop destination for all of your gifs needs. You can create or choose from thousands of gifs present in their library. Furthermore, one can make personalized gifs with all the tools they provide and add custom stickers, texts or different filters. There is also a live wallpaper section present in giphy, from where you can download hundreds of cool gif backgrounds and make your old machine look fabulous again.

02Pinterest
It’s no secret that Pinterest has a lot of great images, but did you know you can also find gif backgrounds here in various genres that you like and then download them?
It’s straightforward to use, and you can also find anime gif backgrounds on Pinterest if you are an anime fan.

03Tenor
This site offers online gif backgrounds. One may choose from a wide selection of wallpapers and backgrounds available on this site. Online Library is filled up with all sorts of aesthetic gif backgrounds and other types of background that people like.
A few more tools fit the need, but most of them are not reliable, and the tools mentioned above are currently the best ones available for you to use.

Part 3 How to Make a GIF Powerpoint Background?
If you make PowerPoint presentations, you can use various tools to modify your presentation. But did you know that you can also include an aesthetic gif background as part of your presentation?
The steps to creating a gif PowerPoint background are very simple, and below you will find all the steps you need to follow:
● You’ll need to choose the PPTx file that you want to use the GIF background on to get started. Then you can choose the specific slide.
● Navigate to the “design” tab, then to the “background” section. You will see a “background styles” option where you will have to select “format background” to complete the process.
● Select “fill” in the left-hand side panel of the appeared window. Now, select “picture or texture fill” and choose the “file” button, which will lead to another window.
● In the “look in” menu, find the folder or file where the required gif is present. Go on to select the “ok” option. You can either select “close” to apply the gif to a particular slide or “apply to all” to use the gif background in the whole presentation.
Part 4 How to Make GIF Without Background - Free & Efficiently?
One may also look for transparent gif maker websites that will help them make gifs without background and use them on different devices they own.
Here are a few websites that are best for this job; they won’t only help you make transparent gifs but also edit various features like delay time, animation speed etc.
01Using EzGif
Using EzGif is probably one of the best options available in the market at the moment. You can go to their website and create a transparent gif background of high resolution.
Doing that is easy; you need to upload PNG type images that don’t have a background or combine transparent background to form a gif. You can choose up to 2000 images with a maximum file size of 100 MB for all images combined.
To create a gif, go on their site, then to the “gif maker” section to upload the images, and click on “make a gif” to make a transparent gif from the selected images. Once the gif is created, you can use it as a moving gif background and share it with friends or family.
02Use animizer.net to create a gif without background
It is effortless to use software to create transparent gifs by uploading multiple transparent PNG images and combining them to form a gif.
You can use unlimited images for your gif and animated gif background. It also lets you adjust various settings for your transparent gifs like loops, animation speed and much more.
03Use filmora for making gifs without background easily
Wondershare Filmora Video Editor is an all in one tool that will help you create all sorts of gifs, including transparent gifs. You can take advantage of their easy to use tools that are fir for people who have no technical skills at all.
You can easily upload the images and remove their background in the software itself and later use it in the gif you are willing to create.

Wondershare Filmora - Best Video Editor for Mac/Windows
5,481,435 people have downloaded it.
Build unique custom animations without breaking a sweat.
Focus on creating epic stories and leave the details to Filmora’s auto features.
Start a creative adventure with drag & drop effects and endless possibilities.
Filmora simplifies advanced features to save you time and effort.
Filmora cuts out repetition so you can move on to your next creative breakthrough.
This is probably one of the best options if you are looking for an all in one tool for all your needs.
● Ending Thoughts →
● The techniques that we have talked about in this guide may help you discover things about gif backgrounds you have not known before.
● They are incredible and can help you utilize gifs in ways you hadn’t even considered.
● Create a moving gif background and apply it to any device easily.
● Of course, a simple background won’t provide the same type of effect as a moving gif. With this guide, you’ll learn about every tool that you may use and how to apply or create a cool gif background on your own.
How to Make Flying Objects in Wondershare Filmora
Let us be honest here, you want to create fly objects in the air but don’t want to get into the witchcraft school. In that case, we have got your back!
In this article, you can learn how to make objects fly in the air! Technically you will not do that in real-time, but with the latest technology and editing tools at your disposal, you will exactly do that.
Use Wondershare Filmora to create the flying object effect. Scroll below to get the guide to the whole process of creation.
Part 1. What will you need to make a flying object?
This is not witchcraft, so we will abstain from using potions and herbs. Instead, to fly objects in our videos, we will use simple techniques that you may also be familiar with.
Video Cameras
The camera, in this scenario, will be the essential accessory as it will capture your video with the proper aspect ratio. This video camera can now be from a mobile phone or a high-quality DSLR. It will all depend upon your preference for quality and frame rate.

Tri-Pod or camera stands
Selecting the Tri-Pod is also crucial to your quality of video taking as it will ensure stability while capturing the video from the camera.

Stability is the key here, as the captured videos will be masked and combined in the later stages of the steps. To do so, consistently capturing the video in the same ratio is necessary. You can stabilize the video with a simple gorilla pod that you can get of good quality or a simple tripod.
The prop
The prop will be the object that we will be flying in the video. It could be a fluffy toy, a ball, a box, or anything you desire to be flying in your video.
![]()
Note: In this article, we are going to use a ball as a prop.

Wondershare Filmora
Now that we have all the physical requirements for the video, our next goal is to ensure that we have the correct video editing software. And what’s best than Wondershare Filmora? Obviously, there’s nothing!
Filmora allows you to edit your videos with ease and comfort. With its interactive UI, even a beginner feels easy to edit a video. With skills on hand, an expert can edit videos ranging from green screen effects to flying objects.
Free Download For Win 7 or later(64-bit)
Free Download For macOS 10.14 or later

Good presentation
Now, if you want your video to shine like the good ones, you will need to know how to present it. In this section, the requirement will be yourself. As you are not flying an object, you must act the part.
A good presentation will allow you to make the video more natural. Because no matter how skilled you are with video editing, a video with props will only be of quality until the subject acts their part with quality.
Part 2. How to capture the footage?
Before we get into how we edit our footage, we need to know how to shoot the video to edit. Follow the steps mentioned below:
- Set up your camera on a tripod or a gorilla pod.
- After setting up the camera, record an empty frame.
![]()
Note: An empty frame video will be the one you will use to mask the original clip.
Reference video
Start recording a five-second clip of the sofa where you will be sitting without yourself or the prop. Here you don’t need to add anything except the reference. Follow the guidelines below when making the reference video:
- The video should be plain.
- It should be simple.
- There should be no moving object or subject.

Main video
After shooting the empty frame video, move on to shooting the video with yourself in it. Follow the below to achieve something unique:
- Your focus should be on the prop.
- Use a thread or a rope to attach the prop to it. (In this case, we are using a ball.)
- Attach the ball to the thread and hand it on the roof.
- Record yourself now with the prop with your desired content or script.

After completing the video, simply stop recording. Now you will end up with two video clips.
Adding these two clips in the Wondershare Filmora , you can easily create the flying object effect. To do so, follow the steps explained in the section ahead.
Part 3. Stepwise guide to making flying objects in Wondershare Filmora
Now that we have looked into our requirements, let us dive into how we will apply our skills to achieve an object to fly in Wondershare Filmora .
Of course, without the software, our editing will not be possible, so download Wondershare Filmora from the steps explained below.
Free Download For Win 7 or later(64-bit)
Free Download For macOS 10.14 or later
Step1Open the Wondershare Filmora software
- Open the Wondershare Filmora software and Click on the New Project icon on the window.
- After you have clicked on the New Project icon, our main workplace will be launched.
- Here you can see various options.
- To get started, we need to import our video clips to edit them.

- Here, you can see two ways to import your clips in Wondershare Filmora.
- Shows you how to import by Right-Clicking on File and selecting the import media option.
- Shows you to drag and drop the file from your main directory simply.
You can choose whatever suits you the best!
Step2Add your clips to your timeline
Now that we have imported our videos into the timeline, our next step will be to add our videos to the timeline.
- Simply click on the imported clips on the import window.
- Then drag it to the timeline below.
- Doing so will create a working timeline you can view and edit as you go along the editing process.

Step3Size the reference video to the original video
Now, remember that we recorded a five-second clip that we will use to create the masking effect. You will need to size it to the original video for that to work. Doing so is simple and will require you to take some easy steps.
- First, click on the clip.
- Then, when it is selected, move on to the tab above to choose the speed option from the bar.
- Here, you will also see options such as cropping, Green screen, and color.
- Choose the option of speed.
- Then, a drop-down tile will pop up. Here you can see different options available to speed up your video.

- You can speed up your video and slow it down.
- For now, we will have to slow it down.
![]()
Note: Slowing it down will increase the time of the video clip and allow you to match it with the original video clip.
Don’t worry about the speed, as the video is already empty, and there will be no distractions to disturb our editing.
Step4Add the masking effect
Now that we have our video aligned with the reference video we are using. Let’s move to the next step.
This step will try to remove the thread attached to the ball; otherwise, it will show in the video, and our effect will be ruined. However, before we do that, we will need to know what masking is.
What is the Masking effect in Wondershare Filmora?
Have you ever seen the behind-the-scenes of those big-budget movies? Then you might have seen the actors and the stunt workers hanging from big ropes performing stunts in front of green screens.
Well, the directors capture the video in real-time. But they can do those big stunts on TV with editing and CGI, and one of the effects is “Masking.”
The masking effect allows you to mask the object on the screen with a reference video. So that’s how the ropes attached to the stuntmen get removed in the original videos.
How to add a masking effect?
Although there are numerous ways to do that, the one we will use in this video is to remove the thread. For this, follow the below steps:
- Simply go to the effect icon that you can see in the bar above.
- In the effects bar, move to the utility tab.
- You will see a window showing you the many effects Wondershare Filmora provides you from default.
- Select the shape mask tile.
- Now drag and drop it on the timeline below.

![]()
Note: You must ensure the effect is applied to the main video, not the reference video.
- When you drag the effect into the main video, you will notice a transparent shape added to the video. This is your Mask.
Step5Edit the masking effect
You must hide the thread attached to the ball with the masking effect. To do this, follow the below guidelines:
- Double-click on the effect added to the main video.
- You will notice another window pop up on the import library.
![]()
Note: In the pop-up window, you will see the multiple options and edits you can apply to the masking effect, such as Transform, Compositing, Motion tracking, and stabilization.

- Scroll down on the window and notice a video effect tab.
In the effect tab, you will have multiple options, such as the shape mask, X, Y, and scale and blur strength options, as shown below.
- Now adjust the mask to hide the string. It may be easy to invert the mask.
![]()
Note: That the borders of the mask are blurred. But you can also change them by inverting the mask, which turns the borders and the space between them.
Remember the invisibility cloak from Harry Potter? It works just like that, only with a solid shape.
- Now use the X and Y options to move the mask anywhere in the video.

Step6Hide the sharp borders
You may notice the shape of borders that do not blend with the background. To blend the borders with the background, follow the steps below:
- Simply Double-click on the effect in the timeline.
- Then, in the editing tab, find out the blur strength option.

- Simply drag the bar to increase the blur strength.
![]()
Note: Please keep looking in the window on the right. Check and increase the blur strength until you are satisfied with the result.
- Lastly, click on OK when you are done.
Step7Creating the popup effect
Now, if you want your object to appear out of thin air, you must create that pop-up effect. You can create the pop-up effect in simple and easy steps, as shown below:
- First, drag the timeline dragger to the point where you want the prop or the ball to pop up.
Your presentation should be accurate and precise!
Imagine you were doing a “swoosh“ action, similar to swinging a wand. Now you want your object to appear at that time.
Split the Video:
- Drag the timeline dragger to that point.
- Now press Ctrl+B to split both videos.
Add Popup Effect:
The masking effect will be applied from the start. Our goal is to hide the masking effect before the ball pop-ups. For this, follow the below steps:
- Go into the setting by Double-Clicking the masking effect on the original video.
- Then move the mask over the ball instead of on the thread. Doing so would make the ball disappear.

Final Results:
- Lastly, click on Ok when done.
Play the clip from the start, and you will notice the ball popping up according to your action.

Congratulations! You did it. You are now able to fly objects with the power of your mind.
Following the abovementioned steps, you can control objects and make them fly in the air. The catch is that you will have to use Wondershare Filmora . But, of course, this is not a witchcraft school now.
Free Download For Win 7 or later(64-bit)
Free Download For macOS 10.14 or later
Conclusion
Well, there comes a time when one needs to make flying objects. Wondershare Filmora is an excellent tool that will allow you to add the masking effect to create the illusion of flying objects in the air.
The video quality at the end will only depend upon how clearly you show during the editing process. Try the above steps and enjoy the results!

Wondershare Filmora
Now that we have all the physical requirements for the video, our next goal is to ensure that we have the correct video editing software. And what’s best than Wondershare Filmora? Obviously, there’s nothing!
Filmora allows you to edit your videos with ease and comfort. With its interactive UI, even a beginner feels easy to edit a video. With skills on hand, an expert can edit videos ranging from green screen effects to flying objects.
Free Download For Win 7 or later(64-bit)
Free Download For macOS 10.14 or later

Good presentation
Now, if you want your video to shine like the good ones, you will need to know how to present it. In this section, the requirement will be yourself. As you are not flying an object, you must act the part.
A good presentation will allow you to make the video more natural. Because no matter how skilled you are with video editing, a video with props will only be of quality until the subject acts their part with quality.
Part 2. How to capture the footage?
Before we get into how we edit our footage, we need to know how to shoot the video to edit. Follow the steps mentioned below:
- Set up your camera on a tripod or a gorilla pod.
- After setting up the camera, record an empty frame.
![]()
Note: An empty frame video will be the one you will use to mask the original clip.
Reference video
Start recording a five-second clip of the sofa where you will be sitting without yourself or the prop. Here you don’t need to add anything except the reference. Follow the guidelines below when making the reference video:
- The video should be plain.
- It should be simple.
- There should be no moving object or subject.

Main video
After shooting the empty frame video, move on to shooting the video with yourself in it. Follow the below to achieve something unique:
- Your focus should be on the prop.
- Use a thread or a rope to attach the prop to it. (In this case, we are using a ball.)
- Attach the ball to the thread and hand it on the roof.
- Record yourself now with the prop with your desired content or script.

After completing the video, simply stop recording. Now you will end up with two video clips.
Adding these two clips in the Wondershare Filmora , you can easily create the flying object effect. To do so, follow the steps explained in the section ahead.
Part 3. Stepwise guide to making flying objects in Wondershare Filmora
Now that we have looked into our requirements, let us dive into how we will apply our skills to achieve an object to fly in Wondershare Filmora .
Of course, without the software, our editing will not be possible, so download Wondershare Filmora from the steps explained below.
Free Download For Win 7 or later(64-bit)
Free Download For macOS 10.14 or later
Step1Open the Wondershare Filmora software
- Open the Wondershare Filmora software and Click on the New Project icon on the window.
- After you have clicked on the New Project icon, our main workplace will be launched.
- Here you can see various options.
- To get started, we need to import our video clips to edit them.

- Here, you can see two ways to import your clips in Wondershare Filmora.
- Shows you how to import by Right-Clicking on File and selecting the import media option.
- Shows you to drag and drop the file from your main directory simply.
You can choose whatever suits you the best!
Step2Add your clips to your timeline
Now that we have imported our videos into the timeline, our next step will be to add our videos to the timeline.
- Simply click on the imported clips on the import window.
- Then drag it to the timeline below.
- Doing so will create a working timeline you can view and edit as you go along the editing process.

Step3Size the reference video to the original video
Now, remember that we recorded a five-second clip that we will use to create the masking effect. You will need to size it to the original video for that to work. Doing so is simple and will require you to take some easy steps.
- First, click on the clip.
- Then, when it is selected, move on to the tab above to choose the speed option from the bar.
- Here, you will also see options such as cropping, Green screen, and color.
- Choose the option of speed.
- Then, a drop-down tile will pop up. Here you can see different options available to speed up your video.

- You can speed up your video and slow it down.
- For now, we will have to slow it down.
![]()
Note: Slowing it down will increase the time of the video clip and allow you to match it with the original video clip.
Don’t worry about the speed, as the video is already empty, and there will be no distractions to disturb our editing.
Step4Add the masking effect
Now that we have our video aligned with the reference video we are using. Let’s move to the next step.
This step will try to remove the thread attached to the ball; otherwise, it will show in the video, and our effect will be ruined. However, before we do that, we will need to know what masking is.
What is the Masking effect in Wondershare Filmora?
Have you ever seen the behind-the-scenes of those big-budget movies? Then you might have seen the actors and the stunt workers hanging from big ropes performing stunts in front of green screens.
Well, the directors capture the video in real-time. But they can do those big stunts on TV with editing and CGI, and one of the effects is “Masking.”
The masking effect allows you to mask the object on the screen with a reference video. So that’s how the ropes attached to the stuntmen get removed in the original videos.
How to add a masking effect?
Although there are numerous ways to do that, the one we will use in this video is to remove the thread. For this, follow the below steps:
- Simply go to the effect icon that you can see in the bar above.
- In the effects bar, move to the utility tab.
- You will see a window showing you the many effects Wondershare Filmora provides you from default.
- Select the shape mask tile.
- Now drag and drop it on the timeline below.

![]()
Note: You must ensure the effect is applied to the main video, not the reference video.
- When you drag the effect into the main video, you will notice a transparent shape added to the video. This is your Mask.
Step5Edit the masking effect
You must hide the thread attached to the ball with the masking effect. To do this, follow the below guidelines:
- Double-click on the effect added to the main video.
- You will notice another window pop up on the import library.
![]()
Note: In the pop-up window, you will see the multiple options and edits you can apply to the masking effect, such as Transform, Compositing, Motion tracking, and stabilization.

- Scroll down on the window and notice a video effect tab.
In the effect tab, you will have multiple options, such as the shape mask, X, Y, and scale and blur strength options, as shown below.
- Now adjust the mask to hide the string. It may be easy to invert the mask.
![]()
Note: That the borders of the mask are blurred. But you can also change them by inverting the mask, which turns the borders and the space between them.
Remember the invisibility cloak from Harry Potter? It works just like that, only with a solid shape.
- Now use the X and Y options to move the mask anywhere in the video.

Step6Hide the sharp borders
You may notice the shape of borders that do not blend with the background. To blend the borders with the background, follow the steps below:
- Simply Double-click on the effect in the timeline.
- Then, in the editing tab, find out the blur strength option.

- Simply drag the bar to increase the blur strength.
![]()
Note: Please keep looking in the window on the right. Check and increase the blur strength until you are satisfied with the result.
- Lastly, click on OK when you are done.
Step7Creating the popup effect
Now, if you want your object to appear out of thin air, you must create that pop-up effect. You can create the pop-up effect in simple and easy steps, as shown below:
- First, drag the timeline dragger to the point where you want the prop or the ball to pop up.
Your presentation should be accurate and precise!
Imagine you were doing a “swoosh“ action, similar to swinging a wand. Now you want your object to appear at that time.
Split the Video:
- Drag the timeline dragger to that point.
- Now press Ctrl+B to split both videos.
Add Popup Effect:
The masking effect will be applied from the start. Our goal is to hide the masking effect before the ball pop-ups. For this, follow the below steps:
- Go into the setting by Double-Clicking the masking effect on the original video.
- Then move the mask over the ball instead of on the thread. Doing so would make the ball disappear.

Final Results:
- Lastly, click on Ok when done.
Play the clip from the start, and you will notice the ball popping up according to your action.

Congratulations! You did it. You are now able to fly objects with the power of your mind.
Following the abovementioned steps, you can control objects and make them fly in the air. The catch is that you will have to use Wondershare Filmora . But, of course, this is not a witchcraft school now.
Free Download For Win 7 or later(64-bit)
Free Download For macOS 10.14 or later
Conclusion
Well, there comes a time when one needs to make flying objects. Wondershare Filmora is an excellent tool that will allow you to add the masking effect to create the illusion of flying objects in the air.
The video quality at the end will only depend upon how clearly you show during the editing process. Try the above steps and enjoy the results!
Also read:
- Looking for Simple Steps to Apply Fade in Effect to Your Text in Premiere Pro? Here Are Two Different Methods Along with an Alternative Way to Fade Text in Videos
- Updated 2024 Approved Learn About some of the Best Apps for Photo Collage for PC
- New In This Article, You Will Learn How to Record Creative Cinematic Videos Using a Smartphone and Edit the Video with Wondershare Filmora for 2024
- This Article Aims to Show You How to Export Videos in Filmora for 2024
- There Are 10 Slideshow Makers Coming with Beautiful Music for Creating a Stunning Slideshow for 2024
- 2024 Approved Top Online Video Background Changers Transform Your Videos with Ease
- Top Tips for Camtasia Freeze-Frame
- New Here Is a Complete Overview of VSCO Video Editor; the Best Photo-Editing App that Helps You Adjust Your Pictures Right After You Capture Them
- What Is AI Composite Video App and AI Composite Video Tutorial for 2024
- In 2024, Get to Know How Excellent Sparkle Video Effects Can Significantly Impact Different Projects. Its Miraculous. Read Below to Learn More and Add Sparkle Effect to Your Videos
- 2024 Approved A Guide to Color Grade Your Picture in LightRoom
- Make A Tattoo Disappear Like A Magic
- New How To Zoom In On TikTok Videos, In 2024
- 2024 Approved Looking for a Way to Edit Your Profile Picture for Telegram? Heres an Easy and Quick Guide on How to Change, Delete and Hide Your Profile Picture with Simple Steps
- MAGIX Vegas Pro Review A Professional Video Editing Software
- New In 2024, How to Animate Text in A Video
- In 2024, Live Stream on YouTube Using Zoom
- How To Be A Successful YouTuber for 2024
- New 2024 Approved Adobe Premiere Pro Rec 709 LUTs Finding The Best Choices
- New In 2024, We All Know Very Well that a 1-Second-Video Has Several Images in a Single Row. Even with iMovie Time-Lapse, You Can Create This! So, without Any Further Ado, Lets Learn How to Make a Timelapse in iMovie
- Learn How to Effectively Use Masking in After Effects with This Comprehensive Guide. Includes Step-by-Step Instructions and an Alternative Masking Technique for 2024
- In 2024, Everything You Need To Know About Unlocked Apple iPhone 11 Pro | Dr.fone
- How to Stop Life360 from Tracking You On Tecno Camon 30 Pro 5G? | Dr.fone
- Forgot iPhone XS Backup Password? Heres What to Do | Dr.fone
- Wondering the Best Alternative to Hola On Lava Blaze 2 Pro? Here Is the Answer | Dr.fone
- In 2024, 8 Safe and Effective Methods to Unlock Your iPhone XS Max Without a Passcode
- Complete Review & Guide to Techeligible FRP Bypass and More For OnePlus 11 5G
- In 2024, 15 Best Strongest Pokémon To Use in Pokémon GO PvP Leagues For Samsung Galaxy F14 5G | Dr.fone
- Can’t view MOV movies content on Galaxy XCover 6 Pro Tactical Edition
- Undeleted lost videos from Oppo K11 5G
- Updated In 2024, How to Make a Talking AI Avatar From Photos Easy Guide
- How to Recover lost Calendar on iPhone SE | Stellar
- In 2024, The 6 Best SIM Unlock Services That Actually Work On Your Lava Device
- How to Perform Hard Reset on Honor 90 Lite? | Dr.fone
- In 2024, How to Fix Pokemon Go Route Not Working On Samsung Galaxy F04? | Dr.fone
- How Can I Use a Fake GPS Without Mock Location On Motorola Moto G34 5G? | Dr.fone
- In 2024, How to Unlock Samsung Galaxy A54 5G Phone Password Without Factory Reset?
- In 2024, How to Track a Lost Samsung Galaxy A05 for Free? | Dr.fone
- In 2024, Top 5 Tracking Apps to Track Realme 12+ 5G without Them Knowing | Dr.fone
- Play Store Stuck on Downloading Of Vivo Y100? 7 Ways to Resolve | Dr.fone
- In 2024, How to Share/Fake Location on WhatsApp for Nokia C12 Plus | Dr.fone
- Universal Unlock Pattern for Samsung Galaxy S24
- Title: Updated Shotcut Video Editor Review
- Author: Morgan
- Created at : 2024-05-19 05:12:06
- Updated at : 2024-05-20 05:12:06
- Link: https://ai-video-editing.techidaily.com/updated-shotcut-video-editor-review/
- License: This work is licensed under CC BY-NC-SA 4.0.

