
:max_bytes(150000):strip_icc():format(webp)/ps5controller-0d702b25f7fa47b482999811cfc7af39.jpg)
Updated Top Animated Title Makers
Top Animated Title Makers
You know that your video needs a title, but rather than just type in some bland text to introduce the video, you can create an animated title page that is far more attractive. Animated titles make a video more attractive and when done correctly, they can even guarantee that your target audience will stick around long enough to watch the entire video. They can also be very useful for introducing the content of the video.
But to make an effective animated title, you need a tool that is designed to do just that. In this article, we look at some of the top animated title makers that you can use to create the perfect animated title for your video.
Part 1. Animated Title Maker Online
If you don’t want to install software on your computer to create the animated title, the following are the top online tools to choose from;
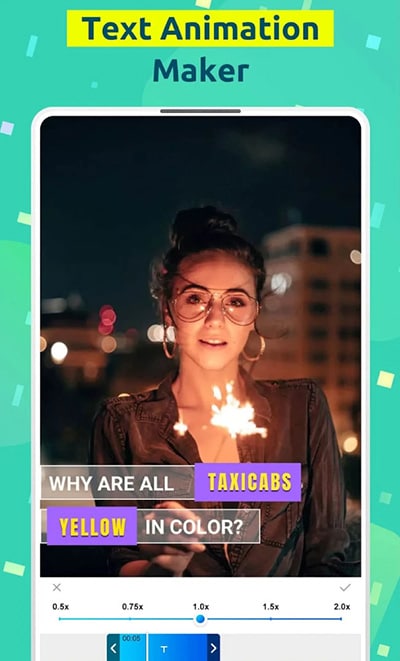
Animaker
Link: https://www.animaker.com/text-animation-maker
Rating: 4.5/5
Animaker is an online tool that is specifically designed to help you create text animations that you can then add to your video project. Available online on all browsers, Animaker has a simple user interface that makes it easy to create text animations in a matter of minutes. It is so easy to use that even the average beginner can create stunning text animations.
If you don’t want to create the animations from scratch, Animaker has numerous pre-designed templates for you to choose from that you can then just edit to fit your design. It also has a lot of customizable infographics that you can repurpose.

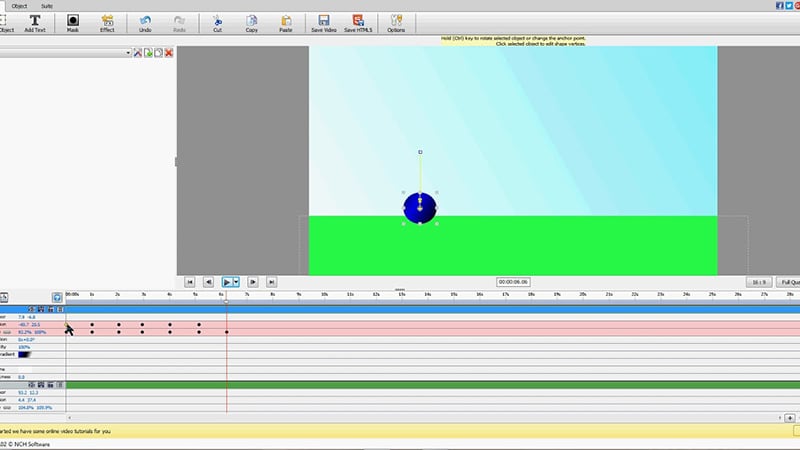
Animatron Studio
Link: https://www.animatron.com/studio
Rating: 4.5/5
The Animatron Studio is a one-stop solution for generating all types of animated texts. You can use it to create the perfect animated title for your video, but its numerous features also mean that it is one of the best ways to create attention-grabbing animated banner ads that can be posted on various ad sites,
It has a wealth of resources that you can use to create the title including more than 500,000 royalty-free images, videos, and audio to include in your project. If you don’t want to build the animated content from the ground up, you can select from the 200 pre-animated sets that Animatron Studio provides.
Kapwing Title Maker
Link: https://www.kapwing.com/animated-text-video-maker
Rating: 4.5/5
If your goal is to do more than just create an animated title for your video, Kapwing is a good solution. It is a complete online video editor that can also be used to create animated titles. As such, you can expect Kapwing to have more advanced features that allow you to customize the animated title in various ways.
For instance, it has a huge selection of animations that you can apply to the text. But you also get the option to upload your own animations, colors, and fonts. But please note that the free version of Kapwing will add a watermark to the video.

Biteable Animated Text Maker
Link: https://biteable.com/animated/text/
Rating: 4.5/5
Biteable is one of the most popular solutions that you can use to create all kinds of animated texts. It is simple enough to use that it is useful to both professionals and amateur video creators. It has numerous useful features including custom scenes, foundations, backgrounds, and characters all of which can work together to create the perfect animated title.
One of the main benefits of choosing Biteable is that you can share the videos you edit directly on social media without having to download the video.

Flexclip Video Maker
Link: https://www.flexclip.com/editor/
Rating: 4.5/5
Flexclip is another very easy-to-use and easily accessible solution to create animated texts for videos. Rather than create the texts from scratch, Flexclip allows you to create stunning animated texts just by selecting several parameters.
There are also a lot of pre-made designer text templates that are fully customizable. All you have to do is select one of the templates, and change the text, font, and any images to make it unique to you and your video.

Part 2. Animated Title Maker for Computer
Online tools can be useful, especially since they are more easily accessible. But if you want additional features and more ways to customize your animated title, the following desktop solutions may be more applicable to you;
Filmora
Rating: 4.5/5
Wondershare Filmora is a complete suite of video editing tools that can also come in handy when creating animated titles for videos. It is a very simple video editor with a simple user interface, making it an ideal solution even for beginner users. Adding a title to your video is easy and you get to choose from more than 200 different animations that you can apply to bring the text to life.
Filmora is also very useful because it comes with advanced editing features for the professional editor. You can use it to edit all aspects of the video including the clips and even any audio that may be on the project.

Adobe Animate
Rating: 4.5/5
Adobe Animate is a great option to create various animations for your video project, including animated texts. Used by animators to create 2D animated content, Adobe Animate has a lot of features designed to facilitate this kind of animation and is, therefore, one of the go-to solutions for designers looking to create illustrations like logos and infographics.
But like other Adobe programs, Adobe Animate is not very easy to use and the beginner may find that it takes quite a long time to figure out how it works. But once you figure it out, the 800+ web fonts can make it very easy for you to customize your animated title in various ways.

Express Animate
Rating: 4.5/5
Express Animate is a completely free program that you can download on your computer. It is a complete video editor which means that you can use it to animate text and characters, but it is also a great way to edit other aspects of the video including the audio tracks and adding digital effects.
With a simple user interface, Express Animate allows users to create 2D animations that can be used to create unique videos. It is also a good way to create GIFs and memes.
Movavi Video Editor
Rating: 4.5/5
Movavi Video Editor is another complete suite of editing tools that can also come in handy when you want to create an animated title for your video. Designed for both professionals and beginners, this video has all the advanced features you will need to edit all aspects of your video, including a built-in audio editor.
When it comes to animation, Movavi has a lot of effects and transitions as well as pre-made title templates to choose from. Once you have selected the title, you can easily customize the font and color to fit into your project.

Windows Movie Maker
Rating: 4.5/5
For PC users Windows Movie Maker is a simple to use and free way to edit videos. Included with the Windows OS, you likely don’t need to install any software to use and even though it is a free solution, Windows Movie Maker does have the necessary features to create and add animated titles to any video.
It comes with numerous effects, transitions, and templates to choose from when animating text. And it can also be used to edit videos in other ways including trimming and merging clips.

Part 3. Animated Title Maker Apps
If you are editing your videos on your mobile device, the following are the top animated title-making apps to choose from;
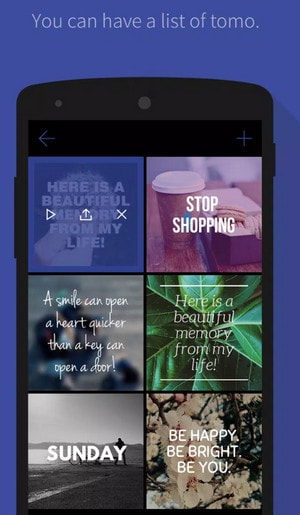
Tomo
Rating: 4.5/5
Link: https://m.apkpure.com/tomo-animate-text-in-video/com.entzeners.app.tomo
Tomo is one of the best apps that you can use to animate text in a video. It has robust features that allow you to easily add text to the video and then animate the text using various transitions and effects. Once the edits are complete, Tomo allows you to share the completed video directly on social media apps like Instagram and Twitter.
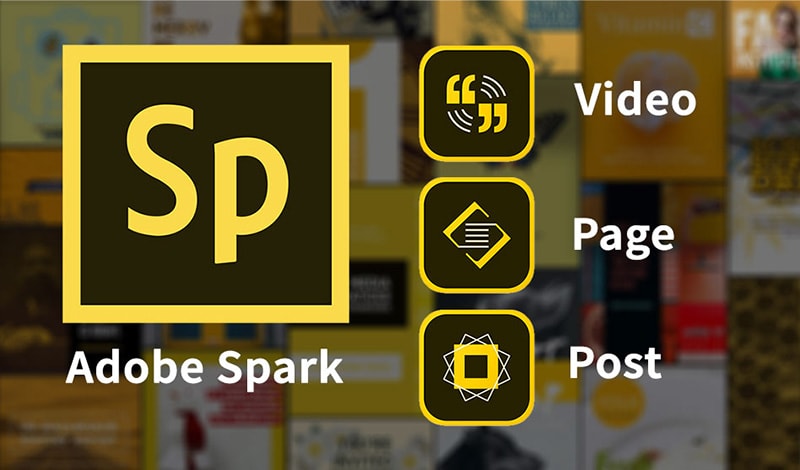
Adobe Spark
Rating: 4.5/5
Link:https://apps.apple.com/us/app/adobe-spark-post-design-maker/id1051937863
Available for both Android and iOS devices, Adobe Spark is a video editing tool that has numerous tools to add and edit texts on videos. You can use the professionally designed templates that you have access to when using Adobe Spark to create stunning animation titles. And since it easily integrates with other apps on the device, sharing the videos is very easy.
Quik
Rating: 4.5/5
Link: https://play.google.com/store/apps/details?id=com.gopro.smarty&hl=en&gl=US
Quik is an app that is dedicated to text animations and therefore one of the best solutions when you want to add and edit texts on videos. It is available for both iOS and Android and although the free version of the app is slightly limited, its basic editing features are still better than what you find on other more expensive solutions.
Hyper-type Animated Text Videos
Rating: 4.5/5
Link: https://itunes.apple.com/us/app/hype-type-animated-text-videos
This app gives you two options when it comes to animating the text on your video; auto-motion and typography. It focuses on just adding and editing text on a video and as such may not have any of the other video editing features you will find on some of the other apps. But if your goal is to create an interactive animated video title, Hyper-type Animated Text Videos is a great solution.
Vimeo
Rating: 4.5/5
Link: https://play.google.com/store/apps/details?id=com.vimeo.android.videoapp&hl=en&gl=US
Also available for both iOS and Android devices, Vimeo can also be a handy solution for the creation and editing of animated titles for videos. It has a lot of features to edit not just the text in videos, but also all other elements including audio. You even get a wide selection of royalty-free music that you can add to the video and motion stickers to make your title stand out even more. But the free version of Vimeo will add a watermark to the video.

Free Download For Win 7 or later(64-bit)
Free Download For macOS 10.14 or later
How to Make a Countdown Video
Have you ever wanted to use Adobe After Effects to recreate a countdown timer for a rocket launch or simply create a suspenseful moment in a video by displaying how the time runs out? This tutorial will show you how. It is imperative that you become familiar with the process of creating a countdown in After Effects.
In this article, we will demonstrate how to use Adobe After Effects to put together a countdown video. This procedure is a straightforward one, and it will handle expressions as well as plugins. Stay here and read on to find out more about the various methods in which we might accomplish this goal!
Let’s begin!
Part 1. Create a new composition
It’s possible that you only want to show the minutes and seconds. Make a mask around the entire area you intend to use in order to quickly remove undesired information.
1. Create a new Text Layer.
2. Alt + Click (on a PC) or Option + Click (on a Mac) on the stopwatch in the Source Text to display text options.
3. Place the expression “timeToCurrentFormat” within the expression box (). You must set your composition frame rate to 60 frames per second in order to make it appear to be a real digital countdown timer.
4. Everything should be pre-composed, and the composition’s tempo should be reversed to make it count down. Right-click the composition and choose Time > Time Reverse Layer to change its pace.

Part 2. Using the timecode plugin
To make a countdown timer, you can use the Timecode plugin rather than the “timeToCurrentFormat()” statement. The timer layout will be immediately created when the plugin is added to a New Solid; use the same steps as before to convert it to a countdown timer.
Here is a quick video that demonstrates how simple it is to set up a countdown timer in this manner:
Step1 Ctrl-click (Windows) or Command-click (Mac OS) the time display to cycle through Timecode Base or Frames/Feet + Frames (depending on whether the “Use Feet + Frames” option is checked in the Project Settings). The Timeline panel’s upper-left corner, as well as the bottoms of the Layer, Composition, and Footage panels, all indicate the current time. Timeline panel (See.)
Step2 A smaller text version of the option that is not selected in the project settings will be seen underneath. Do the following to limit the display to the Timecode or Frames option that was chosen in the Project Settings:
Step3 Choose After Effects > Preferences > Display (Mac OS) or Edit > Preferences > Display to access the display preferences window (Windows). Remove the check mark next to “Show Timecode and Frames in Timeline Panel” (this option is selected by default).
Step4 Change the time display units by selecting File > Project Settings and then selecting a different choice from the list in the Time Display Style section.
Timecode:
Displays the current time as timecode in the time rulers of the Timeline, Layer, and Footage panels. You have the option of utilizing the timecode from the source media (Use Media Source) or beginning at 00:00:00:00. To use timecode rather than frames, select the Timecode option from the menu. It is important to take note that there are no options available for changing the frame rate or whether or not to delete frames, as the source timecode is recognized and used instead.

Part 3. Source timecode
Support for various file formats for the source timecode QuickTime, DV, AVI, P2, MPEG-2, MPEG-4, H.264, AVCHD, RED, XDCAM EX, XDCAM HD, and WAV image sequence importers are just some of the formats that After Effects is able to read and apply timecode for.
Project panel
The Project panel includes several columns that display the source timecode. These columns are titled as follows: Media Start, Media End, Media Duration, and Tape Name. These are the beginning, ending, and overall length of time for the source. There are columns labeled “In,” “Out,” and “Duration,” which reflect the In and Out points that the user has set in the Footage panel for the footage item or the work area for the composition, respectively. These columns also show the duration of the clip.
Context of the Project
The source timecode feature set can be found in the dialog box that is used to configure the Project. Check out the Options for Time Display Units page for more information.
Box for Configuring Composition Settings
The source timecode feature set is located in the dialog box that is called Composition Settings.
Box for Specifying Preferences
The Import section of the Preferences dialog box is capable of handling source timecode functions.

That’s it! You are now familiar with the process of creating a straightforward countdown and a countdown timer in After Effects, and you have three options to choose from. Make use of this information to give your videos an interesting spin and to round out the experience for the audience.
Free Download For Win 7 or later(64-bit)
Free Download For macOS 10.14 or later
Free Download For macOS 10.14 or later
Best Ever Ways Make Tiktok Slideshow [Solved]
Best Ever Ways Make Tiktok Slideshow [Solved] 2022
An easy yet powerful editor
Numerous effects to choose from
Detailed tutorials provided by the official channel
Tiktok is the most amazing and popular social media platform because it has stunning features. It is used by many people like social media influencer to common man. Tiktok helps the content creator in making them and their content viral. It is used for gaining followers and becoming popular.
In this article
01 [How to Make Tiktok Photo Slideshow Faster](#Part 1)
02 [Five Recommended Tiktok Slideshow Effects](#Part 2)
03 [How to Adjust Sound on Tiktok Slideshow](#Part 3)
04 [FAQ of Making Tiktok Slideshow](#Part 4)
Part 1 How To Make Tiktok Photo Slideshow Faster?
01How can you make fast slideshow of pictures on Tiktok 2022?
Do you want to create fast slideshow of pictures on Tiktok? Here is the step by step process to make a fast slideshow of pictures:
Step 1: Open the Tiktok app
Click on the Tiktok logo in your device to open Tiktok app.

Step 2: Click on plus icon.
Now, you will start seeing the videos from “Following” or “For you” on your Home Screen.
Click on the “+” Plus icon in the bottom of the screen.

Step 3: Click on templates
On the right side of “Red Shoot Button” you will see template option, click on templates.

Step 4: Select Template
After clicking on the “Template” option, you will see photo and videos from the gallery on your device. Tap on images to select images.

Step 5: Select Images from your gallery
Tap on the “Radio Button” to select images, you can also choose videos if you want.
To explore all the images on your gallery, you can click on the swipe up or drop down menu.

Step 6: Click on OK Button
When you are done selecting all images from the gallery, at the bottom right you see the OK button. To proceed, click on the OK button.

Step 7: Edit the Slideshow Video
Now you can see a slideshow photo video of the images which you have selected. Now, you can edit the video: you can change the sound, add different effects and add text or any stickers to your slideshow video.

Step 8: Click on Next Button
After completing your photo video slideshow, click on the Next button.
Step 9: Click on the Post button
After clicking on the Next button now you will see two options, Drafts and Post button.
● Drafts: If you don’t want to post the video then add #hashtags, mention your friend name and click on the drafts button.
● Posts: If you want to post the video then add #hashtags, mention your friends and click on post button to publish.

Step 10: Done
You have successfully completed making a fast photo video slideshow.
02How can you make tiktok slideshow faster in 2022?
To faster tiktok photo slideshow follow the given steps:
● Go to Play Store or App Store.
● Search for “Video Speed” Application on your device.
● Download any app, from the search list.
● Open the app and select your Tiktok video for editing.
● Edit the video from the instructions which are given on-screen.
● Download it for free on your device.
● Add it on Tiktok to share.
So, these were the given steps from which you can make your photo slideshow faster.
Part 2 Five Recommended Tiktok Slideshow Effects
01Bling Effect on Tiktok
If you use Tiktok actively then you must have seen the Bling Effect as they look glittery and conspicuous. If you are not aware about the Bling effect on Tiktok, it is an effect which gives sparkly look. Bling Effect works better on videos which emit light. Things that emit light are jewellery, LED lights, glasses etc.

Make sure that your Tiktok is updated with the latest version to get the Bling Effect. Then follow the given steps:
● Open Tiktok on your device and click on the “+” icon to add a new video.
● Click on the “Effects” button at the bottom left side and then open the “Trending” tab of Tiktok effect.
● Keep scrolling until you do not get the Bling effect icon.
● When you get the Bling effect tap to download it, and after that it’s ready to use.
● To add an effect in your favourites, click on the white Bookmark which is given while the Bling effect is alive.
Now, you can use the Bling effect while recording your videos.
02Face Zoom Effect on Tiktok
The Face Zoom Effect is what it sounds like; it’s an effect on Tiktok which is used to automatically zoom the camera on your face. Face Zoom effect can make your videos stand out from other people videos. If you use the Face Zoom effect and hold on to the camera up to your face and pull your phone back slowly, your face will look totally different.

Here are the steps to get the Face Zoom Effect on Tiktok:
● Open the Tiktok on your device.
● Tap on the “+” button on the home screen.
● Then you will see the “Effects” section, click on it.
● In the Effects section you will see various other filters also.
● Keep searching for it and when you get it, select it.
● Now, you can make videos and publish them**.**
03Face Morph Effect on Tiktok
Face Morph Filter is which morphs 2 pictures and make transitions to the pictures at that time. When you use this filter, you can see that it make changes but still you have the same face. Your face remains the same but the transitions look very even and amazing.

Follow the given steps to use the Face Morph Effect:
● Open the Tiktok app on your device.
● Click on the “+” icon at the bottom of the screen.
● Scroll on the right side on the Templates.
● Keep scrolling until you get the Morph Effect.
● Click to select photos.
● Select at least 5 photos from your camera roll.
● Click OK at the bottom right corner
● Now edit and publish your Tiktok.
04 Beauty Effects
Beauty effects are used to beautify your face and changes you into completely different person. If you don’t want to wear makeup just to record one video, in that case you can use this effect. Basically it completely changes your overall appearance.

Steps to follow to use beauty effects:
● Open Tiktok app on your device.
● Click on the “+” button at the bottom- center of the screen.
● Click on the “Effects” section.
● Keep searching for “Beauty Effect” and after that select it.
● Now, you can record your video and publish them.
05Green Effect
Green effects allow you to change the background of any image or you can also add any video to your background of your choice. With the help of Green Screen, users have been able to film their videos wherever they want.

● Open Tiktok application.
● On the bottom center, click on the “+” icon.
● On the bottom left corner, click on “effects”.
● Click on the “Green Screen” from the Effects menu.
● Select Green Screen effect.
● Now you can film videos using Green Screen.
Part 3 How To Adjust Sound On Tiktok Slideshow
Once you have selected the sound, you may need to do some adjustments.
To edit which part of the song you are using:
● Click on the “Trim” button given at the right side of the screen.
● Drag the cursor to adjust which part of the song you want your video to begin at.
● Click on the checkmark to confirm.
To edit the volume of the sound:
● Once you have completed filming your video, in the bottom left corner click on the sounds button.
● Click the “volume” tab and use the cursor to adjust how much loud the sound is compared to the original audio.
● Click on the screen again to confirm.
These were the steps for adjusting sound, the way you want to customize it.
Part 4 FAQ’S of making Tiktok Slideshow
Q1. How can you trim the audio on a Tiktok Sideshow?
A. To trim sound on a Tiktok slideshow, first add a sound to a Tiktok slideshow, click on the ‘Trim” button at the right side of the screen. Then drag the cursor to select which part of the audio you want for your video. Listen to the sound after trimming. If you liked the trimmed song, tap to the next button to add it in your Tiktok slideshow.
Q2. How can you add text to the Tiktok slideshow?
A. Steps to add text to your Tiktok slideshow:
● Open Tiktok app.
● Click on the “+” icon.
● Click on upload.
● Select an image from your gallery.
● Click on the “Next” button.
● Now click on the “Text” to add text.
● After that type the text.
● Choose any font or color of your choice.
● Tap on the “Done “button”.
● Now your video is ready to publish.
Q3. How can we add music to slideshow videos on Tiktok?
A. Yes you can add music to your slideshow video. Before posting it you will find the edit option.
When you select images from your gallery > click next > click on the sound option > choose music from sounds and add it to your slideshow video.
Q4. How many images can you add to a Tiktok slideshow?
A. Select the images to add to the slideshow. You can also add videos to your slideshow from the videos section. Keep in mind that the images you are selecting are in perfect order as you want to see them appear in a slideshow. You can add up to 35 images and videos.
Q5. What are the best recommended slideshow effects on Tiktok?
A. There are a lot of effects on Tiktok but here are some best slideshow effects of Tiktok like Green Screen, Spilt Screen, Face Zoom effect, Bling effect, Trio effect, Beauty effect, Long Face effect, Trisection effect and Face Morph effect.
Tiktok is a great choice for making photo video slideshow but if you want to try something new you can consider using Wondershare Filmora Video Editor . As it have amazing transitions and its own music gallery, it allows you to record your own voiceover. Filmora allows you to make engaging slideshow using different features automatically or manually. It has voice removal, audio mixer, and video stabilization features that add to the output. The 4K editing feature allows you to export the video of resolution of up to 4K.
For Win 7 or later (64-bit)
For macOS 10.12 or later
● Ending Thoughts →
● Tiktok is an amazing and popular social media platform which allows you to create your own content and with the help of this platform your content can reach a wide range of people.
● You can make an attractive photo slideshow with the help of Tiktok because it has amazing features like different effects, and you can also add text and sound to it.
● Tiktok is a great choice but you can also consider an alternate option like, Filmora as you can create your slideshow with its amazing features.
Tiktok is the most amazing and popular social media platform because it has stunning features. It is used by many people like social media influencer to common man. Tiktok helps the content creator in making them and their content viral. It is used for gaining followers and becoming popular.
In this article
01 [How to Make Tiktok Photo Slideshow Faster](#Part 1)
02 [Five Recommended Tiktok Slideshow Effects](#Part 2)
03 [How to Adjust Sound on Tiktok Slideshow](#Part 3)
04 [FAQ of Making Tiktok Slideshow](#Part 4)
Part 1 How To Make Tiktok Photo Slideshow Faster?
01How can you make fast slideshow of pictures on Tiktok 2022?
Do you want to create fast slideshow of pictures on Tiktok? Here is the step by step process to make a fast slideshow of pictures:
Step 1: Open the Tiktok app
Click on the Tiktok logo in your device to open Tiktok app.
Step 2: Click on plus icon.
Now, you will start seeing the videos from “Following” or “For you” on your Home Screen.
Click on the “+” Plus icon in the bottom of the screen.
Step 3: Click on templates
On the right side of “Red Shoot Button” you will see template option, click on templates.
Step 4: Select Template
After clicking on the “Template” option, you will see photo and videos from the gallery on your device. Tap on images to select images.
Step 5: Select Images from your gallery
Tap on the “Radio Button” to select images, you can also choose videos if you want.
To explore all the images on your gallery, you can click on the swipe up or drop down menu.
Step 6: Click on OK Button
When you are done selecting all images from the gallery, at the bottom right you see the OK button. To proceed, click on the OK button.
Step 7: Edit the Slideshow Video
Now you can see a slideshow photo video of the images which you have selected. Now, you can edit the video: you can change the sound, add different effects and add text or any stickers to your slideshow video.
Step 8: Click on Next Button
After completing your photo video slideshow, click on the Next button.
Step 9: Click on the Post button
After clicking on the Next button now you will see two options, Drafts and Post button.
● Drafts: If you don’t want to post the video then add #hashtags, mention your friend name and click on the drafts button.
● Posts: If you want to post the video then add #hashtags, mention your friends and click on post button to publish.
Step 10: Done
You have successfully completed making a fast photo video slideshow.
02How can you make tiktok slideshow faster in 2022?
To faster tiktok photo slideshow follow the given steps:
● Go to Play Store or App Store.
● Search for “Video Speed” Application on your device.
● Download any app, from the search list.
● Open the app and select your Tiktok video for editing.
● Edit the video from the instructions which are given on-screen.
● Download it for free on your device.
● Add it on Tiktok to share.
So, these were the given steps from which you can make your photo slideshow faster.
Part 2 Five Recommended Tiktok Slideshow Effects
01Bling Effect on Tiktok
If you use Tiktok actively then you must have seen the Bling Effect as they look glittery and conspicuous. If you are not aware about the Bling effect on Tiktok, it is an effect which gives sparkly look. Bling Effect works better on videos which emit light. Things that emit light are jewellery, LED lights, glasses etc.
Make sure that your Tiktok is updated with the latest version to get the Bling Effect. Then follow the given steps:
● Open Tiktok on your device and click on the “+” icon to add a new video.
● Click on the “Effects” button at the bottom left side and then open the “Trending” tab of Tiktok effect.
● Keep scrolling until you do not get the Bling effect icon.
● When you get the Bling effect tap to download it, and after that it’s ready to use.
● To add an effect in your favourites, click on the white Bookmark which is given while the Bling effect is alive.
Now, you can use the Bling effect while recording your videos.
02Face Zoom Effect on Tiktok
The Face Zoom Effect is what it sounds like; it’s an effect on Tiktok which is used to automatically zoom the camera on your face. Face Zoom effect can make your videos stand out from other people videos. If you use the Face Zoom effect and hold on to the camera up to your face and pull your phone back slowly, your face will look totally different.
Here are the steps to get the Face Zoom Effect on Tiktok:
● Open the Tiktok on your device.
● Tap on the “+” button on the home screen.
● Then you will see the “Effects” section, click on it.
● In the Effects section you will see various other filters also.
● Keep searching for it and when you get it, select it.
● Now, you can make videos and publish them**.**
03Face Morph Effect on Tiktok
Face Morph Filter is which morphs 2 pictures and make transitions to the pictures at that time. When you use this filter, you can see that it make changes but still you have the same face. Your face remains the same but the transitions look very even and amazing.
Follow the given steps to use the Face Morph Effect:
● Open the Tiktok app on your device.
● Click on the “+” icon at the bottom of the screen.
● Scroll on the right side on the Templates.
● Keep scrolling until you get the Morph Effect.
● Click to select photos.
● Select at least 5 photos from your camera roll.
● Click OK at the bottom right corner
● Now edit and publish your Tiktok.
04 Beauty Effects
Beauty effects are used to beautify your face and changes you into completely different person. If you don’t want to wear makeup just to record one video, in that case you can use this effect. Basically it completely changes your overall appearance.
Steps to follow to use beauty effects:
● Open Tiktok app on your device.
● Click on the “+” button at the bottom- center of the screen.
● Click on the “Effects” section.
● Keep searching for “Beauty Effect” and after that select it.
● Now, you can record your video and publish them.
05Green Effect
Green effects allow you to change the background of any image or you can also add any video to your background of your choice. With the help of Green Screen, users have been able to film their videos wherever they want.
● Open Tiktok application.
● On the bottom center, click on the “+” icon.
● On the bottom left corner, click on “effects”.
● Click on the “Green Screen” from the Effects menu.
● Select Green Screen effect.
● Now you can film videos using Green Screen.
Part 3 How To Adjust Sound On Tiktok Slideshow
Once you have selected the sound, you may need to do some adjustments.
To edit which part of the song you are using:
● Click on the “Trim” button given at the right side of the screen.
● Drag the cursor to adjust which part of the song you want your video to begin at.
● Click on the checkmark to confirm.
To edit the volume of the sound:
● Once you have completed filming your video, in the bottom left corner click on the sounds button.
● Click the “volume” tab and use the cursor to adjust how much loud the sound is compared to the original audio.
● Click on the screen again to confirm.
These were the steps for adjusting sound, the way you want to customize it.
Part 4 FAQ’S of making Tiktok Slideshow
Q1. How can you trim the audio on a Tiktok Sideshow?
A. To trim sound on a Tiktok slideshow, first add a sound to a Tiktok slideshow, click on the ‘Trim” button at the right side of the screen. Then drag the cursor to select which part of the audio you want for your video. Listen to the sound after trimming. If you liked the trimmed song, tap to the next button to add it in your Tiktok slideshow.
Q2. How can you add text to the Tiktok slideshow?
A. Steps to add text to your Tiktok slideshow:
● Open Tiktok app.
● Click on the “+” icon.
● Click on upload.
● Select an image from your gallery.
● Click on the “Next” button.
● Now click on the “Text” to add text.
● After that type the text.
● Choose any font or color of your choice.
● Tap on the “Done “button”.
● Now your video is ready to publish.
Q3. How can we add music to slideshow videos on Tiktok?
A. Yes you can add music to your slideshow video. Before posting it you will find the edit option.
When you select images from your gallery > click next > click on the sound option > choose music from sounds and add it to your slideshow video.
Q4. How many images can you add to a Tiktok slideshow?
A. Select the images to add to the slideshow. You can also add videos to your slideshow from the videos section. Keep in mind that the images you are selecting are in perfect order as you want to see them appear in a slideshow. You can add up to 35 images and videos.
Q5. What are the best recommended slideshow effects on Tiktok?
A. There are a lot of effects on Tiktok but here are some best slideshow effects of Tiktok like Green Screen, Spilt Screen, Face Zoom effect, Bling effect, Trio effect, Beauty effect, Long Face effect, Trisection effect and Face Morph effect.
Tiktok is a great choice for making photo video slideshow but if you want to try something new you can consider using Wondershare Filmora Video Editor . As it have amazing transitions and its own music gallery, it allows you to record your own voiceover. Filmora allows you to make engaging slideshow using different features automatically or manually. It has voice removal, audio mixer, and video stabilization features that add to the output. The 4K editing feature allows you to export the video of resolution of up to 4K.
For Win 7 or later (64-bit)
For macOS 10.12 or later
● Ending Thoughts →
● Tiktok is an amazing and popular social media platform which allows you to create your own content and with the help of this platform your content can reach a wide range of people.
● You can make an attractive photo slideshow with the help of Tiktok because it has amazing features like different effects, and you can also add text and sound to it.
● Tiktok is a great choice but you can also consider an alternate option like, Filmora as you can create your slideshow with its amazing features.
4 Methods: How To Make a Recap Video
Recap videos are a great way to capture the highlights of an event and share them with a wider audience. Whether you’re a professional videographer or a hobbyist, creating a recap video can be a fun and rewarding experience. But with so many different techniques and approaches, knowing where to start can be challenging.
In this article, we’ll explore four methods for making a recap video to help you capture the essence of your event and keep your audience engaged. From planning and scripting to shooting and editing, we’ll cover all the key steps in creating a high-quality recap video. Whether a seasoned pro or a beginner, you can find something valuable in this guide.

Method 1. How To Make a Recap Video from Scratch Using Filmora for Desktop
One approach to creating a recap video is to start from scratch using video editing software like Wondershare Filmora for Desktop. This powerful software offers a wide range of tools and features that allow you to create professional-looking videos easily.
Free Download For Win 7 or later(64-bit)
Free Download For macOS 10.14 or later
Whether you’re a beginner or an experienced video editor, Filmora for Desktop provides all the tools you need to create a stunning recap video that showcases the best moments from your event. With its intuitive interface and easy-to-use features, Filmora for Desktop makes it simple to bring your vision to life and create a video that truly captures the spirit of your event.
Here’s how to make the recap video from scratch using Wondershare Filmora for Desktop:
Step1 Download New Year Memory Book Pack from FilmStock

Step2 Open Filmora and go to “Effects“ > “FilmStock“ > “New Year Memory Book.”
Step3 Drag and drop media like clips, overlay, and tracks to the timeline

Step4 Import photos and videos.

Step5 Add the imported media and edit the clip.
Step6 Add some effects and overlay to the timeline

Step7 Adjust the Overlay duration of the clip.
Step8 Apply all the transitions and overlay to the clip. Edit the text and save it.

For more detailed instructions, you can watch the video tutorial:
Method 2. How To Make an Event Recap Video Using Filmora Templates on a Desktop
Another approach to creating a recap video is using templates from Filmora for Desktop. Filmora offers various templates specifically designed for event recap videos, making it easy to create a professional-looking video without spending hours editing.
These templates come pre-designed with stunning graphics, animations, and transitions and can be easily customized to match your event. With the help of the templates, you can create an event recap video in a matter of minutes without needing any prior editing experience.
Step1 Begin by creating a new project in Filmora and importing your photos and footage into the software.
Step2 Next, navigate to the “Templates“ tab and search for “Retro“ or “Recap“ to find a template that suits your event. Drag the desired template to the timeline.
Step3 Drag your footage onto the timeline, and when prompted, select “Replace“ to replace the sample footage with your own.
Step4 Customize the texts in the template to match the details of your event.
Step5 Preview the final result in the player window, and if satisfied, click “Export“ and adjust the output settings in the “Output Settings“ window.
Method 3. How to Create an End-of-Year Recap Video With Filmora for Mobile
Creating a recap video doesn’t have to be limited to desktop editing software. With Filmora for mobile, you can create a professional-looking end-of-year recap video from the convenience of your mobile device.
With Filmora for mobile, you have access to a wide range of editing tools and features, including filters, transitions, and text options, so you can create a video that truly captures the essence of your event. So whether you’re on the go or prefer to edit on your mobile device, Filmora for mobile makes it easy to create a high-quality recap video that you can share with your audience.
Step1 Start by launching the Filmora for mobile app and selecting the “Templates“ option.

Step2 Tap the “New Year“ panel for an end-of-year recap video template.

Step3 Select the template and tap on “Make Video“ to start editing.
Step4 Add your photos and footage to the template, then tap “Go.”

Step5 Preview the output. Tap “Pro Export“

Step6 Users can share the video on social platforms or tap “More“ to download the video.

Step7 Save the final video to your device

Method 4. How To Create a Memories Recap Video on Instagram Reel
Another way to create a memories recap video is using the Instagram Reel feature. Instagram Reel is a short-form video feature that allows users to create and share videos up to 60 seconds long. With Instagram Reel, you can easily create a recap video of your event by compiling short clips, adding music and text, and sharing it with your followers.
Instagram Reel provides a platform to reach a wider audience and create engaging content. It’s a great way to engage with your followers and share the highlights of your event in a creative and visually appealing way.
Step1 Start a new Reel on Instagram

Step2 Choose a template

Step3 Compile clips, add music, text, and effects

Step4 Post and share the Reel on Instagram and other platforms.

Tips for Making Event Recap Videos
When creating an event recap video, there are key tips to remember to ensure that your video is engaging and effective.
- Know your audience: Tailor the content of your video to your audience to ensure that it resonates with them.
- Highlight the key moments: Be selective and focus on your event’s most memorable and impactful moments.
- Music and Sound Design: The right music can help set the tone and mood of your video and can greatly enhance the overall impact of your video.
- Quality Footage: Make sure to focus on the quality of your footage and use various shots and angles to keep the video interesting and engaging.
- Editing: Keep the pacing of your video brisk and engaging, and use transitions, special effects, and text overlays to help tie the various elements of your video together.
- Plan the video: Careful planning is crucial for creating a great event recap video.
- Use the right tools: Use the appropriate software and equipment to create a professional-looking video.
- Test the video: Preview the video before publishing and make any necessary adjustments to ensure it meets your standards.
- Post-production: After filming, spend time on post-production, such as color correction, audio mixing, and adding text.
- Share it widely: Share the video on different platforms to reach a wider audience.
By following these tips and working with the right tools and techniques, you can create a video that truly captures the essence of your event and resonates with your audience.
Conclusion
Creating an engaging event recap video is an excellent way to share the highlights of your event with a wider audience. With the right tools and techniques, you can create a professional-looking video that truly captures the essence of your event.
Filmora for desktop, Filmora for mobile, and Instagram Reel are all great options that provide a wide range of editing tools and features to help you create a high-quality video. Whether a seasoned pro or a beginner, these tools make it easy to bring your vision to life and create a video that resonates with your audience.
Free Download For macOS 10.14 or later
Whether you’re a beginner or an experienced video editor, Filmora for Desktop provides all the tools you need to create a stunning recap video that showcases the best moments from your event. With its intuitive interface and easy-to-use features, Filmora for Desktop makes it simple to bring your vision to life and create a video that truly captures the spirit of your event.
Here’s how to make the recap video from scratch using Wondershare Filmora for Desktop:
Step1 Download New Year Memory Book Pack from FilmStock
Step2 Open Filmora and go to “Effects“ > “FilmStock“ > “New Year Memory Book.”
Step3 Drag and drop media like clips, overlay, and tracks to the timeline
Step4 Import photos and videos.
Step5 Add the imported media and edit the clip.
Step6 Add some effects and overlay to the timeline
Step7 Adjust the Overlay duration of the clip.
Step8 Apply all the transitions and overlay to the clip. Edit the text and save it.
For more detailed instructions, you can watch the video tutorial:
Method 2. How To Make an Event Recap Video Using Filmora Templates on a Desktop
Another approach to creating a recap video is using templates from Filmora for Desktop. Filmora offers various templates specifically designed for event recap videos, making it easy to create a professional-looking video without spending hours editing.
These templates come pre-designed with stunning graphics, animations, and transitions and can be easily customized to match your event. With the help of the templates, you can create an event recap video in a matter of minutes without needing any prior editing experience.
Step1 Begin by creating a new project in Filmora and importing your photos and footage into the software.
Step2 Next, navigate to the “Templates“ tab and search for “Retro“ or “Recap“ to find a template that suits your event. Drag the desired template to the timeline.
Step3 Drag your footage onto the timeline, and when prompted, select “Replace“ to replace the sample footage with your own.
Step4 Customize the texts in the template to match the details of your event.
Step5 Preview the final result in the player window, and if satisfied, click “Export“ and adjust the output settings in the “Output Settings“ window.
Method 3. How to Create an End-of-Year Recap Video With Filmora for Mobile
Creating a recap video doesn’t have to be limited to desktop editing software. With Filmora for mobile, you can create a professional-looking end-of-year recap video from the convenience of your mobile device.
With Filmora for mobile, you have access to a wide range of editing tools and features, including filters, transitions, and text options, so you can create a video that truly captures the essence of your event. So whether you’re on the go or prefer to edit on your mobile device, Filmora for mobile makes it easy to create a high-quality recap video that you can share with your audience.
Step1 Start by launching the Filmora for mobile app and selecting the “Templates“ option.
Step2 Tap the “New Year“ panel for an end-of-year recap video template.
Step3 Select the template and tap on “Make Video“ to start editing.
Step4 Add your photos and footage to the template, then tap “Go.”
Step5 Preview the output. Tap “Pro Export“
Step6 Users can share the video on social platforms or tap “More“ to download the video.
Step7 Save the final video to your device
Method 4. How To Create a Memories Recap Video on Instagram Reel
Another way to create a memories recap video is using the Instagram Reel feature. Instagram Reel is a short-form video feature that allows users to create and share videos up to 60 seconds long. With Instagram Reel, you can easily create a recap video of your event by compiling short clips, adding music and text, and sharing it with your followers.
Instagram Reel provides a platform to reach a wider audience and create engaging content. It’s a great way to engage with your followers and share the highlights of your event in a creative and visually appealing way.
Step1 Start a new Reel on Instagram
Step2 Choose a template
Step3 Compile clips, add music, text, and effects
Step4 Post and share the Reel on Instagram and other platforms.
Tips for Making Event Recap Videos
When creating an event recap video, there are key tips to remember to ensure that your video is engaging and effective.
- Know your audience: Tailor the content of your video to your audience to ensure that it resonates with them.
- Highlight the key moments: Be selective and focus on your event’s most memorable and impactful moments.
- Music and Sound Design: The right music can help set the tone and mood of your video and can greatly enhance the overall impact of your video.
- Quality Footage: Make sure to focus on the quality of your footage and use various shots and angles to keep the video interesting and engaging.
- Editing: Keep the pacing of your video brisk and engaging, and use transitions, special effects, and text overlays to help tie the various elements of your video together.
- Plan the video: Careful planning is crucial for creating a great event recap video.
- Use the right tools: Use the appropriate software and equipment to create a professional-looking video.
- Test the video: Preview the video before publishing and make any necessary adjustments to ensure it meets your standards.
- Post-production: After filming, spend time on post-production, such as color correction, audio mixing, and adding text.
- Share it widely: Share the video on different platforms to reach a wider audience.
By following these tips and working with the right tools and techniques, you can create a video that truly captures the essence of your event and resonates with your audience.
Conclusion
Creating an engaging event recap video is an excellent way to share the highlights of your event with a wider audience. With the right tools and techniques, you can create a professional-looking video that truly captures the essence of your event.
Filmora for desktop, Filmora for mobile, and Instagram Reel are all great options that provide a wide range of editing tools and features to help you create a high-quality video. Whether a seasoned pro or a beginner, these tools make it easy to bring your vision to life and create a video that resonates with your audience.
Also read:
- In 2024, Discover How You Can Use Vectorscope to Adjust Luminance, Color Grading, and More in Your Video Editing Projects
- In 2024, This Article Talks About if the Windows Movie Maker Available and if Yes, Then How You Can Download It and so On. It Further Comprises an Alternative to the Same to Create Videos
- New Customize PowerPoint Slideshow Icon in 8 Simple Ways for 2024
- 15 Best Travel Vloggers That You Should Follow
- New 2024 Approved It Is Easy to Separate the Audio From the Video in DaVinci Resolve. But, to Avail of This Feature, You Need to Follow Proper Steps, and This Article Is All About It
- Thousands Already Know What Ezgif Is and So Can You for 2024
- Updated In 2024, Top 5 Free Online Video Filter Editors
- New How to Calculate & Change Video Aspect Ratio Online for 2024
- Updated 2024 Approved Splitting Audio From Video in Sony Vegas Step by Step
- Updated How to Make Hand Shake Effect with Final Cut Pro for 2024
- Updated In 2024, Mastering the Art of Video Framing
- Updated 2024 Approved This Article Aims to Provide a Step-by-Step Guide to Changing a Videos Speed by Using the Speed Adjustment Panel and Duration Panel on Wondershare Filmora
- New 2024 Approved Little Tricks to Create Canva Slideshow No One Is Telling You
- New 2024 Approved If You Are a Marketer Who Want to Create Facebook Ads to Boost Your Business, You Are Coming to the Right Place. Well Share You some Useful Tips to Start Your First FB Ads Campaign
- New 2024 Approved How to Fade to Black Premiere Pro
- Updated In 2024, Find a Video Background Change Online that Works for You. This Article Contains Tools that Can Edit Video Backgrounds Online with Little Effort
- New 2024 Approved Step By Step Guide on Using Media Player Classic To Rotate A Video
- New Discover the Ultimate LUTs for Wondershare Filmora Uncover the Answer for 2024
- Updated Do You Know What Is Motion Blur in Fortnite? Read This Article to Find Out How to Apply Motion Blur in Fortnite Efficiently and with Ease for 2024
- New In 2024, How to Turn On/Off Motion Blur in Dying Light 2?
- Updated 2024 Approved How To Trim Video In Premiere Pro in Different Ways
- How to Upgrade iPhone SE (2022) without Data Loss? | Dr.fone
- In 2024, 5 Techniques to Transfer Data from Realme Narzo N55 to iPhone 15/14/13/12 | Dr.fone
- In 2024, Getting the Pokemon Go GPS Signal Not Found 11 Error in Poco C55 | Dr.fone
- How to Resolve Vivo Y100t Screen Not Working | Dr.fone
- Which is the Best Fake GPS Joystick App On Itel A70? | Dr.fone
- 6 Fixes to Unfortunately WhatsApp has stopped Error Popups On Vivo V27 | Dr.fone
- Updated How to Make Your Own GIF on WhatsApp in Simple Ways for 2024
- How to Share/Fake Location on WhatsApp for Tecno Pova 5 Pro | Dr.fone
- Detailed guide of ispoofer for pogo installation On Vivo S17t | Dr.fone
- How To Restore Missing Photos Files from Gionee F3 Pro.
- In 2024, 8 Best Apps for Screen Mirroring Itel A60 PC | Dr.fone
- How To Remove Screen Lock PIN On Samsung Galaxy A15 4G Like A Pro 5 Easy Ways
- The Best Android SIM Unlock Code Generators Unlock Your OnePlus Nord CE 3 Lite 5G Phone Hassle-Free
- 5 Ways to Restart Nubia Red Magic 9 Pro+ Without Power Button | Dr.fone
- In 2024, The Best iSpoofer Alternative to Try On Vivo Y78+ (T1) Edition | Dr.fone
- A Comprehensive Guide to iPhone 11 Blacklist Removal Tips and Tools | Dr.fone
- How To Transfer WhatsApp From Apple iPhone XR to other iPhone 13 devices? | Dr.fone
- In 2024, How to Change Netflix Location to Get More Country Version On Apple iPhone 12 Pro Max | Dr.fone
- Use Device Manager to identify malfunctioning drivers with Windows Device Manager on Windows 11 & 10
- Title: Updated Top Animated Title Makers
- Author: Morgan
- Created at : 2024-05-19 05:12:26
- Updated at : 2024-05-20 05:12:26
- Link: https://ai-video-editing.techidaily.com/updated-top-animated-title-makers/
- License: This work is licensed under CC BY-NC-SA 4.0.
