
:max_bytes(150000):strip_icc():format(webp)/001_best-lgbt-movies-on-netflix-right-now-5069913-92c9bcd3792548908be32c420bc4fa27.jpg)
Ways to Learn Discord Game Bots – Even if Youre Just Starting Out 20
Ways to Learn Discord Game Bots – Even if You’re Just Starting Out [20
Ways to Learn Discord Game Bots – Even if You’re Just Starting out
An easy yet powerful editor
Numerous effects to choose from
Detailed tutorials provided by the official channel
Discord is free social communication service used by tens of millions of individuals aged 13 and above to socialize with their communities and friends. People use discord regularly to discuss various topics, from art projects and family vacations to homework and mental health help. It serves as a home for communities of different sizes but has become quite popular as discord bot games due to the rise in the gaming community.
The great majority of servers are private, invite-only locations where friends and communities may communicate and spend time together. More significant, more open groups based on specific themes like popular video games like PUBG and Genshin Impact. Because all discussions are opt-in, users have complete choice over who they connect with and how they use discord.
In this article
01 [What Are Discord Game Bots?](#Part 1)
02 [How Do You Add Bot Games to Discord?](#Part 2)
03 [Top 10 Picks of Discord Gaming Bots](#Part 3)
04 [Discord Game Bots FAQs](#Part 4)
Part 1 What Are Discord Game Bots?
Discord game bots are artificial intelligence (AI)-powered applications that automate processes and add music, games, welcome messages, memes, and other fun stuff to your server. These bots make it simple to interact with your audience, grow your community, and manage your server.
There is a plethora of game bots for discord to pick from, each with its purpose. Some may automatically welcome new users, while others utilize webhooks to interface with other apps—and it may be tough for novice users to figure out which ones will provide the most remarkable results for their requirements.
Part 2 How Do You Add Bot Games to Discord?
Follow the steps below to add game bots for discord successfully:
Step 1: To add a bot to your Discord server, go to the bot’s source page. We’ll be using ProBot for this lesson.
Step 2: Depending on the bot you’re adding, click Add to Discord or Invite Now.
Step 3: To grant the bot access, a pop-up window will appear asking you to check in to your Discord account.
Step 4: After you log in, you’ll see a box asking for account authorization. Locate and choose the Add to Server drop-down menu.
Step 5: This will bring up a list of discord servers where you can add a bot game discord. Continue after selecting your server.
Step 6: Examine the server permissions that the bot asks for. Select and deselect according to your requirements. When you’re ready, click Authorize.
For those who like to share their discord game bots experience through screen recordings and whatnot, a potent and convenient video editing tool to make your sessions look even more incredible is Filmora.
Wondershare Filmora Video Editor is a famous video editing program for those who wish to focus on editing and producing high-quality videos. The program supports 4K video editing. It’s a reasonably priced tool featuring effects for both video and audio. When it comes to designing, adding effects, and modifying movies, it provides users with many possibilities. You can use the tool to add overlays, create animations and objects, add music, and input text. Imagine sharing your experience in 4k!
For Win 7 or later (64-bit)
For macOS 10.12 or later
Part 3 Top 10 Picks of Discord Gaming Bots
01Karuta
Karuta is a discord game bot where you gather anime characters. In Karuta, though, you collect characters using trading cards. Your cards and other objects may be customized, upgraded, and traded with other players. Better still, you maintain the same cards between servers, allowing you to play Karuta with the same deck on any server where the game discord bot is!
02Dragon Bot Z
Dragon Bot Z is the discord bot game that adds discord Ball Z, a multiplayer text-based RPG, to your server. Players in Discord Ball Z summon characters from the iconic Dragon Ball Z franchise, train them, fight foes, buy equipment, and trade with other players. This Discord game is ideal for Dragon Ball fans or anybody who likes text-based roleplaying games.

03Mudae
Mudae is a bot discord game with character-collecting. For example, you can claim popular anime and videogame characters as your “waifus” or “husbandos,” develop your harem, and compete for your favorite characters with other users. You can also trade the characters with other members.

04Rock Puppy
Rock Puppy is a basic yet entertaining game bots discord bot that incorporates several classic games. You can enjoy Discord games like ConnectFour, Truth or Dare, Trivia, Tic-Tac-Toe, Russian Roulette, and Would You Rather with Rock Puppy. You may also use magic 8-ball, dice, or tarot cards, play classic board and party games on your server with Rock Puppy.
05GarticBOT
GarticBot is a bot game in discord that allows you to play the drawing game Gartic. GarticBot begins the Discord game by painting an image on your server. Members then compete against one another to predict the image the quickest. Others can guess your drawings if you submit them. Type the command g.draw, and Gartic will provide you with a URL to submit your artwork. GarticBot creates a fun Pictionary-style game for everyone on your server to play.

06TriviaBot
TriviaBot is the most popular trivia game discord bot. It has over 90,000 questions, and you can even submit your own for inclusion in the bot. Members can form and join teams to compete in competitions. You may also create a public leaderboard to display who performs the best on the server.

07GamesRob
The finest Uno discord game bot is GamesROB. ConnectFour, Trivia, Battleship, 2048, Tic-Tac-Toe, Minesweeper, and Hangman are the other traditional party games added to discord. You may also play “Detective,” a Discord game in which you try to figure out who is the “assassin” on your server, memory games, and Town, Country, River, a game in which you try to come up with as many phrases as possible within a theme.
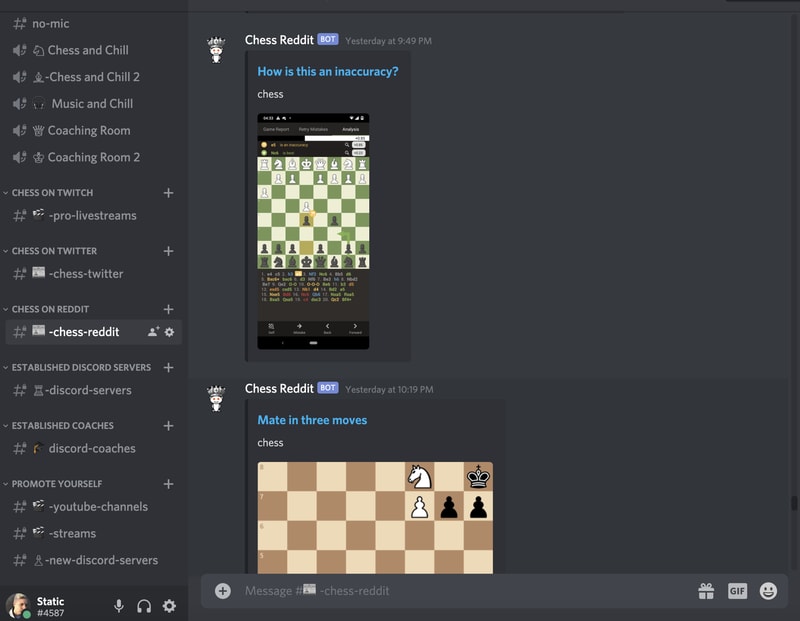
08Chess Reddit
Chess is a simple game that allows you to play chess on discord. You may play a chess game with other server members directly on the server. Instruct the bot on which pieces to move and where they should go. After each move, the Discord game bot creates a fresh graphic of the board so you can plot your next move. And, because the game hosts on your server, other users may watch and debate it!
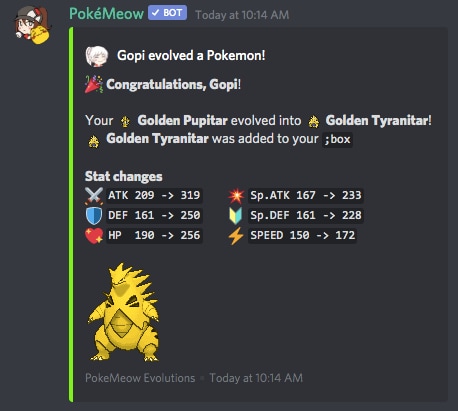
09PokeMeow
PokeMeow is by far the most popular Pokemon game discord bot. With this Pokemon bot, you may capture Pokemon on your server, trade, battle with other players, and accomplish tasks for in-game currency and stuff. As you keep building up your Pokedex, the Pokemon bot also allows to compete with other users on the worldwide leaderboard! PokeMeow is the ideal Pokemon Discord bot for fans of the Pokemon series.
10IdleRPG
IdleRPG is a discord game where you may play a text-based roleplaying game. You may make your character complete with ethnicity and social status. Then, you can go on quests and combat beasts, purchase, and exchange mythic objects, join guilds, engage with gods, and even marry other players. Play through your character’s adventure while engaging with and creating stories with other players. IdleRPG is likely to provide your server with hundreds of hours of roleplaying pleasure.

Part 4 Discord Game Bots FAQs
Now, let us go through some FAQs about discord game bots:
Q. Is it possible to play games with discord bots?
A. You could indeed play discord games in-server with bots, challenge other members, and win prizes! A game bot is a terrific method to keep players engaged on your server, especially if it’s a gaming Discord channel.
Q. Do game bots spy on you?
A. No, game discord bots do not have inbuilt spyware.
Q. How many bots should a server have?
A. It’s best not to have more than 20 bots game on discord on a server at any moment. More bots than this may cause users to become confused and the service to seem suspicious.
Q. Are discord bots free?
A. All these discord game bots are free to use. However, some have premium upgrades.
Q. Which bot is the most popular game bot in discord?
A. Worddle
Q. Which bot is the best bot for gaming on discord?
A. Gawesome is an excellent alternative for adding a multifunctional bot to your discord server.
● Ending Thoughts →
● Discord is accessible communication and socializing service for individuals aged 13 and above.
● The platform extends to various servers, each with its users, rules, themes, and channels, but one underutilized feature is the ability to develop and code custom AI-powered bots.
● Game bots for discord are artificial intelligence (AI)-powered applications that automate processes and add games to your discord server.
● These game discord bots make it simple to interact with your audience, grow your community, and manage your server.
● Lastly, to enhance the discord game bots experience and bring your gaming videos to life, use the Filmora software.
Discord is free social communication service used by tens of millions of individuals aged 13 and above to socialize with their communities and friends. People use discord regularly to discuss various topics, from art projects and family vacations to homework and mental health help. It serves as a home for communities of different sizes but has become quite popular as discord bot games due to the rise in the gaming community.
The great majority of servers are private, invite-only locations where friends and communities may communicate and spend time together. More significant, more open groups based on specific themes like popular video games like PUBG and Genshin Impact. Because all discussions are opt-in, users have complete choice over who they connect with and how they use discord.
In this article
01 [What Are Discord Game Bots?](#Part 1)
02 [How Do You Add Bot Games to Discord?](#Part 2)
03 [Top 10 Picks of Discord Gaming Bots](#Part 3)
04 [Discord Game Bots FAQs](#Part 4)
Part 1 What Are Discord Game Bots?
Discord game bots are artificial intelligence (AI)-powered applications that automate processes and add music, games, welcome messages, memes, and other fun stuff to your server. These bots make it simple to interact with your audience, grow your community, and manage your server.
There is a plethora of game bots for discord to pick from, each with its purpose. Some may automatically welcome new users, while others utilize webhooks to interface with other apps—and it may be tough for novice users to figure out which ones will provide the most remarkable results for their requirements.
Part 2 How Do You Add Bot Games to Discord?
Follow the steps below to add game bots for discord successfully:
Step 1: To add a bot to your Discord server, go to the bot’s source page. We’ll be using ProBot for this lesson.
Step 2: Depending on the bot you’re adding, click Add to Discord or Invite Now.
Step 3: To grant the bot access, a pop-up window will appear asking you to check in to your Discord account.
Step 4: After you log in, you’ll see a box asking for account authorization. Locate and choose the Add to Server drop-down menu.
Step 5: This will bring up a list of discord servers where you can add a bot game discord. Continue after selecting your server.
Step 6: Examine the server permissions that the bot asks for. Select and deselect according to your requirements. When you’re ready, click Authorize.
For those who like to share their discord game bots experience through screen recordings and whatnot, a potent and convenient video editing tool to make your sessions look even more incredible is Filmora.
Wondershare Filmora Video Editor is a famous video editing program for those who wish to focus on editing and producing high-quality videos. The program supports 4K video editing. It’s a reasonably priced tool featuring effects for both video and audio. When it comes to designing, adding effects, and modifying movies, it provides users with many possibilities. You can use the tool to add overlays, create animations and objects, add music, and input text. Imagine sharing your experience in 4k!
For Win 7 or later (64-bit)
For macOS 10.12 or later
Part 3 Top 10 Picks of Discord Gaming Bots
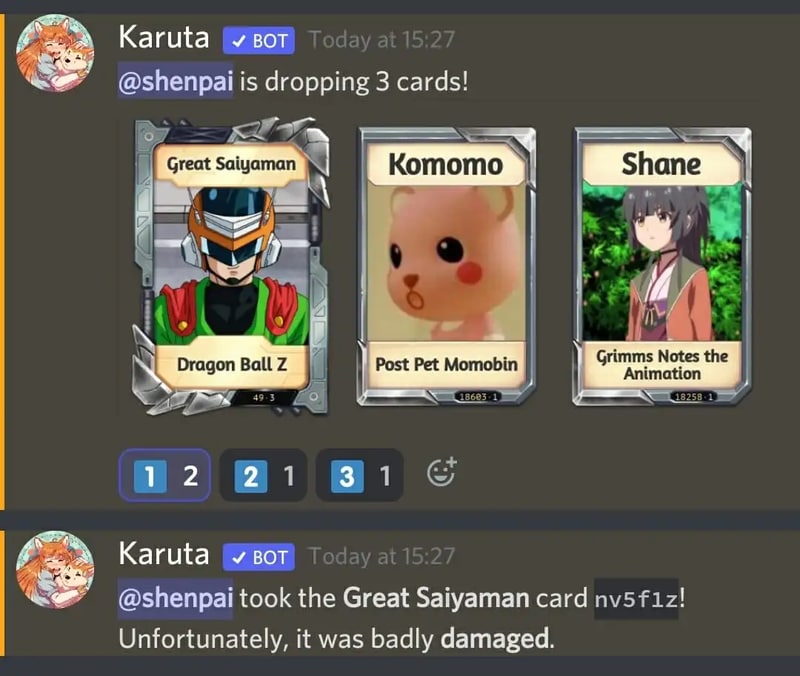
01Karuta
Karuta is a discord game bot where you gather anime characters. In Karuta, though, you collect characters using trading cards. Your cards and other objects may be customized, upgraded, and traded with other players. Better still, you maintain the same cards between servers, allowing you to play Karuta with the same deck on any server where the game discord bot is!
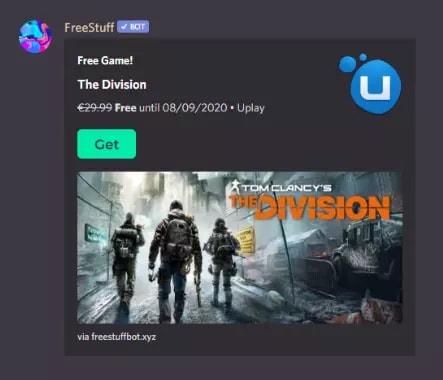
02Dragon Bot Z
Dragon Bot Z is the discord bot game that adds discord Ball Z, a multiplayer text-based RPG, to your server. Players in Discord Ball Z summon characters from the iconic Dragon Ball Z franchise, train them, fight foes, buy equipment, and trade with other players. This Discord game is ideal for Dragon Ball fans or anybody who likes text-based roleplaying games.
03Mudae
Mudae is a bot discord game with character-collecting. For example, you can claim popular anime and videogame characters as your “waifus” or “husbandos,” develop your harem, and compete for your favorite characters with other users. You can also trade the characters with other members.
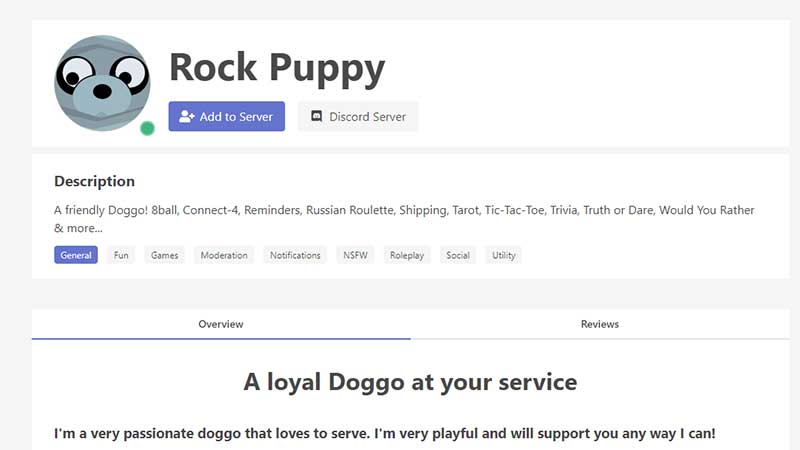
04Rock Puppy
Rock Puppy is a basic yet entertaining game bots discord bot that incorporates several classic games. You can enjoy Discord games like ConnectFour, Truth or Dare, Trivia, Tic-Tac-Toe, Russian Roulette, and Would You Rather with Rock Puppy. You may also use magic 8-ball, dice, or tarot cards, play classic board and party games on your server with Rock Puppy.
05GarticBOT
GarticBot is a bot game in discord that allows you to play the drawing game Gartic. GarticBot begins the Discord game by painting an image on your server. Members then compete against one another to predict the image the quickest. Others can guess your drawings if you submit them. Type the command g.draw, and Gartic will provide you with a URL to submit your artwork. GarticBot creates a fun Pictionary-style game for everyone on your server to play.
06TriviaBot
TriviaBot is the most popular trivia game discord bot. It has over 90,000 questions, and you can even submit your own for inclusion in the bot. Members can form and join teams to compete in competitions. You may also create a public leaderboard to display who performs the best on the server.
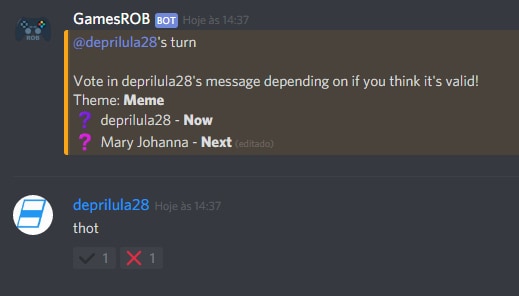
07GamesRob
The finest Uno discord game bot is GamesROB. ConnectFour, Trivia, Battleship, 2048, Tic-Tac-Toe, Minesweeper, and Hangman are the other traditional party games added to discord. You may also play “Detective,” a Discord game in which you try to figure out who is the “assassin” on your server, memory games, and Town, Country, River, a game in which you try to come up with as many phrases as possible within a theme.
08Chess Reddit
Chess is a simple game that allows you to play chess on discord. You may play a chess game with other server members directly on the server. Instruct the bot on which pieces to move and where they should go. After each move, the Discord game bot creates a fresh graphic of the board so you can plot your next move. And, because the game hosts on your server, other users may watch and debate it!
09PokeMeow
PokeMeow is by far the most popular Pokemon game discord bot. With this Pokemon bot, you may capture Pokemon on your server, trade, battle with other players, and accomplish tasks for in-game currency and stuff. As you keep building up your Pokedex, the Pokemon bot also allows to compete with other users on the worldwide leaderboard! PokeMeow is the ideal Pokemon Discord bot for fans of the Pokemon series.
10IdleRPG
IdleRPG is a discord game where you may play a text-based roleplaying game. You may make your character complete with ethnicity and social status. Then, you can go on quests and combat beasts, purchase, and exchange mythic objects, join guilds, engage with gods, and even marry other players. Play through your character’s adventure while engaging with and creating stories with other players. IdleRPG is likely to provide your server with hundreds of hours of roleplaying pleasure.
Part 4 Discord Game Bots FAQs
Now, let us go through some FAQs about discord game bots:
Q. Is it possible to play games with discord bots?
A. You could indeed play discord games in-server with bots, challenge other members, and win prizes! A game bot is a terrific method to keep players engaged on your server, especially if it’s a gaming Discord channel.
Q. Do game bots spy on you?
A. No, game discord bots do not have inbuilt spyware.
Q. How many bots should a server have?
A. It’s best not to have more than 20 bots game on discord on a server at any moment. More bots than this may cause users to become confused and the service to seem suspicious.
Q. Are discord bots free?
A. All these discord game bots are free to use. However, some have premium upgrades.
Q. Which bot is the most popular game bot in discord?
A. Worddle
Q. Which bot is the best bot for gaming on discord?
A. Gawesome is an excellent alternative for adding a multifunctional bot to your discord server.
● Ending Thoughts →
● Discord is accessible communication and socializing service for individuals aged 13 and above.
● The platform extends to various servers, each with its users, rules, themes, and channels, but one underutilized feature is the ability to develop and code custom AI-powered bots.
● Game bots for discord are artificial intelligence (AI)-powered applications that automate processes and add games to your discord server.
● These game discord bots make it simple to interact with your audience, grow your community, and manage your server.
● Lastly, to enhance the discord game bots experience and bring your gaming videos to life, use the Filmora software.
Discord is free social communication service used by tens of millions of individuals aged 13 and above to socialize with their communities and friends. People use discord regularly to discuss various topics, from art projects and family vacations to homework and mental health help. It serves as a home for communities of different sizes but has become quite popular as discord bot games due to the rise in the gaming community.
The great majority of servers are private, invite-only locations where friends and communities may communicate and spend time together. More significant, more open groups based on specific themes like popular video games like PUBG and Genshin Impact. Because all discussions are opt-in, users have complete choice over who they connect with and how they use discord.
In this article
01 [What Are Discord Game Bots?](#Part 1)
02 [How Do You Add Bot Games to Discord?](#Part 2)
03 [Top 10 Picks of Discord Gaming Bots](#Part 3)
04 [Discord Game Bots FAQs](#Part 4)
Part 1 What Are Discord Game Bots?
Discord game bots are artificial intelligence (AI)-powered applications that automate processes and add music, games, welcome messages, memes, and other fun stuff to your server. These bots make it simple to interact with your audience, grow your community, and manage your server.
There is a plethora of game bots for discord to pick from, each with its purpose. Some may automatically welcome new users, while others utilize webhooks to interface with other apps—and it may be tough for novice users to figure out which ones will provide the most remarkable results for their requirements.
Part 2 How Do You Add Bot Games to Discord?
Follow the steps below to add game bots for discord successfully:
Step 1: To add a bot to your Discord server, go to the bot’s source page. We’ll be using ProBot for this lesson.
Step 2: Depending on the bot you’re adding, click Add to Discord or Invite Now.
Step 3: To grant the bot access, a pop-up window will appear asking you to check in to your Discord account.
Step 4: After you log in, you’ll see a box asking for account authorization. Locate and choose the Add to Server drop-down menu.
Step 5: This will bring up a list of discord servers where you can add a bot game discord. Continue after selecting your server.
Step 6: Examine the server permissions that the bot asks for. Select and deselect according to your requirements. When you’re ready, click Authorize.
For those who like to share their discord game bots experience through screen recordings and whatnot, a potent and convenient video editing tool to make your sessions look even more incredible is Filmora.
Wondershare Filmora Video Editor is a famous video editing program for those who wish to focus on editing and producing high-quality videos. The program supports 4K video editing. It’s a reasonably priced tool featuring effects for both video and audio. When it comes to designing, adding effects, and modifying movies, it provides users with many possibilities. You can use the tool to add overlays, create animations and objects, add music, and input text. Imagine sharing your experience in 4k!
For Win 7 or later (64-bit)
For macOS 10.12 or later
Part 3 Top 10 Picks of Discord Gaming Bots
01Karuta
Karuta is a discord game bot where you gather anime characters. In Karuta, though, you collect characters using trading cards. Your cards and other objects may be customized, upgraded, and traded with other players. Better still, you maintain the same cards between servers, allowing you to play Karuta with the same deck on any server where the game discord bot is!
02Dragon Bot Z
Dragon Bot Z is the discord bot game that adds discord Ball Z, a multiplayer text-based RPG, to your server. Players in Discord Ball Z summon characters from the iconic Dragon Ball Z franchise, train them, fight foes, buy equipment, and trade with other players. This Discord game is ideal for Dragon Ball fans or anybody who likes text-based roleplaying games.
03Mudae
Mudae is a bot discord game with character-collecting. For example, you can claim popular anime and videogame characters as your “waifus” or “husbandos,” develop your harem, and compete for your favorite characters with other users. You can also trade the characters with other members.
04Rock Puppy
Rock Puppy is a basic yet entertaining game bots discord bot that incorporates several classic games. You can enjoy Discord games like ConnectFour, Truth or Dare, Trivia, Tic-Tac-Toe, Russian Roulette, and Would You Rather with Rock Puppy. You may also use magic 8-ball, dice, or tarot cards, play classic board and party games on your server with Rock Puppy.
05GarticBOT
GarticBot is a bot game in discord that allows you to play the drawing game Gartic. GarticBot begins the Discord game by painting an image on your server. Members then compete against one another to predict the image the quickest. Others can guess your drawings if you submit them. Type the command g.draw, and Gartic will provide you with a URL to submit your artwork. GarticBot creates a fun Pictionary-style game for everyone on your server to play.
06TriviaBot
TriviaBot is the most popular trivia game discord bot. It has over 90,000 questions, and you can even submit your own for inclusion in the bot. Members can form and join teams to compete in competitions. You may also create a public leaderboard to display who performs the best on the server.
07GamesRob
The finest Uno discord game bot is GamesROB. ConnectFour, Trivia, Battleship, 2048, Tic-Tac-Toe, Minesweeper, and Hangman are the other traditional party games added to discord. You may also play “Detective,” a Discord game in which you try to figure out who is the “assassin” on your server, memory games, and Town, Country, River, a game in which you try to come up with as many phrases as possible within a theme.
08Chess Reddit
Chess is a simple game that allows you to play chess on discord. You may play a chess game with other server members directly on the server. Instruct the bot on which pieces to move and where they should go. After each move, the Discord game bot creates a fresh graphic of the board so you can plot your next move. And, because the game hosts on your server, other users may watch and debate it!
09PokeMeow
PokeMeow is by far the most popular Pokemon game discord bot. With this Pokemon bot, you may capture Pokemon on your server, trade, battle with other players, and accomplish tasks for in-game currency and stuff. As you keep building up your Pokedex, the Pokemon bot also allows to compete with other users on the worldwide leaderboard! PokeMeow is the ideal Pokemon Discord bot for fans of the Pokemon series.
10IdleRPG
IdleRPG is a discord game where you may play a text-based roleplaying game. You may make your character complete with ethnicity and social status. Then, you can go on quests and combat beasts, purchase, and exchange mythic objects, join guilds, engage with gods, and even marry other players. Play through your character’s adventure while engaging with and creating stories with other players. IdleRPG is likely to provide your server with hundreds of hours of roleplaying pleasure.
Part 4 Discord Game Bots FAQs
Now, let us go through some FAQs about discord game bots:
Q. Is it possible to play games with discord bots?
A. You could indeed play discord games in-server with bots, challenge other members, and win prizes! A game bot is a terrific method to keep players engaged on your server, especially if it’s a gaming Discord channel.
Q. Do game bots spy on you?
A. No, game discord bots do not have inbuilt spyware.
Q. How many bots should a server have?
A. It’s best not to have more than 20 bots game on discord on a server at any moment. More bots than this may cause users to become confused and the service to seem suspicious.
Q. Are discord bots free?
A. All these discord game bots are free to use. However, some have premium upgrades.
Q. Which bot is the most popular game bot in discord?
A. Worddle
Q. Which bot is the best bot for gaming on discord?
A. Gawesome is an excellent alternative for adding a multifunctional bot to your discord server.
● Ending Thoughts →
● Discord is accessible communication and socializing service for individuals aged 13 and above.
● The platform extends to various servers, each with its users, rules, themes, and channels, but one underutilized feature is the ability to develop and code custom AI-powered bots.
● Game bots for discord are artificial intelligence (AI)-powered applications that automate processes and add games to your discord server.
● These game discord bots make it simple to interact with your audience, grow your community, and manage your server.
● Lastly, to enhance the discord game bots experience and bring your gaming videos to life, use the Filmora software.
How to Create a Video Slideshow in iMovie
How to Make a Video Slideshow in iMovie
An easy yet powerful editor
Numerous effects to choose from
Detailed tutorials provided by the official channel
Landing into the world of creativity, it can be a smart choice to experiment with creating a slideshow in iMovie. Stay tuned to understand the exquisite design know-hows!
In this article
01 [What’s the Advantage of Slideshow in iMovie?](#Part 1)
02 [How to Make a Video Slideshow in iMovie?](#Part 2)
03 [In What Way Could You Edit Your Video Shortly?](#Part 3)
Part 1 What’s the Advantage of Slideshow in iMovie?
Slideshow presentations land among the most elusive means of sharing valuable information across a diverse range of personal and professional content creation domains. Be it a fun-filled family event or a high end business centered client presentation; slideshows are there to address it all! Talking about affordable software solutions to adhere the purpose, you can conveniently pick the iMovie slideshow creator program.
Entering deeper into the software specifications, the iMovie application package is essentially a video and graphic editor tool, exclusively for MacOS and iOS supported devices. Working with the program, you can create stunning slideshow presentations and storytelling movies to commemorate your most cherished personal and commercial events, moments and scenarios.
Now that you have got an elementary overview of the iMovie video editor software, let us move ahead with our discussion to talk about the latter’s credibility towards creating top rated slideshow presentations in the following section prior to proceeding with addressing the concern of how to make a slideshow on iMovie:
Benefits of Creating iMovie Slideshows
● User Cohesive Working Interface
The most pronounced credibility of iOS compatible software tools and program utilities is undoubtedly, their user friendly operation characteristic, and iMovie is no exception to the lineage. The editor workspace of the slideshow creator is intelligently designed to suit the technical aptitude of the expanded diversity of tech savvy and amateur graphic editors. The interface is equally appealing to the newbies in the design realm.
To proceed with creating a slideshow in iMovie, you can either begin with scratch, working on an entirely new idea; or move ahead with picking any preset slideshow template or background theme, followed by customizing the same in line with the specific creation requirements. The software’s effect library is a vast storehouse of high end editing features and tools with the most convenient access.
● Customization Elements
The iMovie program allows you to create cinematic movie edits in Hollywood style. From curiosity generating trailers to nail biting thrills, you can add it all to engage your audience within your presentation. Talking about the customization flexibility, you can try hands at including studio logos, cast names and credit rolls to add extra value to the edits, while simultaneously appreciating the participants of your project.
If that’s not enough, you can work to create your presentations in a variety of genres and themes by choosing from tons of premade templates under a variety of genre centered categories and sub-categories. Moving further, you can also add related effects from the program’s effect library to match the mood and setting of the slideshow.
● Effects And Improvisations
The software offers a decent range of slideshow enhancement features and special effects. You can pick from over 10 different filters, 8 vivid themes and several numbers of sound and audio effects, along with including recorded voiceovers of your own. You can also go ahead to import audio tracks and music files that are saved locally on your iOS device.
● Convenient Presentation Sharing
To make your presentations accessible to a wider audience, you can proceed to share the created slideshows directly from IMovie to any of your preferred media sharing platforms, or export the same to an online storage account, like, AirDrop, iCloud Drive, etc.
Part 2 How to Make a Video Slideshow in iMovie?
Having observed the credibility of designing slideshow presentations in the iMovie video editor program, you might easily have a motivation to explore your graphic creativity by working with the software to make an iMovie slideshow of your own. Adhering to the concern, let us see through the process of making a slideshow in iMovie through a detailed, step by step guide in the following section:
User’s Guide to Create Video Slideshow in iMovie
Step 1: Download and Install the Program
To create slideshow with iMovie, start with visiting the home website of the iMovie video editor program and proceed to download the software in your desired iOS system for free. Next in the line is the installation process, which you need to complete in order to successfully launch the application in your system.
Step 2: Open a New Project
In the app’s welcome screen, navigate to and click on the ‘File’ tab in the ‘Functions Toolbar’ at the top. From the dropdown menu that follows, select the ‘New Project’ option to start working on a new slideshow. You can alternatively, press the ‘+ N’ command keys from your device keyboard to launch a new project. Once your project file is created, assign it a suitable name and select a desired aspect ratio.

Step 3: Create the First Slide
The inaugural slide of your presentation is generally consists of the slideshow the title, which you can add by clicking on the ‘Title’ icon under the ‘Preview’ box, to see a variety of text customization choices appear within the editor workspace.
To work with adding titles to a slide, choose a preferred text style; followed by navigating to the ‘Events Pane’ and dropping the same within the first dotted frame box. You can edit the text in the blue box above the first frame. The amount of text you can add depends on the size of the box. To change the length of the box, click on the same to drag it to a desired place and finally include the text in the ‘Preview’ box.
Navigate to and hit the ‘Show Fonts’ button to customize the added text in terms of color, fonts, style and size. Tap the ‘Preview Slide’ button to see the applied changes and click on ‘Done’ to confirm the same. You can repeat the above process to add titles and informative banners to all the slides within the slideshow presentation that you are about to create.

Step 3: Include Still Images
Browse through the locally saved images within your device gallery and add the desired ones at a specific point in the editor timeline using the ‘Drag and Drop’ method. A green colored indicative light will mark the spot where the images are being dropped. You are free to drop all the images at the same time and sort them at a later stage. Do not close the image folder in your device until you have imported all the stills.
The images can be alternatively added to the timeline by selecting the required ones from the iOS device’s Photo Booth or iPhoto account. All you need to do is navigate to and hit the ‘Photo’ button to drop the selected images in the ‘Photos’ box at the bottom right corner of the software workspace.

Step 4: Adjust Image Pans and Transitions
Having included the desired images within the slideshow project, it is now time to improvise them with classic and enhanced looks. You can adhere to the task by making suitable changes under the ‘Video Adjustments’, ‘Crop Tool’ and ‘Clock’ options. Drag the cursor to a desired slide to see all the 3 options pop up at the top your slide screen.

● Video Adjustment Tool
Using the ‘Video Adjustment’ option, you are granted the liberty to adjust the brightness, contrast, white point, exposure, saturation and levels of the added images. If your images have an appreciable quality by default, you can skip this step.
● Crop Tool
Consider working with the ‘Crop Tool’ to zoom or pan the system camera across a selected slide. Click on the ‘Fit’ option to set the image within a chosen frame size; however you need to be cautious lest using the tool may render an incorrectly cropped image. Select the ‘Crop’ option to adjust the image aspect ratio according to your specific size constraints.
The ‘Ken Burns’ tool, you can rely on this one to spark the slideshow images with the coolest zoom and pan effects. The tool is represented by ‘Red and Green’ boxes above the ‘Video Preview’ box in the editor timeline. You can easily move and resize the boxes using the ‘Hand’ and the ‘Cross Hair’ tools respectively. When you are satisfied with your work, hit ‘Done’ to return and confirm the changes, or click on the next presentation slide to crop and pan the same.
● Clock Tool
The ‘Clock’ icon lets you adjust the screen time of each slide, assigning a preset minimum duration of 0.25 seconds to each slide. Setting a play duration somewhere between 2-2.5 seconds would be an optimal choice. Avoid choosing shorter slide duration unless it becomes an obvious requirement, lest the audience may find it hard to process the contents.
Prefer adjusting the screen time separately for each slide, in case you have a large project with more than 50 slides. It is instead, advisable to time the entire project under one time frame, while setting a longer screen time for the title slide.
Step 5: Add an Upbeat Background Audio
Adding background music to your presentation slides is pretty simple, with you having to just position the audio files within the desired slides using the ‘Drag and Drop’ method. The slides containing music pieces will have a ‘Light Green’ highlighting box under them. To correct a wrong placement, drag the audio file across the individual slides and drop at the correct space. You can further, modify the length of the audio clips by extending and trimming them.
To import audio files from your online iTunes account, navigate to and click within the ‘Music and Sound Effects’ box at the bottom right corner of the editor timeline. You can also clip the music file to start playing the background audio from a certain point within the track. To do this, take the cursor to the end of the track and drag the red indicator line to the point where you wish the audio to end at or begin playing from.

Step 6: Share Your Presentation
Run a mock slideshow in the ‘Preview’ box to ensure that every element of the presentation is at its specified place. When all looks good, navigate to the ‘Functions Toolbar’ at the top and hit the ‘Share’ tab to select a media sharing platform of your choice. You can even choose to export your slideshow directly from the editor timeline via QuickTime.
Part 3 In What Way Could You Edit Your Video Shortly?
Creating slideshow iMovie presentations is a creative task and everything comes on the line with the finesse of editing skills to evoke an intelligent play with features, tools and effects. While you can master the art with consistent effort and practice, there are some really cool tips and tricks to quickly edit and uplift iMovie presentations.
Let us have a look at a few of the most prominent ones in the following section before you move ahead to create slideshow in iMovie:
01Cool Ways to Quickly Edit Your iMovie Videos
● Crop to Zoon in the Video
When editing your videos in the iMovie software, you can zoom in a desired portion of the video frame. All you need to do is, select a clip, tap on the ‘Crop’ button at the top right corner over the ‘Preview’ box, choose the ‘Crop to Fill’ option and drag the effect to the specific clip area you wish to crop. Apply your changes by clicking inside the checkbox at the top right corner.

● Split a Clip
You can reduce the size of a sufficiently long video clip by choosing to break the same into several parts or trim it to ward off unwanted portions. To split your footage, take your cursor to the specific splitting point of the clip within the editor timeline, make a right click, and select the ‘Split Clip’ option from the dropdown menu that follows next.
● Detach an Audio File
Detaching audio from a clip allows you to experiment with different video play options. You can let the run the in the background as you proceed to split a clip for inserting a still image. To work with the effect, navigate to and right click on a desired clip within the editor timeline and tap on ‘Detach Audio’ in the upcoming list of options. The added music clip in ’Blue’ will detach to appear as an independent clip in ‘Green’ within the software timeline.
● Fade Audio In and Out
To ensure a smooth audio transition between successive clips, try hands at fading the audio in and out by pointing the cursor at a detached green or an attached blue audio clip, followed by dragging the small round circles at the beginning or end of the footage. To introduce a gradual fade in or out effect, drag the round button to the center of the video clip.
● Include Transitions
Transitions allow a seamless presentation flow by ensuring a smooth movement between different slides appearing in continuity. Add a suitable transition element to the video footage of your slideshow by navigating to and hitting the ‘Transition’ tab in the ‘Functions Toolbar’. The default transition screen time is 1 second, but you can customize the same by double clicking on the effect post the latter’s addition within the editor timeline.
02Editing Video Slideshows in Filmora
The iMovie slideshow maker program is an excellent choice to work on, as far as the creation of classic and stunning examples of professional, personal and commercial presentations is concerned. However, if you ever land across the need to pick alternative software for making high end slideshows, you can safely choose to go with the Wondershare Filmora Video Editor slideshow creator and editor application package without having to think twice.
For Win 7 or later (64-bit)
For macOS 10.12 or later
Talking about the specific concern of editing flexibility, tools and features; working with the program you are entitled to access a trunk of graphic customization utilities to spark up your presentations that are bound to receive jaw dropping viewer appreciation. The vast, inbuilt effect library of the program houses more than 800 different and top rated, latest editing effects to uplift and improvise your presentations. Here’s a mention of some of the most distinguished ones:
● The ‘Picture-in-Picture’ effect allows you to layer several video clips in a single track.
● You can change the background and add special effects to the presentation slides with the ‘Green Screen’ feature.
● The ‘Split Screen’ feature of the editor program allows you to introduce a new and unique style of storytelling though a multi-screen access.
● Filmora offers over 70 different ‘AI Potrait’ effects that visibly have the highest accuracy of background removal.
● Using the ‘Auto Reframe’ tool to automatically resize your videos without any pro level editing skills.
● You can work towards creating high resolution screen recordings of business meetings, live events, gameplay sessions, product demo presentations, etc., with the software’s ‘Screen Recorder’ tool.
● Use the ‘Silence Detection’ feature to instantly fade out the slideshow music and make your narration more pronounced.
● You can use the ‘Color Match’ tool to introduce suitable color corrections simultaneously within several slides, thus saving much of your valuable time.
● The program allows you to eliminate the camera shake distortions from your clips with its ‘Video Stabilization’ feature.
● Ending Thoughts →
● iMovie slideshows are exemplary in class and style as far as graphic presentation design is concerned.
● You can quickly create and conveniently edit slideshow presentations with the iMovie graphic editor package in your favorite iOS devices.
● When looking for relevant iMovie alternatives to design and edit slideshow presentations, you can conveniently depend on the Wondershare Filmora video editor program.
Landing into the world of creativity, it can be a smart choice to experiment with creating a slideshow in iMovie. Stay tuned to understand the exquisite design know-hows!
In this article
01 [What’s the Advantage of Slideshow in iMovie?](#Part 1)
02 [How to Make a Video Slideshow in iMovie?](#Part 2)
03 [In What Way Could You Edit Your Video Shortly?](#Part 3)
Part 1 What’s the Advantage of Slideshow in iMovie?
Slideshow presentations land among the most elusive means of sharing valuable information across a diverse range of personal and professional content creation domains. Be it a fun-filled family event or a high end business centered client presentation; slideshows are there to address it all! Talking about affordable software solutions to adhere the purpose, you can conveniently pick the iMovie slideshow creator program.
Entering deeper into the software specifications, the iMovie application package is essentially a video and graphic editor tool, exclusively for MacOS and iOS supported devices. Working with the program, you can create stunning slideshow presentations and storytelling movies to commemorate your most cherished personal and commercial events, moments and scenarios.
Now that you have got an elementary overview of the iMovie video editor software, let us move ahead with our discussion to talk about the latter’s credibility towards creating top rated slideshow presentations in the following section prior to proceeding with addressing the concern of how to make a slideshow on iMovie:
Benefits of Creating iMovie Slideshows
● User Cohesive Working Interface
The most pronounced credibility of iOS compatible software tools and program utilities is undoubtedly, their user friendly operation characteristic, and iMovie is no exception to the lineage. The editor workspace of the slideshow creator is intelligently designed to suit the technical aptitude of the expanded diversity of tech savvy and amateur graphic editors. The interface is equally appealing to the newbies in the design realm.
To proceed with creating a slideshow in iMovie, you can either begin with scratch, working on an entirely new idea; or move ahead with picking any preset slideshow template or background theme, followed by customizing the same in line with the specific creation requirements. The software’s effect library is a vast storehouse of high end editing features and tools with the most convenient access.
● Customization Elements
The iMovie program allows you to create cinematic movie edits in Hollywood style. From curiosity generating trailers to nail biting thrills, you can add it all to engage your audience within your presentation. Talking about the customization flexibility, you can try hands at including studio logos, cast names and credit rolls to add extra value to the edits, while simultaneously appreciating the participants of your project.
If that’s not enough, you can work to create your presentations in a variety of genres and themes by choosing from tons of premade templates under a variety of genre centered categories and sub-categories. Moving further, you can also add related effects from the program’s effect library to match the mood and setting of the slideshow.
● Effects And Improvisations
The software offers a decent range of slideshow enhancement features and special effects. You can pick from over 10 different filters, 8 vivid themes and several numbers of sound and audio effects, along with including recorded voiceovers of your own. You can also go ahead to import audio tracks and music files that are saved locally on your iOS device.
● Convenient Presentation Sharing
To make your presentations accessible to a wider audience, you can proceed to share the created slideshows directly from IMovie to any of your preferred media sharing platforms, or export the same to an online storage account, like, AirDrop, iCloud Drive, etc.
Part 2 How to Make a Video Slideshow in iMovie?
Having observed the credibility of designing slideshow presentations in the iMovie video editor program, you might easily have a motivation to explore your graphic creativity by working with the software to make an iMovie slideshow of your own. Adhering to the concern, let us see through the process of making a slideshow in iMovie through a detailed, step by step guide in the following section:
User’s Guide to Create Video Slideshow in iMovie
Step 1: Download and Install the Program
To create slideshow with iMovie, start with visiting the home website of the iMovie video editor program and proceed to download the software in your desired iOS system for free. Next in the line is the installation process, which you need to complete in order to successfully launch the application in your system.
Step 2: Open a New Project
In the app’s welcome screen, navigate to and click on the ‘File’ tab in the ‘Functions Toolbar’ at the top. From the dropdown menu that follows, select the ‘New Project’ option to start working on a new slideshow. You can alternatively, press the ‘+ N’ command keys from your device keyboard to launch a new project. Once your project file is created, assign it a suitable name and select a desired aspect ratio.
Step 3: Create the First Slide
The inaugural slide of your presentation is generally consists of the slideshow the title, which you can add by clicking on the ‘Title’ icon under the ‘Preview’ box, to see a variety of text customization choices appear within the editor workspace.
To work with adding titles to a slide, choose a preferred text style; followed by navigating to the ‘Events Pane’ and dropping the same within the first dotted frame box. You can edit the text in the blue box above the first frame. The amount of text you can add depends on the size of the box. To change the length of the box, click on the same to drag it to a desired place and finally include the text in the ‘Preview’ box.
Navigate to and hit the ‘Show Fonts’ button to customize the added text in terms of color, fonts, style and size. Tap the ‘Preview Slide’ button to see the applied changes and click on ‘Done’ to confirm the same. You can repeat the above process to add titles and informative banners to all the slides within the slideshow presentation that you are about to create.
Step 3: Include Still Images
Browse through the locally saved images within your device gallery and add the desired ones at a specific point in the editor timeline using the ‘Drag and Drop’ method. A green colored indicative light will mark the spot where the images are being dropped. You are free to drop all the images at the same time and sort them at a later stage. Do not close the image folder in your device until you have imported all the stills.
The images can be alternatively added to the timeline by selecting the required ones from the iOS device’s Photo Booth or iPhoto account. All you need to do is navigate to and hit the ‘Photo’ button to drop the selected images in the ‘Photos’ box at the bottom right corner of the software workspace.
Step 4: Adjust Image Pans and Transitions
Having included the desired images within the slideshow project, it is now time to improvise them with classic and enhanced looks. You can adhere to the task by making suitable changes under the ‘Video Adjustments’, ‘Crop Tool’ and ‘Clock’ options. Drag the cursor to a desired slide to see all the 3 options pop up at the top your slide screen.
● Video Adjustment Tool
Using the ‘Video Adjustment’ option, you are granted the liberty to adjust the brightness, contrast, white point, exposure, saturation and levels of the added images. If your images have an appreciable quality by default, you can skip this step.
● Crop Tool
Consider working with the ‘Crop Tool’ to zoom or pan the system camera across a selected slide. Click on the ‘Fit’ option to set the image within a chosen frame size; however you need to be cautious lest using the tool may render an incorrectly cropped image. Select the ‘Crop’ option to adjust the image aspect ratio according to your specific size constraints.
The ‘Ken Burns’ tool, you can rely on this one to spark the slideshow images with the coolest zoom and pan effects. The tool is represented by ‘Red and Green’ boxes above the ‘Video Preview’ box in the editor timeline. You can easily move and resize the boxes using the ‘Hand’ and the ‘Cross Hair’ tools respectively. When you are satisfied with your work, hit ‘Done’ to return and confirm the changes, or click on the next presentation slide to crop and pan the same.
● Clock Tool
The ‘Clock’ icon lets you adjust the screen time of each slide, assigning a preset minimum duration of 0.25 seconds to each slide. Setting a play duration somewhere between 2-2.5 seconds would be an optimal choice. Avoid choosing shorter slide duration unless it becomes an obvious requirement, lest the audience may find it hard to process the contents.
Prefer adjusting the screen time separately for each slide, in case you have a large project with more than 50 slides. It is instead, advisable to time the entire project under one time frame, while setting a longer screen time for the title slide.
Step 5: Add an Upbeat Background Audio
Adding background music to your presentation slides is pretty simple, with you having to just position the audio files within the desired slides using the ‘Drag and Drop’ method. The slides containing music pieces will have a ‘Light Green’ highlighting box under them. To correct a wrong placement, drag the audio file across the individual slides and drop at the correct space. You can further, modify the length of the audio clips by extending and trimming them.
To import audio files from your online iTunes account, navigate to and click within the ‘Music and Sound Effects’ box at the bottom right corner of the editor timeline. You can also clip the music file to start playing the background audio from a certain point within the track. To do this, take the cursor to the end of the track and drag the red indicator line to the point where you wish the audio to end at or begin playing from.
Step 6: Share Your Presentation
Run a mock slideshow in the ‘Preview’ box to ensure that every element of the presentation is at its specified place. When all looks good, navigate to the ‘Functions Toolbar’ at the top and hit the ‘Share’ tab to select a media sharing platform of your choice. You can even choose to export your slideshow directly from the editor timeline via QuickTime.
Part 3 In What Way Could You Edit Your Video Shortly?
Creating slideshow iMovie presentations is a creative task and everything comes on the line with the finesse of editing skills to evoke an intelligent play with features, tools and effects. While you can master the art with consistent effort and practice, there are some really cool tips and tricks to quickly edit and uplift iMovie presentations.
Let us have a look at a few of the most prominent ones in the following section before you move ahead to create slideshow in iMovie:
01Cool Ways to Quickly Edit Your iMovie Videos
● Crop to Zoon in the Video
When editing your videos in the iMovie software, you can zoom in a desired portion of the video frame. All you need to do is, select a clip, tap on the ‘Crop’ button at the top right corner over the ‘Preview’ box, choose the ‘Crop to Fill’ option and drag the effect to the specific clip area you wish to crop. Apply your changes by clicking inside the checkbox at the top right corner.
● Split a Clip
You can reduce the size of a sufficiently long video clip by choosing to break the same into several parts or trim it to ward off unwanted portions. To split your footage, take your cursor to the specific splitting point of the clip within the editor timeline, make a right click, and select the ‘Split Clip’ option from the dropdown menu that follows next.
● Detach an Audio File
Detaching audio from a clip allows you to experiment with different video play options. You can let the run the in the background as you proceed to split a clip for inserting a still image. To work with the effect, navigate to and right click on a desired clip within the editor timeline and tap on ‘Detach Audio’ in the upcoming list of options. The added music clip in ’Blue’ will detach to appear as an independent clip in ‘Green’ within the software timeline.
● Fade Audio In and Out
To ensure a smooth audio transition between successive clips, try hands at fading the audio in and out by pointing the cursor at a detached green or an attached blue audio clip, followed by dragging the small round circles at the beginning or end of the footage. To introduce a gradual fade in or out effect, drag the round button to the center of the video clip.
● Include Transitions
Transitions allow a seamless presentation flow by ensuring a smooth movement between different slides appearing in continuity. Add a suitable transition element to the video footage of your slideshow by navigating to and hitting the ‘Transition’ tab in the ‘Functions Toolbar’. The default transition screen time is 1 second, but you can customize the same by double clicking on the effect post the latter’s addition within the editor timeline.
02Editing Video Slideshows in Filmora
The iMovie slideshow maker program is an excellent choice to work on, as far as the creation of classic and stunning examples of professional, personal and commercial presentations is concerned. However, if you ever land across the need to pick alternative software for making high end slideshows, you can safely choose to go with the Wondershare Filmora Video Editor slideshow creator and editor application package without having to think twice.
For Win 7 or later (64-bit)
For macOS 10.12 or later
Talking about the specific concern of editing flexibility, tools and features; working with the program you are entitled to access a trunk of graphic customization utilities to spark up your presentations that are bound to receive jaw dropping viewer appreciation. The vast, inbuilt effect library of the program houses more than 800 different and top rated, latest editing effects to uplift and improvise your presentations. Here’s a mention of some of the most distinguished ones:
● The ‘Picture-in-Picture’ effect allows you to layer several video clips in a single track.
● You can change the background and add special effects to the presentation slides with the ‘Green Screen’ feature.
● The ‘Split Screen’ feature of the editor program allows you to introduce a new and unique style of storytelling though a multi-screen access.
● Filmora offers over 70 different ‘AI Potrait’ effects that visibly have the highest accuracy of background removal.
● Using the ‘Auto Reframe’ tool to automatically resize your videos without any pro level editing skills.
● You can work towards creating high resolution screen recordings of business meetings, live events, gameplay sessions, product demo presentations, etc., with the software’s ‘Screen Recorder’ tool.
● Use the ‘Silence Detection’ feature to instantly fade out the slideshow music and make your narration more pronounced.
● You can use the ‘Color Match’ tool to introduce suitable color corrections simultaneously within several slides, thus saving much of your valuable time.
● The program allows you to eliminate the camera shake distortions from your clips with its ‘Video Stabilization’ feature.
● Ending Thoughts →
● iMovie slideshows are exemplary in class and style as far as graphic presentation design is concerned.
● You can quickly create and conveniently edit slideshow presentations with the iMovie graphic editor package in your favorite iOS devices.
● When looking for relevant iMovie alternatives to design and edit slideshow presentations, you can conveniently depend on the Wondershare Filmora video editor program.
Mastering Video Speed Control: Slow Down, Speed Up, and Edit with Ease
Have you ever wondered how to slow down the video to make it more surreal? You may want add an extra flair or revamp educational content in the video. You may want to slow down a product demo or glide through a lengthy instructional video. Adjusting the speed of the video can be beneficial in many ways. Let’s explore how to slow down videos or speed them up for various reasons. In this article, you will learn three ways on how to speed up a slow mo video or slow a fast motoon one.
Speed Ramping Video Maker Slow down or speed up your videos with better control of your keyframes to create unique cinematic effects!
Make A Slow Motion Video Make A Speed Ramping Video More Features

Part 1. Slowing Down or Speeding Up Videos on PC: Windows and Mac Guide
The most effective way to adjust the speed of a video on a PC is to use video editing software. With Wondershare Filmora, you get the tools and features to adjust the speed of your videos. The AI Co-piloy feature is particularly useful in guiding you through the steps of editing your videos. The versatile video editing software helps you adjust the speed with just a few clicks. The approach is similar for both Windows and Mac devices, making Filmora a user-friendly and effective software for editors at all experience levels. So, how do you make a video fast-motion?
Free Download For Win 7 or later(64-bit)
Free Download For macOS 10.14 or later
Step 1: Launch Filmora and Import Video Files
Once you start Filmora on your PC, click on New Project. Then select the Import icon to choose the files you want to import from your computer library. Another way is to drag and drop the files from your computer into Filmora.

Step 2: Add the Clips to the Timeline
After importing the video files, drag and drop them onto the timeline. This prepares the clips for speed adjustment.

Step 3: Open the Speed Adjustment Panel
The Filmora feature that allows you to adjust the speed of your video clips is the speed adjustment panel or Uniform Speed. To open the Uniform Speed Panel, double-click the video clip in the timeline. Find the Uniform Speed option in the pop-up column that appears and click on it. Make adjustments using the speed control.

Step 4: Adjust the Speed Slider
In the speed control panel, clikd the speed adjuster slider. Adjust the slider to the rate of speed you want for your clips between 0.5 (slowest) to 2.00 (fastest).

Step 5: Detach the Audio
Once you adjust the speed of your video, the audio will be affected. It can be a great idea to detach the audio to further edit the video. Right-click the video clip on the timeline, and select the Detach Audio option from the pop-up column. Once the audio has detached, you can further adjust it with fade and other available options.

Step 6: Export Video
Once satisfied with your video adjustments, export it to the desired format. For this step, click the Export button. Select the directory and video format and other preferences, then click ok.

Part 2. How to Quickly Adjust Video Speed Using Online Tool
Are you wondering how to speed up slow mo video or slow a video without installing a special video editor on your computer, using an online tool is the best choice. A free online tool like Fastreel helps you change the speed of short videos, which are smaller than 500 MB with just a few steps. However, this online tool oonly works with MP4 format. When working with other video formats, you will have to convert them first.
Here’s how to speed up a slo mo video using Fastreel
Step 1
Go to the Fastreel website . Upload the video you want to slow down or speed up. Click the Add Your File button to choose and upload the clips.

Step 2
Set the Appropriate Speed. Select the speed you want for your video onVideo Speed section. The results will be displayed in the preview window. Save Processed Video. Mute the video by clicking the corresponding icon if necessary. Then, save the video by selecting the Export Results button.

Part 3. A Guide to Slowing Down or Speeding Up Videos on Android and iPhone
How to speed up slow mo video on phone is a normal concern for many people. Luckily, there are many apps available to do that. In most cases, making a mobile video bit slower or faster will make it seem better. You may want to reduce the duration of your video or check out the details in a specific scene. You may want to speed watch or speed listen to the content. Let’s have a look at how you can achieve this on your Android or Apple device.
1. How to Change the Speed of Your Video on Android
When someone asks how do I slow down a video? The first response that comes to mind is using their phone. This is the device they always have with them. And most people, consider editng easier on theior phones than compiters. For someonw with an Android phone, the Gallery app makes it easier to adjust the speed of a video. Find out how to make fast motion video or slow mo with Android phone. Follow these few steps:
Step 1Launch the Gallery app
Open the video you want to edit. Then, tap on the Edit icon at the bottom to open the video editor.

Step 2Find the Speed Icon
Scroll through the list of the icons at the bottom. Then tap on the Speed icon to start making the adjustments

Step 3Adjust the Speed of the Video
The default speed of the video is 1x. Tap on 2x to seep it up or 1/2x to slow down the video. Then press the Play icon to preview the view with these speed settings.

Step 4Save the Video
Once satisfied with the speed of the video, tap the save button.

2. How to Change the Speed of Your Video on iPhone
The iMovie app offers an easy and effective way of speeding up or slowing down videos on your iPhone. How do you make a video fast motion? The free video editing app from Apple is available for iOS and and can also be used on iPads:
Step 1Launch iMovie App
Once you have installed and opened the iMovie app on your phone, tap on the Create Projects (+) button.

Step 2Select Movie
The app will prompt you to select the kind of project you want between Movie and Trailer.

Step 3Create Movie
Tap on the video that you want to adjust speed. Then, tap on the Create Movie button.

Step 4Adjust the Speed of the Video
On the editing screen, tap on the video clip. The video editing tools will appear at the bottom, allowing you to make the adjustments of your choise. Tap on the Speed icon that looks like a speedometer and drag the slider until you attain the speed you want.

Step 5Preview and Safe
After adjusting the speed, play the video to preview it with the new speed. Then tap on the Done button at the top to save the project. Hit the Share icon, and the Save the Video.

Conclusion
When it comes to creating slow motion videos, Wondershare Filmora stands out as a great software to use. Filmora V13 allows you to speed up or slow down videos with only a few clicks. The versatile video editing software can be used on Windows and Mac PC while producing the same quality of videos. Be sure to check out the range of AI features available in the software. These are helpful in automating most of the tasks and doing a lot more with your editing tasks.
Make A Slow Motion Video Make A Speed Ramping Video More Features
Part 1. Slowing Down or Speeding Up Videos on PC: Windows and Mac Guide
The most effective way to adjust the speed of a video on a PC is to use video editing software. With Wondershare Filmora, you get the tools and features to adjust the speed of your videos. The AI Co-piloy feature is particularly useful in guiding you through the steps of editing your videos. The versatile video editing software helps you adjust the speed with just a few clicks. The approach is similar for both Windows and Mac devices, making Filmora a user-friendly and effective software for editors at all experience levels. So, how do you make a video fast-motion?
Free Download For Win 7 or later(64-bit)
Free Download For macOS 10.14 or later
Step 1: Launch Filmora and Import Video Files
Once you start Filmora on your PC, click on New Project. Then select the Import icon to choose the files you want to import from your computer library. Another way is to drag and drop the files from your computer into Filmora.
Step 2: Add the Clips to the Timeline
After importing the video files, drag and drop them onto the timeline. This prepares the clips for speed adjustment.
Step 3: Open the Speed Adjustment Panel
The Filmora feature that allows you to adjust the speed of your video clips is the speed adjustment panel or Uniform Speed. To open the Uniform Speed Panel, double-click the video clip in the timeline. Find the Uniform Speed option in the pop-up column that appears and click on it. Make adjustments using the speed control.
Step 4: Adjust the Speed Slider
In the speed control panel, clikd the speed adjuster slider. Adjust the slider to the rate of speed you want for your clips between 0.5 (slowest) to 2.00 (fastest).
Step 5: Detach the Audio
Once you adjust the speed of your video, the audio will be affected. It can be a great idea to detach the audio to further edit the video. Right-click the video clip on the timeline, and select the Detach Audio option from the pop-up column. Once the audio has detached, you can further adjust it with fade and other available options.
Step 6: Export Video
Once satisfied with your video adjustments, export it to the desired format. For this step, click the Export button. Select the directory and video format and other preferences, then click ok.
Part 2. How to Quickly Adjust Video Speed Using Online Tool
Are you wondering how to speed up slow mo video or slow a video without installing a special video editor on your computer, using an online tool is the best choice. A free online tool like Fastreel helps you change the speed of short videos, which are smaller than 500 MB with just a few steps. However, this online tool oonly works with MP4 format. When working with other video formats, you will have to convert them first.
Here’s how to speed up a slo mo video using Fastreel
Step 1
Go to the Fastreel website . Upload the video you want to slow down or speed up. Click the Add Your File button to choose and upload the clips.
Step 2
Set the Appropriate Speed. Select the speed you want for your video onVideo Speed section. The results will be displayed in the preview window. Save Processed Video. Mute the video by clicking the corresponding icon if necessary. Then, save the video by selecting the Export Results button.
Part 3. A Guide to Slowing Down or Speeding Up Videos on Android and iPhone
How to speed up slow mo video on phone is a normal concern for many people. Luckily, there are many apps available to do that. In most cases, making a mobile video bit slower or faster will make it seem better. You may want to reduce the duration of your video or check out the details in a specific scene. You may want to speed watch or speed listen to the content. Let’s have a look at how you can achieve this on your Android or Apple device.
1. How to Change the Speed of Your Video on Android
When someone asks how do I slow down a video? The first response that comes to mind is using their phone. This is the device they always have with them. And most people, consider editng easier on theior phones than compiters. For someonw with an Android phone, the Gallery app makes it easier to adjust the speed of a video. Find out how to make fast motion video or slow mo with Android phone. Follow these few steps:
Step 1Launch the Gallery app
Open the video you want to edit. Then, tap on the Edit icon at the bottom to open the video editor.
Step 2Find the Speed Icon
Scroll through the list of the icons at the bottom. Then tap on the Speed icon to start making the adjustments
Step 3Adjust the Speed of the Video
The default speed of the video is 1x. Tap on 2x to seep it up or 1/2x to slow down the video. Then press the Play icon to preview the view with these speed settings.
Step 4Save the Video
Once satisfied with the speed of the video, tap the save button.
2. How to Change the Speed of Your Video on iPhone
The iMovie app offers an easy and effective way of speeding up or slowing down videos on your iPhone. How do you make a video fast motion? The free video editing app from Apple is available for iOS and and can also be used on iPads:
Step 1Launch iMovie App
Once you have installed and opened the iMovie app on your phone, tap on the Create Projects (+) button.
Step 2Select Movie
The app will prompt you to select the kind of project you want between Movie and Trailer.
Step 3Create Movie
Tap on the video that you want to adjust speed. Then, tap on the Create Movie button.
Step 4Adjust the Speed of the Video
On the editing screen, tap on the video clip. The video editing tools will appear at the bottom, allowing you to make the adjustments of your choise. Tap on the Speed icon that looks like a speedometer and drag the slider until you attain the speed you want.
Step 5Preview and Safe
After adjusting the speed, play the video to preview it with the new speed. Then tap on the Done button at the top to save the project. Hit the Share icon, and the Save the Video.
Conclusion
When it comes to creating slow motion videos, Wondershare Filmora stands out as a great software to use. Filmora V13 allows you to speed up or slow down videos with only a few clicks. The versatile video editing software can be used on Windows and Mac PC while producing the same quality of videos. Be sure to check out the range of AI features available in the software. These are helpful in automating most of the tasks and doing a lot more with your editing tasks.
How To Use Face Tracking In After Effects To Make Your Videos Pop
Face Tracking is a process of identifying or locating human faces in digital images and videos, and it is used for a variety of applications, such as to re-target tools and effects to specific areas of the face, to track face data for rotoscoping/motion stabilization, or to generate keyframes for facial expressions automatically.
In Adobe After Effects, there are two Face Tracking features, i.e., Outline Only and Detailed Feature. The former will help only to track the face, while the latter provides detailed data on different facial features to help you change the eye color, mouth movements, etc.
In this blog post, we will explore Face Tracking, its applications, how it works, and its challenges and drawbacks. We will also provide an easy-to-follow guide on using the Face Tracking feature in Adobe After Effects.
Part 1. What Is Face Tracking
Face Tracking is a process of identifying or detecting the areas of the face, such as the eyes, nose, and mouth, in a video or image. This effect can be used to track and animate face replacements, retouch footage, or add effects to a user’s face in live footage.
Where It Is Applied
Face Tracking can be used for a variety of applications, such as:
- Replacing One Face With Another: This is helpful if you need to change the face of a character in video footage.
- Adding Automatic Effects: With this feature, you can apply effects to a face in live footage.
- Retouching Footage: Face Tracking can help you retouch a face in a video clip, for instance, you can smooth it or change the skin tone, etc.
- Robotic Devices: Certain robots use Face Tracking technology to perform human tasks.
Part 2. How Does Face Tracking Work?
Face Tracking algorithms usually begin by detecting facial landmarks, such as the eyes, nose, and mouth. Once detected, the AI algorithms use them to track the face as it moves. This information can be used to perform various tasks, such as identifying the person’s emotions or estimating their head pose.
Face Tracking technology is constantly improving and is now being used in various new applications, such as to create 3D models of people’s faces, control robotic devices, and create more realistic avatars for virtual reality systems.
Part 3. The Challenges And Drawbacks Of Face Tracking
Face Tracking is a technology that has been growing in popularity in recent years. This technology allows computers to detect and track human faces in real-time. While Face Tracking has many potential applications, some challenges and drawbacks also need to be considered:
One of the main challenges with Face Tracking is that it can be difficult to track faces in different lighting conditions. Faces can also be obstructed by objects such as hats or glasses. Another challenge is that things like photographs, makeup, or masks can fool face tracking.
Some privacy concerns need to be considered when using Face Tracking. This technology can be used to collect sensitive data about people without their consent.
Despite these challenges and drawbacks, Face Tracking remains a promising technology with many potential applications, and it can help with many tasks such as identifying a perpetrator, finding a missing person, better security measures in banks and airports, and many more.
Part 4. The Face Tracking In After Effects
Adobe After Effects is a useful and powerful tool that can be used for various purposes, including Face Tracking. This feature enables you to track the movement of a person’s face and detect specific parts of a face, including eyes, nose, mouth, etc., to let you work with these facial features individually.
For instance, you can change the mouth movement or pupil color without frame-by-frame adjustments. Moreover, you can measure facial features to see the details, such as how open the eye or mouth is.
Features
Here’s a simple and quick rundown of the features of Face Tracking in Adobe After Effects:
- Help you detect faces and provide isolated data points to help you refine the content.
- Retouch the face in a video without adjusting it frame by frame.
- Let you export the tracking data to Character Animator for creating performance-based animations.
Function
There are two Face Tracking functions in the Tracker panel:
- Face Tracking (Outline Only): This feature will only help you to outline the face in a video clip.
- Face Tracking (Detailed Features): This option will help you if you want to detect the different facial features and parts, including the eye, pupil, eyebrow, mouth, and nose. You can also take exact measurements of the features.
Part 5. The Guidance Of Using Face Tracking In After Effects
Follow the guidelines below to use Face Tracking in After Effects:
Face Tracking To Outline A Face
Step1Launch the After Effects software and click “File” in the top Toolbar. Select Import and click “File.” Find the video footage and add it to the Project panel.

Step2To add a new layer, drag and drop the video footage from the Project Panel to the Composition.
Step3Drag the blue current-time indicator in the Timeline to a frame showing the face’s upright and front view.

Step4Now, you have to draw a closed mask loosely around the face. This helps identify the region for locating the facial features. The top mask is used for Face Tracking if you have selected multiple masks.

Step5Click the “Window” option from the top Toolbar and scroll down to “Tracker.” Select “Face Tracking (Outline Only)” as the tracking method in the Tracker Panel.
Step6To make sure the tracking is working correctly, track forward or backward one frame at a time and click the “Start” button to start the analysis process of the frames. Once finished, you can find the Face Tracking data within the Composition.
Tracking Detailed Features And Extracting Facial Measurements
For detailed face features tracking, do the following steps in sequence:
Step1Import your file and add it to the Project in the After Effects. Drop and drag the video clip into a Composition from the Project Panel to add a layer.
Step2Position the CTI to a frame showing the upright and front view of the face, and draw a closed mask loosely around the face to define the search region to find the facial features.
Step3Click the “Window” option, scroll down to Tracker and select it. Choose the **“Face Tracking (Detailed Features)**” option as the tracking method.
![]()
Step4Track forward or backward to check the tracking process, and click the “Start” button to initiate the analysis process.
Step5Once the analysis is done, you can find the tracking data within a new effect, “Face Track Point.” To access the face tracking data, go to “Window” and select “Effects Control” to go to the Effects Panel or check within the Composition.
![]()
Step6Move the CTI to a frame displaying neutral facial expressions or is in the rest pose. The measurements of a face on other frames are dependent on the rest pose frame. Now, click “Set Rest Pose” in the Tracker Panel and select “Extract & Copy Face Measurements” to add the Face Measurement layer.
Step7When the Face Measurements effect layer is added, keyframes are automatically generated based on the Face Track Points keyframe data. You can copy the data from the system clipboard for use in Adobe Character Animator.
Video - How to do Face Tracking, Facial ID, with After Effects (iPhone X features) Tutorial
Conclusion
In this article, we’ve discussed what Face Tracking is, where it is applied, how it works, and its challenges and drawbacks. We further provided a step-by-step guide on using Face Tracking in After Effects and discussed its two functions.
Hopefully, this guide helps you understand the Face Tracking technology, and you can now use the feature in After Effects without hassle.
Free Download For Win 7 or later(64-bit)
Free Download For macOS 10.14 or later
Also read:
- 2024 Approved Why Did Filmora AI Portrait Attract People?
- Updated 2024 Approved TikTok Slow Zoom | Create Your Slow Zoom TikTok in Minutes
- In 2024, Do You Want to Know How to Add LUTs to Premiere Pro? In This Guide, You Will Find Details and Easy Steps to Proceed with Using LUTs in Premiere Pro
- New 2024 Approved How to Make First Impression Review Video
- New Tips That Show Anybody How To Create Youtube Slideshow – Guaranteed for 2024
- Updated In 2024, Applications and Software Take up Your Devices Storage to Create Slow-Mo. Explore This Piece to Learn About some Slow-Motion Video Online Makers
- New 2024 Approved Are You in Search for a Step-by-Step Guide to How to Add Effects in TikTok? Here It Is. To Add some Flavor to Your TikTok Videos. Use These How to Add Effect to TikTok Recommendations
- New 6 Instant Mp4 to GIF Online Tools for You
- Create Realistic Fire Effects by Filmora
- Updated Ideas That Help You Out in Making Transparent Image
- New Do You Want to Learn How to Use Premiere Pro Distortion Effects in Your Videos? We Have Provided a List of Distortion Premiere Pro Effects and How to Use Them for 2024
- Updated Leveraging the Vectorscope for Better Color Correction in Premiere Pro
- Updated Do You Want to Rotate Your TikTok Video to Stylize It More? This Article Will Provide Simple Methods of Rotating TikTok Videos to Improve the Audience Viewing Experience for 2024
- Kdenlive Video Editor Review for 2024
- New How to Make Split Screen Videos in Filmora
- Learn Everything About Leeming LUT Pro for 2024
- New 2024 Approved How to DIY VHS Overlay in After Effects?
- 2024 Approved Splitting the Clips in Adobe After Effects Step by Step
- A Review On 3D LUT Creator
- Updated In 2024, Do You Wish to Make Changes Across Your Video? Are You Looking to Record Your Desktop Screen on Mac? Worry Not, as This Article Provides Details About QuickTime Player that Caters to All User Requirements
- New How to Make Tutorial Video with Filmora for 2024
- New 2024 Approved Creating a Slideshow Is Necessity of the Modern Time. Whether You Plan a Business Meeting or You Are Going to Do some Family Event with Slideshow Presentation, a Good Slideshow Maker Will Help You in This Direction
- Applications and Software Take up Your Devices Storage to Create Slow-Mo. Explore This Piece to Learn About some Slow-Motion Video Online Makers for 2024
- 2024 Approved Best 5 Tips to Freeze-Frame in After Effects
- New Best Options to Replace Sky of Any Photo Online + Offline for 2024
- Updated In 2024, Lets Look at Four Different Ways of Merging Audios and Videos. The Tools Will Help You Craft High-End Videos without Involving Any Complex Steps. You Can Make Your Videos Beautiful by Using the Following Easy to Use Tools
- New A Full Guide to Funcall Voice Changer and Its Alternatives
- 2024 Approved Using One of the Best Converter Tools to Turn GIFs Into PNG or JPG. Here, Learn About the Ten Best Ones for Different Operating Systems, with Details on Features, Prices, and More
- In 2024, Best Dark Moody LUTs During Editing
- Updated In 2024, 6 Top Online MP4 Croppers
- Updated 2024 Approved How to Convert SRT to DOCX
- Want to Make Your Canva Slideshow More Attractive? Follow the Given Discussion to Know Everything About Making the Best Slideshows with Canva
- Updated In 2024, How To Create A YouTube Intro
- In 2024, How To Synchronize Your Audio And Videos Properly?
- New Fixes | What If YouTube Zoom to Fill Not Working?
- Updated Do You Wish to Make Your Discord PFP an Attention-Seeker? If Yes, Try the Animated Discord PFP. Lets Go over Essential Facts on the Topic, Including How to Get an Animated Discord PFP
- Updated The Complete Guide to Slideshow Maker with Music for 2024
- 2024 Approved 8 Tips to Apply Cinematic Color Grading to Your Videos
- Updated In 2024, Are You Looking for a Video Format Converter Free? We Will Introduce the 5 Best Online Converters and Also the 5 Best Video Format Converters for PC
- In 2024, Things About Transparent PNG Remove and Convert
- In 2024, Are You Looking for the Best Way to Add Subtitles to Your Video? The Top SRT File Creators Can Help You Do That
- Updated Free Ways to Download Mobile Phone Green Screen Videos and Pictures No Copyright
- How to Use Twixtor Effect to Create Super Slow-Motion Video for 2024
- Updated 2024 Approved Are You Surfing for some Way to Make Your Animated Emoji Discord Using Videos, GIFs, Images, or Text? Read Through This Article as Well Guide You Through the Process
- New Top 6 MP4 Mergers to Join Videos Easily
- New In 2024, This Article Will Address Your Questions About the Easiest Way to Turn a Blog Into a Podcast. Lets Begin with the Reasons Why You Should Do a Podcast
- Recover Apple iPhone 12 Data From iTunes Backup | Dr.fone
- Refurbished Apple iPhone XR Everything You Need to Know | Dr.fone
- In 2024, How to Unlock iPhone 12 Pro Max Passcode without Computer? | Dr.fone
- 11 Ways to Fix it When My Poco F5 5G Wont Charge | Dr.fone
- How To Restore Missing Messages Files from Vivo Y36
- Latest Guide How To Bypass Tecno Pop 8 FRP Without Computer
- In 2024, Unlocking iPhone 12 mini Lock Screen 3 Foolproof Methods that Actually Work
- How to Repair a Damaged video file of Realme Narzo 60 Pro 5G?
- How to Rescue Lost Music from Samsung Galaxy S23 FE
- How to Rescue Lost Music from Honor 100
- In 2024, Easy Tutorial for Activating iCloud from Apple iPhone SE (2020) Safe and Legal
- How to Transfer Text Messages from Vivo T2x 5G to New Phone | Dr.fone
- How To Fix OEM Unlock Missing on Vivo S18?
- How To Remove Passcode From Apple iPhone 14 Pro? Complete Guide
- In 2024, How to Bypass Android Lock Screen Using Emergency Call On Samsung Galaxy M54 5G?
- In 2024, How To Remove Flashlight From Apple iPhone 14 Pro Max Lock Screen
- How to Track Xiaomi Redmi 13C 5G Location by Number | Dr.fone
- Easily Unlock Your Xiaomi Redmi 13C 5G Device SIM
- Title: Ways to Learn Discord Game Bots – Even if Youre Just Starting Out 20
- Author: Morgan
- Created at : 2024-05-19 05:11:41
- Updated at : 2024-05-20 05:11:41
- Link: https://ai-video-editing.techidaily.com/ways-to-learn-discord-game-bots-even-if-youre-just-starting-out-20/
- License: This work is licensed under CC BY-NC-SA 4.0.
