
:max_bytes(150000):strip_icc():format(webp)/connect-tv-to-stereo-system-3135127-83ec0f315fa54c1290555169d689ad88.jpg)
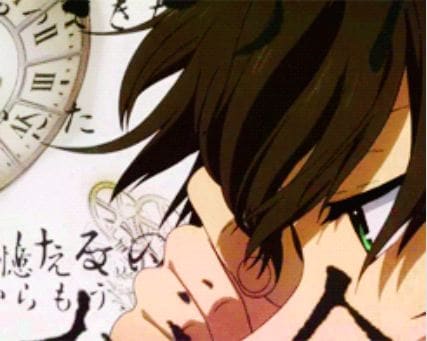
What Anime Character Are You Look Like?
What Anime Character Are You Look Like?
What Anime Character Are You Look Like
An easy yet powerful editor
Numerous effects to choose from
Detailed tutorials provided by the official channel
In this article
01 [What Anime Character Are You Look Like?](#Part 1)
02 [Which Anime Character Do You Share a Personality With?](#Part 2)
03 [What Anime Character Are You Based on Your Zodiac Sign?](#Part 3)
04 [Superb Sites to Create Free Anime Character Online](#Part 4)
05 [Anime Drawing Q&A](#Part 5)
Part 1 Part1: What Anime Character Are You Look Like?
Anime characters are the newest trends of fascination in the realm of motion graphic design and imagery. While you are bound to get an engaging feel regardless of any anime character you pick, the expressive and stunning features and detailing of these graphic images often appear so relatable that you may think of bearing a close resemblance to some specific character.
This may sound fascinating as ever, but the concept has been explored with a digital vision. Graphic creators and design experts have come up with interesting ways and means to help you meet the anime character you resemble the closest to. The most prominent and exact examples of such techniques are anime quizzes. When moving ahead to recognize your look alike in the anime world, you can prefer taking up these quizzes and tests to lead your path in an interesting and amazing manner.
Talking of the functionality of these tests, the latter work on the principle of recognizing the pronounced aspects of your personality, like physical features and body language. Your dressing sense, hair styles and preferences on accessories are matched closely through a digital framework to the anime world creatures to fetch the most accurate results.
Part 2 Which Anime Character Do You Share a Personality With?
Anime characters not only work to bear a close connection with your physical appearances, they are well in concord with your inherent personality traits. However superficial it may seem, such characters are smart enough to mirror your exact personality types and characteristics. If you are interested to find about what anime character are you in more detail, there are respective quizzes and tests to help you out.
As of the credibility of these quizzes, you can be specific on a particular favorite character to look for your resemblance with the same. For example, you can take the ‘Red Flag Anime Character’ quiz to examine the similarity score of your personality with this class of anime characters. Such quizzes further let you know about a variety of additional aspects that connect you with the anime akin, like whether or not you possess the evil traits associated with your favorite anime character.
Knowing your anime personality can cater additional help in some respects. You can have a walk-through of interesting ways to find solutions and alternative reactions to tackle situations like your anime character attempts to address them. To guide you further in the line of understanding the connection of personalities between you and your favorite anime character, here’s a comparison of some specific personality traits with their anime counterparts in what follows next:
Specific Personality Traits: The Pragmatic Ones
The pragmatic personality trait belongs to those who prefer a logical approach over an emotional one while making important decisions. If you have a pragmatic nature, you might stick to the straightforward attitude of looking at things, ahead of inclining towards the empathetic side. Entering into the anime world, you may find a series of characters resembling this specific aspect of your personality. One such character example is Kiritsugu Emiya from the anime series called Fate/Zero.
Talking about the character in some detail, this character has a habit of sacrificing the smaller assets while hoping for bigger and greater opportunities. The habit eventually forces him to take certain painful and unwanted decisions. Mentioning a personal aspect, this one is a relatable character trait to my own personality. Considering the fact that I myself follow the line of logic to find out solutions to challenges and situations, I bear a complete resemblance with the character.
A downside of the pragmatic traits is their double faceted appearance to the viewers in case the latter fail to interpret the character in a correct form. It is a common assumption about these characters is that they wear a pretentious form to hide the actual aspects of personality from the onlookers.
Part 3 What Anime Character Are You Based on Your Zodiac Sign?
Anime characters are known to have a significant potential to relate with peoples’ persona in real-time. Ahead of the physical features and personality, you can even use your zodiac sign to identify your anime mirror. Discussing along the line, let us talk about some of the zodiac deciding constellations and the anime characters that correspond to the same in what follows next:
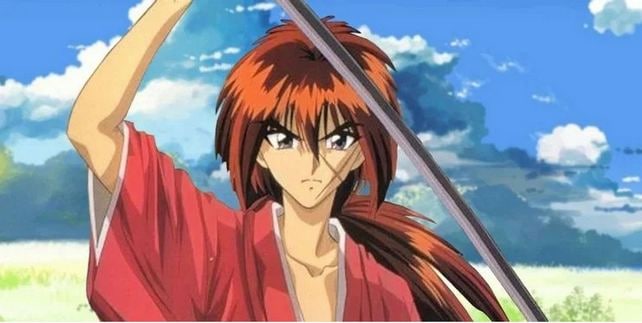
01Taurus: Himsura Kenshin
Belonging to the Taurus constellation, you will have an inherent love for quietness and peace. Satisfying your love for nature, you would be more comfortable with enjoying the small pleasures of life. Talking of a relatable anime character, you bear a close resemblance with Kenshin, the main lead of the anime movie by the name Ruroni Kenshin. The latter went on to trade his murderous past to live a peaceful life in his present.
The major appeals of Kenshin’s character are a gentle and kind personality that caters to understand and care about everyone he comes across. Choosing to kill as the last option, he works to transform his sword into a no blood sucking object. Like most Taurus personalities, the only expectation Kenshin has is of leading a simple, happy and peaceful life around his loved ones.
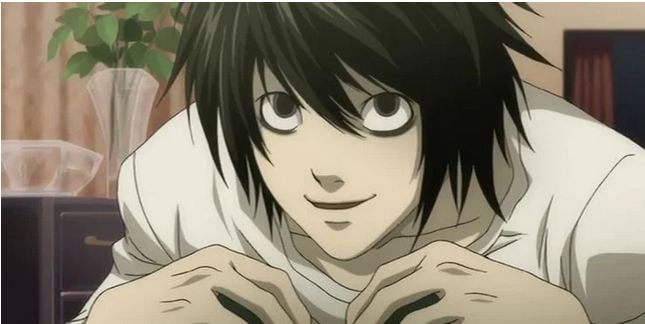
02Gemini: L Lawliet
Being a Gemini, you may well be the master of a conflicting personality, which is commonly victimized of being misinterpreted. Possessing the strongest of thinking abilities, you might be a smart and intelligent philosopher. People belonging to this zodiac sign, however have a quite hidden out perspective of looking at the world. Being a Gemini, you may prefer being a bit antisocial person, who has his own unconventional ways of taking the challenges of life.
In the anime world, the aforesaid zodiac sign traits have the closest connections with Detective L Lawliet from the movie Death Note. The latter possesses a gray shade character, who never reveals his real motives and true colors. He often works out cunning ways and means to get something that suits his needs and wants, in line with a problem he aims to solve.
Nonetheless, Lawliet always attempts to put the well-being of the society ahead of his personal interest in solving cases. While the character is both, complex and fascinating at the same time, a comparison with the latter is an indirect way of addressing yourself as an intelligent and a goal oriented personality. You should however, take care to stop losing your self-confidence amid the process of reaching at your desired goal.
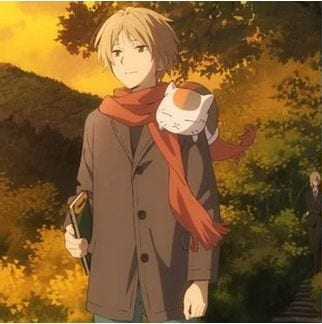
03Cancer: Takeshi Natsume
Talking of the specific characteristics of possessing a Cancarian personality, you will have a sensitive naughtiness and high level of empathy as the common aspects of your behavior. While you may encounter great difficulties to adjust with the world around you, don’t be skeptical about being alone in the race. Natsume, the title character of the anime Natsume’s Book of Friends shares this personality with you.
The striking aspect of this anime character is that its kindness remains untouched by the hardships that life has daunted upon him. The latter additionally obliges with respect towards the kindness he is showered on by other people. The thoughtful aspect of his character is however something that often works against him. The latter becomes oblivious to everything else to care about others’ feelings, making his sensitivity a cursed blessing for himself.
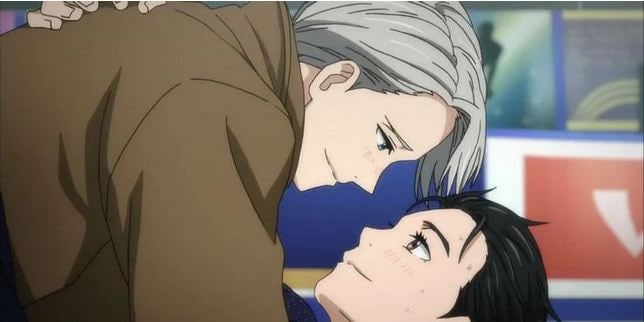
04Leo: Victor Nikiforov
Referred more fondly as the stylish icons among the zodiacs, Leos are the masters of a charismatic personality, who enjoy bring loved and focused on. Blessed with the power to excel on their own terms and conditions, they are habituated to tackle problems and challenges with utmost ease. Being the fiery zodiacs, the Leo personalities are best represented by Victor Nikiforov, the ice skating hero of Yuri on Ice anime.
About the specific personality traits of the character, Victor has ruled the skating world since the time when he was a mere 16 years old. The latter is amazingly talented, possesses a handsome and well groomed physique, along with a stunningly captivating personality. Ahead of all these aspects, what makes him shine so bright is his determination to achieve a place among the stars of his line and expertise.
Being a Leo, he possesses the classically romantic nature and feels not at all guilty in openly expressing his attraction towards Yuri, the female lead of the anime.
05Virgo: Yuugo Hachiken
Talking of the specific aspects of a Virgo personality, masters of this zodiac are diligent and hard workers, love to follow the methodical approach of handling things and solving problems and perform best when adhering to physically straining tasks, such as working in agriculture fields. Searching for an anime resemblance, Yuugo Hachiken from Silver Spoon is affordably the best match you can get.
Hachiken was fortunate enough to have an overly large set of materialistic achievements to his credit. The latter, however, exhausts everything to land in a traditional school, where he meets agriculture, the true love of his life. Though inexperienced in the field, he relies on the ethics and principles of his profession to counter the challenges of his new trade. He is additionally assisted by his imbibing love for nature, which is a Virgo trademark.
Part 4 Superb Sites to Create Free Anime Character Online
For Win 7 or later (64-bit)
For macOS 10.12 or later
By far, you have acquired enough knowledge and understanding of anime characters. While the information is enough to motivate you towards creating your own anime character, it becomes important to pick an affordable motion graphic design utility to begin with the process. Browsing through the IT market, you will land across a hoard of anime character generator software and application programs to choose from.
While the aforesaid alternatives have enough credibility with respect to anime character creation, the impact and performance of web based tools in addressing the concern is no less. Diverting the focus of our discussion along the same line, here’s a brief overview of some of the most popular and preferred online websites to create anime characters for free in what follows next:
01Face Your Manga
Starting the list with the best at the first, this online platform is possibly the best amine character generation tool available across the web. When attempting to create an anime avatar for yourself, landing on the site will entitle you to access the latter’s extensive library of creation features, which literally houses the whole kit and caboodle that you will ever need to craft the best anime personality.
Talking of the character centric features of the site, you are allowed to mask a real-time look on your avatar by adding birth marks, moles, blemishes, scars, third-eye and band-aids. You can additionally craft the eyebrows of your character to be in the perfect shape and setting in line with your specific preferences.
02Potrait Illustration Maker
Moving ahead, there comes the Portrait Illustration Maker website, which is quite a reliable place for working with anime character creation. The site facilitates a quick character design and is best suited for the swift graphic creators, who don’t have a lot of time to spare on crafting an anime character.
If you are more fascinated towards generating a random anime avatar, the ‘Randomizer’ option is there to help you out. All you need to do is, navigate to the respective icon, followed by tapping on the same and that it! The site works to generate an instant anime avatar for you. As of the feature bank offered by the website, you may not have a heap of customization choices at your disposal.
The website however, has an editing facility allows you to manually customize the randomly generated anime character. Additional to creating such characters, the platform grants you the liberty to share your artwork across all popular social media handles and communities.

03Marvel Superhero Avatar
The aforesaid website is a welcome gift for those who have always had a soft corner for the Marvel caricature series. Boasting itself as one among the best anime creator platforms, the latter allows you to craft amazing anime avatars, particularly those from the Marvel Superhero legacy. Packed with almost every customization feature that you will ever need, the site presents you with an expanded canvas to explore your motion graphic design creativity.
The site further lets you cross the boundaries of your imagination, while experimenting with the same to generate an anime superhero of your own. The customization tool of the website further allows you to mix and match the outlooks of the different Marvel superheroes to create a new hybrid character.
As an instance, you can integrate the features of Captain Marvel and Spider-girl, the female Marvel superheroes, into a single character. As of the male counterparts, you can try hands at integrating Spider Man and Iron Man.
Part 5 Anime Drawing Q&A
● What is the difficulty level of creating anime drawings?
However easy it may seem at the first look, crafting anime drawings is no easy thing. Before you proceed to carve out your anime art, you will essentially require a comprehensive knowledge of the various aspects of the character you choose to draw. This includes the character’s anatomy, value, perspective and features, and a series of other details.
● What is the minimum time duration required to create an anime drawing?
Anime drawings are a work of concentration and may take several hours or days to come out with perfection depending upon the complexity level. In most cases, you may finish the drawing in 10-20 hours, with a working time of 1 hour. As you cross different levels of expertise, the aforesaid duration will start appearing too small.
● Why is the accuracy factor so important in anime drawing?
Creating a detailed and accurate drawing helps to bring out the exact vision and perspective you are aiming at. This additionally proves beneficial in catering viable information about the cost constraints before you start with materializing things. This will eventually aid in keeping your construction requirements within the line of your budget, while allowing you to introduce necessary changes if need be.
● What is the cumulative count of the different styles of anime drawings?
The world of anime drawing houses a total of 22 style variants, starting from cubism and technical art, to pop art and realistic creations. There is an additional set of sub-styles in anime drawing that originate from the aforesaid classifications. As of the specific number of sub-styles, these are numerous in count, owing to the fact that the drawing preferences of different artists show significant variations. The diversity in drawing tools further adds to the variations.
● What is the significance of working with exact measurements in anime drawing?
The complete structuration of anime drawing is centered on taking accurate measurements. Being the most essential element of such drawings, a precise measurement can make your creation stand out, while a random one on the other hand, has the potential to put the same into rugs.
● Ending Thoughts →
● Anime characters are found to bear a close connection with different aspects of your personality, such as physical features, inherent traits and zodiac signs.
● There are a hoard of digital and online utilities, like quizzes and personality tests that can help you know about which anime character are you.
● If you are interested in creating your own anime character for free, there is wide range of online tools and software at your disposal.
In this article
01 [What Anime Character Are You Look Like?](#Part 1)
02 [Which Anime Character Do You Share a Personality With?](#Part 2)
03 [What Anime Character Are You Based on Your Zodiac Sign?](#Part 3)
04 [Superb Sites to Create Free Anime Character Online](#Part 4)
05 [Anime Drawing Q&A](#Part 5)
Part 1 Part1: What Anime Character Are You Look Like?
Anime characters are the newest trends of fascination in the realm of motion graphic design and imagery. While you are bound to get an engaging feel regardless of any anime character you pick, the expressive and stunning features and detailing of these graphic images often appear so relatable that you may think of bearing a close resemblance to some specific character.
This may sound fascinating as ever, but the concept has been explored with a digital vision. Graphic creators and design experts have come up with interesting ways and means to help you meet the anime character you resemble the closest to. The most prominent and exact examples of such techniques are anime quizzes. When moving ahead to recognize your look alike in the anime world, you can prefer taking up these quizzes and tests to lead your path in an interesting and amazing manner.
Talking of the functionality of these tests, the latter work on the principle of recognizing the pronounced aspects of your personality, like physical features and body language. Your dressing sense, hair styles and preferences on accessories are matched closely through a digital framework to the anime world creatures to fetch the most accurate results.
Part 2 Which Anime Character Do You Share a Personality With?
Anime characters not only work to bear a close connection with your physical appearances, they are well in concord with your inherent personality traits. However superficial it may seem, such characters are smart enough to mirror your exact personality types and characteristics. If you are interested to find about what anime character are you in more detail, there are respective quizzes and tests to help you out.
As of the credibility of these quizzes, you can be specific on a particular favorite character to look for your resemblance with the same. For example, you can take the ‘Red Flag Anime Character’ quiz to examine the similarity score of your personality with this class of anime characters. Such quizzes further let you know about a variety of additional aspects that connect you with the anime akin, like whether or not you possess the evil traits associated with your favorite anime character.
Knowing your anime personality can cater additional help in some respects. You can have a walk-through of interesting ways to find solutions and alternative reactions to tackle situations like your anime character attempts to address them. To guide you further in the line of understanding the connection of personalities between you and your favorite anime character, here’s a comparison of some specific personality traits with their anime counterparts in what follows next:
Specific Personality Traits: The Pragmatic Ones
The pragmatic personality trait belongs to those who prefer a logical approach over an emotional one while making important decisions. If you have a pragmatic nature, you might stick to the straightforward attitude of looking at things, ahead of inclining towards the empathetic side. Entering into the anime world, you may find a series of characters resembling this specific aspect of your personality. One such character example is Kiritsugu Emiya from the anime series called Fate/Zero.
Talking about the character in some detail, this character has a habit of sacrificing the smaller assets while hoping for bigger and greater opportunities. The habit eventually forces him to take certain painful and unwanted decisions. Mentioning a personal aspect, this one is a relatable character trait to my own personality. Considering the fact that I myself follow the line of logic to find out solutions to challenges and situations, I bear a complete resemblance with the character.
A downside of the pragmatic traits is their double faceted appearance to the viewers in case the latter fail to interpret the character in a correct form. It is a common assumption about these characters is that they wear a pretentious form to hide the actual aspects of personality from the onlookers.
Part 3 What Anime Character Are You Based on Your Zodiac Sign?
Anime characters are known to have a significant potential to relate with peoples’ persona in real-time. Ahead of the physical features and personality, you can even use your zodiac sign to identify your anime mirror. Discussing along the line, let us talk about some of the zodiac deciding constellations and the anime characters that correspond to the same in what follows next:
01Taurus: Himsura Kenshin
Belonging to the Taurus constellation, you will have an inherent love for quietness and peace. Satisfying your love for nature, you would be more comfortable with enjoying the small pleasures of life. Talking of a relatable anime character, you bear a close resemblance with Kenshin, the main lead of the anime movie by the name Ruroni Kenshin. The latter went on to trade his murderous past to live a peaceful life in his present.
The major appeals of Kenshin’s character are a gentle and kind personality that caters to understand and care about everyone he comes across. Choosing to kill as the last option, he works to transform his sword into a no blood sucking object. Like most Taurus personalities, the only expectation Kenshin has is of leading a simple, happy and peaceful life around his loved ones.
02Gemini: L Lawliet
Being a Gemini, you may well be the master of a conflicting personality, which is commonly victimized of being misinterpreted. Possessing the strongest of thinking abilities, you might be a smart and intelligent philosopher. People belonging to this zodiac sign, however have a quite hidden out perspective of looking at the world. Being a Gemini, you may prefer being a bit antisocial person, who has his own unconventional ways of taking the challenges of life.
In the anime world, the aforesaid zodiac sign traits have the closest connections with Detective L Lawliet from the movie Death Note. The latter possesses a gray shade character, who never reveals his real motives and true colors. He often works out cunning ways and means to get something that suits his needs and wants, in line with a problem he aims to solve.
Nonetheless, Lawliet always attempts to put the well-being of the society ahead of his personal interest in solving cases. While the character is both, complex and fascinating at the same time, a comparison with the latter is an indirect way of addressing yourself as an intelligent and a goal oriented personality. You should however, take care to stop losing your self-confidence amid the process of reaching at your desired goal.
03Cancer: Takeshi Natsume
Talking of the specific characteristics of possessing a Cancarian personality, you will have a sensitive naughtiness and high level of empathy as the common aspects of your behavior. While you may encounter great difficulties to adjust with the world around you, don’t be skeptical about being alone in the race. Natsume, the title character of the anime Natsume’s Book of Friends shares this personality with you.
The striking aspect of this anime character is that its kindness remains untouched by the hardships that life has daunted upon him. The latter additionally obliges with respect towards the kindness he is showered on by other people. The thoughtful aspect of his character is however something that often works against him. The latter becomes oblivious to everything else to care about others’ feelings, making his sensitivity a cursed blessing for himself.
04Leo: Victor Nikiforov
Referred more fondly as the stylish icons among the zodiacs, Leos are the masters of a charismatic personality, who enjoy bring loved and focused on. Blessed with the power to excel on their own terms and conditions, they are habituated to tackle problems and challenges with utmost ease. Being the fiery zodiacs, the Leo personalities are best represented by Victor Nikiforov, the ice skating hero of Yuri on Ice anime.
About the specific personality traits of the character, Victor has ruled the skating world since the time when he was a mere 16 years old. The latter is amazingly talented, possesses a handsome and well groomed physique, along with a stunningly captivating personality. Ahead of all these aspects, what makes him shine so bright is his determination to achieve a place among the stars of his line and expertise.
Being a Leo, he possesses the classically romantic nature and feels not at all guilty in openly expressing his attraction towards Yuri, the female lead of the anime.
05Virgo: Yuugo Hachiken
Talking of the specific aspects of a Virgo personality, masters of this zodiac are diligent and hard workers, love to follow the methodical approach of handling things and solving problems and perform best when adhering to physically straining tasks, such as working in agriculture fields. Searching for an anime resemblance, Yuugo Hachiken from Silver Spoon is affordably the best match you can get.
Hachiken was fortunate enough to have an overly large set of materialistic achievements to his credit. The latter, however, exhausts everything to land in a traditional school, where he meets agriculture, the true love of his life. Though inexperienced in the field, he relies on the ethics and principles of his profession to counter the challenges of his new trade. He is additionally assisted by his imbibing love for nature, which is a Virgo trademark.
Part 4 Superb Sites to Create Free Anime Character Online
For Win 7 or later (64-bit)
For macOS 10.12 or later
By far, you have acquired enough knowledge and understanding of anime characters. While the information is enough to motivate you towards creating your own anime character, it becomes important to pick an affordable motion graphic design utility to begin with the process. Browsing through the IT market, you will land across a hoard of anime character generator software and application programs to choose from.
While the aforesaid alternatives have enough credibility with respect to anime character creation, the impact and performance of web based tools in addressing the concern is no less. Diverting the focus of our discussion along the same line, here’s a brief overview of some of the most popular and preferred online websites to create anime characters for free in what follows next:
01Face Your Manga
Starting the list with the best at the first, this online platform is possibly the best amine character generation tool available across the web. When attempting to create an anime avatar for yourself, landing on the site will entitle you to access the latter’s extensive library of creation features, which literally houses the whole kit and caboodle that you will ever need to craft the best anime personality.
Talking of the character centric features of the site, you are allowed to mask a real-time look on your avatar by adding birth marks, moles, blemishes, scars, third-eye and band-aids. You can additionally craft the eyebrows of your character to be in the perfect shape and setting in line with your specific preferences.
02Potrait Illustration Maker
Moving ahead, there comes the Portrait Illustration Maker website, which is quite a reliable place for working with anime character creation. The site facilitates a quick character design and is best suited for the swift graphic creators, who don’t have a lot of time to spare on crafting an anime character.
If you are more fascinated towards generating a random anime avatar, the ‘Randomizer’ option is there to help you out. All you need to do is, navigate to the respective icon, followed by tapping on the same and that it! The site works to generate an instant anime avatar for you. As of the feature bank offered by the website, you may not have a heap of customization choices at your disposal.
The website however, has an editing facility allows you to manually customize the randomly generated anime character. Additional to creating such characters, the platform grants you the liberty to share your artwork across all popular social media handles and communities.
03Marvel Superhero Avatar
The aforesaid website is a welcome gift for those who have always had a soft corner for the Marvel caricature series. Boasting itself as one among the best anime creator platforms, the latter allows you to craft amazing anime avatars, particularly those from the Marvel Superhero legacy. Packed with almost every customization feature that you will ever need, the site presents you with an expanded canvas to explore your motion graphic design creativity.
The site further lets you cross the boundaries of your imagination, while experimenting with the same to generate an anime superhero of your own. The customization tool of the website further allows you to mix and match the outlooks of the different Marvel superheroes to create a new hybrid character.
As an instance, you can integrate the features of Captain Marvel and Spider-girl, the female Marvel superheroes, into a single character. As of the male counterparts, you can try hands at integrating Spider Man and Iron Man.
Part 5 Anime Drawing Q&A
● What is the difficulty level of creating anime drawings?
However easy it may seem at the first look, crafting anime drawings is no easy thing. Before you proceed to carve out your anime art, you will essentially require a comprehensive knowledge of the various aspects of the character you choose to draw. This includes the character’s anatomy, value, perspective and features, and a series of other details.
● What is the minimum time duration required to create an anime drawing?
Anime drawings are a work of concentration and may take several hours or days to come out with perfection depending upon the complexity level. In most cases, you may finish the drawing in 10-20 hours, with a working time of 1 hour. As you cross different levels of expertise, the aforesaid duration will start appearing too small.
● Why is the accuracy factor so important in anime drawing?
Creating a detailed and accurate drawing helps to bring out the exact vision and perspective you are aiming at. This additionally proves beneficial in catering viable information about the cost constraints before you start with materializing things. This will eventually aid in keeping your construction requirements within the line of your budget, while allowing you to introduce necessary changes if need be.
● What is the cumulative count of the different styles of anime drawings?
The world of anime drawing houses a total of 22 style variants, starting from cubism and technical art, to pop art and realistic creations. There is an additional set of sub-styles in anime drawing that originate from the aforesaid classifications. As of the specific number of sub-styles, these are numerous in count, owing to the fact that the drawing preferences of different artists show significant variations. The diversity in drawing tools further adds to the variations.
● What is the significance of working with exact measurements in anime drawing?
The complete structuration of anime drawing is centered on taking accurate measurements. Being the most essential element of such drawings, a precise measurement can make your creation stand out, while a random one on the other hand, has the potential to put the same into rugs.
● Ending Thoughts →
● Anime characters are found to bear a close connection with different aspects of your personality, such as physical features, inherent traits and zodiac signs.
● There are a hoard of digital and online utilities, like quizzes and personality tests that can help you know about which anime character are you.
● If you are interested in creating your own anime character for free, there is wide range of online tools and software at your disposal.
Zoom In and Out on Snapchat
Abundant Video Effects - Wondershare Filmora
Provide abundant video effects - A creative video editor
Powerful color correction and grading
Detailed tutorials are provided by the official channel
People make Snapchat videos for various purposes, such as capturing beautiful natural scenery or a funny video of a friend. To capture the details or to focus on a specific part, the zoom in and out feature is commonly used. By doing so, you can manually focus on a particular area clearly with your fingers.
The following article will focus on how to zoom in on Snapchat by offering detailed and easy steps. Moreover, we will suggest a powerful tool that can help you in zooming in and out on Snapchat flawlessly, along with additional distinct features.
In this article
Part 1: How to Zoom In and Out a Video on Snapchat While Recording?
Part 2: How to Zoom In and Out a Pre-Recorded Video on Snapchat?
Part 3: How to Zoom In and Zoom Out Videos using Wondershare Filmora?
Part 1: How to Zoom In and Out a Video on Snapchat While Recording?
In this section, we will provide you with two methods of how to zoom in and out on Snapchat videos instantly:
Method 1: Without Locking Snapchat Recorder
Step 1: Start by opening your Snapchat from on your mobile device to access the camera screen for recording a video. Now, start capturing the video by holding the center red button from the middle of your screen.

Step 2: While holding the center recording button, use your finger and slide it in the upward direction to zoom in.

Step 3: To zoom out, use the same finger by sliding it to the bottom direction. Once done, leave the recording button by removing your finger to finish the recording. Now you can save the recorded video on Snapchat.

Method 2: By Using the Snapchat Lock Feature
Step 1: Begin with opening your Snapchat account and stay on your camera screen to record the video. Now start the recording by holding the center red button from your displayed screen.

Step 2: To “Lock” the recording, move your finger towards the left side, after which you can see the padlock icon on your screen.

Step 3: After recording the video is locked, use your two fingers simultaneously and move them apart to zoom in on the specific part. Conversely, for zooming out, use your two fingers and move them in an inward direction.

Step 4: To finalize the recording, simply tap on the recording icon, and the recording will stop. You can now edit your snap and send it to your friends or post it on your Snapchat.

Part 2: How to Zoom In and Out a Pre-Recorded Video on Snapchat?
In this section, we will offer detailed steps on how to zoom in and out on Snapchat with pre-recorded videos:
Step 1: Open your Snapchat from your smartphone and then tap on the icon showing on the left side depicting “Two Mobiles Overlapping Each Other.” From this icon, navigate to your “Camera Roll.”

Step 2: From your camera roll, choose the video you want to edit. Then click on the “Pencil” icon by going to the bottom left corner to zoom in and out on your video.

Step 3: On the next screen, you will see various editing options on the right side. Select the second last option, which is for cropping and can be used to zoom in on the videos.

Step 4: By using this selected option, you can zoom in and out on the video according to your preference. Just use your two fingers and place them on the screen. To zoom in, stretch the fingers and move them apart and control the zoom value manually.

Step 5: For zooming out, move the fingers in an inward direction. Once done with all the changes, tap on the “Tick” button. Afterward, click on the “Done” option and save the changes by tapping on “Save Changes.”

Part 3: How to Zoom In and Zoom Out Videos using Wondershare Filmora?
If you are finding it difficult how to zoom in on Snapchat effortlessly, we will recommend Wondershare Filmora as a complete toolbox for editing videos. Through this tool, you can not only flawlessly zoom in on the multiple Snapchat videos but can also perform various editing functions. The user interface is specially designed in a way to assist beginners in executing the editing process.
You can take advantage of tons of advanced features in Filmora like auto reframing, video effects, transitions, and instant mode. The user interface is so simple that within seconds you can zoom in and out on any video perfectly.
Collectively, this tool functions as a complete professional toolbox for video editing and does not require technical experience or additional tools. Steps to Zoom In and Out through Wondershare Filmora:
Step 1: Select New Project
Begin with launching Wondershare Filmora on your computer and click to open its user interface. Afterward, tap on the option “New Project” to continue with the process.

Step 2: Import your Snapchat Video
On the new window, click on the icon of the “Arrowhead” to import the video on this tool. Once done with uploading the video, drag the video to the timeline of this tool.

Step 3: Go to Transitions Tab
From the tabs displayed on the left side, navigate to the “Transitions” tab by clicking on them. On its search box, type “Zoom In Out,” and the tool will automatically fetch transitions related to it.

Step 4: Choose Transitions
From the displayed transitions, select any transition of your choice. Apply the transition to your video by dragging it to the video available on the timeline.

Step 5: Preview the video
If you find the results satisfactory in the preview window, tap on the “Export” button displayed on top and save the video on your computer.

Conclusion
Snapchat videos are highly popular due to their high-quality results and features. However, if you are struggling to focus on certain parts while recording a video through Snapchat, this article has offered a well-structured guide on how to zoom in and out on Snapchat quickly. If you are finding manual methods confusing, you can rely on the top-notch tool called Wondershare Filmora for Snapchat zoomed in.
People make Snapchat videos for various purposes, such as capturing beautiful natural scenery or a funny video of a friend. To capture the details or to focus on a specific part, the zoom in and out feature is commonly used. By doing so, you can manually focus on a particular area clearly with your fingers.
The following article will focus on how to zoom in on Snapchat by offering detailed and easy steps. Moreover, we will suggest a powerful tool that can help you in zooming in and out on Snapchat flawlessly, along with additional distinct features.
In this article
Part 1: How to Zoom In and Out a Video on Snapchat While Recording?
Part 2: How to Zoom In and Out a Pre-Recorded Video on Snapchat?
Part 3: How to Zoom In and Zoom Out Videos using Wondershare Filmora?
Part 1: How to Zoom In and Out a Video on Snapchat While Recording?
In this section, we will provide you with two methods of how to zoom in and out on Snapchat videos instantly:
Method 1: Without Locking Snapchat Recorder
Step 1: Start by opening your Snapchat from on your mobile device to access the camera screen for recording a video. Now, start capturing the video by holding the center red button from the middle of your screen.
Step 2: While holding the center recording button, use your finger and slide it in the upward direction to zoom in.
Step 3: To zoom out, use the same finger by sliding it to the bottom direction. Once done, leave the recording button by removing your finger to finish the recording. Now you can save the recorded video on Snapchat.
Method 2: By Using the Snapchat Lock Feature
Step 1: Begin with opening your Snapchat account and stay on your camera screen to record the video. Now start the recording by holding the center red button from your displayed screen.
Step 2: To “Lock” the recording, move your finger towards the left side, after which you can see the padlock icon on your screen.
Step 3: After recording the video is locked, use your two fingers simultaneously and move them apart to zoom in on the specific part. Conversely, for zooming out, use your two fingers and move them in an inward direction.
Step 4: To finalize the recording, simply tap on the recording icon, and the recording will stop. You can now edit your snap and send it to your friends or post it on your Snapchat.
Part 2: How to Zoom In and Out a Pre-Recorded Video on Snapchat?
In this section, we will offer detailed steps on how to zoom in and out on Snapchat with pre-recorded videos:
Step 1: Open your Snapchat from your smartphone and then tap on the icon showing on the left side depicting “Two Mobiles Overlapping Each Other.” From this icon, navigate to your “Camera Roll.”
Step 2: From your camera roll, choose the video you want to edit. Then click on the “Pencil” icon by going to the bottom left corner to zoom in and out on your video.
Step 3: On the next screen, you will see various editing options on the right side. Select the second last option, which is for cropping and can be used to zoom in on the videos.
Step 4: By using this selected option, you can zoom in and out on the video according to your preference. Just use your two fingers and place them on the screen. To zoom in, stretch the fingers and move them apart and control the zoom value manually.
Step 5: For zooming out, move the fingers in an inward direction. Once done with all the changes, tap on the “Tick” button. Afterward, click on the “Done” option and save the changes by tapping on “Save Changes.”
Part 3: How to Zoom In and Zoom Out Videos using Wondershare Filmora?
If you are finding it difficult how to zoom in on Snapchat effortlessly, we will recommend Wondershare Filmora as a complete toolbox for editing videos. Through this tool, you can not only flawlessly zoom in on the multiple Snapchat videos but can also perform various editing functions. The user interface is specially designed in a way to assist beginners in executing the editing process.
You can take advantage of tons of advanced features in Filmora like auto reframing, video effects, transitions, and instant mode. The user interface is so simple that within seconds you can zoom in and out on any video perfectly.
Collectively, this tool functions as a complete professional toolbox for video editing and does not require technical experience or additional tools. Steps to Zoom In and Out through Wondershare Filmora:
Step 1: Select New Project
Begin with launching Wondershare Filmora on your computer and click to open its user interface. Afterward, tap on the option “New Project” to continue with the process.
Step 2: Import your Snapchat Video
On the new window, click on the icon of the “Arrowhead” to import the video on this tool. Once done with uploading the video, drag the video to the timeline of this tool.
Step 3: Go to Transitions Tab
From the tabs displayed on the left side, navigate to the “Transitions” tab by clicking on them. On its search box, type “Zoom In Out,” and the tool will automatically fetch transitions related to it.
Step 4: Choose Transitions
From the displayed transitions, select any transition of your choice. Apply the transition to your video by dragging it to the video available on the timeline.
Step 5: Preview the video
If you find the results satisfactory in the preview window, tap on the “Export” button displayed on top and save the video on your computer.
Conclusion
Snapchat videos are highly popular due to their high-quality results and features. However, if you are struggling to focus on certain parts while recording a video through Snapchat, this article has offered a well-structured guide on how to zoom in and out on Snapchat quickly. If you are finding manual methods confusing, you can rely on the top-notch tool called Wondershare Filmora for Snapchat zoomed in.
The Ultimate Guide to Using Shotcut To Rotate Videos
Video editing has come a long way in recent years, and with the advancement of technology, it’s now easier than ever to produce high-quality videos. However, one common issue that many video editors encounter is uneven footage. Various reasons can cause this, but the solution is simple - rotating your videos. Shotcut is a powerful video editing software that provides various tools to help you rotate your videos easily.
This guide will explore the ins and outs of using Shotcut to rotate your videos. Whether you’re a seasoned editor or just starting, this guide will provide you with everything you need to know to get the perfect shot every time. This guide has everything from rotating your footage to more advanced tips and tricks. So, if you’re ready to take your video editing skills to the next level, keep reading!

Overview of Shotcut Video Editor
Shotcut is a free, open-source video editing software that offers a range of features for basic video editing. Before downloading Shotcut, it is important to know its features to determine if it suits your video editing needs. Here are the key features of Shotcut that stand out:

- Video Capture. Shotcut allows for screen and webcam capture and audio capture from the system or external microphone. It supports 4K resolution.
- Standard Editing. Shotcut allows for trimming, cutting/copying/pasting of clips and keyframes for video filters and markers. It also uses proxy editing for high-resolution video files.
- Audio Features. Shotcut includes several audio filters for enhancing audio clips and volume control, audio mixing, tone generator, and pitch adjustment options.
- Video Effects. Shotcut offers a range of effects and filters, including blending modes, track compositing, and transitions. It also supports 360-degree filters, reverse video clips, and video scopes.
- Wide Support. Shotcut supports a variety of video and audio formats, as well as photo file formats. The multi-format timeline allows for the mixing of different parameters, and the software supports network streaming and alpha-channel videos.
Shotcut is a versatile video editor that offers a range of features for basic video editing and is a great choice for those looking for a free and open-source video editor.
How To Rotate Videos in Shotcut?
Rotating videos in Shotcut is a simple process. With its user-friendly interface, you can quickly and easily adjust the orientation of your videos to get the perfect shot every time. Whether you need to rotate your footage 90 degrees or make more subtle adjustments, Shotcut has all the tools you need to get the job done.
In this section, we’ll walk you through the steps to rotate your videos in Shotcut and provide you with tips and tricks to ensure that your footage is perfectly aligned every time. So, if you’re ready to rotate your videos, let’s get started!
Step1 Start a new Shotcut project and import the video

Step2 Drag the video to the Timeline

Step3 Go to “Filters“ and press the “+” icon

Step4 Search for “Rotate“ and select “Size, Position & Rotate.”

Step5 Use the bar or enter degrees in numbers to rotate the video.

How To Mirror or Flip Videos in Shotcut?
Do you want to flip or mirror your videos in Shotcut? This feature can add a creative twist to your footage and make your videos stand out. Luckily, Shotcut makes it easy to mirror or flip your videos with just a few simple steps.
Whether you want to add a reflection effect or change the direction of your footage, Shotcut has the tools you need to get the job done. So, get ready to take your videos to the next level with Shotcut’s mirroring and flipping capabilities!
For Steps 1-3, follow the steps from the “How To Rotate Videos in Shotcut?“ section.
Step4 Search for the “Mirror“ effect.

Step5 Select the “Mirror“ effect, and your video will be automatically flipped or mirrored.

How To Make a Vertical Video Horizontal in Shotcut
Are you tired of having a vertical video that doesn’t fit the standard aspect ratio? Don’t worry; Shotcut makes it easy to convert your vertical video into a horizontal format. By converting your vertical video into a horizontal format, you’ll be able to showcase your footage in a more professional and visually appealing manner.
In this section, we’ll walk you through making your vertical video horizontal in Shotcut. With these simple steps, you’ll be able to turn your vertical footage into a horizontal masterpiece in no time!
Step1 Drag the video to the timeline

Step2 Go to “Filters“ and press the “+” icon. Search for the “Crop Source“ effect.

Step3 Toggle “Center“ and notice that it removed the black padding of the horizontal video.

Step4 Adjust the part you want your video to focus on.

Wondershare Filmora – Shotcut’s Alternative To Rotate Videos
If you’re looking for an alternative to Shotcut for rotating your videos, consider Wondershare Filmora . This powerful video editing software is packed with features and is ideal for both beginners and professionals. While Shotcut is a great option for rotating videos, Filmora offers additional capabilities that make it an excellent choice for those who need a more advanced video editing solution.
Free Download For Win 7 or later(64-bit)
Free Download For macOS 10.14 or later

With Wondershare Filmora, you’ll be able to rotate your videos with ease, as well as perform a variety of other editing tasks. From adding music, filters, and text to splitting, trimming, and merging videos, Filmora has you covered.
Additionally, you’ll enjoy the user-friendly interface of Filmora that makes it easy to navigate and find the features you need. Whether you’re just starting with video editing or are a seasoned professional, Wondershare Filmora is the perfect solution for rotating videos and more.
How To Rotate or Flip a Video With Wondershare Filmora?
Wondershare Filmora is a great alternative to Shotcut for those looking to rotate or flip their video clips. It offers an intuitive and user-friendly interface, making rotating or flipping a video simple.
To mirror your video in Filmora, you follow a few easy steps. Whether you want to flip your video horizontally or vertically, Filmora’s rotating tool will help you achieve the perfect reflection with just a few clicks.
In addition to its rotating capabilities, Wondershare Filmora also offers a wide range of features for video editing. From basic video editing tools like trimming and cutting to advanced features like color correction and audio editing, Filmora has everything you need to take your video projects to the next level.
With its user-friendly interface and comprehensive feature set, Wondershare Filmora is a great option for anyone looking for an alternative to Shotcut for their video editing needs.
Step1 Choose between “Flip Horizontal“ or “Flip Vertical“ in the “Flip“ section to mirror the clip left to right or turn it upside down.

Step2 Select either the “Clockwise“ or “Counterclockwise“ icon under the “Rotate“ section to rotate the clip.

Step3 Enter a specific angle value in the “Rotate“ tab or adjust the dot in the circle to reach the desired rotation angle.

How To Make a Vertical Video Horizontal With Filmora?
Are you looking for a solution to convert a vertical video into a horizontal one? Filmora is a great video editing software that can help you do that!
Step1 Launch Filmora and import the video.

Step2 Drag the video to the timeline.

Step3 Right-click on the video and then click on “Crop and Zoom.”

Step4 Click on the “Aspect Ratio“ option and change it to “16:9.”

Step5 Keep the video part that you want to focus on, then click “OK.”
Step6 Your vertical video is now horizontal.
Conclusion
Rotating a video in Shotcut or Wondershare Filmora is a simple process. Both video editing software provides a user-friendly interface and various options to achieve the desired result. Shotcut and Filmora can help you achieve the perfect reflection with a few clicks, whether you want to rotate, flip, or make a horizontal or vertical video. So, choose the one that fits your needs and start creating stunning videos.
Free Download For macOS 10.14 or later
With Wondershare Filmora, you’ll be able to rotate your videos with ease, as well as perform a variety of other editing tasks. From adding music, filters, and text to splitting, trimming, and merging videos, Filmora has you covered.
Additionally, you’ll enjoy the user-friendly interface of Filmora that makes it easy to navigate and find the features you need. Whether you’re just starting with video editing or are a seasoned professional, Wondershare Filmora is the perfect solution for rotating videos and more.
How To Rotate or Flip a Video With Wondershare Filmora?
Wondershare Filmora is a great alternative to Shotcut for those looking to rotate or flip their video clips. It offers an intuitive and user-friendly interface, making rotating or flipping a video simple.
To mirror your video in Filmora, you follow a few easy steps. Whether you want to flip your video horizontally or vertically, Filmora’s rotating tool will help you achieve the perfect reflection with just a few clicks.
In addition to its rotating capabilities, Wondershare Filmora also offers a wide range of features for video editing. From basic video editing tools like trimming and cutting to advanced features like color correction and audio editing, Filmora has everything you need to take your video projects to the next level.
With its user-friendly interface and comprehensive feature set, Wondershare Filmora is a great option for anyone looking for an alternative to Shotcut for their video editing needs.
Step1 Choose between “Flip Horizontal“ or “Flip Vertical“ in the “Flip“ section to mirror the clip left to right or turn it upside down.
Step2 Select either the “Clockwise“ or “Counterclockwise“ icon under the “Rotate“ section to rotate the clip.
Step3 Enter a specific angle value in the “Rotate“ tab or adjust the dot in the circle to reach the desired rotation angle.
How To Make a Vertical Video Horizontal With Filmora?
Are you looking for a solution to convert a vertical video into a horizontal one? Filmora is a great video editing software that can help you do that!
Step1 Launch Filmora and import the video.
Step2 Drag the video to the timeline.
Step3 Right-click on the video and then click on “Crop and Zoom.”
Step4 Click on the “Aspect Ratio“ option and change it to “16:9.”
Step5 Keep the video part that you want to focus on, then click “OK.”
Step6 Your vertical video is now horizontal.
Conclusion
Rotating a video in Shotcut or Wondershare Filmora is a simple process. Both video editing software provides a user-friendly interface and various options to achieve the desired result. Shotcut and Filmora can help you achieve the perfect reflection with a few clicks, whether you want to rotate, flip, or make a horizontal or vertical video. So, choose the one that fits your needs and start creating stunning videos.
A Complete Guide to Use Distortion Effect in Premiere Pro
Create High-Quality Video - Wondershare Filmora
An easy and powerful YouTube video editor
Numerous video and audio effects to choose from
Detailed tutorials are provided by the official channel
Premiere Pro is one of the most popular timeline-based video editing software, with over 9 million users. It’s the successor to Adobe Premiere, and it comes with cool distortion effects. We’ll look at Premiere Pro distortion effects and how to use them.
In this article
01 How to Use Distortion Effect in Premiere Pro?
02 Bonus! Free Distortion Effects for Premiere Pro
Adobe Premiere Pro offers a wide variety of beneficial editing tools and effects. Below are some of the impressive distortion effects you’ll find in Premiere Pro and how to use them in your project.
1. Corner Pin Effect
This effect distorts your image by simply changing the position of its corners. You can use the Corner pin effect to twist, skew, shrink, or stretch an image. Additionally, you can use it to simulate movement or perspective pivoting from the edge of your clip like a door opening.
You can directly manipulate the properties of the Corner Pin effect in the Program monitor by clicking the Transform right next to Corner Pin. To adjust the properties, drag one of the corner handles.
- To use this effect, open Premiere Pro and click File. Choose Import from the drop-down menu. The File Explorer window will open and allow you to find your footage. Select the video file you want to import, then click Open.
- Go to Effects Control and click Distortion. Choose Corner Pin Effect from the drop-down menu.

- You can now pin each corner from its original point to another specific point by adjusting the slider on the Upper Left, Upper Right, Lower Left, and Lower Right. You can also highlight your selection tool when working with the Corner Pin effect.

2. Lens Distortion Effect
This distortion effect Premiere Pro simulates the distorted lens through which people view the clip.
1. Go to Effects Control>Distortion>Lens Distortion Effect.
2. Choose the settings you want to use from the available options and adjust the slider.
- The Vertical and Horizontal Decentering control displaces the lens’ focal and makes the image bend and smear. The image will wrap in on itself at extreme settings.
- The Curvature setting alters the curvature of the lens. You can specify a positive value to make the image convex, while the negative value makes the image concave.
- The Vertical and Horizontal Prism FX setting created results similar to horizontal decentering and vertical, but the image does not wrap in on itself at extreme values.
- Use the Fill Color option to specify the background color, and Fill Alpha to make your background transparent.

3. Magnify Effect
This effect allows you to enlarge a selected area of your clip. The Magnify effect acts as a magnifying glass set over an area of an image. You can also use this effect to scale the whole image far beyond 100 percent and still maintain resolution.
1. To use this effect, go to Effect Control>Distortion>Magnify.
2. Next, go to the left side of the Effects Control panel and make the necessary adjustments to suit your preferences.
- Shape: This control specifies the magnified area shape.
- Center: The Center control allows you to specify the center of the magnified section.
- Magnification: This setting lets users specify the percentage of the magnification of the area they have selected, while the values represent the scale percentage.
- Link: The Link control allows you to specify how the effect will link the Size, Feather, and Magnification amount, to enable them to decrease or increase proportionally. You will disable the Resize Layer option if you set the Link control to any of the available settings except None. Setting the Link control to any setting except None disables Resize Layer. Size & Feather To Magnification allows you to specify that the edge feather and size of the magnified section decrease or increase proportionally regarding the magnification adjustment.
- Size: This control allows you to specify the magnified area size in pixels.
- Feather: With the Feather option, you can specify the amount of feather the effect applies to the magnified area edge. Lower values will sharpen the edge. Higher values will soften the edge while blending the edge with the layer that’s behind it.
- Opacity: This control allows you to specify the transparency of the magnified region.
- Scaling: Use this option to specify the kind of scaling the effect is using to magnify an image.
- Blending Mode: Use this control to specify the blend mode the effect will use to combine the original clip with the magnified area. The None option shows transparent pixels around the magnified section.
- Resize Layer: Selecting this option means the effect will only use the boundaries as the clip’s edge when the magnified region extends beyond the original boundaries of the clip. Deselecting the Resize Layer means that the boundaries of the clip will crop any area of your image outside the bounding box of the original clip.

4. Mirror Effect
This distortion Premiere Pro effect splits an image along a line while reflecting one side onto the other. Where the reflection appears and which side will be reflected is determined by the reflection angles.
1. Head over to Effect Control>Distortion>Mirror to use this effect.
2. Adjust the controls until you get the results you desire.
- Reflection Angle: With the Reflection Angle control, you can specify the angle of reflection and where it appears on the clip. A zero-degree angle reflects the left-hand side on the right.
- Reflection Center: This control allows you to specify the position of the line. You need to click the box, then drag the resulting crosshair up to the area in the image where you would like to place the line.

5. Offset Effect
This effect pans your image within a clip, and visual details pushed off one side of this image will appear on the opposite side. You have to perform the offset with subpixel precision at the best quality.
Also, you can use Offset with a combination of other effects. Head over to Effect Control>Distortion>Offset to use this effect.

6. Spherize Effect
The Spherize effect allows users to wrap a video clip around a spherical shape. You can use it to give texts and objects a three-dimensional effect. Go to Effect Control>Distortion>Spherize and adjust the radius and center of the sphere.

7. Transform Effect
This effect applies 2-dimensional geometric transformations to your clip. You can use this effect to skew clips along any axis.
1. Go to Effect Control>Distortion>Transform to apply this effect to your clip.
2. Use Transform settings to adjust Opacity, Skew, Rotation, Scale, Anchor Point, and more.

8. Turbulent Displace Effect
This fun effect utilizes fractal noise to create turbulent Premiere Pro distortion effects in your image. You can use the Turbulent Displace effect to add movement to your clip.
1. Head to Effect Control>Distortion>Turbulent Displace.
2. Adjust the following controls:
- Displacement
- Amount
- Size
- Offset (Turbulence)
- Complexity
- Evolution
- Pinning
- Resize Layer
- Antialiasing For Best Quality

9. Twirl Effect
The Twirl effect allows you to rotate your clip around its center. It rotates the image more sharply in the middle than at the edge. You can use it on faces to make a funny clip. Navigate to Effect Control>Distortion>Twirl to start using this effect. Next, use the settings to adjust how much angle it twirls and the radius.

10. Wave Warp Effect
This effect is one of the most popular Premiere Pro distortion effects. It generates the appearance of a wave as it’s traveling across an image. The Wave Warp effect allows you to produce various wave shapes, including sine, circular, and square waves.
It’s automatically animated at a steady speed across the time range, and that’s without frames. You need to set keyframes to vary speeds.
1. Head to Effect Control>Distortion>Wave Warp to apply this effect in your video clip.
2. Now, change the wave speed, direction, height, width, and type to suit your preference.

Bonus! Free Distortion Effects for Premiere Pro
1. Liquid Distortion Effect
This effect can distort the content in a clip and can be used to shift into the next clip. It could be utilized in editing or used as a transition.

2. Earthquake Effect
This effect adds a shaking motion to the video clip you add it to; it works as a transition but could also be a useful editing tool.

3. Glass Effect
This effect can add various blurs to the video clip and be used to transition from one clip to the next.

4. TV Effect
This effect imitates the view of a television being turned on or off. You can use it to introduce a new video clip. It would also be a great start or end to the entire video.

5. Glitch Effect
This effect adds a glitch to the video clip. You can use it in editing or as a transition from one clip to the next.

Conclusion
● You can add any of these Premiere Pro distortion effects to make your videos more catchy. In turn, they will get more attention and views. Premiere Pro comes with tons of distortion effects and a responsive interface.
Premiere Pro is one of the most popular timeline-based video editing software, with over 9 million users. It’s the successor to Adobe Premiere, and it comes with cool distortion effects. We’ll look at Premiere Pro distortion effects and how to use them.
In this article
01 How to Use Distortion Effect in Premiere Pro?
02 Bonus! Free Distortion Effects for Premiere Pro
Adobe Premiere Pro offers a wide variety of beneficial editing tools and effects. Below are some of the impressive distortion effects you’ll find in Premiere Pro and how to use them in your project.
1. Corner Pin Effect
This effect distorts your image by simply changing the position of its corners. You can use the Corner pin effect to twist, skew, shrink, or stretch an image. Additionally, you can use it to simulate movement or perspective pivoting from the edge of your clip like a door opening.
You can directly manipulate the properties of the Corner Pin effect in the Program monitor by clicking the Transform right next to Corner Pin. To adjust the properties, drag one of the corner handles.
- To use this effect, open Premiere Pro and click File. Choose Import from the drop-down menu. The File Explorer window will open and allow you to find your footage. Select the video file you want to import, then click Open.
- Go to Effects Control and click Distortion. Choose Corner Pin Effect from the drop-down menu.
- You can now pin each corner from its original point to another specific point by adjusting the slider on the Upper Left, Upper Right, Lower Left, and Lower Right. You can also highlight your selection tool when working with the Corner Pin effect.
2. Lens Distortion Effect
This distortion effect Premiere Pro simulates the distorted lens through which people view the clip.
1. Go to Effects Control>Distortion>Lens Distortion Effect.
2. Choose the settings you want to use from the available options and adjust the slider.
- The Vertical and Horizontal Decentering control displaces the lens’ focal and makes the image bend and smear. The image will wrap in on itself at extreme settings.
- The Curvature setting alters the curvature of the lens. You can specify a positive value to make the image convex, while the negative value makes the image concave.
- The Vertical and Horizontal Prism FX setting created results similar to horizontal decentering and vertical, but the image does not wrap in on itself at extreme values.
- Use the Fill Color option to specify the background color, and Fill Alpha to make your background transparent.
3. Magnify Effect
This effect allows you to enlarge a selected area of your clip. The Magnify effect acts as a magnifying glass set over an area of an image. You can also use this effect to scale the whole image far beyond 100 percent and still maintain resolution.
1. To use this effect, go to Effect Control>Distortion>Magnify.
2. Next, go to the left side of the Effects Control panel and make the necessary adjustments to suit your preferences.
- Shape: This control specifies the magnified area shape.
- Center: The Center control allows you to specify the center of the magnified section.
- Magnification: This setting lets users specify the percentage of the magnification of the area they have selected, while the values represent the scale percentage.
- Link: The Link control allows you to specify how the effect will link the Size, Feather, and Magnification amount, to enable them to decrease or increase proportionally. You will disable the Resize Layer option if you set the Link control to any of the available settings except None. Setting the Link control to any setting except None disables Resize Layer. Size & Feather To Magnification allows you to specify that the edge feather and size of the magnified section decrease or increase proportionally regarding the magnification adjustment.
- Size: This control allows you to specify the magnified area size in pixels.
- Feather: With the Feather option, you can specify the amount of feather the effect applies to the magnified area edge. Lower values will sharpen the edge. Higher values will soften the edge while blending the edge with the layer that’s behind it.
- Opacity: This control allows you to specify the transparency of the magnified region.
- Scaling: Use this option to specify the kind of scaling the effect is using to magnify an image.
- Blending Mode: Use this control to specify the blend mode the effect will use to combine the original clip with the magnified area. The None option shows transparent pixels around the magnified section.
- Resize Layer: Selecting this option means the effect will only use the boundaries as the clip’s edge when the magnified region extends beyond the original boundaries of the clip. Deselecting the Resize Layer means that the boundaries of the clip will crop any area of your image outside the bounding box of the original clip.
4. Mirror Effect
This distortion Premiere Pro effect splits an image along a line while reflecting one side onto the other. Where the reflection appears and which side will be reflected is determined by the reflection angles.
1. Head over to Effect Control>Distortion>Mirror to use this effect.
2. Adjust the controls until you get the results you desire.
- Reflection Angle: With the Reflection Angle control, you can specify the angle of reflection and where it appears on the clip. A zero-degree angle reflects the left-hand side on the right.
- Reflection Center: This control allows you to specify the position of the line. You need to click the box, then drag the resulting crosshair up to the area in the image where you would like to place the line.
5. Offset Effect
This effect pans your image within a clip, and visual details pushed off one side of this image will appear on the opposite side. You have to perform the offset with subpixel precision at the best quality.
Also, you can use Offset with a combination of other effects. Head over to Effect Control>Distortion>Offset to use this effect.
6. Spherize Effect
The Spherize effect allows users to wrap a video clip around a spherical shape. You can use it to give texts and objects a three-dimensional effect. Go to Effect Control>Distortion>Spherize and adjust the radius and center of the sphere.
7. Transform Effect
This effect applies 2-dimensional geometric transformations to your clip. You can use this effect to skew clips along any axis.
1. Go to Effect Control>Distortion>Transform to apply this effect to your clip.
2. Use Transform settings to adjust Opacity, Skew, Rotation, Scale, Anchor Point, and more.
8. Turbulent Displace Effect
This fun effect utilizes fractal noise to create turbulent Premiere Pro distortion effects in your image. You can use the Turbulent Displace effect to add movement to your clip.
1. Head to Effect Control>Distortion>Turbulent Displace.
2. Adjust the following controls:
- Displacement
- Amount
- Size
- Offset (Turbulence)
- Complexity
- Evolution
- Pinning
- Resize Layer
- Antialiasing For Best Quality
9. Twirl Effect
The Twirl effect allows you to rotate your clip around its center. It rotates the image more sharply in the middle than at the edge. You can use it on faces to make a funny clip. Navigate to Effect Control>Distortion>Twirl to start using this effect. Next, use the settings to adjust how much angle it twirls and the radius.
10. Wave Warp Effect
This effect is one of the most popular Premiere Pro distortion effects. It generates the appearance of a wave as it’s traveling across an image. The Wave Warp effect allows you to produce various wave shapes, including sine, circular, and square waves.
It’s automatically animated at a steady speed across the time range, and that’s without frames. You need to set keyframes to vary speeds.
1. Head to Effect Control>Distortion>Wave Warp to apply this effect in your video clip.
2. Now, change the wave speed, direction, height, width, and type to suit your preference.
Bonus! Free Distortion Effects for Premiere Pro
1. Liquid Distortion Effect
This effect can distort the content in a clip and can be used to shift into the next clip. It could be utilized in editing or used as a transition.
2. Earthquake Effect
This effect adds a shaking motion to the video clip you add it to; it works as a transition but could also be a useful editing tool.
3. Glass Effect
This effect can add various blurs to the video clip and be used to transition from one clip to the next.
4. TV Effect
This effect imitates the view of a television being turned on or off. You can use it to introduce a new video clip. It would also be a great start or end to the entire video.
5. Glitch Effect
This effect adds a glitch to the video clip. You can use it in editing or as a transition from one clip to the next.
Conclusion
● You can add any of these Premiere Pro distortion effects to make your videos more catchy. In turn, they will get more attention and views. Premiere Pro comes with tons of distortion effects and a responsive interface.
Also read:
- Updated In 2024, Unlock Your Video Editing Potential With Wondershare Filmora
- Updated Create the Stranger Things Upside Down Effect Video
- Updated 2024 Approved 12 Best GIF Editors to Use
- Updated In 2024, How to to Mimic Professional Filming Gears
- Learn How to Make Interactive and Fun Video Collages Using Kapwing Collage Maker, an Easy-to-Use Tool for All Your Collage-Making Needs for 2024
- New 12 Best Picks of Video Enhancer Software
- Do You Know How to Create Video Loops on PowerPoint? If Not Then Read This Article to Learn More Details
- If You Dont Know How to Blur a Part of a Video, Youre in the Right Place. We Have Provided All the Details You Need to Help You Blur a Still or Moving Portion of Your Video
- New In 2024, Do You Want to Record Videos with a Phantom High-Speed Camera? In This Guide, You Can Get a Detailed Note on the Phantom Camera
- In 2024, Learning How to Slow Down a Video on iPhone Properly
- New How to Use Canva Color Match for 2024
- Updated In 2024, If You Want to Add an Effect Like a VHS Overlay Free Effect to Enhance Your Videos, You Can Do It on After Effects. Read More to Learn How
- New 2024 Approved The Audio You Produce Will Inevitably Be Flawed Throughout the Production Process. So, Learn How Adobe Audition Removes Echo to Sound Better Instead of Throwing It Away
- Final Cut Pro - How to Download and Install It
- New This Article Discusses the Splitting of the Video Clips in DaVinci Resolve Explicitly. There Is Also a Brief Description of Its Best Alternative, Wondershare Filmora. This Is Also Practically Relevant and Reasonable as Well
- How To Make An Interactive Quiz Video? Step-by-Step Guide for 2024
- New How to Make Discord GIF PFP
- 2024 Approved The Best 10 AI Video Analytics Companies at a Glance
- New Top Free Video Editing Software Enhance Your Content with These Essential Tools
- Updated 2024 Approved 8 Tips to Apply Cinematic Color Grading to Your Videos
- New What Is the Best FPS for YouTube Videos?
- New In 2024, Troubleshoot Snapchat Camera Zoomed in Issue 4 Tips
- Quick Answer Why Did Filmora AI Portrait Attract People for 2024
- How to Create Motion Text Effects for Your Video for 2024
- New Easy Step by Step Tutorial on Creating a Lightroom Collage for 2024
- In 2024, Create Glitch Text Effect
- Updated 2024 Approved Step by Step to Rotate Videos Using OBS
- New Best 5 Tools to Help You Know More Freeze-Frame Video Editing Skills
- New 2024 Approved Are You Seeking an Answer for What Is a LUT in the Video? In This Article, We Will Provide You with Detailed Information About LUTs and Their Utility
- New In 2024, Step by Step to Rotate Videos Using OBS
- In 2024, Best CapCut Templates for Slow Motion Video Trend
- 2024 Approved Do You Want to Make TikTok Videos More Elemental by Using Countdown but Dont Know How to Do This? Here We Will Thoroughly Guide You About This
- In 2024, How to Remove Apple iPhone 13 Activation Lock
- In 2024, Samsung Galaxy S24+ ADB Format Tool for PC vs. Other Unlocking Tools Which One is the Best?
- In 2024, How to Unlock iPhone 14 Pro Without Passcode?
- 7 Solutions to Fix Error Code 963 on Google Play Of Honor 90 GT | Dr.fone
- 3 Things You Must Know about Fake Snapchat Location On Realme Narzo 60 Pro 5G | Dr.fone
- Everything To Know About Apple ID Password Requirements For iPhone 6s Plus
- Two Ways to Track My Boyfriends Nokia XR21 without Him Knowing | Dr.fone
- 5 Easy Ways to Change Location on YouTube TV On Itel A60s | Dr.fone
- Ultimate Guide to Free PPTP VPN For Beginners On Apple iPhone X | Dr.fone
- Top 11 Free Apps to Check IMEI on OnePlus 11 5G Phones
- How to Remove iPhone 7 Plus Activation Lock
- In 2024, Hassle-Free Ways to Remove FRP Lock on Xiaomi 13T Phones with/without a PC
- In 2024, How to Unlock iCloud Activation Lock and iCloud Account From iPhone 8 Plus?
- Full Solutions to Fix Error Code 920 In Google Play on Oppo Reno 11F 5G | Dr.fone
- In 2024, Best Itel S23 Pattern Lock Removal Tools Remove Android Pattern Lock Without Losing Data
- In 2024, Change Location on Yik Yak For your Apple iPhone 15 to Enjoy More Fun | Dr.fone
- In 2024, The Complete Guide to Infinix Hot 40 Pro FRP Bypass Everything You Need to Know
- In 2024, New Multiple Ways How To Remove iCloud Activation Lock From your Apple iPhone 6s
- How To Transfer Data From Apple iPhone 12 Pro Max To Others devices? | Dr.fone
- Updated In 2024, Ultimate Guide How to Live Stream on Facebook?
- How to retrieve erased videos from G54 5G
- Title: What Anime Character Are You Look Like?
- Author: Morgan
- Created at : 2024-05-19 05:11:41
- Updated at : 2024-05-20 05:11:41
- Link: https://ai-video-editing.techidaily.com/what-anime-character-are-you-look-like/
- License: This work is licensed under CC BY-NC-SA 4.0.
