

What Is Lumetri Color and How Do You Use It in Adobe After Effects? Find Out the Numerous Functions of Lumetri Panel and Ways to Apply Them to Your Video
What Is Lumetri Color and How Do You Use It in Adobe After Effects? Find Out the Numerous Functions of Lumetri Panel and Ways to Apply Them to Your Video
Create High-Quality Video - Wondershare Filmora
An easy and powerful YouTube video editor
Numerous video and audio effects to choose from
Detailed tutorials provided by the official channel
When going forth with film post-production, video game creation, and television production, almost every video editor’s goal is to produce outstanding results. Usually, this cannot be achieved by using mediocre tools. One of the top-notch software video editors need to use is Adobe After Effect. Adobe After Effect is a motion graphics, digital visual effect, and compositing application developed by the Adobe system.
Adobe After Effects has tons of tools, and an exceptional one is a Lumetri color. With this functionality, you can easily carry out your color correction and color grading. Read this article and get to the bottom line on how to use Lumetri Color in Adobe After Effects.
Let’s dig in!
In this article
01 Does After Effects have Lumetri Color?
02 How to use Lumetri Color in Adobe After Effects
03 Is there a simple way to Unionise the Color of my Video?
Does After Effects have Lumetri Color?
Yes, there is lumetri color in After Effects. Lumetri Color allows you to adjust contrast, light, and color to your video based on your preference. With After Effects, you can carry out various color customizations in the Lumerti panel without exiting your current project.
Furthermore, the Lumetri color panel in Adobe After Effects allows you to export your settings to another different premiere pro project wholly. Usually, the file is exported as a .cube file – This relieves you from the wearisomeness of creating new grading features.
How to use Lumetri Color in Adobe After Effects
You don’t need to be a pro for you to use Lumetri Color in Adobe After Effects. The color workspace in Adobe After Effect is designed to be straightforward and user-friendly.
The Lumetri Color panel in Adobe contains the histogram, vectorscope, parade scope, and waveform monitor. The histogram, parade scope, and waveform monitor display image intensity, whereas the vectorscope display hue and color saturation.
Lumetri Color is considered an ultimate choice by most editors due to its wide range of functionalities. Some of the functionalities in the Lumetri panel include:
1. Vignettes
Vignette is an outstanding feature that effortlessly allows Lumetri users to adjust lightness and darkness using sliders.
Vignettes allow you to darken the borders and highlight certain parts. You will therefore create more emphasis on highlighted parts in your clip.
2. HSL Secondary
When you want to get exceptional footage controls, HSL Secondary (Hue, Saturation, and Luminance) is often the best functionality. HSL Secondary easily separates your footage and works on a selected piece.
With the functionality, you can easily manipulate the skin tones in your footage and refocus images.

3. Curves
The Lumetri panel in Adobe After Effects renders its users the curves functionality. There are two curves in the Lumetri Panel, i.e., Hue Saturation curves and luminesce curves.
The Hue/Saturation curve uses the red, green, and blue (RBG) flagship, whereas the luminance curve helps manage the frame curve’s tone.

4. Fx Bypass
Fx Bypass is a new functionality feature in the Lumetri panel. It allows you to bypass and reset effects without switching to the controls panel.
How to use Lumetri Color
With your Adobe After Effects, you can make quick and advanced color changes to your clips. Here are the simple steps on how to use Lumetri Color.
Step 1. Add your footage to the timeline
First, open your Adobe After Effect and add your video file to the software. Drag and drop to add it to the timeline.

Step 2. Open Lumetri Color
Here, you highlight your video in the timeline, then head over to the “Window” menu. From the drop-down menu, select “Effects & presets” > “Lumetri Color.”
Alternatively, you can go to the “Effects” menu, which is at the left-hand side of your interface, then select “Color Correction”> “Lumetri Color.”

Step 3. Carry out your Color Grading and Saturation
With the “Lumetri Color” functionality, you can carry out various adjustable settings such as tone, hue, saturation and color grading.
To carry out saturation:
Click on the “ Hue/Saturation “ from the drop-down menu in “Lumetri Color.” You can change the color of the entire footage by adjusting the “Master Hue” from the Effects Control Panel.
Alternatively, you can opt to fine-tune the freshly selected color by using the “Master Saturation” and Master Lightness.”
To carry out color grading:
- After opening the “Lumetri Color” panel as in step 2 above, click on the eyedropper to select the curve you want to use.
- Click the color in your footage that you wish to adjust. Usually, when you use the eyedropper, three points will be added to the graph. The two bottom points restrict color selection to a minimum range, whereas the first represents your selected color.
How to Use Lumetri Scope
Besides the Lumetric Color, Lumetric Scope is another essential tool for post-film production in Adobe After Effects. The color correcting tool, Lumetric scope guarantees its users’ accurate results when used correctly.
When carrying out color corrections in films, it is advisable to use quality monitor calibrators and paint your workspace walls neutral grey. Usually, it reduces lighting distraction and the external color effect, respectively.
However, not every editor can meet all the required basics, and that is where Lumetri scope comes in. Lumetri Scope allows one to get the best color results in their videos. Here are the steps on how to use Lumetri Scope:

Step 1. Open Lumetric Scope
First, open your Adobe After Effect application and add your footage to the timeline. Go to the “ Window “ menu at the top-left-hand side of your interface.
In the drop-down menu, select “Lumetri Scopes” or “Workspaces,” then click on the “Color” option.
The Lumetri Scope tab will be displayed adjacent to the timeline footage.
Step 2. Evaluate Hue and Saturation using Vectorscope
In the Lumetri Scope tab, click on the wrench icon, and a drop-down menu will be displayed. From the menu, select “Vectorscope YUV” and read the saturation. When reading saturation, begin from the center going outwards.
Hue, on the other hand, is read in a circular direction.

Step 3. Evaluate the tonal values and Brightness using Histogram
The histogram in Lumetri Scope displays an image’s tonal values and brightness levels.
To measure the brightness and tonal values, go back to the Lumetri Scope panel and click on the wrench icon. Click on “Presets” from the drop-down menu and select “Histogram.”
The scale in the histogram starts from 0 (pure black) to 225 (pure white). You, therefore, need to view the number of pixels for every color horizontally when reading.

Step 4. Evaluate Color and Brightness Intensities using Waveform Monitor
The color and brightness are read from the bottom to the top in the waveform monitor.
Click on the wrench icon to view the intensities, then pick the “Presets” option > “Waveform RBG.” A drop-down menu (RGB, YC, Luma, and YC no Chroma) will be displayed that allows you to do the readings.
Reading the IRE scale is usually done in ascension (0 to 100).

Step 5. Evaluate the Individual color channels using Parade Scope
Here, click on the wrench icon in the Lumetri Scopes panel, then select the “Presets”> “Parade RGB.” Select from the alternate Lumetri scope combinations of RGB, RGB-White, YUV, YUV white.
Is there a simple way to Unionise the Color of my Video?
Have you tried color grading and color correction in Lumetri using Adobe After Effects, but your efforts are bearing no fruits? It would be best not to worry since there is a simple way out. So, Yes! There is a simple way to unionize the color of your video – it is by using Wondershare Filmora .
Wondershare Filmora is a professional application to edit videos with a wide range of tools that allows its users to create stunning videos with ease. From its simple and intuitive design to its wide range of functionalities and affordability, Filmora users have every reason to stick to the software.
Some of the functionality features that make Wondershare Filmora easy to use include:
Curve Section
Filmora has way simpler curves than Adobe After Effects. Filmora has two presets, i.e., One that creates an S-curve over the graph, and the other resets graph to a straight linear line. Usually, the S-curve represents soft contrasts.
YUV color correction
The YUV color correction feature in Filmora functions straightforwardly when compared to Adobe After Effects. The Y and V channels in Filmora stores color data, whereas the U channel carries the brightness data. Editors find it effortlessly using the YUV color correction in Filmora.
Hue and Saturation
Hue, saturation, and lightness levels in Wondershare Filmora are undeniably very easy to understand unline other premiere software applications.
In Filmora, the Hue shift plays an essential role in shuffling the colors, whereas the Saturation defines the overall intensity of colors in an image.
For Win 7 or later (64-bit)
For macOS 10.12 or later
Conclusion
● With the above illustrations, you need not find it challenging to use Lumetri Color in Adobe After Effect. But if you are getting your head stuck when using Adobe After Effects, you need not stress out. There is an ultimate solution, and that is Wondershare Filmora. Incorporate this easy-to-use and pocket-friendly software in your edits. Besides, you will not have to go through the user guide to get started.
When going forth with film post-production, video game creation, and television production, almost every video editor’s goal is to produce outstanding results. Usually, this cannot be achieved by using mediocre tools. One of the top-notch software video editors need to use is Adobe After Effect. Adobe After Effect is a motion graphics, digital visual effect, and compositing application developed by the Adobe system.
Adobe After Effects has tons of tools, and an exceptional one is a Lumetri color. With this functionality, you can easily carry out your color correction and color grading. Read this article and get to the bottom line on how to use Lumetri Color in Adobe After Effects.
Let’s dig in!
In this article
01 Does After Effects have Lumetri Color?
02 How to use Lumetri Color in Adobe After Effects
03 Is there a simple way to Unionise the Color of my Video?
Does After Effects have Lumetri Color?
Yes, there is lumetri color in After Effects. Lumetri Color allows you to adjust contrast, light, and color to your video based on your preference. With After Effects, you can carry out various color customizations in the Lumerti panel without exiting your current project.
Furthermore, the Lumetri color panel in Adobe After Effects allows you to export your settings to another different premiere pro project wholly. Usually, the file is exported as a .cube file – This relieves you from the wearisomeness of creating new grading features.
How to use Lumetri Color in Adobe After Effects
You don’t need to be a pro for you to use Lumetri Color in Adobe After Effects. The color workspace in Adobe After Effect is designed to be straightforward and user-friendly.
The Lumetri Color panel in Adobe contains the histogram, vectorscope, parade scope, and waveform monitor. The histogram, parade scope, and waveform monitor display image intensity, whereas the vectorscope display hue and color saturation.
Lumetri Color is considered an ultimate choice by most editors due to its wide range of functionalities. Some of the functionalities in the Lumetri panel include:
1. Vignettes
Vignette is an outstanding feature that effortlessly allows Lumetri users to adjust lightness and darkness using sliders.
Vignettes allow you to darken the borders and highlight certain parts. You will therefore create more emphasis on highlighted parts in your clip.
2. HSL Secondary
When you want to get exceptional footage controls, HSL Secondary (Hue, Saturation, and Luminance) is often the best functionality. HSL Secondary easily separates your footage and works on a selected piece.
With the functionality, you can easily manipulate the skin tones in your footage and refocus images.
3. Curves
The Lumetri panel in Adobe After Effects renders its users the curves functionality. There are two curves in the Lumetri Panel, i.e., Hue Saturation curves and luminesce curves.
The Hue/Saturation curve uses the red, green, and blue (RBG) flagship, whereas the luminance curve helps manage the frame curve’s tone.
4. Fx Bypass
Fx Bypass is a new functionality feature in the Lumetri panel. It allows you to bypass and reset effects without switching to the controls panel.
How to use Lumetri Color
With your Adobe After Effects, you can make quick and advanced color changes to your clips. Here are the simple steps on how to use Lumetri Color.
Step 1. Add your footage to the timeline
First, open your Adobe After Effect and add your video file to the software. Drag and drop to add it to the timeline.
Step 2. Open Lumetri Color
Here, you highlight your video in the timeline, then head over to the “Window” menu. From the drop-down menu, select “Effects & presets” > “Lumetri Color.”
Alternatively, you can go to the “Effects” menu, which is at the left-hand side of your interface, then select “Color Correction”> “Lumetri Color.”
Step 3. Carry out your Color Grading and Saturation
With the “Lumetri Color” functionality, you can carry out various adjustable settings such as tone, hue, saturation and color grading.
To carry out saturation:
Click on the “ Hue/Saturation “ from the drop-down menu in “Lumetri Color.” You can change the color of the entire footage by adjusting the “Master Hue” from the Effects Control Panel.
Alternatively, you can opt to fine-tune the freshly selected color by using the “Master Saturation” and Master Lightness.”
To carry out color grading:
- After opening the “Lumetri Color” panel as in step 2 above, click on the eyedropper to select the curve you want to use.
- Click the color in your footage that you wish to adjust. Usually, when you use the eyedropper, three points will be added to the graph. The two bottom points restrict color selection to a minimum range, whereas the first represents your selected color.
How to Use Lumetri Scope
Besides the Lumetric Color, Lumetric Scope is another essential tool for post-film production in Adobe After Effects. The color correcting tool, Lumetric scope guarantees its users’ accurate results when used correctly.
When carrying out color corrections in films, it is advisable to use quality monitor calibrators and paint your workspace walls neutral grey. Usually, it reduces lighting distraction and the external color effect, respectively.
However, not every editor can meet all the required basics, and that is where Lumetri scope comes in. Lumetri Scope allows one to get the best color results in their videos. Here are the steps on how to use Lumetri Scope:
Step 1. Open Lumetric Scope
First, open your Adobe After Effect application and add your footage to the timeline. Go to the “ Window “ menu at the top-left-hand side of your interface.
In the drop-down menu, select “Lumetri Scopes” or “Workspaces,” then click on the “Color” option.
The Lumetri Scope tab will be displayed adjacent to the timeline footage.
Step 2. Evaluate Hue and Saturation using Vectorscope
In the Lumetri Scope tab, click on the wrench icon, and a drop-down menu will be displayed. From the menu, select “Vectorscope YUV” and read the saturation. When reading saturation, begin from the center going outwards.
Hue, on the other hand, is read in a circular direction.
Step 3. Evaluate the tonal values and Brightness using Histogram
The histogram in Lumetri Scope displays an image’s tonal values and brightness levels.
To measure the brightness and tonal values, go back to the Lumetri Scope panel and click on the wrench icon. Click on “Presets” from the drop-down menu and select “Histogram.”
The scale in the histogram starts from 0 (pure black) to 225 (pure white). You, therefore, need to view the number of pixels for every color horizontally when reading.
Step 4. Evaluate Color and Brightness Intensities using Waveform Monitor
The color and brightness are read from the bottom to the top in the waveform monitor.
Click on the wrench icon to view the intensities, then pick the “Presets” option > “Waveform RBG.” A drop-down menu (RGB, YC, Luma, and YC no Chroma) will be displayed that allows you to do the readings.
Reading the IRE scale is usually done in ascension (0 to 100).
Step 5. Evaluate the Individual color channels using Parade Scope
Here, click on the wrench icon in the Lumetri Scopes panel, then select the “Presets”> “Parade RGB.” Select from the alternate Lumetri scope combinations of RGB, RGB-White, YUV, YUV white.
Is there a simple way to Unionise the Color of my Video?
Have you tried color grading and color correction in Lumetri using Adobe After Effects, but your efforts are bearing no fruits? It would be best not to worry since there is a simple way out. So, Yes! There is a simple way to unionize the color of your video – it is by using Wondershare Filmora .
Wondershare Filmora is a professional application to edit videos with a wide range of tools that allows its users to create stunning videos with ease. From its simple and intuitive design to its wide range of functionalities and affordability, Filmora users have every reason to stick to the software.
Some of the functionality features that make Wondershare Filmora easy to use include:
Curve Section
Filmora has way simpler curves than Adobe After Effects. Filmora has two presets, i.e., One that creates an S-curve over the graph, and the other resets graph to a straight linear line. Usually, the S-curve represents soft contrasts.
YUV color correction
The YUV color correction feature in Filmora functions straightforwardly when compared to Adobe After Effects. The Y and V channels in Filmora stores color data, whereas the U channel carries the brightness data. Editors find it effortlessly using the YUV color correction in Filmora.
Hue and Saturation
Hue, saturation, and lightness levels in Wondershare Filmora are undeniably very easy to understand unline other premiere software applications.
In Filmora, the Hue shift plays an essential role in shuffling the colors, whereas the Saturation defines the overall intensity of colors in an image.
For Win 7 or later (64-bit)
For macOS 10.12 or later
Conclusion
● With the above illustrations, you need not find it challenging to use Lumetri Color in Adobe After Effect. But if you are getting your head stuck when using Adobe After Effects, you need not stress out. There is an ultimate solution, and that is Wondershare Filmora. Incorporate this easy-to-use and pocket-friendly software in your edits. Besides, you will not have to go through the user guide to get started.
How to Make a Smooth Speed Ramping in Premiere Pro?
Versatile Video Editor - Wondershare Filmora
An easy and powerful editor
Numerous effects to choose from
Detailed tutorials are provided by the official channel
Speed ramping is a popular Premiere Pro effect for good reason: it looks fantastic! When utilized simultaneously to spice up a video clip, slow motion and quick motion may both be great aesthetic choices. This practice may save you time by enabling you to show more about what you want to see in your edit without using harsh jump cuts.

This effect may be used for a number of reasons, including clip transitions, speeding up a clip to make it shorter, and slowing down a clip to make it longer. Speed ramping may be used with a number of various effects.
According to the business, Adobe Premiere Pro is one of the most widely used video editing products on the market today. The ability to alter the speed of individual clips is one of Premiere Pro’s most important capabilities. While speed ramping is often used in sports highlights, changing the speed of video may be useful for a number of other types of material.
You’ll learn how to construct a spectacular speed ramp in Adobe Premiere Pro, beginning with capturing the proper kind of video and moving to advanced tips and methods. Following that, we’ll go through some ideas and inspiration for when to use a speed ramp in your circumstance.
What is Speed Ramping?
A speed ramp is used to gradually increase the speed of a video clip as it accelerates or decelerates. It is guaranteed that a smooth transition between two separate speeds will take place. The method is crucial in changing the tempo of the film and, as a consequence, creating a dramatic impression. The film’s required velocity is achieved by the employment of super-fast visual effects.
A speed ramp, as opposed to a rapid shift in speed, provides for a more smooth transition between two drastically differing speeds. This method is used to focus attention on certain parts of your video, which has a huge impact on your editing. It provides just the right amount of zing to keep your audience interested and excited about your presentation.
Examples of Speed Ramping
It works especially well when utilized to focus the viewer’s attention on a certain moment or action in your videos, such as a tough jump or an impending bullet. Another name for this approach speeds ramping (sometimes known as time remapping). It may also be used to create a visually pleasing transition between two clips or pictures inside a single movie.
You may also use Speed Ramping to alter the runtime of your video to fit the time limits of other social media sites, such as Instagram and Vine. If you just have 30 seconds to deliver your video, the following are the two most common places where people apply speed ramping techniques:
Assume you are shooting a person walking and want the clip to play in slow motion so that viewers can clearly see the person’s face. In this scenario, speed ramping is precisely what you need since it enables you to do precisely that.
Do you remember the famous movie “The Matrix” scene, when Neo dodges the bullets? It’s not some typical scene; it’s a pretty good example of speed ramping.
How to Create Speed Ramping/Time Remapping in Premiere Pro?
Speed Ramping premiere pro is an excellent tool for speeding up video clips. ‘ In order to speed up or slow down the speed of a video clip, this effect may be employed. In this article, you’ll learn how to make the most of this fantastic tool in Adobe Premiere Pro.

While using Premiere Pro, the ability to change a clip’s speed without altering its pitch is a very useful feature. An example of how this feature comes in helpful is when you have a clip that shows someone or something moving from left to right or vice versa.
Advanced Premiere Pro Time Remapping
The fact that this effect is so simple to use is its main benefit. By moving handles around on the clip, you may quickly choose different regions of the clip to be influenced by the adjustment when you apply it. This makes achieving the required result extremely quick and easy.

If you want to go deep into the game, Speed Ramp offers some more advanced options that give you even more control over your speed modifications. The properties section allows you to designate which portions of the timeline are affected by the ramp, as well as change factors like the curve type and bias.
Steps To Use Speed Ramping In Premiere Pro
Follow the below-mentioned steps to learn how to use speed ramping in premiere pro:
- Download and install Adobe Premiere Pro. Once installed, launch the application.
- Create a new project in Premiere by clicking the New Project button. After that, import the film that you want to speed ramp. It is the simplest and most straightforward method of importing film into Premiere to just click and drag the clip into the project window.
- Before commencing any work with speed, click and drag the video track in the timeline to make it taller by increasing the height of the track. This will guarantee that you can see the speed ramp as you go to the next stages.
- To create a sequence if you don’t already have one, drag a clip into the timeline and drop it where you want it to appear. Using the clip’s parameters, Premiere will automatically generate a sequence with the necessary settings.
- Decide when you want to apply the speed ramp and mark the spot on the screen where you will do so. The key to a pleasant speed ramp is movement, so choose a time when the environment is very active. You can specify in and out points, cut the clip with “Command+K,” or divide the clip into parts using the razor blade tool (which is accessible through the “Command+K” shortcut).
- Keyframes will be created at this point. It’s first and foremost important that the keyframes be clearly visible. Access the proper view by selecting “Show Clip Keyframes” from the context menu when you right-click on your clip.
- Another drop-down option will appear, from which you’ll choose “Time Remapping” and then press the “Enter” key.
- Select “Speed” from the drop-down menu.
- To create a keyframe, choose the pen from the toolbar (or just use the “P” key on your keyboard) and click on the white line running across the video track. If you wish to make a speed ramp, you’ll need at least two keyframes: one to indicate where the speed ramp should begin and another to indicate where it should terminate.
- If you wish to create more sophisticated speed ramps, you may do so by including more keyframes in your animation.
- Switch back to the selection tool when you’ve finished placing your keyframes. “V” is the shortcut key for this.
- Now comes the critical moment: it’s time to change the speed. This is a task that Premiere Pro makes rather simple. The only thing you have to do now is click on the white line between the keyframes you have created and drag it either up or down, depending on your preference for speed or slowness.
- It’s not finished yet; we still need to smooth it out a little more. With the selection tool selected, click and drag one of the keyframe markers to the other side of the screen. The number of frames across which the speed shift will occur will be stretched out as a result of this. The longer and more gradual the speed ramp will be, the greater the distance between the two sides of the keyframe indication is separated.
- Complete the process with the other keyframe, and your speed ramp will be complete!
Techniques to Make Speed Ramping Smooth
In this section, we will be viewing some advanced time remapping features of Adobe Premiere Pro, which are as follows.
Keyframe Interpolation
When creating a speed ramp, keyframes are used to indicate the beginning and finishing points of the speed shift. However, there are a number of methods in which Premiere may transport the clip from point A to point B.
In the video industry, filling in the data between the two locations is known as keyframe interpolation.
- Simply dragging to divide a keyframe, like in the previous example, results in an equitable speed increase between the keyframes in the animation. Linear interpolation is the term used to describe this process.
- Instead of using Bezier Interpolation, you may utilize it to produce a smoother, more natural speed ramp. With Bezier Interpolation, the pace at which the speed increases will likewise accelerate, giving the effect of a more pronounced ramp.
- To build an S-curve shape, choose a keyframe and drag the Bezier handles to the desired position. Make adjustments until you are satisfied with the outcome.
Speed Ramp Transition
Speed ramp transitions are easy to make and may be utilized to add visual interest to a wide range of video genres. This effect is achieved by boosting the clip speed at the end of a clip before transitioning into a cut.
- In the second clip, the tempo is abruptly boosted and subsequently decreased to provide a smooth transition between situations. It may symbolize the passage of time, a character’s perplexity, or simply add flair to a commercial film.
- Using Premiere Pro, create a ramp-up at the end of your first clip and a ramp-down at the start of your second clip. The speed rubber band will be curved like a bell curve across the two clips when finished.
Adding speed ramps to films in Premiere Pro may improve the usefulness and looks of a variety of movies, from narrative features to social media posts. In Premiere, you may easily create and adjust speed duration directly in the timeline to meet any needs.
Speed Ramping In Wondershare Filmora
We understood how to do speed ramping in Premiere Pro. You can also get the same results using a much easier software that is “Wondershare Filmora”.
What is Wondershare Filmora?
Filmora is a video editor that is best suited for social video editors, vloggers, home movies, and other video projects. In addition, it may be used on both Macs and PCs. To begin using Filmora, you just need to pay a one-time registration fee of $0! You’ll notice a watermark when you export from the free version. For $59.99, Filmora’s latest version is a one-time purchase that doesn’t need a subscription!
Amazing Features
Filmora is an award-winning video editing program, that allows users to create visually stunning videos without the need for complex editing techniques.
Video playback in Filmora’s latest version may be accelerated by the graphics card (GPU). It’s accelerating at an alarming rate right now. It’s also possible to lower the resolution of a 4K or higher video for quicker playing. Cuts and splits are a snap using Filmora. Make a cut by dragging your play head to the location where you want to split the footage. Then, to remove the additional clip from the clip, use the delete key.
Even those with the most basic PC hardware may use this video editing software to create high-quality movies. Moreover, the most anticipated features that Filmora’s latest version offers are as follows:
- Motion Tracking
- Keyframing Animations
- Audio Ducking
- Split Screen
- Video Transitions
- Speed Control
- Color Grading
- Filmstock Effects
- Multiple Formats Exporting
Users may utilize the color tuning option to change the white balance and dynamic range of their video clip, among other things. You may alter the audio levels of each track using the audio mixer tool. The advanced Text Editor function allows you to adjust the color, size, font, and even the motion of text. The screen recording tool enables you to capture your computer’s screen as well as your webcam in excellent quality. The video stabilization feature lowers or eliminates the effect of camera shake on video.
Speed Ramping In Filmora
The method is crucial in changing the tempo of the film and, as a consequence, creating a dramatic impression. The film’s required speed is achieved by the employment of super-fast visual effects.
When using a camera with a much higher frame rate, the speed ramping approach may provide excellent effects. It aids in the production of the most dramatic impression.
Speed ramping effects are available in six presets, which include Montage, Hero Moment, Bullet Time, Jumper, and Flash In, all of which will add a theatrical element to your movie that will leave your viewers in awe.

Creative pros can swiftly and effectively speed up a movie with Wondershare Filmora. However, in order to get the intended results, it is essential to completely understand and adhere to the approach.
Wondershare Filmora 11 has a variety of tools and features to help you create a visually stunning film in a short period of time. Its Instant Mode allows you to produce a video creation from start to finish in less than 5 minutes.
Steps
- Download and Install Filmora. Launch the application on your system.

- Navigate to the chosen video and open it in the program to speed up and lengthen it. You may also add the movie to the interface by dragging and dropping it there.

- When the video appears in the timeline, right-click it to begin playback. As a consequence, a context menu is displayed.

- Select Speed from the pop-up editing window, and then select Speed Ramping from the drop-down menu.

- Alternatively, right-click on the video or audio clip, choose Speed from the drop-down menu, and select Speed Ramping.

- In the Speed Ramping panel, you may adjust the speed or choose from a number of presets, including Montage, Hero Moment, Bullet Time, Jumper, Flash in, and Flash out, to use as templates. You have the option of using the Preset speed ramps. Alternatively, you may personalize your own innovative ones.

- Move the play head to the point where you wish to increase or decrease the speed of the video or audio. Then, to add speed keyframes, choose the Add icon from the toolbar. The video or audio clips will be marked as Speed Ramping when the speed ramp has been added by Filmora.

- If you want to delete a keyframe, you can do so by selecting that particular keyframe and selecting the delete button like in the image:

- As we go on to the video keyframe speed adjustment, just slide the keyframe dot upward or downward to alter the point speed of the movie. Aside from that, you can keep the audio pitch constant regardless of how fast or slow the video is moving.

- The settings will be saved if you are pleased with them after you make the necessary modifications. In any other case, you may use the Reset button to return to the original configuration.
- When you’ve finished your work, go to the “File” panel and choose “Save Project” from the list of options that display. Change the name of the project and then click “Save.”
- Additionally, the movie may be exported using Filmora’s “Export” feature; just choose “Export” and then specify a new name for the file. The video may be exported to a device, a system, or even YouTube. After that, choose “Export.”

Speed Ramping Tips
- High Frame Rate: The frame rate is an important consideration when it comes to speed ramping. If you wish to slow down the video after it’s been recorded, shoot it at a frame rate higher than 60 frames per second. When a video is slowed down, there should be enough frames to guarantee that the video passes the 24 frames per second threshold frame rate.
- Choose The Appropriate Frame Resolution: Another possibility is to modify your video’s frame resolution. The tip has the ability to edit the clip’s properties from the Slowing down the video is achieved by changing the frame rate in the clip’s parameters from 120 to 24 frames per second. As a consequence, the frames will be expanded to the proper frame rate. As a consequence, the video is slowed down but not jerked.
- Purposeful Time Remapping: Instead of keeping the same pace throughout the film, a deliberate speed ramp should be implemented. A video has emotional, mysterious, exciting, and slow-motion Why is this the case? The usage of the same video speed throughout the film may have a negative influence on the watching experience. As a result, it is critical that videos be separated into genres and that the tempo of the videos is modified accordingly.
Conclusion
The use of the ideal cinematic effect at the right time boosts the audience and engagement with the material. This respective article explored speed ramping in-depth and oughts to teach creative pros how to slow down a video and speed up a movie. It covers speed raming in premiere pro and then moves toward Wondershare Filmora which seems a bit easier. Wondershare Filmora is a good choice for completing the task as quickly as possible. You will have access to all of the effects and tools mentioned, as well as the ability to keep the audio pitch consistent throughout the effect, which is critical while altering the video speed.
Speed ramping is a popular Premiere Pro effect for good reason: it looks fantastic! When utilized simultaneously to spice up a video clip, slow motion and quick motion may both be great aesthetic choices. This practice may save you time by enabling you to show more about what you want to see in your edit without using harsh jump cuts.
This effect may be used for a number of reasons, including clip transitions, speeding up a clip to make it shorter, and slowing down a clip to make it longer. Speed ramping may be used with a number of various effects.
According to the business, Adobe Premiere Pro is one of the most widely used video editing products on the market today. The ability to alter the speed of individual clips is one of Premiere Pro’s most important capabilities. While speed ramping is often used in sports highlights, changing the speed of video may be useful for a number of other types of material.
You’ll learn how to construct a spectacular speed ramp in Adobe Premiere Pro, beginning with capturing the proper kind of video and moving to advanced tips and methods. Following that, we’ll go through some ideas and inspiration for when to use a speed ramp in your circumstance.
What is Speed Ramping?
A speed ramp is used to gradually increase the speed of a video clip as it accelerates or decelerates. It is guaranteed that a smooth transition between two separate speeds will take place. The method is crucial in changing the tempo of the film and, as a consequence, creating a dramatic impression. The film’s required velocity is achieved by the employment of super-fast visual effects.
A speed ramp, as opposed to a rapid shift in speed, provides for a more smooth transition between two drastically differing speeds. This method is used to focus attention on certain parts of your video, which has a huge impact on your editing. It provides just the right amount of zing to keep your audience interested and excited about your presentation.
Examples of Speed Ramping
It works especially well when utilized to focus the viewer’s attention on a certain moment or action in your videos, such as a tough jump or an impending bullet. Another name for this approach speeds ramping (sometimes known as time remapping). It may also be used to create a visually pleasing transition between two clips or pictures inside a single movie.
You may also use Speed Ramping to alter the runtime of your video to fit the time limits of other social media sites, such as Instagram and Vine. If you just have 30 seconds to deliver your video, the following are the two most common places where people apply speed ramping techniques:
Assume you are shooting a person walking and want the clip to play in slow motion so that viewers can clearly see the person’s face. In this scenario, speed ramping is precisely what you need since it enables you to do precisely that.
Do you remember the famous movie “The Matrix” scene, when Neo dodges the bullets? It’s not some typical scene; it’s a pretty good example of speed ramping.
How to Create Speed Ramping/Time Remapping in Premiere Pro?
Speed Ramping premiere pro is an excellent tool for speeding up video clips. ‘ In order to speed up or slow down the speed of a video clip, this effect may be employed. In this article, you’ll learn how to make the most of this fantastic tool in Adobe Premiere Pro.
While using Premiere Pro, the ability to change a clip’s speed without altering its pitch is a very useful feature. An example of how this feature comes in helpful is when you have a clip that shows someone or something moving from left to right or vice versa.
Advanced Premiere Pro Time Remapping
The fact that this effect is so simple to use is its main benefit. By moving handles around on the clip, you may quickly choose different regions of the clip to be influenced by the adjustment when you apply it. This makes achieving the required result extremely quick and easy.
If you want to go deep into the game, Speed Ramp offers some more advanced options that give you even more control over your speed modifications. The properties section allows you to designate which portions of the timeline are affected by the ramp, as well as change factors like the curve type and bias.
Steps To Use Speed Ramping In Premiere Pro
Follow the below-mentioned steps to learn how to use speed ramping in premiere pro:
- Download and install Adobe Premiere Pro. Once installed, launch the application.
- Create a new project in Premiere by clicking the New Project button. After that, import the film that you want to speed ramp. It is the simplest and most straightforward method of importing film into Premiere to just click and drag the clip into the project window.
- Before commencing any work with speed, click and drag the video track in the timeline to make it taller by increasing the height of the track. This will guarantee that you can see the speed ramp as you go to the next stages.
- To create a sequence if you don’t already have one, drag a clip into the timeline and drop it where you want it to appear. Using the clip’s parameters, Premiere will automatically generate a sequence with the necessary settings.
- Decide when you want to apply the speed ramp and mark the spot on the screen where you will do so. The key to a pleasant speed ramp is movement, so choose a time when the environment is very active. You can specify in and out points, cut the clip with “Command+K,” or divide the clip into parts using the razor blade tool (which is accessible through the “Command+K” shortcut).
- Keyframes will be created at this point. It’s first and foremost important that the keyframes be clearly visible. Access the proper view by selecting “Show Clip Keyframes” from the context menu when you right-click on your clip.
- Another drop-down option will appear, from which you’ll choose “Time Remapping” and then press the “Enter” key.
- Select “Speed” from the drop-down menu.
- To create a keyframe, choose the pen from the toolbar (or just use the “P” key on your keyboard) and click on the white line running across the video track. If you wish to make a speed ramp, you’ll need at least two keyframes: one to indicate where the speed ramp should begin and another to indicate where it should terminate.
- If you wish to create more sophisticated speed ramps, you may do so by including more keyframes in your animation.
- Switch back to the selection tool when you’ve finished placing your keyframes. “V” is the shortcut key for this.
- Now comes the critical moment: it’s time to change the speed. This is a task that Premiere Pro makes rather simple. The only thing you have to do now is click on the white line between the keyframes you have created and drag it either up or down, depending on your preference for speed or slowness.
- It’s not finished yet; we still need to smooth it out a little more. With the selection tool selected, click and drag one of the keyframe markers to the other side of the screen. The number of frames across which the speed shift will occur will be stretched out as a result of this. The longer and more gradual the speed ramp will be, the greater the distance between the two sides of the keyframe indication is separated.
- Complete the process with the other keyframe, and your speed ramp will be complete!
Techniques to Make Speed Ramping Smooth
In this section, we will be viewing some advanced time remapping features of Adobe Premiere Pro, which are as follows.
Keyframe Interpolation
When creating a speed ramp, keyframes are used to indicate the beginning and finishing points of the speed shift. However, there are a number of methods in which Premiere may transport the clip from point A to point B.
In the video industry, filling in the data between the two locations is known as keyframe interpolation.
- Simply dragging to divide a keyframe, like in the previous example, results in an equitable speed increase between the keyframes in the animation. Linear interpolation is the term used to describe this process.
- Instead of using Bezier Interpolation, you may utilize it to produce a smoother, more natural speed ramp. With Bezier Interpolation, the pace at which the speed increases will likewise accelerate, giving the effect of a more pronounced ramp.
- To build an S-curve shape, choose a keyframe and drag the Bezier handles to the desired position. Make adjustments until you are satisfied with the outcome.
Speed Ramp Transition
Speed ramp transitions are easy to make and may be utilized to add visual interest to a wide range of video genres. This effect is achieved by boosting the clip speed at the end of a clip before transitioning into a cut.
- In the second clip, the tempo is abruptly boosted and subsequently decreased to provide a smooth transition between situations. It may symbolize the passage of time, a character’s perplexity, or simply add flair to a commercial film.
- Using Premiere Pro, create a ramp-up at the end of your first clip and a ramp-down at the start of your second clip. The speed rubber band will be curved like a bell curve across the two clips when finished.
Adding speed ramps to films in Premiere Pro may improve the usefulness and looks of a variety of movies, from narrative features to social media posts. In Premiere, you may easily create and adjust speed duration directly in the timeline to meet any needs.
Speed Ramping In Wondershare Filmora
We understood how to do speed ramping in Premiere Pro. You can also get the same results using a much easier software that is “Wondershare Filmora”.
What is Wondershare Filmora?
Filmora is a video editor that is best suited for social video editors, vloggers, home movies, and other video projects. In addition, it may be used on both Macs and PCs. To begin using Filmora, you just need to pay a one-time registration fee of $0! You’ll notice a watermark when you export from the free version. For $59.99, Filmora’s latest version is a one-time purchase that doesn’t need a subscription!
Amazing Features
Filmora is an award-winning video editing program, that allows users to create visually stunning videos without the need for complex editing techniques.
Video playback in Filmora’s latest version may be accelerated by the graphics card (GPU). It’s accelerating at an alarming rate right now. It’s also possible to lower the resolution of a 4K or higher video for quicker playing. Cuts and splits are a snap using Filmora. Make a cut by dragging your play head to the location where you want to split the footage. Then, to remove the additional clip from the clip, use the delete key.
Even those with the most basic PC hardware may use this video editing software to create high-quality movies. Moreover, the most anticipated features that Filmora’s latest version offers are as follows:
- Motion Tracking
- Keyframing Animations
- Audio Ducking
- Split Screen
- Video Transitions
- Speed Control
- Color Grading
- Filmstock Effects
- Multiple Formats Exporting
Users may utilize the color tuning option to change the white balance and dynamic range of their video clip, among other things. You may alter the audio levels of each track using the audio mixer tool. The advanced Text Editor function allows you to adjust the color, size, font, and even the motion of text. The screen recording tool enables you to capture your computer’s screen as well as your webcam in excellent quality. The video stabilization feature lowers or eliminates the effect of camera shake on video.
Speed Ramping In Filmora
The method is crucial in changing the tempo of the film and, as a consequence, creating a dramatic impression. The film’s required speed is achieved by the employment of super-fast visual effects.
When using a camera with a much higher frame rate, the speed ramping approach may provide excellent effects. It aids in the production of the most dramatic impression.
Speed ramping effects are available in six presets, which include Montage, Hero Moment, Bullet Time, Jumper, and Flash In, all of which will add a theatrical element to your movie that will leave your viewers in awe.
Creative pros can swiftly and effectively speed up a movie with Wondershare Filmora. However, in order to get the intended results, it is essential to completely understand and adhere to the approach.
Wondershare Filmora 11 has a variety of tools and features to help you create a visually stunning film in a short period of time. Its Instant Mode allows you to produce a video creation from start to finish in less than 5 minutes.
Steps
- Download and Install Filmora. Launch the application on your system.
- Navigate to the chosen video and open it in the program to speed up and lengthen it. You may also add the movie to the interface by dragging and dropping it there.
- When the video appears in the timeline, right-click it to begin playback. As a consequence, a context menu is displayed.
- Select Speed from the pop-up editing window, and then select Speed Ramping from the drop-down menu.
- Alternatively, right-click on the video or audio clip, choose Speed from the drop-down menu, and select Speed Ramping.
- In the Speed Ramping panel, you may adjust the speed or choose from a number of presets, including Montage, Hero Moment, Bullet Time, Jumper, Flash in, and Flash out, to use as templates. You have the option of using the Preset speed ramps. Alternatively, you may personalize your own innovative ones.
- Move the play head to the point where you wish to increase or decrease the speed of the video or audio. Then, to add speed keyframes, choose the Add icon from the toolbar. The video or audio clips will be marked as Speed Ramping when the speed ramp has been added by Filmora.
- If you want to delete a keyframe, you can do so by selecting that particular keyframe and selecting the delete button like in the image:
- As we go on to the video keyframe speed adjustment, just slide the keyframe dot upward or downward to alter the point speed of the movie. Aside from that, you can keep the audio pitch constant regardless of how fast or slow the video is moving.
- The settings will be saved if you are pleased with them after you make the necessary modifications. In any other case, you may use the Reset button to return to the original configuration.
- When you’ve finished your work, go to the “File” panel and choose “Save Project” from the list of options that display. Change the name of the project and then click “Save.”
- Additionally, the movie may be exported using Filmora’s “Export” feature; just choose “Export” and then specify a new name for the file. The video may be exported to a device, a system, or even YouTube. After that, choose “Export.”
Speed Ramping Tips
- High Frame Rate: The frame rate is an important consideration when it comes to speed ramping. If you wish to slow down the video after it’s been recorded, shoot it at a frame rate higher than 60 frames per second. When a video is slowed down, there should be enough frames to guarantee that the video passes the 24 frames per second threshold frame rate.
- Choose The Appropriate Frame Resolution: Another possibility is to modify your video’s frame resolution. The tip has the ability to edit the clip’s properties from the Slowing down the video is achieved by changing the frame rate in the clip’s parameters from 120 to 24 frames per second. As a consequence, the frames will be expanded to the proper frame rate. As a consequence, the video is slowed down but not jerked.
- Purposeful Time Remapping: Instead of keeping the same pace throughout the film, a deliberate speed ramp should be implemented. A video has emotional, mysterious, exciting, and slow-motion Why is this the case? The usage of the same video speed throughout the film may have a negative influence on the watching experience. As a result, it is critical that videos be separated into genres and that the tempo of the videos is modified accordingly.
Conclusion
The use of the ideal cinematic effect at the right time boosts the audience and engagement with the material. This respective article explored speed ramping in-depth and oughts to teach creative pros how to slow down a video and speed up a movie. It covers speed raming in premiere pro and then moves toward Wondershare Filmora which seems a bit easier. Wondershare Filmora is a good choice for completing the task as quickly as possible. You will have access to all of the effects and tools mentioned, as well as the ability to keep the audio pitch consistent throughout the effect, which is critical while altering the video speed.
Video Editing Tips to Know Before Editing First Draft
Whether your video is short or long, you may want to make it better and appealing. Video editing involves the manipulation of your videos through which the desired transformation is achieved and you can flaunt every move of your video in a more preferable way. Video editing involves cutting the video short, changing the speed, organizing the video in a seamless flow. In short, the better the cuts of your videos, the better your message/story is conveyed.
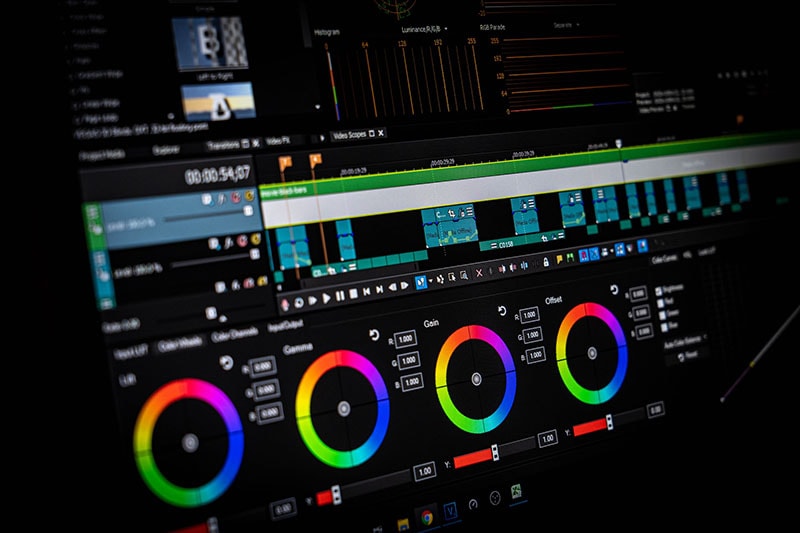
Part 1: Things to Learn Before Editing First Draft
You have shot your video and now you’re stuck on the post-processing of that video. Don’t worry! We got you covered through this article which will guide you through the different things which you must learn before editing the first draft of your video.
Start a video project
Your smartphone and digital camera can let you record multiple videos but what now? You head out to edit your first draft by choosing a suitable platform or software and then you can surely lay back and see the software doing wonders to your raw videos. By starting off with editing, you choose your video editing preferences and then you just let the video editing tools do the magic.
Get to know the video editing software workspace
Video editing software offer customizable workspaces for different editing tasks. The software workspace streamlines routine actions you take with clips, like editing clips, making DVD and Blu-ray menus, and sharing movies. By placing panels in the layout that best matches your working style, you can personalize your workspace. The additional panels adjust automatically to fit the window as you rearrange them. For various jobs, such as one for editing and one for preview, you can build and store multiple workspaces.
Understand the timeline
The timeline of your video is the backbone of your digital video editing process. It’s called a timeline because the various pieces of video will be lined up horizontally. In a video editing software, the timeline is where you arrange your video clips and plan out all the modifications you want to do. As you work, you will see every single one of your video and audio clips, effects, and transitions sorted chronologically from beginning to end. All the fundamentals of video editing, including reordering, trimming, and enhancing your footage, are available. To preview how your adjustments will turn out, you can also play your project at any point in the timeline.
Add clips to timeline
When you have grasped the idea behind a timeline, the next step you need to follow is to add clips into your timeline. Before adding clips to your timeline, it is suggested that you label each clip. Although it does seem like a lot of work, it will be easier to locate all of the clips later on if you’re working on a large project. after the footages are gathered and named, add important clips in the beginning of the timeline to begin establishing the video’s overall structure and order.
Editing tools
Besides basic cutting, trimming and cropping, video editing software offer multiple professional editing tools which enhance the outlook your videos and make them 10x better. For example, instead of cutting up a clip into a bunch of small clips and unwanted gaps, use the Ripple Edit tool keep your timeline clean. This means when a clip is trimmed, it causes a ripple effect throughout the rest of your timeline, shifting all other clips into a new timeline position.
Similarly, when working with lengthy timelines, the Razor tool is also really helpful because you can select the clip you wish to cut by dragging your razor over it. So, the Razor cut is the tool to use if you need to make a lot of cuts in your videos quickly.
Syncing audio and video
You already know how annoying it can be if audio and video don’t sync while you’re listening to a podcast or viewing a YouTube vlog. The video editing software offer helpful manual and auto sync tools. It can be though a bit of hard work for beginners, but the ‘Lights, Camera, Action’ approach works best in syncing your audio with your video. To sync audio, you need to record audio first and then through matching the wavelengths displayed on your timeline, you can sync the audio with your video.
Edit download talking head/interview footage
Now with professional video editing tools, you can make ‘talking head videos’ if you want to share your expertise as a YouTube vlogger or if you want to do employee training. Talking head films are a fantastic way to stimulate the mind and the heart while increasing learner retention in this digital age.
Additionally, with other video editing tools, you can edit your interview footages and for that, you don’t have to mess with timestamps, cutting or splicing videos, or creating transitions between clips, you just edit the transcript of the video and the video edits itself to match.
Video properties: Scale, position, opacity
Any screen recording, camera-based video, imported video clips, and text picture clips can have their visuals altered using video properties. In video editing software, multiple video properties are offered which include scaling, positioning, rotating, changing the opacity, changing level of reflection and shadow. Additionally, Video properties also include editing the video as a whole or just altering a clip from the video.
Types of cuts: Straight, J-Cut, L-Cut etc
The different types of cuts used in the video editing process is an effective way to make the transitions in your video pop. Basically, these cuts join two or more clips together via audio. Professional editors call these cuts as ‘split edits. The most common cuts are called J-Cut and L-Cut. They help to mix the content’s flow and keep the on-screen narrative in motion. In essence, these edits are necessary to make your scenes feel warm and more authentic.
Part 2: Practical Video Editing Tips
Choose right software
The push start of video editing for beginners is based on one common step: know your software or workspace. Selecting the appropriate software for editing your video is the first step in streamlining your video editing process. Although all software often includes the tools that you need to make ordinary video edits, you could favor one over the others based on its usefulness, digital interface, and features. Instead of just using the latest and trending video editing software available, the key is to choose what functions for you and your editing style.
Use a fast computer
Slow rendering hinders video editing process and other commands given to a computer. From a practical point of view, it is recommended that irrespective of the model of the computer or version of your software; your computer must be efficient to help you to access your files and software easily and to speed up your export time. With a slow computer, you will definitely feel stuck and the video editing complications will haunt you in your dreams.
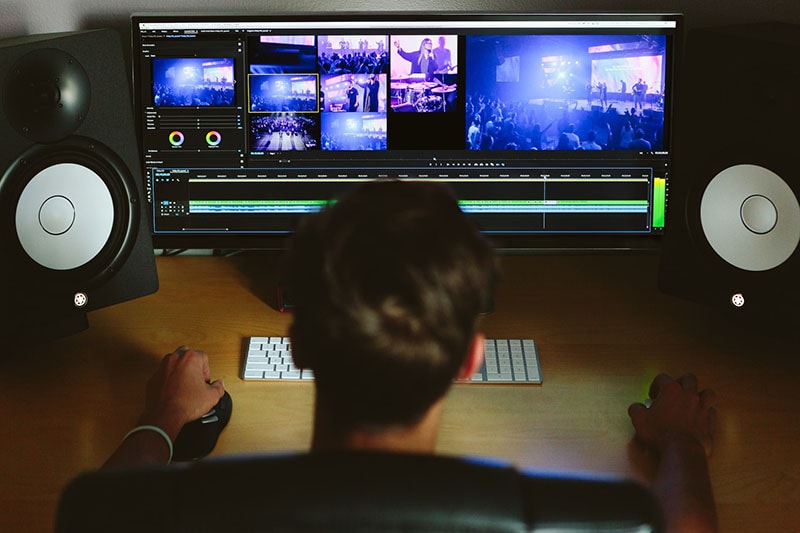
Watch video editing tutorials
None of us is a pro until we’ve practiced something enough to know everything about it. Video editing requires both; technical knowledge as well as your creativity, so it is better not to do try things on your own. A little guidance can surely help you get through the basics of the video editing process. There are tons of helpful tutorials for making excellent videos on YouTube, vlogs, and educational websites. The majority of tutorials you’ll discover online are free, making the readily available at the tip of your fingers.
Get the project files
Most of the beginner video editors prefer to use the same project files as the tutorial instructors when they are following along. Your work will exactly resemble the demo’s sample, which will aid in your understanding of the steps. For precisely this reason, many tutorials let you download the project files. You can repeat a process with your own video files once you’ve mastered this technique.
Edit for a story
Remembering your creative objective to create a wonderful story or message through your edited video is one of the most crucial lessons you should learn from this article. It is critically important that you make your film visually appealing and dramatically engaging to effectively evoke the right emotions and to communicate your desired message. Instead of merely adding a huge amount of effects to wow your audience, use your practical and technical skills to do this.
Maintain an efficient workflow
You’ll need to be systematic and organized in addition to having an editing software if you want to become a more competent editor. Putting your projects and files in folders that you may use repeatedly is one method to streamline your process. Besides this, organizing your projects and files into an external hard drive or USB is recommended in case of losing access to your intricately designed projects.
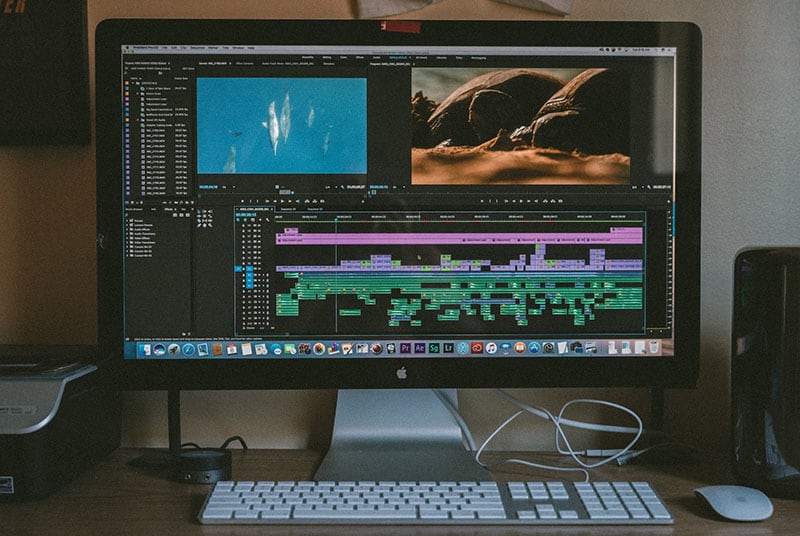
Utilize keyboard shortcuts
Keyboard shortcuts speed up the process of video editing and save you ample time. Different keyboard shortcuts are compatible with different video editing software; leaving a few which are mutual in every software. Don’t attempt to put all of these shortcuts into action at once. Pick a small number to begin with, and as they become instinctive, add more. You’ll progress more quickly if you use less mouse while editing your video.
Learn important terms
As a beginner, you may not want to feel a lump in the throat caused by the complicated dictionary of video editing software. There are some broad video editing terms that refer to videography as a whole as well as video editing terms specific to the process of editing footage. You must first learn what these terms means for example you may want to know what the terms like ‘aspect ratio, B-roll, bit rate, close up, compression, crop and compositing’ mean.
Color correct your clips
Do you own a rather boring video? Perhaps it’s a little too dull or the colors don’t stand out as much as they should? A crucial step is to modify the video’s color. This will assist in reducing the saturation and revive your video. Yet, there are some color correcting presets which can be easily accessed in different video editing apps.
Select good music
You ever saw an ad on YouTube or other social media platforms without an audio background. You may just want to skip it because the video, which may apparently be appealing, fails to strike you. Coordinating and complimenting your video with a music in the background is like cherry on top. It’s a huge plus to attract viewers’ attention. Though it is necessary that the music you choose must be relevant to your video file and should target the majority. So, choose good music to adorn your videos and trigger emotions in your target audience.
Add text and graphics
Some people are attracted more towards textual descriptions rather visual representation of content. It is crucial that considering the preferences of majority, you add significant details to your video which can target your audience in a multidimension. You might need to include more text in addition to the title, opening/closing billboards (for broadcasting), and film credits, depending on the type of film you’re making. However, you can make dazzling visuals using your editing program if you feel the urge to do so.
Export web versions
When your film is finished and is ready to be exported, you would have a natural urge to export it at the highest video resolution possible. If it’s going to be shown in theatres and on ultra-HD screens, this is unquestionably the best course of action. However, you should also export smaller, higher-quality versions for simpler viewing in the modern day where video projects are typically promoted online and on social media.
The objective of creating a file for the web is to keep its high quality while not making it too large for upload and online viewing. Don’t worry if you’re unsure of the export settings to utilize. Websites like Facebook, YouTube, and Vimeo all provide suggested export settings to assist you in correctly resizing your content.
Part 3: 10 Advanced Editing Tips for Professionals
We all definitely have experimented with video editing tools to some extent. But now, it is definitely time to become a pro. Don’t worry, the process isn’t as scary as we imagine it to be. This article is your best stop to grab some fine guidelines about how to become a video editor, in fact, a Pro video editor.
- Make titles stand out
You’re skilled in video editing, but do your titles seem a little…unfinished? Do those lower thirds strike you as being monotonous and boring? Is your typography competing for attention against your pictures? It appears that you would benefit from some basic title design advice, and lucky for you, we have some. Your title must be readable by majority and always choose your safe way in selecting texts for example, a sans-serif typeface is usually going to be a safe choice for video. You can also animate text to highlight it so that it is more captivating.
- Put video inside text or logos effects
Videos resonate with your brand and content if you add a specific logo or text effects to it. Almost all the video editors allow this featuring so that the identification of your work is maintained and copyright claim can be imposed if you see your content being copied or manipulated.
- Add light leaks, film burns and lens flares
Incorporating unique transitions into your monotonous videos can get you your viewer’s attention in a go. Lens flares, light leaks, and film burns can result in a unique look, but are not always easy to add naturally in-camera. Some of the best video editing software which allow access to adding lens flares, light leaks and film burns include: Free 4K Light Leaks – RocketStock, Motion Array Free Light Leaks, WZZLY Free Light Leaks, LIGHT LEAK FILM OVERLAY and many more.
- Add the vintage old film look
The quick Instagram-category of filters are common today but what makes your videos more natural and appealing is the addition of some presets which almost every video editor offers. These presets add a classic vintage old film look to your videos by manipulating color correction effects, framerate settings, overlays, and aspect ratio hacks. Some popular vintage old film effects are found in software namely VSDC, VEED, Adobe Premium Pro and many others in list.
- Add type-on effect
A type-on effect added to your videos comprehend your content more firmly. Simply by tabbing on ‘Add text effect’ in any video editor, you can add type-on effect to your videos and to add ravishing component to the overall structure of your video.
- Zoom in or out effect
The zoom-in or out feature (if available) in your video editing software can allow you to magnify any part of your video quickly and easily. Some of the best video editors featuring this specification include: Wondershare DemoCreator Zoom in Video Effect, DaVinci Resolve, Wondershare Filmora , Windows Movie Maker and Apowersoft Screen Recorder.
- Custom wipe on/off reveal effect
The wipe on/off reveal transition or effect is one of the earliest ways of transitioning from one scene to another. An object (usually a line) moves across the screen, revealing the next scene, while simultaneously removing (or wiping) the previous scene and when used properly, they can create a very powerful effect. It involves creative fading in and out transitions to give a more dramatic look.
- 4k, 8k, HD resolution
The latest video editing software offer the export your edited video in multiple formats, out of which 4k, 8k and HD resolution formats are preferable for majority of the professional video editors. It is necessary that even after the video is uploaded to a platform, the pixels do not decrease and the quality of the video is maintained. Although attractive to the viewers, the higher the resolution, the more the data with which you must deal. It is suggested that a standard or default resolution is chosen to play and replay the video in different computers.

- B-roll
B-roll is secondary video that is frequently used as cutaway video to add context and visual interest to your story. The term is originated from the early days of Hollywood when there used to be an A-roll which was the primary video and B-roll which served as a secondary video footage. This can help you visualize your video from different dimensions, giving it a more realistic look for captivating viewers.

- Compression rate, bit depth, bit
The amount of data the camera records each second is referred to as bit rate. Every single second of a video is subject to significant data processing by cameras. The higher the quality of the video, the more is the bit rate. Bit depth refers to the number of colors your camera can read per pixel. Common bit depths are 8-bit and 10-bit, which enable a camera to read 256 million or 1.07 billion colors respectively. To upload your edited video, a compression is usually required to convert your resolution to internet quality so that the upload can be made simpler, without distorting the video resolution.
Whether your video is short or long, you may want to make it better and appealing. Video editing involves the manipulation of your videos through which the desired transformation is achieved and you can flaunt every move of your video in a more preferable way. Video editing involves cutting the video short, changing the speed, organizing the video in a seamless flow. In short, the better the cuts of your videos, the better your message/story is conveyed.
Part 1: Things to Learn Before Editing First Draft
You have shot your video and now you’re stuck on the post-processing of that video. Don’t worry! We got you covered through this article which will guide you through the different things which you must learn before editing the first draft of your video.
Start a video project
Your smartphone and digital camera can let you record multiple videos but what now? You head out to edit your first draft by choosing a suitable platform or software and then you can surely lay back and see the software doing wonders to your raw videos. By starting off with editing, you choose your video editing preferences and then you just let the video editing tools do the magic.
Get to know the video editing software workspace
Video editing software offer customizable workspaces for different editing tasks. The software workspace streamlines routine actions you take with clips, like editing clips, making DVD and Blu-ray menus, and sharing movies. By placing panels in the layout that best matches your working style, you can personalize your workspace. The additional panels adjust automatically to fit the window as you rearrange them. For various jobs, such as one for editing and one for preview, you can build and store multiple workspaces.
Understand the timeline
The timeline of your video is the backbone of your digital video editing process. It’s called a timeline because the various pieces of video will be lined up horizontally. In a video editing software, the timeline is where you arrange your video clips and plan out all the modifications you want to do. As you work, you will see every single one of your video and audio clips, effects, and transitions sorted chronologically from beginning to end. All the fundamentals of video editing, including reordering, trimming, and enhancing your footage, are available. To preview how your adjustments will turn out, you can also play your project at any point in the timeline.
Add clips to timeline
When you have grasped the idea behind a timeline, the next step you need to follow is to add clips into your timeline. Before adding clips to your timeline, it is suggested that you label each clip. Although it does seem like a lot of work, it will be easier to locate all of the clips later on if you’re working on a large project. after the footages are gathered and named, add important clips in the beginning of the timeline to begin establishing the video’s overall structure and order.
Editing tools
Besides basic cutting, trimming and cropping, video editing software offer multiple professional editing tools which enhance the outlook your videos and make them 10x better. For example, instead of cutting up a clip into a bunch of small clips and unwanted gaps, use the Ripple Edit tool keep your timeline clean. This means when a clip is trimmed, it causes a ripple effect throughout the rest of your timeline, shifting all other clips into a new timeline position.
Similarly, when working with lengthy timelines, the Razor tool is also really helpful because you can select the clip you wish to cut by dragging your razor over it. So, the Razor cut is the tool to use if you need to make a lot of cuts in your videos quickly.
Syncing audio and video
You already know how annoying it can be if audio and video don’t sync while you’re listening to a podcast or viewing a YouTube vlog. The video editing software offer helpful manual and auto sync tools. It can be though a bit of hard work for beginners, but the ‘Lights, Camera, Action’ approach works best in syncing your audio with your video. To sync audio, you need to record audio first and then through matching the wavelengths displayed on your timeline, you can sync the audio with your video.
Edit download talking head/interview footage
Now with professional video editing tools, you can make ‘talking head videos’ if you want to share your expertise as a YouTube vlogger or if you want to do employee training. Talking head films are a fantastic way to stimulate the mind and the heart while increasing learner retention in this digital age.
Additionally, with other video editing tools, you can edit your interview footages and for that, you don’t have to mess with timestamps, cutting or splicing videos, or creating transitions between clips, you just edit the transcript of the video and the video edits itself to match.
Video properties: Scale, position, opacity
Any screen recording, camera-based video, imported video clips, and text picture clips can have their visuals altered using video properties. In video editing software, multiple video properties are offered which include scaling, positioning, rotating, changing the opacity, changing level of reflection and shadow. Additionally, Video properties also include editing the video as a whole or just altering a clip from the video.
Types of cuts: Straight, J-Cut, L-Cut etc
The different types of cuts used in the video editing process is an effective way to make the transitions in your video pop. Basically, these cuts join two or more clips together via audio. Professional editors call these cuts as ‘split edits. The most common cuts are called J-Cut and L-Cut. They help to mix the content’s flow and keep the on-screen narrative in motion. In essence, these edits are necessary to make your scenes feel warm and more authentic.
Part 2: Practical Video Editing Tips
Choose right software
The push start of video editing for beginners is based on one common step: know your software or workspace. Selecting the appropriate software for editing your video is the first step in streamlining your video editing process. Although all software often includes the tools that you need to make ordinary video edits, you could favor one over the others based on its usefulness, digital interface, and features. Instead of just using the latest and trending video editing software available, the key is to choose what functions for you and your editing style.
Use a fast computer
Slow rendering hinders video editing process and other commands given to a computer. From a practical point of view, it is recommended that irrespective of the model of the computer or version of your software; your computer must be efficient to help you to access your files and software easily and to speed up your export time. With a slow computer, you will definitely feel stuck and the video editing complications will haunt you in your dreams.
Watch video editing tutorials
None of us is a pro until we’ve practiced something enough to know everything about it. Video editing requires both; technical knowledge as well as your creativity, so it is better not to do try things on your own. A little guidance can surely help you get through the basics of the video editing process. There are tons of helpful tutorials for making excellent videos on YouTube, vlogs, and educational websites. The majority of tutorials you’ll discover online are free, making the readily available at the tip of your fingers.
Get the project files
Most of the beginner video editors prefer to use the same project files as the tutorial instructors when they are following along. Your work will exactly resemble the demo’s sample, which will aid in your understanding of the steps. For precisely this reason, many tutorials let you download the project files. You can repeat a process with your own video files once you’ve mastered this technique.
Edit for a story
Remembering your creative objective to create a wonderful story or message through your edited video is one of the most crucial lessons you should learn from this article. It is critically important that you make your film visually appealing and dramatically engaging to effectively evoke the right emotions and to communicate your desired message. Instead of merely adding a huge amount of effects to wow your audience, use your practical and technical skills to do this.
Maintain an efficient workflow
You’ll need to be systematic and organized in addition to having an editing software if you want to become a more competent editor. Putting your projects and files in folders that you may use repeatedly is one method to streamline your process. Besides this, organizing your projects and files into an external hard drive or USB is recommended in case of losing access to your intricately designed projects.
Utilize keyboard shortcuts
Keyboard shortcuts speed up the process of video editing and save you ample time. Different keyboard shortcuts are compatible with different video editing software; leaving a few which are mutual in every software. Don’t attempt to put all of these shortcuts into action at once. Pick a small number to begin with, and as they become instinctive, add more. You’ll progress more quickly if you use less mouse while editing your video.
Learn important terms
As a beginner, you may not want to feel a lump in the throat caused by the complicated dictionary of video editing software. There are some broad video editing terms that refer to videography as a whole as well as video editing terms specific to the process of editing footage. You must first learn what these terms means for example you may want to know what the terms like ‘aspect ratio, B-roll, bit rate, close up, compression, crop and compositing’ mean.
Color correct your clips
Do you own a rather boring video? Perhaps it’s a little too dull or the colors don’t stand out as much as they should? A crucial step is to modify the video’s color. This will assist in reducing the saturation and revive your video. Yet, there are some color correcting presets which can be easily accessed in different video editing apps.
Select good music
You ever saw an ad on YouTube or other social media platforms without an audio background. You may just want to skip it because the video, which may apparently be appealing, fails to strike you. Coordinating and complimenting your video with a music in the background is like cherry on top. It’s a huge plus to attract viewers’ attention. Though it is necessary that the music you choose must be relevant to your video file and should target the majority. So, choose good music to adorn your videos and trigger emotions in your target audience.
Add text and graphics
Some people are attracted more towards textual descriptions rather visual representation of content. It is crucial that considering the preferences of majority, you add significant details to your video which can target your audience in a multidimension. You might need to include more text in addition to the title, opening/closing billboards (for broadcasting), and film credits, depending on the type of film you’re making. However, you can make dazzling visuals using your editing program if you feel the urge to do so.
Export web versions
When your film is finished and is ready to be exported, you would have a natural urge to export it at the highest video resolution possible. If it’s going to be shown in theatres and on ultra-HD screens, this is unquestionably the best course of action. However, you should also export smaller, higher-quality versions for simpler viewing in the modern day where video projects are typically promoted online and on social media.
The objective of creating a file for the web is to keep its high quality while not making it too large for upload and online viewing. Don’t worry if you’re unsure of the export settings to utilize. Websites like Facebook, YouTube, and Vimeo all provide suggested export settings to assist you in correctly resizing your content.
Part 3: 10 Advanced Editing Tips for Professionals
We all definitely have experimented with video editing tools to some extent. But now, it is definitely time to become a pro. Don’t worry, the process isn’t as scary as we imagine it to be. This article is your best stop to grab some fine guidelines about how to become a video editor, in fact, a Pro video editor.
- Make titles stand out
You’re skilled in video editing, but do your titles seem a little…unfinished? Do those lower thirds strike you as being monotonous and boring? Is your typography competing for attention against your pictures? It appears that you would benefit from some basic title design advice, and lucky for you, we have some. Your title must be readable by majority and always choose your safe way in selecting texts for example, a sans-serif typeface is usually going to be a safe choice for video. You can also animate text to highlight it so that it is more captivating.
- Put video inside text or logos effects
Videos resonate with your brand and content if you add a specific logo or text effects to it. Almost all the video editors allow this featuring so that the identification of your work is maintained and copyright claim can be imposed if you see your content being copied or manipulated.
- Add light leaks, film burns and lens flares
Incorporating unique transitions into your monotonous videos can get you your viewer’s attention in a go. Lens flares, light leaks, and film burns can result in a unique look, but are not always easy to add naturally in-camera. Some of the best video editing software which allow access to adding lens flares, light leaks and film burns include: Free 4K Light Leaks – RocketStock, Motion Array Free Light Leaks, WZZLY Free Light Leaks, LIGHT LEAK FILM OVERLAY and many more.
- Add the vintage old film look
The quick Instagram-category of filters are common today but what makes your videos more natural and appealing is the addition of some presets which almost every video editor offers. These presets add a classic vintage old film look to your videos by manipulating color correction effects, framerate settings, overlays, and aspect ratio hacks. Some popular vintage old film effects are found in software namely VSDC, VEED, Adobe Premium Pro and many others in list.
- Add type-on effect
A type-on effect added to your videos comprehend your content more firmly. Simply by tabbing on ‘Add text effect’ in any video editor, you can add type-on effect to your videos and to add ravishing component to the overall structure of your video.
- Zoom in or out effect
The zoom-in or out feature (if available) in your video editing software can allow you to magnify any part of your video quickly and easily. Some of the best video editors featuring this specification include: Wondershare DemoCreator Zoom in Video Effect, DaVinci Resolve, Wondershare Filmora , Windows Movie Maker and Apowersoft Screen Recorder.
- Custom wipe on/off reveal effect
The wipe on/off reveal transition or effect is one of the earliest ways of transitioning from one scene to another. An object (usually a line) moves across the screen, revealing the next scene, while simultaneously removing (or wiping) the previous scene and when used properly, they can create a very powerful effect. It involves creative fading in and out transitions to give a more dramatic look.
- 4k, 8k, HD resolution
The latest video editing software offer the export your edited video in multiple formats, out of which 4k, 8k and HD resolution formats are preferable for majority of the professional video editors. It is necessary that even after the video is uploaded to a platform, the pixels do not decrease and the quality of the video is maintained. Although attractive to the viewers, the higher the resolution, the more the data with which you must deal. It is suggested that a standard or default resolution is chosen to play and replay the video in different computers.
- B-roll
B-roll is secondary video that is frequently used as cutaway video to add context and visual interest to your story. The term is originated from the early days of Hollywood when there used to be an A-roll which was the primary video and B-roll which served as a secondary video footage. This can help you visualize your video from different dimensions, giving it a more realistic look for captivating viewers.
- Compression rate, bit depth, bit
The amount of data the camera records each second is referred to as bit rate. Every single second of a video is subject to significant data processing by cameras. The higher the quality of the video, the more is the bit rate. Bit depth refers to the number of colors your camera can read per pixel. Common bit depths are 8-bit and 10-bit, which enable a camera to read 256 million or 1.07 billion colors respectively. To upload your edited video, a compression is usually required to convert your resolution to internet quality so that the upload can be made simpler, without distorting the video resolution.
How to Make GIF With Transparent Background?
How to Make a GIF With Transparent Background?
An easy yet powerful editor
Numerous effects to choose from
Detailed tutorials provided by the official channel
How to Make a GIF With Transparent Background?
In this article
01 [Is It Possible to Create a Transparent GIF From Video?](#Part 1)
02 [Can Parts of GIF Be Made Semi-Transparent?](#Part 2)
03 [6 Best Free Transparent GIF Maker Software](#Part 3)
Part 1 Is It Possible to Create a Transparent GIF From Video?
GIFs are a complete infotainment package that keeps you imbibed with requisite information in a rather fun centered way. When it is about editing GIFs, you are free to experiment with limitless creativity. While making GIFs from videos is quite a common edit, something that gains attraction is, turning dull videos into classic, transparent GIFs.
Still wondering on this to be a possibility? Rest assured, because it is certainly a ‘Yes’. You can very conveniently create a transparent GIF from your videos without a hustle. All you need to do is just a background shuffle. While you can do this with almost any GIF editing software available across the web, here’s how you can take up the process using the Egif video converter tool:
Step 1: Convert a Video to GIF
Using Egif, first of all convert a desired video into GIF. Take caution to manually remove backgrounds from all video frames and save the GIF using .gif or .png file extensions. Don’t use .jpg extension; else you will end up losing background transparency.
In case of a solid color GIF background, navigate to Egif’s ‘Effects Tool’ and click on ‘Replace Color with Transparency’.

Step 2: Color Selection
Make a desired color selection that you wish to replace with transparent pixels. Select ‘White’ for a black and white GIF background. In case of color backgrounds, open any suitable picture editor (GIMP, MS Paint, etc.) and choose the hex color code using the ‘Color Picker’ tool.


This tool however, has compatibility limitations and can replace only a restricted number of color backgrounds, which too should not match the color scheme of foreground objects that you wish to restore in your GIF. If you require partially transparent backgrounds within specific portions of complex animated creations, you can use the ‘GIF Maker’ tool to selectively split and edit every clip frame, apply the transparency effect and finally merge all such clips together.
Part 2 Can Parts of GIF Be Made Semi-Transparent?
No matter how much disappointing it appears, you can never introduce semi-transparent backgrounds in your GIFs. This is due to the fact that the GIF format has a limitation on pixel appearances. This basically means that you can only have completely opaque or completely transparent GIF backgrounds, strictly permitting nothing in between. Hence, it is a regret to conclude that you can literally never add anti-aliasing effects to your GIF backgrounds.
This may be a little disapproving though, but thanks to revolutions in technology, you can live up to the hope that creating semi-transparent GIFs would not be a forever tussle. You never know when the trick strikes IT engineers, and you may possibly be reading an article on interesting ways of creating semi-transparent GIFs in future!
Part 3 Best Free Transparent GIF Maker Software
Having learnt about the exciting background edit feature to create transparent GIFs, let’s have a look through the top rated transparent GIF maker software available across the web and get into a spree of creating classic transparent GIFs that are bound to attract the attention of every viewer!
013 Transparent GIF Maker for Windows
When looking for the most suitable transparent GIF maker software for your Windows device, you can conveniently trust the following choices:
● Wondershare Filmora Video Editor
If you are browsing the web for an affordable, quick and visibly smart image and video editor software, Filmora by Wondershare can definitely be a worthy choice for you. Loaded with tons of top class editing features, this software assures you of a professional quality editing experience and is absolutely free to use.
Talk of creating transparent GIFs and this tool makes it a task of few seconds with its exclusive green screen feature. Hold on, that’s not over yet! Filmora offers you with a treat of over 300 audio and video effects that are all set to make your creation stand out in the crowd!

Wondershare Filmora - Best Video Editor for Mac/Windows
5,481,435 people have downloaded it.
Build unique custom animations without breaking a sweat.
Focus on creating epic stories and leave the details to Filmora’s auto features.
Start a creative adventure with drag & drop effects and endless possibilities.
Filmora simplifies advanced features to save you time and effort.
Filmora cuts out repetition so you can move on to your next creative breakthrough.
Key Features
● You get to work with possibly the most user cohesive, clean and speedy GIF maker tool with this software.
● It comes with a unique ‘Green Screen’ feature that changes your GIF background to a transparent one within a blink.
● Fillmora’s explicit media gallery allows you to add music and audio to create impactful animated and static GIFs.
● You have the liberty to adjust the size and rate, loop frequency and duration of your GIF frames.
● This software allows you to locally save as well as share the created GIFs with your social media peers.
● RealWorld Paint
This one is quite dependable software for quality image editing. Originally launched as a graphic editing tool, this software is a complete package of top class, professional editing features. Available to you absolutely free of cost, this GIF creator tool gas excellent compatibility for all your Windows supported devices.

Key Features
● Using this tool, you get the liberty to create your own video frames manually for transparent GIFs with a variety of drawing utilities, like, brush, magic wand, shapes, texts, retouch, lasso and many more.
● You can play with an enormous inventory of editing tools to improvise your craft in style. It allows you to cut, trim, resize, flip your GIFs and add beautiful mirrors and borders to them.
● You get to emote and design top quality animated GIFs with effects like, drop shadow, pixelate, unsharp mask, bevel, reduce noise, glow, etc.
● You can further introduce amazing color effects, such as, vignetting correction, watermark, color saturation, colorize, and so on.
● You are allowed to use images saved in your device to create frames for animated GIFs with transparent background.
● The software comes with a unique ‘Create Film Strip’ feature, which you can use to merge all the existing frames of your animated GIF.
● You can create animated GIFs in PNG and WebP formats.
● You can also create animated and static cursors, icons and images, etc. with this software.
● Chasys Draw IES
This one is a free, Widows compatible, processor suite for graphic editing. The software is packed with quality editing tools and effects that are all set to create elegant animated GIFs with transparent and colored backgrounds. You can however, use its Chasys Draw IES Artist tool to create GIFs with transparent background.

Key Features
● With this software, you are gifted with a long list of drawing tools, like, cloning, healing and paint brushes, snip tool, magic wand, smoother, sharpen, texts and shapes, etc,, that give you the liberty to manually create interesting animated GIF frames.
● It is loaded with prominent editing effects, like, transformation and color adjustment tools that can create catchy animated GIFs.
● The software allows two creation modes for animated GIFs, viz., normal and onion skin.
● You can use locally saved images to design animated GIF frames.
● It is compatible with a variety of image formats, like, PNG, JPEG, ANI, TIFF, PCX, ICO, TGA, etc. to name a few.
● You can even use this software as a file converter, video creator, animated and static icon generator, etc.
● To improve software efficiency, you can add suitable plugins to it.
023 Transparent GIF Maker for Mac
If you are more comfortable using Mac devices, you can go for the following transparent GIF maker tools to add that extra glitter to your otherwise basic GIFs:
● Smart GIF Maker
This is free GIF creator software you can use to make transparent animated GIFs on Mac supported devices. With its frame splitter tool, the software makes GIF editing quite easy for you by segmenting your imported video into a number of frames, following which, you are free to experiment with your editing skills.

Key Features
● This GIF maker has a simple and interactive user interface.
● The software allows you to import locally saved images and even select from chaises available on the software interface to create GIFs with transparent background.
● You can manually apply selective effects, such as background color adjustments, eyedropper, etc., to every image frame independently.
● Tools like, drawing resizer, eraser, etc, allow you to create that ‘just perfect’ frame for your transparent GIF.
● The software also permits you to set requisite time delays and loop frequency for each frame, once you are done with editing them.
● You can further preview your creation before choosing to export it to social media or save it to your device.
● Giphy Capture
This one is also a free, Mac compatible tool which you can use to create transparent animated GIFs. To use this software for making GIFs, you need to create time bounded screen recordings and edit them in the software’s editing interface to apply transparent backgrounds.

Key Features
● The software is loaded with tons of smart, professional quality editing features that can make your GIFs shine out in the crowd.
● You are free to play with tools like, text, style and color adjustments, reverse and resize frames rates, etc., to give your GIF the most perfect look.
● You have the liberty to set frame sizes within 640 pixels, shuffle loop styles among reverse, normal and ping-pong and adjust frame rates to high, low or HD.
● The software also allows you to choose from animation styles, like, fade, scale, etc. and caption your GIF.
● Once you are satisfied, you can save your creation locally to your device. However, you need to purchase the software for exporting your work to different platforms.
● This one is a simple GIF creator tool with a clean user interface.
● GIFlash
Like other GIF creator tools mentioned earlier, this is also a free, Mac supported transparent GIF maker software that works well with videos and static images. You can use either of them to make and edit GIFs with this tool. Additionally, it is also an impressive image and video mixing software.

Key Features
● Using this GIF maker, you are allowed to make specific screen selections while converting videos to GIFs.
● You have the liberty to flip or change frame positions and even delete specific frames according to your requirements.
● You can make changes in frame rates, alignments and dimensions.
● You get a unique color inversion feature with tool, in case you are creating GIFs with color backgrounds.
● You are also free to fix the loop frequency and duration of your created GIF.
● This is a quick and convenient tool with simple interface.
● Key Takeaways from This Episode →
● GIFs are already known to fall within the best and quick entertainment sources. These short catchy snippets become more attractive when created with transparent backgrounds.
● Talking of high quality transparent GIF maker tools, the software market offers you a diverse range of choices. Among these, Filmora by Wondershare is certainly a top rated GIF creator, loaded with advanced features for making professional quality GIFs with transparent backgrounds.
How to Make a GIF With Transparent Background?
In this article
01 [Is It Possible to Create a Transparent GIF From Video?](#Part 1)
02 [Can Parts of GIF Be Made Semi-Transparent?](#Part 2)
03 [6 Best Free Transparent GIF Maker Software](#Part 3)
Part 1 Is It Possible to Create a Transparent GIF From Video?
GIFs are a complete infotainment package that keeps you imbibed with requisite information in a rather fun centered way. When it is about editing GIFs, you are free to experiment with limitless creativity. While making GIFs from videos is quite a common edit, something that gains attraction is, turning dull videos into classic, transparent GIFs.
Still wondering on this to be a possibility? Rest assured, because it is certainly a ‘Yes’. You can very conveniently create a transparent GIF from your videos without a hustle. All you need to do is just a background shuffle. While you can do this with almost any GIF editing software available across the web, here’s how you can take up the process using the Egif video converter tool:
Step 1: Convert a Video to GIF
Using Egif, first of all convert a desired video into GIF. Take caution to manually remove backgrounds from all video frames and save the GIF using .gif or .png file extensions. Don’t use .jpg extension; else you will end up losing background transparency.
In case of a solid color GIF background, navigate to Egif’s ‘Effects Tool’ and click on ‘Replace Color with Transparency’.
Step 2: Color Selection
Make a desired color selection that you wish to replace with transparent pixels. Select ‘White’ for a black and white GIF background. In case of color backgrounds, open any suitable picture editor (GIMP, MS Paint, etc.) and choose the hex color code using the ‘Color Picker’ tool.
This tool however, has compatibility limitations and can replace only a restricted number of color backgrounds, which too should not match the color scheme of foreground objects that you wish to restore in your GIF. If you require partially transparent backgrounds within specific portions of complex animated creations, you can use the ‘GIF Maker’ tool to selectively split and edit every clip frame, apply the transparency effect and finally merge all such clips together.
Part 2 Can Parts of GIF Be Made Semi-Transparent?
No matter how much disappointing it appears, you can never introduce semi-transparent backgrounds in your GIFs. This is due to the fact that the GIF format has a limitation on pixel appearances. This basically means that you can only have completely opaque or completely transparent GIF backgrounds, strictly permitting nothing in between. Hence, it is a regret to conclude that you can literally never add anti-aliasing effects to your GIF backgrounds.
This may be a little disapproving though, but thanks to revolutions in technology, you can live up to the hope that creating semi-transparent GIFs would not be a forever tussle. You never know when the trick strikes IT engineers, and you may possibly be reading an article on interesting ways of creating semi-transparent GIFs in future!
Part 3 Best Free Transparent GIF Maker Software
Having learnt about the exciting background edit feature to create transparent GIFs, let’s have a look through the top rated transparent GIF maker software available across the web and get into a spree of creating classic transparent GIFs that are bound to attract the attention of every viewer!
013 Transparent GIF Maker for Windows
When looking for the most suitable transparent GIF maker software for your Windows device, you can conveniently trust the following choices:
● Wondershare Filmora Video Editor
If you are browsing the web for an affordable, quick and visibly smart image and video editor software, Filmora by Wondershare can definitely be a worthy choice for you. Loaded with tons of top class editing features, this software assures you of a professional quality editing experience and is absolutely free to use.
Talk of creating transparent GIFs and this tool makes it a task of few seconds with its exclusive green screen feature. Hold on, that’s not over yet! Filmora offers you with a treat of over 300 audio and video effects that are all set to make your creation stand out in the crowd!
Wondershare Filmora - Best Video Editor for Mac/Windows
5,481,435 people have downloaded it.
Build unique custom animations without breaking a sweat.
Focus on creating epic stories and leave the details to Filmora’s auto features.
Start a creative adventure with drag & drop effects and endless possibilities.
Filmora simplifies advanced features to save you time and effort.
Filmora cuts out repetition so you can move on to your next creative breakthrough.
Key Features
● You get to work with possibly the most user cohesive, clean and speedy GIF maker tool with this software.
● It comes with a unique ‘Green Screen’ feature that changes your GIF background to a transparent one within a blink.
● Fillmora’s explicit media gallery allows you to add music and audio to create impactful animated and static GIFs.
● You have the liberty to adjust the size and rate, loop frequency and duration of your GIF frames.
● This software allows you to locally save as well as share the created GIFs with your social media peers.
● RealWorld Paint
This one is quite dependable software for quality image editing. Originally launched as a graphic editing tool, this software is a complete package of top class, professional editing features. Available to you absolutely free of cost, this GIF creator tool gas excellent compatibility for all your Windows supported devices.
Key Features
● Using this tool, you get the liberty to create your own video frames manually for transparent GIFs with a variety of drawing utilities, like, brush, magic wand, shapes, texts, retouch, lasso and many more.
● You can play with an enormous inventory of editing tools to improvise your craft in style. It allows you to cut, trim, resize, flip your GIFs and add beautiful mirrors and borders to them.
● You get to emote and design top quality animated GIFs with effects like, drop shadow, pixelate, unsharp mask, bevel, reduce noise, glow, etc.
● You can further introduce amazing color effects, such as, vignetting correction, watermark, color saturation, colorize, and so on.
● You are allowed to use images saved in your device to create frames for animated GIFs with transparent background.
● The software comes with a unique ‘Create Film Strip’ feature, which you can use to merge all the existing frames of your animated GIF.
● You can create animated GIFs in PNG and WebP formats.
● You can also create animated and static cursors, icons and images, etc. with this software.
● Chasys Draw IES
This one is a free, Widows compatible, processor suite for graphic editing. The software is packed with quality editing tools and effects that are all set to create elegant animated GIFs with transparent and colored backgrounds. You can however, use its Chasys Draw IES Artist tool to create GIFs with transparent background.
Key Features
● With this software, you are gifted with a long list of drawing tools, like, cloning, healing and paint brushes, snip tool, magic wand, smoother, sharpen, texts and shapes, etc,, that give you the liberty to manually create interesting animated GIF frames.
● It is loaded with prominent editing effects, like, transformation and color adjustment tools that can create catchy animated GIFs.
● The software allows two creation modes for animated GIFs, viz., normal and onion skin.
● You can use locally saved images to design animated GIF frames.
● It is compatible with a variety of image formats, like, PNG, JPEG, ANI, TIFF, PCX, ICO, TGA, etc. to name a few.
● You can even use this software as a file converter, video creator, animated and static icon generator, etc.
● To improve software efficiency, you can add suitable plugins to it.
023 Transparent GIF Maker for Mac
If you are more comfortable using Mac devices, you can go for the following transparent GIF maker tools to add that extra glitter to your otherwise basic GIFs:
● Smart GIF Maker
This is free GIF creator software you can use to make transparent animated GIFs on Mac supported devices. With its frame splitter tool, the software makes GIF editing quite easy for you by segmenting your imported video into a number of frames, following which, you are free to experiment with your editing skills.
Key Features
● This GIF maker has a simple and interactive user interface.
● The software allows you to import locally saved images and even select from chaises available on the software interface to create GIFs with transparent background.
● You can manually apply selective effects, such as background color adjustments, eyedropper, etc., to every image frame independently.
● Tools like, drawing resizer, eraser, etc, allow you to create that ‘just perfect’ frame for your transparent GIF.
● The software also permits you to set requisite time delays and loop frequency for each frame, once you are done with editing them.
● You can further preview your creation before choosing to export it to social media or save it to your device.
● Giphy Capture
This one is also a free, Mac compatible tool which you can use to create transparent animated GIFs. To use this software for making GIFs, you need to create time bounded screen recordings and edit them in the software’s editing interface to apply transparent backgrounds.
Key Features
● The software is loaded with tons of smart, professional quality editing features that can make your GIFs shine out in the crowd.
● You are free to play with tools like, text, style and color adjustments, reverse and resize frames rates, etc., to give your GIF the most perfect look.
● You have the liberty to set frame sizes within 640 pixels, shuffle loop styles among reverse, normal and ping-pong and adjust frame rates to high, low or HD.
● The software also allows you to choose from animation styles, like, fade, scale, etc. and caption your GIF.
● Once you are satisfied, you can save your creation locally to your device. However, you need to purchase the software for exporting your work to different platforms.
● This one is a simple GIF creator tool with a clean user interface.
● GIFlash
Like other GIF creator tools mentioned earlier, this is also a free, Mac supported transparent GIF maker software that works well with videos and static images. You can use either of them to make and edit GIFs with this tool. Additionally, it is also an impressive image and video mixing software.
Key Features
● Using this GIF maker, you are allowed to make specific screen selections while converting videos to GIFs.
● You have the liberty to flip or change frame positions and even delete specific frames according to your requirements.
● You can make changes in frame rates, alignments and dimensions.
● You get a unique color inversion feature with tool, in case you are creating GIFs with color backgrounds.
● You are also free to fix the loop frequency and duration of your created GIF.
● This is a quick and convenient tool with simple interface.
● Key Takeaways from This Episode →
● GIFs are already known to fall within the best and quick entertainment sources. These short catchy snippets become more attractive when created with transparent backgrounds.
● Talking of high quality transparent GIF maker tools, the software market offers you a diverse range of choices. Among these, Filmora by Wondershare is certainly a top rated GIF creator, loaded with advanced features for making professional quality GIFs with transparent backgrounds.
Also read:
- The Ultimate Wedding Videography Checklist
- 2024 Approved Unleash the Power of Video Scopes in Your Video Editing Projects. Find the Most Common Video Scopes and How to Use Them on Video Editing Software
- New In 2024, Best iOS Slow Motion Apps To Work With
- New 2024 Approved M31 LUT (Teal and Orange LUT) Free Download
- Learn How to Use 3D Camera Tracking in Adobe After Effects and Take Your Skills to the Next Level
- Updated Making Slow Motion Videos in Final Cut Pro The Best Methods for 2024
- Updated 2024 Approved How to Animate Text in A Video
- Updated 8 Ways to Merge SRT with MP4
- New Are You Wondering How to Slow Down Videos or Speed Them up, Here Are Three Ways to Do It. Speed up or Slow Down Your Videos on PC, Online, and Phone
- Updated In 2024, 3 Ways to Create Motion Text Effects for Your Video
- In 2024, Discord Is Becoming More Popular with Time with Millions of Users. Are You Thinking of Getting a GIF for Discord Profile? If Yes, Learn From This Piece Since We Have a Conclusive Summary of Getting a GIF Profile Picture for Discord
- New Detailed Steps to Rotate Videos Using OBS
- New In 2024, Do You Know What Is Motion Blur in Fortnite? Read This Article to Find Out How to Apply Motion Blur in Fortnite Efficiently and with Ease
- New Top Tools To Create Blend Image Collage for 2024
- New Do You Want a LUT that You Can Use for Your High-Definition Content? You Can Use Rec 709 LUT Premiere Pro for Your HD Digital Media to Give the Perfect Result for 2024
- New In 2024, This Article Describes Different Ways for Removing Gif Backgrounds, How We Can Use Them, and How This Way Differs From One Another
- New In 2024, Do You Want to Create Adjustment Layers in Final Cut Pro? This Article Will Discuss a Simple yet Efficient Method to Generate Adjustment Layers in Final Cut Pro
- 2024 Approved How to Change Aspect Ratio of Video?
- New In 2024, 12 Impressive AI Video Ideas for Making Engaging Video Content
- The Ultimate Wedding Videography Checklist for 2024
- In 2024, Ultimate Guidelines to Help You Better Use VLC Media Player
- New Here Is a Complete Overview of VSCO Video Editor; the Best Photo-Editing App that Helps You Adjust Your Pictures Right After You Capture Them
- Updated 2024 Approved Looking Forward to Complement Your Weekend Evenings with a Fantasy Tour to the Anime World? Stay Here to Pick the Most Appealing Alternative From the Best and Timeless Anime Creations
- 5 Tips for Aquasoft Slideshow for 2024
- New In 2024, Easy Ways to Make Procreate GIFs
- New This Article Has a Detailed Description of How You Can Split the Videos in Lightworks Including the the Discussion of Splitting the Wondershare Filmora as an Alternative. It Is Also a Suitable Choice for 2024
- Deep Learning of AI Video Recognition for 2024
- Updated In 2024, Deep Learning of AI Video Recognition - Guide
- Updated In 2024, Its Always a Cool Thing to Use a 3D Intro Maker to Create Intro Videos for Your Clips. This Post Will Introduce You 4 of the Best Intro Video Makers to Help You Improve Your Video
- Figuring Out Proper Ways to Play a Video in Slow Motion on iPhone for 2024
- New In 2024, Planning and Storyboarding Is the Most Important Part of Creating a Music Video. Here Are some Easy Tips for Planning and Storyboarding a Music Video in Filmora
- New Vlogs and Travel Content Are Incomplete without a Fast-Motion Effect. Learn Step-by-Step How to Make Fast Motion Video on an iPhone in This Article for 2024
- New How To Use Voicemod On Discord Desktop+Mobile for 2024
- New 2024 Approved Five Thoughts on Discord Create Accounts How-To Questions
- Updated How to Use Lumetri Color in Adobe After Effects
- Updated In 2024, 6 Instant Mp4 to GIF Online Tools
- Updated How to Color Correct in OBS for 2024
- In 2024, 3D Ray Traced Settings In After Effects
- New 2024 Approved Find The Best LUTs for Lightroom
- How to Create Your Own LUTs for Your Video for 2024
- Updated 2024 Approved Techniques You Never Heard of for Learning AI Marketing YouTube
- New 2024 Approved How to Use Rule of Thirds in Video
- Updated In 2024, Event Videography Is Popular in Weddings, Graduation, Family Reunion and Other Great Moments. Here Im Going to Share some of the Tips to Make a Better Event Videography
- Updated 2024 Approved How to Make Discord Emoji GIF
- Updated Comprehensive Guide to Add LUTs in Premiere Pro with Ease
- Updated Do You Want to Learn How to Use Premiere Pro Distortion Effects in Your Videos? We Have Provided a List of Distortion Premiere Pro Effects and How to Use Them
- How To Change Speed of Video in Final Cut Pro, In 2024
- Are You Interested in the Best LUTs ? Do You Want to Enhance Your Photos and Images with High-End Quality? Then, Quickly Step Into This Article for Mind-Blowing Facts on It
- The Complete Guide to HTC FRP Bypass Everything You Need to Know
- In 2024, Unlocking an iCloud Locked iPad and iPhone 11 Pro Max
- In 2024, Android Unlock Code Sim Unlock Your Xiaomi 13 Ultra Phone and Remove Locked Screen
- MP4 Video Repair Tool - Repair corrupt, damaged, unplayable video files of Poco C65
- How To Transfer WhatsApp From iPhone 14 to Android? | Dr.fone
- In 2024, 2 Ways to Monitor Apple iPhone X Activity | Dr.fone
- Reasons for Itel P55+ Stuck on Startup Screen and Ways To Fix Them | Dr.fone
- In 2024, How to Come up With the Best Pokemon Team On Vivo V30 Pro? | Dr.fone
- 11 Best Location Changers for Realme V30T | Dr.fone
- Want to Uninstall Google Play Service from Infinix Zero 30 5G? Here is How | Dr.fone
- Unlocking Made Easy The Best 10 Apps for Unlocking Your Xiaomi Redmi Note 13 5G Device
- 5 Ways to Restart Infinix Zero 5G 2023 Turbo Without Power Button | Dr.fone
- How to Transfer Everything from Apple iPhone 14 Plus to iPhone 8/X/11 | Dr.fone
- In 2024, What Is a SIM Network Unlock PIN? Get Your Oppo K11 5G Phone Network-Ready
- 3 Ways to Fake GPS Without Root On Asus ROG Phone 7 Ultimate | Dr.fone
- In 2024, How To Enable USB Debugging on a Locked Realme C67 4G Phone
- In 2024, List of Pokémon Go Joysticks On Apple iPhone 13 Pro | Dr.fone
- In 2024, How to Spy on Text Messages from Computer & Vivo Y200e 5G | Dr.fone
- 9 Best Phone Monitoring Apps for Itel A05s | Dr.fone
- In 2024, How and Where to Find a Shiny Stone Pokémon For Samsung Galaxy M34? | Dr.fone
- 9 Quick Fixes to Unfortunately TouchWiz has stopped Of Motorola Moto G13 | Dr.fone
- Title: What Is Lumetri Color and How Do You Use It in Adobe After Effects? Find Out the Numerous Functions of Lumetri Panel and Ways to Apply Them to Your Video
- Author: Morgan
- Created at : 2024-06-15 18:56:19
- Updated at : 2024-06-16 18:56:19
- Link: https://ai-video-editing.techidaily.com/what-is-lumetri-color-and-how-do-you-use-it-in-adobe-after-effects-find-out-the-numerous-functions-of-lumetri-panel-and-ways-to-apply-them-to-your-video/
- License: This work is licensed under CC BY-NC-SA 4.0.
