
:max_bytes(150000):strip_icc():format(webp)/set-top-dvr-1130767-f2aa7f11e3d2442b966d53b8aa2d25fd.png)
Best 12 AI Video Generators to Pick for 2024
Best 12 AI Video Generators to Pick
Top 12 AI Video Generators to Pick
An easy yet powerful editor
Numerous effects to choose from
Detailed tutorials provided by the official channel
It is a fact that video editing can sometimes be laborious and time-consuming. Even when using the best video editing software, it still requires human effort to get an impressive result. But luckily for us, the invention of the AI video generator has now made a lot of things easier. The AI video generators are the next level as they allow users to automate video creation and editing without compromising quality.
This article will discuss the best AI text to video generators for free that will help make your life easier. Thus, this will soon help you create engaging videos for your personal or business use in just a few clicks.
In this article
01 [What Is an AI Video Generator](#Part 1)
02 [How Does the AI Video Maker Work](#Part 2)
03 [The 12 Best AI Video Generator](#Part 3)
Part 1 What Is an AI Video Generator
AI video generator is the process of using artificial intelligence (AI) to create professional videos. With an AI video generator for free, you do not need any equipment, an editing studio, or a premium video editing application to be able to create a video.
All that is required is that you feed input to the AI tool, and it will automatically help you generate a video. You can edit a blog post into a video within a few minutes with any of these tools listed. In addition, it won’t incur any high costs for video productions because the AI tool will help you carry out most of the tasks.
Part 2 How Does the AI Video Maker Work
Professional AI video editors, are trained by showing them various examples and then providing them feedback by telling them what is wrong and good. The machine then takes note of it and remembers it. However, as the machine continues to learn, it picks the results and then improves itself based on the feedback. Ultimately the device becomes very good or even better than the human that creates it. Here are some breakdowns of the ways video editors work:
● The AI video maker tool, can augment your videos with AR effects, including AR masks, face and color filters, face touch-ups, etc. The tool uses neural networks and computer vision to interrupt, extract, and understand the video content.
● This AI subtitle generator can allow interviews to be delivered and analyzed to the editor fully transcribed, searchable by word or even sentences. Video editors can use AI for keyword extraction, speech-to-text conversion, facial recognition, sentiment analysis, image recognition, and emotion detection.
● AI-video editors can pull sections of a video clip from any source automatically. These AI systems can also detect emotions that allow the creation of warm, appealing videos.
Part 3 The 12 Best AI Video Generator
There are top AI video generators for free that you can choose from for your video editing. These video editors complete work quickly and easily. In addition, if you need video editing software to help you edit your generated videos after generating them, we recommend that you try out Filmora from Wondershare. Wondershare Filmora Video Editor is a perfect video editing software with tons of new features, like keyframing, split video, and adding animations and effects to help you carry out your video editing seamlessly.
For Win 7 or later (64-bit)
For macOS 10.12 or later
01Sora
Sora is an artificial intelligence model that generates videos with textual descriptions, developed by OpenAI. It is a US-based artificial intelligence research organization. Sora stands out as a game-changing platform. It can seamlessly convert text into captivating videos, blending convenience with creativity.
Features
● With Sora, transforming written content into engaging videos is swift and efficient.
● Unlike traditional video editing tools, Sora is designed for users of all levels, eliminating the need for prior video production experience.
● Sora offers a plethora of customization options.
● Generates videos up to 60 seconds long
● Generates complex scenes with multiple characters, motions, and accurate details of the subject
● Creates multiple shots within a single generated video
● Generating videos from text instructions by utilizing the recaptioning technique from DALL·E 3
Pros
● Highly realistic video generation with impressive visual quality
● Text-based control over the content of the video, allowing for precise video generation
● A highly versatile tool that handles a wide range of prompts and styles
Cons
● Lacks implicit understanding of the rules of physics
This software is best realistic and imaginative scenes.
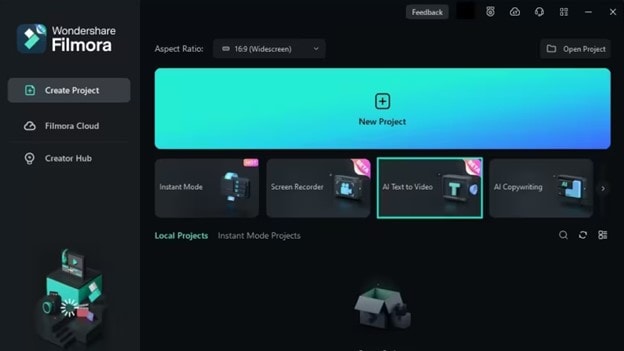
02Wondershare Filmora
Wondershare Filmora is a highly efficient video editing software that comes with AI text to video generation. The software is friendly to both beginner and intermediate creations, offering you a wide range of intuitive features.
Pricing
● Subscription Plan: US$19.99 per month
● Cross-Platform Plan: US$69.99 per year
● Perpetual Plan: US$19.99 Onetime Payment
Features
● User-friendly interface that is easy to learn and use
● Wide range of features for creating and editing videos, including transitions, effects, and text overlays.
● Large stock library of royalty-free music and stock footage
● Readily available templates and presets to quickly generate videos
● Easily export videos directly to popular platforms like YouTube and TikTok
Pros
● User-friendly interface with a learning curve suitable for all kinds of creators
● Extensive library of free and paid assets to enhance your videos
● Wide range of features for video editing
Cons
● Lacks advanced features for AI video prompt generation
This software is best for video creation and editing for freelancers, SMBs, markters.
For Win 7 or later (64-bit)
For macOS 10.12 or later
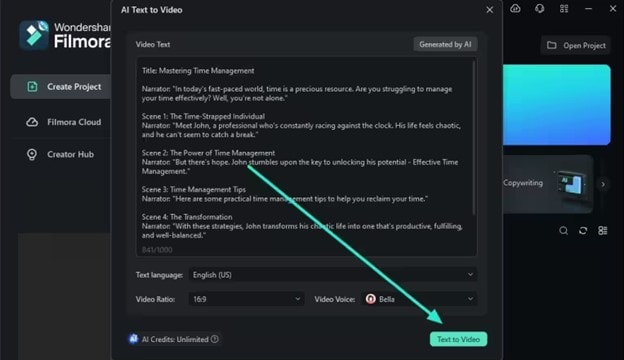
How to Use Filmora’s AI to Video Feature : AI Video Prompt Sample
Here is a brief step-by-step guide on how to use Filmora to generate AI videos. The process is as simple as writing a text prompt and getting the video ready:
Step 1: Lauch Filmora AI Text-to-Video Features
Once you launch on your PC Filmora, click the AI Text-to-Video option to start the video generation process.
Step 2: Add a Text Prompt or Video Script
On the AI Text-to-Video video, add your text prompt. You can also modify other settings such as text language and video voice. Then click the Text to Video button at the bottom to prompt Filmora to generate the video.
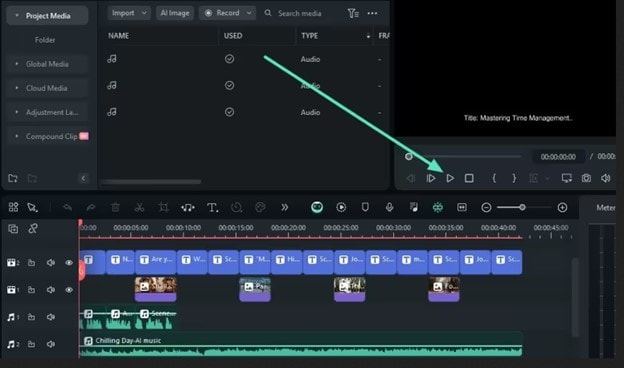
Step 3: Preview the Generated Video
Filmora generates the video based on your prompt and a new editing window. You can now a preview video and make any further editing needed.
AI Video Prompt Sample Using Filmora
Prompt: A young man at his 20s is sitting on a piece of cloud in the sky, reading a book.
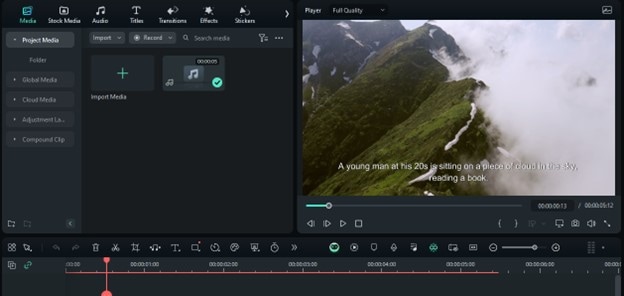
When prompted to generate a video of a young man in his 20s sitting on a piece of cloud in the sky, reading a book, Filmora generated a narration video from the point of view of the young man as shown above.
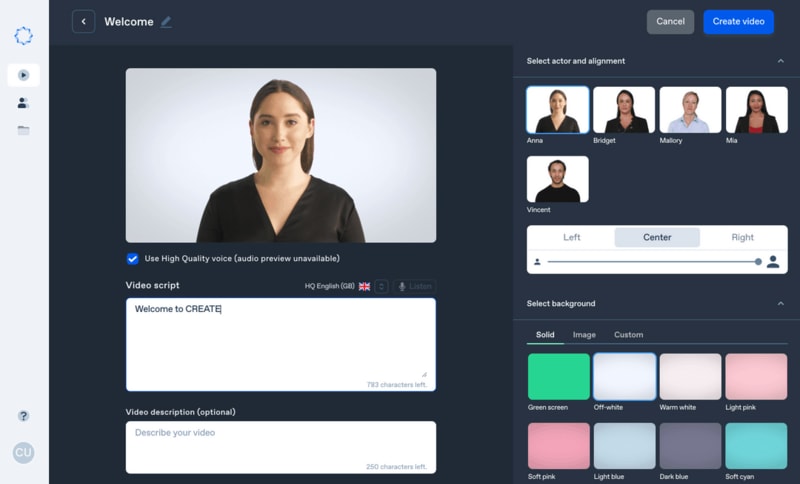
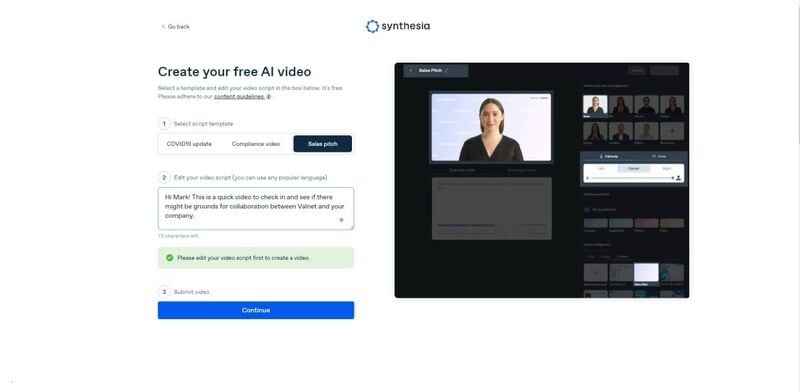
03Synthesia
This is a web-app video generator AI from a text supporting AI-driven video creation used by experts and beginners. Rather than filming content utilizing a microphone and camera, this software AI technology helps to simulate human presenters and real-life videos. Thus, it saves video creators hours of work.
Pricing
● Personal Plan: $30 monthly
● Corporate Plan: custom pricing
Features
● Over 40 supported languages
● Allows template customizations
● Allows users to make their avatars
● It has 50 built-in presenters
● Allows you to create realistic AI videos
● Offers live chat support
● Allows download in Mp4
● Enables users to create videos automatically using integrations with APIs
● Allows the addition of backgrounds
● Users can share their videos on other social media platforms
● Allows the addition of images, shapes, and texts to videos
Pros
● Great for beginners are you do not need prior knowledge
Cons
● It supports only front-facing poses
This software is best for freelancers, agencies, marketers, and content creators looking to create high-quality video content.
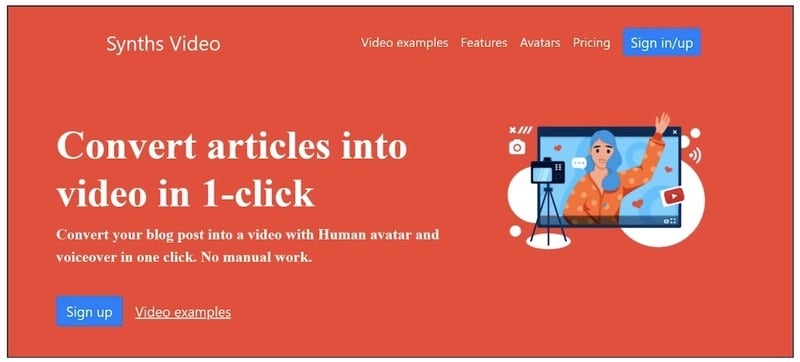
04Synths Video
This is an AI video-generating tool primarily concerned with helping users drive leads and traffic from YouTube. It is an AI YouTube title generator that allows users to create professional-looking videos from blog posts on YouTube.
Pricing
● YouTube Start: $399 monthly.
● Premium Custom Package: Custom Pricing.
Features
● Video generation from URLs
● It has built-in integration with YouTube
● 20+ avatars are available
● Allows video upload in HD quality
● Over 40+ languages supported
Cons
● No free plan is available
Best for the owners of YouTube channels.
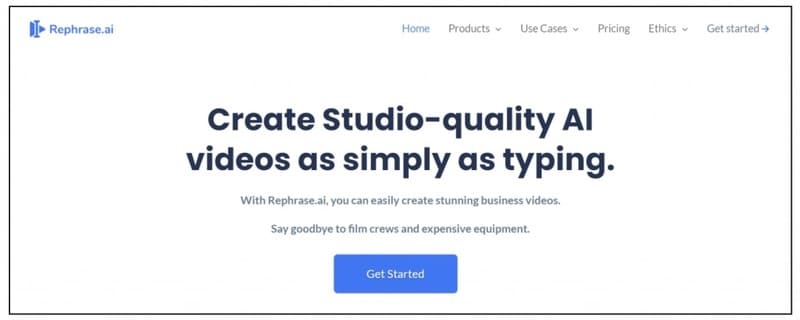
05Rephrase.ai
Rephrase.ai is a video editing software that uses a sophisticated deep learning engine to create professional videos.
Pricing
● Starter plan: $25 monthly
● Enterprise plan: Custom Pricing
Features
● Produces high-resolution videos
● Supports functionality for presenter customization
● Multiple-use cases supported
● Allows users to select their preferred AI voice
● Support varieties of video editing tools
Cons
● It has a complex pricing plan
It is best for agencies seeking to create customizable and personalized professional videos for marketing and advertising.
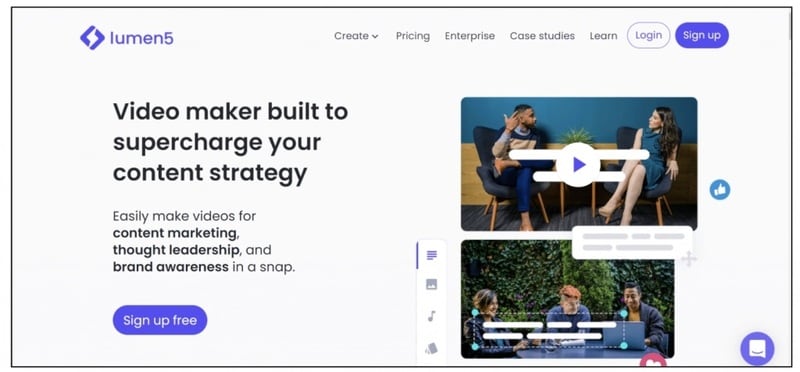
06Lumen5
Lumen5 is one of the top AI video-creating tools available for beginners and uses Natural Language Processing algorithms to convert text into high-quality videos.
Pricing
● Free Plan
● Creator plan: $15 monthly.
● Premium plan: $79 monthly.
● Business plan: $199 monthly.
● Enterprise plan: Custom Pricing.
Features
● Transforms text to video within minutes
● Numerous templates are available
● Allows customization of videos resolution, color, and font
Cons
● Limited features in the free plan
Best for beginners who are looking to generate short-duration of videos for social media platforms.
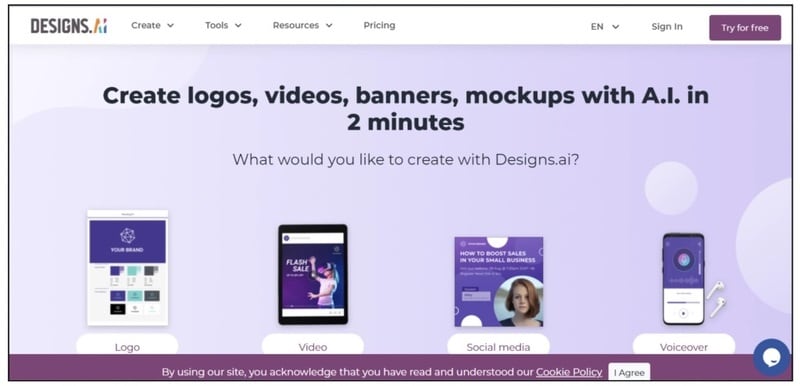
07Designs.ai
This is an AI-powered video maker that is useful for users that do not have any experience in design.
Pricing
● Basic plan: $29 monthly
● Pro plan: $69 monthly
● Enterprise plan: Custom Pricing
Features
● It has an attractive and modern user interface
● Allows the creation of videos from pre-designed templates
● Helps video creation from your custom video files
● Over 20 languages supported
● Coverts texts to video
Cons
● Only allows video download in a paid plan.
This tool is best for creators and designers who are willing to create quick AI videos.
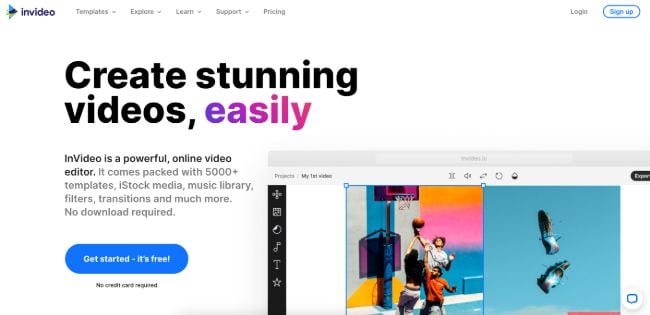
08InVideo
This is a perfect AI generator used for creating explainers or marketing videos easily and quickly. The platform helps produce high-quality videos with varieties of style options to make the ideal video according to your requirements.
Pricing
● Free: Free with watermarks on your videos.
● Business: $15 monthly with no watermarks.
● Unlimited: $30 monthly with unlimited video exports.
Features
● Very affordable
● Comprises an online drag-and-drop video editor
● Over 50 AI-powered themes that help to convert text to video in 3 minutes
● Full iStock media library available in all plans
Cons
● Requires internet connection to use
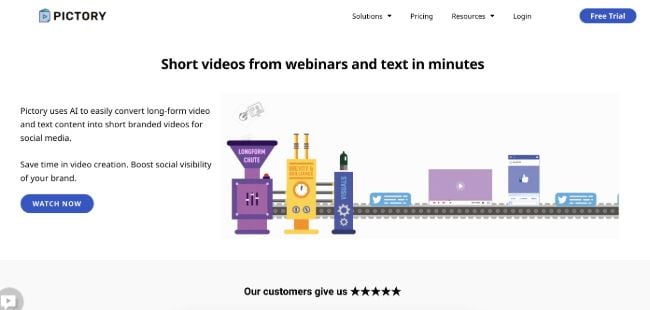
09Pictory.ai
This AI subtitle generator converts your text and turns it into an AI-generated video. This program is simple and easy to get started, requiring no software download. Paste your text into the editor and get started.
Pricing
● Free trial: Only use 3 videos.
● Standard Plan: $29 per month.
● Premium Plan: $59 per month.
Features
● It has a simple user interface.
● Over 6M licensed Shutterstock available
● Unlimited and affordable videos in the premium plan
Cons
● It is quite expensive compared to other tools
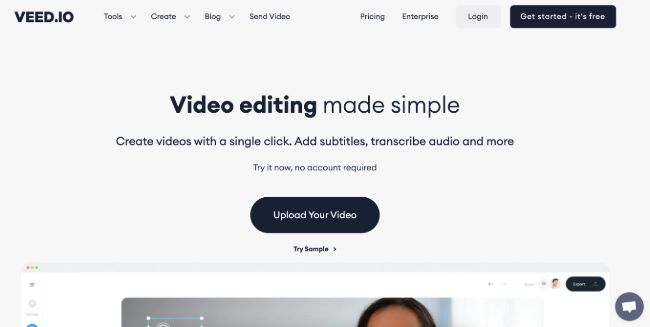
10Veed.io
Veed.io is not specifically an AI video generator but a video editing tool that utilizes AI to simplify the entire process and allows users to create high-quality videos within seconds.
Pricing
● Free: Free with watermarks!
● Basic: $18 monthly.
● Pro: $30 monthly
Features
● It has lots of video templates and a music library to choose
● Easy to learn, user-friendly interface
● Video rendering times are quite fast
● The basic plan has a high-quality resolution
Cons
● Not a typical AI video generator
● Not for beginners
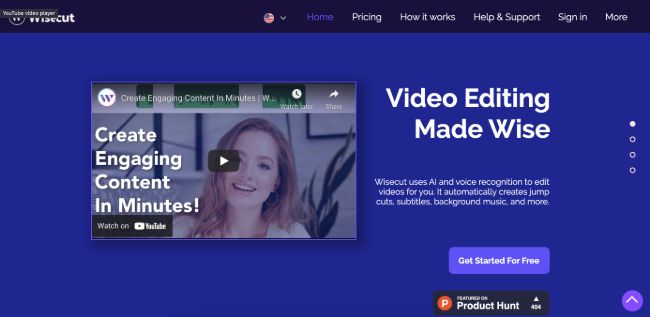
11Wisecut
This free AI video generator platform allows you to turn your text into video. Type in your text and choose a voice actor, and then Wisecut will take care of the rest. It offers excellent editing tools for users to tweak your video until it’s just right.
Pricing
● Basic: Free.
● Professional: $57 per month.
Features
● This platform is easy to use
● It has a simple drag and drops user-interface
● Allows auto subtitles and auto cut silences
● Allows integration with YouTube
● Subtitles auto-translation
● Excellent video quality
Cons
● Has limited effects
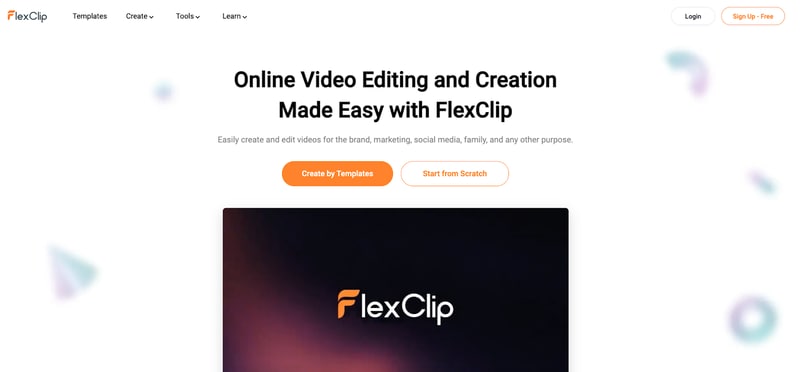
12Flexclip
FlexClip makes video creation and editing easy with-it millions of royalty-free stock media and thousands of templates for you to choose from.
Pricing
● Free
● Basic: $5.99 per month.
● Plus: $9.99 per month
● Business: $19.99 per month.
Features
● Thousands of available templates
● Simple tool for creating and editing videos
● Use for creating engaging videos
● Provides millions of royalty stock media
● Versatile and Flexible
Cons
● Not for beginners
● Ending Thoughts →
● In this post, we have listed the top text to video generators that you can choose from to help you perform tasks within minutes.
● The report also explains all you need to know about video AI generators and recommends Filmora as a perfect tool for editing your videos.
It is a fact that video editing can sometimes be laborious and time-consuming. Even when using the best video editing software, it still requires human effort to get an impressive result. But luckily for us, the invention of the AI video generator has now made a lot of things easier. The AI video generators are the next level as they allow users to automate video creation and editing without compromising quality.
This article will discuss the best AI text to video generators for free that will help make your life easier. Thus, this will soon help you create engaging videos for your personal or business use in just a few clicks.
In this article
01 [What Is an AI Video Generator](#Part 1)
02 [How Does the AI Video Maker Work](#Part 2)
03 [The 12 Best AI Video Generator](#Part 3)
Part 1 What Is an AI Video Generator
AI video generator is the process of using artificial intelligence (AI) to create professional videos. With an AI video generator for free, you do not need any equipment, an editing studio, or a premium video editing application to be able to create a video.
All that is required is that you feed input to the AI tool, and it will automatically help you generate a video. You can edit a blog post into a video within a few minutes with any of these tools listed. In addition, it won’t incur any high costs for video productions because the AI tool will help you carry out most of the tasks.
Part 2 How Does the AI Video Maker Work
Professional AI video editors, are trained by showing them various examples and then providing them feedback by telling them what is wrong and good. The machine then takes note of it and remembers it. However, as the machine continues to learn, it picks the results and then improves itself based on the feedback. Ultimately the device becomes very good or even better than the human that creates it. Here are some breakdowns of the ways video editors work:
● The AI video maker tool, can augment your videos with AR effects, including AR masks, face and color filters, face touch-ups, etc. The tool uses neural networks and computer vision to interrupt, extract, and understand the video content.
● This AI subtitle generator can allow interviews to be delivered and analyzed to the editor fully transcribed, searchable by word or even sentences. Video editors can use AI for keyword extraction, speech-to-text conversion, facial recognition, sentiment analysis, image recognition, and emotion detection.
● AI-video editors can pull sections of a video clip from any source automatically. These AI systems can also detect emotions that allow the creation of warm, appealing videos.
Part 3 The 12 Best AI Video Generator
There are top AI video generators for free that you can choose from for your video editing. These video editors complete work quickly and easily. In addition, if you need video editing software to help you edit your generated videos after generating them, we recommend that you try out Filmora from Wondershare. Wondershare Filmora Video Editor is a perfect video editing software with tons of new features, like keyframing, split video, and adding animations and effects to help you carry out your video editing seamlessly.
For Win 7 or later (64-bit)
For macOS 10.12 or later
01Sora
Sora is an artificial intelligence model that generates videos with textual descriptions, developed by OpenAI. It is a US-based artificial intelligence research organization. Sora stands out as a game-changing platform. It can seamlessly convert text into captivating videos, blending convenience with creativity.
Features
● With Sora, transforming written content into engaging videos is swift and efficient.
● Unlike traditional video editing tools, Sora is designed for users of all levels, eliminating the need for prior video production experience.
● Sora offers a plethora of customization options.
● Generates videos up to 60 seconds long
● Generates complex scenes with multiple characters, motions, and accurate details of the subject
● Creates multiple shots within a single generated video
● Generating videos from text instructions by utilizing the recaptioning technique from DALL·E 3
Pros
● Highly realistic video generation with impressive visual quality
● Text-based control over the content of the video, allowing for precise video generation
● A highly versatile tool that handles a wide range of prompts and styles
Cons
● Lacks implicit understanding of the rules of physics
This software is best realistic and imaginative scenes.
02Wondershare Filmora
Wondershare Filmora is a highly efficient video editing software that comes with AI text to video generation. The software is friendly to both beginner and intermediate creations, offering you a wide range of intuitive features.
Pricing
● Subscription Plan: US$19.99 per month
● Cross-Platform Plan: US$69.99 per year
● Perpetual Plan: US$19.99 Onetime Payment
Features
● User-friendly interface that is easy to learn and use
● Wide range of features for creating and editing videos, including transitions, effects, and text overlays.
● Large stock library of royalty-free music and stock footage
● Readily available templates and presets to quickly generate videos
● Easily export videos directly to popular platforms like YouTube and TikTok
Pros
● User-friendly interface with a learning curve suitable for all kinds of creators
● Extensive library of free and paid assets to enhance your videos
● Wide range of features for video editing
Cons
● Lacks advanced features for AI video prompt generation
This software is best for video creation and editing for freelancers, SMBs, markters.
For Win 7 or later (64-bit)
For macOS 10.12 or later
How to Use Filmora’s AI to Video Feature : AI Video Prompt Sample
Here is a brief step-by-step guide on how to use Filmora to generate AI videos. The process is as simple as writing a text prompt and getting the video ready:
Step 1: Lauch Filmora AI Text-to-Video Features
Once you launch on your PC Filmora, click the AI Text-to-Video option to start the video generation process.
Step 2: Add a Text Prompt or Video Script
On the AI Text-to-Video video, add your text prompt. You can also modify other settings such as text language and video voice. Then click the Text to Video button at the bottom to prompt Filmora to generate the video.
Step 3: Preview the Generated Video
Filmora generates the video based on your prompt and a new editing window. You can now a preview video and make any further editing needed.
AI Video Prompt Sample Using Filmora
Prompt: A young man at his 20s is sitting on a piece of cloud in the sky, reading a book.
When prompted to generate a video of a young man in his 20s sitting on a piece of cloud in the sky, reading a book, Filmora generated a narration video from the point of view of the young man as shown above.
03Synthesia
This is a web-app video generator AI from a text supporting AI-driven video creation used by experts and beginners. Rather than filming content utilizing a microphone and camera, this software AI technology helps to simulate human presenters and real-life videos. Thus, it saves video creators hours of work.
Pricing
● Personal Plan: $30 monthly
● Corporate Plan: custom pricing
Features
● Over 40 supported languages
● Allows template customizations
● Allows users to make their avatars
● It has 50 built-in presenters
● Allows you to create realistic AI videos
● Offers live chat support
● Allows download in Mp4
● Enables users to create videos automatically using integrations with APIs
● Allows the addition of backgrounds
● Users can share their videos on other social media platforms
● Allows the addition of images, shapes, and texts to videos
Pros
● Great for beginners are you do not need prior knowledge
Cons
● It supports only front-facing poses
This software is best for freelancers, agencies, marketers, and content creators looking to create high-quality video content.
04Synths Video
This is an AI video-generating tool primarily concerned with helping users drive leads and traffic from YouTube. It is an AI YouTube title generator that allows users to create professional-looking videos from blog posts on YouTube.
Pricing
● YouTube Start: $399 monthly.
● Premium Custom Package: Custom Pricing.
Features
● Video generation from URLs
● It has built-in integration with YouTube
● 20+ avatars are available
● Allows video upload in HD quality
● Over 40+ languages supported
Cons
● No free plan is available
Best for the owners of YouTube channels.
05Rephrase.ai
Rephrase.ai is a video editing software that uses a sophisticated deep learning engine to create professional videos.
Pricing
● Starter plan: $25 monthly
● Enterprise plan: Custom Pricing
Features
● Produces high-resolution videos
● Supports functionality for presenter customization
● Multiple-use cases supported
● Allows users to select their preferred AI voice
● Support varieties of video editing tools
Cons
● It has a complex pricing plan
It is best for agencies seeking to create customizable and personalized professional videos for marketing and advertising.
06Lumen5
Lumen5 is one of the top AI video-creating tools available for beginners and uses Natural Language Processing algorithms to convert text into high-quality videos.
Pricing
● Free Plan
● Creator plan: $15 monthly.
● Premium plan: $79 monthly.
● Business plan: $199 monthly.
● Enterprise plan: Custom Pricing.
Features
● Transforms text to video within minutes
● Numerous templates are available
● Allows customization of videos resolution, color, and font
Cons
● Limited features in the free plan
Best for beginners who are looking to generate short-duration of videos for social media platforms.
07Designs.ai
This is an AI-powered video maker that is useful for users that do not have any experience in design.
Pricing
● Basic plan: $29 monthly
● Pro plan: $69 monthly
● Enterprise plan: Custom Pricing
Features
● It has an attractive and modern user interface
● Allows the creation of videos from pre-designed templates
● Helps video creation from your custom video files
● Over 20 languages supported
● Coverts texts to video
Cons
● Only allows video download in a paid plan.
This tool is best for creators and designers who are willing to create quick AI videos.
08InVideo
This is a perfect AI generator used for creating explainers or marketing videos easily and quickly. The platform helps produce high-quality videos with varieties of style options to make the ideal video according to your requirements.
Pricing
● Free: Free with watermarks on your videos.
● Business: $15 monthly with no watermarks.
● Unlimited: $30 monthly with unlimited video exports.
Features
● Very affordable
● Comprises an online drag-and-drop video editor
● Over 50 AI-powered themes that help to convert text to video in 3 minutes
● Full iStock media library available in all plans
Cons
● Requires internet connection to use
09Pictory.ai
This AI subtitle generator converts your text and turns it into an AI-generated video. This program is simple and easy to get started, requiring no software download. Paste your text into the editor and get started.
Pricing
● Free trial: Only use 3 videos.
● Standard Plan: $29 per month.
● Premium Plan: $59 per month.
Features
● It has a simple user interface.
● Over 6M licensed Shutterstock available
● Unlimited and affordable videos in the premium plan
Cons
● It is quite expensive compared to other tools
10Veed.io
Veed.io is not specifically an AI video generator but a video editing tool that utilizes AI to simplify the entire process and allows users to create high-quality videos within seconds.
Pricing
● Free: Free with watermarks!
● Basic: $18 monthly.
● Pro: $30 monthly
Features
● It has lots of video templates and a music library to choose
● Easy to learn, user-friendly interface
● Video rendering times are quite fast
● The basic plan has a high-quality resolution
Cons
● Not a typical AI video generator
● Not for beginners
11Wisecut
This free AI video generator platform allows you to turn your text into video. Type in your text and choose a voice actor, and then Wisecut will take care of the rest. It offers excellent editing tools for users to tweak your video until it’s just right.
Pricing
● Basic: Free.
● Professional: $57 per month.
Features
● This platform is easy to use
● It has a simple drag and drops user-interface
● Allows auto subtitles and auto cut silences
● Allows integration with YouTube
● Subtitles auto-translation
● Excellent video quality
Cons
● Has limited effects
12Flexclip
FlexClip makes video creation and editing easy with-it millions of royalty-free stock media and thousands of templates for you to choose from.
Pricing
● Free
● Basic: $5.99 per month.
● Plus: $9.99 per month
● Business: $19.99 per month.
Features
● Thousands of available templates
● Simple tool for creating and editing videos
● Use for creating engaging videos
● Provides millions of royalty stock media
● Versatile and Flexible
Cons
● Not for beginners
● Ending Thoughts →
● In this post, we have listed the top text to video generators that you can choose from to help you perform tasks within minutes.
● The report also explains all you need to know about video AI generators and recommends Filmora as a perfect tool for editing your videos.
How to Change Quicktime Player Speed on Mac?
Powerful Video Editor - Wondershare Filmora
An easy and powerful editor
Numerous effects to choose from
Detailed tutorials are provided by the official channel
Quicktime Player is an Apple Inc. software that is compatible with all current versions of macOS X as well as Windows.
The user interface of the Quicktime media player is straightforward to navigate. The majority of video formats may be supported, as well. Like VLC, you can quickly speed up or slow down videos with Quicktime player using specific hotkeys or by manually altering the speed of the video.

A broad number of formats may be handled by QuickTime, including music, graphics, and panoramic photography. All of your music and video files will play without a hitch, and it is a fully complete media player.
Many customers buy a Mac computer and instantly install QuickTime, the default video player, under the notion that it is a basic video player with few additional functions. In fact, the QuickTime player has a slew of hidden functions that are pretty useful, but only a few people are aware of it. The option to increase the Quicktime player speed is one of these hidden features’ which is most popular and helpful. This is particularly true if you have to sit through a presentation or lecture.
How to Speed up Videos in Quicktime Player?
If you want to watch your movies on Quicktime player as quickly as possible, go with a long-term solution. The pace of the clip may be raised or lowered from the toolbar, and the settings of the application can be altered.
Thus, in easy words when you download a video to your Mac, you can control the speed at which it plays back on your computer using Quicktime player.

There are two ways to achieve this goal, one is manually through settings whereas the second way is using hotkeys. Let’s discuss both by understanding how to increase QuickTime player speed manually.
Manually Setting Up Quicktime player speed
- Open the Quicktime player installed on your computer.
- Embedding video within the interface is recommended.
- Go to the Toolbar and choose the Windows tab from the drop-down menu.
- To access the A/V controls, press the A/V Controls button. There will be a dialogue box that appears.
- Locate the Playback Speed option and adjust the speed of the movie by increasing or decreasing it.
- Close the box and go to watch the video in its entirety.
Speeding Up playback Speed Quicktime Using Hotkeys
- There isn’t a special hotkey for Quicktime that allows you to speed up or slow down the video. Using your mouse and keyboard, on the other hand, you may do the task in an instant.
- Open the video in the Quicktime Player on your computer by clicking on it.
- Play the video clip, and then hit the “OPTIONS” key on your keyboard to stop it.
- Press the Fast Forward button on the player and the left mouse button at the same time. It will speed up the pace at which the video is played back.
- The tap will cause a 1.1x choice to appear at the top of the screen.

Increasing the speed is accomplished by repeatedly clicking until the desired speed is achieved.
However, keep in mind that there has been a glitch that has existed for years that causes the audio to stop working after you reach 2x speed. To get around this problem, just accelerate to 1.9x and then stop.
If you come across anything you like and want to view it again, you may stop the video by pressing the space bar twice. However, pressing the spacebar will cause the playing speed to be reset.
How to Slow Down Videos in Quicktime Player?
When viewing a movie on your Mac, you may discover that you need to slow it down on a frequent basis. You may discover a range of slow down video editing tools that can help you slow down a video on the internet. Furthermore, various video players may be able to let you quickly slow down your movie. QuickTime Player is one of those programs that may be customized to your individual needs.
We sometimes overlook the enormous capacity inherent inside the dependable and dependable QuickTime Player. QuickTime contains a number of key capabilities meant to help you deal with your media files and play video and audio files.
Steps to follow to slow down Quicktime Player speed
Like speeding up the QuickTime playback speed, the users can simultaneously slow down the playback speed as well. It can be done manually and through the use of specific keys already present on the keyboard.
Manual Setup
In order to manually slowdown QuickTime video, follow the below-mentioned steps:
- Launch the Quicktime player application
- Click on “File” and choose the video which is already saved or downloaded on your MAC.
- Once the video is loaded in the Quicktime player, click on “View” on the toolbar on the top.
- As you click on “View”, a drop-down menu will appear. Locate the “Playback speed” option from the drop-down menu.

- When you click on “Playback speed”, another dialogue box will appear right next to the drop-down menu, which will have options regarding the playback speed.

- Click on “Half speed” and press the play button to watch the video with a slower playback rate.

Slowdown QuickTime speed using Hotkeys
- Open the video or the clip you want to watch.
- If Quicktime is your default player, the video loads in it.
- Otherwise, launch the QuickTime application
- By clicking on “Open”, choose your specific clip or video.
- Once the video is loaded, press the ““OPTIONS”” key next to cmd and simultaneously press the rewind button on the task bar of Quicktime. It starts to slow down the playback speed of the video.
What If Quicktime Player Speed up With No Sound?
No sound may be heard when the video is played back if it was encoded in a format that QuickTime cannot understand. Verifying your QuickTime installation is the most obvious way to find out whether it has decoded all of the video files. Let’s investigate the issue to its root.
Updating Your Quicktime to the Latest Version
The user must carefully study the QuickTime player. For some reason, your QuickTime behaviour is out of whack.
People often neglect to keep their QuickTime software up-to-date, which results in problems with video playback, such as no sound or stuttering, among many other things. To fix this issue, just download and install the most latest release of QuickTime player.
Examine the System and Driver
Faulty speakers, audio issues in the system, and update failures will ultimately cause media playback difficulties.
To find the root cause, you should first check internally to see whether your speakers are working correctly. Speaking straight to Siri and hearing her reaction is the fastest and most straightforward option.
Another reason you may be hearing no sound on QuickTime is because of a recent system update. Apple, as we all know, often releases new operating systems, and you must keep track of the most current versions of updates in order to keep your system running effectively.
You just need to ensure that your machine is running the most recent version. As a result, your system will resume regular functioning, and QuickTime will be immediately fixed and restored.
Inspect if the File is Corrupted or not
Checking the file to see whether it has been corrupted is a good idea regardless of whether QuickTime and your system are up and running. To make matters worse, the lack of sound in QuickTime will be the consequence of a corrupted video file.
Try opening the file in a different programme or player to see if the issue may be resolved. If this is the case, your source video file is either destroyed or corrupted. You may wish to consider regaining access to the file in this situation. The likelihood of your file being corrupted by malware or a virus is relatively high. Remember to be patient if this does happen to you.
It is necessary to use third-party repair programmes to successfully fix the file. Consequently, using third-party software to recover and restore the source file should be considered if you are in a situation where the source file is crucial and do not have a backup. As we’ll see, there are a number of options available, including Filmora.
How to Play Videos at 2X Speed with Sound in Quicktime?
Follow the below-mentioned steps to play video at 2x speed with sound in Quicktime:
- Launch QuickTime.
- Click on Edit, which is located on the toolbar on the top. A drop-down menu will appear.
- From the drop-down menu, click on QuickTime Preferences.
- Then select Audio from the dialogue box.
- Then moving forward, change the music synthesizer to Promethean Audio Device, Promethean USB Audio or USB Audio Device. These options might vary depending on the user’s specific hardware.
- Click on Apply and then OK.
Use Quick Time Features in Filmora
What is Wondershare Filmora?
For users to quickly and easily create high-quality films using a variety of sophisticated editing tools, Wondershare Filmora provides an extensive set of powerful tools for video editors. Wondershare Filmora’s user-friendly interface makes it easy for anybody to become an expert video editor on Mac .
In addition to the usual video effects, Wondershare Filmora provides filters, animated components, and other video effects. In order to alter a movie, you may use filters and overlays to add a variety of effects and graphic overlays. There are several options for titles, openers, and bottom thirds to pick from in Wondershare Filmora.

Using Wondershare Filmora’s drag and drop, users may include moving graphics into their movies. Additionally, users may quickly combine many videos and photographs and choose the good royalty-free music from a wide range of options, all in one spot.
Among the many functions offered by Wondershare Filmora include the ability to edit in 4K and GIF format, noise reduction and colour correction, and an advanced text editor and an audio mixer. A wide range of operating systems can run Wondershare Filmora.
Although there are many other video editors out there vying for attention, Wondershare has been one of the few that has managed to stay relevant in an increasingly competitive industry saturated with old and new video editors all competing for the same consumer base.
Unique and Distinct Features of Filmora
Software is not nearly as good if it does not have the appropriate set of functionalities, and most users will not bother to use it if it does not include these features. Listed here are the most eagerly anticipated features of Filmora’s latest version:
Motion Tracking
The Motion Tracking module enables you to identify an object or point inside a video and then have the computer track that object or point to generate a moving path.
It allows you to capture the motion of a moving object in the frame and add text, subtitles, effects, and other components to the frame that follow the moving object’s motion as it moves around the screen. After you’ve constructed that path, you may link any other item to it and have it follow the initial object.
Colour Matching Feature
This team has always considered that Filmora’s colour grading and correction tools were excellent, but their most recent addition to the ‘Color Matching’ program has garnered them even more praise.
Colour matching is crucial when trying to merge several video images obtained by two different cameras. In this semi-automated module, you may match video from multiple sources or footage acquired at different times of day with one another.
Keyframing Feature
Keyframing is an essential feature for users who wish to boost the appeal of their video by incorporating critical animation sequences throughout the film.
It enables you to create custom animations and have fine-grained control over the effects you apply to your projects via the use of keyframes.
Keyframing becomes critical when creating special effects, custom title cards at the beginning or middle of a film or conjuring precise paths for visuals or picture-in-picture movies to follow.
Audio Ducking
Audio ducking is a method used in video editing and production that allows the narrator’s voice to be heard consistently and clearly over other sounds on the recording that are happening at the same time, such as background music, without being dominated.
Transitions and Vast Amount of Effects
Over 300 special effects, objects, overlays, transitions, and music and audio effects are available whenever and wherever you need them. The bundle includes 25 sound effects and 26 royalty-free recordings, making it a complete package.
Then there are 176 transitions, each of which may be customized to liven up your project. You may also alter and manipulate visuals and text to make your project more aesthetically appealing.
Hardcore Video Editing
Moving on to the heart of this application, Filmora latest version’s video editing features are both excellent and user-friendly. [pagebreak] The editing options in Filmora are comprehensive, with the most noticeable being cutting, audio manipulation, transition creation, visual effects, and a plethora of additional features and functions.
The above editing functions are simple to carry out by selecting a specific section of the video on your timeline, double-clicking it, waiting for it to appear in the preview section, and then applying effects and transitions, adding audio, stabilizing and correcting the video using any of the editing options available to you.
Simplified Exporting Of Your Masterpiece
Exporting a finished project is as simple as any other activity in Filmora latest version. Indeed, the option to export your completed project is clearly presented on the main page and instantly visible to the human eye. After you’ve completed making changes, all you have to do is click the ‘Export’ button.
How to change video playback speed in Filmora
When using fast-motion/slow-motion effects on a video, the clips are sped up or slowed down in comparison to their original speed.
If you’re looking for a “close up in time,” the slow-motion effect may be the best choice, while the fast-forward effect may be used to produce dramatic or amusing videos.
Filmora is widely praised and utilized by professionals throughout the globe because of its user-friendly design and uncomplicated editing features. For this, it is often chosen over other editing programs.
Steps
Follow the below-mentioned steps to change video speed in Filmora:
- A wide range of video formats is supported by Wondershare Filmora, including MP4 and AVI, WMV and MOV, and FLV and M4V, etc. Enter the media library and click Import to import videos from your PC. The software will use the video files on your computer. Drag and drop is also an option for adding files to the User’s Album.

- Right-click on the video track on the Timeline and then drag movies from your User’s Album into it to access the Speed and Duration choices.

- A pop-up window will be shown. The rapidity or sluggishness of the motion effects is denoted by speed numbers. Then you may go at your own speed. Just click on the preview box to test out effects like sped-up or slowed-down videos. 0.5 speed is a good choice if you think it’s too much.

Video playback speed similarly affects the audio playback speed. Delete the video’s audio if you want to maintain the original playing speed of the video’s audio.
You must first double-click the audio clip in the audio editing window in order to adjust it. Adding and deleting fade in/out effects and reducing background noise are all options.
After you’ve finished adjusting the video speed, click Export. To save your movie in a standard format, just choose Format from the File menu.

It’s also possible to publish your videos to YouTube and Vimeo or create a DVD if you’d like.
Choose Device from the drop-down box and choose the proper symbol to view your new video output on your iPod, iPhone, or iPad.
Conclusion
While watching a movie, you may want the audio to be slower or faster, and you may want to adjust the atmosphere with the help of the music track, either when merely a soundtrack is being played or while a movie is being watched. This article, which includes images, explains in great detail how Mac users can achieve this using playback speed Quicktime. It also explains how to alter the speed at which a video play by in Filmora. Filmora has a variety of easy and advanced editing options, as well as video effects like slow motion and fast motion.
Quicktime Player is an Apple Inc. software that is compatible with all current versions of macOS X as well as Windows.
The user interface of the Quicktime media player is straightforward to navigate. The majority of video formats may be supported, as well. Like VLC, you can quickly speed up or slow down videos with Quicktime player using specific hotkeys or by manually altering the speed of the video.
A broad number of formats may be handled by QuickTime, including music, graphics, and panoramic photography. All of your music and video files will play without a hitch, and it is a fully complete media player.
Many customers buy a Mac computer and instantly install QuickTime, the default video player, under the notion that it is a basic video player with few additional functions. In fact, the QuickTime player has a slew of hidden functions that are pretty useful, but only a few people are aware of it. The option to increase the Quicktime player speed is one of these hidden features’ which is most popular and helpful. This is particularly true if you have to sit through a presentation or lecture.
How to Speed up Videos in Quicktime Player?
If you want to watch your movies on Quicktime player as quickly as possible, go with a long-term solution. The pace of the clip may be raised or lowered from the toolbar, and the settings of the application can be altered.
Thus, in easy words when you download a video to your Mac, you can control the speed at which it plays back on your computer using Quicktime player.
There are two ways to achieve this goal, one is manually through settings whereas the second way is using hotkeys. Let’s discuss both by understanding how to increase QuickTime player speed manually.
Manually Setting Up Quicktime player speed
- Open the Quicktime player installed on your computer.
- Embedding video within the interface is recommended.
- Go to the Toolbar and choose the Windows tab from the drop-down menu.
- To access the A/V controls, press the A/V Controls button. There will be a dialogue box that appears.
- Locate the Playback Speed option and adjust the speed of the movie by increasing or decreasing it.
- Close the box and go to watch the video in its entirety.
Speeding Up playback Speed Quicktime Using Hotkeys
- There isn’t a special hotkey for Quicktime that allows you to speed up or slow down the video. Using your mouse and keyboard, on the other hand, you may do the task in an instant.
- Open the video in the Quicktime Player on your computer by clicking on it.
- Play the video clip, and then hit the “OPTIONS” key on your keyboard to stop it.
- Press the Fast Forward button on the player and the left mouse button at the same time. It will speed up the pace at which the video is played back.
- The tap will cause a 1.1x choice to appear at the top of the screen.
Increasing the speed is accomplished by repeatedly clicking until the desired speed is achieved.
However, keep in mind that there has been a glitch that has existed for years that causes the audio to stop working after you reach 2x speed. To get around this problem, just accelerate to 1.9x and then stop.
If you come across anything you like and want to view it again, you may stop the video by pressing the space bar twice. However, pressing the spacebar will cause the playing speed to be reset.
How to Slow Down Videos in Quicktime Player?
When viewing a movie on your Mac, you may discover that you need to slow it down on a frequent basis. You may discover a range of slow down video editing tools that can help you slow down a video on the internet. Furthermore, various video players may be able to let you quickly slow down your movie. QuickTime Player is one of those programs that may be customized to your individual needs.
We sometimes overlook the enormous capacity inherent inside the dependable and dependable QuickTime Player. QuickTime contains a number of key capabilities meant to help you deal with your media files and play video and audio files.
Steps to follow to slow down Quicktime Player speed
Like speeding up the QuickTime playback speed, the users can simultaneously slow down the playback speed as well. It can be done manually and through the use of specific keys already present on the keyboard.
Manual Setup
In order to manually slowdown QuickTime video, follow the below-mentioned steps:
- Launch the Quicktime player application
- Click on “File” and choose the video which is already saved or downloaded on your MAC.
- Once the video is loaded in the Quicktime player, click on “View” on the toolbar on the top.
- As you click on “View”, a drop-down menu will appear. Locate the “Playback speed” option from the drop-down menu.
- When you click on “Playback speed”, another dialogue box will appear right next to the drop-down menu, which will have options regarding the playback speed.
- Click on “Half speed” and press the play button to watch the video with a slower playback rate.
Slowdown QuickTime speed using Hotkeys
- Open the video or the clip you want to watch.
- If Quicktime is your default player, the video loads in it.
- Otherwise, launch the QuickTime application
- By clicking on “Open”, choose your specific clip or video.
- Once the video is loaded, press the ““OPTIONS”” key next to cmd and simultaneously press the rewind button on the task bar of Quicktime. It starts to slow down the playback speed of the video.
What If Quicktime Player Speed up With No Sound?
No sound may be heard when the video is played back if it was encoded in a format that QuickTime cannot understand. Verifying your QuickTime installation is the most obvious way to find out whether it has decoded all of the video files. Let’s investigate the issue to its root.
Updating Your Quicktime to the Latest Version
The user must carefully study the QuickTime player. For some reason, your QuickTime behaviour is out of whack.
People often neglect to keep their QuickTime software up-to-date, which results in problems with video playback, such as no sound or stuttering, among many other things. To fix this issue, just download and install the most latest release of QuickTime player.
Examine the System and Driver
Faulty speakers, audio issues in the system, and update failures will ultimately cause media playback difficulties.
To find the root cause, you should first check internally to see whether your speakers are working correctly. Speaking straight to Siri and hearing her reaction is the fastest and most straightforward option.
Another reason you may be hearing no sound on QuickTime is because of a recent system update. Apple, as we all know, often releases new operating systems, and you must keep track of the most current versions of updates in order to keep your system running effectively.
You just need to ensure that your machine is running the most recent version. As a result, your system will resume regular functioning, and QuickTime will be immediately fixed and restored.
Inspect if the File is Corrupted or not
Checking the file to see whether it has been corrupted is a good idea regardless of whether QuickTime and your system are up and running. To make matters worse, the lack of sound in QuickTime will be the consequence of a corrupted video file.
Try opening the file in a different programme or player to see if the issue may be resolved. If this is the case, your source video file is either destroyed or corrupted. You may wish to consider regaining access to the file in this situation. The likelihood of your file being corrupted by malware or a virus is relatively high. Remember to be patient if this does happen to you.
It is necessary to use third-party repair programmes to successfully fix the file. Consequently, using third-party software to recover and restore the source file should be considered if you are in a situation where the source file is crucial and do not have a backup. As we’ll see, there are a number of options available, including Filmora.
How to Play Videos at 2X Speed with Sound in Quicktime?
Follow the below-mentioned steps to play video at 2x speed with sound in Quicktime:
- Launch QuickTime.
- Click on Edit, which is located on the toolbar on the top. A drop-down menu will appear.
- From the drop-down menu, click on QuickTime Preferences.
- Then select Audio from the dialogue box.
- Then moving forward, change the music synthesizer to Promethean Audio Device, Promethean USB Audio or USB Audio Device. These options might vary depending on the user’s specific hardware.
- Click on Apply and then OK.
Use Quick Time Features in Filmora
What is Wondershare Filmora?
For users to quickly and easily create high-quality films using a variety of sophisticated editing tools, Wondershare Filmora provides an extensive set of powerful tools for video editors. Wondershare Filmora’s user-friendly interface makes it easy for anybody to become an expert video editor on Mac .
In addition to the usual video effects, Wondershare Filmora provides filters, animated components, and other video effects. In order to alter a movie, you may use filters and overlays to add a variety of effects and graphic overlays. There are several options for titles, openers, and bottom thirds to pick from in Wondershare Filmora.
Using Wondershare Filmora’s drag and drop, users may include moving graphics into their movies. Additionally, users may quickly combine many videos and photographs and choose the good royalty-free music from a wide range of options, all in one spot.
Among the many functions offered by Wondershare Filmora include the ability to edit in 4K and GIF format, noise reduction and colour correction, and an advanced text editor and an audio mixer. A wide range of operating systems can run Wondershare Filmora.
Although there are many other video editors out there vying for attention, Wondershare has been one of the few that has managed to stay relevant in an increasingly competitive industry saturated with old and new video editors all competing for the same consumer base.
Unique and Distinct Features of Filmora
Software is not nearly as good if it does not have the appropriate set of functionalities, and most users will not bother to use it if it does not include these features. Listed here are the most eagerly anticipated features of Filmora’s latest version:
Motion Tracking
The Motion Tracking module enables you to identify an object or point inside a video and then have the computer track that object or point to generate a moving path.
It allows you to capture the motion of a moving object in the frame and add text, subtitles, effects, and other components to the frame that follow the moving object’s motion as it moves around the screen. After you’ve constructed that path, you may link any other item to it and have it follow the initial object.
Colour Matching Feature
This team has always considered that Filmora’s colour grading and correction tools were excellent, but their most recent addition to the ‘Color Matching’ program has garnered them even more praise.
Colour matching is crucial when trying to merge several video images obtained by two different cameras. In this semi-automated module, you may match video from multiple sources or footage acquired at different times of day with one another.
Keyframing Feature
Keyframing is an essential feature for users who wish to boost the appeal of their video by incorporating critical animation sequences throughout the film.
It enables you to create custom animations and have fine-grained control over the effects you apply to your projects via the use of keyframes.
Keyframing becomes critical when creating special effects, custom title cards at the beginning or middle of a film or conjuring precise paths for visuals or picture-in-picture movies to follow.
Audio Ducking
Audio ducking is a method used in video editing and production that allows the narrator’s voice to be heard consistently and clearly over other sounds on the recording that are happening at the same time, such as background music, without being dominated.
Transitions and Vast Amount of Effects
Over 300 special effects, objects, overlays, transitions, and music and audio effects are available whenever and wherever you need them. The bundle includes 25 sound effects and 26 royalty-free recordings, making it a complete package.
Then there are 176 transitions, each of which may be customized to liven up your project. You may also alter and manipulate visuals and text to make your project more aesthetically appealing.
Hardcore Video Editing
Moving on to the heart of this application, Filmora latest version’s video editing features are both excellent and user-friendly. [pagebreak] The editing options in Filmora are comprehensive, with the most noticeable being cutting, audio manipulation, transition creation, visual effects, and a plethora of additional features and functions.
The above editing functions are simple to carry out by selecting a specific section of the video on your timeline, double-clicking it, waiting for it to appear in the preview section, and then applying effects and transitions, adding audio, stabilizing and correcting the video using any of the editing options available to you.
Simplified Exporting Of Your Masterpiece
Exporting a finished project is as simple as any other activity in Filmora latest version. Indeed, the option to export your completed project is clearly presented on the main page and instantly visible to the human eye. After you’ve completed making changes, all you have to do is click the ‘Export’ button.
How to change video playback speed in Filmora
When using fast-motion/slow-motion effects on a video, the clips are sped up or slowed down in comparison to their original speed.
If you’re looking for a “close up in time,” the slow-motion effect may be the best choice, while the fast-forward effect may be used to produce dramatic or amusing videos.
Filmora is widely praised and utilized by professionals throughout the globe because of its user-friendly design and uncomplicated editing features. For this, it is often chosen over other editing programs.
Steps
Follow the below-mentioned steps to change video speed in Filmora:
- A wide range of video formats is supported by Wondershare Filmora, including MP4 and AVI, WMV and MOV, and FLV and M4V, etc. Enter the media library and click Import to import videos from your PC. The software will use the video files on your computer. Drag and drop is also an option for adding files to the User’s Album.
- Right-click on the video track on the Timeline and then drag movies from your User’s Album into it to access the Speed and Duration choices.
- A pop-up window will be shown. The rapidity or sluggishness of the motion effects is denoted by speed numbers. Then you may go at your own speed. Just click on the preview box to test out effects like sped-up or slowed-down videos. 0.5 speed is a good choice if you think it’s too much.
Video playback speed similarly affects the audio playback speed. Delete the video’s audio if you want to maintain the original playing speed of the video’s audio.
You must first double-click the audio clip in the audio editing window in order to adjust it. Adding and deleting fade in/out effects and reducing background noise are all options.
After you’ve finished adjusting the video speed, click Export. To save your movie in a standard format, just choose Format from the File menu.
It’s also possible to publish your videos to YouTube and Vimeo or create a DVD if you’d like.
Choose Device from the drop-down box and choose the proper symbol to view your new video output on your iPod, iPhone, or iPad.
Conclusion
While watching a movie, you may want the audio to be slower or faster, and you may want to adjust the atmosphere with the help of the music track, either when merely a soundtrack is being played or while a movie is being watched. This article, which includes images, explains in great detail how Mac users can achieve this using playback speed Quicktime. It also explains how to alter the speed at which a video play by in Filmora. Filmora has a variety of easy and advanced editing options, as well as video effects like slow motion and fast motion.
How to Do Censor Effects with Filmora
There are many aspects to consider when it comes to publishing a video. Safety and privacy aspects are some of them. If you’re looking to blur out a bystander or cut out profanities from your video with Filmora, this is the right article for you.
Part 1. How to add a beep sound to a video with Filmora
Filmora’s powerful video editing menu includes easy tweaking on audio. You can censor any part of speech you want to exclude from your video with just these simple steps.
Step1 Create a new project and import the video to Filmora.

Step2 Separate the audio component from the video by right-clicking on the video and selecting the Detach Audio option. You can now edit each of them individually.

Step3 Mark the part to place the start of the beep using the playhead and click the Split icon on the editor’s toolbar.

Step4 Place the playhead at the end of the censored segment and click Split. Double-click on the segment to open the audio editing menu, then you can remove that part of the audio or lower the volume.

Step5 Click the Audio>Audio Effects menu on the upper left corner of the screen. After you find the Beep effect, drag the track to the audio timeline and place it in between the split section. Adjust trimming and volume until the censor is placed correctly.

Part 2. How to add mosaic to video with Filmora
Whether you want to hide a passerby’s face or your own, or even other types of objects, Wondershare Filmora is ready to take on the task. While its nifty face-off function automatically follows the movement of a marked face, the mosaic effect is the fast and perfect solution for a static object in the video.
Step1 After importing a video to Filmora, tap on the Effects tab and find the Mosaic filter from the gallery.

Step2 Drag the Mosaic filter to the timeline just above the main video track.

Step3 A yellow box will appear in the viewer. You can drag and adjust its size to hide the targetted object. You can also adjust the opacity and intensity of the effect using the adjustment menu, accessible when you double-click the yellow box.

If the targetted object moves, you can set the automatic tracking before adding the mosaic filter by clicking on the Motion Tracking>Start Tracking located above the timeline. Before you place the filter, preview and adjust the tracking frame to ensure tight proof censor.

Conclusion
Wondershare Filmora offers a large array of special effects that goes beyond simply trimming, cropping, splitting, or adding transitions to your video. You can add some special effects to your video as well, such as Blur, Face-Off, Mosaic, Tilt Shift and Jump Cut at Beat. On top of completing it with audio effects, you can also add subtitles or typography easily.
With Filmora, you can always enhance your video within minutes with excellent quality.
Free Download For Win 7 or later(64-bit)
Free Download For macOS 10.14 or later
Free Download For macOS 10.14 or later
Video Course and Online Learning Are Very Popular Nowadays. Here We Are Going to Recommend some of the Best Video Websites for Teachers to Use
The examples below are the only few that are possible to find on the internet and offer a thousand free educational videos usable in the classroom or online classroom. It’s up to you if you can use or follow all the websites I provide. Of course, the internet offers unlimited help for teachers to tap into, but it has dangers around quality, inappropriate content, advertisement, and copyrights. Double-check everything before you use in your classes and show it to your students.
Khan Academy (https://www.khanacademy.org/ )
Provides a free personalized learning resource for all ages. Khan Academy also offers different exercises and instructional videos that empower the students to study at their own pace inside the classroom or outside. For the students who want to learn something, these are the following subjects they tackle: Science, Mathematics, History, Economics, Reading & Language, Life Skills, and more.

They are working hard to ensure that Khan Academy gives teachers of all stripes the tools they need to understand better the students’ activities and how to assist them effectively. The Khan Academy teacher dashboard offers an overview of the overall performance of the class as well as comprehensive student profiles. Khan Academy is free, and anyone can learn anything. They are nonprofit because, according to Khan Academy, they believe in free, world-class education anywhere.
Is Khan Academy suitable for learning?
An excellent and convenient resource for academic study is Khan Academy. Anyone who desires to study may benefit from Khan, even though it is specially designed for kids in grade school through the college level stage. The website has several fantastic features, like the ability to enable subtitles for each video and the availability of the whole Khan Academy course in at least 18 other languages.
However, it would be convenient if the text-only material could use the built-in text-to-speech feature. Students may now access all courses using the Khan Academy app, which also enables downloading for offline learning. It’s doubtful that many students will open Khan Academy and be eager to start using it because its organization and interface are both rather formal, and its activities are simple.
SchoolTube (https://www.schooltube.com/ )
- is a secure platform for sharing videos without distraction-causing side video suggestions and advertising. Teachers and students can upload a YouTube video to their SchoolTube playlist. Still, all ancillary material, including advertising that would typically be included on the YouTube website, has been stripped off.

Many choices are available on the SchoolTube website, including the ability to submit movies, screenshot a device’s display, record video inside the application, add attachments to films, and add a video quiz. Further exploration of the application reveals more possibilities for the editor. SchoolTube is suitable for teachers and students since it lets them contribute or make their movies with brand-new features that encourage more interactive learning in a secure digital setting.
Is SchoolTube suitable for learning?
This product is an excellent place to submit student-made movies or to obtain videos related to your classroom topics. The subject or topic they are discussing can be used to filter channels for students and teachers. I think it is a fantastic alternative to using YouTube, a more restricted site in the classroom. When you require students to watch films related to the ideas you are discussing, SchoolTube is a terrific resource to use. It is a safer or more closely supervised website than YouTube.
TeacherTube (https://www.teachertube.com/ )
- is an online community for sharing instructional videos. They seek to offer a safe venue or site for teachers, schools, and students to access educationally focused videos. Currently, they provide an incredible 60 topics or subjects for all ages from Science, Math, History, Social Studies, Language & Arts, and more. They also have educational songs for kids and programming languages for the higher level. TeacherTube also provides anytime, anywhere professional development for teachers. And the site where teachers can post educational videos on their own designed for students to view to learn a concept or skill.

Is TeacherTube suitable for learning?
Despite being helpful in situations with no access to YouTube, this has a restricted search function. For each topic searched, there are just a few relevant search results. Results might range widely in terms of quality. If required, this would be a helpful resource, but it might be even better if it were more thorough.
TED-Ed (https://www.ed.ted.com/ )
- the videos and courses on TED-Ed may be used to supplement practically any topic by adding video learning, knowledge tests, and conversation prompts. Students are likely to get immediately engaged with the content because it is outstanding and comes from some of the top brains in the world. Videos are excellent for group viewing or use in flipped classrooms.

You can use TED-Ed’s videos and lessons to supplement almost any subject with video learning, basic knowledge checks, and discussion questions. Browse by topic or subtopic or search by keyword. You can filter by target age, content type, subtitles, etc. The content is remarkable and comes from some of the world’s best minds, and the students will likely engage with it immediately. Videos can be great to watch as a class or to include as part of a flipped classroom.
Is Ted-Ed suitable for learning?
TED-Ed is a fantastic tool for students and instructors searching for inspiration, knowledge, and perhaps even some fun, thanks to the high-quality videos and the vast library of lesson ideas. The cartoons and films are just as well-made and engaging as some of the most remarkable television programming. The website presents a complicated subject intelligently, while a few students may feel bored or annoyed with videos on more advanced topics.
Crash Course (https://thecrashcourse.com/ )
Can provide a free high-quality educational video on various subjects. Crash Course also alters the traditional textbook model by presenting information in a fast-paced format to enhance students’ learning experience. With the help of the Crash Course team, they created different kinds of videos on 21 subjects for high school and college learners.

Primary and Intermediate or grade school students can also use this site. According to Crash Course, they also have hundreds of millions of views on their YouTube channel. While the show is a beneficial tool for teachers and students, it also has an extensive viewership of casual learners seeking online educational content independently.
Is Crash Course suitable for learning?
The sarcastic tone and rapid speed of Crash Course will undoubtedly keep students intrigued, but the material is often dubious, and the videos offer primarily passive learning. Each Crash Course video’s host is enthusiastic about the subject. The majority of the Crash Course videos are pretty accurate. However, in an attempt to simplify topics, several Crash Course Kids videos fall short.
National Geographic Kids (https://kids.nationalgeographic.com/ )
It offers educational videos, games, and other activities, especially on animals and the natural world. The students will enjoy playing games with simple instructions and a range of difficulties and frequently practice memory, logic, and other skills. They can contribute to the site by leaving some comments, taking quizzes, viewing user photos, and sharing their own.

Is National Geographic Kids suitable for learning?
The National Geographic Kids website is easy to navigate and contains exciting materials for students, while some content isn’t properly structured and may be challenging to find. Clicking on a menu choice at the top of the screen leads you to a related page, but lingering over that same option brings up extra alternatives that you wouldn’t see if you clicked. Keyword searches and links supplied by the teacher will be helpful here. For example, the site has tools such as a Homework Help section that teaches kids how to be an expert fact-checker, write an animal report, and more. Still, it’s not precisely apparent how to get there unless you search for it.
NeoK12 (https://www.neok12.com/ )
Uses educational videos and animations for the students. It is a great way to learn, allowing the students to build a visual model in their minds by watching their videos. The graphical representation of the ideas aids their comprehension, piques their interest, and promotes self-directed learning in each learner. Educational videos in NeoK12 and games are possibly one of the most effective learning tools. Even the higher levels of students will find the platform enriching and entertaining. NeoK12’s website also features tools not only for learners but also for teachers.

Is NeoK12 suitable for learning?
This platform is a rather extensive library of interesting educational tools, and the films and brain games are both free and well worth a look. Kids may augment the movie with other resources, such as interactive diagrams, flowcharts, fun, and puzzles, for a relatively inexpensive monthly charge. The films are simple teaching tools that usually contain supplementary resources that help youngsters to put what they’ve learned into practice. There are various “Universe” films, for example, under the Earth and Space area. Children who watch these films may also access relevant games, diagrams, activities, and photographs to prepare presentations.
Discovery Education (https://www.discoveryeducation.com/ )
Has made a name for itself as the top supplier of digital content, curriculum resources, and professional development for grades K–12. Discovery Education is used by almost 5.6 million students in Canada, all 50 states, and other countries. Why not give it a shot in the Philippines or somewhere else in Asia?

Teachers can use the free resources on Discovery Education to enhance their existing curriculum from the Grade School Level up to High School Level. An example of a tool with this platform is the Puzzlemaker, whose vocabulary makes crosswords and other types of puzzles. They can also be assigned specific videos or interactive activities to introduce new ideas at home.
Is Discovery Education suitable for learning?
Discovery Education is an excellent free resource. The commercial edition has considerably more resources, and after using it, I sincerely wished they would make it accessible for free or at a lower cost. The items aimed at students are straightforward and uninspiring; the website is intended for teachers. I would love to see them unlock more of the stuff that is locked behind the barrier, maybe in a cyclical manner where some films or resources are made available for free for a month at a time.
Free Download For Win 7 or later(64-bit)
Free Download For macOS 10.14 or later
Free Download For macOS 10.14 or later
Useful Guide to Speed Up/Down Videos in VLC
You can add fun by modifying the video speed when you play a video. To perform the detailed effects on the content, you need sophisticated programs that are reliable and user-friendly. Do you know about the VLC playback speed? Are there any options in the VLC app to edit the playback speed as per your needs?
Here, you will be learning about the precise video edits you can perform effortlessly on your captured content using VLC and its alternative application. Stay connected and scroll down for enlightening facts on it.

In this article
01 What is VLC?
02 How to speed up/down videos in VLC
03 Alternative for changing speed for videos
Part 1: What is VLC?
VLC is an open-source program, and it supports media files to play on its interface efficiently. This app supports different file formats and is available in many versions. You can use VLC players on Windows, Mac, and Linux platforms. There are options to play a part of a file using this program when trying to download any video file into your system.

Here, you can find video edit features like you can add subtitles and modifying the playback speed precisely. It is a flexible player with a simple user interface. You do not require any prior knowledge to play the desired content on this interface. All the essential controls are explicit and you can reach for them quickly.
Part 2: How to speed up/down videos in VLC
It is high time to learn about the VLC playback speed that you can implement on your video effortlessly. You must carefully follow up the below instructions and perform the right clicks to edit the video speed.
The stepwise guidelines to modify the video speed using the VLC application.
Step 1
Install VLC from its official webpage according to your system OS type and then upload the desired video into its working space.

Step 2
Now, tap the Playback option from the menu and choose the required speed duration of the content from the expanded items. Select faster, slower, normal speed in pace with your needs and modify the video speed accordingly.

Save the changes you had performed on the video and play the track to view the changes done on this media space.
The Filmora video editor is the reliable and performable tool that edits the video beyond limitations. The above instructions will guide you to edit the video speed using the VLC player. If you search for an alternative tool to perform further edits on your captures, then quickly scroll down for more enlightening facts.
Part 3: Alternative for changing speed for videos
The Filmora video editor provides you with in-built templates, filter effects, transitions to make the content attractive. If you take closer looks at the filters, you will find mesmerizing special effects available as ready to use the element to edit your uploaded content on the timeline. Few clicks are enough to bring the best in your video in no time. It is easy to use and you can embed efficient elements to the video precisely. There are options to insert desired elements from integrated libraries like Filmstock, Giphy to add flavors to your video content.
The Key Features of Filmora Video Editor program.
- This app supports all file types effortlessly, and you can import any media file quickly despite its size.
- Simple clicks are sufficient to include desired effects on the video content.
- Filters, transitions, and special elements to insert into the uploaded file.
- Use audio customization features like Audio ducking, audio equalizers, and detach audio to personalize the content.
- Tap the preview option to view the edited file before finalizing the export option.
Connect with the integrated libraries and download the desired elements to customize the uploaded content. During the export action, you can change its file type, resolution, and size to add compatibility for end streaming devices. Drag and drop the elements into the working timeline to insert the changes to the captured media.
The detailed guide on how to change the video speed using the Filmora video editor tool.
Step 1: Install the program
Download the application from its official website and install it by following the instruction wizard. Then, launch the app and import the media file into the working space. To make further edits, drag and drop the file into the timeline.

Step 2: Customize the video speed
Next, make a right-click on the imported media file and select the Speed and Duration option from the expanded list. Adjust the speed slider from the pop-up window to change the video duration while playing. Finally, save the changes by tapping the OK button.

Now, play the edited content to witness the changes in the video speed. The video plays according to the customized value, and you can have a preview before exporting it to the necessary storage space.
Conclusion
Wondershare Filmora
Get started easily with Filmora’s powerful performance, intuitive interface, and countless effects!
Try It Free Try It Free Try It Free Learn More about Filmora>

Thus, in detail, you had an enlightening discussion on the VLC playback speed. You would have understood the tips and tricks associated with these video edits. Use the Filmora video editor application to create stunning videos for your needs. It is a reliable program, and you can go for it without any hesitation. You can customize the content by modifying every detail of the content precisely. Choose Filmora and enjoy the video edits beyond boundaries. Create content as per your requirements without sacrificing any parameters. Stay tuned for many more facts on video edits using the Filmora video editor application.
02 How to speed up/down videos in VLC
03 Alternative for changing speed for videos
Part 1: What is VLC?
VLC is an open-source program, and it supports media files to play on its interface efficiently. This app supports different file formats and is available in many versions. You can use VLC players on Windows, Mac, and Linux platforms. There are options to play a part of a file using this program when trying to download any video file into your system.
Here, you can find video edit features like you can add subtitles and modifying the playback speed precisely. It is a flexible player with a simple user interface. You do not require any prior knowledge to play the desired content on this interface. All the essential controls are explicit and you can reach for them quickly.
Part 2: How to speed up/down videos in VLC
It is high time to learn about the VLC playback speed that you can implement on your video effortlessly. You must carefully follow up the below instructions and perform the right clicks to edit the video speed.
The stepwise guidelines to modify the video speed using the VLC application.
Step 1
Install VLC from its official webpage according to your system OS type and then upload the desired video into its working space.
Step 2
Now, tap the Playback option from the menu and choose the required speed duration of the content from the expanded items. Select faster, slower, normal speed in pace with your needs and modify the video speed accordingly.
Save the changes you had performed on the video and play the track to view the changes done on this media space.
The Filmora video editor is the reliable and performable tool that edits the video beyond limitations. The above instructions will guide you to edit the video speed using the VLC player. If you search for an alternative tool to perform further edits on your captures, then quickly scroll down for more enlightening facts.
Part 3: Alternative for changing speed for videos
The Filmora video editor provides you with in-built templates, filter effects, transitions to make the content attractive. If you take closer looks at the filters, you will find mesmerizing special effects available as ready to use the element to edit your uploaded content on the timeline. Few clicks are enough to bring the best in your video in no time. It is easy to use and you can embed efficient elements to the video precisely. There are options to insert desired elements from integrated libraries like Filmstock, Giphy to add flavors to your video content.
The Key Features of Filmora Video Editor program.
- This app supports all file types effortlessly, and you can import any media file quickly despite its size.
- Simple clicks are sufficient to include desired effects on the video content.
- Filters, transitions, and special elements to insert into the uploaded file.
- Use audio customization features like Audio ducking, audio equalizers, and detach audio to personalize the content.
- Tap the preview option to view the edited file before finalizing the export option.
Connect with the integrated libraries and download the desired elements to customize the uploaded content. During the export action, you can change its file type, resolution, and size to add compatibility for end streaming devices. Drag and drop the elements into the working timeline to insert the changes to the captured media.
The detailed guide on how to change the video speed using the Filmora video editor tool.
Step 1: Install the program
Download the application from its official website and install it by following the instruction wizard. Then, launch the app and import the media file into the working space. To make further edits, drag and drop the file into the timeline.
Step 2: Customize the video speed
Next, make a right-click on the imported media file and select the Speed and Duration option from the expanded list. Adjust the speed slider from the pop-up window to change the video duration while playing. Finally, save the changes by tapping the OK button.
Now, play the edited content to witness the changes in the video speed. The video plays according to the customized value, and you can have a preview before exporting it to the necessary storage space.
Conclusion
Wondershare Filmora
Get started easily with Filmora’s powerful performance, intuitive interface, and countless effects!
Try It Free Try It Free Try It Free Learn More about Filmora>
Thus, in detail, you had an enlightening discussion on the VLC playback speed. You would have understood the tips and tricks associated with these video edits. Use the Filmora video editor application to create stunning videos for your needs. It is a reliable program, and you can go for it without any hesitation. You can customize the content by modifying every detail of the content precisely. Choose Filmora and enjoy the video edits beyond boundaries. Create content as per your requirements without sacrificing any parameters. Stay tuned for many more facts on video edits using the Filmora video editor application.
Also read:
- New 2024 Approved Methods on How to Speed Up Video on Splice
- New 2024 Approved How to Make a Custom Slide Show in PowerPoint
- Updated The Quick and Simple Way to Mirror Video in Premiere Pro for 2024
- In 2024, Achieving GoPro Slow Motion with Quality An In-Depth Overview
- Updated 2024 Approved To Know How to Add Effects in Premiere Pro, You Need to Follow This Guide as It Has All You Need to Know to Add Effects in Premiere Pro. Learn More Here
- In This Article, We Will Show You How to Rotate Videos Using Obs for 2024
- Updated 2024 Approved Cropping a Video in Davinci Resolve Step by Step
- The Glitch Filter Is Similar to an Error or a Distorted Effect in the Video. The Article Enables the Users to Get the VHS Filter in One of Their Travel Videos and Instagram Accounts for 2024
- In 2024, 6 Best Methods to Make a Video Longer
- In 2024, Best Green Screen Software for Beginner on Mac
- New How To Create Transparent Background On Picsart
- Updated Create Glitch Text Effect for 2024
- Updated In 2024, Detailed Steps to Rotate Videos in Blender
- New How to Reduce the Size of Video Files Online? In This Article, Well Share the Top 10 Free Online Video Compressors that You Can Use Anywhere at Any Time and on Any Device
- How to Merge Audio and Video in VLC Media Player for 2024
- In 2024, How to Create a Glitch Text Effect?
- Updated Best 10 Anime Movies for All Time
- New In 2024, Deep Learning of AI Video Recognition
- In 2024, The Actual Discussion Is Regarding the Splitting of the Video by Using the VSDC. Also, Recommendation of Using Wondershare Filmora as the Better Substitute in Place of VSDC
- 2024 Approved Change Speed of a Video on iPhone
- In 2024, How to Use LUTs Perfectly in Final Cut Pro
- How to Create OBS Slideshow for 2024
- Updated 4 Solutions to Resize a WebM File for 2024
- New 2024 Approved Ultimate Guidelines to Help You Use VLC Media Player Better
- Updated | Live Stream on YouTube Using Zoom for 2024
- New How to Make Falling Text Effect in Filmora, In 2024
- List of Supported iPhone Video Formats and Best iPhone Video Editor for 2024
- 2024 Approved Looking for the Different Ar Video Effects to Include in Your Film? Check Out This Article for the Best 10 Augmented Reality Effects and the Fun Ar Effects in Filmora
- Updated 10 Top Innovative AR Video Effects to Check Out for 2024
- New The Ultimate Guide to GIF for Discord Profile for 2024
- Updated In 2024, Top 5 Online Video Converter for Instagram
- New A Roster of 8 Top Color Match Generators for 2024
- Updated 2024 Approved Land Into the Thrill of Creating Stunning GIFs with Ezgif
- 2024 Approved Are You Searching for the Best Canon LUT Download? This Article Provides the Best Recommendations for Creating the Best Professional Videos
- 2024 Approved Detailed Guide to Resize Your Video in VLC
- Updated 2024 Approved 3 Methods to Combine 2 or 3 Videos Into 1
- Updated In 2024, Easy Way to Create an Alternate Reality Effect
- New 2024 Approved How to Apply Video Filters
- In 2024, How to Transfer Contacts from Realme Narzo N53 To Phone | Dr.fone
- Change Location on Yik Yak For your Infinix Smart 8 Pro to Enjoy More Fun | Dr.fone
- 9 Best Free Android Monitoring Apps to Monitor Phone Remotely For your Samsung Galaxy F34 5G | Dr.fone
- Best Fixes For Oppo Reno 11 5G Hard Reset | Dr.fone
- In 2024, How To Fix Auto Lock Greyed Out on Apple iPhone 7 Plus
- Is GSM Flasher ADB Legit? Full Review To Bypass Your Lava Blaze 2 Pro Phone FRP Lock
- All Things You Need to Know about Wipe Data/Factory Reset For Vivo Y100 5G | Dr.fone
- Can I Bypass a Forgotten Phone Password Of Asus ROG Phone 7?
- Ways to stop parent tracking your Realme V30T | Dr.fone
- How to Change Lock Screen Wallpaper on Realme C53
- The Complete Guide to Whiteboard Animation
- In 2024, 3 Ways to Erase iPhone 11 When Its Locked Within Seconds
- Ultimate Guide to Catch the Regional-Located Pokemon For Realme GT 3 | Dr.fone
- In 2024, How to Change your Oppo A59 5G Location on Twitter | Dr.fone
- In 2024, How To Bypass the Required Apple Store Verification For iPhone 14 Pro
- In 2024, How to Track WhatsApp Messages on OnePlus Ace 2 Without Them Knowing? | Dr.fone
- In 2024, How can I get more stardust in pokemon go On Lava Yuva 3? | Dr.fone
- In 2024, Top 11 Free Apps to Check IMEI on iPhone XR
- Reset iTunes Backup Password Of iPhone 8 Plus Prevention & Solution | Dr.fone
- How to Reset a Tecno Pova 5 Pro Phone That Is Locked | Dr.fone
- Does Airplane Mode Turn off GPS Location On Vivo S18e? | Dr.fone
- In 2024, Unova Stone Pokémon Go Evolution List and How Catch Them For Realme V30T | Dr.fone
- How to add a digital signature field to a .wpt file
- In 2024, Is GSM Flasher ADB Legit? Full Review To Bypass Your Meizu 21FRP Lock
- Best Android Data Recovery - Retrieve Lost Pictures from 11X 5G.
- In 2024, How to Intercept Text Messages on Apple iPhone 6s Plus | Dr.fone
- In 2024, How To Unlock Apple iPhone 15 Without Passcode? 4 Easy Methods | Dr.fone
- Title: Best 12 AI Video Generators to Pick for 2024
- Author: Morgan
- Created at : 2024-05-19 05:12:11
- Updated at : 2024-05-20 05:12:11
- Link: https://ai-video-editing.techidaily.com/best-12-ai-video-generators-to-pick-for-2024/
- License: This work is licensed under CC BY-NC-SA 4.0.
