
Updated 2024 Approved 2 Effective Ways to Add Text Behind Objects
2 Effective Ways to Add Text Behind Objects
Adding text behind objects in your videos can be a great way to start your videos. For example, you can do so to create an attractive intro or startup a video. So, if you hope to make a video like a pro, let’s learn how to add text behind objects in your videos by Filmora.

Part 1. What Are The Benefits of Adding Text Behind Objects in Videos?
Your videos must maintain quality to create content worthy of a huge audience. You may have a YouTube channel or be starting down the road. Then you must give this a try because
Give a cool look
Adding text behind an object in a video looks cool! Now, your object could be a silhouette of a person or a huge skyscraper. You can add a text tile behind the object, creating the illusion. Due to this, the text will be flying in real-time.
Show creativity
Blasting your channel with innovative and creative content is the key to building a big audience. But, of course, you can always opt for many ways to create a video showing your creativity. One of those ways is to add text behind your object.
You can create an attractive intro by adding text behind objects that captivate the viewer. It ensures that your subscribers stay tuned to your channel and your content.
Build up a solid audience
Every day can be a real struggle if you are a daily content creator on YouTube. The audience demands good content. But your daily videos can get boring if you do not use new methods to edit your videos.
You can add text behind videos to spice up your intros and hook your daily audience even more. That will show the audience that you are genuinely putting in the effort.
Part 2. What Will You Need To Add Text Behind Videos?
Now there are a few things that you will need to add text behind videos. First, take a look at the basic priorities to perform this feature.
1. A Static Object Video
Adding text behind an object can be tricky if the object isn’t static. For example, the effect will be ruined if an object moves around a lot in a video.
Our goal is to create a smooth text behind the video effect. And this can only be achieved if the target object remains static in the video and does not move about its position.
2. A Video Editing Software - Wondershare Filmora
Once you select a video source, you aim to add it to a video editor. For this purpose, Wondershare Filmora would be your best choice. Wondershare Filmora allows you to create innovative and attractive videos.
Free Download For Win 7 or later(64-bit)
Free Download For macOS 10.14 or later
It has a very engaging system UI, allowing even beginner users to get their hands on it instantly. You will learn how to add text behind your videos with a few simple steps.

Now that you know the requirements for the video, let’s move on to the step-by-step guide to add text to your video.
Part 3. Step-by-Step Guide To Add Text Behind Videos
We look at two examples of how to add text behind videos in Wondershare Filmora.
- A static video with an object that can be easily masked out.
- A video with high contrast and a clean background.
Add Text behind a Static Video
First, we will go with adding text behind a static object. For this, scroll more to get the step-by-step process.
Step1 Download Wondershare Filmora
If you are a beginner just starting in the video editing business, Wondershare Filmora is the best choice. Follow the steps below to download the free version of Wondershare Filmora:
- First, download the Wondershare Filmora on your PC or Mac.
- Open the setup and install the Wondershare Filmora.
After downloading the Wondershare Filmora software, let’s edit the video. Scroll below to learn how to start the editing process!
Step2 Add the Video to the Timeline
We will first look at the static video example. For this, follow the below instructions:
- You have to start by importing your video in the import library.
- From the import library, you can click on the video and drag it down below to the timeline.

![]()
Note: Adding video to the timelines will allow you to create a workspace to edit your video.
Now let’s move on to how we will add the text tile to our video.
Step3 Add the Text Tile
It is time to add the text tile you will animate behind the object. To do that, follow the steps mentioned as such.:
- Go to the Titles icon on the bar above the import library.
- A drop-down option will be available on the left side.
- Scroll down to the Plain text.
- Here, you can see many text tiles to add to your video.
- You can choose anyone you like.
- The most commonly used tile is the Basic 6.
- When you add the text tile to the timeline, you must ensure that the text is of equal length to the video.
- To do that, drag the right corner of the text tile and drag it to the right to match the length of the video.

Step4 Edit the Text Tile
After you have added the text tile you desire, you need to type in the text. For this article, we will keep it simple. We will be typing a simple statement such as “Hello, World.“
- Double-click the Text tile to open the settings menu.
- After the settings menu is opened, type in the text box on the import window.
You will notice changes on the main window that your text has changed.

- After the text appears, you can make the font look as desired.
- Look above the text window, and you will see the type of text font selected.
- Click on the drop-down option and choose whatever you like.
Let’s move on to animate the text tile.
Step5 Animate the text tile
After adding text, it is time to animate it. This animation will decide how your text will appear behind the target object.
- First, you must open the text settings by double-clicking on the text tile in the timeline.
- In the settings opened in the import window, you will have to click on the animation tab in the upper left corner, aside from the Preset
- Now scroll down to where you will see the Right Roll
- Click on Right Roll and then click on the OK in the bottom right corner of the import window.

![]()
Note: You may notice now that the text appears in front of our object. Don’t worry now! We are getting there. With a few simple steps, we will see the results.
Now let us move on to the more significant part of the editing, masking the object. Again, look ahead to see how you can mask the object!
Step6 Mask the Object
To mask our object, we will need to be technical. We will begin by adding the same footage of the static object on our timeline. Follow the steps mentioned below:
- Drag and drop the static object footage above the timeline text. Make sure the text stays in the middle of the sandwich.

- We will hide the video in the first track to simplify things. In addition, this will make our editing easier.
- We will have to look in the effects library to insert the masking effect.
- You can see the Effects icon on the bar at the top.
- Click on the Effects.
- You will see the search bar at the top of the import window.
- In the search bar, type in Image mask.
- Drag the Image mask effect on the video above the text tile.
Now the masking effect has been added. But we would have to adjust so that it stays upon our object.
- Double-click on the video and the settings option will open up.
- Go into the Effects
![]()
Note: You must select your target object’s mask shape exactly as its shape.
- We have to mask out a building, so that we will need a vertical rectangle.

- After you have selected the shape of your object, we will need to convert it to the object’s size so that it only masks the building.
- To do that, scroll down below the import window to the settings.
- Here you can see the X, Y, and width settings.
- First, move the width bar so that it matches the width of the building.

- Now drag the X bar until the mask is confined to the building. You would have created the mask only limited to the building.

- Once you complete this step, click OK in the bottom right corner.
- Now un-hide the original video that you imported in the beginning.
Finally, play the video in the main play window from the beginning.

You have successfully created a text behind the object effect. Now that you know how to add text behind static objects let us move to learn how to add text to a video that has high contrast and a clean background.
Add text behind a high contrast and clean background
Besides the text can be added behind a static object, it can also be added to a clean background with high contrast. But how is it? Let’s dive into it.
Step1 Import the video into the timeline
- Import the video from the location in your PC media.
- When imported, drag and drop it onto the timeline.

Step2 Add the text tile
To add the text to your video, follow the steps mentioned below.
- Click on the titles icon on the bar above the import window.
- On the left drop-down option, scroll down to the titles.
- Select the Plain text option.
- You will notice that multiple options will pop up in the import window.
- Select the text title that suits you best.
- After you have selected the text style, drag and drop it down above your video in the timeline.

- Our next step would be to add the text.
- Double-click on the text tile. Doing so will open the settings menu in the import window.
- Type in the text that you want. For reference, we will keep it simple such as, “Hello world.”
- You can also adjust the font of your text.
- Above the type box, a drop-down option will show you the range of fonts available.
- Select the font you desire.

Now that you have added the text, it is time to animate it.
Step3 Take a snapshot
After typing in the text, you will notice in the main play window that your text still appears in front of your object. Therefore, we want to take it behind the object. To do so, first, you will need to take a snapshot.
Follow the steps mentioned to take a snapshot:
- Hide the main video. You can see the Eye icon aside from your main video in the edit column on the left side of the timeline.
- Click on the Eye icon to hide the main video.
- In the main play window, you will notice that the screen turns black, which leaves only the text on the screen.

- In the main play screen, you can notice a small camera icon.
- This camera icon is used to take snapshots of your screen.
- Click on the camera icon to take a snapshot of your screen.
- Your snapshot will now be saved in the main import window.

Now that we have taken a snapshot, we will need to import it into the timeline. Scroll below for more.
Step4 Add the snapshot
After taking it, your goal is to import it into the timeline. To perform this action, perform the following steps:
- Before adding the snapshot to the timeline, we must delete the main text tile.
- Then drag and drop the snapshot from the import library into the timeline above the video.
- Make sure that the snapshot is aligned well with the length of the video.
- If it is longer than the video, drag it from the right to match the length of the video.
- If its length is smaller than the video, drag it to the right to increase its length.

After adding the snapshot, we will have to change its blending mode.
Step5 Change the blending of the snapshot
To create the effect of your text behind the video, you must alter the main text’s blending mode. In this case, it will be the snapshot we took.
![]()
Note: Changing the blending mode of the snapshot will allow it to blend with the transparent background and will create the effect of the text behind the object in the video.
Follow the steps mentioned below to change the blending of the snapshot:
- Double-click the snapshot.
- If you select the compositing tab, the blending options will pop up.
- From default, it would be set to Normal. Click on the Normal
- It will show a drop-down option.
- Scroll down below until you can see an option labeled Then click on Overlay.

- And press OK in the bottom right corner to confirm your changes.
The text can be blended with the background.
- Click on the Eye icon to un-hide the video from the timeline.
- Now play the video from the start from the main play screen to see the final changes.

Congratulations! The above steps allow you to add text behind objects in your videos.
Conclusion
Modern media is full of creative content. And if you are a content creator that wants to make it through the world of YouTube and video creating, you need to be the best. You can only be the best at what you do if you keep pushing the boundaries of your creativity.
Adding text behind objects could be the first step in making your intros shine with creativity and innovation. It allows you to maintain and build your viewing audience. The more the audience, the more your content gets watched!
Free Download For macOS 10.14 or later
It has a very engaging system UI, allowing even beginner users to get their hands on it instantly. You will learn how to add text behind your videos with a few simple steps.
Now that you know the requirements for the video, let’s move on to the step-by-step guide to add text to your video.
Part 3. Step-by-Step Guide To Add Text Behind Videos
We look at two examples of how to add text behind videos in Wondershare Filmora.
- A static video with an object that can be easily masked out.
- A video with high contrast and a clean background.
Add Text behind a Static Video
First, we will go with adding text behind a static object. For this, scroll more to get the step-by-step process.
Step1 Download Wondershare Filmora
If you are a beginner just starting in the video editing business, Wondershare Filmora is the best choice. Follow the steps below to download the free version of Wondershare Filmora:
- First, download the Wondershare Filmora on your PC or Mac.
- Open the setup and install the Wondershare Filmora.
After downloading the Wondershare Filmora software, let’s edit the video. Scroll below to learn how to start the editing process!
Step2 Add the Video to the Timeline
We will first look at the static video example. For this, follow the below instructions:
- You have to start by importing your video in the import library.
- From the import library, you can click on the video and drag it down below to the timeline.
![]()
Note: Adding video to the timelines will allow you to create a workspace to edit your video.
Now let’s move on to how we will add the text tile to our video.
Step3 Add the Text Tile
It is time to add the text tile you will animate behind the object. To do that, follow the steps mentioned as such.:
- Go to the Titles icon on the bar above the import library.
- A drop-down option will be available on the left side.
- Scroll down to the Plain text.
- Here, you can see many text tiles to add to your video.
- You can choose anyone you like.
- The most commonly used tile is the Basic 6.
- When you add the text tile to the timeline, you must ensure that the text is of equal length to the video.
- To do that, drag the right corner of the text tile and drag it to the right to match the length of the video.
Step4 Edit the Text Tile
After you have added the text tile you desire, you need to type in the text. For this article, we will keep it simple. We will be typing a simple statement such as “Hello, World.“
- Double-click the Text tile to open the settings menu.
- After the settings menu is opened, type in the text box on the import window.
You will notice changes on the main window that your text has changed.
- After the text appears, you can make the font look as desired.
- Look above the text window, and you will see the type of text font selected.
- Click on the drop-down option and choose whatever you like.
Let’s move on to animate the text tile.
Step5 Animate the text tile
After adding text, it is time to animate it. This animation will decide how your text will appear behind the target object.
- First, you must open the text settings by double-clicking on the text tile in the timeline.
- In the settings opened in the import window, you will have to click on the animation tab in the upper left corner, aside from the Preset
- Now scroll down to where you will see the Right Roll
- Click on Right Roll and then click on the OK in the bottom right corner of the import window.
![]()
Note: You may notice now that the text appears in front of our object. Don’t worry now! We are getting there. With a few simple steps, we will see the results.
Now let us move on to the more significant part of the editing, masking the object. Again, look ahead to see how you can mask the object!
Step6 Mask the Object
To mask our object, we will need to be technical. We will begin by adding the same footage of the static object on our timeline. Follow the steps mentioned below:
- Drag and drop the static object footage above the timeline text. Make sure the text stays in the middle of the sandwich.
- We will hide the video in the first track to simplify things. In addition, this will make our editing easier.
- We will have to look in the effects library to insert the masking effect.
- You can see the Effects icon on the bar at the top.
- Click on the Effects.
- You will see the search bar at the top of the import window.
- In the search bar, type in Image mask.
- Drag the Image mask effect on the video above the text tile.
Now the masking effect has been added. But we would have to adjust so that it stays upon our object.
- Double-click on the video and the settings option will open up.
- Go into the Effects
![]()
Note: You must select your target object’s mask shape exactly as its shape.
- We have to mask out a building, so that we will need a vertical rectangle.
- After you have selected the shape of your object, we will need to convert it to the object’s size so that it only masks the building.
- To do that, scroll down below the import window to the settings.
- Here you can see the X, Y, and width settings.
- First, move the width bar so that it matches the width of the building.
- Now drag the X bar until the mask is confined to the building. You would have created the mask only limited to the building.
- Once you complete this step, click OK in the bottom right corner.
- Now un-hide the original video that you imported in the beginning.
Finally, play the video in the main play window from the beginning.
You have successfully created a text behind the object effect. Now that you know how to add text behind static objects let us move to learn how to add text to a video that has high contrast and a clean background.
Add text behind a high contrast and clean background
Besides the text can be added behind a static object, it can also be added to a clean background with high contrast. But how is it? Let’s dive into it.
Step1 Import the video into the timeline
- Import the video from the location in your PC media.
- When imported, drag and drop it onto the timeline.
Step2 Add the text tile
To add the text to your video, follow the steps mentioned below.
- Click on the titles icon on the bar above the import window.
- On the left drop-down option, scroll down to the titles.
- Select the Plain text option.
- You will notice that multiple options will pop up in the import window.
- Select the text title that suits you best.
- After you have selected the text style, drag and drop it down above your video in the timeline.
- Our next step would be to add the text.
- Double-click on the text tile. Doing so will open the settings menu in the import window.
- Type in the text that you want. For reference, we will keep it simple such as, “Hello world.”
- You can also adjust the font of your text.
- Above the type box, a drop-down option will show you the range of fonts available.
- Select the font you desire.
Now that you have added the text, it is time to animate it.
Step3 Take a snapshot
After typing in the text, you will notice in the main play window that your text still appears in front of your object. Therefore, we want to take it behind the object. To do so, first, you will need to take a snapshot.
Follow the steps mentioned to take a snapshot:
- Hide the main video. You can see the Eye icon aside from your main video in the edit column on the left side of the timeline.
- Click on the Eye icon to hide the main video.
- In the main play window, you will notice that the screen turns black, which leaves only the text on the screen.
- In the main play screen, you can notice a small camera icon.
- This camera icon is used to take snapshots of your screen.
- Click on the camera icon to take a snapshot of your screen.
- Your snapshot will now be saved in the main import window.
Now that we have taken a snapshot, we will need to import it into the timeline. Scroll below for more.
Step4 Add the snapshot
After taking it, your goal is to import it into the timeline. To perform this action, perform the following steps:
- Before adding the snapshot to the timeline, we must delete the main text tile.
- Then drag and drop the snapshot from the import library into the timeline above the video.
- Make sure that the snapshot is aligned well with the length of the video.
- If it is longer than the video, drag it from the right to match the length of the video.
- If its length is smaller than the video, drag it to the right to increase its length.
After adding the snapshot, we will have to change its blending mode.
Step5 Change the blending of the snapshot
To create the effect of your text behind the video, you must alter the main text’s blending mode. In this case, it will be the snapshot we took.
![]()
Note: Changing the blending mode of the snapshot will allow it to blend with the transparent background and will create the effect of the text behind the object in the video.
Follow the steps mentioned below to change the blending of the snapshot:
- Double-click the snapshot.
- If you select the compositing tab, the blending options will pop up.
- From default, it would be set to Normal. Click on the Normal
- It will show a drop-down option.
- Scroll down below until you can see an option labeled Then click on Overlay.
- And press OK in the bottom right corner to confirm your changes.
The text can be blended with the background.
- Click on the Eye icon to un-hide the video from the timeline.
- Now play the video from the start from the main play screen to see the final changes.
Congratulations! The above steps allow you to add text behind objects in your videos.
Conclusion
Modern media is full of creative content. And if you are a content creator that wants to make it through the world of YouTube and video creating, you need to be the best. You can only be the best at what you do if you keep pushing the boundaries of your creativity.
Adding text behind objects could be the first step in making your intros shine with creativity and innovation. It allows you to maintain and build your viewing audience. The more the audience, the more your content gets watched!
Adobe After Effects Review
Make cinematic films, movies, intros, and transitions. Delete people from clips. Start fires or create a foggy weather. With Adobe After Effects, the industry-standard motion graphics and visual effects software, you are able to take any idea and make it come to life. Animate titles, credits, and lower thirds. Begin editing from scratch or with presets available. Combine photos and video footage to create anything you can think of.
Choose amazing effects from hundreds of options, remove unwanted parts from the frame, people or objects, and make VR videos to push your audience into the action. This software lets professionals configure keyframes, allow them to create compositing operations. Features of Adobe After Effects include a content library, digital asset management, video rendering, data import/export, and much more. In this article we will give you a brief overview of what After Effects is, what it’s used for and by who and the overall experience!
With that said, let’s get started!
1. Speed and Stability
When talking about speed and stability, After Effects has the latest release packed with improvements. All the developers have focused themselves on speed and also performance. The team at Adobe have worked very hard to make this application more responsive and when we go along in this article, that can be seen in many ways
The main improvement which is immediately clear to all users, is the renewed preview playback optimization. What we noticed is that After Effects is creating the ram preview for your projects a lot faster. However, while working with the software for this article, we did find the user interface to be more responsive, the playback is way smoother, so is it a lot more stable overall.
While using shape layers, there was a significant improvement. A few expressions are a lot faster. This alone is worth upgrading to the latest version of After Effects.

2. User Interface
The After Effects interface is constructed up of four main parts. The Timeline panel, the Project panel, the Composition panel and the Effects panel.
The Timeline Panel
In the Timeline panel, you edit all the footage and clips to create your rough cut. You can find the Timeline panel on the bottom of the workspace.
The Project Panel
It’s pretty straightforward that in the Project panel you import your footage and create your project. This is located on the top left of the standard After Effects workspace.
The Composition Panel
The Composition panel is where you will see the final product. This is located in the middle of your workspace.
The Effects Panel
In order to make creative changes to your video, use the preview, audio, effects, and Preset Panels. These panels are located on the upper right area of your workspace, each one also has its dropdown.
3. Learning Curve
The learning curve for After Effects depends on your background, the best way to find out if you like it is starting a free trial. Go through some tutorials online or paid courses. You’ll also want to spend time with the User Guide. The Search Help field in the top right corner provides you an easier search for answers to most questions that you have. Speaking of YouTube and online learning, most of the video tutorials you will find have been created by people that are experienced in After Effects and know their way around it.
4. VFX
There’s a time-period when video editors require strengthening their skills, calling it imperative software for improving editing skills is nowhere near an exaggeration. it really helps prospective professionals improve their learning experience through visual effects, camera tracking, text animation, motion tracking, color grading, etc. All of these methodologies do help in improving the VFX learning process in the long run.
Video editing happens to be a crucial part of film production. Making videos in a fantastic process can indulge in building professional videos via motion graphics animation. This is where Adobe After Effects become an excellent learning tool.
5. Motion Graphics
Motion graphics can sound quite scary. It’s a new term for a specific genre of animation. Motion graphics is the intersection between animation and graphic design. These are purpose-driven visual aspects with the goal of showing information to the viewer through the use of animated graphics or text. Sometimes they include voice-overs narrating what the text or graphics are showing. Where it gets a little complex is that the more popular the term motion graphics becomes, the more people are misaligning animations to it. They need to represent information and illustrate the idea to the viewer clearly, so they do that using animation and motion graphics.
6. Titles and Outros
Adobe released a new combination of features for you. For Adobe Stock: Graphics templates. Those pre-made templates give you a super smooth way to discover new motion graphics within Premiere Pro, without needing to spend time creating titles, overlays, or animations from scratch. The world has digitalized, and videos often need visual aspects such as titles, lower thirds, to present information. The templates not only assist video editors increase the quality of the content by showing certain information, but they also give a strong visual touch to keep the viewer engaged throughout the video. The audience nowadays is a lot more sophisticated, meaning that motion graphics are a necessity in a driven media world.
Motion Graphics templates are valuable for video editors of all levels. For the beginning content creators, the templates offer great quality, ready-made footage to help their creative goal. They can explore and work on their skills. Motion graphics that are pre-made are an excellent way to express the vision and express inspiration to new opportunities.
So now that you are aware of what After Effects templates are, we can move on to the actual workflow, why it is important, and how to use it as efficient as possible.
7. Workflow
Whether you are using Adobe After Effects to create motion graphics, or composite realistic visuals, you usually follow the same workflow, you may repeat the process of adjusting layer properties, editing, and compositing until everything looks good. You can change any property of any element, such as position, opacity and size. Make use of motion tracking to stabilize footage so that it follows the motion from another clip, and so much more!
8. Rendering Speed
When it comes to exporting your project in After Effects, you don’t need to buy an expensive workstation. You can speed up your rendering process from your own laptop without investing too much and by using the following tips we have for you below!
Tip #1: Enable Multiprocessing
What exactly is multiprocessing? That is when After Effects uses multiple cores from your CPU to export multiple frames at once. If your processor has one or more cores, you can enable this feature to reduce your rendering time. We want to mention that you need to check whether or not this option is turned on. Once enabled, you’ll see a great decrease in export time.
To enable Multiprocessing, navigate to Preferences > Memory & Multiprocessing. Then you click the check box next to ‘Render Multiple Frames Simultaneously’ and remember also to adjust the settings that you need.
Tip #2: Optimize Your RAM Usage
The RAM memory inside your workstation can be used to write and read data at a lot higher speeds than regular hard drives and portable drives. Configuring your RAM in a system is one of the easiest upgrades for better performance. Giving you affordable solutions for both desktop and laptop systems, the RAM memory upgrade does not require a lot of knowledge. The more RAM you allow applications to use, the higher the performance you will get out of it.
It also shows a noticeable increase in rendering speed. When the export time in your work is longer than needed, look at your RAM memory and see if you can make the necessary changes or upgrades.
Tip #3: Use the Media Encoder
Let’s talk about the Media Encoder. It’s the software that comes up with Adobe Creative Cloud products such as After Effects and Premiere Pro to simplify the export process. You can easily render your project from After Effects to Adobe Media Encoder and begin the project render process from that point on. The Media Encoder will increase your rendering performance and will significantly decrease rendering time.
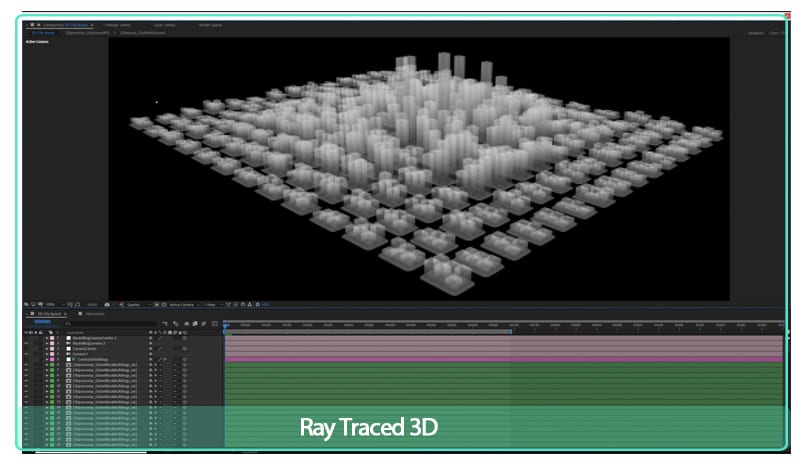
Tip #4: Disable Ray-Traced 3D
The included After Effects Ray-Traced 3D feature enables you to produce 3D models within After Effects without any struggle. Calculating all the motions and visual graphics is such a heavy process for your workstation. When you disable raytracing, you will get a faster export time. By looking that ‘Classic 3D’ is checked instead of ‘Ray-Traced 3D’ from your composition preferences, you can speed your rendering speed up to 50%. Isn’t that incredible?
Tip #5: Activate GPU Exporting with Cuda Acceleration
Exporting your videos with GPU rather than CPU will increase the efficiency of your render process. The export length will decrease a whole lot when you activate Mercury GPU Acceleration, also known as ‘CUDA’ from the ‘Project Settings’.
After Effects doesn’t really require CUDA features from a special kind of Nvidia GPU. Only the GPU accelerated 3D renderer, that is based on the raytracing algorithm, requires that. The other GPU features are running on any GPU that meets the basic minimums, including Intel and AMD GPUs.
9. System Requirements for Windows
These are the minimum specifications needed to use After Effects on PC:
OS: Windows 10 (64-bit) versions 1909 and later, or Windows 11
CPU: Intel or AMD Quad-Core Processor (Intel i5 and i7 will do the job)
RAM: 16 GB
Monitor resolution: 1280 x 1080
An internet connection
Free storage: 15 GB
GPU: Minimum 2 GB of VRAM
10. System Requirements for macOS
OS: macOS 10.13 or later
RAM: 16 GB
CPU: Intel and Apple Silicon (Rosetta2 Supported) Quad-Core Processor
GPU: 2GB of VRAM
Monitor resolution: 1440×900
Free storage: 15 GB
An internet connection
11. Keyboard Shortcuts
You can work visually when you configure your keyboard shortcuts with the visual keyboard shortcut editor within After Effects. You can use the keyboard user interface to show the keys that have been assigned to shortcuts, the available keys for assignment, and edit assigned shortcuts to make your workflow even easier.
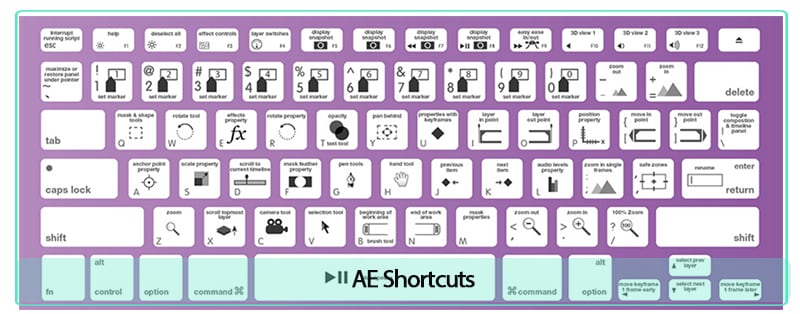
The keyboard layout:
This is a representation of your physical keyboard where you can see which keys have been assigned a shortcut, and which are available.
Command list:
The list displays all the commands that can be assigned shortcuts.
Key modifier list:
This list shows you all the modifier combinations and assigned shortcuts associated with the key you select on your physical keyboard.
After Effects does not allow you to reassign the following keys:
- A
- AA
- E
- EE
- F
- FF
- L
- LL
- M
- MM
- P
- PP
- R
- RR
- S
- SS
- T
- TT
- U
- UU
12. Should You Buy It?
Well first, you cannot buy After Effects, Premiere Pro or other software from Adobe. You have to rent them by paying monthly. After Effects is primarily a compositing and graphics software. Premiere is primarily a video editing program. In the case of After Effects and Premiere Pro, it’s not really an either/or. They’re both software with different purposes. After Effects is a lot more powerful and essentially showcases most of Premiere’s functionality, but according to our experience, the Premiere Pro interface and workflow is way more superior for video editing.
Premiere Pro is essentially built around its timeline, the region where you cut your video clips and drag and place them into your appropriate sequence. Hollywood filmmakers and professional YouTube content creators are using Premiere Pro to edit high-performing content and award-winning films. The software is very intuitive and easy for beginners to start with.
Are going to work with After Effects to create an income? Or are just going to use it for a hobby? It’s crucial to mention that question because Adobe After Effects is not something that is cheaply available. You will be investing much money on the program, and if you are working to use the software, paying a good amount, and earning nothing in return, then you might want to shift to another alternative which would cost you less. For instance, let’s assume you are using the application to earn an income, and have a few low-paying clients. In such a situation, you will have to rethink your options of software and analyze whether what you are paying in comparison to what you are getting is enough for you or not. We all are different individuals and have different preferences. Once we can see what is more important to us, or what is our need at this moment, then we will be able to judge the worth of purchasing Adobe After Effects better.
Are you going to use After Effects to earn an income? Or are just using it as a hobby? It is very important to address this question because Adobe After Effects is not something cheaply accessible. You will be investing a lot of money into this software, if you are using the software while paying a good amount and earning nothing in return yet, then you could shift to a different alternative which will cost you a lot less. Let’s say you are using After Effects to earn an income and have some low-paying work. In that case, you will have to reconsider your options of video editing software and look at whether what you are paying in comparison to what you are getting is possible for you. When we can see what is more important to us, we will be able to see the worth of buying After Effects.
Did you previously use After Effects or are you new to the program? The return that you will get using Adobe After Effects, depends on how good you know how to work with the options, functions and features in the software.
The Bottom Line
So summing it all together, Adobe After Effects takes care of all your assets and creates a final product, considering that After Effects is usually an asset-generation tool. Most video editors complete their projects in After Effects non-stop. It’s excellent for making visual videos come to life.
AE version 22.3 is very impressive. Giving you a wealth of new features created to make VFX editing a lot faster and easier. Offering new features on a regular basis, improving their subscription model making it more attractive. Especially if you’re a professional editor and designer.
Once you get comfortable with Adobe After Effects, you learn how to dynamically combine After Effects compositions to your Premiere projects. You are able to access both assets at the same time if needed!
Free Download For Win 7 or later(64-bit)
Free Download For macOS 10.14 or later
How to Make a Time-Lapse Video Online
If you’re looking for a way to create a time-lapse video online, you have come to the right place. There are different reasons why people use online time-lapse video makers. Let us take an example, if you want to make a time-lapse video of someone holding a phone in their hand then this would be pretty easy to do with the help of an online time-lapse maker.
Why do people use an online time-lapse maker because they want to get some good quality videos without spending much money on them? That’s something that many people who are just starting their business can do easily since it can be done by anyone who knows how to use online time-lapse makers properly! Let’s have a look at some online tools on which you can make time-lapse videos online.
1. Clideo Timelapse Video Tool
A video timelapse video is a type of video that shows the progression of time. It allows you to create an engaging experience for your viewers, and it can also be used to promote your business. Whether you’re a content creator, brand manager, or just a fan of videos, creating a time-lapse video is one of the most popular and effective ways to produce impressive content.
With Clideo Time-lapse Video Tool you can create incredible videos with ease. You can choose from dozens of beautiful templates, music tracks, transitions, and more. You can also add your photos or video clips and make your unique time-lapse video. By using this tool, you can:
- Capture your events in real-time and save them for later. Once captured, you can use the timeline function to move backward or forwards through the events of your day.
- Add filters and effects such as blur or freeze frame.
- Share your videos on social media with ease!
Steps to make a time-lapse video on Clideo:
Step1 Open Clideo and Create an account
You can use this online time-lapse maker from any browser e.g Google Chrome, Mozilla Firefox, Internet Explorer, etc. After that you don’t have an account on it then you have to create it first. You can Sign in by using different platforms like Google, Facebook, apple, etc.

Step2 Create a project and select a tool
When you create an account on Clideo, a page appears where you will get the option of creating a project. A list of several features will be provided by this online time-lapse video maker. You will get to add subtitles, compress videos, resize the video, and many more features in it.

Step3 Create a video on Clideo
If you want to create a video then click on video maker and after that choose a file whether it is an image, video, gif, or music.

Step4 Edit the video and export
With Clideo, you can make amazing videos with just one click. You can choose the length of your video, as well as the format, and save it to your computer’s hard drive.
You can also adjust the duration of your video and add music to make it more interesting. This way you can make sure that your video is the right length for the content you’re putting in it.

2. Flixier Timelapse Video Maker
Flixier Timelapse Video Maker is the easiest way to create beautiful timelapse videos. You can create beautiful, high-quality videos with ease. What’s more, you don’t have to know any programming languages! You’ll be able to export your videos in just one step.
The program’s intuitive user interface makes it easy for beginners to get started while still providing advanced features that professionals will love. The program supports drag-and-drop editing and has an intuitive layout designed for maximum efficiency.
Step1 Create a video without having an account
Flixier Timelapse Video Maker is a powerful video editing tool that allows you to create beautiful, high-quality timelapse videos. The best thing about Flixier is it does not require any account. You can easily click on Get Started and move on to the next step.

Step2 Drop and Browse any file
The Flixier Timelapse Video Maker is a new and exciting way to create HD videos from your favorite photos. It makes it easy for you to choose the photo you want to use, and then attach it to your video.
Flixier works with all of your favorite services: Google Drive, Google Photos, Dropbox, Flowplayer, and more! Flixier has a massive library of videos that you can use as inspiration for your project. There are thousands of them, some of which are free.

Step3 Edit the video and save it
This online time-lapse maker is easy to use, and it allows you to edit your videos in a few simple steps. You can add text, motion, position, and scale to your videos in just a few clicks. After that, you can export it to your hard drive.

Flixier has tons of useful features for creating content for social media marketing. You can upload multiple clips at once and easily customize the length and format of each clip. You can also add music to your videos and adjust the volume levels for each clip individually so that they blend seamlessly when viewed as a whole.
3. Kapwing
Are you looking for a way to speed up and down your video without having to rewind and fast-forward? Kapwing is the tool that can help you do just that. With Kapwing, you can change the speed of your video from 1x to 10x faster. And because it’s easy to use and can be used on any device, you can take your videos anywhere!
There’s nothing worse than having your video slowdown in the middle of a high-speed chase. That’s why, this tool can speed up and down your videos as much as you want, whenever you want it. Now move to steps that how can we use it:
Step1 Sign in and export the file
If you’re looking for a way to speed up your video editing process, look no further. Kapwing Video Speed Changer is here to help!
With Kapwing, you have to create an account, add media like pictures and videos, and then easily tweak the speed of your video without ever having to create a new one.

Step2 Create video and change speed
Kapwing is a video editing software that lets you create videos as well as control the speed according to your needs. This feature makes it easy for you to create videos with different features. You can create videos with size, transitions, layers, and fonts. You can add text to your video as well as record audio from your computer’s microphone.
The software also includes other tools such as watermarking and adding subtitles to your video.

Step3 Export the video
This online tool provides you with different formats to export your video like mp4, mp3, GIF, and JPEG. You can download or export your video in full HD form. It provides you full resolution video.

4. Veed.io Video Speed Controller
Are you looking to speed up or slow down your videos? We’ve got you covered. With Veed.io, you can easily adjust the speed of your video to your liking. You can also use a slider to control the speed of the video itself, which allows for more flexibility and control.
To use this tool, all you have to do is enter the URL of your video and select how fast you want it to be played back. And if you need even more flexibility, go ahead and add buttons so that you can easily change between faster and slower speeds without having to pause or rewind your video at all!
How can we control the speed on Veed.io let’s have a look at some steps:
Step1 Open the tool and create an account
Check out Veed.io Video Speed Controller, a new tool that allows you to control the speed of your videos. It’s super easy to use and can be accessed from any browser. Just create an account and you’ll be able to adjust the speed of your video on the go!

Step2 Create, edit the video and add subtitles
Veed.io is a video speed controller that allows you to create videos, edit your footage, and add voice-over in one simple app.
This is perfect for content creators who want to create more engaging videos and increase their profits by selling subscriptions or advertising within their content. With Veed.io, you can use the built-in editor to easily add text overlays, adjust the speed of your video, and add voice-over effects to create professional videos that people will love watching!

Step3 Add elements, and emojis in the video
Are you tired of your videos just being boring? Worried that they’re not engaging enough? Don’t worry, Veed.io has a solution for that.
With this editor, you can add elements to your videos to increase engagement and make them more interesting. You can also select the size and color of each element, so you can customize the look of your video to stand out from the crowd!

Step4 Export video without the watermark
After all the editing you can export or download the video without watermarks. The resolution of the video will be HD.

5. Typito Time Lapse Maker
Typito Time Lapse Maker is a tool that allows you to create videos with a timelapse effect. It is easy to use, and the interface is extremely simple. The first step is to select your video source and output format. You can choose from several different video formats, including MP4, MOV, and AVI.
Next, you’ll be prompted to select what you want your video to do. You have the option of creating a looping video or not it’s up to you! Once you’ve made your choices, you will be taken to the final step: entering text into the text editor for your video. This is where you can add captions or text overlays to spice up your video’s storyline.
Move to steps to create a lapse video online:
Step1 Create an account and make a video
Firstly, create an account on Typito and once you are done with the creation of the account click on the “Create Video” button in the middle of the screen. The video creation tool will begin loading, so please be patient!

Step2 Add media, title, elements, music
Time-lapse is a great way to create visual content. But how do you do it without spending a fortune? Typito Time Lapse Maker can help you make your time-lapse videos with the click of a button!
Just select media, add titles, elements, and anything else you want, and we’ll handle the rest—whether you’re using your music or not. You can add music according to your taste.

Step3 Export video and re-edit
When you are done with the video export it. And the great thing is video can be re-edited again and again. You can apply changes many times.

Conclusion
We hope that these ideas can motivate you to make timelapse videos. If you want to create a time-lapse video but don’t want to use a big and expensive camera just set up your online time-lapse. Moreover, there are lots of excellent platforms out there to share the finished product. Refer to the above recommendations to choose your favorite one.
Free Download For Win 7 or later(64-bit)
Free Download For macOS 10.14 or later
Free Download For macOS 10.14 or later
Some Facts About GIF Background You Didn’t Know
Some Facts About GIF Background You Didn’t Know
An easy yet powerful editor
Numerous effects to choose from
Detailed tutorials provided by the official channel
Once you start using GIFs in your everyday conversations, there’s no going back. GIFs make the conversation more immersive and enjoyable and add a sense of emotion that is not possible with ordinary text. You probably loved some gifs more than others, or there were moments when you wanted to turn them into gifs and wished you could use them as a gif background on your device or presentation but couldn’t figure out how to do it. But, now you don’t have to bury your wish any longer. During this article, you will learn everything there is to know about all the different ways you can use gifs as your background and many more. In addition, you will learn how to use them as your background and how to create them.
In this article
01 [How to Use a GIF as Your Desktop Background on Windows](#Part 1)
02 [How to Make GIF Background on Windows/Mac/Android/iPhone](#Part 2)
03 [How to Make GIF Powerpoint Background](#Part 3)
04 [How to Make GIF Without Background - Free & Efficiently?](#Part 4)
Part 1 How to Use a GIF as Your Desktop Background on Windows?
Although Windows doesn’t have native support to keep animated gif backgrounds, you can use third-party services to keep gifs as background images.
Using Plastuer or BioniX wallpaper changer as a 3rd party software is the best way to use animated gifs for your desktop.
As a starting point, we’ll cover plastuer, which uses WebGL and chromium-browser to make gifs as your background.

The software includes selecting different screens where you want the wallpaper to appear, making it possible to apply it to different screens at once.
To select the gif you want:
● You can paste the URL of the gif you want to use.
● You can also use the “create playlist” field to add multiple gifs as your background.
● You can select a file from your device using the “select file” option.
● Or you can choose from hundreds of gifs present in the plastuer library.
● You can disable the wallpaper whenever you wish by clicking on the “disable wallpaper” option.

How to use the bioniX wallpaper changer?
BioniX comes with several options that one may need to apply to their Windows device’s background, and animated gif backgrounds are one of them.

You will need to download the software and once it is installed, launch it on your PC to apply cool gif backgrounds. To choose files from the device itself, you will have to use the shortcut command “CTRL+F”, or you can also choose to insert the URL of the gif you want to use as your background.
Once your image gets uploaded into the software, double click on it to set it as your windows wallpaper. You can also choose a launch of gifs, create a playlist, and select the timer to change wallpaper regularly.
Part 2 How to Make GIF Background on Windows/Mac/Android/iPhone?
So, how can you create moving background gifs on your different devices like Windows/Mac/Android/iPhone?
In case you thought that was hard, you were entirely mistaken. Now, you can easily create or customize cool background gifs for your computer, tablet, phone, or other devices that you own. The best part is that you don’t need any technical skills to use different tools.
You can create gifs with the help of many tools such as Giphy and share them with your family, friends, and coworkers.
01Giphy
Giphy is a one-stop destination for all of your gifs needs. You can create or choose from thousands of gifs present in their library. Furthermore, one can make personalized gifs with all the tools they provide and add custom stickers, texts or different filters. There is also a live wallpaper section present in giphy, from where you can download hundreds of cool gif backgrounds and make your old machine look fabulous again.

02Pinterest
It’s no secret that Pinterest has a lot of great images, but did you know you can also find gif backgrounds here in various genres that you like and then download them?
It’s straightforward to use, and you can also find anime gif backgrounds on Pinterest if you are an anime fan.

03Tenor
This site offers online gif backgrounds. One may choose from a wide selection of wallpapers and backgrounds available on this site. Online Library is filled up with all sorts of aesthetic gif backgrounds and other types of background that people like.
A few more tools fit the need, but most of them are not reliable, and the tools mentioned above are currently the best ones available for you to use.

Part 3 How to Make a GIF Powerpoint Background?
If you make PowerPoint presentations, you can use various tools to modify your presentation. But did you know that you can also include an aesthetic gif background as part of your presentation?
The steps to creating a gif PowerPoint background are very simple, and below you will find all the steps you need to follow:
● You’ll need to choose the PPTx file that you want to use the GIF background on to get started. Then you can choose the specific slide.
● Navigate to the “design” tab, then to the “background” section. You will see a “background styles” option where you will have to select “format background” to complete the process.
● Select “fill” in the left-hand side panel of the appeared window. Now, select “picture or texture fill” and choose the “file” button, which will lead to another window.
● In the “look in” menu, find the folder or file where the required gif is present. Go on to select the “ok” option. You can either select “close” to apply the gif to a particular slide or “apply to all” to use the gif background in the whole presentation.
Part 4 How to Make GIF Without Background - Free & Efficiently?
One may also look for transparent gif maker websites that will help them make gifs without background and use them on different devices they own.
Here are a few websites that are best for this job; they won’t only help you make transparent gifs but also edit various features like delay time, animation speed etc.
01Using EzGif
Using EzGif is probably one of the best options available in the market at the moment. You can go to their website and create a transparent gif background of high resolution.
Doing that is easy; you need to upload PNG type images that don’t have a background or combine transparent background to form a gif. You can choose up to 2000 images with a maximum file size of 100 MB for all images combined.
To create a gif, go on their site, then to the “gif maker” section to upload the images, and click on “make a gif” to make a transparent gif from the selected images. Once the gif is created, you can use it as a moving gif background and share it with friends or family.
02Use animizer.net to create a gif without background
It is effortless to use software to create transparent gifs by uploading multiple transparent PNG images and combining them to form a gif.
You can use unlimited images for your gif and animated gif background. It also lets you adjust various settings for your transparent gifs like loops, animation speed and much more.
03Use filmora for making gifs without background easily
Wondershare Filmora Video Editor is an all in one tool that will help you create all sorts of gifs, including transparent gifs. You can take advantage of their easy to use tools that are fir for people who have no technical skills at all.
You can easily upload the images and remove their background in the software itself and later use it in the gif you are willing to create.

Wondershare Filmora - Best Video Editor for Mac/Windows
5,481,435 people have downloaded it.
Build unique custom animations without breaking a sweat.
Focus on creating epic stories and leave the details to Filmora’s auto features.
Start a creative adventure with drag & drop effects and endless possibilities.
Filmora simplifies advanced features to save you time and effort.
Filmora cuts out repetition so you can move on to your next creative breakthrough.
This is probably one of the best options if you are looking for an all in one tool for all your needs.
● Ending Thoughts →
● The techniques that we have talked about in this guide may help you discover things about gif backgrounds you have not known before.
● They are incredible and can help you utilize gifs in ways you hadn’t even considered.
● Create a moving gif background and apply it to any device easily.
● Of course, a simple background won’t provide the same type of effect as a moving gif. With this guide, you’ll learn about every tool that you may use and how to apply or create a cool gif background on your own.
Once you start using GIFs in your everyday conversations, there’s no going back. GIFs make the conversation more immersive and enjoyable and add a sense of emotion that is not possible with ordinary text. You probably loved some gifs more than others, or there were moments when you wanted to turn them into gifs and wished you could use them as a gif background on your device or presentation but couldn’t figure out how to do it. But, now you don’t have to bury your wish any longer. During this article, you will learn everything there is to know about all the different ways you can use gifs as your background and many more. In addition, you will learn how to use them as your background and how to create them.
In this article
01 [How to Use a GIF as Your Desktop Background on Windows](#Part 1)
02 [How to Make GIF Background on Windows/Mac/Android/iPhone](#Part 2)
03 [How to Make GIF Powerpoint Background](#Part 3)
04 [How to Make GIF Without Background - Free & Efficiently?](#Part 4)
Part 1 How to Use a GIF as Your Desktop Background on Windows?
Although Windows doesn’t have native support to keep animated gif backgrounds, you can use third-party services to keep gifs as background images.
Using Plastuer or BioniX wallpaper changer as a 3rd party software is the best way to use animated gifs for your desktop.
As a starting point, we’ll cover plastuer, which uses WebGL and chromium-browser to make gifs as your background.
The software includes selecting different screens where you want the wallpaper to appear, making it possible to apply it to different screens at once.
To select the gif you want:
● You can paste the URL of the gif you want to use.
● You can also use the “create playlist” field to add multiple gifs as your background.
● You can select a file from your device using the “select file” option.
● Or you can choose from hundreds of gifs present in the plastuer library.
● You can disable the wallpaper whenever you wish by clicking on the “disable wallpaper” option.
How to use the bioniX wallpaper changer?
BioniX comes with several options that one may need to apply to their Windows device’s background, and animated gif backgrounds are one of them.
You will need to download the software and once it is installed, launch it on your PC to apply cool gif backgrounds. To choose files from the device itself, you will have to use the shortcut command “CTRL+F”, or you can also choose to insert the URL of the gif you want to use as your background.
Once your image gets uploaded into the software, double click on it to set it as your windows wallpaper. You can also choose a launch of gifs, create a playlist, and select the timer to change wallpaper regularly.
Part 2 How to Make GIF Background on Windows/Mac/Android/iPhone?
So, how can you create moving background gifs on your different devices like Windows/Mac/Android/iPhone?
In case you thought that was hard, you were entirely mistaken. Now, you can easily create or customize cool background gifs for your computer, tablet, phone, or other devices that you own. The best part is that you don’t need any technical skills to use different tools.
You can create gifs with the help of many tools such as Giphy and share them with your family, friends, and coworkers.
01Giphy
Giphy is a one-stop destination for all of your gifs needs. You can create or choose from thousands of gifs present in their library. Furthermore, one can make personalized gifs with all the tools they provide and add custom stickers, texts or different filters. There is also a live wallpaper section present in giphy, from where you can download hundreds of cool gif backgrounds and make your old machine look fabulous again.
02Pinterest
It’s no secret that Pinterest has a lot of great images, but did you know you can also find gif backgrounds here in various genres that you like and then download them?
It’s straightforward to use, and you can also find anime gif backgrounds on Pinterest if you are an anime fan.
03Tenor
This site offers online gif backgrounds. One may choose from a wide selection of wallpapers and backgrounds available on this site. Online Library is filled up with all sorts of aesthetic gif backgrounds and other types of background that people like.
A few more tools fit the need, but most of them are not reliable, and the tools mentioned above are currently the best ones available for you to use.
Part 3 How to Make a GIF Powerpoint Background?
If you make PowerPoint presentations, you can use various tools to modify your presentation. But did you know that you can also include an aesthetic gif background as part of your presentation?
The steps to creating a gif PowerPoint background are very simple, and below you will find all the steps you need to follow:
● You’ll need to choose the PPTx file that you want to use the GIF background on to get started. Then you can choose the specific slide.
● Navigate to the “design” tab, then to the “background” section. You will see a “background styles” option where you will have to select “format background” to complete the process.
● Select “fill” in the left-hand side panel of the appeared window. Now, select “picture or texture fill” and choose the “file” button, which will lead to another window.
● In the “look in” menu, find the folder or file where the required gif is present. Go on to select the “ok” option. You can either select “close” to apply the gif to a particular slide or “apply to all” to use the gif background in the whole presentation.
Part 4 How to Make GIF Without Background - Free & Efficiently?
One may also look for transparent gif maker websites that will help them make gifs without background and use them on different devices they own.
Here are a few websites that are best for this job; they won’t only help you make transparent gifs but also edit various features like delay time, animation speed etc.
01Using EzGif
Using EzGif is probably one of the best options available in the market at the moment. You can go to their website and create a transparent gif background of high resolution.
Doing that is easy; you need to upload PNG type images that don’t have a background or combine transparent background to form a gif. You can choose up to 2000 images with a maximum file size of 100 MB for all images combined.
To create a gif, go on their site, then to the “gif maker” section to upload the images, and click on “make a gif” to make a transparent gif from the selected images. Once the gif is created, you can use it as a moving gif background and share it with friends or family.
02Use animizer.net to create a gif without background
It is effortless to use software to create transparent gifs by uploading multiple transparent PNG images and combining them to form a gif.
You can use unlimited images for your gif and animated gif background. It also lets you adjust various settings for your transparent gifs like loops, animation speed and much more.
03Use filmora for making gifs without background easily
Wondershare Filmora Video Editor is an all in one tool that will help you create all sorts of gifs, including transparent gifs. You can take advantage of their easy to use tools that are fir for people who have no technical skills at all.
You can easily upload the images and remove their background in the software itself and later use it in the gif you are willing to create.
Wondershare Filmora - Best Video Editor for Mac/Windows
5,481,435 people have downloaded it.
Build unique custom animations without breaking a sweat.
Focus on creating epic stories and leave the details to Filmora’s auto features.
Start a creative adventure with drag & drop effects and endless possibilities.
Filmora simplifies advanced features to save you time and effort.
Filmora cuts out repetition so you can move on to your next creative breakthrough.
This is probably one of the best options if you are looking for an all in one tool for all your needs.
● Ending Thoughts →
● The techniques that we have talked about in this guide may help you discover things about gif backgrounds you have not known before.
● They are incredible and can help you utilize gifs in ways you hadn’t even considered.
● Create a moving gif background and apply it to any device easily.
● Of course, a simple background won’t provide the same type of effect as a moving gif. With this guide, you’ll learn about every tool that you may use and how to apply or create a cool gif background on your own.
Also read:
- Updated In 2024, How to Add Green Screen Effects In Phhotoshop
- Updated 2024 Approved Convert MP4 to 60 FPS GIF A Step-by-Step Guide
- New Hitfilm Express Video Editor Review
- Updated 2024 Approved Tips for Choosing Location & Scheduling Music Video
- In 2024, How to Edit Facebook eCommerce Video Ads
- Updated 10 Best Suggestions for AI Video Interviews for 2024
- Trailer Guide for Creators and Developers
- Having GoPro Accessories Is Easy, but Editing on GoPro Quik Is Challenging. Read This Guide and, Stepwise, Learn to Use GoPro Slow-Motion for Perfect Shots for 2024
- Updated Best Frame Rate for 4K Video for 2024
- Updated How to Create Cooking Video Intro and End Screen for YouTube Channel for 2024
- Updated In 2024, Make A Tattoo Disappear Like A Magic
- Updated Ideas That Help You Out in Making Transparent Image
- New Are You Surfing for some Way to Make Your Animated Emoji Discord Using Videos, GIFs, Images, or Text? Read Through This Article as Well Guide You Through the Process
- 10 Top Free GIF Background Remover for PC and Online
- Good Slideshow Makers Sometimes Cost High and Free Slideshow Makers Provide Slideshows with the Watermark. How to Cope with This Problem? This Article Gives Solutions
- Updated 2024 Approved Exploring the Finest Text-to-Speech Male Voice Tools for Natural Output
- How To Fix Part of the Touch Screen Not Working on Realme Narzo 60x 5G | Dr.fone
- In 2024, A Guide Samsung Galaxy XCover 6 Pro Tactical Edition Wireless and Wired Screen Mirroring | Dr.fone
- How to Share/Fake Location on WhatsApp for Vivo S17t | Dr.fone
- In 2024, The 10 Best Tools to Bypass iCloud Activation Lock From iPhone XR You Should Try Out
- Pattern Locks Are Unsafe Secure Your Realme Narzo 60 Pro 5G Phone Now with These Tips
- The Ultimate Guide How to Bypass Swipe Screen to Unlock on Vivo Y28 5G Device
- Recover Excel 2019 Files from Virus-Infected Pen Drives for Free | Stellar
- In 2024, How to Unlock Apple iPhone 13 Pro Max Passcode without Computer?
- Undeleted lost videos from Y28 5G
- The way to get back lost call history from V29e
- 6 Solutions to Fix Error 505 in Google Play Store on Samsung Galaxy A54 5G | Dr.fone
- How to Intercept Text Messages on Oppo K11 5G | Dr.fone
- In 2024, 3 Ways to Erase Apple iPhone 15 Pro Max When Its Locked Within Seconds
- Title: Updated 2024 Approved 2 Effective Ways to Add Text Behind Objects
- Author: Morgan
- Created at : 2024-05-19 05:12:49
- Updated at : 2024-05-20 05:12:49
- Link: https://ai-video-editing.techidaily.com/updated-2024-approved-2-effective-ways-to-add-text-behind-objects/
- License: This work is licensed under CC BY-NC-SA 4.0.
