
:max_bytes(150000):strip_icc():format(webp)/dualsenseedge-749ef030e3c84376926d817913be924b.jpg)
Updated Creating Testimonial Videos For Health And Wellness Business Industry
Creating Testimonial Videos For Health And Wellness Business Industry
It’s not easy to get a testimonial video right. You need to know how to write one, find the right people to speak in it, and make sure your audience likes what they hear. But post-production can be even more challenging than getting everything else right: editing, adding effects, and music—it’s enough to make your head spin!
Fortunately for you, we’re here with our step-by-step guide on how to edit testimonial videos using Wondershare Filmora . So, sit tight because we’re about to take you through each stage of this process from start to finish!
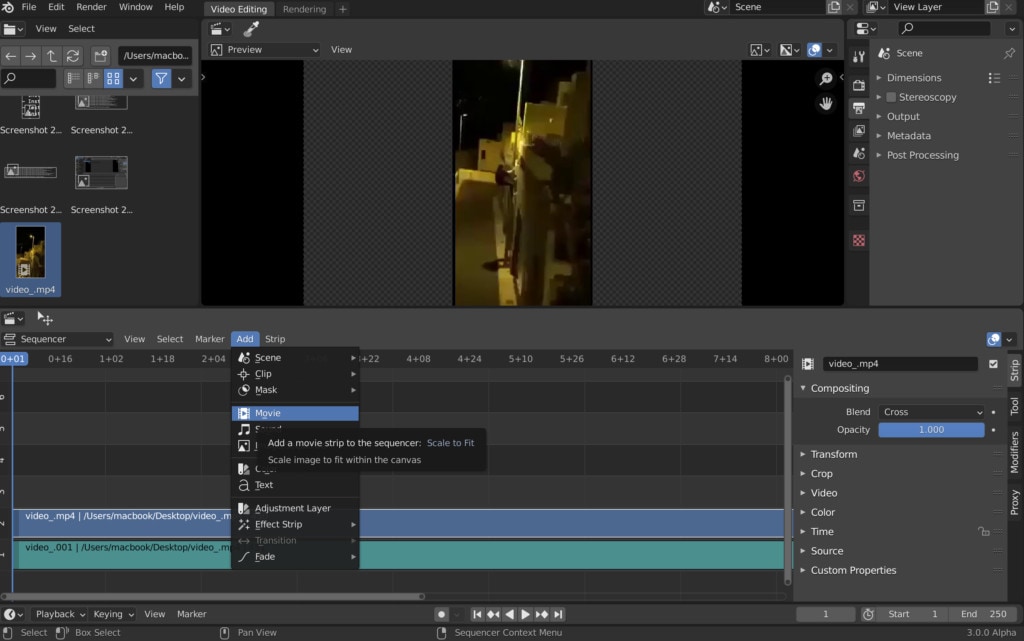
Import Your Media Files to Filmora Video Editor
It includes your testimonial videos and video/photo materials. You can import your media files from the following sources:
- Medial Files
- Medial Folder
- From Camera or a Phone
- With Instant Cutter Tool
- With Auto Beat Sync

To save time, it is best to prepare ahead of time all your videos materials before start editing your testimonial video. Save it in just one folder including your script guide, photos, and videos
Select Your Preferred Project Aspect Ratio
Aspect ratio is the relationship between the width and height of your video, which determines how it will look on different screens. There are several commonly used aspect ratios such as:
- Widescreen (16:9) – Recommended for Youtube and Facebook
- Instagram (1:1) – Recommended for Instagram and Facebook
- Portrait (9:16) – Recommended for Tiktok, Stories and Reels
- Standard (4:3) – Recommended for Facebook, LinkedInn and other

Being aware of the right ratio for each social media platform will help you to advertise correctly. It also affects how you edit your video. For example, if you choose a different aspect ratio than what was originally recorded by Filmora’s camera tools, then some of your content may be cut off or stretched out in undesirable ways when viewed on certain devices (e.g., smartphones).
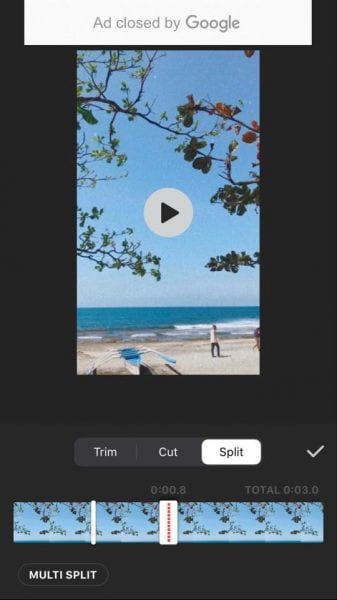
Split Testimonial Video into Small Clips

When you’re ready, drag your video testimonials to the Show Track then begin to use the “split” button to cut out parts of the video.
To split a video into smaller sections, start by cutting it down to the appropriate length by moving the playhead to the beginning position of the part you want to cut, clicking the Split icon (the scissors icon) on the toolbar, or clicking the Split button on the playhead.
From there, repeat this procedure until you’ve completed the whole narrative. You’ll be left with numerous cut segments that you may either delete or rearrange. To remove a clip from your movie, choose Delete from the toolbar or right-click and select delete.
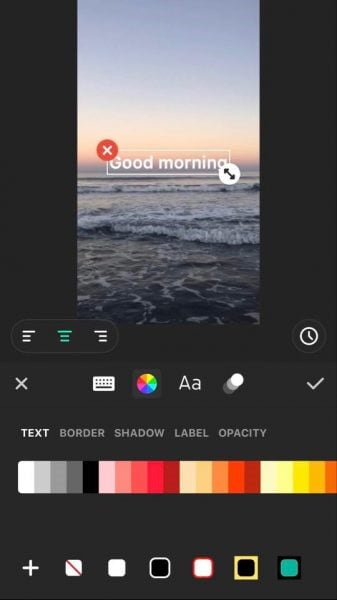
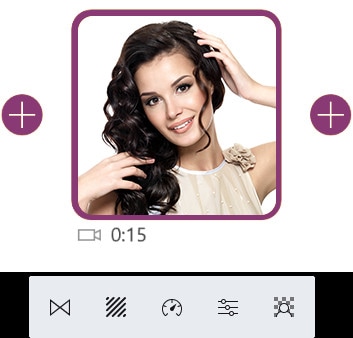
Add Catchy Headlines and Text (Optional)
If desired, add catchy headlines/texts like “How to Eliminate Chronic Pain Forever”. You can do this by clicking Text button from toolbar located across top portion of screen (beside Transitions button).
![]()
Adding a phrase or a short sentence is called “headline”. It would be nice to add one of them at your video, so that viewers can get an idea about what it’s about before watching it in full. The text can be customized by using different font styles like bold, italic, underline etc., as well as its size and color.
Input Subtitle
Subtitles are used to translate the spoken word into text. If you have a video that is in a language other than English, subtitles can be added so that viewers who do not speak the language can still understand what is being said. Subtitles are also useful if you want to add subtitles for educational purposes, such as teaching students how to pronounce certain words and phrases.

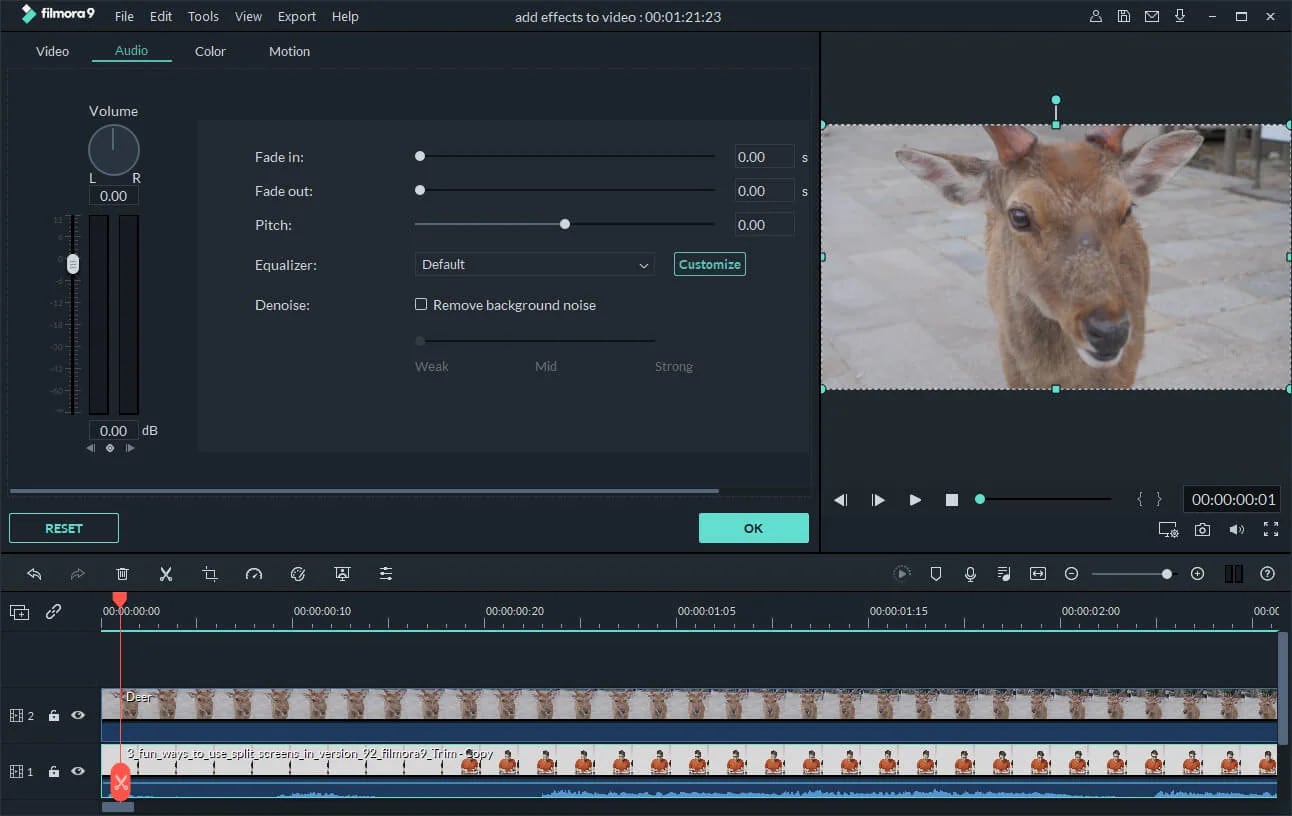
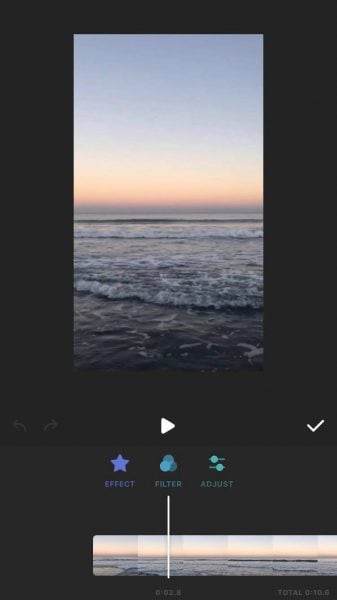
Apply Transitions to Your Testimonial Video
You can add fade-in transitions to clips, as well as fade-out transitions.
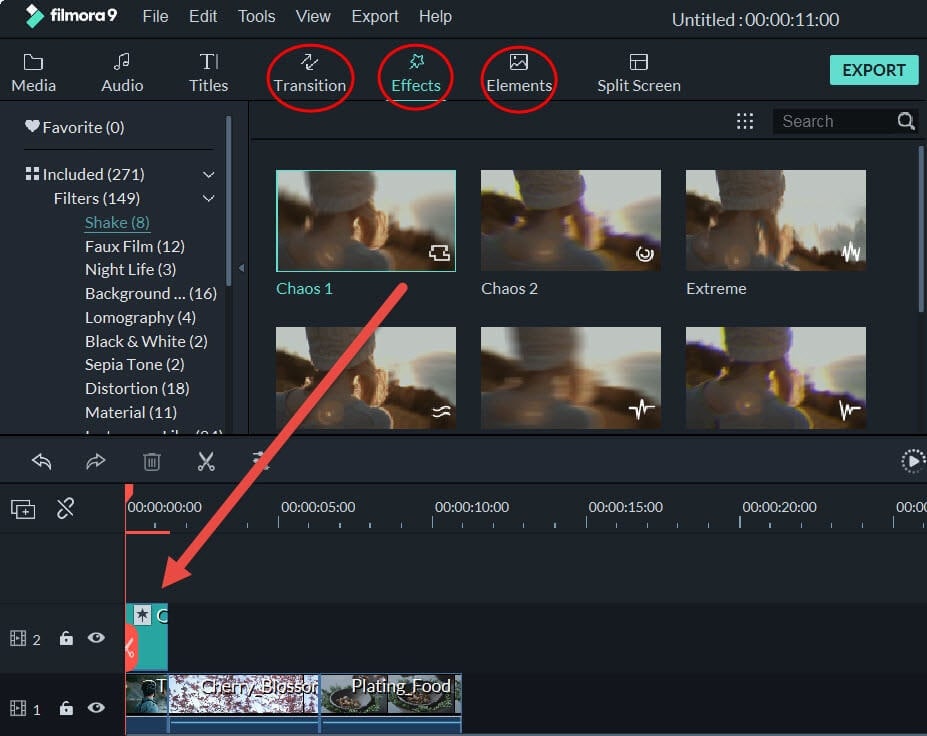
To add a fade-in transition: Click on the first clip and select “Effects.” Then, click “Transition.” Choose a transition from the category of “Fades” and then apply it to the first clip by clicking on its thumbnail image.
To add a fade-out transition: Click on the second clip and select “Effects.” Then, click “Transition.” Choose a transition from the category of “Fades” and then apply it to the second clip by clicking on its thumbnail image.
Feel free also to use other transitions as you want, but be careful not to use an overly extreme one.

Add Background Music to Testimonial Video
You may choose from a wide range of music in the audio library. It’s available both online and offline.
You can also easily add background music from your computer by going to the “Media” menu and then selecting the import option. Make sure to use a non-copyright music so that you don’t run into any copyright problems when you post your video. There are several no copyright tracks on Youtube; simply search for no copyright background music or get it from other sites that provide a free-royalty background music.

Add a Logo/Watermark
To add a logo or watermark to your video, follow these steps:
- Import your Business Logo to the Media Folder.
- Then drag it into the Show Track area.
- Resize it to the ideal dimensions, then position it in the correct location in your video. It’s preferable to place it at the top or button section of the video.
You may also add your company’s logo at the end of the video as a fade-out transition.
![]()
By adding a logo or watermark to your video, you can make it harder for people to illegally distribute and share your video without permission. It helps also to promote your brand or business. When viewers see your logo or watermark throughout the video, they will be more likely to remember who made the video and where they can find more information about your company or products.
Insert Thumbnail
A video thumbnail is an image that represents your video to viewers. It should be eye-catching, but not so much that it’s distracting. The right video thumbnail can help you increase views and engagement on your content.
Place the thumbnail at the beginning of the video, and make sure it’s catchy! Your viewers won’t have time to look at it in detail, but they will glance at it in passing. Make sure to include relevant text and images that can hook your audience and keep them watching!

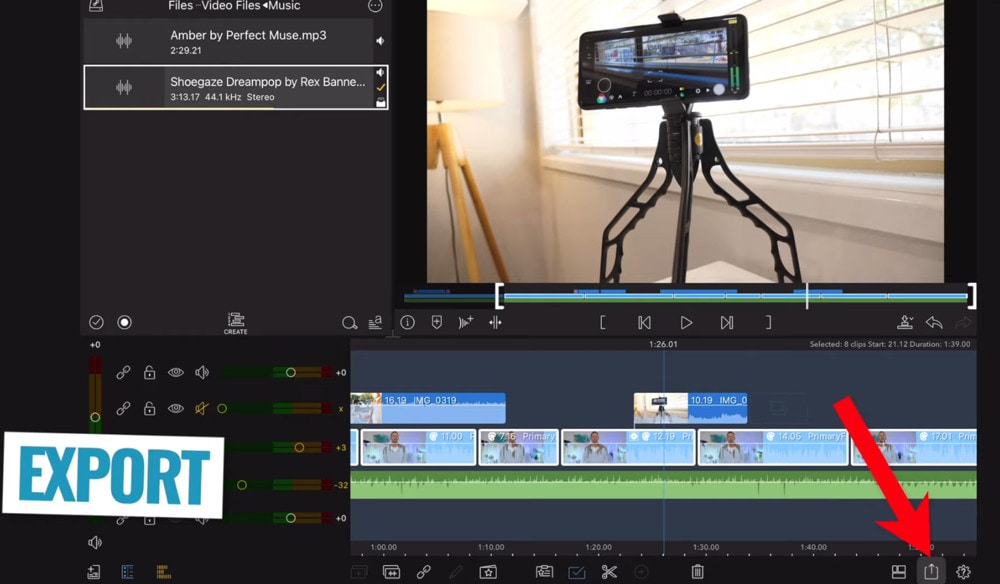
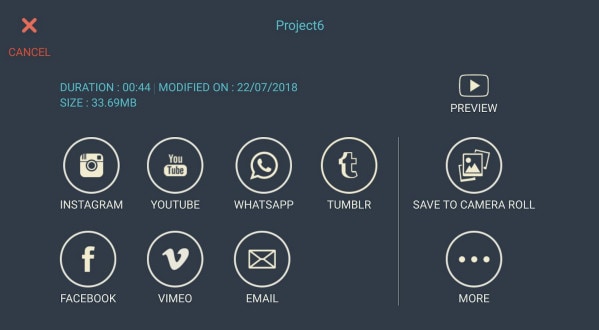
After completing the editing process, you can export your testimonial video in a variety of formats. To do this, click on the “Export” button in the upper right-hand corner of Wondershare Filmora.
Recommended Export Quality
- Resolution: 720 or 1080
- Frame rate 30 fps
Select your preferred file format and destination for storage.
Conclusion
That’s all for today! With this tutorial, you can edit testimonial videos for the health and wellness business industry on your own and make them look more professional, engaging, and converting.
Hopefully, this post gave you an idea of how to use Filmora as an easy-to-use video editing software that can help you create awesome videos with just a few clicks. Thanks for reading!
Free Download For Win 7 or later(64-bit)
Free Download For macOS 10.14 or later
How to Edit FLV Video Files with FLV Editor [Windows, Mac,Android, iPhone & Online]
FLV is a common container format for transferring digital video and audio information over the Internet. A.flv file is a flash video that may be seen on your computer with Adobe Flash Player, Adobe Air, or some third-party Adobe Flash plugins.
FLV has become the standard video format for web-based streaming video service providers such as Hulu and VEVO due to its superior functionality and tiny size. It’s also the default format for Quicktime on Mac systems.
If you wish to edit FLV videos without any problems, you should utilize a multipurpose video editor that supports the FLV file format.
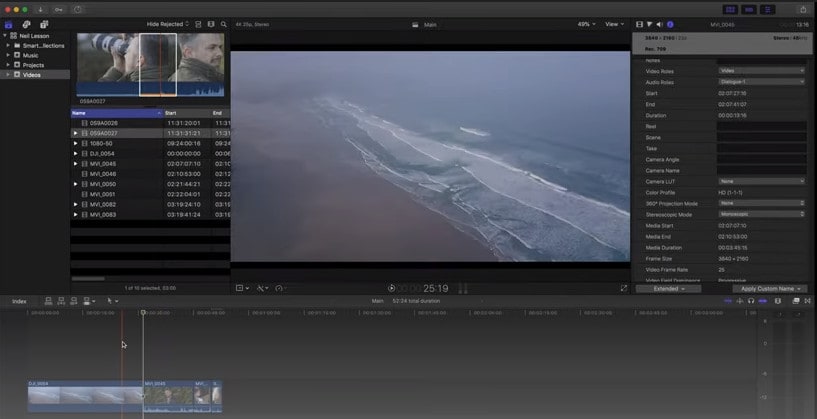
Best FLV Editor to Edit FlV Video on Windows and Mac - Filmroa Video Editor
Filmora Video Editor is a professional FLV video editing application. This software allows you to edit 4K video files, share completed films directly on social media platforms, and add subtitles and audio files.
You may mix multiple films and enhance your footage with numerous transitions and other effects using this FLV video editing software. Furthermore, the free Filmora application is ideal for adding audio files or video clips from the wide library and uploading your soundtrack.
For Win 7 or later (64-bit)
For macOS 10.14 or later
Therefore, you can use the following steps to edit FLV video on Windows and Mac:
Step 1: Import file:

Step 2: Edit the FLV file:
Acquire the perfect tool in your palm for anything you want to do, such as clipping, cropping, rotating, and more.
Furthermore, all editing capabilities in the toolbar allow drag-and-drop, making it even easier to touch up your films quickly. Consider the following scenario:
- Drag and drop a transition into the video/photo, or right-click it and select “Apply to All.”
- Please drag & drop a title template to the position where you want it to appear, then adjust it.
- To use the effects, select one from the 50+ available video effects, select it, and apply it to your photos/videos instantaneously.
Step 3: Save or Export the file:

When you’re done, export your modified MP4 files to Windows/Mac and quickly share them on YouTube, with the option of sending a message to Facebook and Twitter. When you click Create in the program window’s middle right corner, you’ll be taken to the Output window below.
Alternative Way to Edit FlV Video on Windows
1. VSDC
VSDC is a free video editor along with a lot of advanced features. Cut, combine, trim, crop, and other editing capabilities are available to help you polish your FLV films.
Although it may not look logical, learning the editing capabilities hidden within modular boxes is simple. One noteworthy aspect of VSDC is its ability to produce good visual effects using many trendy video effects, transitions, and filters.
Furthermore, strong chroma keys, color correction, object modification, and other editing tools can be utilized to edit FLV videos. It not only creates excellent FLV videos, but it also supports a wide range of media conversion, allowing you to convert FLV files to various formats and export them without a watermark.
Therefore, follow the below mentioned steps to edit FLV video using VSDC:
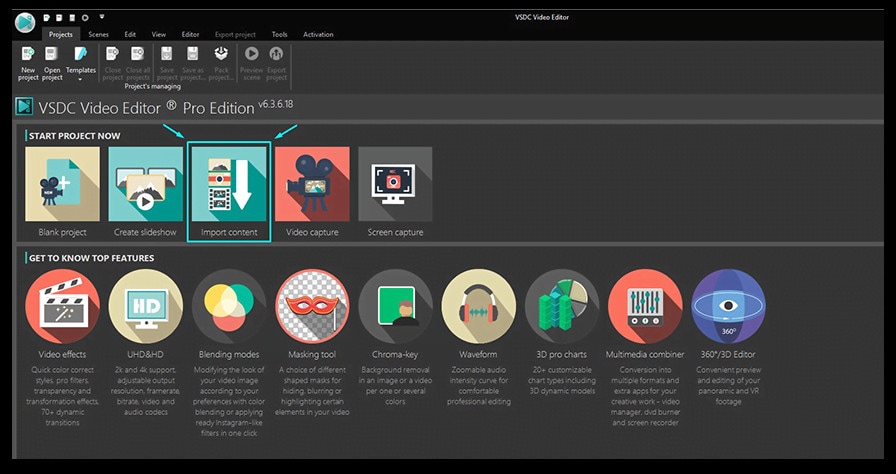
Step 1: Install the software on the Windows. Open the application and import the video.
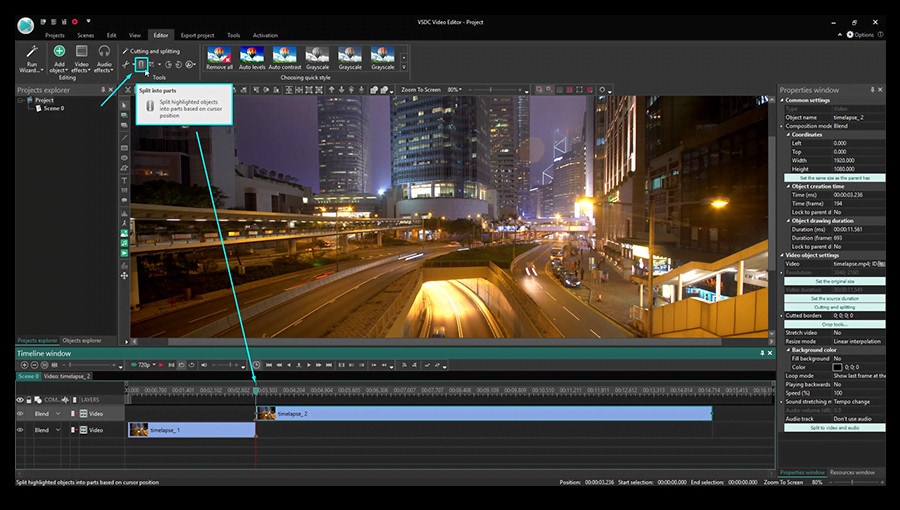
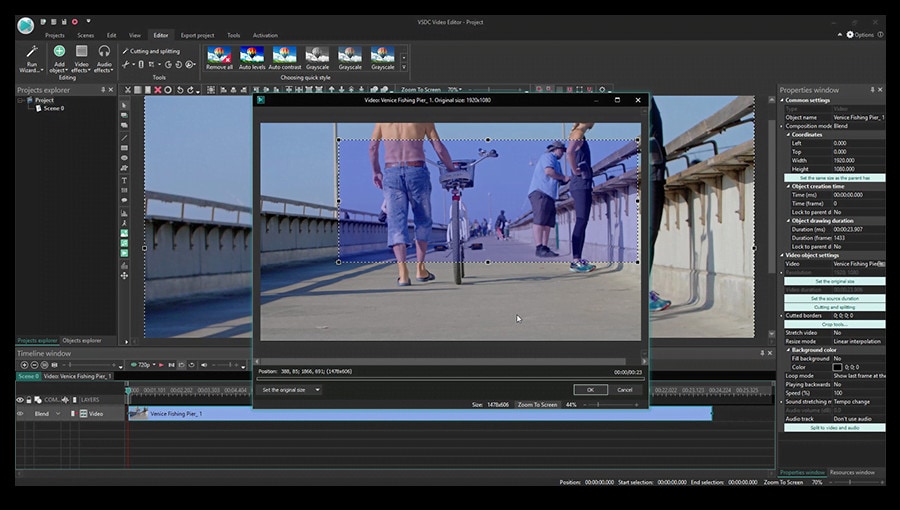
Step 2: Use cutting and splitting tools to edit the video.
The first icon is a picture of a pair of scissors, which is a cutting tool. It’s very useful when you need to cut the beginning or end of a film. Place the cursor exactly where you want to cut, then select “Trim start” or “Trim finish” from the dropdown cutting menu (the small triangle next to the scissors icon).
Cropping is also simple. If you have too much additional space around the scene object recorded, just choose the file you want to trim and select the cropping icon from the “Cutting and Splitting” option. A new window will appear, allowing you to select the region of the scene that should stay.
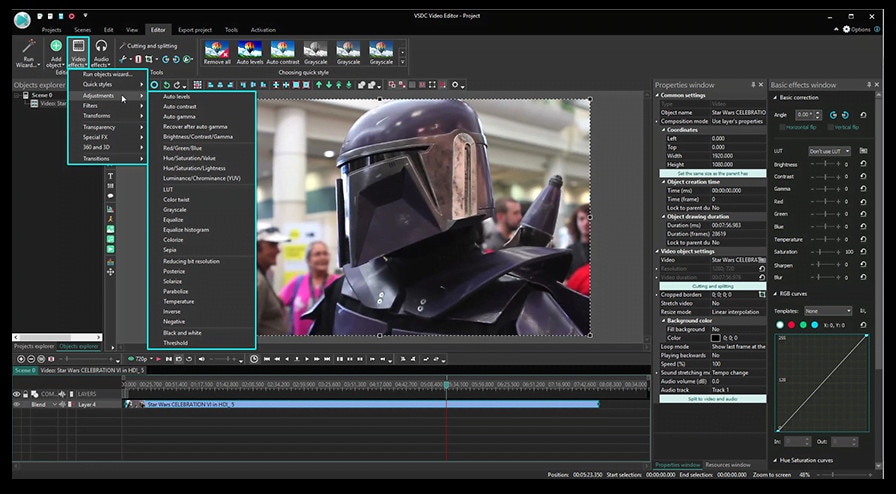
Step 3: Apply effects and transitions.
To use one, first select the video file you wish to edit, then go to the Video effects tab and select the effect you want to use. On the timeline, a new tab will appear, containing all of the effects done to the selected object. You can alter the effect’s duration and position in time by dragging it with the mouse there. The properties pane on the right-hand side can be used to change other parameters.
Transitions follow the same rule. Place your cursor where you want the transition to begin, then choose a transition from the Video effects dropdown menu and manually adjust the duration.
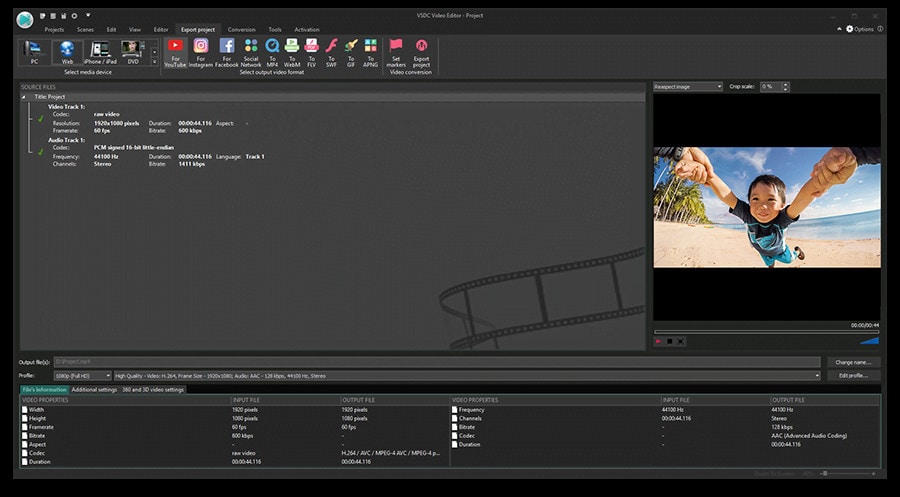
Step 4: Save changes and export video.
Make sure your movie appears exactly how you want it to before exporting it. If the video appears choppy, use the red preview button and lower the preview quality. When the PC’s resources are insufficient to process the video in real time, lagging can occur. Keep in mind that it has no bearing on the outcome. When you’re finished, navigate to the Export project tab and select an export format.
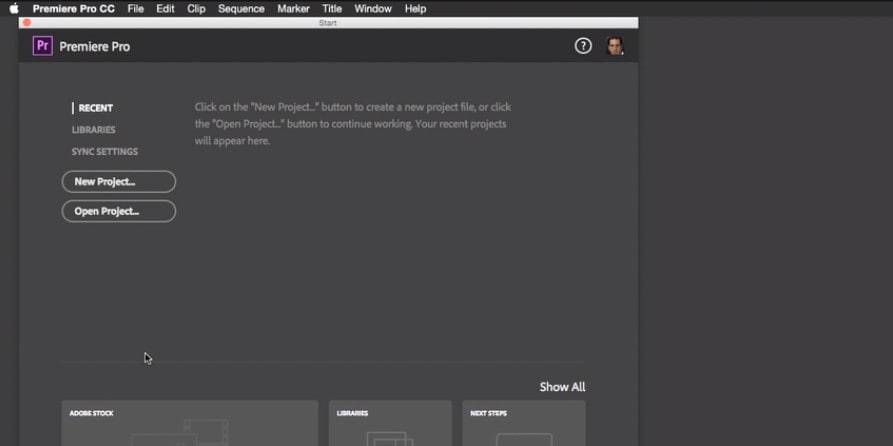
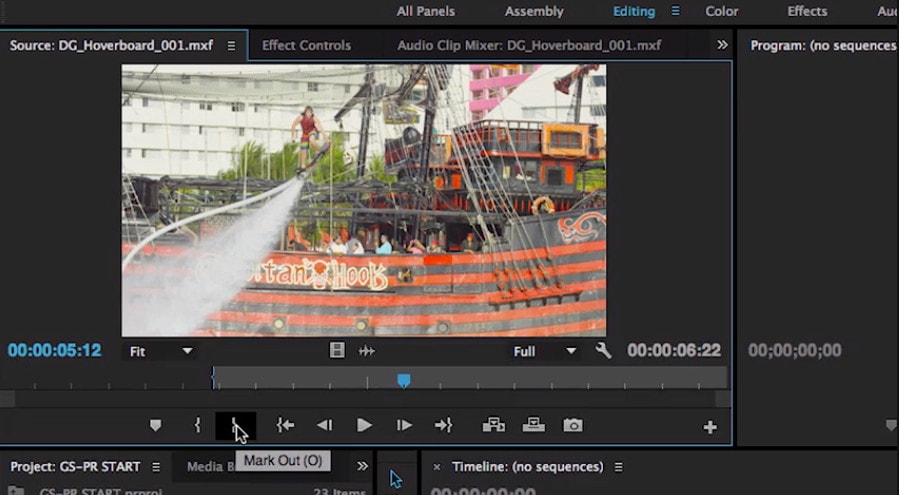
2. Adobe Premiere Pro:
Professional video editors use Premiere Pro to make everything from YouTube videos to Hollywood films like Mank, a 2021 Oscar candidate. It’s also widely utilized in the workflows of designers, animators, and VFX artists, and we can see why after lengthy testing.
We found the software’s UI to be simple to use, and it increased our productivity by separating things into various workspaces, such as editing, effects, and audio. When we tested it on both Mac and PC, we discovered that each workspace helps handle a specific activity while minimizing distraction.
Edit the FLV video with Adobe Premiere Pro using the following steps:
Step 1: Import the video and create initial sequence.
Step 2: In the Timeline, trim and rearrange clips, add audio, and transitions.
Step 3: Add title and graphics.
In Premiere Pro, you may make onscreen titles, as well as stylize and animate your images.
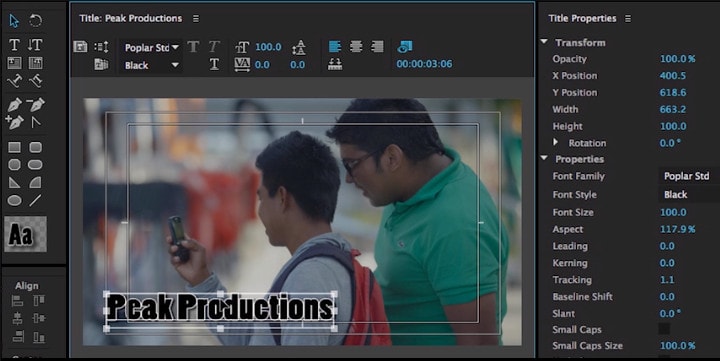
Step 4: Export your video.

Alternative Way to Edit FlV Video on Mac
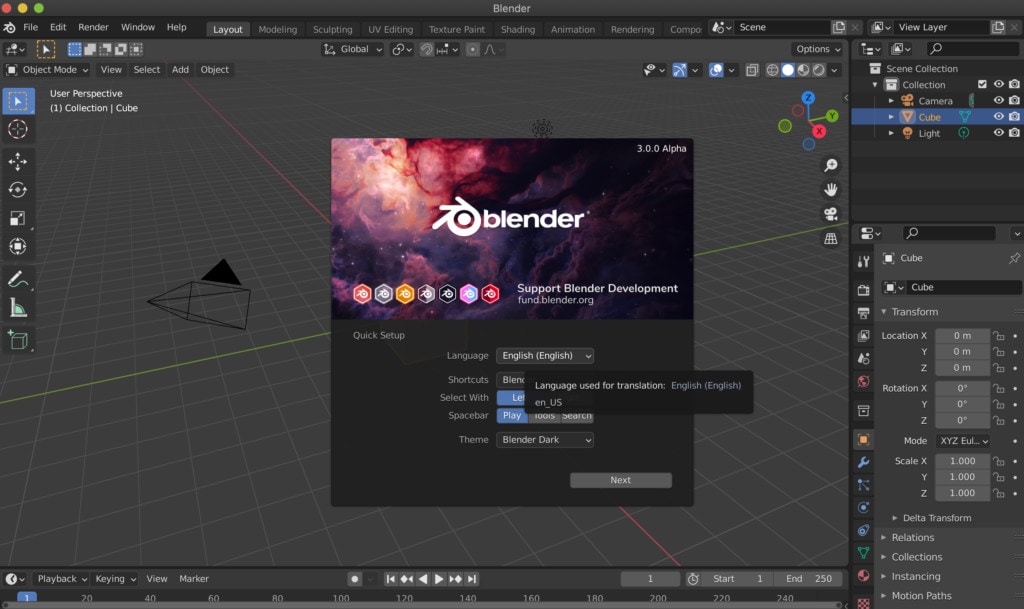
1. Blender:
Under the GNU General Public License, Blender is a free, open-source 3D content production program that runs on all major operating systems. Blender is one of the greatest video editors for both Windows and Mac, with advanced features such as modifier-based modeling tools, powerful character animation capabilities, a node-based material, etc.
Because it is developed for professionals, it is tough to use as a beginner. However, it is unrestricted in its use and distribution. In addition, color options are changeable and versatile in the UI.
In contrast, this free video editor is perfect for semi-pros or those who want to enhance their video editing skills. However, you’ll need a lot of time and effort to learn it.
Step 1: Open the application.
Step 2: Then, go into File->New->Video Editing to open the video editor.
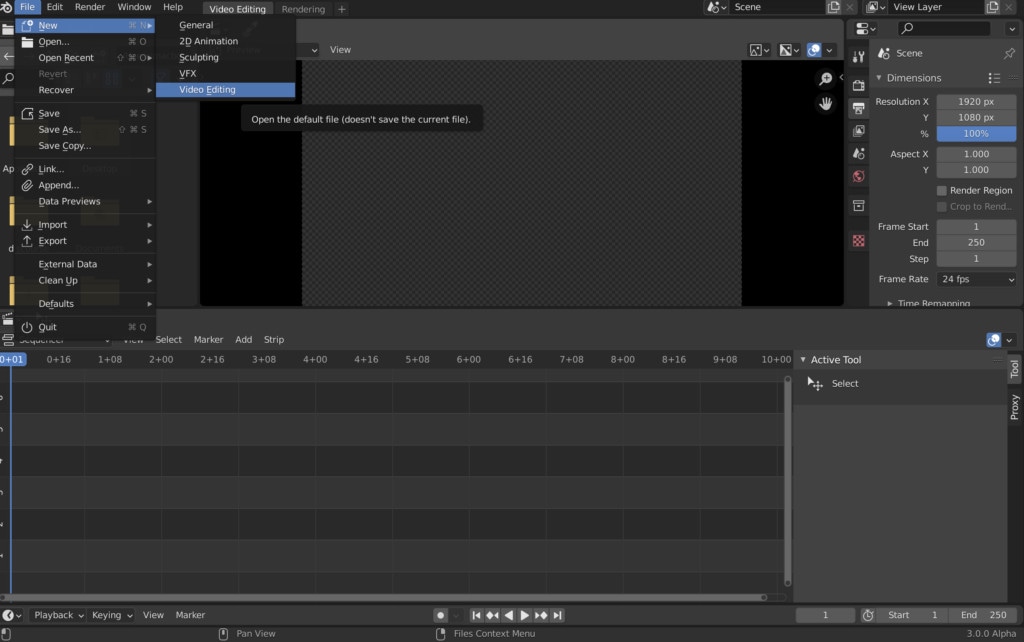
Step 3: Import the video and start editing using the editing tools.
Step 4: Save and export the video.

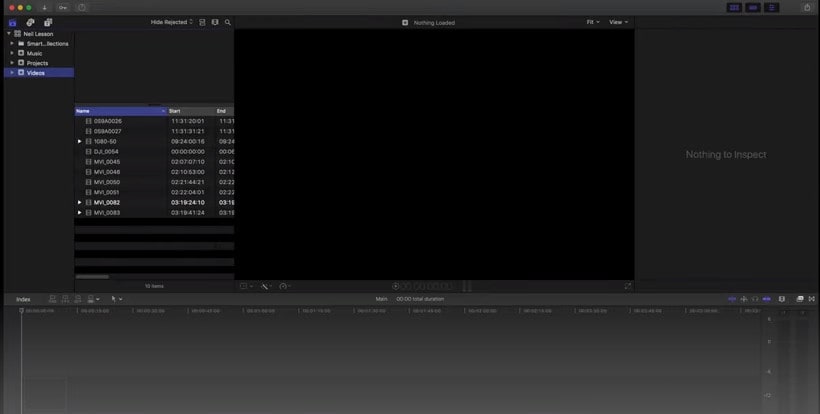
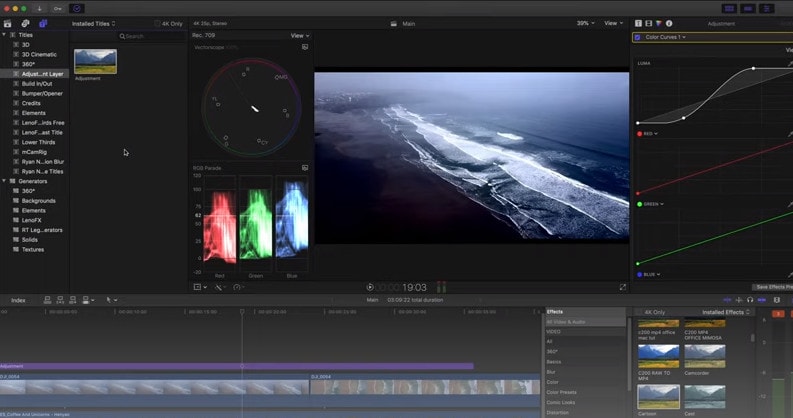
2. Final Cut Pro:
When it comes to video editing software, Apple’s Final Cut Pro is one of the industry standards. As a result, it’s widely utilized in the television and film industries - at least among Mac users. However, one of the truly convincing reasons to choose it over Premiere Pro is because it is subscription-free: you only pay once.
The software’s Magnetic Timeline, grouping tools, a vast selection of effects, solid organizational capabilities, and simple ways to add and edit audio make it a favorite among professional video editors. 360° video, HDR, and powerful color correcting tools are among the other capabilities. It’s a strong software with a lot of features.
Follow the steps to edit FLV video using Final Cut Pro:
Step 1: Create Project.
To make a movie in Final Cut Pro, you must first establish a project, which keeps track of your editing selections and the media you utilize.
Step 2: Select and add clips to the timeline:
The second stage in making a movie with Final Cut Pro is to add and arrange clips in your project. In the timeline, you can move and reorder clips.
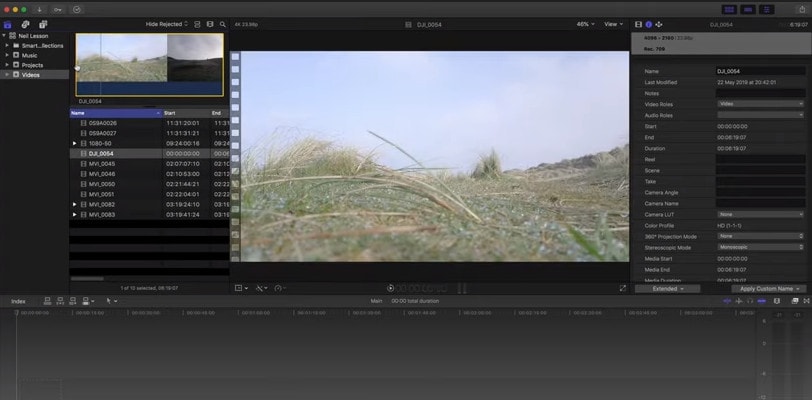
Step 3: Cut and trim video:
Final Cut Pro has a number of features for altering the start and stop points of clips in the timeline, as well as regulating the pacing of shots from one to the next.
Step 4: Edit the video by adding effects and transitions:
Final Cut Pro includes a number of advanced editing features that make it simple to create a professional film. Visual enhancements and colour correction are among the finishing touches.

Step 5: Save and export video:
2 Ways to Edit FlV Video on Android:
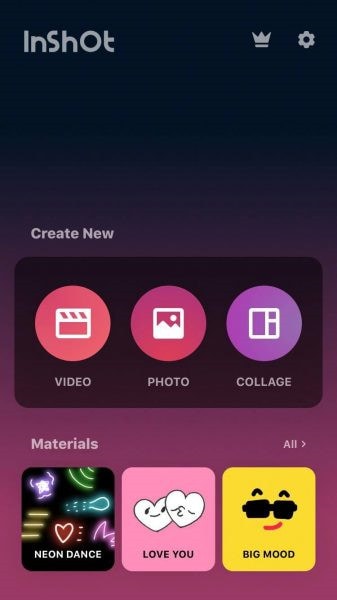
1. Inshot:
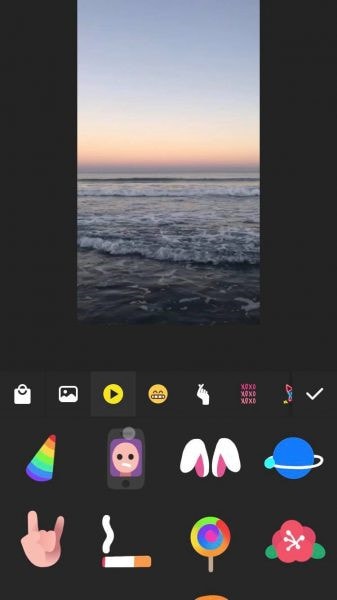
For Android users, Inshot is a fantastic image and video editor. This Android video editor allows you to add popular stickers and emoticons to your films, making them more fashionable and unique.
The program supports HD video output, allowing you more control over your footage. Moreover, the additional sound and video can be synchronized with the available video chronology.
You can quickly blend more than two movies into one with rich effects and sound with this Android editor app. In addition, you can generate a watermark using unique text provided in the app, and subtitles support allow you to produce one with a variety of fonts.
Following are the steps that you can follow to edit FLV video using Inshot:
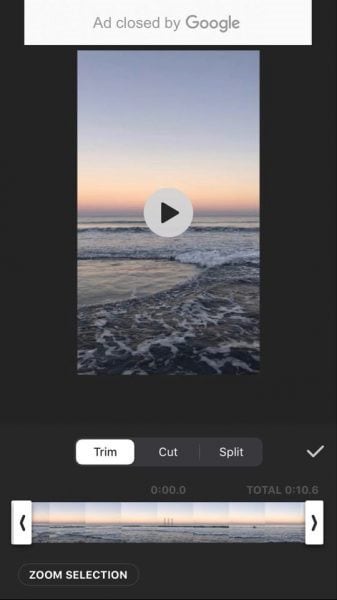
Step 1: Open the app and import the video.
Tap “Video” to open your phone’s gallery folder and begin editing a video in the InShot app. Select a video to work with. Adjust the canvass after your video has been loaded into the InShot App. For your other social media accounts, there are aspect ratios and sizes that work well with the video. It also has the option of being in portrait or landscape mode.
Step 2: Trim and split videos.
Step 3: Merge videos (optional):
By combining clips, you can combine them into a single film or project. Simply choose the videos you want to import from the drop-down menu. By tapping the “+” button on the lower left of the screen, you can insert and merge more videos. Your project will then be updated using the selected video.
Step 4: Apply filters, add music, text and stickers.
Step 5: Once you are done with the editing process, save the file.
2. Videoshow:
VideoShow has a lot of video editing options. It is a simple and practical video editing program and movie scene maker for art directors and beginners. Using this video cutter, you may reverse, blur, duplicate, edit, merge and split collage clips or films.
You can also use VideoShow to adjust the audio or add subtitles to any video. It also allows you to use different filters on any video on your device. Over 50 intricate themes are included in the program, allowing you to create gorgeous music videos, slide shows, and vlogs in no time.
The annual subscription package is for $135.19, or you can also make a one-time purchase for $225.78.
However, to edit the video, you can use the following steps:
Step 1: Download and install the videoshow application and open it. Upload the video that you want to edit.
Step 2: Edit the video by applying filters or cutting and trimming the part of the video that you want to remove.
Step 3: Save changes and export the video to your preferred location.
2 Ways to Edit FlV Video on iPhone:
1. LumaFusion:
No other software program on the iPhone comes close to the feature set that LumaFusion offers for video editing. It is the only premium app on this list, and it is well worth every penny.
But, of course, YouTubers aren’t the only ones who use the program; mobile journalists and professional video producers who don’t want to lug along their bulky camera equipment and editing apparatus also use it.
LumaFusion deals with up to six video and audio tracks for photographs, movies, audio, titles, and graphics, and six audio tracks for narration, music, and sound effects. You also receive a magnetic timeline; importing clips is a breeze once they’ve been imported.
There are many transitions and effects to choose from, all of which can be layered. Finally, it includes much royalty-free music, sound effects, and other assets. So if you need a professional video editing tool for your iPhone, LumaFusion ($29.99) is the way to go.
Follow these steps to edit FLV video using LumaFusion:
Step 1: To create your first project, press + at the bottom of the screen. You can create a new project by tapping that area or by tapping the Plus button.
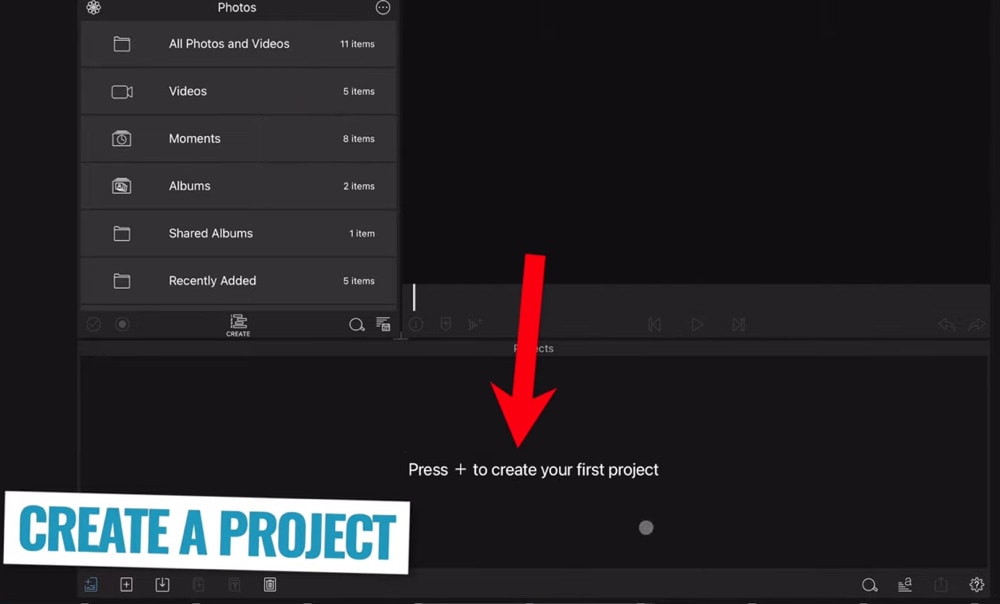
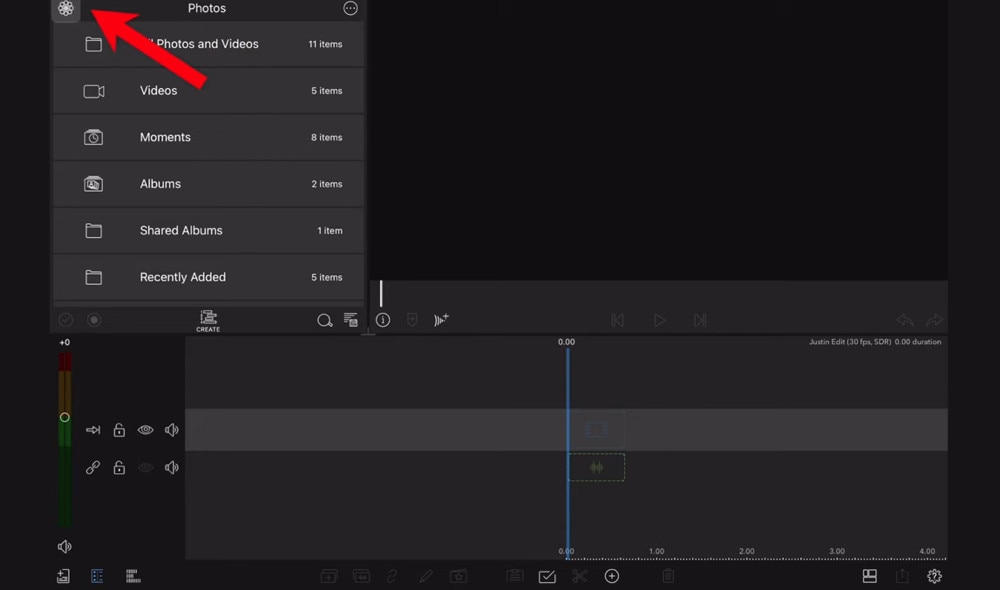
Step 2: Import video:
The Import section is located in the top left corner of the screen. This defaults to the Photos tab when you initially launch a new project. All of the photographs and videos can be seen here.
Step 3: Check layout and adjust volume levels
Step 4: Edit the video and add titles.
Step 5: Export the video.
2. Filmora Go:
Without a doubt, Filmora is one of the greatest free video editors for iPhone that does not contain any watermarks. In addition, it’s compatible with both iPhones and Android devices and has a simple user interface.
Filmora is the greatest iPhone video editor for beginners, with themed filters and effects that add flair to your videos without any work.
Filmora has many unique features, including themes for your videos and ‘Materials,’ which are visual effects created by the program. Unfortunately, materials are only available with Filmora Pro, so keep that in mind.
Aside from that, you’ll find all of the typical features here. You can also add titles to videos, utilize stickers and effects, and add music to the background of your movie. You may also add another clip in picture-in-picture mode, which is beneficial.
Below are the following steps to edit FLV video:
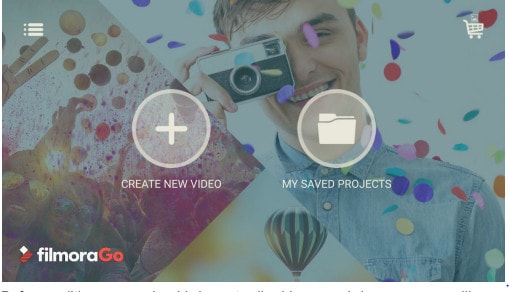
Step 1: Open the application and select ‘Create new video’. Now, import the video by choosing the video icon.
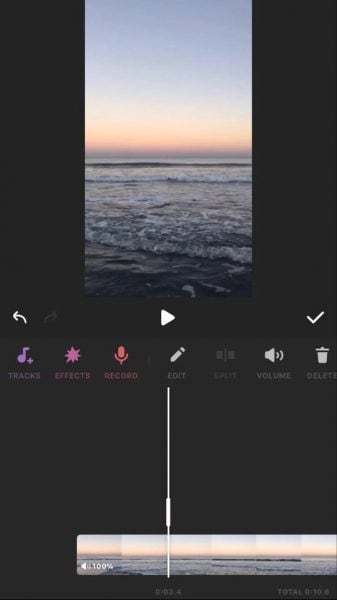
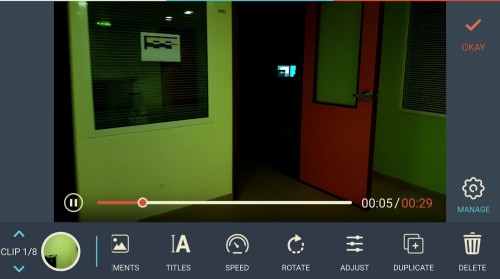
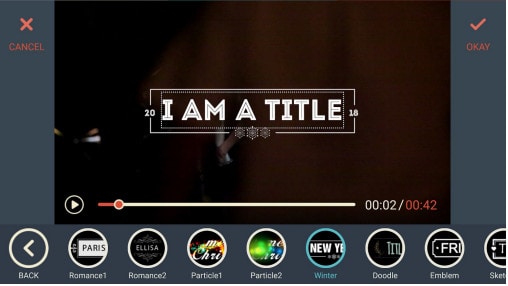
Step 2: Edit the video. Within the edit tool, you can trim and split the video. You can also improve the video quality by adding titles, transitions, and music, and voiceovers.


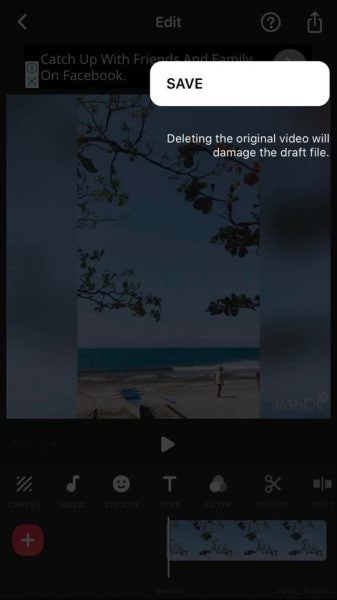
Step 3: After editing the video, select ‘SAVE’ and export the video or download it.
2 Ways to Edit FlV Video Online:
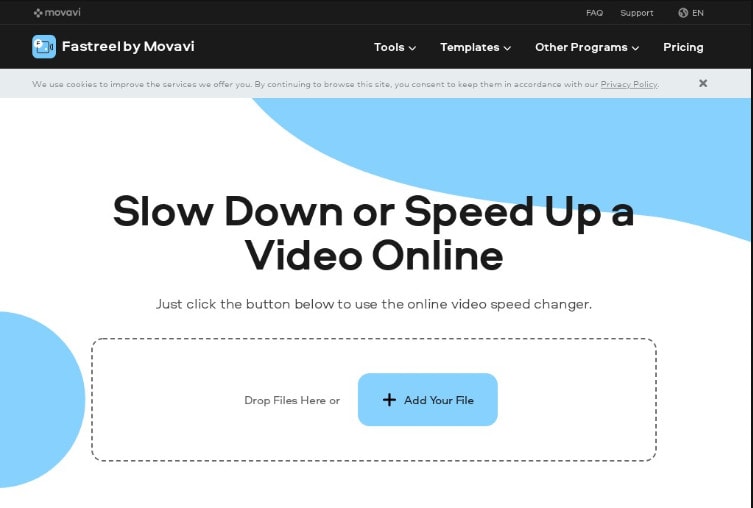
1. Fastreel:
If you’re seeking the finest free online video editor, Fastreel is a terrific tool to start with. This online video editing software provides a wide range of editing options. It can merge, edit, crop, and compress videos to make sharing easier.
It also includes many pre-made templates that you can change to create titles and transitions and other editing features like reverse, looping, and rotating. It’s also quite simple to use, and you can have polished videos in minutes.
There are also numerous pricing options to suit different customers, ranging from a completely free plan with watermarks to paid subscriptions with no limitations.
Use the following steps to edit FLV video:
Step 1: Open Fastreel web and import the video.
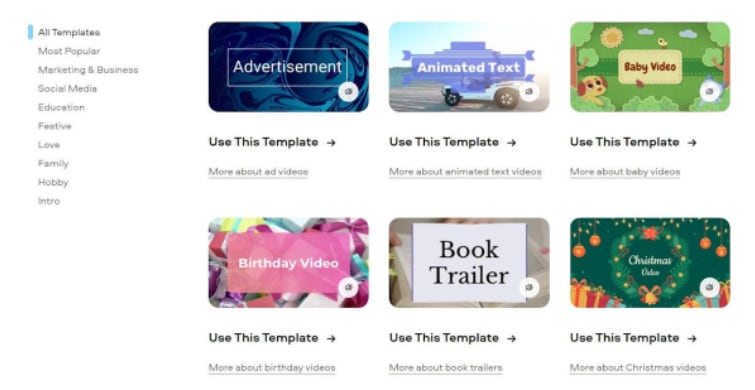
Step 2: Use templates to make it look attractive.
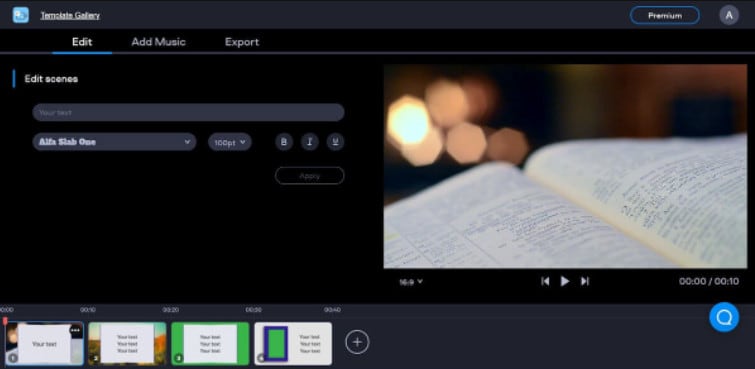
Step 3: Edit the video using the template.
Templates are unfinished videos with all of the effects already applied, such as backdrops, transitions, animated stickers, and titles. There are blank spots for your photos or videos, and you can arrange them in any sequence you like. You can also add music from the Fastreel library or upload your own track after entering your text.
Step 4: Once you are done with edits, save the video and export it.
2. WeVideo:
When you’re seeking the greatest video producer online, another wonderful choice to explore is WeVideo.
Google, Dropbox, Rover, and Roche are just a few of the huge names that trust our online editor. Its fast, versatile editing engine and vast stock content collection for adding stock movies, photos, and audio tracks to your productions are ideal for business users.
WeVideo also stands out since it provides unlimited cloud storage for all of your videos, which you can download and watch on any device. The only drawback is that all of this comes at a price, with WeVideo offering a variety of payment plans ranging from $4.99 to $36.99 a month.
Follow the steps to edit videos using WeVideo:
Step 1: Open WeVideo and import the video file.
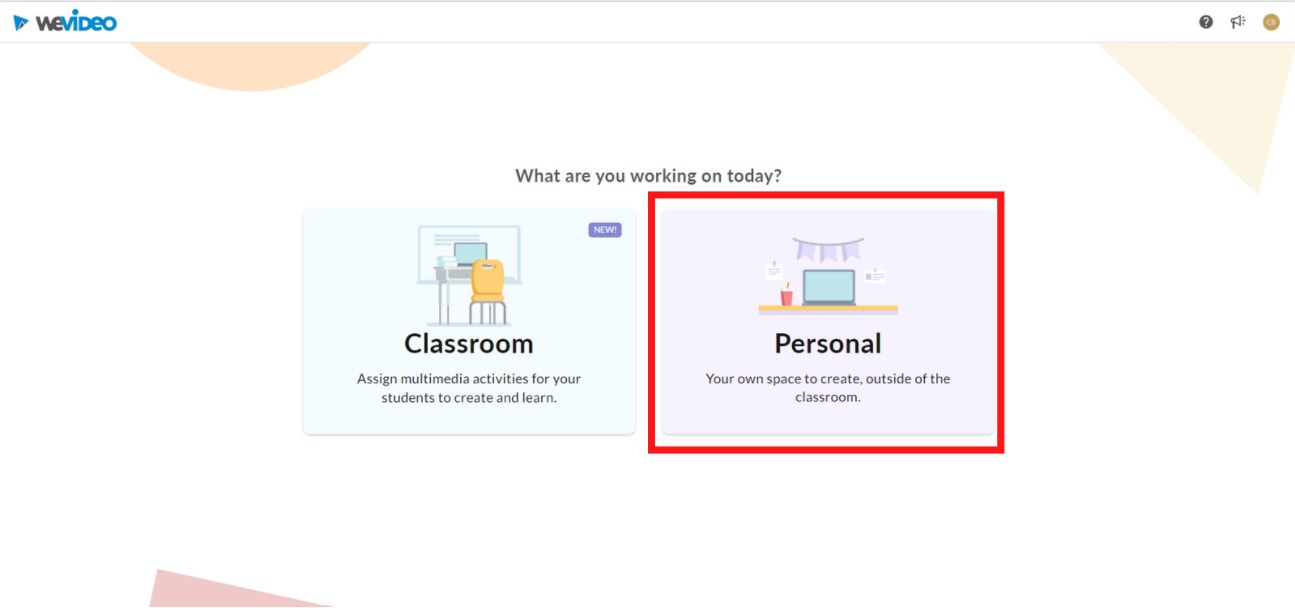
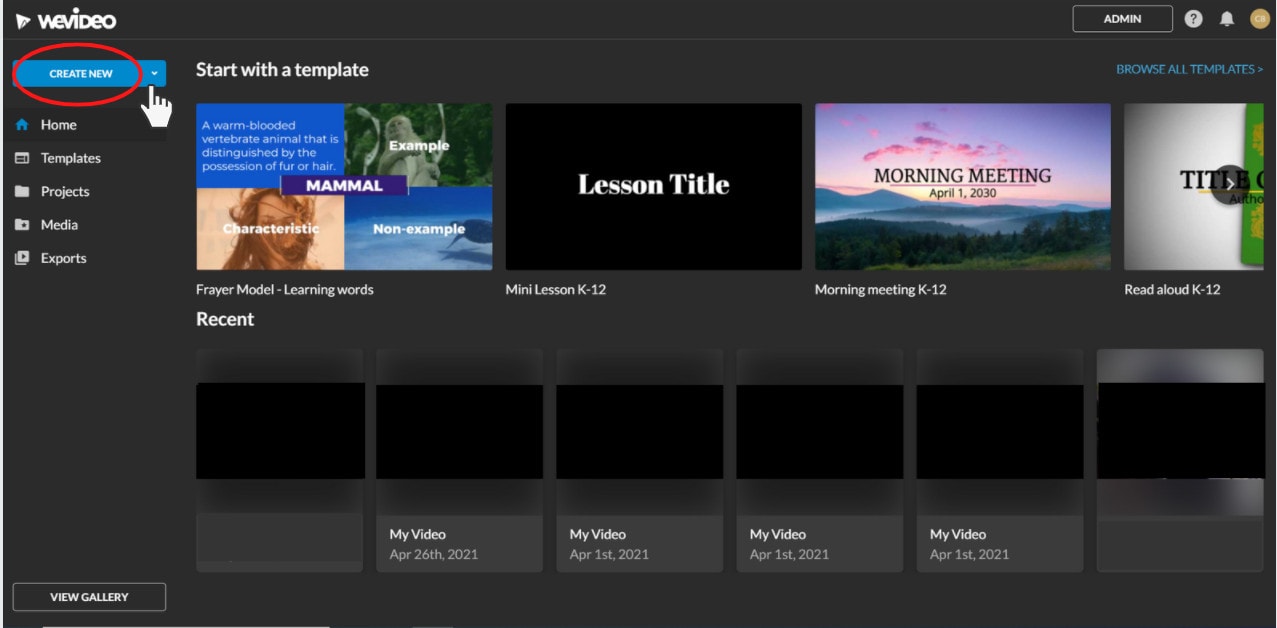
Step 2: Click on create new video in the left-hand corner of the screen.
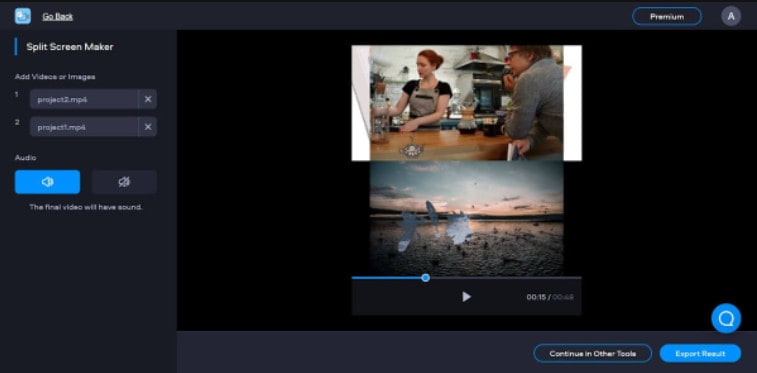
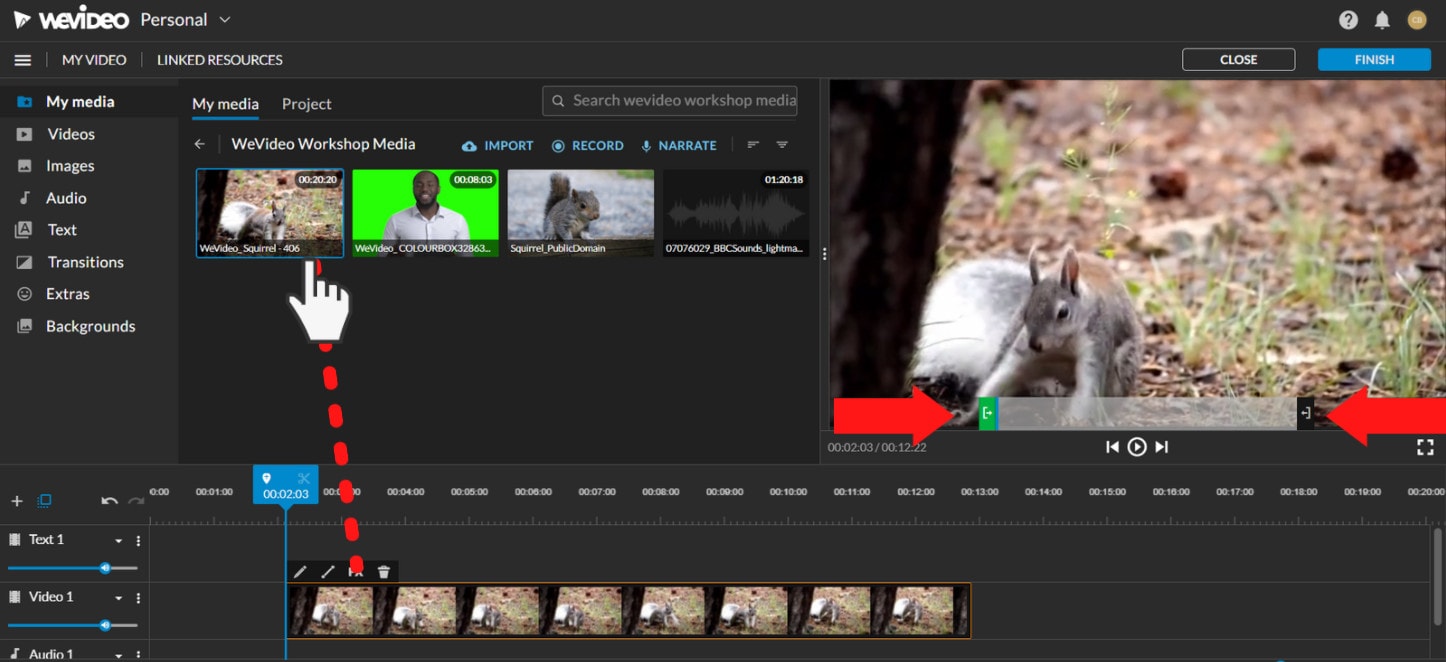
Step 3: Edit the video.
The video clip you imported will appear in the viewing window to the right once you click on it. By moving the arrows and either end, you can edit out the beginning or end of your footage.
- Drag the clip into your timeline from your media pool.
- Place the clip on your timeline by dragging and dropping it.
- Click the scissor symbol after moving the blue marker to the spot where you want to cut your clip.
- Once the material has been chopped, you can erase bits of it by selecting it with your mouse and then pressing delete on your keyboard or rearrange the clips in the timeline by dragging and dropping them to other positions.
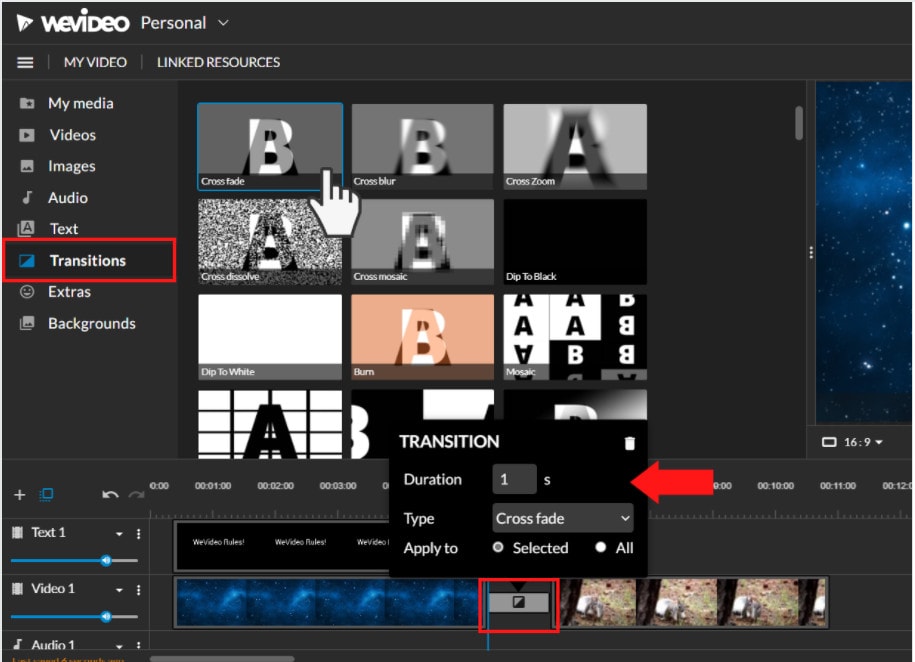
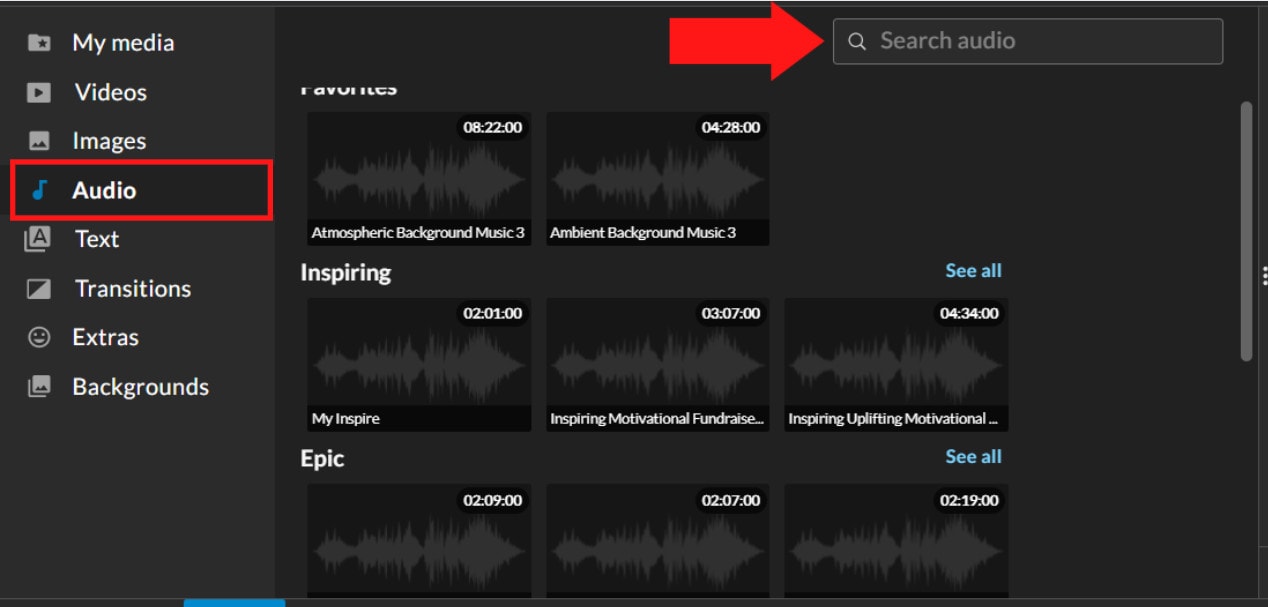
Step 4: Add effects, transitions, and music to the video.
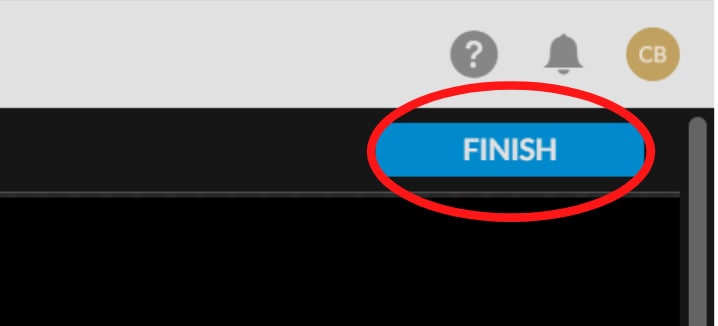
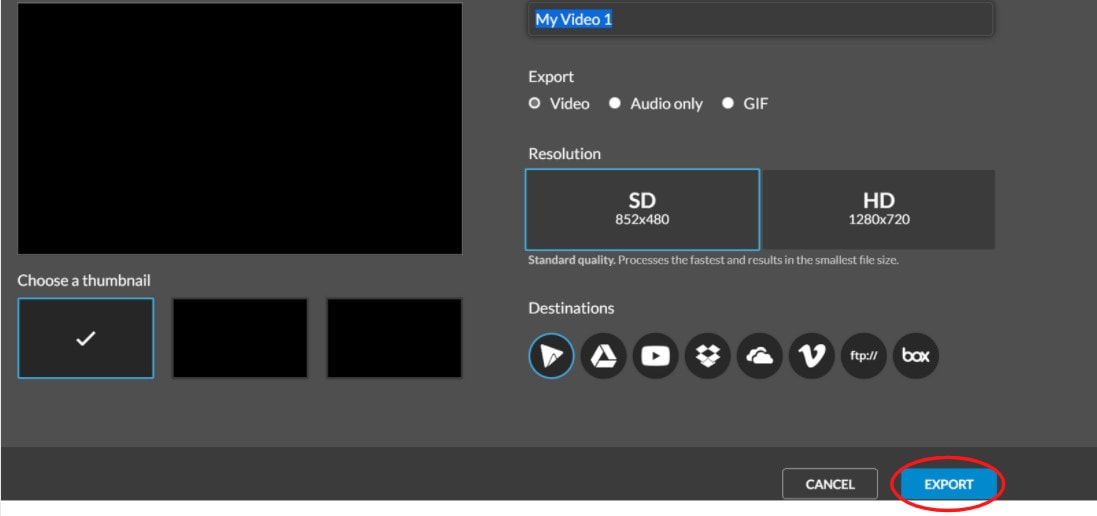
Step 5: Save and export the video by clicking on the Finish tab.
FAQs about editing FLV video
- How to open FLV files?
Any FLV player is required to view FLV files. Various players are available, including VLC, FLV Player, Sothink FLV Player for Mac, Tonec Free FLV Player, Any FLV Player, and others.
- Is Filmora compatible with Mac?
Filmora requires macOS Sierra (version 10.12) or later and the Big Sur (version 11) and Apple M1 chips. Touch Bar compatibility for MacBook Pro users and custom shortcuts to speed up editing.
- What is the best online FLV editor?
There are numerous free online editors to choose from. Fastreel, WeVideo, and FlexClip Video Maker are a few of the most popular.
- Is FLV better than MP4?
Because FLV and MP4 are the two most popular video file formats, it’s crucial to know which one is preferable. Adobe’s proprietary format is FLV. Both formats employ video and audio codecs and have equal performance levels. In their unprocessed state, MP4 files are more adaptable. You can, however, use an FLV file at the same time if you have the correct player.
- How do I choose a video editor?
When comparing video editing software, there are six crucial elements to consider.
- Budget and cost
- Ease of use/learning curve
- Multi-GPGPU acceleration and video format support
- Tools for advanced editing
- Music, special effects, and other goodies
- Customer service is second to none.
For macOS 10.14 or later
Therefore, you can use the following steps to edit FLV video on Windows and Mac:
Step 1: Import file:
Step 2: Edit the FLV file:
Acquire the perfect tool in your palm for anything you want to do, such as clipping, cropping, rotating, and more.
Furthermore, all editing capabilities in the toolbar allow drag-and-drop, making it even easier to touch up your films quickly. Consider the following scenario:
- Drag and drop a transition into the video/photo, or right-click it and select “Apply to All.”
- Please drag & drop a title template to the position where you want it to appear, then adjust it.
- To use the effects, select one from the 50+ available video effects, select it, and apply it to your photos/videos instantaneously.
Step 3: Save or Export the file:
When you’re done, export your modified MP4 files to Windows/Mac and quickly share them on YouTube, with the option of sending a message to Facebook and Twitter. When you click Create in the program window’s middle right corner, you’ll be taken to the Output window below.
Alternative Way to Edit FlV Video on Windows
1. VSDC
VSDC is a free video editor along with a lot of advanced features. Cut, combine, trim, crop, and other editing capabilities are available to help you polish your FLV films.
Although it may not look logical, learning the editing capabilities hidden within modular boxes is simple. One noteworthy aspect of VSDC is its ability to produce good visual effects using many trendy video effects, transitions, and filters.
Furthermore, strong chroma keys, color correction, object modification, and other editing tools can be utilized to edit FLV videos. It not only creates excellent FLV videos, but it also supports a wide range of media conversion, allowing you to convert FLV files to various formats and export them without a watermark.
Therefore, follow the below mentioned steps to edit FLV video using VSDC:
Step 1: Install the software on the Windows. Open the application and import the video.
Step 2: Use cutting and splitting tools to edit the video.
The first icon is a picture of a pair of scissors, which is a cutting tool. It’s very useful when you need to cut the beginning or end of a film. Place the cursor exactly where you want to cut, then select “Trim start” or “Trim finish” from the dropdown cutting menu (the small triangle next to the scissors icon).
Cropping is also simple. If you have too much additional space around the scene object recorded, just choose the file you want to trim and select the cropping icon from the “Cutting and Splitting” option. A new window will appear, allowing you to select the region of the scene that should stay.
Step 3: Apply effects and transitions.
To use one, first select the video file you wish to edit, then go to the Video effects tab and select the effect you want to use. On the timeline, a new tab will appear, containing all of the effects done to the selected object. You can alter the effect’s duration and position in time by dragging it with the mouse there. The properties pane on the right-hand side can be used to change other parameters.
Transitions follow the same rule. Place your cursor where you want the transition to begin, then choose a transition from the Video effects dropdown menu and manually adjust the duration.
Step 4: Save changes and export video.
Make sure your movie appears exactly how you want it to before exporting it. If the video appears choppy, use the red preview button and lower the preview quality. When the PC’s resources are insufficient to process the video in real time, lagging can occur. Keep in mind that it has no bearing on the outcome. When you’re finished, navigate to the Export project tab and select an export format.
2. Adobe Premiere Pro:
Professional video editors use Premiere Pro to make everything from YouTube videos to Hollywood films like Mank, a 2021 Oscar candidate. It’s also widely utilized in the workflows of designers, animators, and VFX artists, and we can see why after lengthy testing.
We found the software’s UI to be simple to use, and it increased our productivity by separating things into various workspaces, such as editing, effects, and audio. When we tested it on both Mac and PC, we discovered that each workspace helps handle a specific activity while minimizing distraction.
Edit the FLV video with Adobe Premiere Pro using the following steps:
Step 1: Import the video and create initial sequence.
Step 2: In the Timeline, trim and rearrange clips, add audio, and transitions.
Step 3: Add title and graphics.
In Premiere Pro, you may make onscreen titles, as well as stylize and animate your images.
Step 4: Export your video.
Alternative Way to Edit FlV Video on Mac
1. Blender:
Under the GNU General Public License, Blender is a free, open-source 3D content production program that runs on all major operating systems. Blender is one of the greatest video editors for both Windows and Mac, with advanced features such as modifier-based modeling tools, powerful character animation capabilities, a node-based material, etc.
Because it is developed for professionals, it is tough to use as a beginner. However, it is unrestricted in its use and distribution. In addition, color options are changeable and versatile in the UI.
In contrast, this free video editor is perfect for semi-pros or those who want to enhance their video editing skills. However, you’ll need a lot of time and effort to learn it.
Step 1: Open the application.
Step 2: Then, go into File->New->Video Editing to open the video editor.
Step 3: Import the video and start editing using the editing tools.
Step 4: Save and export the video.
2. Final Cut Pro:
When it comes to video editing software, Apple’s Final Cut Pro is one of the industry standards. As a result, it’s widely utilized in the television and film industries - at least among Mac users. However, one of the truly convincing reasons to choose it over Premiere Pro is because it is subscription-free: you only pay once.
The software’s Magnetic Timeline, grouping tools, a vast selection of effects, solid organizational capabilities, and simple ways to add and edit audio make it a favorite among professional video editors. 360° video, HDR, and powerful color correcting tools are among the other capabilities. It’s a strong software with a lot of features.
Follow the steps to edit FLV video using Final Cut Pro:
Step 1: Create Project.
To make a movie in Final Cut Pro, you must first establish a project, which keeps track of your editing selections and the media you utilize.
Step 2: Select and add clips to the timeline:
The second stage in making a movie with Final Cut Pro is to add and arrange clips in your project. In the timeline, you can move and reorder clips.
Step 3: Cut and trim video:
Final Cut Pro has a number of features for altering the start and stop points of clips in the timeline, as well as regulating the pacing of shots from one to the next.
Step 4: Edit the video by adding effects and transitions:
Final Cut Pro includes a number of advanced editing features that make it simple to create a professional film. Visual enhancements and colour correction are among the finishing touches.
Step 5: Save and export video:
2 Ways to Edit FlV Video on Android:
1. Inshot:
For Android users, Inshot is a fantastic image and video editor. This Android video editor allows you to add popular stickers and emoticons to your films, making them more fashionable and unique.
The program supports HD video output, allowing you more control over your footage. Moreover, the additional sound and video can be synchronized with the available video chronology.
You can quickly blend more than two movies into one with rich effects and sound with this Android editor app. In addition, you can generate a watermark using unique text provided in the app, and subtitles support allow you to produce one with a variety of fonts.
Following are the steps that you can follow to edit FLV video using Inshot:
Step 1: Open the app and import the video.
Tap “Video” to open your phone’s gallery folder and begin editing a video in the InShot app. Select a video to work with. Adjust the canvass after your video has been loaded into the InShot App. For your other social media accounts, there are aspect ratios and sizes that work well with the video. It also has the option of being in portrait or landscape mode.
Step 2: Trim and split videos.
Step 3: Merge videos (optional):
By combining clips, you can combine them into a single film or project. Simply choose the videos you want to import from the drop-down menu. By tapping the “+” button on the lower left of the screen, you can insert and merge more videos. Your project will then be updated using the selected video.
Step 4: Apply filters, add music, text and stickers.
Step 5: Once you are done with the editing process, save the file.
2. Videoshow:
VideoShow has a lot of video editing options. It is a simple and practical video editing program and movie scene maker for art directors and beginners. Using this video cutter, you may reverse, blur, duplicate, edit, merge and split collage clips or films.
You can also use VideoShow to adjust the audio or add subtitles to any video. It also allows you to use different filters on any video on your device. Over 50 intricate themes are included in the program, allowing you to create gorgeous music videos, slide shows, and vlogs in no time.
The annual subscription package is for $135.19, or you can also make a one-time purchase for $225.78.
However, to edit the video, you can use the following steps:
Step 1: Download and install the videoshow application and open it. Upload the video that you want to edit.
Step 2: Edit the video by applying filters or cutting and trimming the part of the video that you want to remove.
Step 3: Save changes and export the video to your preferred location.
2 Ways to Edit FlV Video on iPhone:
1. LumaFusion:
No other software program on the iPhone comes close to the feature set that LumaFusion offers for video editing. It is the only premium app on this list, and it is well worth every penny.
But, of course, YouTubers aren’t the only ones who use the program; mobile journalists and professional video producers who don’t want to lug along their bulky camera equipment and editing apparatus also use it.
LumaFusion deals with up to six video and audio tracks for photographs, movies, audio, titles, and graphics, and six audio tracks for narration, music, and sound effects. You also receive a magnetic timeline; importing clips is a breeze once they’ve been imported.
There are many transitions and effects to choose from, all of which can be layered. Finally, it includes much royalty-free music, sound effects, and other assets. So if you need a professional video editing tool for your iPhone, LumaFusion ($29.99) is the way to go.
Follow these steps to edit FLV video using LumaFusion:
Step 1: To create your first project, press + at the bottom of the screen. You can create a new project by tapping that area or by tapping the Plus button.
Step 2: Import video:
The Import section is located in the top left corner of the screen. This defaults to the Photos tab when you initially launch a new project. All of the photographs and videos can be seen here.
Step 3: Check layout and adjust volume levels
Step 4: Edit the video and add titles.
Step 5: Export the video.
2. Filmora Go:
Without a doubt, Filmora is one of the greatest free video editors for iPhone that does not contain any watermarks. In addition, it’s compatible with both iPhones and Android devices and has a simple user interface.
Filmora is the greatest iPhone video editor for beginners, with themed filters and effects that add flair to your videos without any work.
Filmora has many unique features, including themes for your videos and ‘Materials,’ which are visual effects created by the program. Unfortunately, materials are only available with Filmora Pro, so keep that in mind.
Aside from that, you’ll find all of the typical features here. You can also add titles to videos, utilize stickers and effects, and add music to the background of your movie. You may also add another clip in picture-in-picture mode, which is beneficial.
Below are the following steps to edit FLV video:
Step 1: Open the application and select ‘Create new video’. Now, import the video by choosing the video icon.
Step 2: Edit the video. Within the edit tool, you can trim and split the video. You can also improve the video quality by adding titles, transitions, and music, and voiceovers.
Step 3: After editing the video, select ‘SAVE’ and export the video or download it.
2 Ways to Edit FlV Video Online:
1. Fastreel:
If you’re seeking the finest free online video editor, Fastreel is a terrific tool to start with. This online video editing software provides a wide range of editing options. It can merge, edit, crop, and compress videos to make sharing easier.
It also includes many pre-made templates that you can change to create titles and transitions and other editing features like reverse, looping, and rotating. It’s also quite simple to use, and you can have polished videos in minutes.
There are also numerous pricing options to suit different customers, ranging from a completely free plan with watermarks to paid subscriptions with no limitations.
Use the following steps to edit FLV video:
Step 1: Open Fastreel web and import the video.
Step 2: Use templates to make it look attractive.
Step 3: Edit the video using the template.
Templates are unfinished videos with all of the effects already applied, such as backdrops, transitions, animated stickers, and titles. There are blank spots for your photos or videos, and you can arrange them in any sequence you like. You can also add music from the Fastreel library or upload your own track after entering your text.
Step 4: Once you are done with edits, save the video and export it.
2. WeVideo:
When you’re seeking the greatest video producer online, another wonderful choice to explore is WeVideo.
Google, Dropbox, Rover, and Roche are just a few of the huge names that trust our online editor. Its fast, versatile editing engine and vast stock content collection for adding stock movies, photos, and audio tracks to your productions are ideal for business users.
WeVideo also stands out since it provides unlimited cloud storage for all of your videos, which you can download and watch on any device. The only drawback is that all of this comes at a price, with WeVideo offering a variety of payment plans ranging from $4.99 to $36.99 a month.
Follow the steps to edit videos using WeVideo:
Step 1: Open WeVideo and import the video file.
Step 2: Click on create new video in the left-hand corner of the screen.
Step 3: Edit the video.
The video clip you imported will appear in the viewing window to the right once you click on it. By moving the arrows and either end, you can edit out the beginning or end of your footage.
- Drag the clip into your timeline from your media pool.
- Place the clip on your timeline by dragging and dropping it.
- Click the scissor symbol after moving the blue marker to the spot where you want to cut your clip.
- Once the material has been chopped, you can erase bits of it by selecting it with your mouse and then pressing delete on your keyboard or rearrange the clips in the timeline by dragging and dropping them to other positions.
Step 4: Add effects, transitions, and music to the video.
Step 5: Save and export the video by clicking on the Finish tab.
FAQs about editing FLV video
- How to open FLV files?
Any FLV player is required to view FLV files. Various players are available, including VLC, FLV Player, Sothink FLV Player for Mac, Tonec Free FLV Player, Any FLV Player, and others.
- Is Filmora compatible with Mac?
Filmora requires macOS Sierra (version 10.12) or later and the Big Sur (version 11) and Apple M1 chips. Touch Bar compatibility for MacBook Pro users and custom shortcuts to speed up editing.
- What is the best online FLV editor?
There are numerous free online editors to choose from. Fastreel, WeVideo, and FlexClip Video Maker are a few of the most popular.
- Is FLV better than MP4?
Because FLV and MP4 are the two most popular video file formats, it’s crucial to know which one is preferable. Adobe’s proprietary format is FLV. Both formats employ video and audio codecs and have equal performance levels. In their unprocessed state, MP4 files are more adaptable. You can, however, use an FLV file at the same time if you have the correct player.
- How do I choose a video editor?
When comparing video editing software, there are six crucial elements to consider.
- Budget and cost
- Ease of use/learning curve
- Multi-GPGPU acceleration and video format support
- Tools for advanced editing
- Music, special effects, and other goodies
- Customer service is second to none.
Top 10 Online And PC Cartoon Video Maker 2022 [For Beginner]
Abundant Video Effects - Wondershare Filmora
Provide abundant video effects - A creative video editor
Powerful color correction and grading
Detailed tutorials are provided by the official channel
Introduction
There are some issues common to the video production process. However, animated or cartoon videos have helped to combat such issues. You do not need to scout for locations, go through a seemingly endless casting process, or rent the pricey equipment. A cartoon is simply a type of animation or an illustration that usually appears in a semi-realistic or an unreal style. In addition, it uses simple, satirical, and humorous drawing language to tell the story.
Although there are restrictions, there are a lot of possibilities cartoon video makers still offer to their users. Therefore, this article will share the top 10 best cartoon video makers online and on PC that you can use before diving into an animated video world.
So, here is what we shall learn about cartoon makers today:
In this article
01 Best 5 Online Cartoon Makers
02 Cartoon Video Maker for Desktop (Win and Mac)
03 How Can I Create My Own Cartoon Using Wondershare Anireel
Part 1: Best 5 Online Cartoon Makers
1. Biteable
Biteable provides a seemingly endless list of template categories to cater to your online media marketing needs. Aside from offering entertaining cartoon-making templates, the platform also allows users to create motion graphics or content, and Facebook covers for their social media channels.
Price: Free, $23 per month, billed annually.
Features:
- Offering library with lots of templates to choose from
- Free to use, except you are looking for additional features
- Five simple steps to an incredible cartoon video
- It has an easily customizable template
Pros
- It is a perfect option for social media managers
- Quickly create entertaining cartoons
- Used by biggies like Amazon, Microsoft, Google, Disney, BBC, Shopify, Samsung, and salesforce.
- Over 9 million users
Cons
- There is a mandatory registration
- There are no audio editing options
- The file-sharing capabilities are limited to YouTube and Facebook
- The download option is disabled in the free version
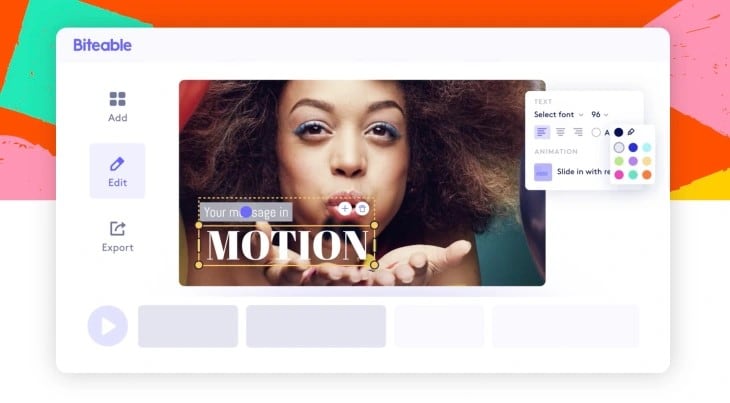
2. Animaker
With this animated maker, you get access to hundreds of animated characters, maps, and backgrounds. There are six (6) video styles available in this cartoon maker: Typography, Infographic, or 2D for different types of projects.
Price: Free version available. Subscription plans start at $12 per month/billed annually.
Features
- Different video styles, marketing, explainer, or 2D animation.
- Posts itself as the number 1 cartoon maker
- No need for a credit card to start.
- Four-step process; select template, customize it, add music, and download or share.
- 200+ voices, 25+ languages, and loads of customizable options.
- It offers auto-lip sync with advanced animation effects.
- There is a rich selection of 1000+ templates
Pros:
- Superb audio editing options
- Excellent and quick animation tools.
- Over 10 million users so far and still counting.
- Currently used by Amazon, Bosch, HP, Nokia, and Philips.
Cons:
- The monthly fee is pricey
- Account creation is mandatory for a free version
- The free version contains a watermark
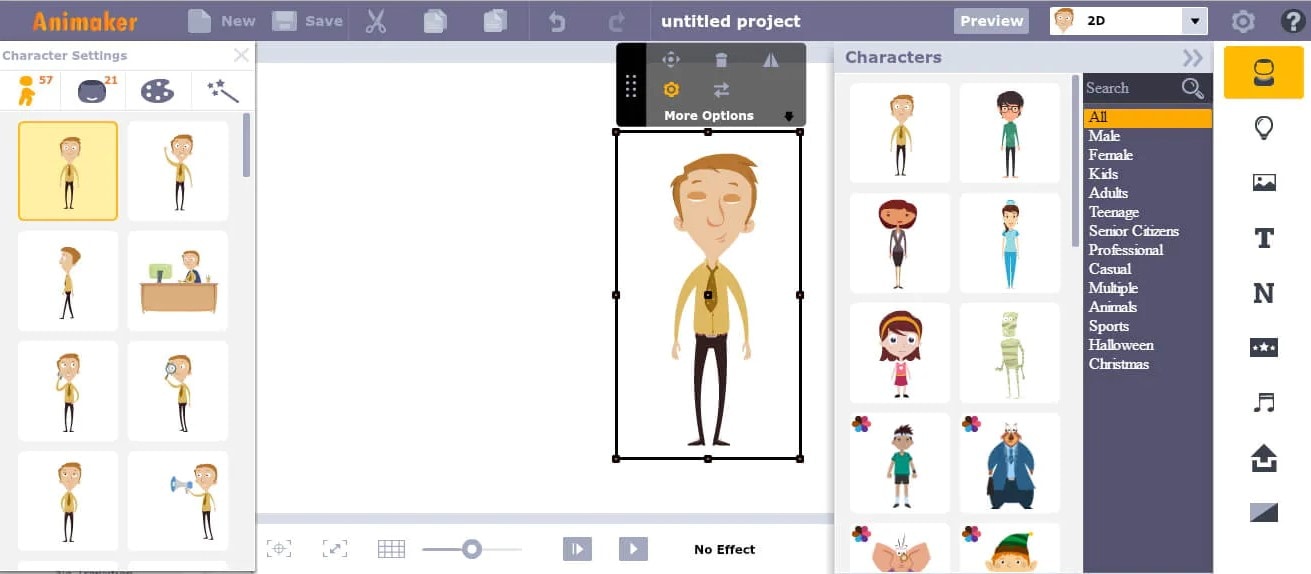
3. Vyond
Vyond, the cartoon creator launched in 2007, is probably one of the oldest online cartoon video makers. Additionally, it is still one of the most popular online destinations meant for anyone who wants to create an animated video quickly.
Price: Subscription plans start from $39 per month, billed annually.
Features:
- Perfect for animated video creation
- There is automatic character lip-syncing
- Try it for free before purchasing
- Make videos for training, e-learning, marketing, human resources, etc.
- The maximum duration of the video is 120 minutes
Pros:
- It has a fully customizable template
- There are high-end object and character animated features
- Certified by GDPR, TrustArc, BSI, and CCPA
- A wholesome cartoon makerfor enterprise and individual
- Data security and privacy assurance by BSI, CCPA, and GPDR.
Cons:
- It is quite expensive
- Vyond is not the best option for inexperienced animators
- The features depend on the subscription model
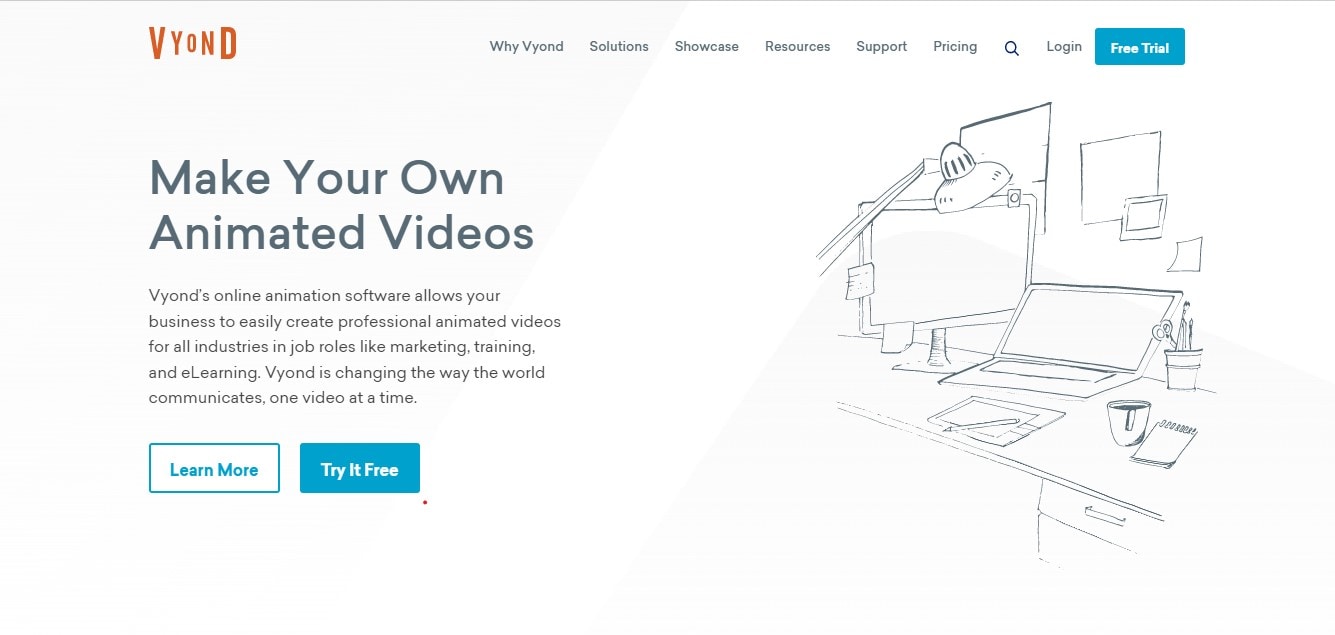
4. Renderforest
This is a famous online cartoon video maker for many purposes. Among the numerous options, the platform offers to its user. They include; 3D explainer videos, logo animations, or professional presentations.
Price: Free version available. Subscription plans start at $16 per month, billed annually.
Features:
- There is an extensive library of templates with numerous options
- Has a large online storage
- Was among the top 100 software companies in 2019.
- Top ranked solution holder for 2020
- Up to 250GB of online storage space
- Use the in-built template to make a story, customize the video, and then export it to share with your friends.
- Amadeus, Bose, BBC, Vodafone, Sony Music, and many others use Renderforest.
Pros:
- Produce videos like a pro
- Comes with an ultimate animation pack.
- Trusted by millions and one of the oldest cartoon makers.
Cons:
- A limited amount of commercial music tracks
- There are modest export options
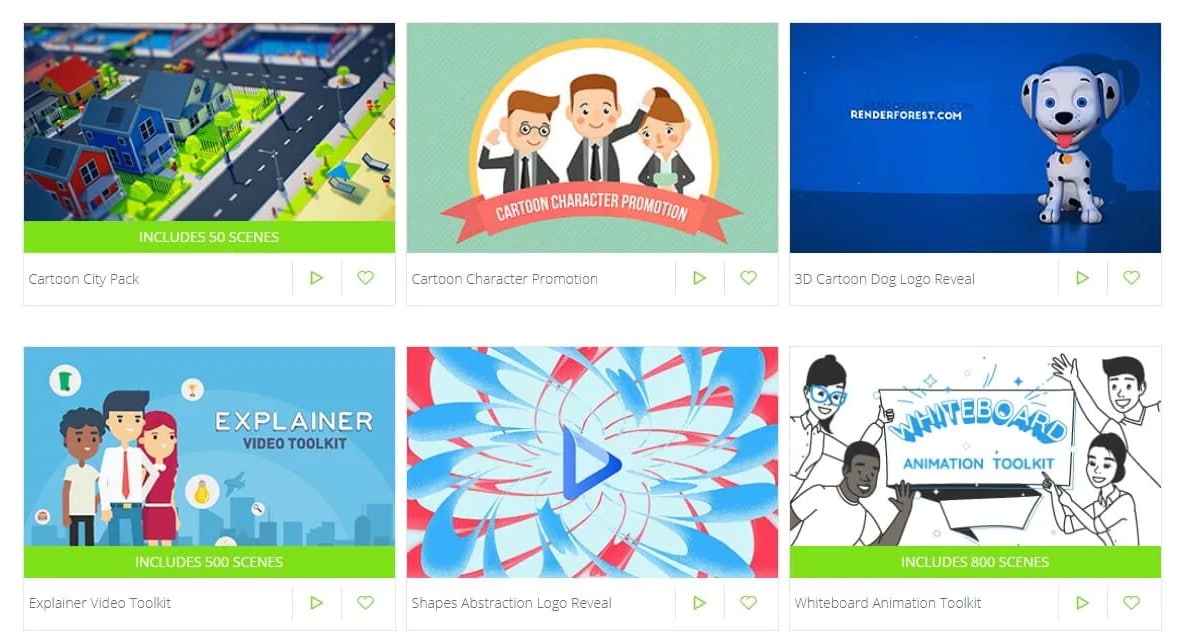
5. Moovly
With this cartoon maker, users must first log in. However, there is no need to create a new account as you can use your LinkedIn or Google account to sign in quickly.
Price: Free 30-day trial, $24.92 per month billed annually.
Features:
- Moovly is the perfect cartoon video maker for sales&marketing, human resources, internal communication, learning&development, agencies, and education.
- Apply expert features in one click with Moovly.
- Create videos and edit with browser-based or drag and drop features without installing software.
- Moovly has over 1.3 million free media, like images, sounds, music, and royalty-free stock videos at no extra charge.
- Besides, it offers 100 million extra media you can try and then purchase.
- You can add your images, music, and videos to create unique clips in style.
- Add text, remove color, add subtitles or generate them, auto-translate your text and subtitles, import PPT files, structure your content, record yourself or your computer screen, edit, mix, etc.
Pros:
- Even if users need to log in, they don’t need to create an account
- Allows users to import content from online sources like Storyblock, Shutterstock, etc.
- It is the number 1 customizable and straightforward solution to making cartoons.
- Use by Colgate-Palmolive, NHS, Teradata, Amadeus, Cisco, Continental, and Logitech.
- The interface is intuitive and user-friendly.
Cons:
- Watermarked videos during the free trial
- To export videos in HD 1080p quality, one needs to purchase one of the available plans.
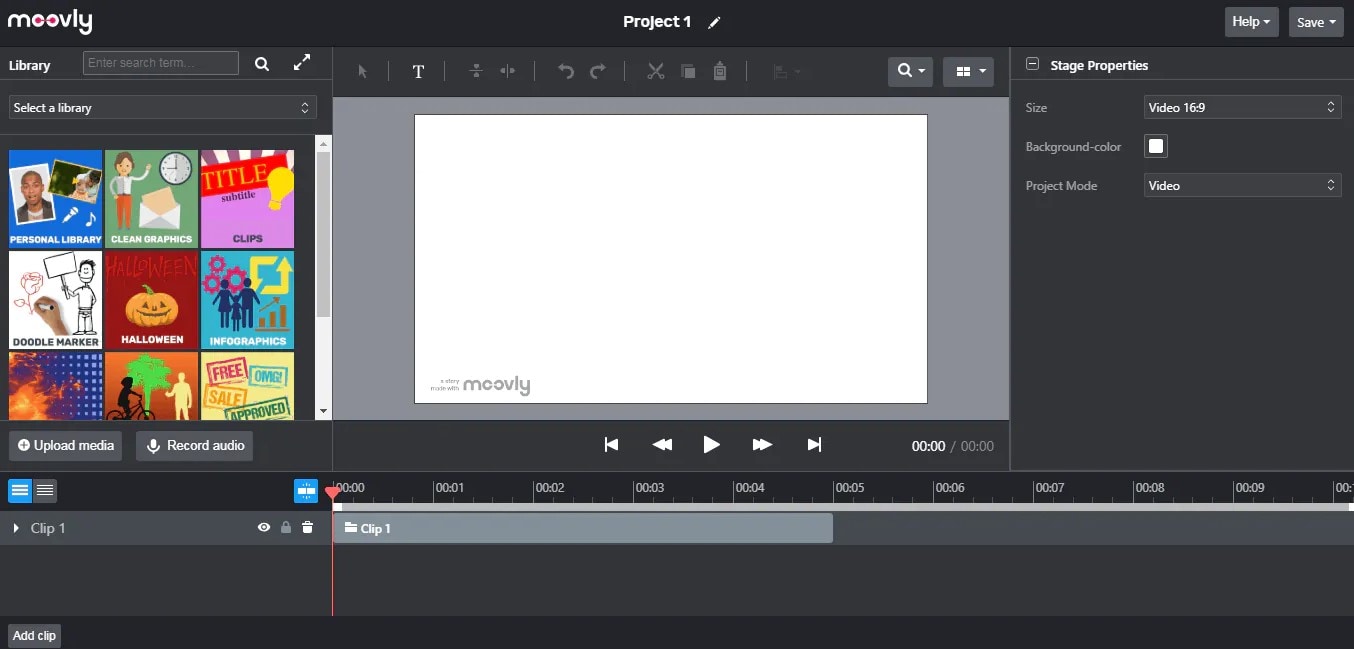
Renderforest is the best cartoon maker online of the listed five in this article due to the vast library template and large online bandwidth.
Part 2: Cartoon Video Maker for Desktop (Win and Mac)
1. Wondershare Anireel
Anireel is one of the top animation software on the internet that allows users to bring their imaginations to life with a huge range of customizable elements and features.
Price: $9.99 per month billed annually and $19.99 monthly
Features:
- 40+ customizable templates
- Top animation software
- Compatible with Windows 11/10/8.1 (64 bit OS)
- Only three steps to an excellent animated video.
- Import images, videos, and sound in almost all formats.
- Create unique avatar, logo images, and more specific to your brand.
- The Deep Learning tech offers quick text-to-speech conversion.
- Animate camera movements, entry and exit effects, motion path, etc.
- Use the one-click option and change scripts to clips.
- Anireel cartoon video makercan lip-sync your characters with perfection.
- Quick and easy drag and drop editing.
Pros:
- It is convenient and simple to use
- Anireel has an intuitive interface
- The cartoon makeroffers a practical and seamless animated video editing
- It comes at an affordable and competitive price
Cons:
- It has a limited amount of assets
- Not suitable for too professional people to use.
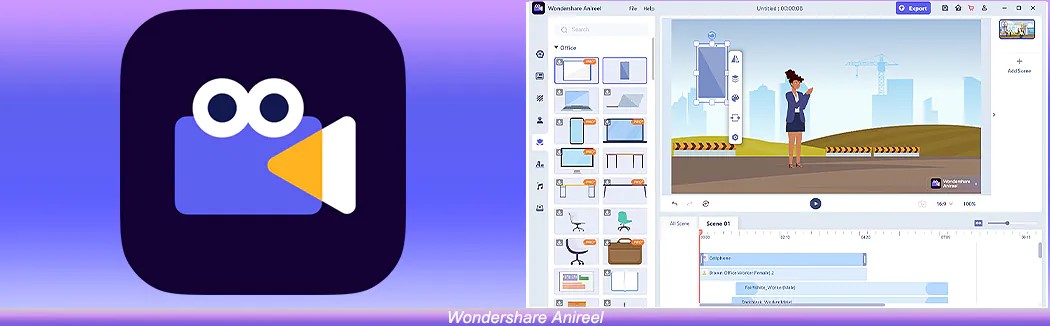
2. Autodesk Maya
Autodesk Maya is one of the best animation tools used to create animation pictures, video games, and add 3D effects in motion pictures. Plus, this cartoon maker is the best if you require a high-quality visual impact.
Price: Free trial, $225 billed monthly.
Features:
- It offers AutoDesk financing for new buyers.
- Maya is the go-to shop for architects, engineers, designers, media, and entertainment.
- Shape 3D objects and add realistic effects with Maya cartoon maker’s NURBS modeling.
- The Integrated Arnold rendering technology lets you view scene changes in real-time.
- Maya has been part of the top movie makers, including the MCU.
- This cartoon video maker offers geometry-based polygon modeling and helps create accurate simulations for visual programming.
- Maya can load and change vast data sets at a faster pace.
Pros:
- It makes complex hand-made animation tasks extremely easy
- Efficient color management
- Allows the creation of realistic effects like cloth simulations and explosions
- 30-day free trial and 30-day money-back guarantee
- Meet deadlines, add fine details to develop even the most complex shots or characters.
- Excellent tool for professionals
Cons:
- The pro is quite expensive
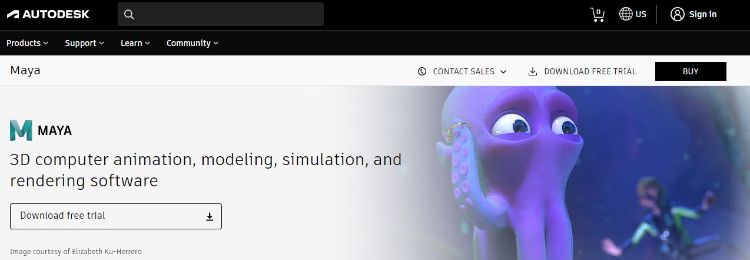
3. Adobe Animate
This is one of the most powerful animation software products on the internet that has been available for decades. It can animate images used for games, film, or online and produce HTML 5, WebGL, or Flash content.
Price: This cartoon creator offers three pricing plans starting at US$24.14/month
Features:
- Excellent for complex animation
- The capability of freehand drawing
- Animate, illustrate, and make 3D typography.
- Import and add vector drawings for further editing.
- Export your work as HTML5 Canvas, WebGL, Flash/Adobe AIR, GIF, or QuickTime movie.
- With the Bone tool, make your cartoon characters fluid and natural.
- Synchronize sounds and music for your project.
- Choose parts of the clip to be animated.
Pros:
- It has Puppeting features
- It is an excellent choice for complex animations
- It includes freehand drawing capability
Cons:
- It is not suitable for beginners
- Other Adobe software may be required while working on a project
4. Adobe Character Animator
Adobe Character Animator is another type of Adobe’s animation software stack that allows users to use motion to capture and create live animations of their 2D characters.
Price: Adobe Character Animator has two pricing plans starting at US$34,49/month for the first year
Features:
- This product requires other Adobe products to function
- Lots of options to export and import.
- Make your real-life cartoon using the Motion Capture feature in five steps.
- The Avatar will walk, talk, and copy your expressions in real-time.
- Integrate and add assets from other Adobe Creative Cloud apps.
- Auto lip-syncing and real-time facial movement capture.
- Works on iOS and Android.
Pros:
- Easy to replicate real-life movements and expressions with facial tracking.
- There are various import and export options.
Cons:
- It is not a standalone product.
- Users need to have a webcam and microphone to use the motion capture feature.
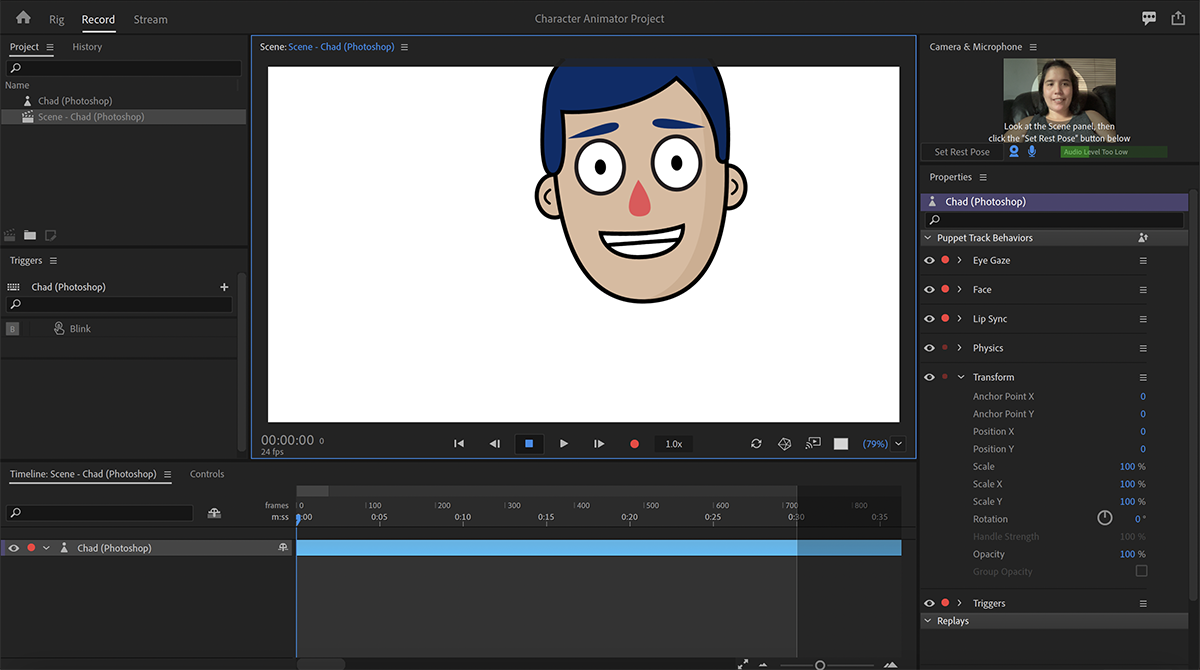
5. Cinema 4D
This cartoon maker has a 3D application interface that offers a keyframe animation, life-like characters, simulation building, object tracking, flexible rig building, cartoon styling, and animation basics.
Price: 4 pricing plans, starting at $99.91/month and $1199.00 billed annually.
Features:
- Keyframing animation effect
- It has a 3d interface
- The ZRemesher for retopology and new tools for modeling add to the new features.
- The Cloth Simulation features help make your cartoon more real.
- It supports CPU rendering with Redshift, which helps you preview, import, and export in high quality.
Pros:
- It is pretty easy to use.
- Lots of exciting design templates are available
- Many editing features are available
Cons
- It is pretty expensive compared to other software
- Not good for beginners
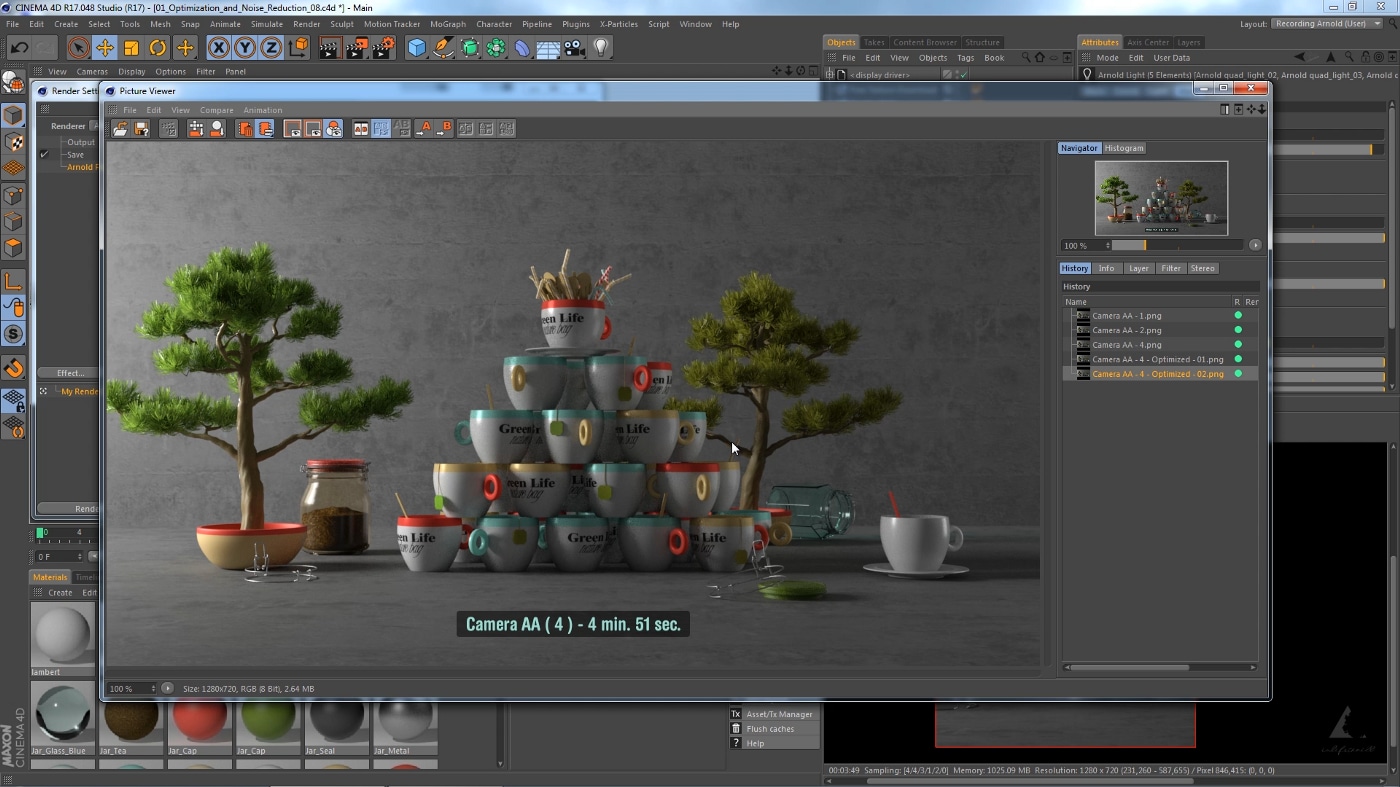
Wondershare Anireel is the best cartoon maker of the five listed in this article. It has lots of advanced features and templates to choose from.
Part 3: How Can I Create My Own Cartoon Using Wondershare Anireel
As stated, Wondershare Anireel has become our top cartoon creator pick due to its affordable pricing, secure server, and ease of use.
So, let us view the simple steps to create your cartoon using the Anireel software.
Step 1: Download, install and Create Character
Run Anireel on your device, visit Characters Tab and then click on Create a Character option, or you may click on the Create Brand Characters tab on the home screen.
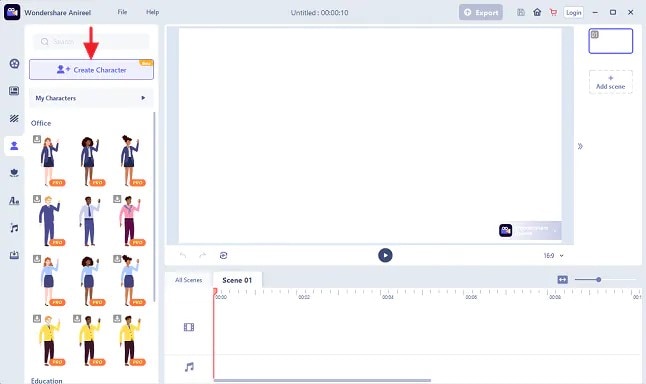
Step 2: Start Creating your Cartoon Character
Choose your gender and body shape, and apply some preset suits.
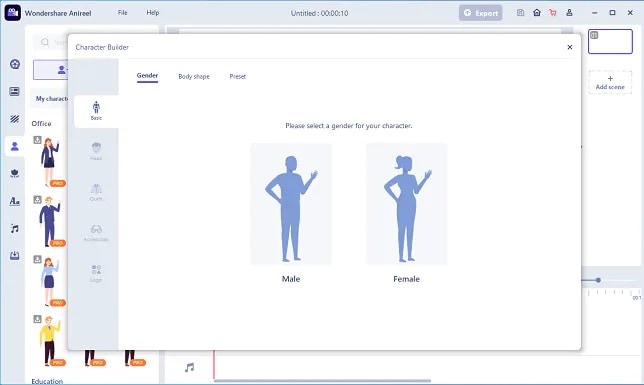
Now, you can start building facial features using the Head tab to customize the shape of the face, eyes, hairstyle, nose, mouth, ears, and eyebrows.
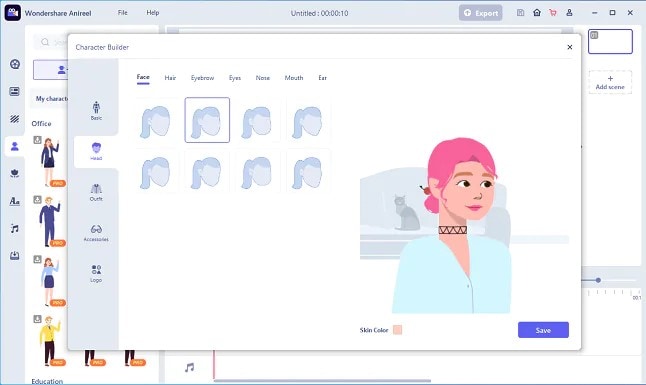
You can also choose to change the skin tone to match yours.
Step 3: Add an Outfit and Accessories
Choose the Outfit tab in Character Builder to select the base layer, outfit, bottom wear, and footwear. Pick what you want to use on your cartoon and keep adding.
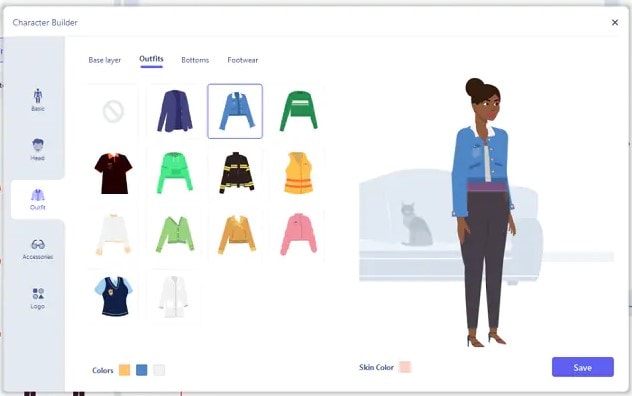
Next, reach the Accessories tab to add glasses, necklaces, and more to your cartoon character.
Step 4: Name your Cartoon and Apply
Click on Save and add a name to your cartoon when all done. Finally, click Apply Now to add your cartoon character to your Anireel cartoon maker canvas or My Characters tab.
Part 4: People Also Want to Know
Below are some answers to a few queries about cartoon creators. Let us look at them one by one.
1. What is the best free cartoon maker?
Wondershare Anireel is the best cartoon maker for Android as it is free to use with lots of advanced features and templates to choose from.
2. What is the best app to make a cartoon?
Wondershare Anireel’s Microsoft app is also one of the best cartoon applications that are very flexible and easy to use on the go.
Conclusion
In this article, we explained the best cartoon creators in the industry. Also, we gave the best cartoon video maker from the list. Thus, as you saw, in this report, we have summarized a few essential points regarding cartoon video makers. You learned:
- The cartoon video maker for free that you should know of.
- The ten best cartoon video makers.
- Why are Wondershare Anireel and Renderforest excellent online cartoon video makers?
- How does Anireel, cartoon creator, work?
- Finally, a few FAQs for users to better understand the cartoon maker
Introduction
There are some issues common to the video production process. However, animated or cartoon videos have helped to combat such issues. You do not need to scout for locations, go through a seemingly endless casting process, or rent the pricey equipment. A cartoon is simply a type of animation or an illustration that usually appears in a semi-realistic or an unreal style. In addition, it uses simple, satirical, and humorous drawing language to tell the story.
Although there are restrictions, there are a lot of possibilities cartoon video makers still offer to their users. Therefore, this article will share the top 10 best cartoon video makers online and on PC that you can use before diving into an animated video world.
So, here is what we shall learn about cartoon makers today:
In this article
01 Best 5 Online Cartoon Makers
02 Cartoon Video Maker for Desktop (Win and Mac)
03 How Can I Create My Own Cartoon Using Wondershare Anireel
Part 1: Best 5 Online Cartoon Makers
1. Biteable
Biteable provides a seemingly endless list of template categories to cater to your online media marketing needs. Aside from offering entertaining cartoon-making templates, the platform also allows users to create motion graphics or content, and Facebook covers for their social media channels.
Price: Free, $23 per month, billed annually.
Features:
- Offering library with lots of templates to choose from
- Free to use, except you are looking for additional features
- Five simple steps to an incredible cartoon video
- It has an easily customizable template
Pros
- It is a perfect option for social media managers
- Quickly create entertaining cartoons
- Used by biggies like Amazon, Microsoft, Google, Disney, BBC, Shopify, Samsung, and salesforce.
- Over 9 million users
Cons
- There is a mandatory registration
- There are no audio editing options
- The file-sharing capabilities are limited to YouTube and Facebook
- The download option is disabled in the free version
2. Animaker
With this animated maker, you get access to hundreds of animated characters, maps, and backgrounds. There are six (6) video styles available in this cartoon maker: Typography, Infographic, or 2D for different types of projects.
Price: Free version available. Subscription plans start at $12 per month/billed annually.
Features
- Different video styles, marketing, explainer, or 2D animation.
- Posts itself as the number 1 cartoon maker
- No need for a credit card to start.
- Four-step process; select template, customize it, add music, and download or share.
- 200+ voices, 25+ languages, and loads of customizable options.
- It offers auto-lip sync with advanced animation effects.
- There is a rich selection of 1000+ templates
Pros:
- Superb audio editing options
- Excellent and quick animation tools.
- Over 10 million users so far and still counting.
- Currently used by Amazon, Bosch, HP, Nokia, and Philips.
Cons:
- The monthly fee is pricey
- Account creation is mandatory for a free version
- The free version contains a watermark
3. Vyond
Vyond, the cartoon creator launched in 2007, is probably one of the oldest online cartoon video makers. Additionally, it is still one of the most popular online destinations meant for anyone who wants to create an animated video quickly.
Price: Subscription plans start from $39 per month, billed annually.
Features:
- Perfect for animated video creation
- There is automatic character lip-syncing
- Try it for free before purchasing
- Make videos for training, e-learning, marketing, human resources, etc.
- The maximum duration of the video is 120 minutes
Pros:
- It has a fully customizable template
- There are high-end object and character animated features
- Certified by GDPR, TrustArc, BSI, and CCPA
- A wholesome cartoon makerfor enterprise and individual
- Data security and privacy assurance by BSI, CCPA, and GPDR.
Cons:
- It is quite expensive
- Vyond is not the best option for inexperienced animators
- The features depend on the subscription model
4. Renderforest
This is a famous online cartoon video maker for many purposes. Among the numerous options, the platform offers to its user. They include; 3D explainer videos, logo animations, or professional presentations.
Price: Free version available. Subscription plans start at $16 per month, billed annually.
Features:
- There is an extensive library of templates with numerous options
- Has a large online storage
- Was among the top 100 software companies in 2019.
- Top ranked solution holder for 2020
- Up to 250GB of online storage space
- Use the in-built template to make a story, customize the video, and then export it to share with your friends.
- Amadeus, Bose, BBC, Vodafone, Sony Music, and many others use Renderforest.
Pros:
- Produce videos like a pro
- Comes with an ultimate animation pack.
- Trusted by millions and one of the oldest cartoon makers.
Cons:
- A limited amount of commercial music tracks
- There are modest export options
5. Moovly
With this cartoon maker, users must first log in. However, there is no need to create a new account as you can use your LinkedIn or Google account to sign in quickly.
Price: Free 30-day trial, $24.92 per month billed annually.
Features:
- Moovly is the perfect cartoon video maker for sales&marketing, human resources, internal communication, learning&development, agencies, and education.
- Apply expert features in one click with Moovly.
- Create videos and edit with browser-based or drag and drop features without installing software.
- Moovly has over 1.3 million free media, like images, sounds, music, and royalty-free stock videos at no extra charge.
- Besides, it offers 100 million extra media you can try and then purchase.
- You can add your images, music, and videos to create unique clips in style.
- Add text, remove color, add subtitles or generate them, auto-translate your text and subtitles, import PPT files, structure your content, record yourself or your computer screen, edit, mix, etc.
Pros:
- Even if users need to log in, they don’t need to create an account
- Allows users to import content from online sources like Storyblock, Shutterstock, etc.
- It is the number 1 customizable and straightforward solution to making cartoons.
- Use by Colgate-Palmolive, NHS, Teradata, Amadeus, Cisco, Continental, and Logitech.
- The interface is intuitive and user-friendly.
Cons:
- Watermarked videos during the free trial
- To export videos in HD 1080p quality, one needs to purchase one of the available plans.
Renderforest is the best cartoon maker online of the listed five in this article due to the vast library template and large online bandwidth.
Part 2: Cartoon Video Maker for Desktop (Win and Mac)
1. Wondershare Anireel
Anireel is one of the top animation software on the internet that allows users to bring their imaginations to life with a huge range of customizable elements and features.
Price: $9.99 per month billed annually and $19.99 monthly
Features:
- 40+ customizable templates
- Top animation software
- Compatible with Windows 11/10/8.1 (64 bit OS)
- Only three steps to an excellent animated video.
- Import images, videos, and sound in almost all formats.
- Create unique avatar, logo images, and more specific to your brand.
- The Deep Learning tech offers quick text-to-speech conversion.
- Animate camera movements, entry and exit effects, motion path, etc.
- Use the one-click option and change scripts to clips.
- Anireel cartoon video makercan lip-sync your characters with perfection.
- Quick and easy drag and drop editing.
Pros:
- It is convenient and simple to use
- Anireel has an intuitive interface
- The cartoon makeroffers a practical and seamless animated video editing
- It comes at an affordable and competitive price
Cons:
- It has a limited amount of assets
- Not suitable for too professional people to use.
2. Autodesk Maya
Autodesk Maya is one of the best animation tools used to create animation pictures, video games, and add 3D effects in motion pictures. Plus, this cartoon maker is the best if you require a high-quality visual impact.
Price: Free trial, $225 billed monthly.
Features:
- It offers AutoDesk financing for new buyers.
- Maya is the go-to shop for architects, engineers, designers, media, and entertainment.
- Shape 3D objects and add realistic effects with Maya cartoon maker’s NURBS modeling.
- The Integrated Arnold rendering technology lets you view scene changes in real-time.
- Maya has been part of the top movie makers, including the MCU.
- This cartoon video maker offers geometry-based polygon modeling and helps create accurate simulations for visual programming.
- Maya can load and change vast data sets at a faster pace.
Pros:
- It makes complex hand-made animation tasks extremely easy
- Efficient color management
- Allows the creation of realistic effects like cloth simulations and explosions
- 30-day free trial and 30-day money-back guarantee
- Meet deadlines, add fine details to develop even the most complex shots or characters.
- Excellent tool for professionals
Cons:
- The pro is quite expensive
3. Adobe Animate
This is one of the most powerful animation software products on the internet that has been available for decades. It can animate images used for games, film, or online and produce HTML 5, WebGL, or Flash content.
Price: This cartoon creator offers three pricing plans starting at US$24.14/month
Features:
- Excellent for complex animation
- The capability of freehand drawing
- Animate, illustrate, and make 3D typography.
- Import and add vector drawings for further editing.
- Export your work as HTML5 Canvas, WebGL, Flash/Adobe AIR, GIF, or QuickTime movie.
- With the Bone tool, make your cartoon characters fluid and natural.
- Synchronize sounds and music for your project.
- Choose parts of the clip to be animated.
Pros:
- It has Puppeting features
- It is an excellent choice for complex animations
- It includes freehand drawing capability
Cons:
- It is not suitable for beginners
- Other Adobe software may be required while working on a project
4. Adobe Character Animator
Adobe Character Animator is another type of Adobe’s animation software stack that allows users to use motion to capture and create live animations of their 2D characters.
Price: Adobe Character Animator has two pricing plans starting at US$34,49/month for the first year
Features:
- This product requires other Adobe products to function
- Lots of options to export and import.
- Make your real-life cartoon using the Motion Capture feature in five steps.
- The Avatar will walk, talk, and copy your expressions in real-time.
- Integrate and add assets from other Adobe Creative Cloud apps.
- Auto lip-syncing and real-time facial movement capture.
- Works on iOS and Android.
Pros:
- Easy to replicate real-life movements and expressions with facial tracking.
- There are various import and export options.
Cons:
- It is not a standalone product.
- Users need to have a webcam and microphone to use the motion capture feature.
5. Cinema 4D
This cartoon maker has a 3D application interface that offers a keyframe animation, life-like characters, simulation building, object tracking, flexible rig building, cartoon styling, and animation basics.
Price: 4 pricing plans, starting at $99.91/month and $1199.00 billed annually.
Features:
- Keyframing animation effect
- It has a 3d interface
- The ZRemesher for retopology and new tools for modeling add to the new features.
- The Cloth Simulation features help make your cartoon more real.
- It supports CPU rendering with Redshift, which helps you preview, import, and export in high quality.
Pros:
- It is pretty easy to use.
- Lots of exciting design templates are available
- Many editing features are available
Cons
- It is pretty expensive compared to other software
- Not good for beginners
Wondershare Anireel is the best cartoon maker of the five listed in this article. It has lots of advanced features and templates to choose from.
Part 3: How Can I Create My Own Cartoon Using Wondershare Anireel
As stated, Wondershare Anireel has become our top cartoon creator pick due to its affordable pricing, secure server, and ease of use.
So, let us view the simple steps to create your cartoon using the Anireel software.
Step 1: Download, install and Create Character
Run Anireel on your device, visit Characters Tab and then click on Create a Character option, or you may click on the Create Brand Characters tab on the home screen.
Step 2: Start Creating your Cartoon Character
Choose your gender and body shape, and apply some preset suits.
Now, you can start building facial features using the Head tab to customize the shape of the face, eyes, hairstyle, nose, mouth, ears, and eyebrows.
You can also choose to change the skin tone to match yours.
Step 3: Add an Outfit and Accessories
Choose the Outfit tab in Character Builder to select the base layer, outfit, bottom wear, and footwear. Pick what you want to use on your cartoon and keep adding.
Next, reach the Accessories tab to add glasses, necklaces, and more to your cartoon character.
Step 4: Name your Cartoon and Apply
Click on Save and add a name to your cartoon when all done. Finally, click Apply Now to add your cartoon character to your Anireel cartoon maker canvas or My Characters tab.
Part 4: People Also Want to Know
Below are some answers to a few queries about cartoon creators. Let us look at them one by one.
1. What is the best free cartoon maker?
Wondershare Anireel is the best cartoon maker for Android as it is free to use with lots of advanced features and templates to choose from.
2. What is the best app to make a cartoon?
Wondershare Anireel’s Microsoft app is also one of the best cartoon applications that are very flexible and easy to use on the go.
Conclusion
In this article, we explained the best cartoon creators in the industry. Also, we gave the best cartoon video maker from the list. Thus, as you saw, in this report, we have summarized a few essential points regarding cartoon video makers. You learned:
- The cartoon video maker for free that you should know of.
- The ten best cartoon video makers.
- Why are Wondershare Anireel and Renderforest excellent online cartoon video makers?
- How does Anireel, cartoon creator, work?
- Finally, a few FAQs for users to better understand the cartoon maker
Best Tips for Better Event Videography
There is no doubt that if you have an upcoming corporate event, you will want to record it using professional
corporate event video production. This is something that can’t be stressed enough. Providing video footage of events is an excellent method to raise people’s awareness of your brand, as well as interest in and enthusiasm for the work that your firm does.
Let’s start!

1. A quality corporate event video represents your business
People who are watching your corporate event video aren’t just learning about who your company is and what your company does. They’re also learning about your commitment to quality. If your event video looks like it was shot off the cuff by an employee on someone’s phone, people may assume you take that kind of approach to your business and service to your customers.
You don’t, but it’s an easy assumption to make. A professionally shot, high-quality video signals to viewers that your company appreciates quality and seeks it out in everything they do. It also shows your attention to detail and what they can expect when they choose your business to handle their own occasions or services.
2. A professional videographer is capable of editing
Videoing your corporate event is about more than just filming, it’s knowing how to cut the event together, how to mix the shots and the sound, and add music and any subtle effects or graphics that will make the video really shine. There is a lot that goes into post-production that an amateur simply cannot replicate.
Editing your video without the benefit of a dedicated studio with years of experience just won’t have the same
effect when it comes to amplifying the energy and mission of your event. It also will not show the level of detail that your video could contain if a professional corporate event video production company did it.
3. A professional video is completed on schedule
It can take longer than you anticipate if you opt to handle your corporate or conference videos yourself or
delegate the task to one of your workers. Without a lot of post-production knowledge, it could take a lot of trial and error to put your material together in a way that produces the desired outcome.
If you’re trying to summarize an event and demonstrate to stakeholders or customers how effective it was, you might not have time for that. Even though unforeseen issues might always arise, if you and a competent
videographer agree on a finish date, they will be able to deliver. This is crucial if you want to utilize your video
to promote a recent event or for marketing purposes.
4. A skilled videographer avoids interference
A skilled videographer is trained to film an event without getting in the way, so things can keep going as usual.
If you’re not used to doing professional videography, you might not realize you’re bothering your guests and
messing up the event while you’re trying to film it. This can turn people off and hurt your finished product, as
well as the success of your event. If your occasion is streamed online, you don’t want the videographer to get in the way or become visible in the frame your live show.
5. A video that is done well tells a story
Companies with experience creating videos do more than just capture actions digitally, they also find the story
in the event they are recording and use their videography skills to tell that story. This storyline is defined in
what they choose to shoot, when they shoot it and how they edit it all together. It’s that storyline that is going
to capture the attention from the audience and give your video the desired impact.
It’s also going to stir up emotions and passion in your audience, creating momentum in your company and with your customers that will last until your next event. Remember that any video you share with your customers or employees is a video marketing exercise that helps you build brand awareness. Let your corporate event video reflect positively on your business.
6. A videographer has a shot list
It is not enough to simply create a list; you must also put it to good use. The idea that you should plan your shot and then execute your plan is a fundamental element of production. Create a strategy and put it into action since your videographer will be knowing his job to adhere to this concept regardless of whether or not they are aware of it.
Also, get things you may or may not need for editing. It is usually excellent practice to use some B roll audio
and video, in addition to establishing shots, no matter what kind of event you are filming, be it a wedding or a business function. If you anticipate that it will be overly crowded during the event, take your creative shoton a pleasant day that occurs before the main event.
Conclusion
We sincerely hope that some of these pointers will be of assistance to you as you navigate the area of special
events videos. Whether you are able to employ all of them or not will depend on your client, the event, and
your own workflow; nonetheless, the takeaway from this anecdote is that you should be prepared for the
worst-case scenario and find that you are better equipped to offer the best possible results. There won’t be
many situations that you won’t be able to manage with grace and professionally if you have the ability to
remain calm, cool, and professional.
Free Download For Win 7 or later(64-bit)
Free Download For macOS 10.14 or later
Free Download For macOS 10.14 or later
Also read:
- New In 2024, Can You Enhance Your Drone Footage with Cinematic Drone LUTs? This Article Discusses Top Drone LUTs Recommendations to Simplify Video Editing
- Updated Five Thoughts on Discord Create Accounts How-To Questions
- Updated In 2024, 10 Best Music Video Templates to Make Your Video Popular
- Finding LUTs Made by Danny Gevirtz
- Updated Best Tips for Camtasia Freeze-Frame
- In 2024, How to Add Subtitles to Videos With Kapwing
- Updated The Right Ways to Slow Down a Video on iPhone
- Steps To Fade Audio In Premier Pro for 2024
- Dubbing Videos With Voiceovers | Wondershare Filmora Tutorial for 2024
- Do You Want to Record Videos with a Phantom High-Speed Camera? In This Guide, You Can Get a Detailed Note on the Phantom Camera
- 2024 Approved Vintage Film Effect 1980S - How to Create
- Updated In 2024, Want to Immediately Know Something About Discord GIF?
- In 2024, A Wedding Is One of the Exciting Parts that Will Happen in Your Life. Its Not that Easy to Plan a Wedding, Theres a Lot to Be Consider Like Wedding Dress, Food, Venue, Videographer Etc
- New 2024 Approved Easy Guide to Overlay Videos in Premiere Pro
- New How to Crop a Video in Windows Media Player
- Updated Best GIF to AVI Converters (Online + Software Solutions) for 2024
- New 2024 Approved Top 8 Augmented Reality Video Games
- Updated In 2024, How to Create Your Own Subscribe Channel Graphics
- In 2024, How to Detect and Stop mSpy from Spying on Your Vivo S17 | Dr.fone
- Unlock Your Device iCloud DNS Bypass Explained and Tested, Plus Easy Alternatives From iPhone 6
- 2 Ways to Monitor Google Pixel 8 Activity | Dr.fone
- How Can We Bypass Samsung Galaxy S23+ FRP?
- Vivo V29 Pro Camera Not Working Unexpected Error? Fix It Now | Dr.fone
- Three Solutions to Hard Reset Motorola Razr 40? | Dr.fone
- 2024 Approved 10 Best Free AI Script Generators | Movie Script Generators
- How to Flash Dead Lava Yuva 2 Pro Safely | Dr.fone
- AddROM Bypass An Android Tool to Unlock FRP Lock Screen For your Infinix Smart 8 Plus
- Pokemon Go No GPS Signal? Heres Every Possible Solution On OnePlus 12 | Dr.fone
- How To Change Your iPhone 14 Pro Apple ID on MacBook
- How To Unlock Xiaomi 13T Phone Without Password?
- How to add a digital signature block to Word 2019
- In 2024, Easy Steps on How To Create a New Apple ID Account On iPhone 15 | Dr.fone
- In 2024, How to Show Wi-Fi Password on Realme GT Neo 5
- The way to convert MTS for Samsung Galaxy XCover 7
- Title: Updated Creating Testimonial Videos For Health And Wellness Business Industry
- Author: Morgan
- Created at : 2024-05-19 05:11:57
- Updated at : 2024-05-20 05:11:57
- Link: https://ai-video-editing.techidaily.com/updated-creating-testimonial-videos-for-health-and-wellness-business-industry/
- License: This work is licensed under CC BY-NC-SA 4.0.
