
:max_bytes(150000):strip_icc():format(webp)/012_how-to-make-video-call-on-android-bd93ab594aa648c7977f4c1ecf42c85b.jpg)
Updated In 2024, You May Want to Change the Speed of Certain Portions of Your Video. This Article Enlightens You on How to Splice and Speed up the Video in Simple Ways
You May Want to Change the Speed of Certain Portions of Your Video. This Article Enlightens You on How to Splice and Speed up the Video in Simple Ways
Create High-Quality Video - Wondershare Filmora
An easy and powerful YouTube video editor
Numerous video and audio effects to choose from
Detailed tutorials are provided by the official channel
The availability of video editing apps enables you to turn your device into a compelling tool to make video tweaks. Several editing abilities are available, ranging from adding overlays, text, music, and changing speed. The latter carries more weight, especially when dealing with a wide range of scenes. You can either slow down or speed up your video with a click of a button. In this article, we focus on how to speed up video on Splice and its alternative.

In this article
01 Can I speed up a video using Splice?
02 Alternative: Try out Filmora V11’s Speed Ramping
03Additional Video Splice Apps for Android
Can I speed up a video using Splice?
Yes, Splice is a state-of-the-art tool that comprises several editing features, including speed up and down controls. It works with iOS devices like iPhones and iPads and is a sure bet to edit your videos on the go. The Splice app is generally useful for social media influencers who want to market their products and hold online tutorials, among other functions.t
Splice’s video speed control features
Among the features of Splice, is the ability to speed up or slow down your video. A splice speed ramp is the rate of acceleration or deceleration of a clip. This technique smoothly adjusts the video speed to the desired pace.
Some other features of the Splice
- You can also add music to your videos. Music attracts attention, thereby keeping them glued during the video playback.
- The trim and crop features let you cut out unnecessary footage from your video for a polished finish. Likewise, you can use the app to remove some segments that you don’t want to feature in your video.
- It brings you exclusive effects that widely enhance your videos. Adding certain elements, like overlay text, and changing speed, among other aspects, is a great way to enrich your video.
- Utilizing the social media platform is Splice’s most influential feature. It facilitates the online sharing of videos once you have edited and completed the creation process. You can easily upload your video to Instagram, Facebook, and YouTube, among other platforms.
Alternative: Try out Filmora V11’s Speed Ramping
An alternative to Splice video in Filmora V11’s Speed Ramping. Filmora brings you ramping features to make breathtaking videos.
- Filmora brings you six preset speed effects to create professional speed changes such as flash in, bullet time, montage, etc.
- This tool helps you to maintain the original audio pitch when changing the video’s speed.
- Filmora also supports customized speed ramping templates for a unique speed ramping effect.
For Win 7 or later (64-bit)
For macOS 10.12 or later
How to use Filmora to speed up video
Filmora is a sophisticated tool that quickly solves any editing functions for you. It has an intuitive interface, accommodating both professionals and beginners. It is a quick solution to speed up your video for a fast-track action. Follow these steps to speed up the video with Filmora to produce high-end quality videos.
Step 1. Launch Filmora and open the video
First, open the Filmora app on your device, then search for the target video to speed up. Alternatively, you can drag and drop the videos onto the interface.
Step 2: The speed
Working Vary with the video from your timeline Right-click on the video, and a menu will pop up immediately. Then tap on “Speed and Duration” and select the number of times you want to speed up your speed. These range from X2, X3, X4, X5, or any other speed rate of your choice.

Step 3: Modify the Duration
Specify the duration of your video; it will take Remember that the duration should be less than the original one if you aim to speed up the video. Then click on the “OK” button to preview the video.
Step 4. Save and export your video
Finally, it’s time to save and share your video. Click on the “File” tab and go to the “Save Project” option. Give your project a name then, tap on the “Save” option. Then use the “Export” feature to export your video to other media sites.
Using Splice to Speed Up a Video
Before you speed up a video on Splice, it is better to know how to use the Splice app and make impressive videos.
1) Starting a video project
Ensure the Splice app is installed on your device. Then choose what needs to be the first part of your video. This could be a title screen, or you could add a video first. To create a title screen, click on the “Title” button. Then type in the text to use as a title. Likewise, you can select how long the title screen should show in your video by adjusting the “duration” slider. Next, continue to add content after your title or the video you used.
2) Add videos
Check for the video to add to your project and click on the “+” button. You should notice the “Albums” screen show up and your videos will be visible in the “Camera roll” section. Choose the video you want to edit and click on the “Done” tab. Next, your videos will upload into the project, and be brought back to the main screen where you can view the project.
3) Edit your videos
The Splice app is rich in various editing tools to change your video into any enticing piece of work.
To trim and cut video: To trim your video, just tap on your video and drag the edge clip to the portion you want to trim.
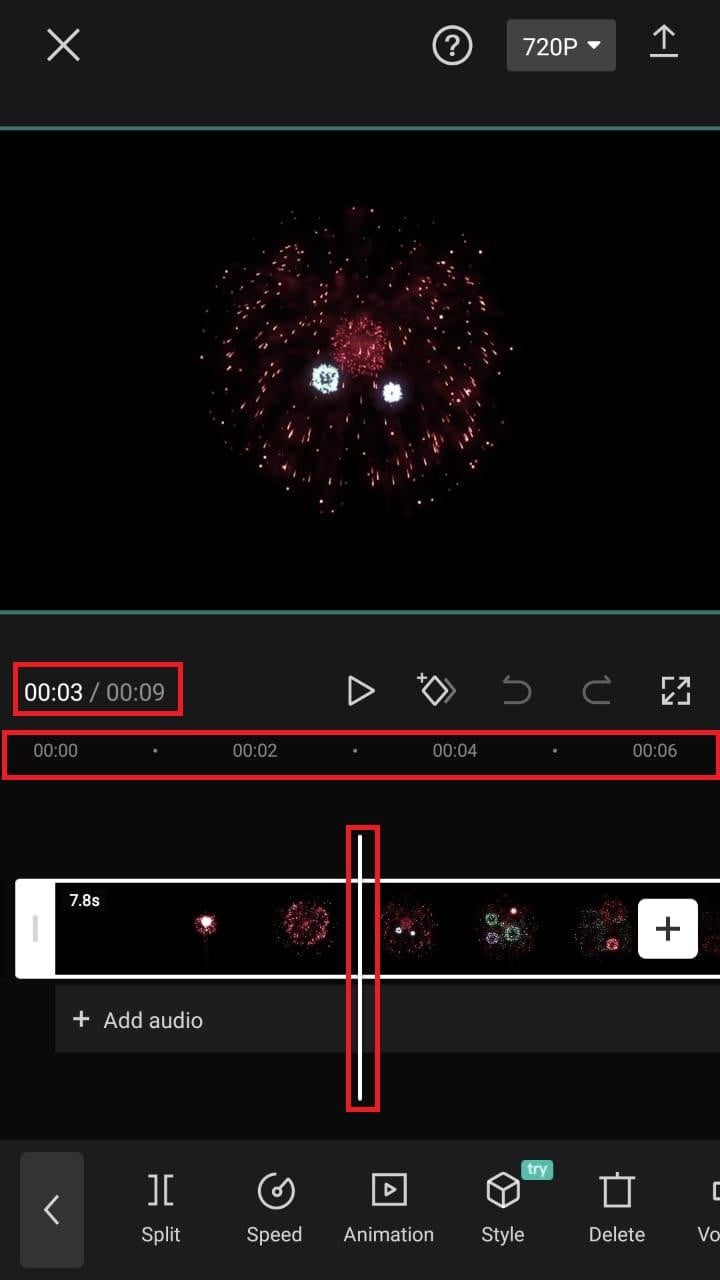
Meanwhile, to cut your video, tap on the video and locate where you want to cut the clip. Check on the “yellow” line as it is the guideline for your clip. Then tap on your clip once more and hit the “Split” tab to separate the video into two.
To add video overlays, first, insert your video into the timeline. Then press and hold on to the media that you want to add as an overlay. Next, drag the clip to the “Drop here to turn into an overlay” tab to add it.
To add text: Adding text to your video allows you to expand on it more easily. To do this, tap on the “Title” icon at the bottom of the timeline. Then double-tap on the media screen and type in the text you want to add.
To add music: For music, tap on the “Music” icon found at the bottom of the timeline. You can extract music from the “Splice” gallery or import your music from your device.
Add filters and other effects: You can also add filters to your clip. Just click on the “Filter” icon found at the bottom of the timeline. Then choose the filter of choice you wish to add and, finally, adjust the filter level.
4) Save and export your video
After a successful edit, it is time to save your project onto your device. Splice lets you choose an output format to save your file into. Once saved on your computer, you can now share it on social media sites.
• Remember, you can do more with Splice, such as speeding up your video. This section walks you through simple ways to speed up video for a professional look.
Here are the steps to speed up your video on Splice
Step 1: Choose a video
You first need to select the video that you need to speed up. Go to the timeline and select the video to add to the timeline. You can select the video from the Splice gallery by importing it or dragging and dropping the video onto the timeline.

Step 2: Select your speed
It is the speed rate that determines how fast or slow is your video. For this, you should select a fast speed. To do so, first, choose the “Speed” tab from the bottom toolbar. Then tap the “Speed Effects” option and specify your speed as X2, X4, etc.
Step 3: Begin the effect
Identify where you want to start the speeding effect and position the yellow line at that point.

Step 4. Add a speed point
Just tap the white “+” button to add a speed point to your video.
Step 5: Determine an endpoint
Now position the yellow line once more at the point where you intend to end the effect. Next, click on the white “+” button again and you will have specified the endpoint.
Step 6. Set the desired speed
Finally, choose the segment whose speed you wish to adjust. Use the “Slider” at the bottom to set the speed you want for your video. Then save and share your video.

Conclusion
● Video editing entails many aspects. Speed control is one of the major specifications of a successful video. Speeding up your video will fast forward to the selected portion and, thereby, eliminate repetitions or non-important sections of your video. This article covers how to splice and speed up video and also perform other video edits.
The availability of video editing apps enables you to turn your device into a compelling tool to make video tweaks. Several editing abilities are available, ranging from adding overlays, text, music, and changing speed. The latter carries more weight, especially when dealing with a wide range of scenes. You can either slow down or speed up your video with a click of a button. In this article, we focus on how to speed up video on Splice and its alternative.
In this article
01 Can I speed up a video using Splice?
02 Alternative: Try out Filmora V11’s Speed Ramping
03Additional Video Splice Apps for Android
Can I speed up a video using Splice?
Yes, Splice is a state-of-the-art tool that comprises several editing features, including speed up and down controls. It works with iOS devices like iPhones and iPads and is a sure bet to edit your videos on the go. The Splice app is generally useful for social media influencers who want to market their products and hold online tutorials, among other functions.t
Splice’s video speed control features
Among the features of Splice, is the ability to speed up or slow down your video. A splice speed ramp is the rate of acceleration or deceleration of a clip. This technique smoothly adjusts the video speed to the desired pace.
Some other features of the Splice
- You can also add music to your videos. Music attracts attention, thereby keeping them glued during the video playback.
- The trim and crop features let you cut out unnecessary footage from your video for a polished finish. Likewise, you can use the app to remove some segments that you don’t want to feature in your video.
- It brings you exclusive effects that widely enhance your videos. Adding certain elements, like overlay text, and changing speed, among other aspects, is a great way to enrich your video.
- Utilizing the social media platform is Splice’s most influential feature. It facilitates the online sharing of videos once you have edited and completed the creation process. You can easily upload your video to Instagram, Facebook, and YouTube, among other platforms.
Alternative: Try out Filmora V11’s Speed Ramping
An alternative to Splice video in Filmora V11’s Speed Ramping. Filmora brings you ramping features to make breathtaking videos.
- Filmora brings you six preset speed effects to create professional speed changes such as flash in, bullet time, montage, etc.
- This tool helps you to maintain the original audio pitch when changing the video’s speed.
- Filmora also supports customized speed ramping templates for a unique speed ramping effect.
For Win 7 or later (64-bit)
For macOS 10.12 or later
How to use Filmora to speed up video
Filmora is a sophisticated tool that quickly solves any editing functions for you. It has an intuitive interface, accommodating both professionals and beginners. It is a quick solution to speed up your video for a fast-track action. Follow these steps to speed up the video with Filmora to produce high-end quality videos.
Step 1. Launch Filmora and open the video
First, open the Filmora app on your device, then search for the target video to speed up. Alternatively, you can drag and drop the videos onto the interface.
Step 2: The speed
Working Vary with the video from your timeline Right-click on the video, and a menu will pop up immediately. Then tap on “Speed and Duration” and select the number of times you want to speed up your speed. These range from X2, X3, X4, X5, or any other speed rate of your choice.
Step 3: Modify the Duration
Specify the duration of your video; it will take Remember that the duration should be less than the original one if you aim to speed up the video. Then click on the “OK” button to preview the video.
Step 4. Save and export your video
Finally, it’s time to save and share your video. Click on the “File” tab and go to the “Save Project” option. Give your project a name then, tap on the “Save” option. Then use the “Export” feature to export your video to other media sites.
Using Splice to Speed Up a Video
Before you speed up a video on Splice, it is better to know how to use the Splice app and make impressive videos.
1) Starting a video project
Ensure the Splice app is installed on your device. Then choose what needs to be the first part of your video. This could be a title screen, or you could add a video first. To create a title screen, click on the “Title” button. Then type in the text to use as a title. Likewise, you can select how long the title screen should show in your video by adjusting the “duration” slider. Next, continue to add content after your title or the video you used.
2) Add videos
Check for the video to add to your project and click on the “+” button. You should notice the “Albums” screen show up and your videos will be visible in the “Camera roll” section. Choose the video you want to edit and click on the “Done” tab. Next, your videos will upload into the project, and be brought back to the main screen where you can view the project.
3) Edit your videos
The Splice app is rich in various editing tools to change your video into any enticing piece of work.
To trim and cut video: To trim your video, just tap on your video and drag the edge clip to the portion you want to trim.
Meanwhile, to cut your video, tap on the video and locate where you want to cut the clip. Check on the “yellow” line as it is the guideline for your clip. Then tap on your clip once more and hit the “Split” tab to separate the video into two.
To add video overlays, first, insert your video into the timeline. Then press and hold on to the media that you want to add as an overlay. Next, drag the clip to the “Drop here to turn into an overlay” tab to add it.
To add text: Adding text to your video allows you to expand on it more easily. To do this, tap on the “Title” icon at the bottom of the timeline. Then double-tap on the media screen and type in the text you want to add.
To add music: For music, tap on the “Music” icon found at the bottom of the timeline. You can extract music from the “Splice” gallery or import your music from your device.
Add filters and other effects: You can also add filters to your clip. Just click on the “Filter” icon found at the bottom of the timeline. Then choose the filter of choice you wish to add and, finally, adjust the filter level.
4) Save and export your video
After a successful edit, it is time to save your project onto your device. Splice lets you choose an output format to save your file into. Once saved on your computer, you can now share it on social media sites.
• Remember, you can do more with Splice, such as speeding up your video. This section walks you through simple ways to speed up video for a professional look.
Here are the steps to speed up your video on Splice
Step 1: Choose a video
You first need to select the video that you need to speed up. Go to the timeline and select the video to add to the timeline. You can select the video from the Splice gallery by importing it or dragging and dropping the video onto the timeline.
Step 2: Select your speed
It is the speed rate that determines how fast or slow is your video. For this, you should select a fast speed. To do so, first, choose the “Speed” tab from the bottom toolbar. Then tap the “Speed Effects” option and specify your speed as X2, X4, etc.
Step 3: Begin the effect
Identify where you want to start the speeding effect and position the yellow line at that point.
Step 4. Add a speed point
Just tap the white “+” button to add a speed point to your video.
Step 5: Determine an endpoint
Now position the yellow line once more at the point where you intend to end the effect. Next, click on the white “+” button again and you will have specified the endpoint.
Step 6. Set the desired speed
Finally, choose the segment whose speed you wish to adjust. Use the “Slider” at the bottom to set the speed you want for your video. Then save and share your video.
Conclusion
● Video editing entails many aspects. Speed control is one of the major specifications of a successful video. Speeding up your video will fast forward to the selected portion and, thereby, eliminate repetitions or non-important sections of your video. This article covers how to splice and speed up video and also perform other video edits.
How To Split Screen On Tiktok
TikTok is probably the most popular video-sharing app in the world right now. Many TikTokers have become famous for making videos that have a significant impact and encourage creativity and new ideas. One of the most popular TikTok trends is the split-screen effect. You’ve probably seen a lot of TikTok split-screen videos with cool effects that made you wonder how the user split their screen. Becoming skilled in using TikTok effects is not as difficult as it might look. It only requires a significant amount of practice. Read on as we show you how to make a TikTok split-screen video.
Using CapCut To Split Screen
CapCut is the official free TikTok Video Maker and Video Editor with Music for TikTok that is multifunctional. Its interface is quite similar and easy to use.
CapCut includes free advanced capabilities such as keyframe animation, stabilization, and Picture-in-Picture (PIP). These are in addition to its fundamental functions, such as video editing, adding stickers, text, and music.
Steps to Split Screen Video with CapCut On Android and IOS Devices
- To use the app, you need to install it first. iPhone and Android users can download CapCut. Navigate to the appropriate app store of your choice and download CapCut.
- After installation, launch the app.
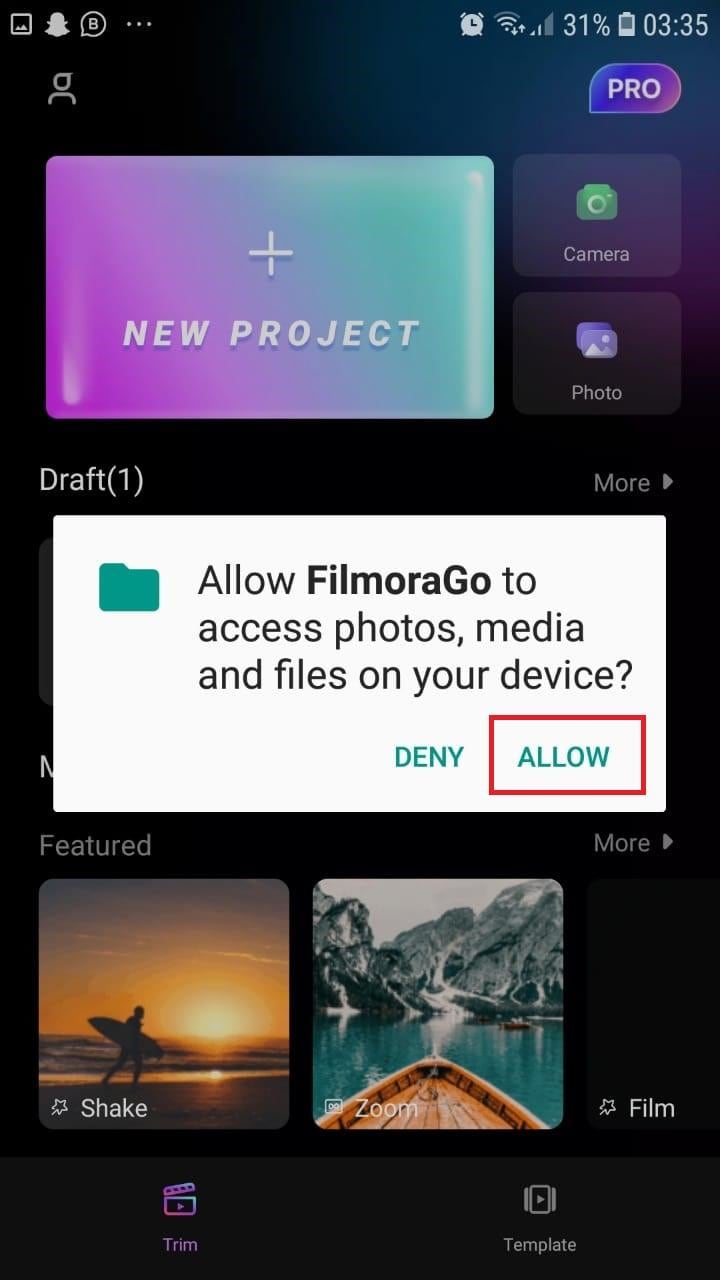
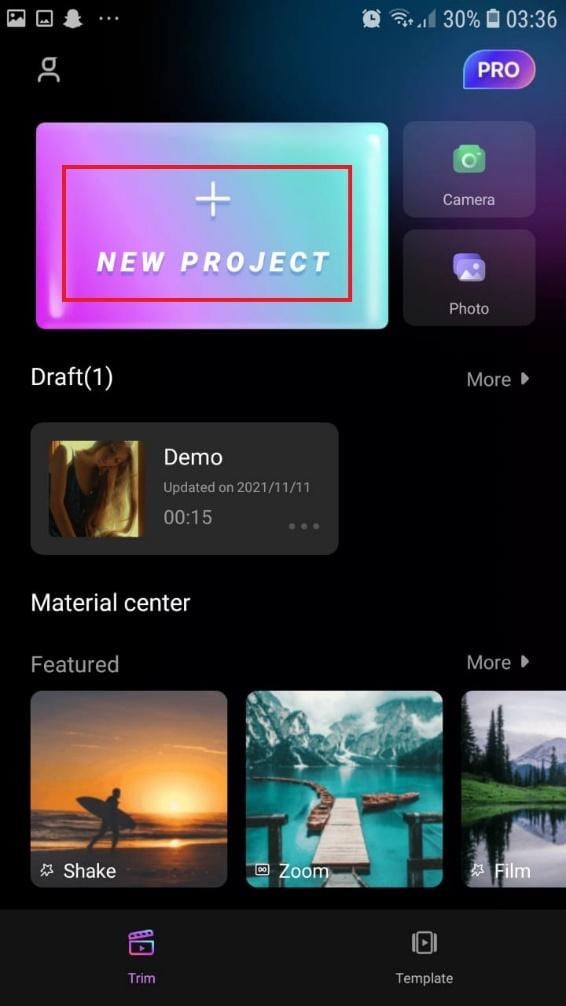
- Then go ahead and grant CapCut permission to view your camera roll. Incorporating video clips into your project has never been easier. Go to the app’s main screen and select “New Project“ from the drop-down menu.
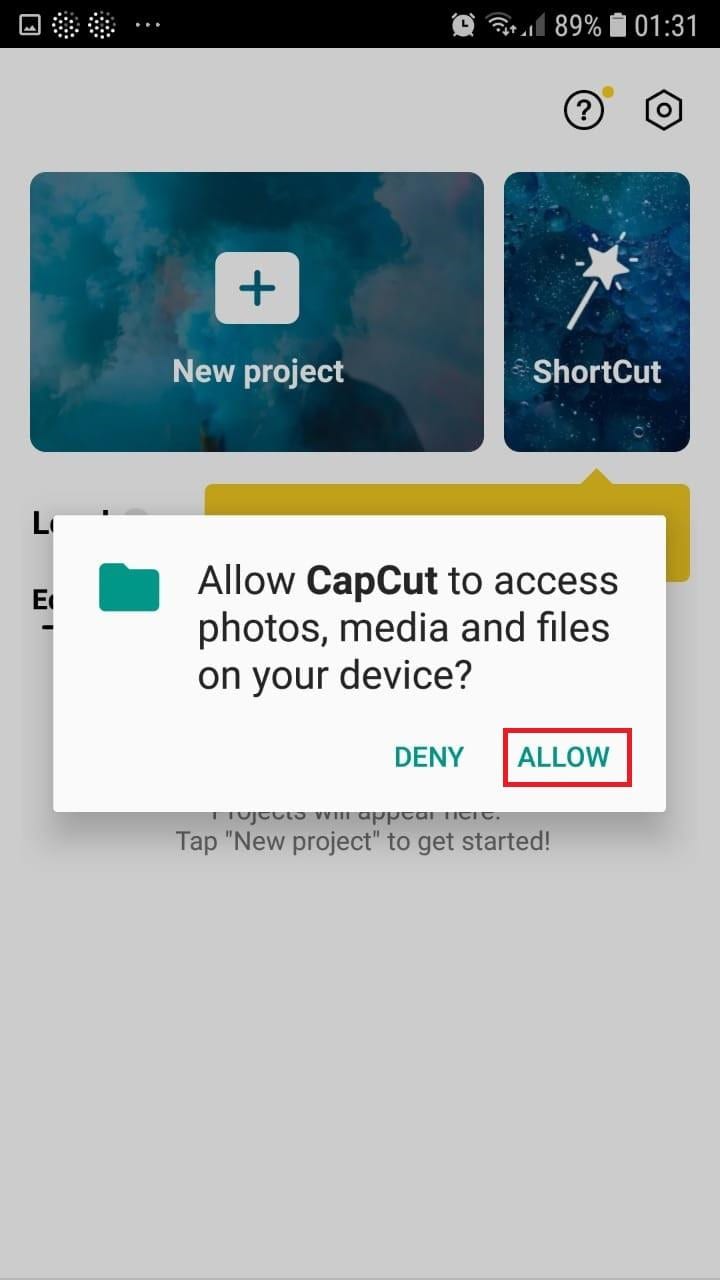
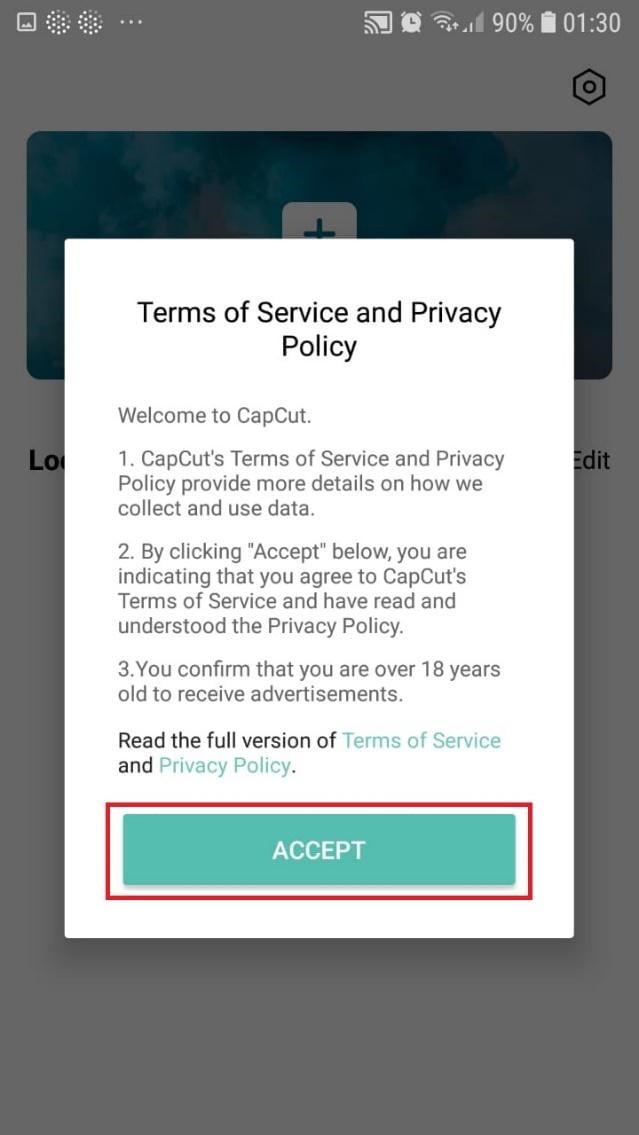
- To confirm your selection, click the green Accept This confirms that CapCut requires access to your photographs to function correctly. Tap on the button on the following pop-up window to gain access to all the photos. This is a one-time process that must be carried out the first time you launch the application.
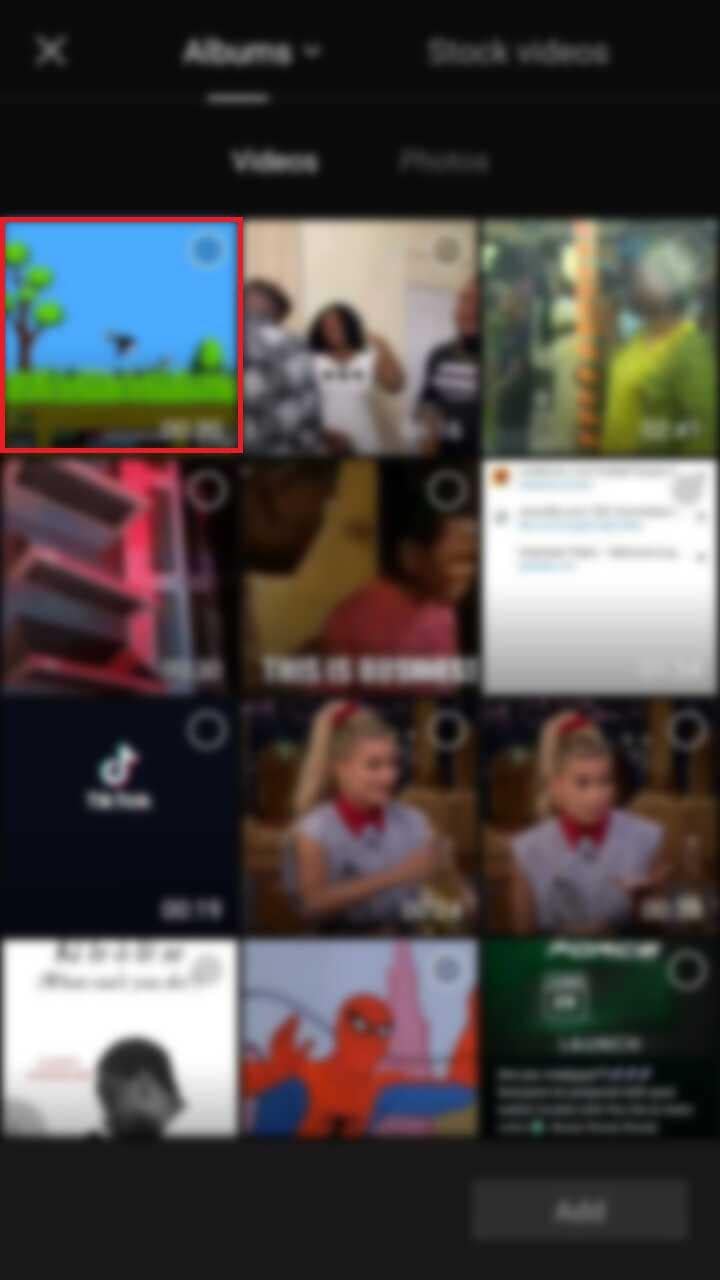
- Begin a New Project. After opening the app, press the “New Project“ icon to bring up a new screen showing your device’s videos.

- Choose a video clip. Locate the desired video clip for your project by scrolling through the pages displaying your camera roll. Tap the video’s thumbnail and then tap the “Add“ icon in the screen’s lower part.
- Get familiar with your workspace. Upon uploading your first clip, CapCut leads you to the primary workspace. This is where you will spend most of your time within the app. The preview panel, the timeline, and the toolbar are in order from top to bottom.
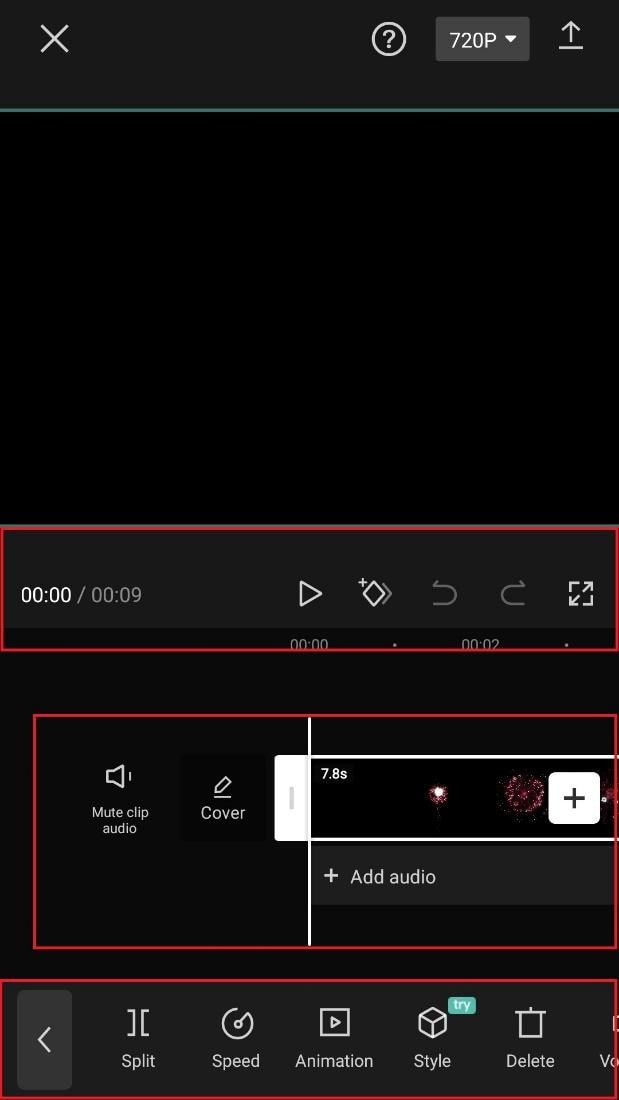
- View the toolbar and timeline. They represent your screen’s bottom half. The timeline, located below the preview panel, is where you’ll make all your adjustments. You can access all your video editing tools, including split, text, audio, effects, stickers, and more, on the toolbar at the bottom of your screen.
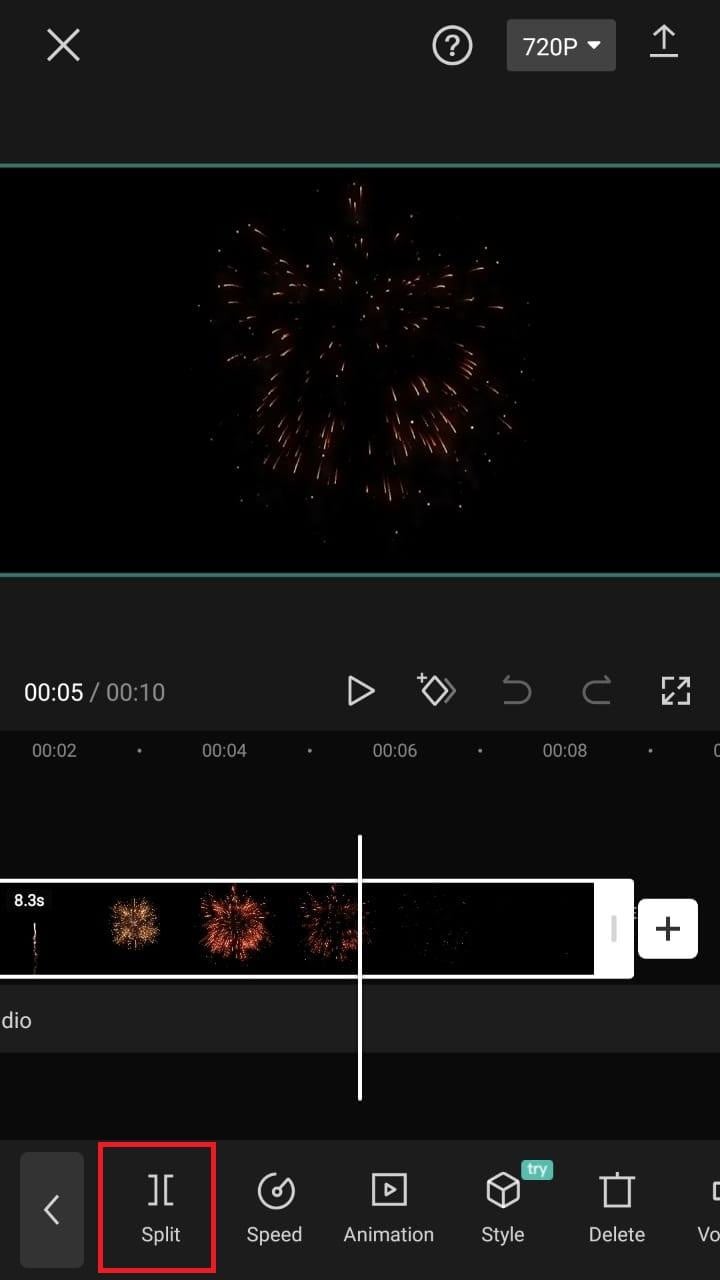
- Split video clips. To split a video clip in half, move the play head to the desired location on the timeline. Tap on your clip, then press the “Split“ toolbar icon. Your result now shows two different clips, not just one.
A Better Split-Screen Effect Video Editor
Filmora is one of the best free HD video makers and video editors with several functionalities, including text, backgrounds, filters, special effects, emoji, audio, and special effects.
Filmora is a feature-packed video editor which has a variety of tools to work with. With this video editor, producing memes, videos with images, pictures, music, stickers, and sound effects and editing videos for YouTube, Twitter, WhatsApp, Facebook, TikTok, and Instagram is simple and entertaining.
Free Download For Win 7 or later(64-bit)
Free Download For macOS 10.14 or later
Steps to Split Screen Video with Filmora
- Download Filmora from the App store
- After installation, launch it.
- Click on “Continue” to continue to use the app.

- Click on Allow to grant Filmora access to your photos and videos.
- You can now tap on “New Project” with the + Symbol.
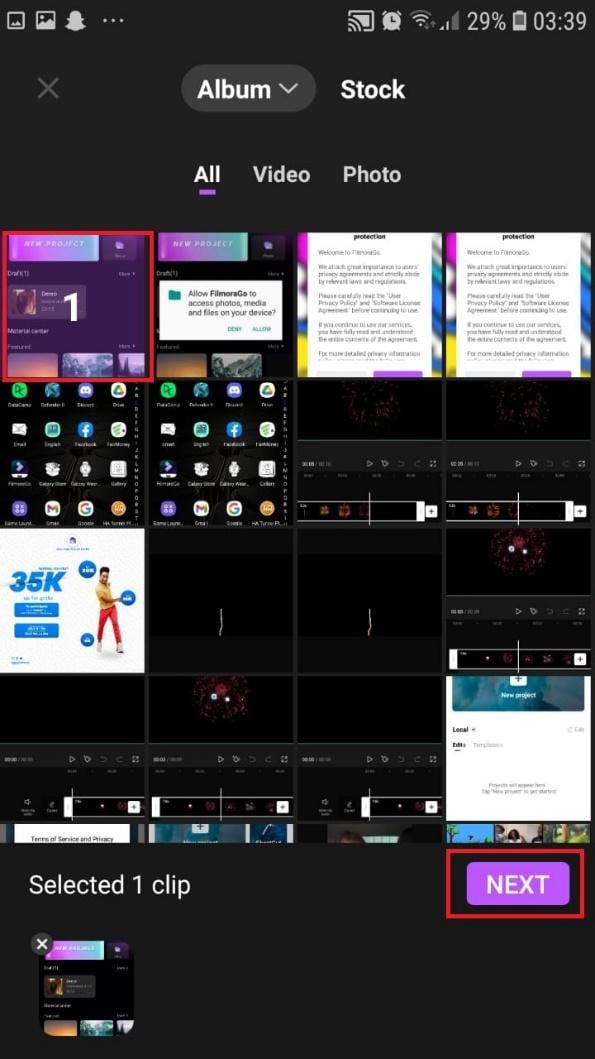
- Select your desired video and tap on “Next” at the bottom right of your screen
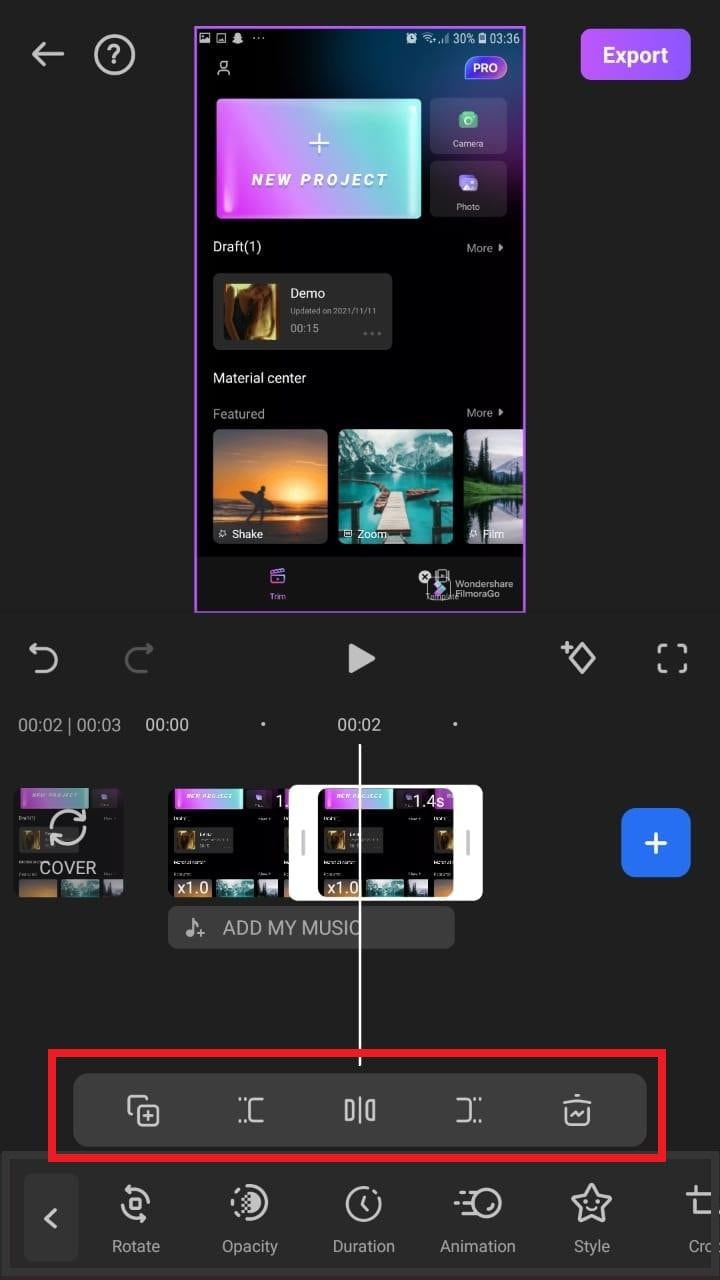
- You can select various options from the bottom of your screen to edit the selected video the way you like.

- Click on trim, and then you will see the different split-screen and collage feature options. Pick any that appeals to you.
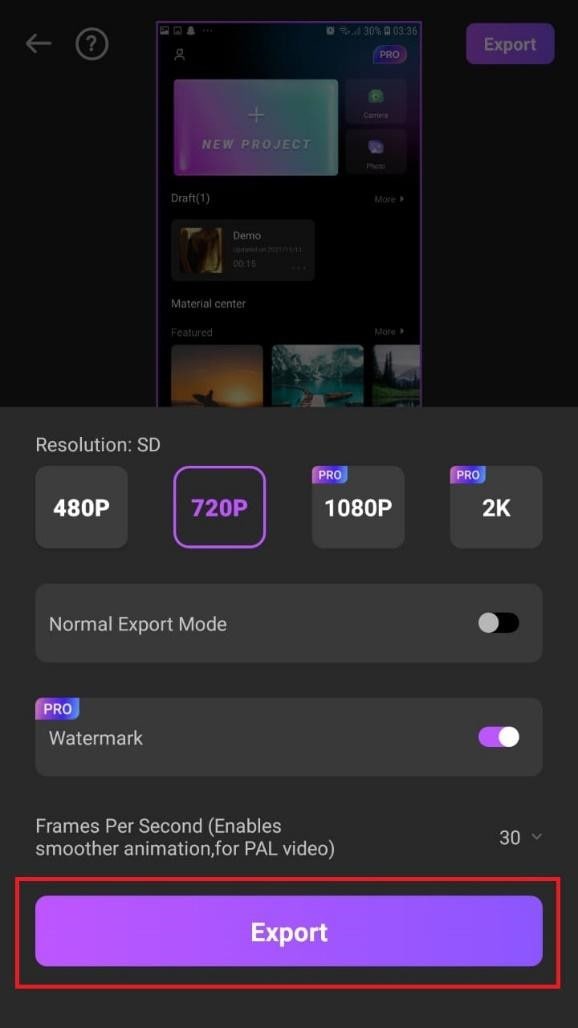
- When you are done with the editing, tap on “Export” at the top right of your screen.

- Go ahead and tap on “Export” on the next screen. Your video will be successfully exported and saved to your camera roll.
Using Filmora is very efficient in splitting your videos and making collage features for TikTok. It is a very simplified app available on both the Google Play Store and Apple Appstore.
Conclusion
TikTok is a platform that users use worldwide to create and share content. It could be pictures, videos, reels, or any other media type. Some people create videos for their audience on TikTok to educate them, while others do it to entertain them.
In any case, the goal is to build a more significant following on TikTok and garner greater attention from its users. You could even make money off the app.
One of the methods to impress your fans and explore multiple possibilities to build unique reels is to use the TikTok split-screen and collage feature effect available on TikTok. Although there are a few different ways to create a Split Screen on TikTok, the steps highlighted in this article are the most straightforward.
Free Download For macOS 10.14 or later
Steps to Split Screen Video with Filmora
- Download Filmora from the App store
- After installation, launch it.
- Click on “Continue” to continue to use the app.
- Click on Allow to grant Filmora access to your photos and videos.
- You can now tap on “New Project” with the + Symbol.
- Select your desired video and tap on “Next” at the bottom right of your screen
- You can select various options from the bottom of your screen to edit the selected video the way you like.
- Click on trim, and then you will see the different split-screen and collage feature options. Pick any that appeals to you.
- When you are done with the editing, tap on “Export” at the top right of your screen.
- Go ahead and tap on “Export” on the next screen. Your video will be successfully exported and saved to your camera roll.
Using Filmora is very efficient in splitting your videos and making collage features for TikTok. It is a very simplified app available on both the Google Play Store and Apple Appstore.
Conclusion
TikTok is a platform that users use worldwide to create and share content. It could be pictures, videos, reels, or any other media type. Some people create videos for their audience on TikTok to educate them, while others do it to entertain them.
In any case, the goal is to build a more significant following on TikTok and garner greater attention from its users. You could even make money off the app.
One of the methods to impress your fans and explore multiple possibilities to build unique reels is to use the TikTok split-screen and collage feature effect available on TikTok. Although there are a few different ways to create a Split Screen on TikTok, the steps highlighted in this article are the most straightforward.
Doable Ways to Create Transparent Background in Procreate
Doable Ways to Make Transparent Background in Procreate
An easy yet powerful editor
Numerous effects to choose from
Detailed tutorials provided by the official channel
Figuring out the crucial steps to make the canvas excellent is one of the loveliest things users are performing for exporting the closing Procreate-projects. Once after getting expert with things trick you can be able to position the canvas surprisingly on great back for a memorable moment. You can make the most of it for your procreate mission that you have created.
Out of many essentials tools you have ever used for experiencing the benefits of equipment & skills, the Procreate is a kind of solution that comes with one of the most trustworthy as well as brilliant capability to erase the undesired background from the pictures. It is more than a general tool and there are some specified approaches to do so, but in today possible scenario, you can easily focus around choice of right selections to erase a background at ease. People can explore the chances of creating various attractive methods to work in the PNG structure after removing the desired background.
In this article
01 [How to Delete a White Background with Procreate for the IPad?](#Part 1)
02 [How to Make Transparent Background with Procreate for iPhone?](#Part 2)
03 [How to Create Popping Thumbnails or Profile Photos](#Part 3)
Part 1 How to Delete a White Background with Procreate for the IPad?

In case you are facing discoloration problem too then it is always a better idea to cast image with desired background and remove the objects.
Now turning your background with a lovely image or your own is just a matter of few clicks. With great transparent background procreate, you will be heading towards the satisfaction of obtaining transparent background. With few crucial steps you can stay from the other competitors or it will make your posts viral. With stepwise guidelines on removing the background as well as replacing it with a transparent one in Procreate is what you need the most today.
When it comes to deleting the white-background with a Procreate, then with great selection of tools you can easily create amazing performance for your post. If you are still in a dilemma to make use of the white coloured Background. After tapping on the top-left corner of the screen, you can open-up brilliant level of opportunities to make the most out of it. Are you ready to begin? Next you will learn about how to turn the background into a desired canvas for all your Instagram stories.
The following steps will provide you a quick walkthrough of entire process, stepwise:-
Step 1: First you are required to open the picture with Procreate. Get your desired image for the edit or open your picture & turn-off the overall visibility of background layer by layers-icon, tap it, it is presented on the top-right corner. Here, you will see layer labelled as the background, you need to uncheck the layer’s box for turning-off overall visibility at the bottom of Layers menu.
It is an important step to perform as if you want to deleting any white background from the image otherwise background will be treated as transparent with white-background showing through, thus you will experience no changes to the document. You are not required to remove background from image procreate if your image is not having a background layer.
Step 2: Create the selection at around white area of an image & delete background
For you to perform the step of procreate remove white background, you are required to make selection around white area. For this, open-up the selection-menu and it is placed in the form round icon named ‘S’ at the top-left-corner of the screen. At this menu, choose auto & Add. To create such level of perfection in selection, just hold & tap over any area of white-background at this screen. You can also increase threshold of your selection by moving the fingers/stylus at the right. For the opposite process, you can move the same to the left.You need to adjust the desired threshold until selection-area on your screen lines-up in accordance with an edges of the subject. You are now heading towards the process of make background transparent procreatefor your desired image quickly.
With your current selection still in active state, just tap on wrench-icon it the top-left area of your screen, then navigate to Add-menu, and here tap on the Cut option. Congrats, you have effectively deleted the background from an image.
**Step 3:**Just release the selection in the form of tapping on Selection-menu icon and repeat the process again for negative space-areas & at last clean-up stray-pixels with through an Eraser. You can repeat the process further from the step-2 in case any stray pixels still remains there as it is a normal situation to face while removing the pixels background with ‘remove background on procreate’ option.You can also take the Eraser & then manually erase those stray-pixels in there is any.
Step 4: Export your final work as PNG-file to preserve the transparency
After finishing the task of deleting background from the picture you can easily export your work to a desirable file format. The image you want to export can be in the form of PNG to retain the transparency. Other useful formats you can choose is JPEG but this doesn’tsupport transparency. So, be wise & be careful while choose your file formats.You are now having procreate export transparent backgroundand can also place the same to any sort of backdrop like an app, website, or any other workspace.
Part 2 How to Make Transparent Background with Procreate for iPhone?

Let’s dive-in quickly into the process of making the background transparent with procreate, if you are an iPhone User.
● GO Into an option of Canvas
It is up-to you whether you want to create a new canvas or want to work-upon already saved canvas. In your device through procreate app, you can do the same without any worries.
● Tap onto the option of Layers Panel
This option is located at the top-right corner of your toolbar. This option looks similar to the two-squares on the top of one another.
● Replace dull looking background with transparent background
You can quickly go down to the layers-panel placed at the bottom to choose the background color.Transparent background in procreateis always a good option to consider.
● Put uncheck before the box
At the right of toolbar you can be able to see words ‘Background color’ and if it is checked then you need to uncheck it. Now your goal to make the background completely transparent with procreate make background transparent tool, will be achieved. Now your background is completely transparent and ready to use.
Part 3 How to Create Popping Thumbnails or Profile Photos

There are various tools available in the market to make a popping thumbnail for your YouTube or Instagram pages. Thumbnail maker like Filmora can be an interesting option to choose as it is quick and effective. You can also customized as well as download the thumbnails at no cost with the same. However, they comes with certain limitations like overall size of the image to be downloaded. For better versions you can use premium tools. With better creativity and great imagination you can make the thumbnail as crisp as possible.
● Upload your desired photo to Filmora’s thumbnail maker templates.
You can easily create your video thumbnail, but you need some inspiration and for that you can make use of amazing tool like Filmora. With access to more than 50 free templates you can achieve your goal of making popping thumbnails.
● Adding text, clipart, or perfect quality of background can give it a boost
After picking your template, one can make use of thumbnail to stand out different in terms of adding text, clipart or background. For adding custom background to your thumbnail you can make use of procreate that can remove the background with procreateremove white backgroundfeatures and give you better featured image with nice background. Also to clarify the objectives of your thumbnail you can add titles, and also consider placing the same on the top of any dark color background if your thumbnail is light in color. For making the background darker just choose remove white background procreateas discussed above.
● Just Download your finished product to your device
After polishing the thumbnails with creative stuff, you can download the same to your device or export it to your smartphone.
Voila, you just have create your own custom popping thumbnail. With remove background on procreate, you can never feel disappointed.
****Wondershare Filmora Video Editor App to Remove Unwanted Background Easily**
For Win 7 or later (64-bit)
For macOS 10.12 or later
In case you are searching for any professional tool to remove het background and replace the one with any of your favorite picture then there is a tool for you to consider. With greater different functionalities, you can make any Instagram post or story interesting through the help of Fillmora App. This has set of brilliant solutions to provide with most brilliant picture and video editing features. It is interesting, fun-loving as well as attractive enough to turn any moments extraordinary.
Handy features to enjoy:-
● You can make use of this tool to create custom thumbnails for your YouTube or Instagram page.
● Great varieties of templates for making popping thumbnails
● Greater capability to beautifully construct picture editing animations
● Varieties of Effects for every age group
● Attractive filters, GIFs packs and images to turn any dull looking background into an amazing moment.
● Delete white background quickly
● Right selection of tools to make the editing effective
● Flawless features to crop, cut-up, cut, trim & mix operations.
● Single click operation to turn the images into a beauty mode
● Options to save your creations into your device or virtual space
● Share your creations to your community, to your friends via Facebook, Instagram, YouTube, and Twitter quickly.
It is a greater idea to try this app for making use of its image editing features for deleting the white background in an easy manner.
● Ending Thoughts →
● With great varieties of features it is now very easy for you to create some automated selections in just single tap.
● Deleting the white background through a pro-tool like Procreate is smart, quick & seamless process.
● You are not going to get confused, even if you are using it for the very first time.
● It is the trend that every Instagram user is following for posting better images with nice background options.
Figuring out the crucial steps to make the canvas excellent is one of the loveliest things users are performing for exporting the closing Procreate-projects. Once after getting expert with things trick you can be able to position the canvas surprisingly on great back for a memorable moment. You can make the most of it for your procreate mission that you have created.
Out of many essentials tools you have ever used for experiencing the benefits of equipment & skills, the Procreate is a kind of solution that comes with one of the most trustworthy as well as brilliant capability to erase the undesired background from the pictures. It is more than a general tool and there are some specified approaches to do so, but in today possible scenario, you can easily focus around choice of right selections to erase a background at ease. People can explore the chances of creating various attractive methods to work in the PNG structure after removing the desired background.
In this article
01 [How to Delete a White Background with Procreate for the IPad?](#Part 1)
02 [How to Make Transparent Background with Procreate for iPhone?](#Part 2)
03 [How to Create Popping Thumbnails or Profile Photos](#Part 3)
Part 1 How to Delete a White Background with Procreate for the IPad?
In case you are facing discoloration problem too then it is always a better idea to cast image with desired background and remove the objects.
Now turning your background with a lovely image or your own is just a matter of few clicks. With great transparent background procreate, you will be heading towards the satisfaction of obtaining transparent background. With few crucial steps you can stay from the other competitors or it will make your posts viral. With stepwise guidelines on removing the background as well as replacing it with a transparent one in Procreate is what you need the most today.
When it comes to deleting the white-background with a Procreate, then with great selection of tools you can easily create amazing performance for your post. If you are still in a dilemma to make use of the white coloured Background. After tapping on the top-left corner of the screen, you can open-up brilliant level of opportunities to make the most out of it. Are you ready to begin? Next you will learn about how to turn the background into a desired canvas for all your Instagram stories.
The following steps will provide you a quick walkthrough of entire process, stepwise:-
Step 1: First you are required to open the picture with Procreate. Get your desired image for the edit or open your picture & turn-off the overall visibility of background layer by layers-icon, tap it, it is presented on the top-right corner. Here, you will see layer labelled as the background, you need to uncheck the layer’s box for turning-off overall visibility at the bottom of Layers menu.
It is an important step to perform as if you want to deleting any white background from the image otherwise background will be treated as transparent with white-background showing through, thus you will experience no changes to the document. You are not required to remove background from image procreate if your image is not having a background layer.
Step 2: Create the selection at around white area of an image & delete background
For you to perform the step of procreate remove white background, you are required to make selection around white area. For this, open-up the selection-menu and it is placed in the form round icon named ‘S’ at the top-left-corner of the screen. At this menu, choose auto & Add. To create such level of perfection in selection, just hold & tap over any area of white-background at this screen. You can also increase threshold of your selection by moving the fingers/stylus at the right. For the opposite process, you can move the same to the left.You need to adjust the desired threshold until selection-area on your screen lines-up in accordance with an edges of the subject. You are now heading towards the process of make background transparent procreatefor your desired image quickly.
With your current selection still in active state, just tap on wrench-icon it the top-left area of your screen, then navigate to Add-menu, and here tap on the Cut option. Congrats, you have effectively deleted the background from an image.
**Step 3:**Just release the selection in the form of tapping on Selection-menu icon and repeat the process again for negative space-areas & at last clean-up stray-pixels with through an Eraser. You can repeat the process further from the step-2 in case any stray pixels still remains there as it is a normal situation to face while removing the pixels background with ‘remove background on procreate’ option.You can also take the Eraser & then manually erase those stray-pixels in there is any.
Step 4: Export your final work as PNG-file to preserve the transparency
After finishing the task of deleting background from the picture you can easily export your work to a desirable file format. The image you want to export can be in the form of PNG to retain the transparency. Other useful formats you can choose is JPEG but this doesn’tsupport transparency. So, be wise & be careful while choose your file formats.You are now having procreate export transparent backgroundand can also place the same to any sort of backdrop like an app, website, or any other workspace.
Part 2 How to Make Transparent Background with Procreate for iPhone?
Let’s dive-in quickly into the process of making the background transparent with procreate, if you are an iPhone User.
● GO Into an option of Canvas
It is up-to you whether you want to create a new canvas or want to work-upon already saved canvas. In your device through procreate app, you can do the same without any worries.
● Tap onto the option of Layers Panel
This option is located at the top-right corner of your toolbar. This option looks similar to the two-squares on the top of one another.
● Replace dull looking background with transparent background
You can quickly go down to the layers-panel placed at the bottom to choose the background color.Transparent background in procreateis always a good option to consider.
● Put uncheck before the box
At the right of toolbar you can be able to see words ‘Background color’ and if it is checked then you need to uncheck it. Now your goal to make the background completely transparent with procreate make background transparent tool, will be achieved. Now your background is completely transparent and ready to use.
Part 3 How to Create Popping Thumbnails or Profile Photos
There are various tools available in the market to make a popping thumbnail for your YouTube or Instagram pages. Thumbnail maker like Filmora can be an interesting option to choose as it is quick and effective. You can also customized as well as download the thumbnails at no cost with the same. However, they comes with certain limitations like overall size of the image to be downloaded. For better versions you can use premium tools. With better creativity and great imagination you can make the thumbnail as crisp as possible.
● Upload your desired photo to Filmora’s thumbnail maker templates.
You can easily create your video thumbnail, but you need some inspiration and for that you can make use of amazing tool like Filmora. With access to more than 50 free templates you can achieve your goal of making popping thumbnails.
● Adding text, clipart, or perfect quality of background can give it a boost
After picking your template, one can make use of thumbnail to stand out different in terms of adding text, clipart or background. For adding custom background to your thumbnail you can make use of procreate that can remove the background with procreateremove white backgroundfeatures and give you better featured image with nice background. Also to clarify the objectives of your thumbnail you can add titles, and also consider placing the same on the top of any dark color background if your thumbnail is light in color. For making the background darker just choose remove white background procreateas discussed above.
● Just Download your finished product to your device
After polishing the thumbnails with creative stuff, you can download the same to your device or export it to your smartphone.
Voila, you just have create your own custom popping thumbnail. With remove background on procreate, you can never feel disappointed.
****Wondershare Filmora Video Editor App to Remove Unwanted Background Easily**
For Win 7 or later (64-bit)
For macOS 10.12 or later
In case you are searching for any professional tool to remove het background and replace the one with any of your favorite picture then there is a tool for you to consider. With greater different functionalities, you can make any Instagram post or story interesting through the help of Fillmora App. This has set of brilliant solutions to provide with most brilliant picture and video editing features. It is interesting, fun-loving as well as attractive enough to turn any moments extraordinary.
Handy features to enjoy:-
● You can make use of this tool to create custom thumbnails for your YouTube or Instagram page.
● Great varieties of templates for making popping thumbnails
● Greater capability to beautifully construct picture editing animations
● Varieties of Effects for every age group
● Attractive filters, GIFs packs and images to turn any dull looking background into an amazing moment.
● Delete white background quickly
● Right selection of tools to make the editing effective
● Flawless features to crop, cut-up, cut, trim & mix operations.
● Single click operation to turn the images into a beauty mode
● Options to save your creations into your device or virtual space
● Share your creations to your community, to your friends via Facebook, Instagram, YouTube, and Twitter quickly.
It is a greater idea to try this app for making use of its image editing features for deleting the white background in an easy manner.
● Ending Thoughts →
● With great varieties of features it is now very easy for you to create some automated selections in just single tap.
● Deleting the white background through a pro-tool like Procreate is smart, quick & seamless process.
● You are not going to get confused, even if you are using it for the very first time.
● It is the trend that every Instagram user is following for posting better images with nice background options.
The Right Ways to Slow Down a Video on iPhone
Slow-motion videos are widely used for various purposes in videography or filmmaking. They not only underline the significance of a shot but also elevate creativity. The frame rate is remarkably higher in slow-motion videos than in normal videos. There are two methods included in the process of how to slow down a video on an iPhone.
The first method involves increasing the frame rate; meanwhile, the other is playback speed adjustment. This article will enfold apps to teach how to slow a video down on iPhone. All these applications will be available in the iPhone’s official App Store. However, check the compatibility of these apps with the iOS version you’re using. Ultimately, we’ll share a desktop alternative on how to slow down a video iPhone.
Slow Motion Video Maker Slow your video’s speed with better control of your keyframes to create unique cinematic effects!
Make A Slow Motion Video Make A Slow Motion Video More Features

Part 1: Pre-Recorded A Video? Adjust Slow Motion Parameters Right Away
One of the major reasons Gen Z and Gen Alpha opt for iPhones is their high-quality camera. It is ideal for capturing and editing videos in high resolution is ideal. In 2013, iPhones were integrated with the Slow-mo feature for creative purposes. Where first users needed third-party applications, they could use the built-in feature. Here is how do you slow down a video on iPhone officially:
Step 1
Locate the “Photos” application on your iPhone and launch it by simply clicking. Upon accessing the app, go to the bottom and click on “Albums.” Afterward, click the “Slo-mo” option from the expanding menu. Formerly, select a video from your device media library import.

Step 2
Once the video has been selected, navigate to the top right corner and select “Edit.”

Step 3
When the editing panel appears, navigate towards the bottom of the timeline bar. Drag the slider’s position to adjust the speed to create a slow motion. As the slow-motion effect has been created, click the “Done” button. Commencing this action will finalize your slow-motion video.

Part 2: Some Top-Notch Solutions to Slow Down Any Video on iPhone
The iPhone does offer a built-in feature to help you curate a perfect slow-mo. Nonetheless, a third-party application can offer additional and upgraded features. They offer specialized effects and filters, multiplatform support, and more. This section discusses 4 applications and how to make video slow motion iPhone using them. Find the brief introduction, capabilities, and guides of these apps below:
- SpeedPro Slow Speed Video Edit
- Slow Fast Slow – Control the Speed of Your Videos
- Slo Mo – Speed Up Video Editor
- Video Speed Editor Slow & Fast
1. SpeedPro Slow Speed Video Edit
This is an exclusive application to answer your question about how to put a video in slow motion on an iPhone. This application offers a -2x to -6x playback speed option for a slow-mo. Its intuitive feature enables speed alteration from a specific video section. This option is ideal for creatively editing your Instagram reels. Along with slowing down the speed, you can also enhance it for fast motion generation.

Key Features
- The application offers a timeline editing interface that enhances precision and accuracy.
- It possesses the ability to incorporate music in your videos using its Music feature.
- The application collaborates with social platforms like Instagram and Facebook for
Steps to Add Slow Motion in Video Using SpeedPro Slow Speed Video Edit
When you embark on a new experience, using something for the first time can be tricky. The unfamiliarity makes it harder, and one doubts its abilities. Hence, consider us your partner in guiding you on how to edit slow motion on your iPhone. We have curated a step-by-step guide to help you in creating a slow-mo:
Step 1: After downloading and accessing the application’s main menu, click the “Speed Pro” option. Then, select a video clip from your device that you desire to apply this effect to.

Step 2: Once the video clip has been selected, click the “Done” button to import.

Step 3: Afterward, you’ll be redirected to its editing interface for speed change. Navigate toward the speed slider at the bottom of the video display. Drag the slider towards the left to select a suitable playback speed option. You can also apply the slow-mo to a specific area by dragging the timeline slider.

2. Slow Fast Slow - Control the Speed of Your Videos
Use this application to record a slow-motion video or add the effect in post-production editing. This application offers a high frame rate of 240 fps for a high-grade slow-mo effect. This means you can now slow a video up to 1/16th of its original speed. It wins at creating slow motion with the iPhone’s built-in speed manipulation feature.

Key Features
- Provides audio pitch maintenance feature during speed alteration.
- Gives the option to adjust the screen ratio before editing, like square or more.
- The application is compatible with all your iOS 10.0 devices and higher versions.
Steps to Add Slow Motion in Video Using Slow Fast Slow
The encounter with an advanced tool or application is often stressful as you are unfamiliar with it. You do not want to mess up the video, so you must master an app. Following is how to slow down a video on an iPhone using the Slow Fast Slow app:
Step 1: After launching the application, give it access to your files for editing. Then, click on the “Other Videos” option to select a video from a device for slow-mo.

Step 2: Once the video has been imported, you will reach the editing interface. You’ll notice a slider with different points. These points indicate the time frames of your video. The slider is positioned downward to add a slow-mo effect at specific durations.

Step 3: Once you are done with the editing, click the play button to preview. Next, navigate towards the right-side bottom of the preview screen and hit “Export.” Select any particular resolution to save the slowed-down video on your device.

3. Slo Mo – Speed Up Video Editor
Are you looking for a versatile application about how to make a normal video slow-motion iPhone 13? Fashioned to modify a video’s speed, this app can help you. It allows users to adjust the video speed up to 12x for slow and fast motion. In addition, you can alter the video frame rate up to 240 fps at precise frames.

Key Feature
- With an additional freeze frame feature, infuse an innovative touch to videos.
- Experience a more productive workflow with its quick processing feature.
- Keeping up an accessible to all approach, the user interface is straightforward and minimal.
Steps to Add Slow Motion in Video Using Slo Mo – Speed Up Video Editor
Those initial stages of operating a new app and getting your hands on its UI are difficult. However, this article prioritizes your ease more than anything. Find our guide on how to make a video in slow motion on iPhone here:
Step 1: Upon launching the application, it will ask you for storage access. After that, you’ll have to import a video to add slow motion. Just select any normal video on your device and click on the “Next” option.

Step 2: Navigate toward the bar at the bottom of the timeline panel and select “Adjust.”

Step 3: This will feature the speed control options on your screen; go to “Advance.” Further, change the speed change slider towards the left to manipulate it. Afterward, preview the video and click on the “tick” icon.

Step 4: Further, select the “Export” icon appearing in the expanded menu.

4. Video Speed Editor Slow & Fast
How do you slow down a video on an iPhone after recording in a minimalistic way? This iPhone application is designed for such contexts to create slow-motion videos. Users can slow down a clip’s playback speed up to 8x at specific durations. Simply trim the video parts to apply the speed setting at specific sections and merge them later.

Key Features
- After slow motion, you have the option to keep the original sound or insert music offered by it.
- The timeline editing method helps you to trim the video at the right time.
- The application is compatible with iOS 12.0, iPadOS 12.0, macOS 11.0, and newer versions.
Steps to Add Slow Motion in Video Using Video Speed Editor Slow & Fast
This application has an innovative user interface with a simple operational menu. To add a slow-motion effect to a video, buy its Pro subscription first. To assist you further, here is how to slow down an iPhone video in it:
Step 1: Create a new project after launching the application and giving access to storage. Do this by clicking on the screen saying, “Tap to create a new project.”

Step 2: From the Videos section of your media, select a video and hit “Choose.”

Step 3: In the editing interface, simply select a speed option from -2x to -8x for slowing. Once the video is slowed down according to your preferences, export it.

Part 3: Failed to Slow Down Video Properly? Try Wondershare Filmora as a Remedy
Have you tried all the given solutions on how to slow-mo a video on an iPhone and are still clueless? Not getting the desired results can be frustrating, but we have brought the best answer. Wondershare Filmora helps you achieve slow motion on a computer or laptop. The software is compatible with all Windows and macOS devices. You can just connect your iPhone with the source using a cable and import media.
Being a versatile software, Filmora introduces you to two advanced methods. Uniform speed emerges as a simple method of creating a slow-motion effect. On the other hand, Speed Ramping allows you to edit speed for professional purposes. Amongst speed alteration, users can also use the frame interpolation technique. It increases video frames to ensure a smooth playback during slow-mo.
Step-by-Step Guide to Creating Slow-Motion in Filmora
If you are using Filmora for the first time, the user interface might initially seem confusing. However, in comparison to other post-production software, it possesses a minimal interface. In this section, learn about how to slo-mo a video iPhone using Filmora:
Free Download For Win 7 or later(64-bit)
Free Download For macOS 10.14 or later
Step 1Connect iPhone and Import Clip
Once you have created a new project on Filmora, import media. First, to import media from your iPhone, connect it to your computer or related device. Then, go to “Import” > “Import from a Camera or Phone” option. Further, select the device name and import data.

Step 2Access Speed Ramping Option
Use your cursor to bring the edited media to the timeline and select it. From the appearing settings panel, access the “Speed” > “Speed Ramping” tabs. Here, either choose any of the predesigned templates or customize one.

Step 3Enable Optical Flow for Additional Touch
If the slow motion seems rough or abrupt, Filmora has a solution to that as well. Go to the “AI Frame Interpolation” section and expand it. From the expanding menu, click the “Optical Flow” option for a high-quality slow-mo.

Step 4Rendering for Final Preview
To observe the overall results, navigate towards the top toolbar. Select the “File” tab and “Render Preview” from the dropdown menu. After reviewing the final video, use your cursor to click the “Export” button.

Key Features of Wondershare Filmora
Wondershare Filmora provides a wide range of features for a full-fledged editing experience. Some of these features are for video, some are for audio, and others are for visuals. Here is a list of some of Filmora’s key features that you must give a try to:
1. Instant Mode
Once you have recorded a video, the post-production process cannot be neglected. However, when you start editing a video, the process might be confusing at first. With Filmora’s Instant Mode, use AI’s assistance to edit any video without effort. There are 115 built-in templates to integrate according to context and highlights it.
2. Green Screen
Integrate attractive backgrounds in your videos, like mountains, beaches, or more. With Filmora’s Green Screen feature, remove the video backgrounds with accuracy. After removing the background, you can insert multiple backgrounds, like solid colors. If there are backgrounds that you have previously saved, import them to the timeline. They will automatically show in the video, and you can customize them further.
3. Color Correction
Filmora offers an extensive range of color correction elements to enhance visibility. There are 40+ free presets in Filmora that you can download and apply within the app. In addition, you can do custom color settings and save them as custom presets. You can also use the 3D LUT feature to set preferences for specific factors.
4. Text-to-Speech
Another important feature that helps with interactive video creation is text-to-speech. It allows users to transform text into speech with voice selection options. The software has been trained on NLP and integrates realistic voices in videos. Being closer to the human voice helps with better audience interaction and understanding.
Conclusion
The main theme of this article was how to slow down a video on iPhone and the tools to do it. We mentioned 4 applications that are compatible with higher versions of the iPhone. In addition, the article provided detailed guides on all these applications.
Among them, Wondershare Filmora has been integrated with an advanced slow-mo feature. It allows a seamless and professional user interface to import, edit, and customize. The AI Optical Flow in it adds a remarkable fine touch to your slow-mo video.
Make A Slow Motion Video Make A Slow Motion Video More Features
Part 1: Pre-Recorded A Video? Adjust Slow Motion Parameters Right Away
One of the major reasons Gen Z and Gen Alpha opt for iPhones is their high-quality camera. It is ideal for capturing and editing videos in high resolution is ideal. In 2013, iPhones were integrated with the Slow-mo feature for creative purposes. Where first users needed third-party applications, they could use the built-in feature. Here is how do you slow down a video on iPhone officially:
Step 1
Locate the “Photos” application on your iPhone and launch it by simply clicking. Upon accessing the app, go to the bottom and click on “Albums.” Afterward, click the “Slo-mo” option from the expanding menu. Formerly, select a video from your device media library import.
Step 2
Once the video has been selected, navigate to the top right corner and select “Edit.”
Step 3
When the editing panel appears, navigate towards the bottom of the timeline bar. Drag the slider’s position to adjust the speed to create a slow motion. As the slow-motion effect has been created, click the “Done” button. Commencing this action will finalize your slow-motion video.
Part 2: Some Top-Notch Solutions to Slow Down Any Video on iPhone
The iPhone does offer a built-in feature to help you curate a perfect slow-mo. Nonetheless, a third-party application can offer additional and upgraded features. They offer specialized effects and filters, multiplatform support, and more. This section discusses 4 applications and how to make video slow motion iPhone using them. Find the brief introduction, capabilities, and guides of these apps below:
- SpeedPro Slow Speed Video Edit
- Slow Fast Slow – Control the Speed of Your Videos
- Slo Mo – Speed Up Video Editor
- Video Speed Editor Slow & Fast
1. SpeedPro Slow Speed Video Edit
This is an exclusive application to answer your question about how to put a video in slow motion on an iPhone. This application offers a -2x to -6x playback speed option for a slow-mo. Its intuitive feature enables speed alteration from a specific video section. This option is ideal for creatively editing your Instagram reels. Along with slowing down the speed, you can also enhance it for fast motion generation.
Key Features
- The application offers a timeline editing interface that enhances precision and accuracy.
- It possesses the ability to incorporate music in your videos using its Music feature.
- The application collaborates with social platforms like Instagram and Facebook for
Steps to Add Slow Motion in Video Using SpeedPro Slow Speed Video Edit
When you embark on a new experience, using something for the first time can be tricky. The unfamiliarity makes it harder, and one doubts its abilities. Hence, consider us your partner in guiding you on how to edit slow motion on your iPhone. We have curated a step-by-step guide to help you in creating a slow-mo:
Step 1: After downloading and accessing the application’s main menu, click the “Speed Pro” option. Then, select a video clip from your device that you desire to apply this effect to.
Step 2: Once the video clip has been selected, click the “Done” button to import.
Step 3: Afterward, you’ll be redirected to its editing interface for speed change. Navigate toward the speed slider at the bottom of the video display. Drag the slider towards the left to select a suitable playback speed option. You can also apply the slow-mo to a specific area by dragging the timeline slider.
2. Slow Fast Slow - Control the Speed of Your Videos
Use this application to record a slow-motion video or add the effect in post-production editing. This application offers a high frame rate of 240 fps for a high-grade slow-mo effect. This means you can now slow a video up to 1/16th of its original speed. It wins at creating slow motion with the iPhone’s built-in speed manipulation feature.
Key Features
- Provides audio pitch maintenance feature during speed alteration.
- Gives the option to adjust the screen ratio before editing, like square or more.
- The application is compatible with all your iOS 10.0 devices and higher versions.
Steps to Add Slow Motion in Video Using Slow Fast Slow
The encounter with an advanced tool or application is often stressful as you are unfamiliar with it. You do not want to mess up the video, so you must master an app. Following is how to slow down a video on an iPhone using the Slow Fast Slow app:
Step 1: After launching the application, give it access to your files for editing. Then, click on the “Other Videos” option to select a video from a device for slow-mo.
Step 2: Once the video has been imported, you will reach the editing interface. You’ll notice a slider with different points. These points indicate the time frames of your video. The slider is positioned downward to add a slow-mo effect at specific durations.
Step 3: Once you are done with the editing, click the play button to preview. Next, navigate towards the right-side bottom of the preview screen and hit “Export.” Select any particular resolution to save the slowed-down video on your device.
3. Slo Mo – Speed Up Video Editor
Are you looking for a versatile application about how to make a normal video slow-motion iPhone 13? Fashioned to modify a video’s speed, this app can help you. It allows users to adjust the video speed up to 12x for slow and fast motion. In addition, you can alter the video frame rate up to 240 fps at precise frames.
Key Feature
- With an additional freeze frame feature, infuse an innovative touch to videos.
- Experience a more productive workflow with its quick processing feature.
- Keeping up an accessible to all approach, the user interface is straightforward and minimal.
Steps to Add Slow Motion in Video Using Slo Mo – Speed Up Video Editor
Those initial stages of operating a new app and getting your hands on its UI are difficult. However, this article prioritizes your ease more than anything. Find our guide on how to make a video in slow motion on iPhone here:
Step 1: Upon launching the application, it will ask you for storage access. After that, you’ll have to import a video to add slow motion. Just select any normal video on your device and click on the “Next” option.
Step 2: Navigate toward the bar at the bottom of the timeline panel and select “Adjust.”
Step 3: This will feature the speed control options on your screen; go to “Advance.” Further, change the speed change slider towards the left to manipulate it. Afterward, preview the video and click on the “tick” icon.
Step 4: Further, select the “Export” icon appearing in the expanded menu.
4. Video Speed Editor Slow & Fast
How do you slow down a video on an iPhone after recording in a minimalistic way? This iPhone application is designed for such contexts to create slow-motion videos. Users can slow down a clip’s playback speed up to 8x at specific durations. Simply trim the video parts to apply the speed setting at specific sections and merge them later.
Key Features
- After slow motion, you have the option to keep the original sound or insert music offered by it.
- The timeline editing method helps you to trim the video at the right time.
- The application is compatible with iOS 12.0, iPadOS 12.0, macOS 11.0, and newer versions.
Steps to Add Slow Motion in Video Using Video Speed Editor Slow & Fast
This application has an innovative user interface with a simple operational menu. To add a slow-motion effect to a video, buy its Pro subscription first. To assist you further, here is how to slow down an iPhone video in it:
Step 1: Create a new project after launching the application and giving access to storage. Do this by clicking on the screen saying, “Tap to create a new project.”
Step 2: From the Videos section of your media, select a video and hit “Choose.”
Step 3: In the editing interface, simply select a speed option from -2x to -8x for slowing. Once the video is slowed down according to your preferences, export it.
Part 3: Failed to Slow Down Video Properly? Try Wondershare Filmora as a Remedy
Have you tried all the given solutions on how to slow-mo a video on an iPhone and are still clueless? Not getting the desired results can be frustrating, but we have brought the best answer. Wondershare Filmora helps you achieve slow motion on a computer or laptop. The software is compatible with all Windows and macOS devices. You can just connect your iPhone with the source using a cable and import media.
Being a versatile software, Filmora introduces you to two advanced methods. Uniform speed emerges as a simple method of creating a slow-motion effect. On the other hand, Speed Ramping allows you to edit speed for professional purposes. Amongst speed alteration, users can also use the frame interpolation technique. It increases video frames to ensure a smooth playback during slow-mo.
Step-by-Step Guide to Creating Slow-Motion in Filmora
If you are using Filmora for the first time, the user interface might initially seem confusing. However, in comparison to other post-production software, it possesses a minimal interface. In this section, learn about how to slo-mo a video iPhone using Filmora:
Free Download For Win 7 or later(64-bit)
Free Download For macOS 10.14 or later
Step 1Connect iPhone and Import Clip
Once you have created a new project on Filmora, import media. First, to import media from your iPhone, connect it to your computer or related device. Then, go to “Import” > “Import from a Camera or Phone” option. Further, select the device name and import data.
Step 2Access Speed Ramping Option
Use your cursor to bring the edited media to the timeline and select it. From the appearing settings panel, access the “Speed” > “Speed Ramping” tabs. Here, either choose any of the predesigned templates or customize one.
Step 3Enable Optical Flow for Additional Touch
If the slow motion seems rough or abrupt, Filmora has a solution to that as well. Go to the “AI Frame Interpolation” section and expand it. From the expanding menu, click the “Optical Flow” option for a high-quality slow-mo.
Step 4Rendering for Final Preview
To observe the overall results, navigate towards the top toolbar. Select the “File” tab and “Render Preview” from the dropdown menu. After reviewing the final video, use your cursor to click the “Export” button.
Key Features of Wondershare Filmora
Wondershare Filmora provides a wide range of features for a full-fledged editing experience. Some of these features are for video, some are for audio, and others are for visuals. Here is a list of some of Filmora’s key features that you must give a try to:
1. Instant Mode
Once you have recorded a video, the post-production process cannot be neglected. However, when you start editing a video, the process might be confusing at first. With Filmora’s Instant Mode, use AI’s assistance to edit any video without effort. There are 115 built-in templates to integrate according to context and highlights it.
2. Green Screen
Integrate attractive backgrounds in your videos, like mountains, beaches, or more. With Filmora’s Green Screen feature, remove the video backgrounds with accuracy. After removing the background, you can insert multiple backgrounds, like solid colors. If there are backgrounds that you have previously saved, import them to the timeline. They will automatically show in the video, and you can customize them further.
3. Color Correction
Filmora offers an extensive range of color correction elements to enhance visibility. There are 40+ free presets in Filmora that you can download and apply within the app. In addition, you can do custom color settings and save them as custom presets. You can also use the 3D LUT feature to set preferences for specific factors.
4. Text-to-Speech
Another important feature that helps with interactive video creation is text-to-speech. It allows users to transform text into speech with voice selection options. The software has been trained on NLP and integrates realistic voices in videos. Being closer to the human voice helps with better audience interaction and understanding.
Conclusion
The main theme of this article was how to slow down a video on iPhone and the tools to do it. We mentioned 4 applications that are compatible with higher versions of the iPhone. In addition, the article provided detailed guides on all these applications.
Among them, Wondershare Filmora has been integrated with an advanced slow-mo feature. It allows a seamless and professional user interface to import, edit, and customize. The AI Optical Flow in it adds a remarkable fine touch to your slow-mo video.
Also read:
- New 2024 Approved Replace Sky Background in Video Figuring Out the Best Options
- In 2024, How to Add a Custom Transition to OBS
- In 2024, How Does the YouTube AI Algorithm Work
- New 2024 Approved How to Change Quicktime Player Speed on Mac?
- On the Tiktok App, You Can Make a Photo Video Slideshow. You Can Make Photo Video Slideshow with Music, Animated Tiktok Templates, and Can Also Add Text to Slideshow Video
- In 2024, 2 Ways to Fade in Text in Premiere Pro
- Updated In 2024, Do You Want to Get Green Screen Effects on Your Video without Green Screen Setup in Your Background? Learn How to Get Virtual Green Screen Background and Shoot Videos Like a Pro
- New In 2024, | Change Speed of a Video on iPhone
- New 2024 Approved Some Facts About GIF Background You Didnt Know
- New 2024 Approved How to Create a Slideshow GIF?
- New In 2024, Best Movie Title Maker
- Updated Want to Learn How to Make a Fortnite Montage? This Guide Will Give You the Low-Down on Creating Epic Montage Fortnite Videos that You Can Share with Other Players on Social Media Platforms for 2024
- 2024 Approved A Guide to Adding Audio in Wondershare Filmora
- New Spooky Halloween with the Best 15+ Halloween Countdown Video Clips for 2024
- Updated In 2024, Some Top Methods to Create AI Slow Motion Videos
- New In 2024, The Most Efficient Ways to Manage Your Timeline
- New In This Article, We Will Show You How to Rotate Videos Using Obs
- New Video Course and Online Learning Are Very Popular Nowadays. Here We Are Going to Recommend some of the Best Video Websites for Teachers to Use
- Updated 2024 Approved Top GIF to MP4 Converters
- New 2024 Approved Create the Night-to-Day Effect Videos
- List of Supported Whatsapp Video Format You May Want to Know for 2024
- New 4 Solutions to Crop a Video on Android Easily
- How to Achieve GoPro Slow Motion With Quality
- Updated In 2024, What Is MOV Format and How to Edit MOV Video Better?
- 2024 Approved How to Make Cool COD Warzone Thumbnail
- In 2024, What You Should Know About Speech-to-Text Technology
- New This Article Will Show You the Steps to Make Coin Magic in Videos with Filmora
- 2024 Approved Follow a Few Simple Steps and Learn How to Create a Professional Glowing Edge Effect to Your Videos in Filmora
- Ideas for Time-Lapse Video for 2024
- Updated Do You Have a Sony Camera and Want to Try Different LUTs on Your Digital Content? Youre at the Right Place, as You Can Apply Sony HLG LUTs to Your Media
- In 2024, How To Create The Best AI Thumbnail Using The Right Tools?
- In 2024, Discover the Top 5 Free Online Video Filter Editors to Transform Your Videos with Captivating Color Grading and Correction Presets. Elevate Your Digital Storytelling Effortlessly
- Updated 2024 Approved How to Do Masking in After Effects Alternative Provided
- New In 2024, Best 5 Solutions on How to Add Emojis to iPhone
- HDR Photography How to Use HDR Mode on Your Android Devices
- New 2024 Approved Do You Waste Time Making Transparent Background in Paint
- How Can I Use a Fake GPS Without Mock Location On Samsung Galaxy A54 5G? | Dr.fone
- In 2024, Ways to stop parent tracking your Vivo Y36i | Dr.fone
- In 2024, How to Change Google Play Location On Samsung Galaxy F34 5G | Dr.fone
- Top 9 Vivo Y100t Monitoring Apps for Parental Controls | Dr.fone
- Updated Free MSNBC Live Online Stream for the Latest Shows for All Devices
- In 2024, Here are Some of the Best Pokemon Discord Servers to Join On Tecno Pova 5 | Dr.fone
- In 2024, A Comprehensive Guide to Apple iPhone 14 Plus Blacklist Removal Tips and Tools
- In 2024, Did Your Apple iPhone SE (2020) Passcode Change Itself? Unlock It Now | Dr.fone
- Forgotten The Voicemail Password Of Samsung Galaxy A23 5G? Try These Fixes
- In 2024, The Most Useful Tips for Pokemon Go Ultra League On Realme 11 5G | Dr.fone
- Detailed guide of ispoofer for pogo installation On Xiaomi Redmi A2 | Dr.fone
- In 2024, How To Bypass Activation Lock On Apple Watch Or Apple iPhone 15 Plus?
- Use Device Manager to identify some outdated your drivers on Windows 10
- How to Fix Pokemon Go Route Not Working On Honor Magic 6? | Dr.fone
- Title: Updated In 2024, You May Want to Change the Speed of Certain Portions of Your Video. This Article Enlightens You on How to Splice and Speed up the Video in Simple Ways
- Author: Morgan
- Created at : 2024-04-24 01:12:10
- Updated at : 2024-04-25 01:12:10
- Link: https://ai-video-editing.techidaily.com/updated-in-2024-you-may-want-to-change-the-speed-of-certain-portions-of-your-video-this-article-enlightens-you-on-how-to-splice-and-speed-up-the-video-in-si/
- License: This work is licensed under CC BY-NC-SA 4.0.
