

Updated Top 6 Text to Speech Generators for YouTube Videos Windows, Mac, And for 2024
Top 6 Text to Speech Generators for YouTube Videos [Windows, Mac, And
Best Text To Speech Converter and Video Editor
Filmora’s Text to Speech (TTS) function allows you to convert your text files to voiceover and bring more elements to enrich your video.
Free Download Free Download Free Download Learn More >

Speech has a significant impact on the success rate of the entire YouTube adventure, whether storytelling or a standard sales pitch. It helps to have a decent voice and speaking abilities. However, not everyone gets both simultaneously; many individuals employ voice artists to provide voice-overs.
Some freelancers charge $5-$100 for a 5-minute voice-over. However, not everyone can afford an expensive voice artist, especially for longer films or just starting. Here are other options that I discovered as the most acceptable free text to voice generators for YouTube videos.
Let’s take a deeper look at the most excellent free text to speech software for YouTube videos.
Getting Started
Text to speech is a speech synthesis software that speaks aloud digital and textual content. The software offers a wide range of applications and is utilized by everyone from professionals and students to toddlers and adults.
Viewers are emotionally attached to documents such as PDFs, books, novels, and e-learning courses when they hear narration with a human voice. Text-to-speech systems are ideal for multitasking by busy professionals.
It’s no surprise that there are numerous text-to-speech options available. Audiobooks are also becoming more popular for the same reasons.
We’ll go over the best text-to-speech tools available in this guide. We’ve gathered a detailed list of the most exemplary free and commercial text-to-speech applications to help you choose the best option for your needs:
#1: Murf
It is available on Windows, Mac, Android, iPhone, and Online
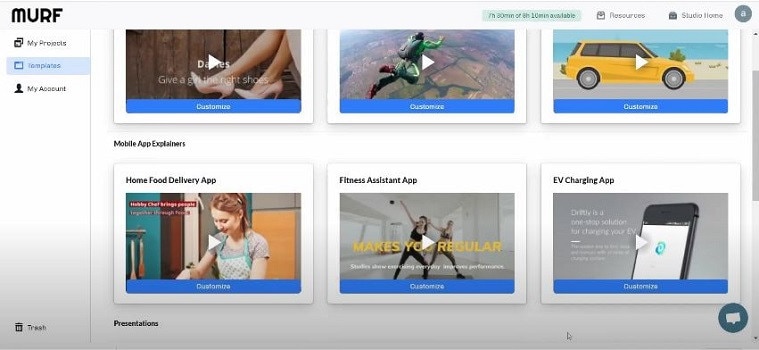
Murf is a text-based voice-over maker. You can either compose your script or submit a voice clip to convert it into hyper-realistic AI voices. Murf delivers expert voice-over artists with experienced voices. You can check multiple parameters in the voices. You can use Murf to signify a brand, a product, a company, a presentation, and many more.
Features:
- Murf allows you to create voice-overs from the text. It also allows you to transform your speech into editable text, which you can subsequently edit or convert into AI voice.
- Murf Studio provides the ability to synchronize your speech with visuals.
- Murf provides over 100 authentic voices in 19 languages.
- It also gives options for inserting pauses, altering narration tempo, and emphasizing certain points.
- It also includes features such as script checking with grammar assistance, free background music, video and music cutting, and more.
- Murf offers comprehensive communication and collaboration tools, access control, a pronunciation library, and a service level agreement (SLA) for enterprises wishing to develop voice-overs in bulk.
Price
| Free | Basic | Pro | Enterprise |
|---|---|---|---|
| $0 / Month | $13 / Month | $26 / Month | $166 / Month |
| Try all 120+ voices 10 mins of voice generation 10 mins of transcription Share link for audio/video output No downloads Single User No credit card required | Unlimited Downloads 24 hours of voice generation/year Access to 60 voices (10 languages) Commercial Usage rights Chat and Email support Single User | Unlimited Downloads 96 hours of voice generation/year 48 hours of transcription/year Access 120+ voices (20 languages) Commercial Usage rights Recorded voice editing Voice changer Up to 3 users Priority Support | 5+ Users Unlimited Voice Generation Time Unlimited Transcription time Custom Voices Single-sign on (SSO) Collaboration and Access Control Dedicated Account Representative Centralized invoicing Service Agreement Deletion recovery Unlimited Storage |
Cons
- You may experience frequent technical glitches.
#2: Speechelo
It is available on Windows, Mac, Android, iPhone, and Online
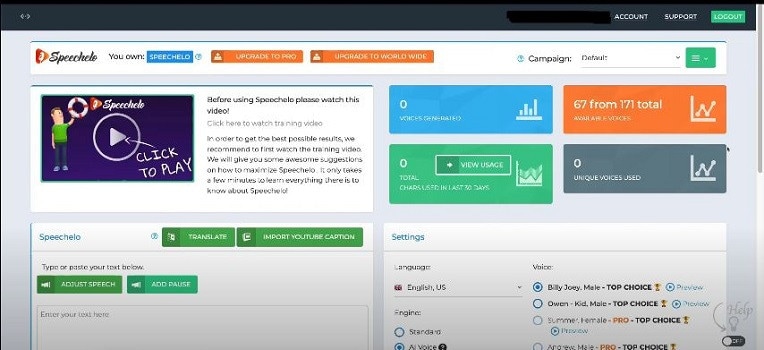
Speechelo gives a realistic voice tone and expressions. This gets people more interested in voice-overs. You can use Speechelo to create sales videos, training films, and instructive videos, among other things. It includes attributes such as breathing and pauses, vocal tones, changing speed and pitch, and compatibility for 23 languages.
Features
- The text-to-speech engine in Speechelo can add intonation to the voice.
- It contains over 30 voices that sound natural.
- It has both male and female voices.
- It works with various video editing tools, including Camatasia, Adobe, Premier, and iMovie.
- Ordinary tone, cheerful tone, and serious tone are the three tones you may use to read your text.
Price
| Premium |
|---|
| $47 (Discount price) |
| One-time payment With 60-day money-back guarantee |
Cons
- The output of Speechelo will be 48kbps. If you’re familiar with sound production, you’ll see that this is a very low output.
- It might produce inaccurate output if you input long voice-overs.
#3: Synthesys
It is available on Windows, Mac, Android, iPhone, and Online
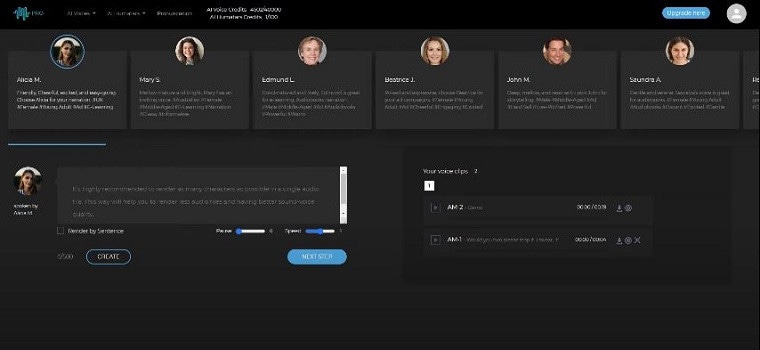
Synthesys helps to convert text into a natural-sounding voice. With Synthesis, you can choose from various tones, accents, male and female voices, languages, and reading speeds. Moreover, It simply takes three steps to create a natural-sounding artificial speech that you may use for a variety of commercial applications.
- To begin, select the gender, style, accent, and tone you want the created voice to have.
- You can paste or type the content you want to turn into speech into Synthesys’ AI voice-producing platform.
- Lastly, click ‘create’ to start creating your artificial speech in minutes. You may adjust the reading speed and pause length from here.
Features
- Cloud-based software.
- Expert and natural-sounding voices are available in an extensive collection.
- There are over 35 female voices and 30 male voices.
- You can create and sell unlimited voices.
- Extremely user-friendly interface.
Price
| Audio Synthesys | Human Studio Synthesys | Audio and Human Studio Synthesys |
|---|---|---|
| $29 / Month | #39 / Month | $59 / Month |
| Unlimited voice-overs downloads Access to 30 Real Human Voices Access to 66 Languages & 254 General Voices Fully Web-Based | Unlimited Videos Access to 73 Humatars (Extra Outfits included) Access to 66 Languages & 254 General Voices Upload Your Own Voice Full Video Customization Fully Web-Based | Unlimited Videos & Voice Overs Access to both Software All features included 20% OFF |
Cons
- It has character limitations when making a voice-over.
- It does not have a free trial version.
#4: Nuance Dragon
It is available in Windows only
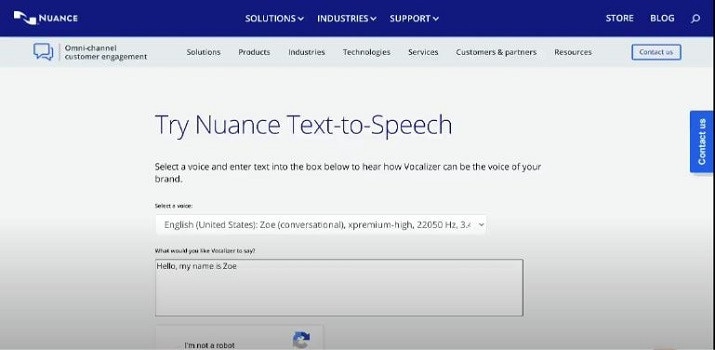
Nuance Dragon is an artificial intelligence-powered voice recognition system. It offers both residential and commercial solutions. It spans across various data centers and delivers cloud services.
Its hosting platform is Microsoft Azure, which is HITRUST CSF-approved. All of their solutions follow industry-standard guidelines. Nuance Dragon protects data in transit and at rest with 256-bit encryption.
Features
- Nuance Dragon complies with HIPAA regulations, which are critical for public sector security and confidentiality.
- It applies to a wide range of professions.
- It offers complete protection.
Price
| Home | Professional |
|---|---|
| $200 | $500 |
| It has 99% recognition accuracy Immediate access to your dictation. One-time payment. | It has 99% recognition accuracy Share documents Sync custom words and commands Immediate access to your dictation. One-time payment. |
Cons
- It works only on Windows, and it is not available on Mac.
- It does not have a free trial version.
- It does not include Premium Consulting or Integration Services.
#5: Notevibes
It is available on Windows, Mac, Android, iPhone, and Online
Notevibes is a tremendous text-to-speech tool that comes in both a free and a commercial edition with many features. It offers customers over five hundred translation characters while also allowing them to modify the pronunciation.
As a result, users have access to all of their resources to learn a new language and significantly increase their reading skills. Furthermore, Notevibes features 177 distinct voices speaking in 18 different languages.
Users appreciate the natural-sounding voices that assist them in pronouncing words correctly. Users from many walks of life can profit from the tool because it has many functions.
Features
- Realistic voice generator
- Aloud Speaking
- Make an MP3 of your audio speech.
- 47 Individual Voices
- Characters: 200 – 1,000,000
Price
| Personal Pack | Commercial Pack | Corporate Pack |
|---|---|---|
| $9 / Month ($107 per year) | $90 / Month ($1080 per year) | $4,000 / Year |
| For personal use only: private listening, personal e-learning 1,200,000 characters pack per year 201 Premium Voices available 18 Languages (EN, ES, DE, FR, VT, RU, PT, IT, NL, TR, JP, KO, HI and etc) MP3 Download 1 Account License | For Commercial use: YouTube, broadcasts, TV, IVR voiceover and other businesses 12,000,000 characters pack per year Advanced voice editor new 201 Premium Voices available 18 Languages (EN, ES, DE, FR, VT, RU, PT, IT, NL, TR, JP, KO, HI and etc.) SSML tags support MP3, Wav Download Audio files history You 100% own intellectual property for all files | For Corporate Users All in Commercial and 50,000,000 characters pack per year Master account for management Team License (up to 10 users) Priority email support |
Cons
- It does not have a preview. You have to generate the voice-over to listen.
- You can’t combine a single audio file out of many audio files.
- The Voiceover & Editor Page is unique in that it has two sections: one for creating the voice-over and another for obtaining audio files. Switching between them will take some time. If you’re working on a large project, moving between bot sites will be a hassle.
- No project-based organization
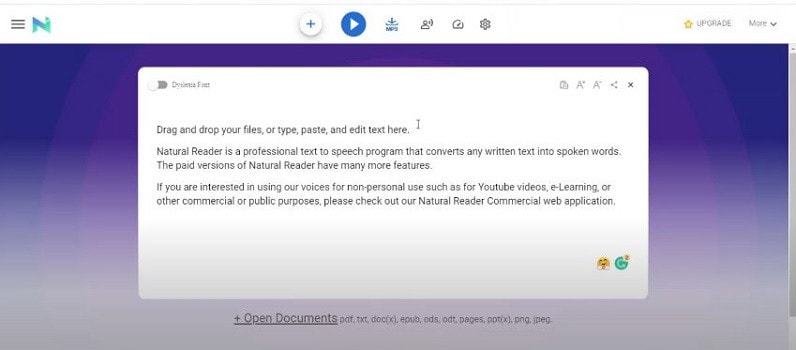
#6: Natural Reader
It is available on Windows, Mac, Android, iPhone, and Online
Natural Reader is among the few free text-to-speech programs with several exciting features. It’s pretty easy to use, and you can get started right away by loading texts into its library.
Furthermore, the tool allows users to manage several files in various formats. Lastly, the built-in OCR will enable you to submit images or text scans and have them read aloud.
Features
- Built-in OCR
- Choice of interfaces
- Built-in browser
- Dyslexic-friendly font
Price
| Free | Personal | Professional | Ultimate |
|---|---|---|---|
| $0 (Free to use) | $99.50 (One-time payment) | $129.50 (One-time payment) | $199.50 (One-time payment) |
| Unlimited use with Free Voices Miniboard to read text in other applications Pronunciation Editor Works with PDF, Docx, TXT and ePub | 2 natural voices included All features of Free Version included Convert to MP3 | 4 natural voices included All features of Personal Version included | 6 natural voices included All features of Professional Version included 5000 images/year for OCR to read from images & scanned PDFs |
Cons
- There is no way to skip or jump around any text on the page.
- You will need internet access in the free software to access the voices.
- The paid version is very expensive in comparison to others.
- Long-term use is complex.
Pro Tip:
If you just use text-to-speech software sometimes, it’s best to utilize one of the many free options available. On the other hand, paid versions are great if you want extensive functionality and don’t mind limitations on usage.
You should check for text-to-speech software with natural voices enabled in commercial applications. A top-rated system should include real-time speech capabilities and a user-friendly UI.
Text to Speech Services’ Advantages
TTS systems can help content owners such as corporations, YouTubers, institutions, media houses, mobile app developers, e-learning solution providers, and others in comparable fields in the following ways:
- Global Reach: TTS voices that sound human, are clear, and can be customized can let you communicate with people worldwide. You can even incorporate translations in multiple languages to read the text in their own language.
- Improve User Experience: Allowing speech in pre-sales and after-sales can reduce human agent burden, provide individualized services, lower operating expenses, and speed up productivity.
- Saves Money and Time: Companies can quickly and easily implement TTS systems with little maintenance.
- Improves Productivity: E-learning experts and HR departments can create learning modules for staff training using TTS. This will allow employees to learn the information while working anywhere and at any time.
Text to speech solutions can also help online students, researchers, teachers, device users, app users, website visitors, machine users, and others in the following ways:
- People with Reading Difficulties: A considerable portion of the global population suffers from learning or reading disabilities, including language-based learning disabilities. TTS solutions in your documents might assist them in better understanding the document. It can also aid persons with vision problems and literacy issues.
- Multitasking: Listening to something allows you to execute multiple physical duties at once, such as cooking, cleaning, exercising, etc. It’s a welcome break for busy professionals who can’t find time to read the stacks of books that have accumulated on their desks for years. They can just put on their headphones and listen to them while doing other things.
- Great for Kids: Instead of being glued to their computers or phones all day, your children can listen to audio files, including their books and other study materials. It will safeguard their priceless sight. It will also increase word recognition, cognitive skills, make finding and correcting problems in their writing easier.
- Journey Mate: People can listen to information while traveling by using speech to text. You may always listen to the noises and enjoy them while riding without having to strain your eyes, regardless of how rocky the road is.
Frequently Asked Questions
What is Text to Speech Software?
TTS (text-to-speech) is an assistive technology that reads text aloud. TTS systems provide computer-generated sound, and we may vary the reading speed by increasing the speed or slowing things down.
Is Text-To-Speech Technology Handy?
According to studies, text-to-speech technology helps viewers concentrate on the content rather than the process of reading, resulting in a greater understanding of the topic and more engagement.
While some argue that audiobooks, or scripts read by paid voice actors, are superior to computer-generated voices, there is compelling proof that text to speech can be a handy tool for YouTube content creators.
Is The Voice Quality Consistent Across All Text to Speech Programs?
Voice quality ultimately depends on the service. However, some use human voices, while premium solutions employ the voices of well-known narrators like David Attenborough and Morgan Freeman.
You can even mimic the sound of youngsters speaking. Many gadgets, particularly online web page scanners and even audiobooks emphasize the text they are scanning.
What Are the Benefits of Using Text to Speech Software?
You can use this type of technology in a variety of ways. Some programs read text from a digital document or an interactive online page for users. Some programs can even convert handwritten text into speech using modern technology such as Optical Character Recognition (OCR).
Text-to-speech software is compatible with various devices and applies to all kinds of individual digital devices, including laptops, PCs, tablets, and smartphones.
What Is the Process of Converting Speech in Text to Speech Software?
The majority of text-to-speech software works in the same way. Users can either upload or input the content to convert to audio. Then they choose from the different voices to evaluate which sound is best for the voice-over.
Many TTS solutions rely on OCR technology in some form. OCR allows us to obtain text from documents and photos by recognizing written and digital text. If you click an image of a street sign, the program will read the words printed on it.
Is it possible to use Text to Speech on YouTube?
Absolutely, you can get them in YouTube videos, but to prevent advertising strikes, make sure you post videos with authentic human voices somewhere between.
What Text-To-Speech Software Does YouTube Content Creators Use?
To incorporate voice-overs on their sales pitches and informative videos, most YouTubers pay for text-to-speech software like Synthesys and Speechelo.
Is It Possible to Monetize YouTube Videos Using Text to Speech?
It varies on the text to speech engine you’re using; some TTS engines support YouTube monetization while others don’t.
Speech has a significant impact on the success rate of the entire YouTube adventure, whether storytelling or a standard sales pitch. It helps to have a decent voice and speaking abilities. However, not everyone gets both simultaneously; many individuals employ voice artists to provide voice-overs.
Some freelancers charge $5-$100 for a 5-minute voice-over. However, not everyone can afford an expensive voice artist, especially for longer films or just starting. Here are other options that I discovered as the most acceptable free text to voice generators for YouTube videos.
Let’s take a deeper look at the most excellent free text to speech software for YouTube videos.
Getting Started
Text to speech is a speech synthesis software that speaks aloud digital and textual content. The software offers a wide range of applications and is utilized by everyone from professionals and students to toddlers and adults.
Viewers are emotionally attached to documents such as PDFs, books, novels, and e-learning courses when they hear narration with a human voice. Text-to-speech systems are ideal for multitasking by busy professionals.
It’s no surprise that there are numerous text-to-speech options available. Audiobooks are also becoming more popular for the same reasons.
We’ll go over the best text-to-speech tools available in this guide. We’ve gathered a detailed list of the most exemplary free and commercial text-to-speech applications to help you choose the best option for your needs:
#1: Murf
It is available on Windows, Mac, Android, iPhone, and Online
Murf is a text-based voice-over maker. You can either compose your script or submit a voice clip to convert it into hyper-realistic AI voices. Murf delivers expert voice-over artists with experienced voices. You can check multiple parameters in the voices. You can use Murf to signify a brand, a product, a company, a presentation, and many more.
Features:
- Murf allows you to create voice-overs from the text. It also allows you to transform your speech into editable text, which you can subsequently edit or convert into AI voice.
- Murf Studio provides the ability to synchronize your speech with visuals.
- Murf provides over 100 authentic voices in 19 languages.
- It also gives options for inserting pauses, altering narration tempo, and emphasizing certain points.
- It also includes features such as script checking with grammar assistance, free background music, video and music cutting, and more.
- Murf offers comprehensive communication and collaboration tools, access control, a pronunciation library, and a service level agreement (SLA) for enterprises wishing to develop voice-overs in bulk.
Price
| Free | Basic | Pro | Enterprise |
|---|---|---|---|
| $0 / Month | $13 / Month | $26 / Month | $166 / Month |
| Try all 120+ voices 10 mins of voice generation 10 mins of transcription Share link for audio/video output No downloads Single User No credit card required | Unlimited Downloads 24 hours of voice generation/year Access to 60 voices (10 languages) Commercial Usage rights Chat and Email support Single User | Unlimited Downloads 96 hours of voice generation/year 48 hours of transcription/year Access 120+ voices (20 languages) Commercial Usage rights Recorded voice editing Voice changer Up to 3 users Priority Support | 5+ Users Unlimited Voice Generation Time Unlimited Transcription time Custom Voices Single-sign on (SSO) Collaboration and Access Control Dedicated Account Representative Centralized invoicing Service Agreement Deletion recovery Unlimited Storage |
Cons
- You may experience frequent technical glitches.
#2: Speechelo
It is available on Windows, Mac, Android, iPhone, and Online
Speechelo gives a realistic voice tone and expressions. This gets people more interested in voice-overs. You can use Speechelo to create sales videos, training films, and instructive videos, among other things. It includes attributes such as breathing and pauses, vocal tones, changing speed and pitch, and compatibility for 23 languages.
Features
- The text-to-speech engine in Speechelo can add intonation to the voice.
- It contains over 30 voices that sound natural.
- It has both male and female voices.
- It works with various video editing tools, including Camatasia, Adobe, Premier, and iMovie.
- Ordinary tone, cheerful tone, and serious tone are the three tones you may use to read your text.
Price
| Premium |
|---|
| $47 (Discount price) |
| One-time payment With 60-day money-back guarantee |
Cons
- The output of Speechelo will be 48kbps. If you’re familiar with sound production, you’ll see that this is a very low output.
- It might produce inaccurate output if you input long voice-overs.
#3: Synthesys
It is available on Windows, Mac, Android, iPhone, and Online
Synthesys helps to convert text into a natural-sounding voice. With Synthesis, you can choose from various tones, accents, male and female voices, languages, and reading speeds. Moreover, It simply takes three steps to create a natural-sounding artificial speech that you may use for a variety of commercial applications.
- To begin, select the gender, style, accent, and tone you want the created voice to have.
- You can paste or type the content you want to turn into speech into Synthesys’ AI voice-producing platform.
- Lastly, click ‘create’ to start creating your artificial speech in minutes. You may adjust the reading speed and pause length from here.
Features
- Cloud-based software.
- Expert and natural-sounding voices are available in an extensive collection.
- There are over 35 female voices and 30 male voices.
- You can create and sell unlimited voices.
- Extremely user-friendly interface.
Price
| Audio Synthesys | Human Studio Synthesys | Audio and Human Studio Synthesys |
|---|---|---|
| $29 / Month | #39 / Month | $59 / Month |
| Unlimited voice-overs downloads Access to 30 Real Human Voices Access to 66 Languages & 254 General Voices Fully Web-Based | Unlimited Videos Access to 73 Humatars (Extra Outfits included) Access to 66 Languages & 254 General Voices Upload Your Own Voice Full Video Customization Fully Web-Based | Unlimited Videos & Voice Overs Access to both Software All features included 20% OFF |
Cons
- It has character limitations when making a voice-over.
- It does not have a free trial version.
#4: Nuance Dragon
It is available in Windows only
Nuance Dragon is an artificial intelligence-powered voice recognition system. It offers both residential and commercial solutions. It spans across various data centers and delivers cloud services.
Its hosting platform is Microsoft Azure, which is HITRUST CSF-approved. All of their solutions follow industry-standard guidelines. Nuance Dragon protects data in transit and at rest with 256-bit encryption.
Features
- Nuance Dragon complies with HIPAA regulations, which are critical for public sector security and confidentiality.
- It applies to a wide range of professions.
- It offers complete protection.
Price
| Home | Professional |
|---|---|
| $200 | $500 |
| It has 99% recognition accuracy Immediate access to your dictation. One-time payment. | It has 99% recognition accuracy Share documents Sync custom words and commands Immediate access to your dictation. One-time payment. |
Cons
- It works only on Windows, and it is not available on Mac.
- It does not have a free trial version.
- It does not include Premium Consulting or Integration Services.
#5: Notevibes
It is available on Windows, Mac, Android, iPhone, and Online
Notevibes is a tremendous text-to-speech tool that comes in both a free and a commercial edition with many features. It offers customers over five hundred translation characters while also allowing them to modify the pronunciation.
As a result, users have access to all of their resources to learn a new language and significantly increase their reading skills. Furthermore, Notevibes features 177 distinct voices speaking in 18 different languages.
Users appreciate the natural-sounding voices that assist them in pronouncing words correctly. Users from many walks of life can profit from the tool because it has many functions.
Features
- Realistic voice generator
- Aloud Speaking
- Make an MP3 of your audio speech.
- 47 Individual Voices
- Characters: 200 – 1,000,000
Price
| Personal Pack | Commercial Pack | Corporate Pack |
|---|---|---|
| $9 / Month ($107 per year) | $90 / Month ($1080 per year) | $4,000 / Year |
| For personal use only: private listening, personal e-learning 1,200,000 characters pack per year 201 Premium Voices available 18 Languages (EN, ES, DE, FR, VT, RU, PT, IT, NL, TR, JP, KO, HI and etc) MP3 Download 1 Account License | For Commercial use: YouTube, broadcasts, TV, IVR voiceover and other businesses 12,000,000 characters pack per year Advanced voice editor new 201 Premium Voices available 18 Languages (EN, ES, DE, FR, VT, RU, PT, IT, NL, TR, JP, KO, HI and etc.) SSML tags support MP3, Wav Download Audio files history You 100% own intellectual property for all files | For Corporate Users All in Commercial and 50,000,000 characters pack per year Master account for management Team License (up to 10 users) Priority email support |
Cons
- It does not have a preview. You have to generate the voice-over to listen.
- You can’t combine a single audio file out of many audio files.
- The Voiceover & Editor Page is unique in that it has two sections: one for creating the voice-over and another for obtaining audio files. Switching between them will take some time. If you’re working on a large project, moving between bot sites will be a hassle.
- No project-based organization
#6: Natural Reader
It is available on Windows, Mac, Android, iPhone, and Online
Natural Reader is among the few free text-to-speech programs with several exciting features. It’s pretty easy to use, and you can get started right away by loading texts into its library.
Furthermore, the tool allows users to manage several files in various formats. Lastly, the built-in OCR will enable you to submit images or text scans and have them read aloud.
Features
- Built-in OCR
- Choice of interfaces
- Built-in browser
- Dyslexic-friendly font
Price
| Free | Personal | Professional | Ultimate |
|---|---|---|---|
| $0 (Free to use) | $99.50 (One-time payment) | $129.50 (One-time payment) | $199.50 (One-time payment) |
| Unlimited use with Free Voices Miniboard to read text in other applications Pronunciation Editor Works with PDF, Docx, TXT and ePub | 2 natural voices included All features of Free Version included Convert to MP3 | 4 natural voices included All features of Personal Version included | 6 natural voices included All features of Professional Version included 5000 images/year for OCR to read from images & scanned PDFs |
Cons
- There is no way to skip or jump around any text on the page.
- You will need internet access in the free software to access the voices.
- The paid version is very expensive in comparison to others.
- Long-term use is complex.
Pro Tip:
If you just use text-to-speech software sometimes, it’s best to utilize one of the many free options available. On the other hand, paid versions are great if you want extensive functionality and don’t mind limitations on usage.
You should check for text-to-speech software with natural voices enabled in commercial applications. A top-rated system should include real-time speech capabilities and a user-friendly UI.
Text to Speech Services’ Advantages
TTS systems can help content owners such as corporations, YouTubers, institutions, media houses, mobile app developers, e-learning solution providers, and others in comparable fields in the following ways:
- Global Reach: TTS voices that sound human, are clear, and can be customized can let you communicate with people worldwide. You can even incorporate translations in multiple languages to read the text in their own language.
- Improve User Experience: Allowing speech in pre-sales and after-sales can reduce human agent burden, provide individualized services, lower operating expenses, and speed up productivity.
- Saves Money and Time: Companies can quickly and easily implement TTS systems with little maintenance.
- Improves Productivity: E-learning experts and HR departments can create learning modules for staff training using TTS. This will allow employees to learn the information while working anywhere and at any time.
Text to speech solutions can also help online students, researchers, teachers, device users, app users, website visitors, machine users, and others in the following ways:
- People with Reading Difficulties: A considerable portion of the global population suffers from learning or reading disabilities, including language-based learning disabilities. TTS solutions in your documents might assist them in better understanding the document. It can also aid persons with vision problems and literacy issues.
- Multitasking: Listening to something allows you to execute multiple physical duties at once, such as cooking, cleaning, exercising, etc. It’s a welcome break for busy professionals who can’t find time to read the stacks of books that have accumulated on their desks for years. They can just put on their headphones and listen to them while doing other things.
- Great for Kids: Instead of being glued to their computers or phones all day, your children can listen to audio files, including their books and other study materials. It will safeguard their priceless sight. It will also increase word recognition, cognitive skills, make finding and correcting problems in their writing easier.
- Journey Mate: People can listen to information while traveling by using speech to text. You may always listen to the noises and enjoy them while riding without having to strain your eyes, regardless of how rocky the road is.
Frequently Asked Questions
What is Text to Speech Software?
TTS (text-to-speech) is an assistive technology that reads text aloud. TTS systems provide computer-generated sound, and we may vary the reading speed by increasing the speed or slowing things down.
Is Text-To-Speech Technology Handy?
According to studies, text-to-speech technology helps viewers concentrate on the content rather than the process of reading, resulting in a greater understanding of the topic and more engagement.
While some argue that audiobooks, or scripts read by paid voice actors, are superior to computer-generated voices, there is compelling proof that text to speech can be a handy tool for YouTube content creators.
Is The Voice Quality Consistent Across All Text to Speech Programs?
Voice quality ultimately depends on the service. However, some use human voices, while premium solutions employ the voices of well-known narrators like David Attenborough and Morgan Freeman.
You can even mimic the sound of youngsters speaking. Many gadgets, particularly online web page scanners and even audiobooks emphasize the text they are scanning.
What Are the Benefits of Using Text to Speech Software?
You can use this type of technology in a variety of ways. Some programs read text from a digital document or an interactive online page for users. Some programs can even convert handwritten text into speech using modern technology such as Optical Character Recognition (OCR).
Text-to-speech software is compatible with various devices and applies to all kinds of individual digital devices, including laptops, PCs, tablets, and smartphones.
What Is the Process of Converting Speech in Text to Speech Software?
The majority of text-to-speech software works in the same way. Users can either upload or input the content to convert to audio. Then they choose from the different voices to evaluate which sound is best for the voice-over.
Many TTS solutions rely on OCR technology in some form. OCR allows us to obtain text from documents and photos by recognizing written and digital text. If you click an image of a street sign, the program will read the words printed on it.
Is it possible to use Text to Speech on YouTube?
Absolutely, you can get them in YouTube videos, but to prevent advertising strikes, make sure you post videos with authentic human voices somewhere between.
What Text-To-Speech Software Does YouTube Content Creators Use?
To incorporate voice-overs on their sales pitches and informative videos, most YouTubers pay for text-to-speech software like Synthesys and Speechelo.
Is It Possible to Monetize YouTube Videos Using Text to Speech?
It varies on the text to speech engine you’re using; some TTS engines support YouTube monetization while others don’t.
Do You Wish to Convert GIF to Animated PNG? Then, You Need to Know About Using a GIF to APNG Converter to Help You Carry This Process Out in No Time. Read On
Great Video Converter - Wondershare Filmora
Provide abundant video effects - A creative video editor
Powerful color correction and grading
Detailed tutorials provided by the official channel
The GIF image format is a bitmap image format that supports up to 8 bits per pixel. APNG (Animated Portable Network Graphics) is a format for animated images that supports 24 bits per pixel and 8 bits of transparency, which is not available in GIFs. Backward compatibility with non-animated PNG files is also maintained.
Because the initial frame of an APNG file saves as a regular PNG stream, it can display by most conventional PNG decoders. Extra chunks can hold frame speed data and different animation frames (as provided by the original PNG specification).
Is APNG superior to GIF? APNG files are smaller and have more outstanding quality than GIF files. However, GIF is more compatible than APNG. Firefox, Safari, Google Chrome, and Opera support APNG, while practically all online browsers support GIF.
Let’s look at the top 8 best GIFs to APNG converters now.
In this article
Part 1: Best 8 GIF to APNG Converters
Part 2: How to Convert a GIF to APNG
Part 3: FAQs
Part 1. Best 8 GIF to APNG Converters
Here are the top 8 GIFs to APNG converters to look out for
1. EZgif

Ezgif.com is a free, easy-to-use toolset for making and modifying animated GIFs. Besides some basic video editing, we also offer editing and conversions for various other picture formats, like animated WebP, PNG, MNG, and FLIF. GIF maker, video to GIF converter, and photo resizer are three of our most popular online utilities.
In addition, EZgif lets you edit GIFs before converting them to APNG.
Features:
- ImageMagick - conducts most picture editing tasks such as resizing, optimization, cropping, etc.
- Making, optimizing, trimming, and resizing animated GIFs with gifsicle and lossygif.
- For video conversions and editing, use FFmpeg (the genuine one).
- This video to GIF converter online has a low conversion rate.
- This free online GIF banner maker can assist you in creating GIF banners.
- This online GIF creator has an extremely user-friendly UI.
- This web program’s impressive capabilities are completely free to use.
- This GIF converter online maintains high-quality GIF conversion.
- You can make GIFs from videos in seconds.
Pros
The program at ezgif.com is entirely secure to use.
Users do not have to install any other programs for the software to work.
The application is simple and allows users to create GIFs online without exerting any effort.
Cons
Because there is a problem in the program, the result of this online GIF maker from photographs degrades. Hence it is not advised for high professional use.
2. FreeConvert

FreeConvert is a GIF to APNG converter that can convert photos, videos, audio files, documents, eBooks, and units, among other formats. It can upload GIFs from your device, Google Drive, Dropbox, or a URL, and it can batch convert many GIFs to animated PNG files without sacrificing quality. FreeConvert is a safe program because it automatically deletes converted files after two hours.
Features:
- You can convert numerous files at once without sacrificing quality.
- It provides a variety of output file types.
- You can choose from your device (computer, smartphone, etc.) or a Dropbox or Google Drive account to select your files.
Pros
It’s as simple as uploading your GIF files and clicking convert.
Convert a GIF to APNG(animated PNG) while keeping the original GIF’s animation quality.
It is entirely free and works with any web browser.
All files are encrypted using 256-bit SSL and erased after two hours.
Cons
Limited services for free users
3. Aconvert

Aconvert is another free online GIF to APNG converter. It not only converts GIFs to APNG but also compresses, resizes, merges, crops, and rotates GIFs. GIFs can be stored on your device or online storage services after being uploaded from local, online storage services or a URL.
The uploaded image file can be up to 200 MB in size.
My favorite software is AVS Image Converter, which can convert GIF to APNG and APNG to GIF. Furthermore, its ability to support a wide range of image formats and editing capabilities such as Watermarks, Filters, Image Corrections, and others is fantastic.
Features:
- It supports large file conversion of up to 200MB
- It can also resize and rotate GIF file
- It supports a wide range of image formats
- Edits watermark
Pros
Simple user interface
File compression settings get support across platforms
Multiplatform
Free and can be used on a web browser
Cons
Limited services for free users.
4. AVS Image Converter

AVS Image Converter for Windows is a free GIF to APNG converter. You can use it to convert animated GIF files into animated PNG files. This software can convert GIFs to APNGs and APNGs to animated GIFs. Aside from APNG and GIF, this shareware accepts various additional image and project formats as input, including BMP, JPEG, TIFF, TGA, PCX, PSD, PDD, and more. Unlike input types, only JPEG, PDF, GIF, PNG (APNG), TIFF, BMP, TGA, and RAS are the output formats. You can convert several photos from one format to another using our GIF to APNG converter’s batch conversion.
Features:
- It supports a variety of formats.
- It converts in batches.
- Convert animated GIFs into animated PNG files
Pros
Processes large groups of images
It’s possible to utilize it from the command line.
Presets for various dimensions
Multiple input formats are supported.
Allows you to convert photos to PDF.
Multiple effects are applied.
Cons
There are no individual presets.
Displays advertisements
5. Real World Paint
RealWorld Paint - portable image editor (rw-designer.com)

Another free GIF to APNG converter for Windows is RealWorld Paint. It can also convert an APNG file back to a GIF. Additionally, format conversions between PNG, JPEG, GIF, WEBP, animated WEBP, and other formats are possible. The prime benefit of this software is that it can work with projects created by various famous photo editors, including Photoshop, Paint.Net, GIMP, and others.
You can also add, edit, and improve frames in GIF files and simple conversion. When you open a GIF file in it, an editor area appears, right below which you can see all of the GIF file’s frames.
Features:
- Supports a wide range of file types
- Easy to use interface
- Doesn’t consume a lot of hardware resources
- Can convert in a few minutes
Pros
Transformation of a particular area
Multi-platform
Folder selection is simple.
Set the conversion quality quickly.
Cons
For novices, it’s a bit difficult.
Only the premium version is available.
6. Convertio

Convertio is a competitor to Browserling in terms of simplicity. Convertio, on the other hand, outnumbers the former in terms of picture formats supported. Convertio can also convert GIFs to TGA, PSD, JPG, TIFF, ICO, etc. Unfortunately, it lacks image editing capabilities.
Features:
- The file size is unrestricted.
- There is no restriction to how many conversions you can do at once.
- Priority number one.
- Every day, you have an unlimited number of conversion minutes.
- The maximum conversion time per file is unlimited.
- Pages with no advertisements.
Pros
Allows you to convert files by dragging and dropping them.
The ETA is less than 2 minutes, and the conversion is quick.
There are 3 membership options.
Cons
After 24 hours/manually, files saved on the server/cloud gets removed.
7. Onlineconvertfree

Onlineconvertfree is a lovely PNG converter that works with all standard image formats. You can create a PNG file from various formats, including GIF, JPG, HTML, TIFF, RAW, and more. Users may crop, clip, rotate, flip, and perform many other editing actions on their files.
Features:
- It has offline access for quick connectivity and document access.
- Even when an internet connection is unavailable, this helps speed up the entire document management process.
- The software comes with a free version that includes all of the basic capabilities
- Individuals and small enterprises will find it very affordable due to this.
- It supports a Variety of Formats
Pros
Converted files are simple to upload and download.
You can convert almost any file to your preferred format.
There is no need to give personal information such as an email address.
It offers three subscription tiers, all of which are ad-free.
Cons
This is a free service with a limit of two files per conversion.
8. Zamzar

Zamzar is the easiest online GIF to APNG converter on this list. It has numbered steps that make it extremely simple to use. You may convert GIF to PNG, TIFF, TGA, JPG, BMP, and other image formats on Zamzar.
Features:
- Uploading files by dragging and dropping them and speedier file conversions.
- All Zamzar subscribers get high-speed downloads.
- Email files to be converted.
- You can stream the converted videos and audio to your iPhone, iPad, and iPod.
Pros
Allows you to convert files from URLs. Batch conversion is supported.
Presets a three-step method that is quite easy to follow.
Over 1200 file formats are supported.
Multiplatform
File compression settings are now supported.
Developers will appreciate the API.
Cons
File size restricted to 50 MB on free accounts for uploads.
Like other online tools, it lacks OCR.
Part 2. How to Convert a GIF to APNG
Follow the 3 simple steps to convert GIF to animated PNG
Step 1: Choose Files
Select several files on your computer using the “Choose Files” button or the dropdown menu to select an online file from a URL, Google Drive, or Dropbox. The file size of an image can be up to 200 megabytes. You can use a file analyzer to gain detailed information about a source image, including its size, resolution, quality, and transparent color.

Step 2: Choose Image Format
Determine the image format, quality, and size you want to use. You choose to use the original image size or select “Change width and height” and enter a custom image size. 1920x1080 is an example of a [width]x[height] format. Only a few image formats support the picture quality choice, such as JPG, WEBP, or AVIF. The value ranges from 1 (lowest picture quality and highest compression) to 100 (highest image quality and lowest compression) (best quality but least effective compression). If this field is left blank, the converter will use the estimated quality of your input image if found; otherwise, 92 by default. JPG, PNG, TIFF, GIF, HEIC, BMP, PS, PSD, WEBP, TGA, DDS, EXR, J2K, PNM, or SVG are examples of target image formats.

Step 3: Click on Convert Now
Click the “Convert Now” option to begin the batch conversion. If one server fails, it will automatically attempt another; please be patient while converting. The resultant files will be in the “Conversion Results” section. Click the icon to display the QR code for the file or save it to an online storage like Google Drive or Dropbox.

Part 3. FAQ
1. What Is APNG (Animated Portable Network Graphics)
The .apng (Animated Portable Network Graphics) extension is an unofficial extension to the Portable Network Graphics format (PNG). It is a series of frames (a PNG image) that represent an animation sequence, producing a visual effect comparable to a GIF. APNG files support 24-bit pictures with 8-bit transparency. You can convert non-animated GIF files to APNG format. APNG files have the same.png extension as PNG files and can be opened by software like Mozilla Firefox, Chrome with APNG compatibility, and iOS 10’s iMessage apps.
2. How to Create APNG File?
Step 1: Select Image
Click File > Open to bring up the photo you wish to convert to PNG.

Step 2: Click Open
Click “Open” when you’ve navigated to your picture.

Step 3: Go to Save As
After you’ve opened the file, go to File > Save As.

Step 4: Save
Make sure PNG is selected from the drop-down list of formats in the following box, then click “Save.”

Step 5: Compress
The compression rate is set to “Best” by default, but the Save Options box contains a few extras to check if you want a bit more control over the compression of your file. The file size will be determined by changing the compression rate; the higher the value, the less compression will be utilized when saving your image.

3. How Do I Save Something as APNG?
Here are the steps to take when saving an image as APNG
Step 1: Open Paint
Open an image-editing program on your computer, such as Paint for Windows or Paintbrush for Mac. Simply double-click the software’s icon on your desktop, or choose it from your applications list.
Step 2: Go to saved Images
Open the image you already saved. Navigate to the window where you saved the image. Click-hold it, drag it, and drop it onto the editor to display the image.
Step 3: Resize Image
Make changes to the image. You can resize or rescale the image before saving it as a PNG file, and you can even add text using your software’s Text tool. This is, however, wholly optional.
Step 4: Choose Save as
PNG is the top format for saving images. Choose “Save as” from the “File” menu in the editor’s upper left corner.
In the File Name window, provide the name you want for the file.
Under the File Name field, click the “Save as type” drop-down option to see all of the image’s possible formats.
Click “Save” after selecting “PNG.” The file will be saved as a PNG file in the same directory as the original.
Conclusion
After getting to know the eight best GIF to APNG converters, you can utilize them efficiently when converting files. Also, we provided answers to frequently asked questions to help increase your knowledge of what an APNG is and how to save and create an APNG file.
Now explore these and convert GIF to animated PNG.
The GIF image format is a bitmap image format that supports up to 8 bits per pixel. APNG (Animated Portable Network Graphics) is a format for animated images that supports 24 bits per pixel and 8 bits of transparency, which is not available in GIFs. Backward compatibility with non-animated PNG files is also maintained.
Because the initial frame of an APNG file saves as a regular PNG stream, it can display by most conventional PNG decoders. Extra chunks can hold frame speed data and different animation frames (as provided by the original PNG specification).
Is APNG superior to GIF? APNG files are smaller and have more outstanding quality than GIF files. However, GIF is more compatible than APNG. Firefox, Safari, Google Chrome, and Opera support APNG, while practically all online browsers support GIF.
Let’s look at the top 8 best GIFs to APNG converters now.
In this article
Part 1: Best 8 GIF to APNG Converters
Part 2: How to Convert a GIF to APNG
Part 3: FAQs
Part 1. Best 8 GIF to APNG Converters
Here are the top 8 GIFs to APNG converters to look out for
1. EZgif
Ezgif.com is a free, easy-to-use toolset for making and modifying animated GIFs. Besides some basic video editing, we also offer editing and conversions for various other picture formats, like animated WebP, PNG, MNG, and FLIF. GIF maker, video to GIF converter, and photo resizer are three of our most popular online utilities.
In addition, EZgif lets you edit GIFs before converting them to APNG.
Features:
- ImageMagick - conducts most picture editing tasks such as resizing, optimization, cropping, etc.
- Making, optimizing, trimming, and resizing animated GIFs with gifsicle and lossygif.
- For video conversions and editing, use FFmpeg (the genuine one).
- This video to GIF converter online has a low conversion rate.
- This free online GIF banner maker can assist you in creating GIF banners.
- This online GIF creator has an extremely user-friendly UI.
- This web program’s impressive capabilities are completely free to use.
- This GIF converter online maintains high-quality GIF conversion.
- You can make GIFs from videos in seconds.
Pros
The program at ezgif.com is entirely secure to use.
Users do not have to install any other programs for the software to work.
The application is simple and allows users to create GIFs online without exerting any effort.
Cons
Because there is a problem in the program, the result of this online GIF maker from photographs degrades. Hence it is not advised for high professional use.
2. FreeConvert
FreeConvert is a GIF to APNG converter that can convert photos, videos, audio files, documents, eBooks, and units, among other formats. It can upload GIFs from your device, Google Drive, Dropbox, or a URL, and it can batch convert many GIFs to animated PNG files without sacrificing quality. FreeConvert is a safe program because it automatically deletes converted files after two hours.
Features:
- You can convert numerous files at once without sacrificing quality.
- It provides a variety of output file types.
- You can choose from your device (computer, smartphone, etc.) or a Dropbox or Google Drive account to select your files.
Pros
It’s as simple as uploading your GIF files and clicking convert.
Convert a GIF to APNG(animated PNG) while keeping the original GIF’s animation quality.
It is entirely free and works with any web browser.
All files are encrypted using 256-bit SSL and erased after two hours.
Cons
Limited services for free users
3. Aconvert
Aconvert is another free online GIF to APNG converter. It not only converts GIFs to APNG but also compresses, resizes, merges, crops, and rotates GIFs. GIFs can be stored on your device or online storage services after being uploaded from local, online storage services or a URL.
The uploaded image file can be up to 200 MB in size.
My favorite software is AVS Image Converter, which can convert GIF to APNG and APNG to GIF. Furthermore, its ability to support a wide range of image formats and editing capabilities such as Watermarks, Filters, Image Corrections, and others is fantastic.
Features:
- It supports large file conversion of up to 200MB
- It can also resize and rotate GIF file
- It supports a wide range of image formats
- Edits watermark
Pros
Simple user interface
File compression settings get support across platforms
Multiplatform
Free and can be used on a web browser
Cons
Limited services for free users.
4. AVS Image Converter
AVS Image Converter for Windows is a free GIF to APNG converter. You can use it to convert animated GIF files into animated PNG files. This software can convert GIFs to APNGs and APNGs to animated GIFs. Aside from APNG and GIF, this shareware accepts various additional image and project formats as input, including BMP, JPEG, TIFF, TGA, PCX, PSD, PDD, and more. Unlike input types, only JPEG, PDF, GIF, PNG (APNG), TIFF, BMP, TGA, and RAS are the output formats. You can convert several photos from one format to another using our GIF to APNG converter’s batch conversion.
Features:
- It supports a variety of formats.
- It converts in batches.
- Convert animated GIFs into animated PNG files
Pros
Processes large groups of images
It’s possible to utilize it from the command line.
Presets for various dimensions
Multiple input formats are supported.
Allows you to convert photos to PDF.
Multiple effects are applied.
Cons
There are no individual presets.
Displays advertisements
5. Real World Paint
RealWorld Paint - portable image editor (rw-designer.com)
Another free GIF to APNG converter for Windows is RealWorld Paint. It can also convert an APNG file back to a GIF. Additionally, format conversions between PNG, JPEG, GIF, WEBP, animated WEBP, and other formats are possible. The prime benefit of this software is that it can work with projects created by various famous photo editors, including Photoshop, Paint.Net, GIMP, and others.
You can also add, edit, and improve frames in GIF files and simple conversion. When you open a GIF file in it, an editor area appears, right below which you can see all of the GIF file’s frames.
Features:
- Supports a wide range of file types
- Easy to use interface
- Doesn’t consume a lot of hardware resources
- Can convert in a few minutes
Pros
Transformation of a particular area
Multi-platform
Folder selection is simple.
Set the conversion quality quickly.
Cons
For novices, it’s a bit difficult.
Only the premium version is available.
6. Convertio
Convertio is a competitor to Browserling in terms of simplicity. Convertio, on the other hand, outnumbers the former in terms of picture formats supported. Convertio can also convert GIFs to TGA, PSD, JPG, TIFF, ICO, etc. Unfortunately, it lacks image editing capabilities.
Features:
- The file size is unrestricted.
- There is no restriction to how many conversions you can do at once.
- Priority number one.
- Every day, you have an unlimited number of conversion minutes.
- The maximum conversion time per file is unlimited.
- Pages with no advertisements.
Pros
Allows you to convert files by dragging and dropping them.
The ETA is less than 2 minutes, and the conversion is quick.
There are 3 membership options.
Cons
After 24 hours/manually, files saved on the server/cloud gets removed.
7. Onlineconvertfree
Onlineconvertfree is a lovely PNG converter that works with all standard image formats. You can create a PNG file from various formats, including GIF, JPG, HTML, TIFF, RAW, and more. Users may crop, clip, rotate, flip, and perform many other editing actions on their files.
Features:
- It has offline access for quick connectivity and document access.
- Even when an internet connection is unavailable, this helps speed up the entire document management process.
- The software comes with a free version that includes all of the basic capabilities
- Individuals and small enterprises will find it very affordable due to this.
- It supports a Variety of Formats
Pros
Converted files are simple to upload and download.
You can convert almost any file to your preferred format.
There is no need to give personal information such as an email address.
It offers three subscription tiers, all of which are ad-free.
Cons
This is a free service with a limit of two files per conversion.
8. Zamzar
Zamzar is the easiest online GIF to APNG converter on this list. It has numbered steps that make it extremely simple to use. You may convert GIF to PNG, TIFF, TGA, JPG, BMP, and other image formats on Zamzar.
Features:
- Uploading files by dragging and dropping them and speedier file conversions.
- All Zamzar subscribers get high-speed downloads.
- Email files to be converted.
- You can stream the converted videos and audio to your iPhone, iPad, and iPod.
Pros
Allows you to convert files from URLs. Batch conversion is supported.
Presets a three-step method that is quite easy to follow.
Over 1200 file formats are supported.
Multiplatform
File compression settings are now supported.
Developers will appreciate the API.
Cons
File size restricted to 50 MB on free accounts for uploads.
Like other online tools, it lacks OCR.
Part 2. How to Convert a GIF to APNG
Follow the 3 simple steps to convert GIF to animated PNG
Step 1: Choose Files
Select several files on your computer using the “Choose Files” button or the dropdown menu to select an online file from a URL, Google Drive, or Dropbox. The file size of an image can be up to 200 megabytes. You can use a file analyzer to gain detailed information about a source image, including its size, resolution, quality, and transparent color.
Step 2: Choose Image Format
Determine the image format, quality, and size you want to use. You choose to use the original image size or select “Change width and height” and enter a custom image size. 1920x1080 is an example of a [width]x[height] format. Only a few image formats support the picture quality choice, such as JPG, WEBP, or AVIF. The value ranges from 1 (lowest picture quality and highest compression) to 100 (highest image quality and lowest compression) (best quality but least effective compression). If this field is left blank, the converter will use the estimated quality of your input image if found; otherwise, 92 by default. JPG, PNG, TIFF, GIF, HEIC, BMP, PS, PSD, WEBP, TGA, DDS, EXR, J2K, PNM, or SVG are examples of target image formats.
Step 3: Click on Convert Now
Click the “Convert Now” option to begin the batch conversion. If one server fails, it will automatically attempt another; please be patient while converting. The resultant files will be in the “Conversion Results” section. Click the icon to display the QR code for the file or save it to an online storage like Google Drive or Dropbox.
Part 3. FAQ
1. What Is APNG (Animated Portable Network Graphics)
The .apng (Animated Portable Network Graphics) extension is an unofficial extension to the Portable Network Graphics format (PNG). It is a series of frames (a PNG image) that represent an animation sequence, producing a visual effect comparable to a GIF. APNG files support 24-bit pictures with 8-bit transparency. You can convert non-animated GIF files to APNG format. APNG files have the same.png extension as PNG files and can be opened by software like Mozilla Firefox, Chrome with APNG compatibility, and iOS 10’s iMessage apps.
2. How to Create APNG File?
Step 1: Select Image
Click File > Open to bring up the photo you wish to convert to PNG.
Step 2: Click Open
Click “Open” when you’ve navigated to your picture.
Step 3: Go to Save As
After you’ve opened the file, go to File > Save As.
Step 4: Save
Make sure PNG is selected from the drop-down list of formats in the following box, then click “Save.”
Step 5: Compress
The compression rate is set to “Best” by default, but the Save Options box contains a few extras to check if you want a bit more control over the compression of your file. The file size will be determined by changing the compression rate; the higher the value, the less compression will be utilized when saving your image.
3. How Do I Save Something as APNG?
Here are the steps to take when saving an image as APNG
Step 1: Open Paint
Open an image-editing program on your computer, such as Paint for Windows or Paintbrush for Mac. Simply double-click the software’s icon on your desktop, or choose it from your applications list.
Step 2: Go to saved Images
Open the image you already saved. Navigate to the window where you saved the image. Click-hold it, drag it, and drop it onto the editor to display the image.
Step 3: Resize Image
Make changes to the image. You can resize or rescale the image before saving it as a PNG file, and you can even add text using your software’s Text tool. This is, however, wholly optional.
Step 4: Choose Save as
PNG is the top format for saving images. Choose “Save as” from the “File” menu in the editor’s upper left corner.
In the File Name window, provide the name you want for the file.
Under the File Name field, click the “Save as type” drop-down option to see all of the image’s possible formats.
Click “Save” after selecting “PNG.” The file will be saved as a PNG file in the same directory as the original.
Conclusion
After getting to know the eight best GIF to APNG converters, you can utilize them efficiently when converting files. Also, we provided answers to frequently asked questions to help increase your knowledge of what an APNG is and how to save and create an APNG file.
Now explore these and convert GIF to animated PNG.
10 Best Websites to Discover Free Premiere Pro Video Templates
The Premiere Pro templates are a great help to start working on the video right away. You don’t need to create your video from scratch thus, saving time. Moreover, there are fully adaptable features that make your video eye-catching. The article provides knowledge about 10 free Premiere Pro templates. So, let us commence this! Are you with us?
Part 1: 10 Popular Websites to Find Premiere Pro Templates
There is an extensive range of websites to access the free Adobe Premiere templates. It is important to know the workability of such websites and what they bring to the house. Therefore, the sub-section of this write-up would shed light on 10 of such websites where you can download Adobe Premiere templates and find them compatible with the software.
So, what are we waiting for? Let us begin the process!
1. Envato Elements
The first website offering Adobe Premiere templates is known as Envato Elements. One can count on this webpage to access millions of creative assets. Envato Elements comes up with Adobe Premiere Pro templates free, stock videos, graphic templates, photos, and website templates.
Moreover, if you are into print and website design, you will find Envato Elements beside you. The search bar makes the search effective as you can choose between categories or applications. The search filter has made life easy for designers and creators.

2. Storyblocks
Storyblocks are the next big thing if you need to download Premiere templates without much effort. This website presents an awful load of green screen footage, music and sound effects, animated backgrounds, royalty stock footage, and templates for Premiere Pro. It also has a Maker, enabling the user to make the professional video in seconds.
The filtering option of Storyblocks is to die for. Style or software can filter the templates and effects to have what we need without wasting much time.

3. MotionElements
The third royalty-free marketplace making a brand name for itself is MotionElements. The website offers more than 3 million assets for its users in different industry sectors. You can access Premiere Pro templates free download with other stock videos and audio files.
From images, music, templates, effects to transitions, logos, and animations, MotionElements has covered its basis. The search filter gives multiple categories, including software, category, and style.

4. Motion Array
Claiming to be an all-in-one video and filmmaker’s platform, Motion Array takes complete responsibility for making your projects successful. The website takes the raw concept of your project and turns it into completion. Adobe Premiere Pro templates can be downloaded via Motion Array with other effects.
You can have Adobe Premiere Pro, Final Cut, DaVinci, and After Effects templates. The stock motion graphics, sound effects, videos, and photos are some of the strengths of Motion Array. The unlimited downloads save you from emptying your wallet.

5. Adobe Stock
While we are on the subject of template Adobe Premiere free, how can we forget about Adobe Stock? Adobe Stock is a serious archive for templates, especially for Adobe Creative Suite applications. Moreover, getting hands-on an impeccable library of stock photos, audio, and videos, is one of the strongest traits of Adobe Stock.
The search filter has different options to make the search easier, for instance, application, categories, transitions, and whatnot. If you type free in the search bar, you will find Premiere Pro video templates so that downloading them wouldn’t cost a penny.

6. Mixkit
Mixkit is the top choice for getting Premiere Pro split-screen template among other royalty-free assets. Mixkit offers free Premiere Pro templates with After Effects, Final Cut Pro, DaVinci Resolve, and much more.
Moreover, Mixkit can be used for stock videos, music, sound effects, and music tracks. The quality is always high, so you don’t need to worry about that.

7. VideoHive
VideoHive offers the best quality and fast researched Premiere Pro templates. With more than 9,100 free Adobe Premiere templates, VideoHive helps add motion graphics and effects to your videos. Most filmmakers prefer the usage of motion graphics as it improves time and cost-effectiveness and enhances ease in adding animations to the projects.
If you are interested in making a slideshow, animated title, transition, or logo stings, you will find VideoHive there for you.

8. Videezy
Videezy is a fair choice if you need to access Premiere templates free in the most effortless fashion. The search bar of Videezy stock marketplace has interactive filter options. The user is free to navigate by sorting the results based on their presence on the website. Moreover, you can choose between the file type and bring productivity to the media industry.
The resolution can also be decided as Videezy offers SD, HD 720, HD 1080, 4K, and Ultra HD. Doesn’t it feel like a dream come true?

9. Videvo
Videvo is the right shop for you if you prefer the ease-of-use over-complicated workability. Offering an interactive interface and progressive search results, Videvo boosts the production value of your projects multifold. Furthermore, this free Premiere Pro templates provider is an allrounder from the video footage, motion graphics, templates, music, and sound effects.
The user is free to customize titles, intros, typographs, overlays, and transitions. Launch the website, download the template, and get into the process.

10. Monsterone
Offering Trending, Newest, Popular, and Undiscovered filtering options and choosing the right tags, Monsterone has made it to the bucket list of professionals in the field. More than 400 Premiere Pro templates can be downloaded to start working on the deadline right away.
The templates can be effortlessly previewed and launched before accessing them. It helps the user make a conscious choice. The resolution can also be set as the user deems necessary.

The Bottom Line
We are surrounded by videos 24/7. It is true for most creative professionals in the industry who are expected to edit the video to make it more captivating and attractive. One needs to have access to free Premiere Pro templates to obtain a sense of originality as we save money and time on making videos from scratch.
For this very reason, the article discussed 10 compatible and popular websites where Premiere templates free are found. We expect the user to make the right choice based on their niche in the industry. The video editing process can be accelerated by using a phenomenal tool which is Wondershare Filmora.
Filmora has the right toolbox set to make video editing easier and flawless. From cropping to flipping and motion tracking to adding keyframes, Filmora knows it all. One can also count on this tool to add backgrounds in Hollywood effect to gain innovation at all costs.
Wondershare Filmstock is your one-stop shop for royalty-free effects, video footage, clips, video effects, and audio tracks. Do not forget to review Filmora and Filmstock about their workability in the flesh.
Click here to find 10 Free After Effects Logo Templates .
Wondershare Filmora
Get started easily with Filmora’s powerful performance, intuitive interface, and countless effects!
Try It Free Try It Free Try It Free Learn More >

Best 22 Video Editing Tips to Know
Whether your video is short or long, you may want to make it better and appealing. Video editing involves the manipulation of your videos through which the desired transformation is achieved and you can flaunt every move of your video in a more preferable way. Video editing involves cutting the video short, changing the speed, organizing the video in a seamless flow. In short, the better the cuts of your videos, the better your message/story is conveyed.
Part 1: Things to Learn Before Editing First Draft
You have shot your video and now you’re stuck on the post-processing of that video. Don’t worry! We got you covered through this article which will guide you through the different things which you must learn before editing the first draft of your video.
Start a video project
Your smartphone and digital camera can let you record multiple videos but what now? You head out to edit your first draft by choosing a suitable platform or software and then you can surely lay back and see the software doing wonders to your raw videos. By starting off with editing, you choose your video editing preferences and then you just let the video editing tools do the magic.
Get to know the video editing software workspace
Video editing software offer customizable workspaces for different editing tasks. The software workspace streamlines routine actions you take with clips, like editing clips, making DVD and Blu-ray menus, and sharing movies. By placing panels in the layout that best matches your working style, you can personalize your workspace. The additional panels adjust automatically to fit the window as you rearrange them. For various jobs, such as one for editing and one for preview, you can build and store multiple workspaces.
Understand the timeline
The timeline of your video is the backbone of your digital video editing process. It’s called a timeline because the various pieces of video will be lined up horizontally. In a video editing software, the timeline is where you arrange your video clips and plan out all the modifications you want to do. As you work, you will see every single one of your video and audio clips, effects, and transitions sorted chronologically from beginning to end. All the fundamentals of video editing, including reordering, trimming, and enhancing your footage, are available. To preview how your adjustments will turn out, you can also play your project at any point in the timeline.
Add clips to timeline
When you have grasped the idea behind a timeline, the next step you need to follow is to add clips into your timeline. Before adding clips to your timeline, it is suggested that you label each clip. Although it does seem like a lot of work, it will be easier to locate all of the clips later on if you’re working on a large project. after the footages are gathered and named, add important clips in the beginning of the timeline to begin establishing the video’s overall structure and order.
Editing tools
Besides basic cutting, trimming and cropping, video editing software offer multiple professional editing tools which enhance the outlook your videos and make them 10x better. For example, instead of cutting up a clip into a bunch of small clips and unwanted gaps, use the Ripple Edit tool keep your timeline clean. This means when a clip is trimmed, it causes a ripple effect throughout the rest of your timeline, shifting all other clips into a new timeline position.
Similarly, when working with lengthy timelines, the Razor tool is also really helpful because you can select the clip you wish to cut by dragging your razor over it. So, the Razor cut is the tool to use if you need to make a lot of cuts in your videos quickly.
Syncing audio and video
You already know how annoying it can be if audio and video don’t sync while you’re listening to a podcast or viewing a YouTube vlog. The video editing software offer helpful manual and auto sync tools. It can be though a bit of hard work for beginners, but the ‘Lights, Camera, Action’ approach works best in syncing your audio with your video. To sync audio, you need to record audio first and then through matching the wavelengths displayed on your timeline, you can sync the audio with your video.
Edit download talking head/interview footage
Now with professional video editing tools, you can make ‘talking head videos’ if you want to share your expertise as a YouTube vlogger or if you want to do employee training. Talking head films are a fantastic way to stimulate the mind and the heart while increasing learner retention in this digital age.
Additionally, with other video editing tools, you can edit your interview footages and for that, you don’t have to mess with timestamps, cutting or splicing videos, or creating transitions between clips, you just edit the transcript of the video and the video edits itself to match.
Video properties: Scale, position, opacity
Any screen recording, camera-based video, imported video clips, and text picture clips can have their visuals altered using video properties. In video editing software, multiple video properties are offered which include scaling, positioning, rotating, changing the opacity, changing level of reflection and shadow. Additionally, Video properties also include editing the video as a whole or just altering a clip from the video.
Types of cuts: Straight, J-Cut, L-Cut etc
The different types of cuts used in the video editing process is an effective way to make the transitions in your video pop. Basically, these cuts join two or more clips together via audio. Professional editors call these cuts as ‘split edits. The most common cuts are called J-Cut and L-Cut. They help to mix the content’s flow and keep the on-screen narrative in motion. In essence, these edits are necessary to make your scenes feel warm and more authentic.
Part 2: Practical Video Editing Tips
Choose right software
The push start of video editing for beginners is based on one common step: know your software or workspace. Selecting the appropriate software for editing your video is the first step in streamlining your video editing process. Although all software often includes the tools that you need to make ordinary video edits, you could favor one over the others based on its usefulness, digital interface, and features. Instead of just using the latest and trending video editing software available, the key is to choose what functions for you and your editing style.
Use a fast computer
Slow rendering hinders video editing process and other commands given to a computer. From a practical point of view, it is recommended that irrespective of the model of the computer or version of your software; your computer must be efficient to help you to access your files and software easily and to speed up your export time. With a slow computer, you will definitely feel stuck and the video editing complications will haunt you in your dreams.
Watch video editing tutorials
None of us is a pro until we’ve practiced something enough to know everything about it. Video editing requires both; technical knowledge as well as your creativity, so it is better not to do try things on your own. A little guidance can surely help you get through the basics of the video editing process. There are tons of helpful tutorials for making excellent videos on YouTube, vlogs, and educational websites. The majority of tutorials you’ll discover online are free, making the readily available at the tip of your fingers.
Get the project files
Most of the beginner video editors prefer to use the same project files as the tutorial instructors when they are following along. Your work will exactly resemble the demo’s sample, which will aid in your understanding of the steps. For precisely this reason, many tutorials let you download the project files. You can repeat a process with your own video files once you’ve mastered this technique.
Edit for a story
Remembering your creative objective to create a wonderful story or message through your edited video is one of the most crucial lessons you should learn from this article. It is critically important that you make your film visually appealing and dramatically engaging to effectively evoke the right emotions and to communicate your desired message. Instead of merely adding a huge amount of effects to wow your audience, use your practical and technical skills to do this.
Maintain an efficient workflow
You’ll need to be systematic and organized in addition to having an editing software if you want to become a more competent editor. Putting your projects and files in folders that you may use repeatedly is one method to streamline your process. Besides this, organizing your projects and files into an external hard drive or USB is recommended in case of losing access to your intricately designed projects.
Utilize keyboard shortcuts
Keyboard shortcuts speed up the process of video editing and save you ample time. Different keyboard shortcuts are compatible with different video editing software; leaving a few which are mutual in every software. Don’t attempt to put all of these shortcuts into action at once. Pick a small number to begin with, and as they become instinctive, add more. You’ll progress more quickly if you use less mouse while editing your video.
Learn important terms
As a beginner, you may not want to feel a lump in the throat caused by the complicated dictionary of video editing software. There are some broad video editing terms that refer to videography as a whole as well as video editing terms specific to the process of editing footage. You must first learn what these terms means for example you may want to know what the terms like ‘aspect ratio, B-roll, bit rate, close up, compression, crop and compositing’ mean.
Color correct your clips
Do you own a rather boring video? Perhaps it’s a little too dull or the colors don’t stand out as much as they should? A crucial step is to modify the video’s color. This will assist in reducing the saturation and revive your video. Yet, there are some color correcting presets which can be easily accessed in different video editing apps.
Select good music
You ever saw an ad on YouTube or other social media platforms without an audio background. You may just want to skip it because the video, which may apparently be appealing, fails to strike you. Coordinating and complimenting your video with a music in the background is like cherry on top. It’s a huge plus to attract viewers’ attention. Though it is necessary that the music you choose must be relevant to your video file and should target the majority. So, choose good music to adorn your videos and trigger emotions in your target audience.
Add text and graphics
Some people are attracted more towards textual descriptions rather visual representation of content. It is crucial that considering the preferences of majority, you add significant details to your video which can target your audience in a multidimension. You might need to include more text in addition to the title, opening/closing billboards (for broadcasting), and film credits, depending on the type of film you’re making. However, you can make dazzling visuals using your editing program if you feel the urge to do so.
Export web versions
When your film is finished and is ready to be exported, you would have a natural urge to export it at the highest video resolution possible. If it’s going to be shown in theatres and on ultra-HD screens, this is unquestionably the best course of action. However, you should also export smaller, higher-quality versions for simpler viewing in the modern day where video projects are typically promoted online and on social media.
The objective of creating a file for the web is to keep its high quality while not making it too large for upload and online viewing. Don’t worry if you’re unsure of the export settings to utilize. Websites like Facebook, YouTube, and Vimeo all provide suggested export settings to assist you in correctly resizing your content.
Part 3: 10 Advanced Editing Tips for Professionals
We all definitely have experimented with video editing tools to some extent. But now, it is definitely time to become a pro. Don’t worry, the process isn’t as scary as we imagine it to be. This article is your best stop to grab some fine guidelines about how to become a video editor, in fact, a Pro video editor.
- Make titles stand out
You’re skilled in video editing, but do your titles seem a little…unfinished? Do those lower thirds strike you as being monotonous and boring? Is your typography competing for attention against your pictures? It appears that you would benefit from some basic title design advice, and lucky for you, we have some. Your title must be readable by majority and always choose your safe way in selecting texts for example, a sans-serif typeface is usually going to be a safe choice for video. You can also animate text to highlight it so that it is more captivating.
- Put video inside text or logos effects
Videos resonate with your brand and content if you add a specific logo or text effects to it. Almost all the video editors allow this featuring so that the identification of your work is maintained and copyright claim can be imposed if you see your content being copied or manipulated.
- Add light leaks, film burns and lens flares
Incorporating unique transitions into your monotonous videos can get you your viewer’s attention in a go. Lens flares, light leaks, and film burns can result in a unique look, but are not always easy to add naturally in-camera. Some of the best video editing software which allow access to adding lens flares, light leaks and film burns include: Free 4K Light Leaks – RocketStock, Motion Array Free Light Leaks, WZZLY Free Light Leaks, LIGHT LEAK FILM OVERLAY and many more.
- Add the vintage old film look
The quick Instagram-category of filters are common today but what makes your videos more natural and appealing is the addition of some presets which almost every video editor offers. These presets add a classic vintage old film look to your videos by manipulating color correction effects, framerate settings, overlays, and aspect ratio hacks. Some popular vintage old film effects are found in software namely VSDC, VEED, Adobe Premium Pro and many others in list.
- Add type-on effect
A type-on effect added to your videos comprehend your content more firmly. Simply by tabbing on ‘Add text effect’ in any video editor, you can add type-on effect to your videos and to add ravishing component to the overall structure of your video.
- Zoom in or out effect
The zoom-in or out feature (if available) in your video editing software can allow you to magnify any part of your video quickly and easily. Some of the best video editors featuring this specification include: Wondershare DemoCreator Zoom in Video Effect, DaVinci Resolve, Wondershare Filmora , Windows Movie Maker and Apowersoft Screen Recorder.
- Custom wipe on/off reveal effect
The wipe on/off reveal transition or effect is one of the earliest ways of transitioning from one scene to another. An object (usually a line) moves across the screen, revealing the next scene, while simultaneously removing (or wiping) the previous scene and when used properly, they can create a very powerful effect. It involves creative fading in and out transitions to give a more dramatic look.
- 4k, 8k, HD resolution
The latest video editing software offer the export your edited video in multiple formats, out of which 4k, 8k and HD resolution formats are preferable for majority of the professional video editors. It is necessary that even after the video is uploaded to a platform, the pixels do not decrease and the quality of the video is maintained. Although attractive to the viewers, the higher the resolution, the more the data with which you must deal. It is suggested that a standard or default resolution is chosen to play and replay the video in different computers.
- B-roll
B-roll is secondary video that is frequently used as cutaway video to add context and visual interest to your story. The term is originated from the early days of Hollywood when there used to be an A-roll which was the primary video and B-roll which served as a secondary video footage. This can help you visualize your video from different dimensions, giving it a more realistic look for captivating viewers.
- Compression rate, bit depth, bit
The amount of data the camera records each second is referred to as bit rate. Every single second of a video is subject to significant data processing by cameras. The higher the quality of the video, the more is the bit rate. Bit depth refers to the number of colors your camera can read per pixel. Common bit depths are 8-bit and 10-bit, which enable a camera to read 256 million or 1.07 billion colors respectively. To upload your edited video, a compression is usually required to convert your resolution to internet quality so that the upload can be made simpler, without distorting the video resolution.
Also read:
- New In 2024, How to Animate Text in A Video
- Updated 2024 Approved Top Free LUTs To Use in Shotcut An Overview
- How To Zoom In On TikTok Videos for 2024
- Updated 2024 Approved How to Fade to Black Premiere Pro
- How to Perfectly Use Canva Color Match?
- New 2024 Approved How to Create Vintage Film Effect 1920S
- What Is the Best MP4 Cutters for YouTubers on Mac, In 2024
- 2024 Approved Best 10 Mind-Blowing Video Collage Maker for PC
- 2024 Approved Sync Audio With Video With Filmora
- New How to Make GIF With Transparent Background, In 2024
- New 2024 Approved Best Video Editors to Add Text to a Video
- Updated In 2024, So, You Are a Gamer and Have Been on the Cool App Discord for a While, and You Keep Hearing People Talk About Game Bots in Discord, Like, Robot Gamers? This Article Will Discuss All Discord Game Bots and Much More
- Updated 10 Recommended Websites to Discover Awesome Premiere Pro Video Templates for 2024
- New Whatre the Best Alternatives to Pexels?
- New Top 12 Best Freeze Frame Video Editing Examples
- New How to Choose A Nice GoPro for Vlogging for 2024
- In 2024, Learn the Step-by-Step Process of Slowing Down Time-Lapse Videos on Your iPhone
- How to Clone Yourself in Videos with Filmora?
- New In 2024, How to Make Fortnite Thumbnail with Motion Blur?
- Updated Why Vimeo Slideshow Maker Become More and More Popular
- Updated 10 Apps to Make Videos with Pictures and Music
- Updated Efficient Ways to Manage Your Timeline for 2024
- New 2024 Approved Are You Eager to Discover the Top-Rated and Reliable LUTs that Can Be Used in Shotcut? This Article Will Help You a Lot with This Matter
- New Creating Video Testimonials
- Updated 3 Ways To Stream And Record At The Same Time for 2024
- New In 2024, 3 Ways to Combine 2 or 3 Videos Into 1
- Updated 2024 Approved Progressive Solutions to Adding VHS Effects to Video with Ease
- New In 2024, Create Promotional Video
- Updated A Guide to Understanding Efectum App and Some Top Alternatives
- New 2024 Approved 10 Best Free Spanish Text To Speech Converter Websites
- Updated 2024 Approved Add Some Shake to Videos with Alight Motion
- Learn How to Trim/Crop Video in Microsoft PowerPoint
- New Can You Enhance Your Drone Footage with Cinematic Drone LUTs? This Article Discusses Top Drone LUTs Recommendations to Simplify Video Editing
- In 2024, Focusing On The Best Ways To Convert Slow-Motion Video to Normal
- New How to Make a Gaming Montage - Guide & Tips for 2024
- New 2024 Approved Powerpoint Slideshow Icon, Slide Sorter View Icon, Slideshow Icon Powerpoint, Slide Show View Icon
- New 2024 Approved Find The Best LUTs for Lightroom
- New In 2024, How to Make a Gaming Montage - Guide & Tips
- Updated 2024 Approved How to Make Split Screen Videos in Filmora
- Updated 2024 Approved What Are The Stages Of Film Production
- 2024 Approved If You Want to Keep Your Memories in Form of Video or Slideshow Then Keynote Is Great App for You. It Has Amazing and Powerful Tools Which Give Your Slideshow a Great and Beautiful Look
- New 2024 Approved How to Use Twixtor Effect to Create Super Slow-Motion Video?
- New In 2024, Ultimate Guidelines to Help You Better Use VLC Media Player
- Updated In 2024, Create a Kickass COD Warzone Thumbnail for Free
- Updated VSDC Free Video Editor Review 2023
- Updated Exploring the Top Professional Tools to Perform Mask Tracking for 2024
- How To Track IMEI Number Of Vivo V30 Pro Through Google Earth?
- Easy Guide to Honor X9a FRP Bypass With Best Methods
- How To Change Vivo V29 Pro Lock Screen Clock in Seconds
- Hard Reset Realme GT 5 in 3 Efficient Ways | Dr.fone
- In 2024, Top IMEI Unlokers for Apple iPhone 15 Pro and Android Phones
- Forgot your Realme C67 4G lock screen pattern, PIN or password? Here’s what to do
- Undelete lost photos from S18 Pro.
- Process of Screen Sharing Itel P40 to PC- Detailed Steps | Dr.fone
- In 2024, How to Use Pokémon Emerald Master Ball Cheat On Realme 10T 5G | Dr.fone
- In 2024, Best Ways on How to Unlock/Bypass/Swipe/Remove Xiaomi Redmi Note 12R Fingerprint Lock
- In 2024, How to Transfer Data from Apple iPhone 14 Pro to ZTE Phones | Dr.fone
- Why can’t I play MP4 files on my Motorola Moto G34 5G?
- In 2024, How to Reset a Locked Nokia C02 Phone
- Life360 Learn How Everything Works On Vivo V27 Pro | Dr.fone
- How to Turn Off Google Location to Stop Tracking You on Poco M6 Pro 4G | Dr.fone
- The Most Effective Ways to Bypass iPhone 13 Pro Activation Lock
- How to Fix My Itel A60 Location Is Wrong | Dr.fone
- 10 Free Location Spoofers to Fake GPS Location on your Itel P40 | Dr.fone
- How to Repair a Damaged video file of Samsung Galaxy F34 5G using Video Repair Utility on Windows?
- Updated All About 3D Medical Animation And Its Uses
- How to retrieve erased videos from Sony Xperia 10 V
- Updated 12+ Stunning Instagram GIF Stickers
- How to Fix My Realme 12+ 5G Location Is Wrong | Dr.fone
- Title: Updated Top 6 Text to Speech Generators for YouTube Videos Windows, Mac, And for 2024
- Author: Morgan
- Created at : 2024-07-01 13:02:31
- Updated at : 2024-07-02 13:02:31
- Link: https://ai-video-editing.techidaily.com/updated-top-6-text-to-speech-generators-for-youtube-videos-windows-mac-and-for-2024/
- License: This work is licensed under CC BY-NC-SA 4.0.
